- Home
- DLP
- How to Configure Sensitive Print Control Policy using miniOrange DLP
Configure Sensitive Print Control Policy with miniOrange DLP Solution
The Sensitive Print Control Policy feature in miniOrange Endpoint Defence helps organizations manage and secure printing activities on managed endpoints. It enables administrators to configure print policies, control sensitive printing activities, and apply actions such as blocking, logging, notifications, or watermarking. This helps organizations prevent unauthorized printing and protect sensitive information.
Prerequisites
Before you begin the configuration, ensure you have the required access:
- You need Administrator access to your DLP dashboard.
Configuration Steps
Step 1: Configure Sensitive Print Control Policy
- Sign in to your DLP Admin dashboard.
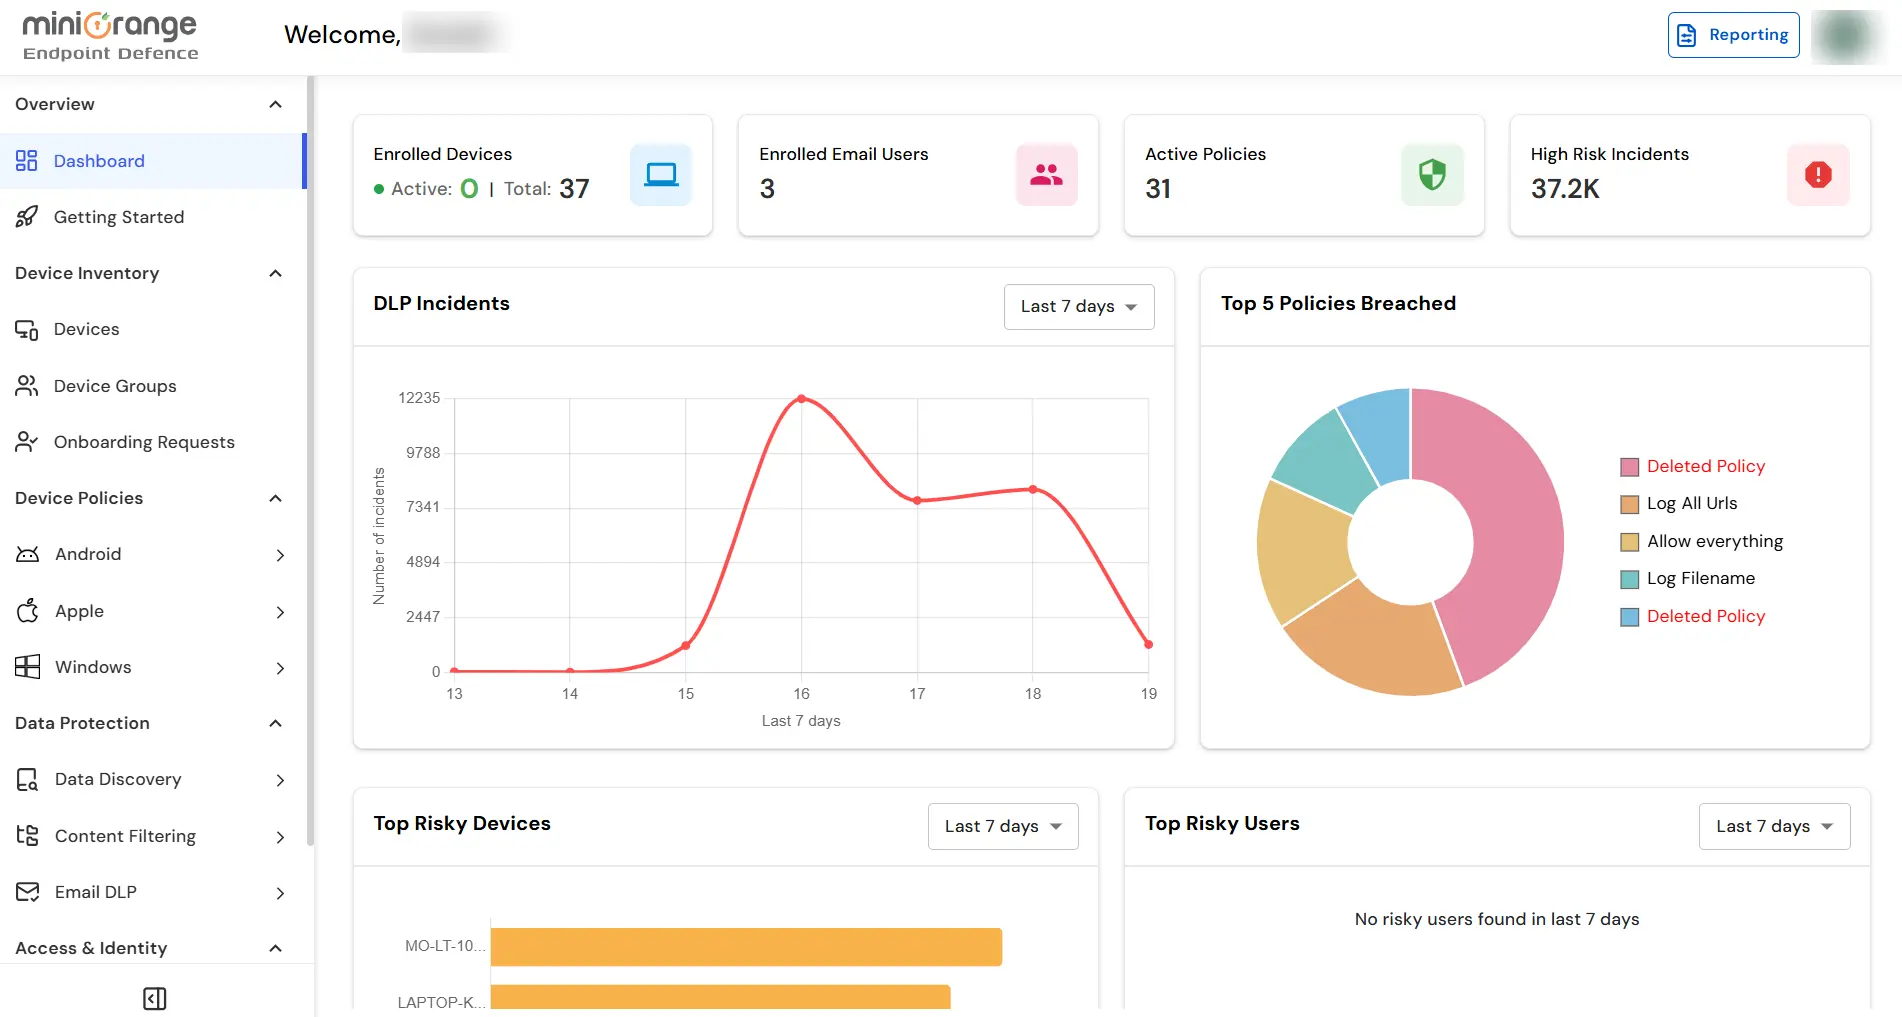
- On the dashboard, navigate to the left menu panel and click Endpoint → Sensitive Print Control.
- Under the Printers tab, click the Add Printer button to add a printer for the Sensitive Print Control Policy.
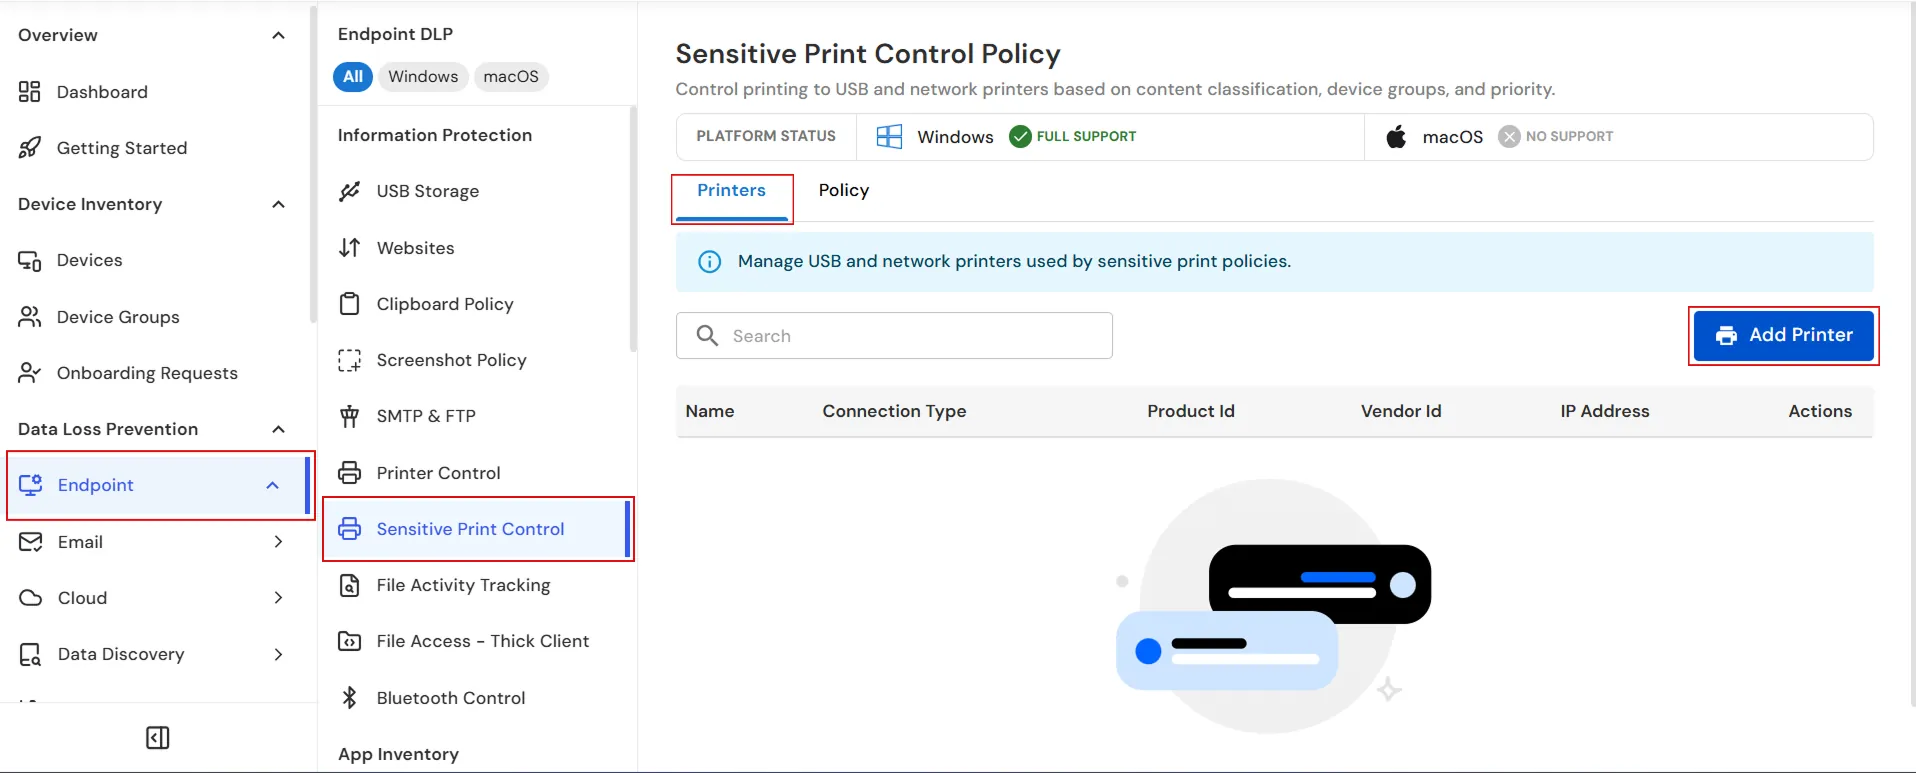
- Select USB Printer under Connection Type.
- Enter a unique printer name in the Name field.
- Enter the printer’s Product ID in the Product Id field.
- Enter the printer’s Vendor ID in the Vendor Id field.
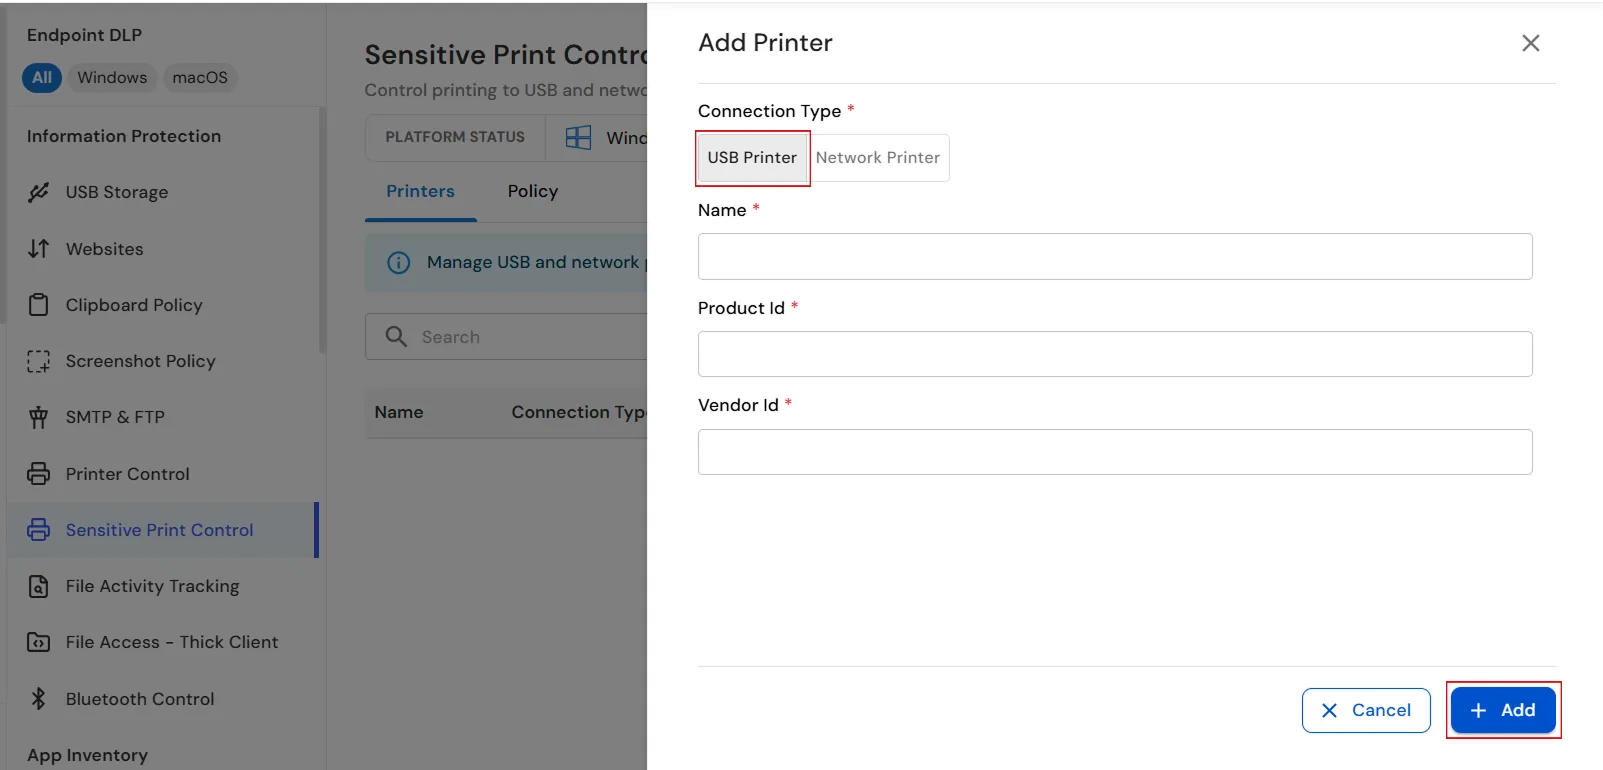
- Click Add to register the printer.
- Verify that the printer appears in the Printers list with the correct connection type, Product ID, and Vendor ID.
- Select the Network Printer option under Connection Type.
- Enter a unique printer name in the Name field.
- Enter the printer’s IP address in the IP Address field.
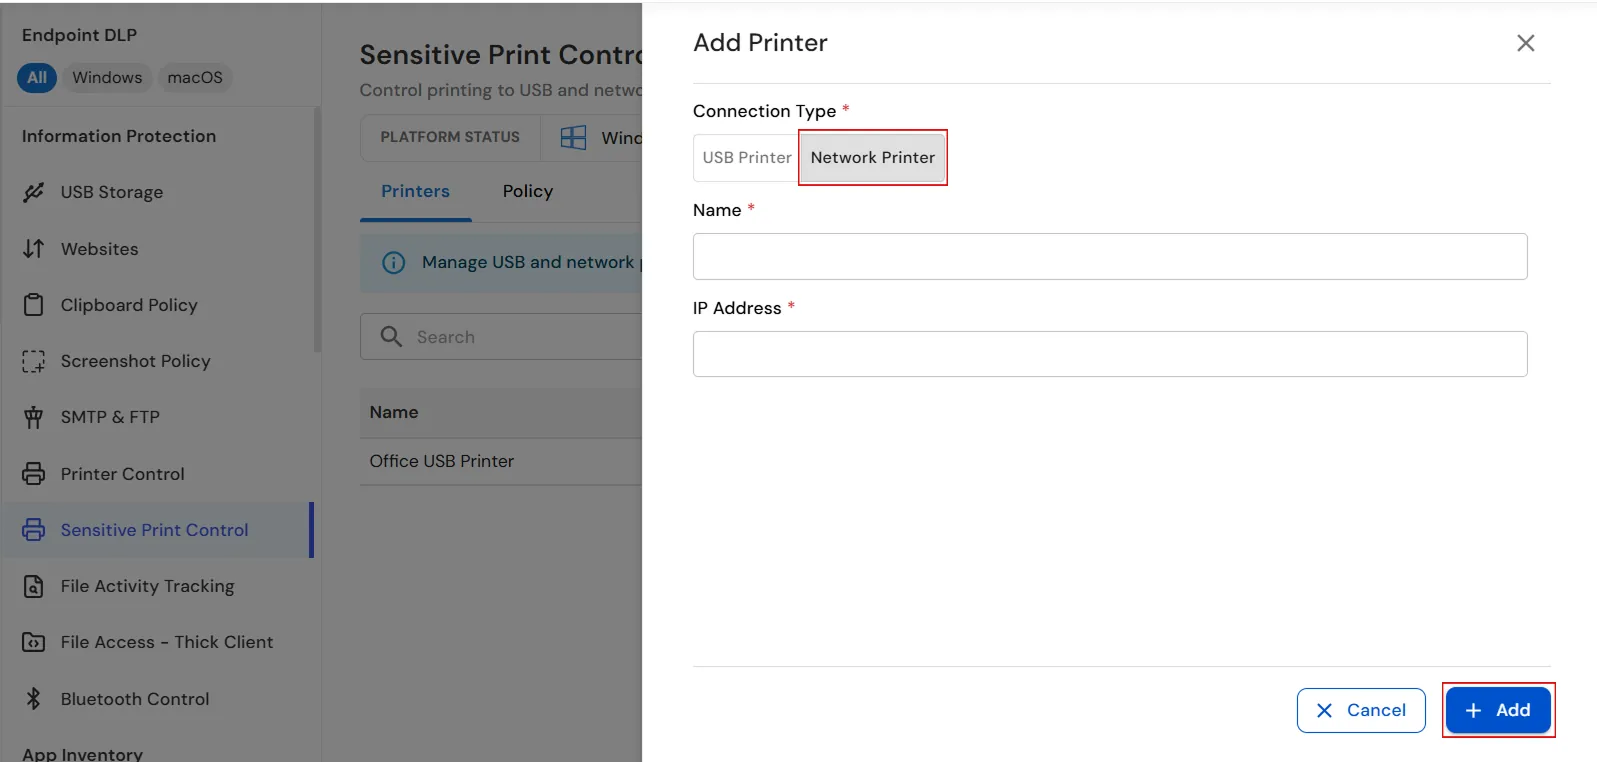
- Click the Add button to add the network printer.
- Verify that the network printer appears in the Printers list with the correct Connection Type and IP Address.
- Click the Policy tab, then click the Add Policy button to create a new Sensitive Print Control Policy.
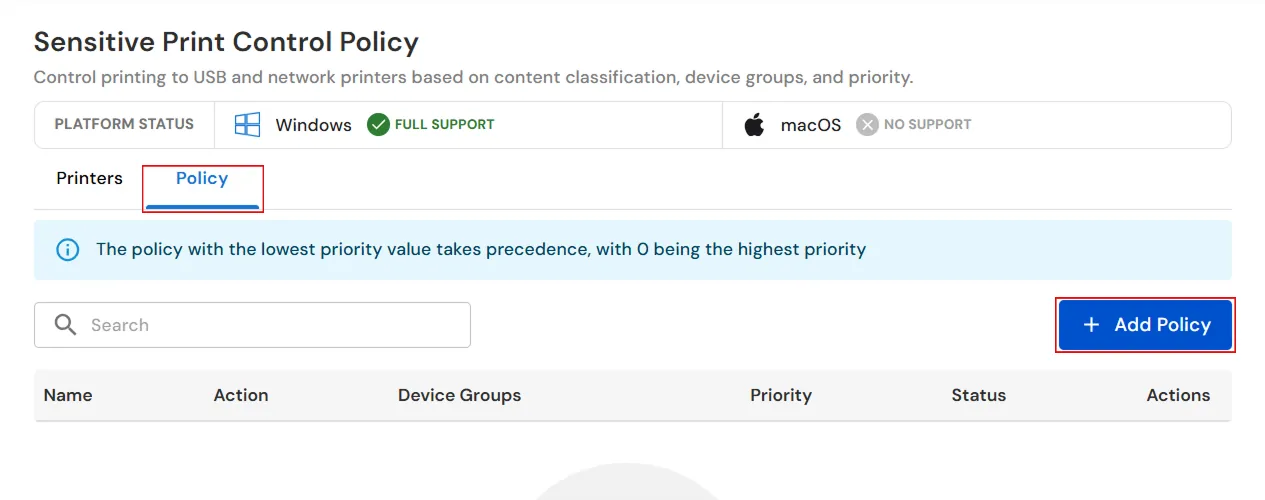
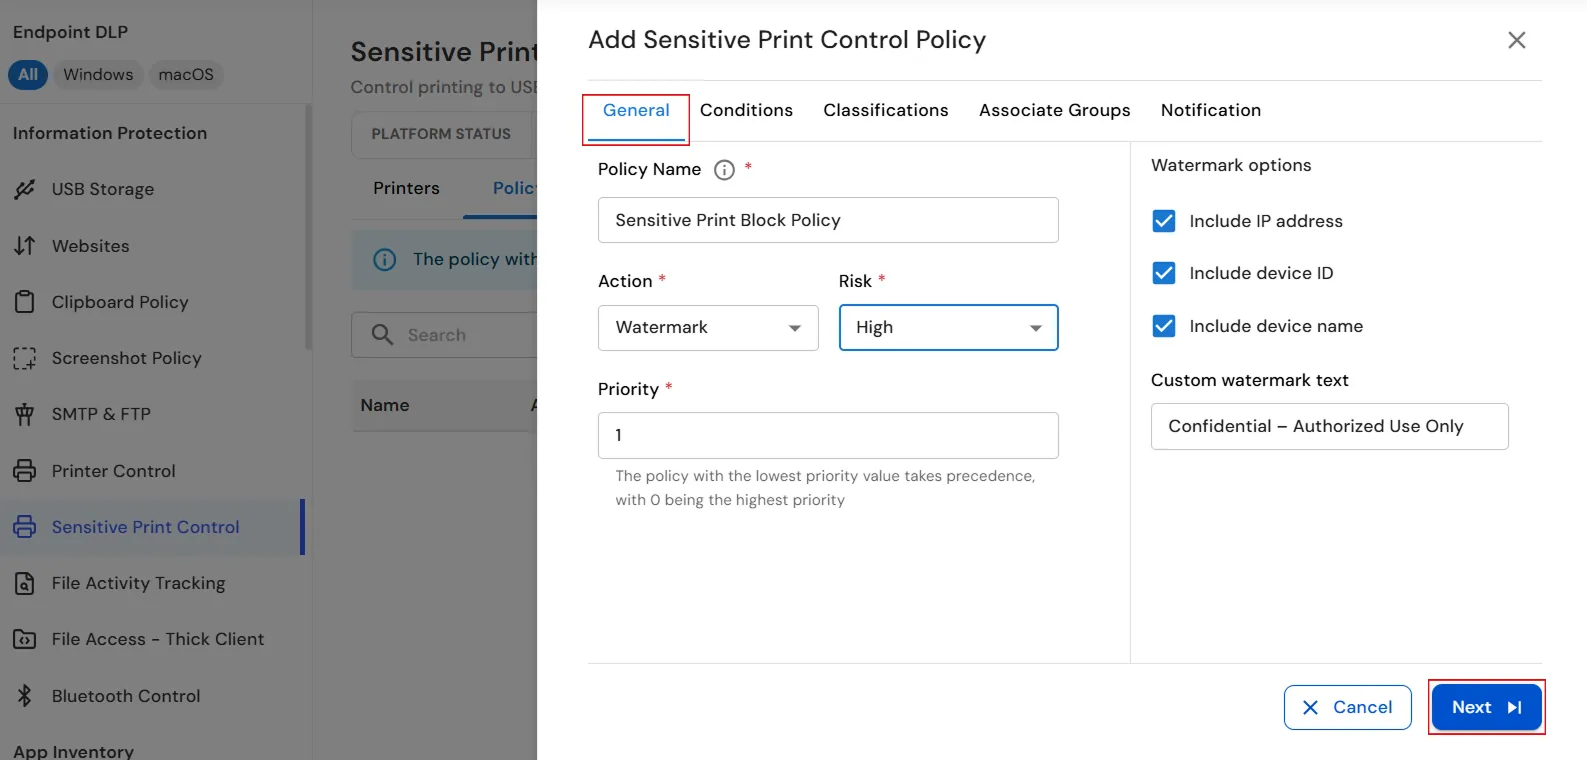
- Enter a unique policy name in the Policy Name field.
- Select the required option from the Action dropdown based on your printing control requirements:
- Block — Prevent printing of sensitive content.
- Log — Allow printing and record the print activity.
- Notify — Allow printing and notify the configured users.
- Watermark — Allow printing with a watermark on the printed document.
- If you select Watermark from the Action dropdown, configure the required watermark options.
- Under Watermark options, select the details you want to include in the watermark:
- Include IP address
- Include device ID
- Include device name
- If required, enter custom text in the Custom watermark text field. Leave this field blank if no custom text is required.
- Select the appropriate Risk level from the dropdown:
- Low — For low-risk printing activities.
- Medium — For moderate-risk printing activities.
- High — For high-risk printing activities.
- Enter the required Priority value. A lower priority value takes precedence, with 0 being the highest priority.
- Click Next to continue.
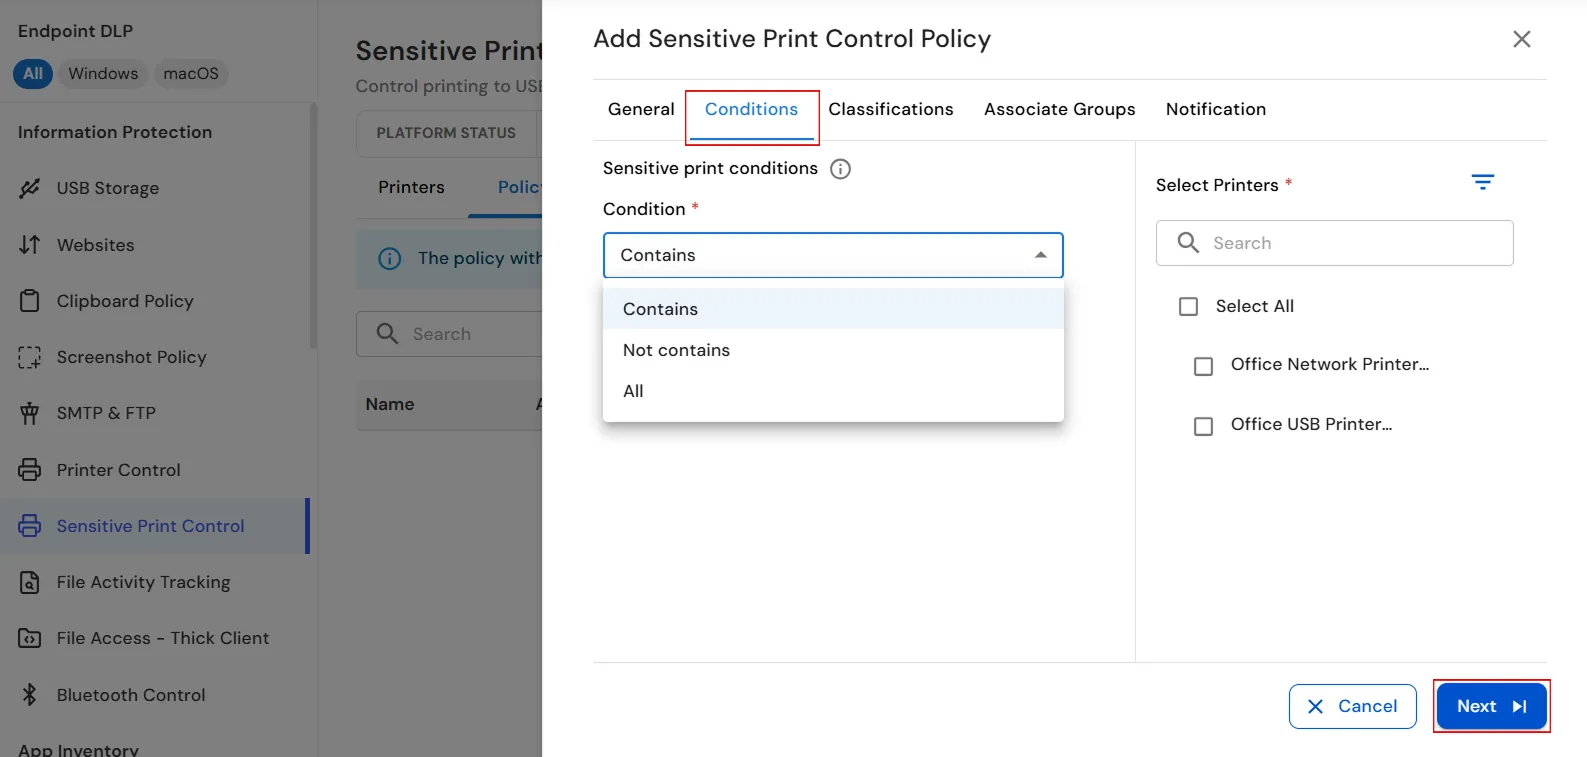
- Under the Conditions tab, select the required option from the Condition dropdown:
- Contains — We will match the policy against print jobs from these specific printers.
- Not Contains — We will match the policy against all print jobs, excluding those from these printers.
- All — We will match the policy against all print jobs from every printer.
- For Contains or Not Contains, under Select Printers, select the required printer(s).
- Click Next to continue.
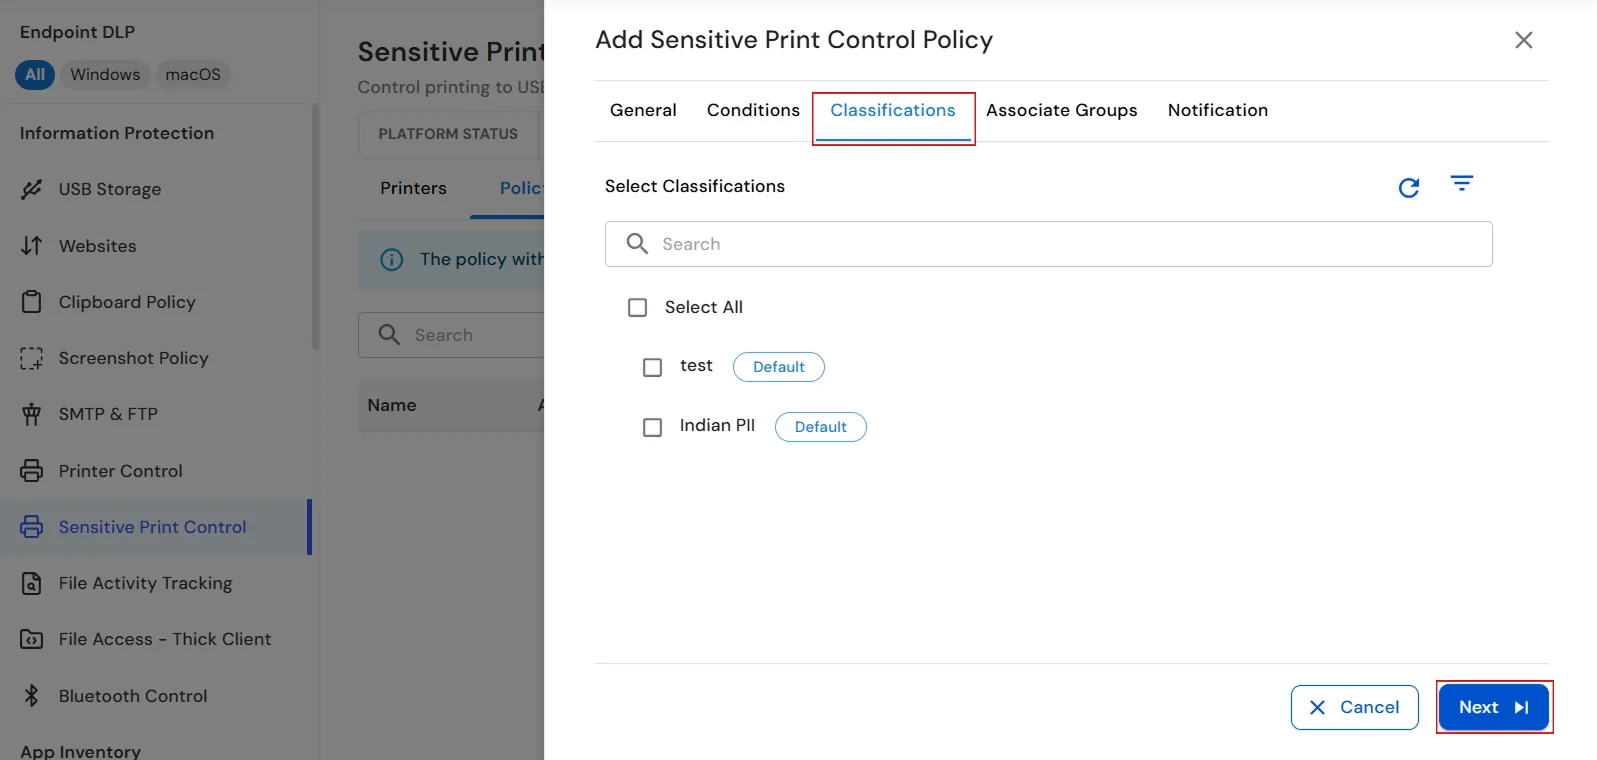
- Under the Classifications tab, select the checkbox next to the required classification, such as Indian PII.
- If a classification is selected, the policy applies only to content with that classification. If no classification is selected, the policy applies to the entire content.
- To select all available classifications, select the Select All checkbox.
- Click Next to continue configuring the policy.
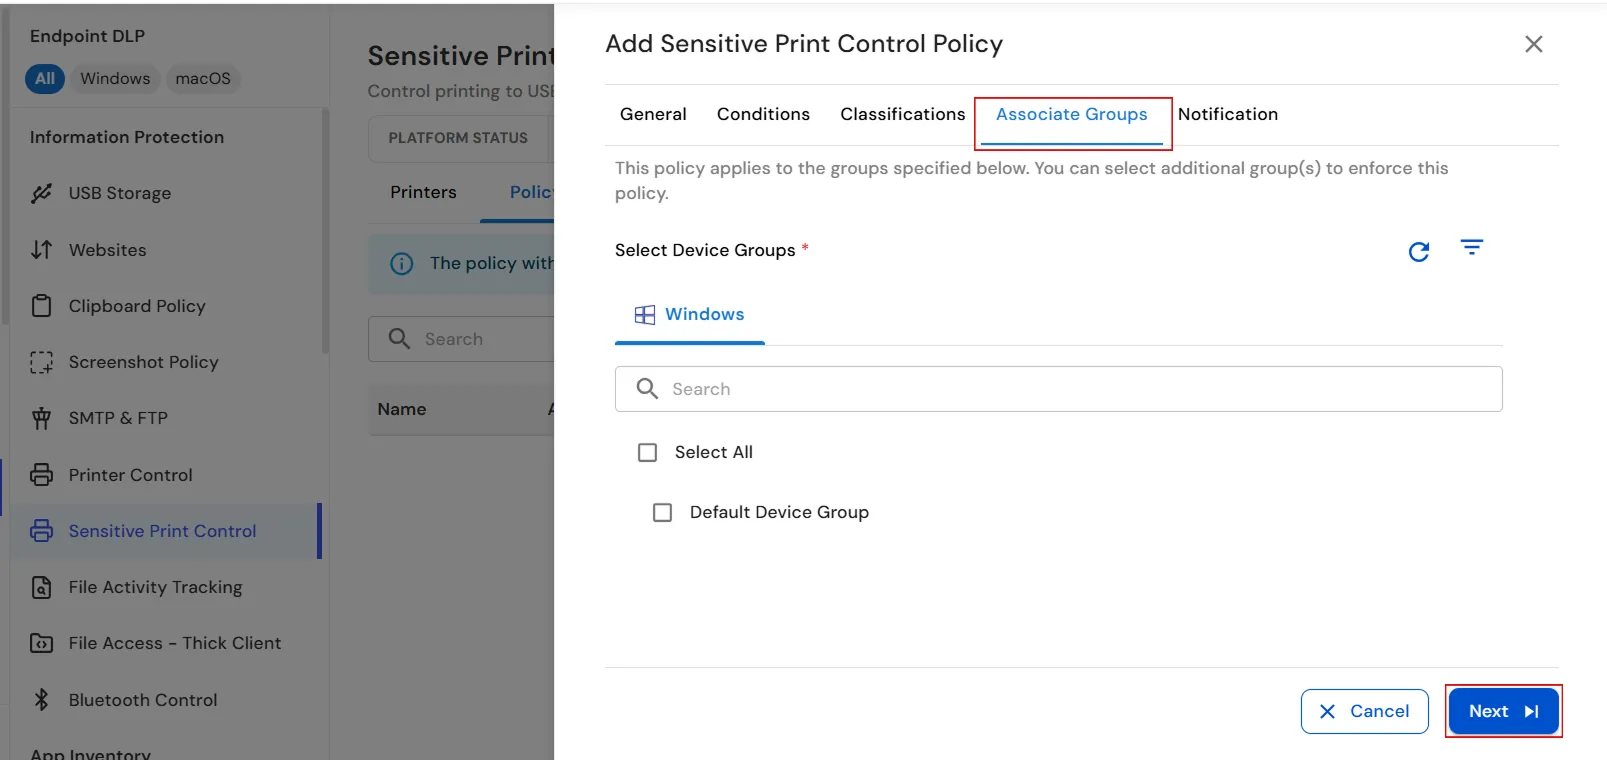
- Under the Associate Groups tab, select the Windows platform.
- Select the checkbox next to the desired device group, such as Default Device Group.
- To apply the policy to all available device groups, select the Select All checkbox.
- Click Next to continue.
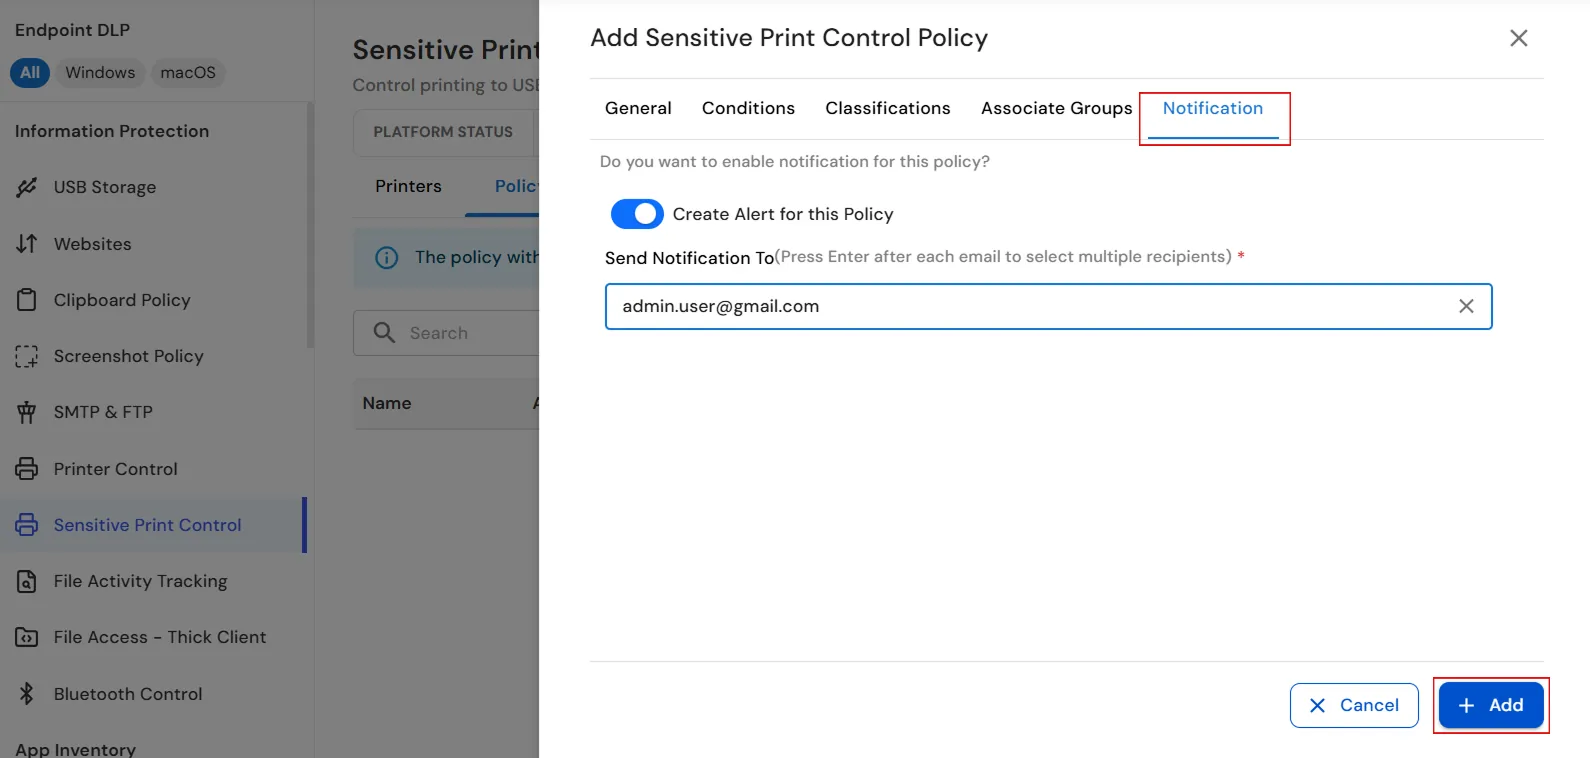
- Under the Notification tab, enable the Create Alert for this Policy toggle to receive an email alert when the policy is triggered.
- In the Send Notification To field, enter a valid email address to specify the recipient for policy alerts.
- Press Enter after entering each email address to add multiple recipients.
- Click Add to create the Sensitive Print Control Policy.
- Verify that the Sensitive Print Control Policy appears in the Policy list, displays the selected action, and has the Status toggle enabled.
Step 2: Reporting
- Click the Reporting button in the top-right corner of the miniOrange DLP dashboard to view policy activity and reports.
- From the left navigation panel, select Printer Reporting to view print-related policy events across managed devices.
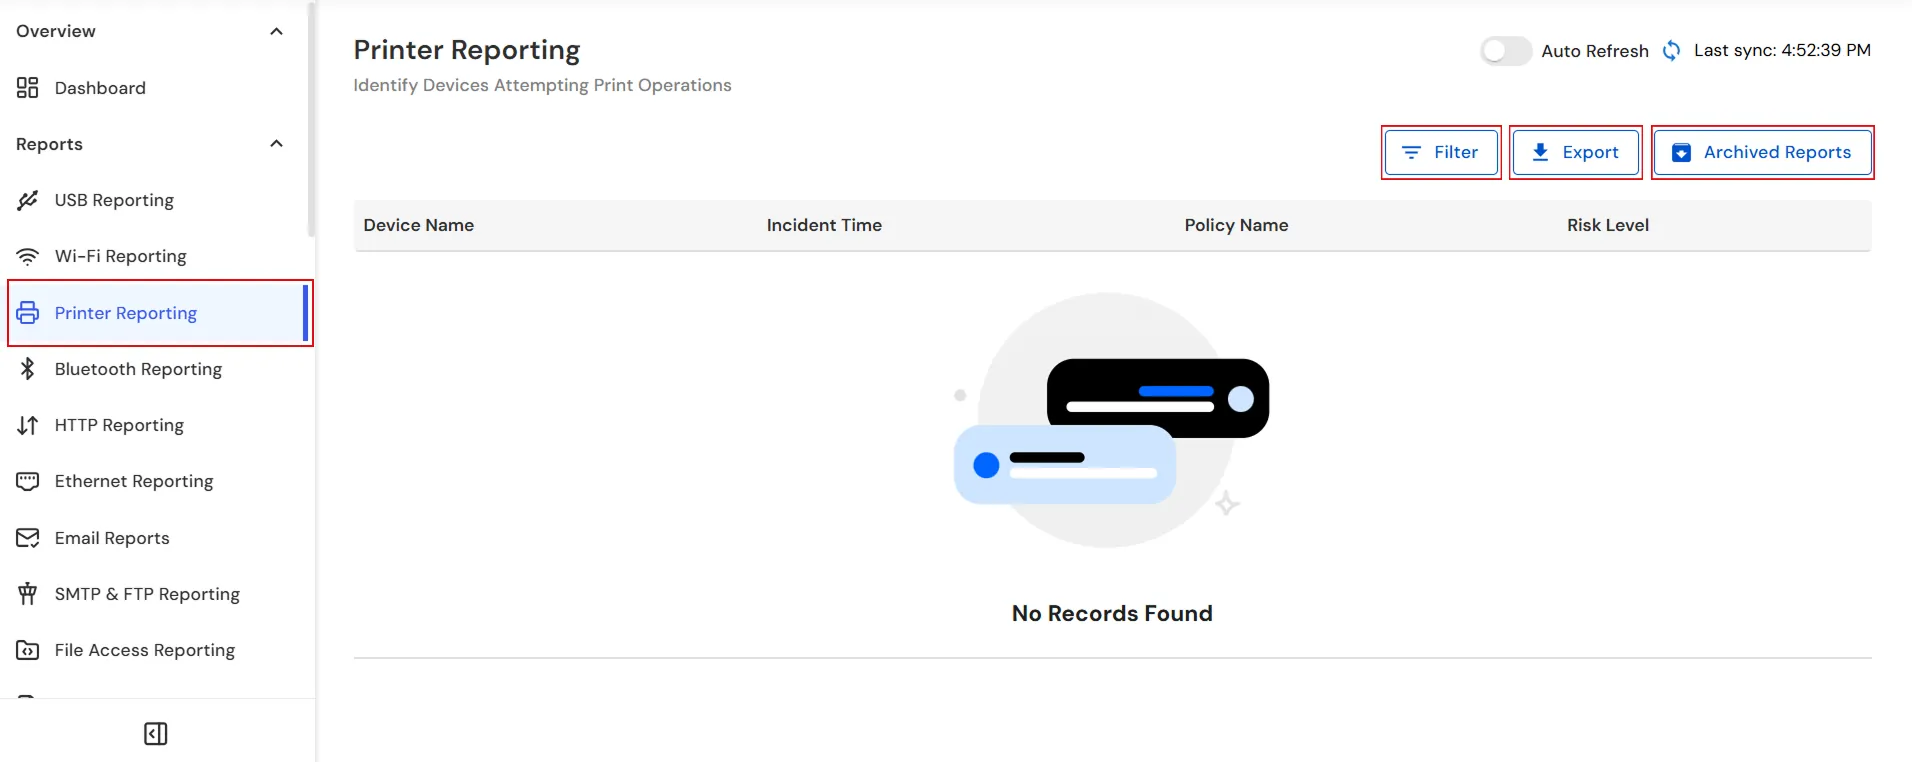
- Click the Filter button to filter printer reporting events by device, policy, or date.
- In the Printer Reporting Filter panel, select Device and choose the required device(s) from the list.
- Then select Policy and choose the required policy.
- Under the Date filter, select the required From and To dates, click OK, and then click Apply to view printer reports for the selected date range.
- Click the Export button to download the printer report.
- Click Archived Reports to view previously generated printer reports.
- In the Download Archived Printer Report dialog, select the required Year, Quarter, and Date Range, then click Download.
You have successfully configured the Sensitive Print Control Policy using our DLP Software. If you encounter any issues during the configuration, please feel free to contact us at uemsupport@xecurify.com.