- Home
- DLP
- How to configure Classification Labels using miniOrange DLP
Configure Classification Labels with miniOrange DLP
Classification Labels help categorize and manage sensitive data based on defined levels of confidentiality. By creating and managing classification labels, administrators can assign appropriate labels to data and apply visual labeling and enforcement rules to help protect sensitive information across the organization.
Prerequisites
There are a couple of things you need to check before you start with the setup:
- You must have the required privileges to create and configure Classification Labels in the miniOrange DLP dashboard.
Configuration Steps
Step 1: Configure Classification Labels
- Sign in to your DLP Admin dashboard.
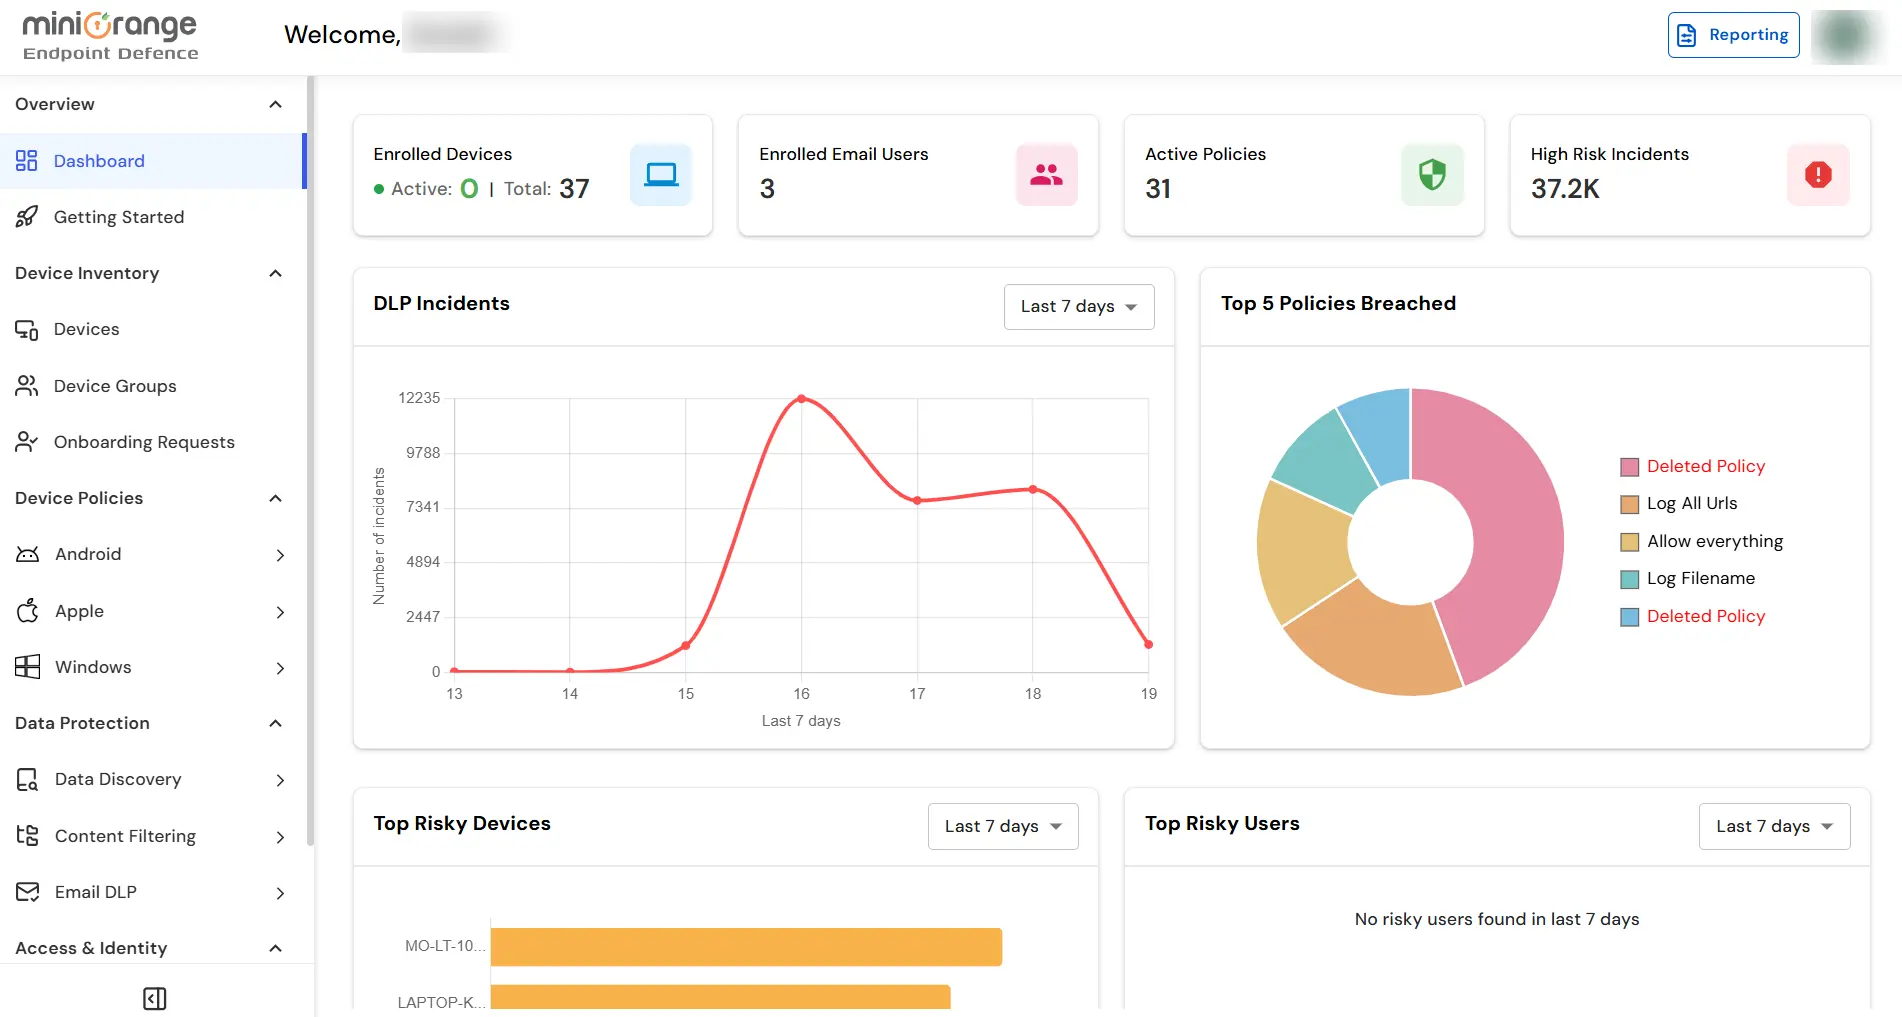
- On the dashboard, navigate to the left menu panel and click Content Filtering → Classification Labels.
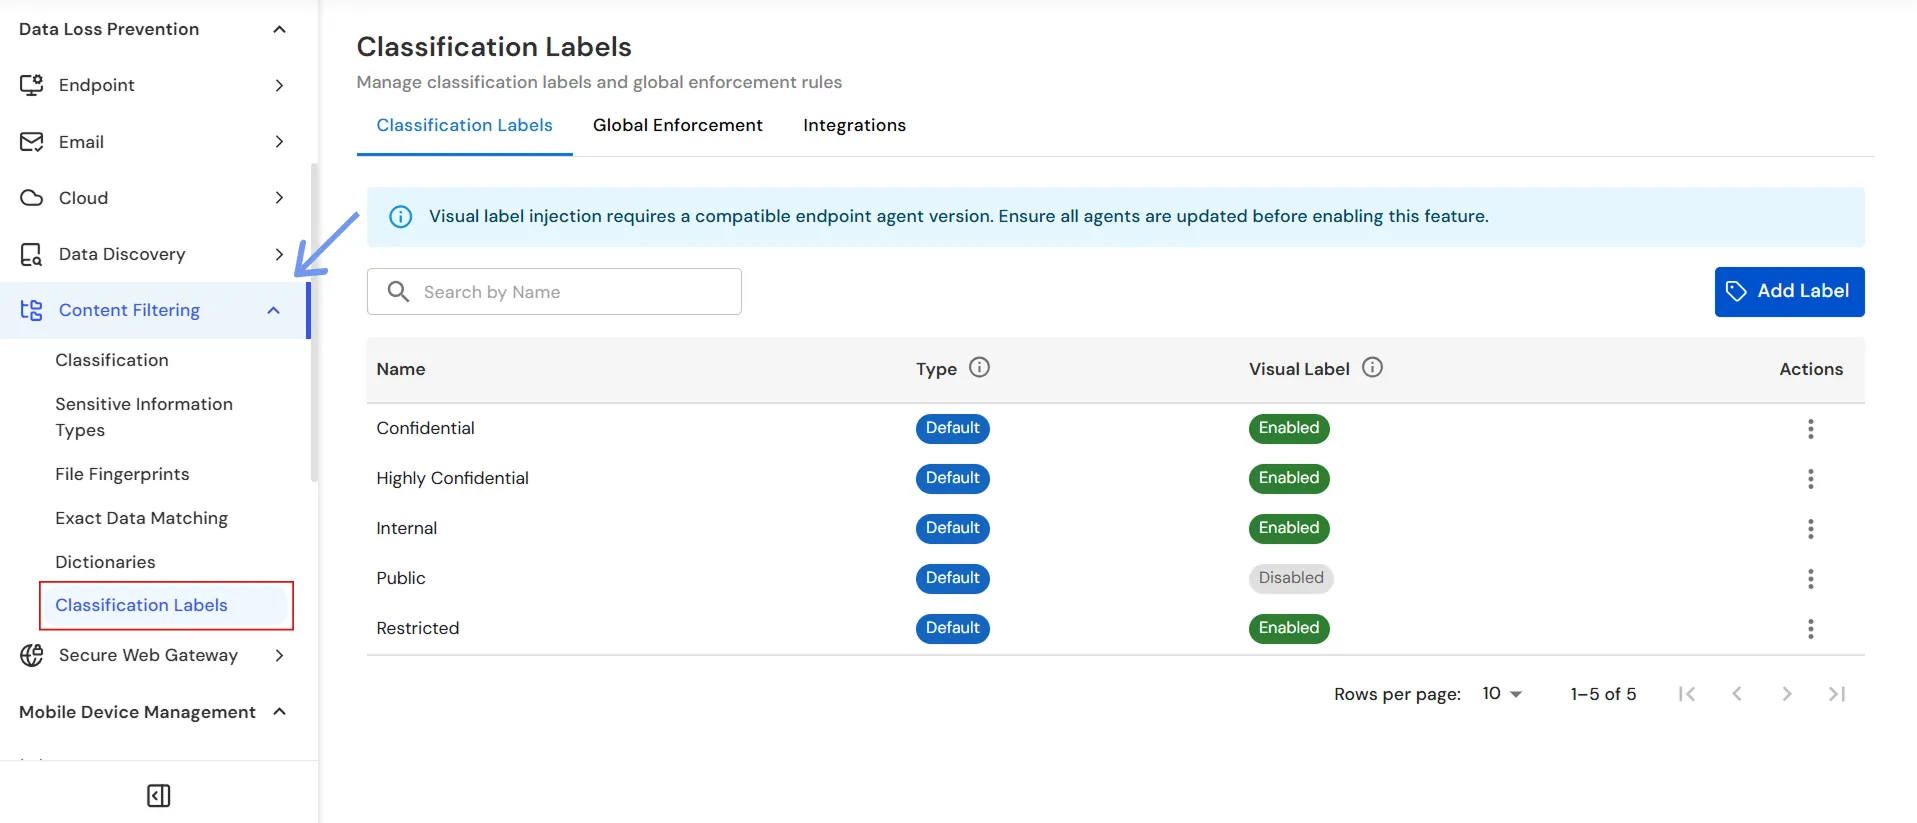
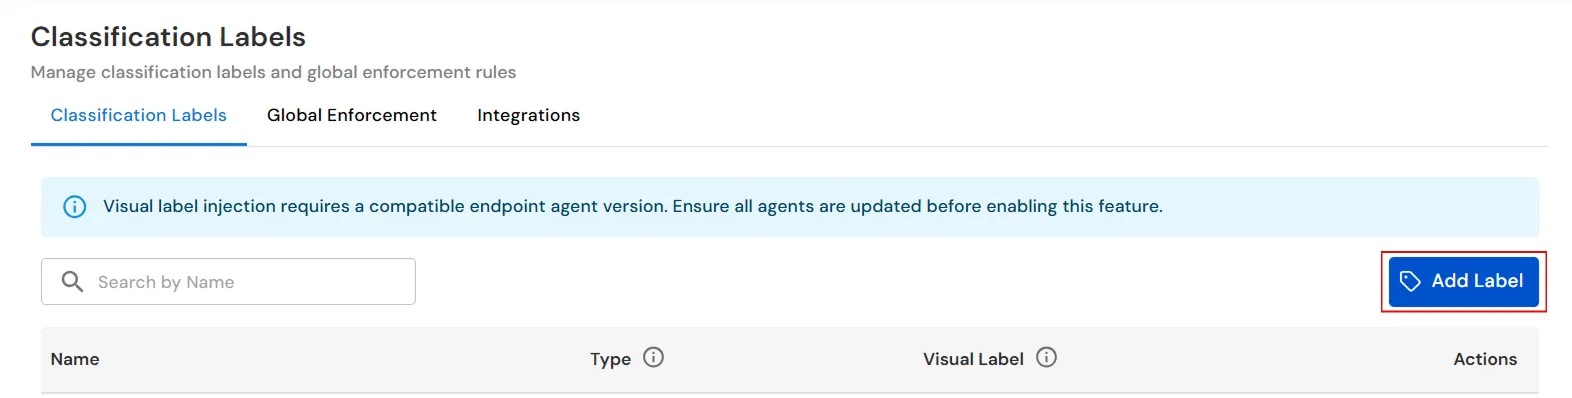
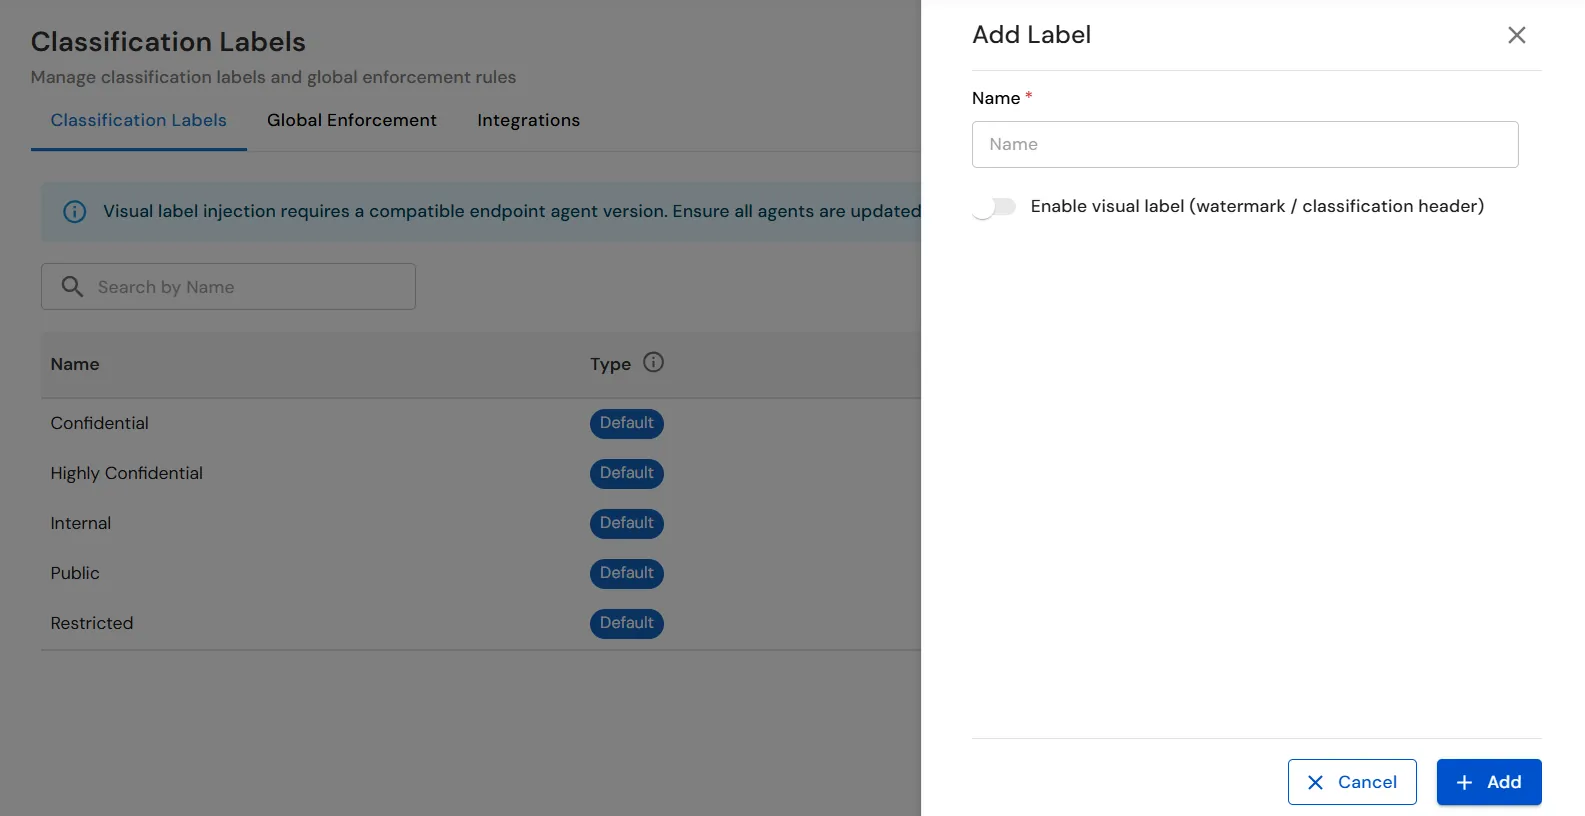
- Click the Add Label button to create a new classification label.
- In the Add Label window, enter a unique name for the classification label in the Name field.
- Enable the Enable visual label (watermark / classification header) option to display the classification label as a visual marker on applicable content.
- Click Add to create the classification label.
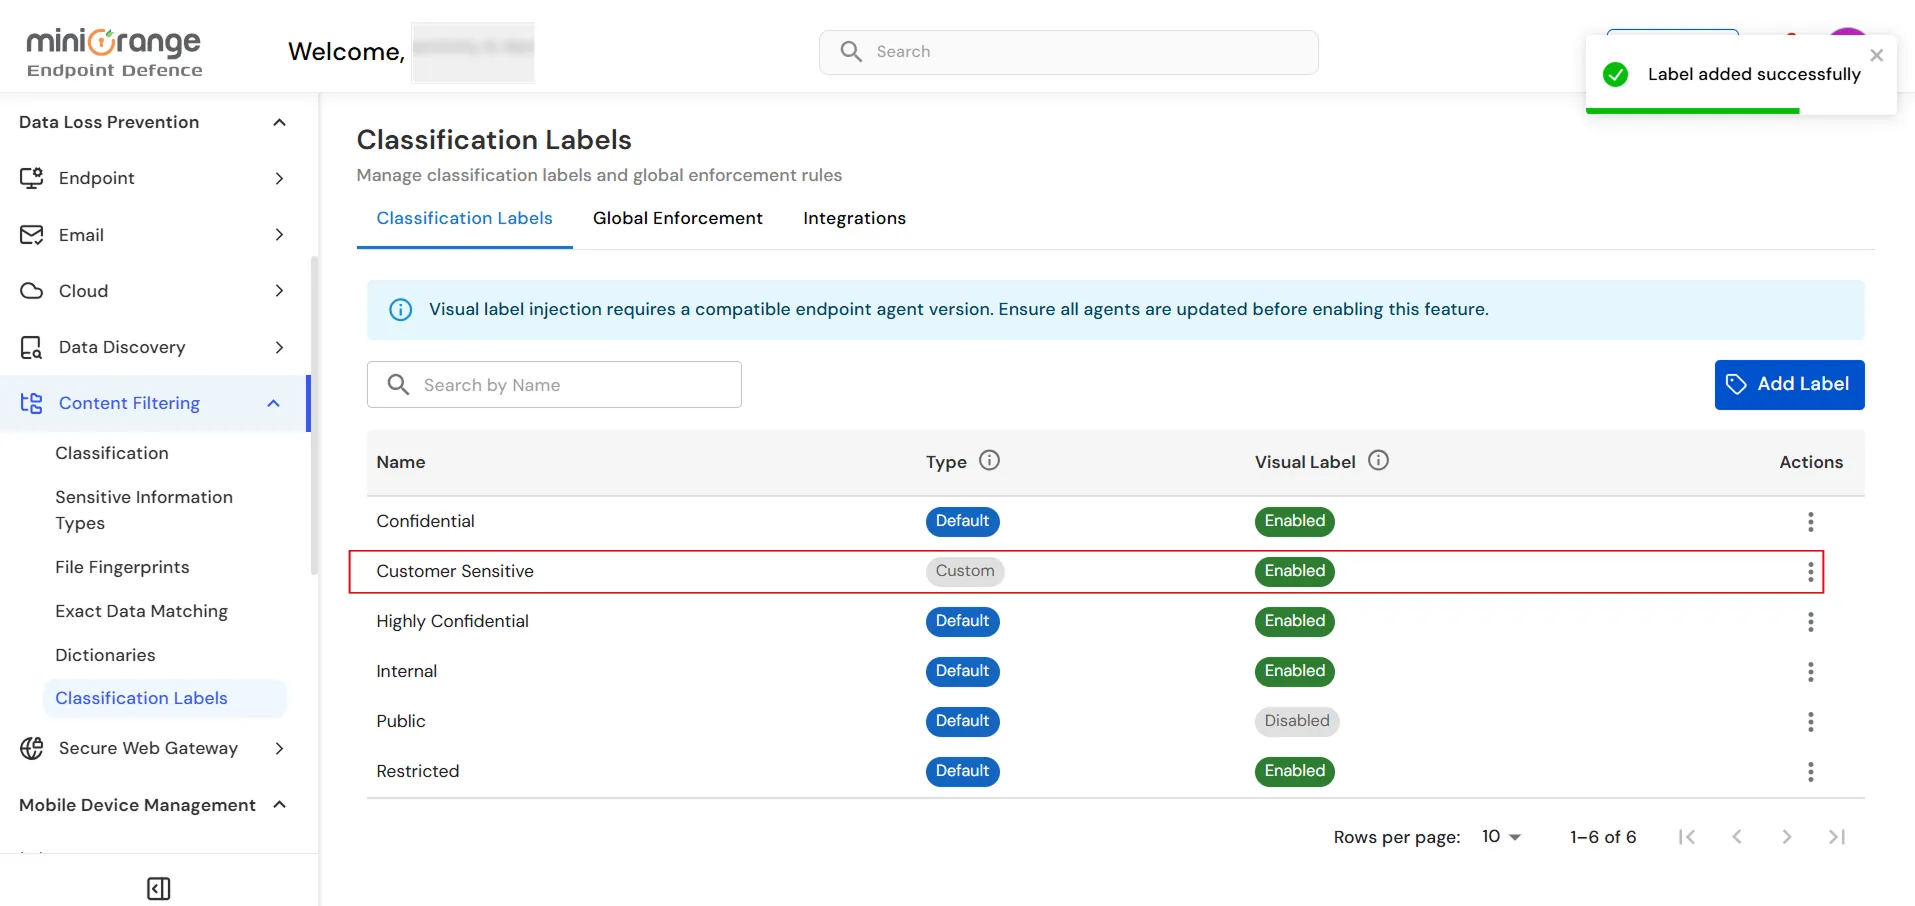
- Verify that the newly created classification label appears in the list with the configured Name, Type shown as Custom, and Visual Label status.
Step 2: (Optional) Configure Integrations
- Click the Integrations tab to configure integrations for classification labels.
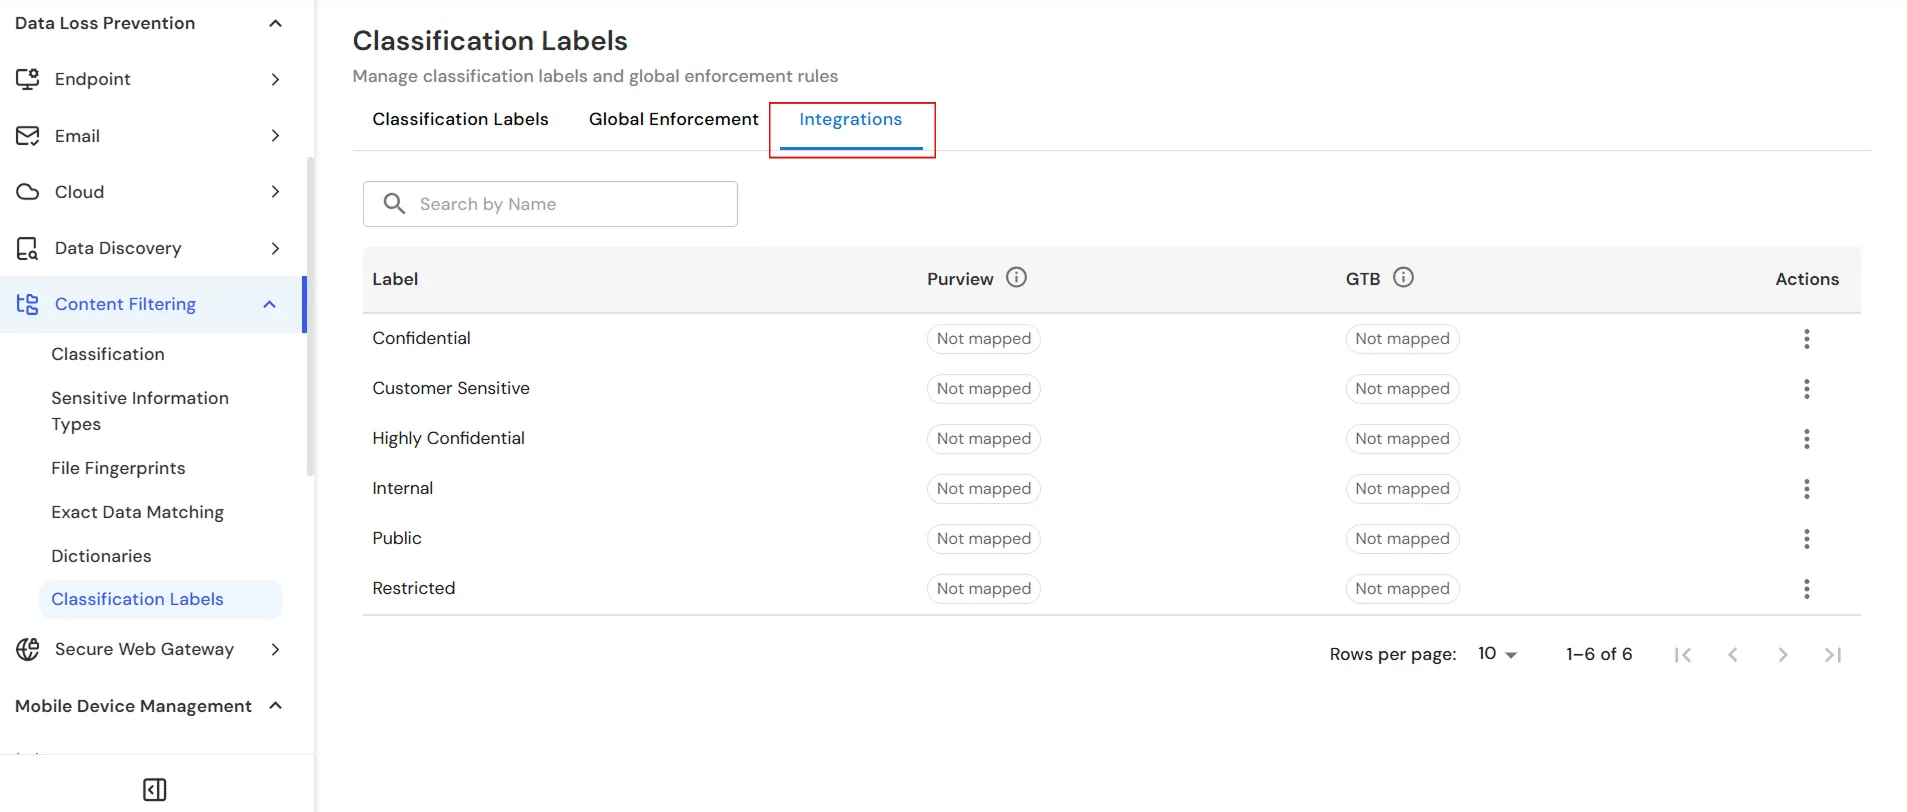
- You can configure either Microsoft Purview or GTB integration based on your requirements.
- Configure Microsoft Purview Integration:
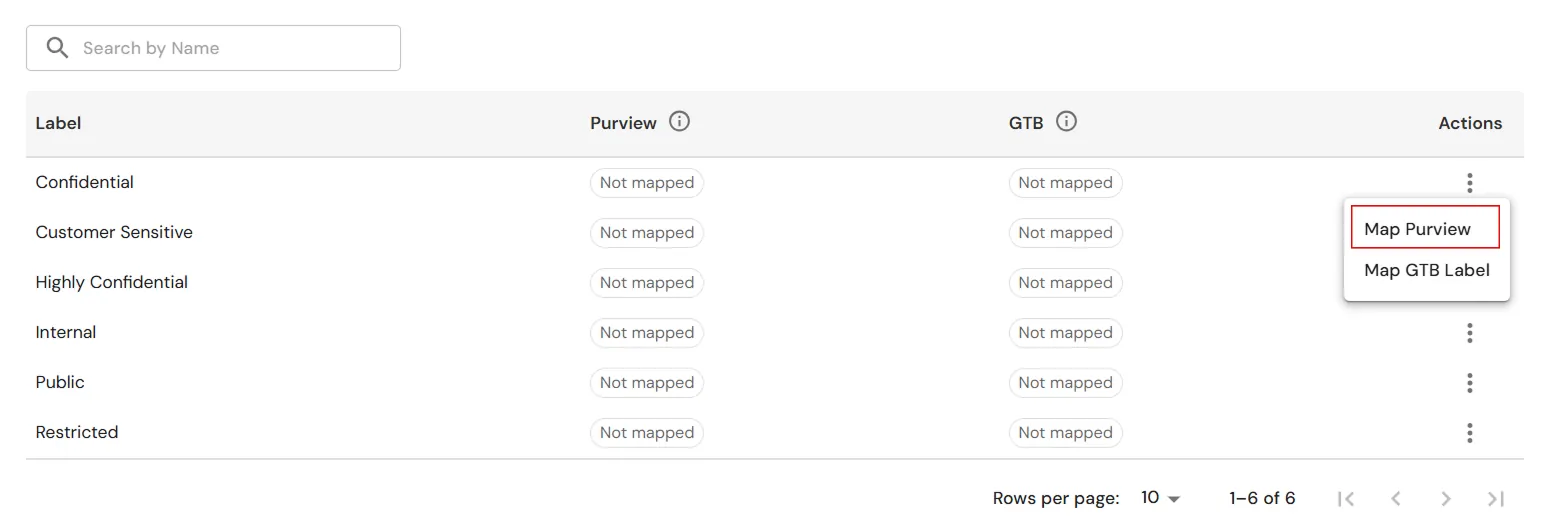
- Under the Purview column, locate the classification label that you want to map and click the corresponding Actions menu.
- From the Actions menu, click Map Purview to map the classification label to a Microsoft Purview sensitivity label.
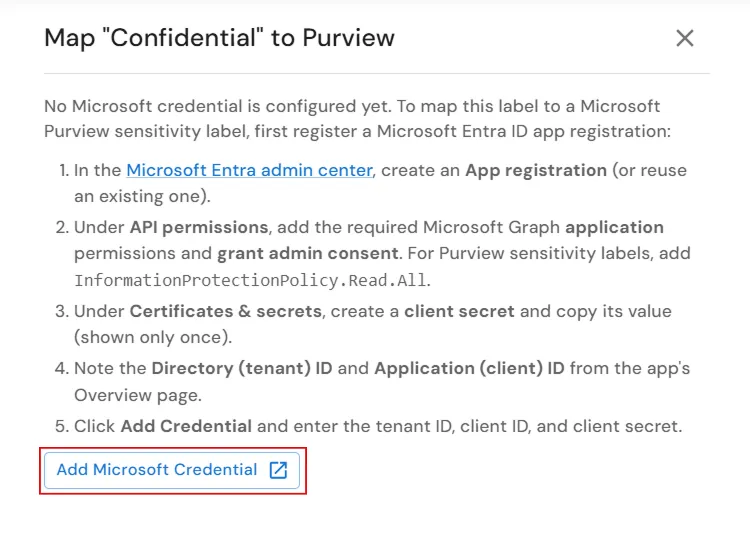
- In the Map "Confidential" to Purview window, click Add Microsoft Credential to configure the Microsoft Entra ID credentials required for the Purview integration.
- In the Add Microsoft Credential window, enter a name for the credential in the Name field. This field is optional. For example, enter Corporate Entra ID.
- Under Tenant ID, enter the Directory (tenant) ID of the Microsoft Entra ID application.
- Under Client ID, enter the Application (client) ID of the Microsoft Entra ID application.
- Under Client Secret, enter the client secret value generated for the Microsoft Entra ID application.
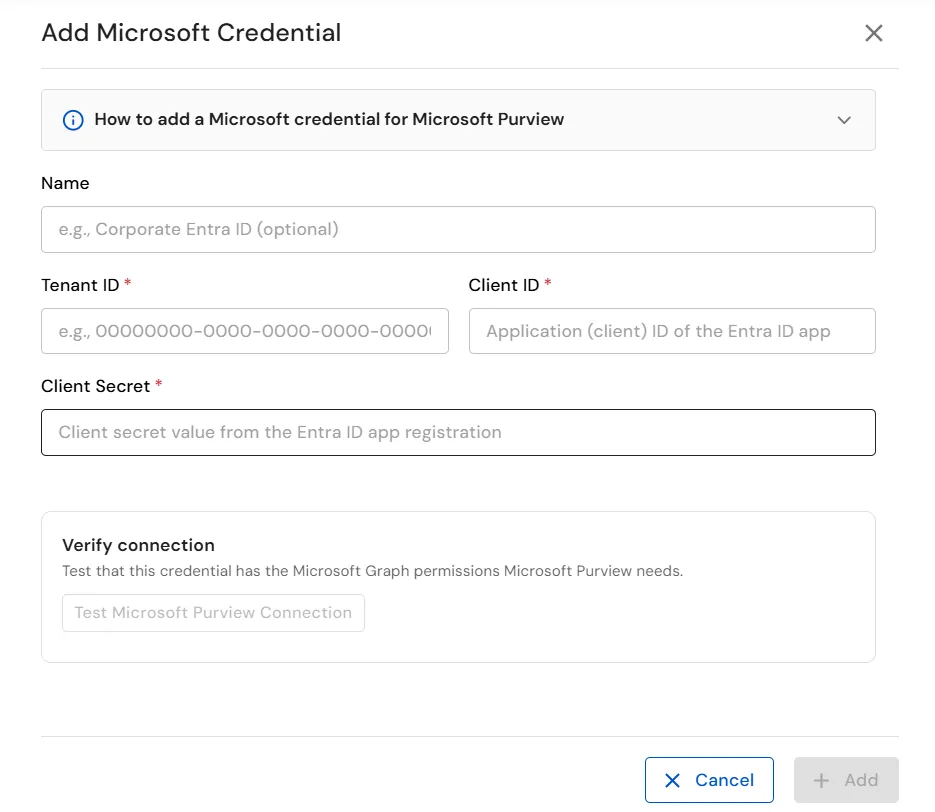
- Under Verify connection, click Test Microsoft Purview Connection to verify that the configured credential has the required Microsoft Graph permissions.
- After the connection test is successful, save the Microsoft credential by clicking Add.
- Return to the Map "Confidential" to Purview window and select the appropriate Microsoft Purview sensitivity label for the Confidential classification label.
- After selecting the required Purview sensitivity label, click Save Mapping to save the mapping.
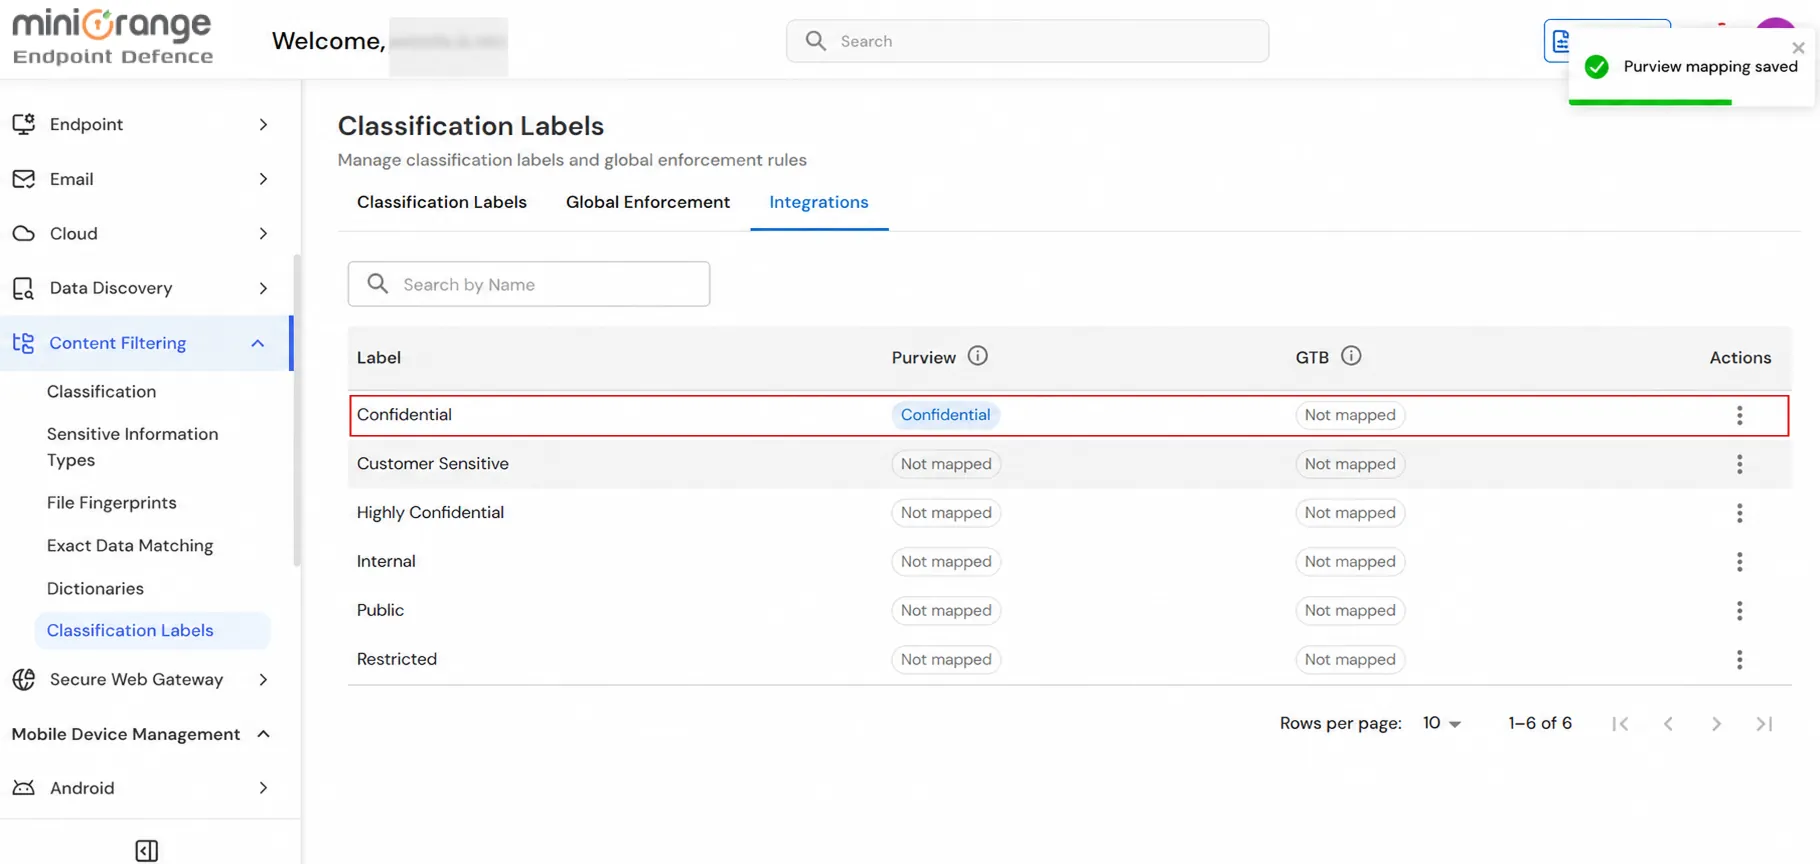
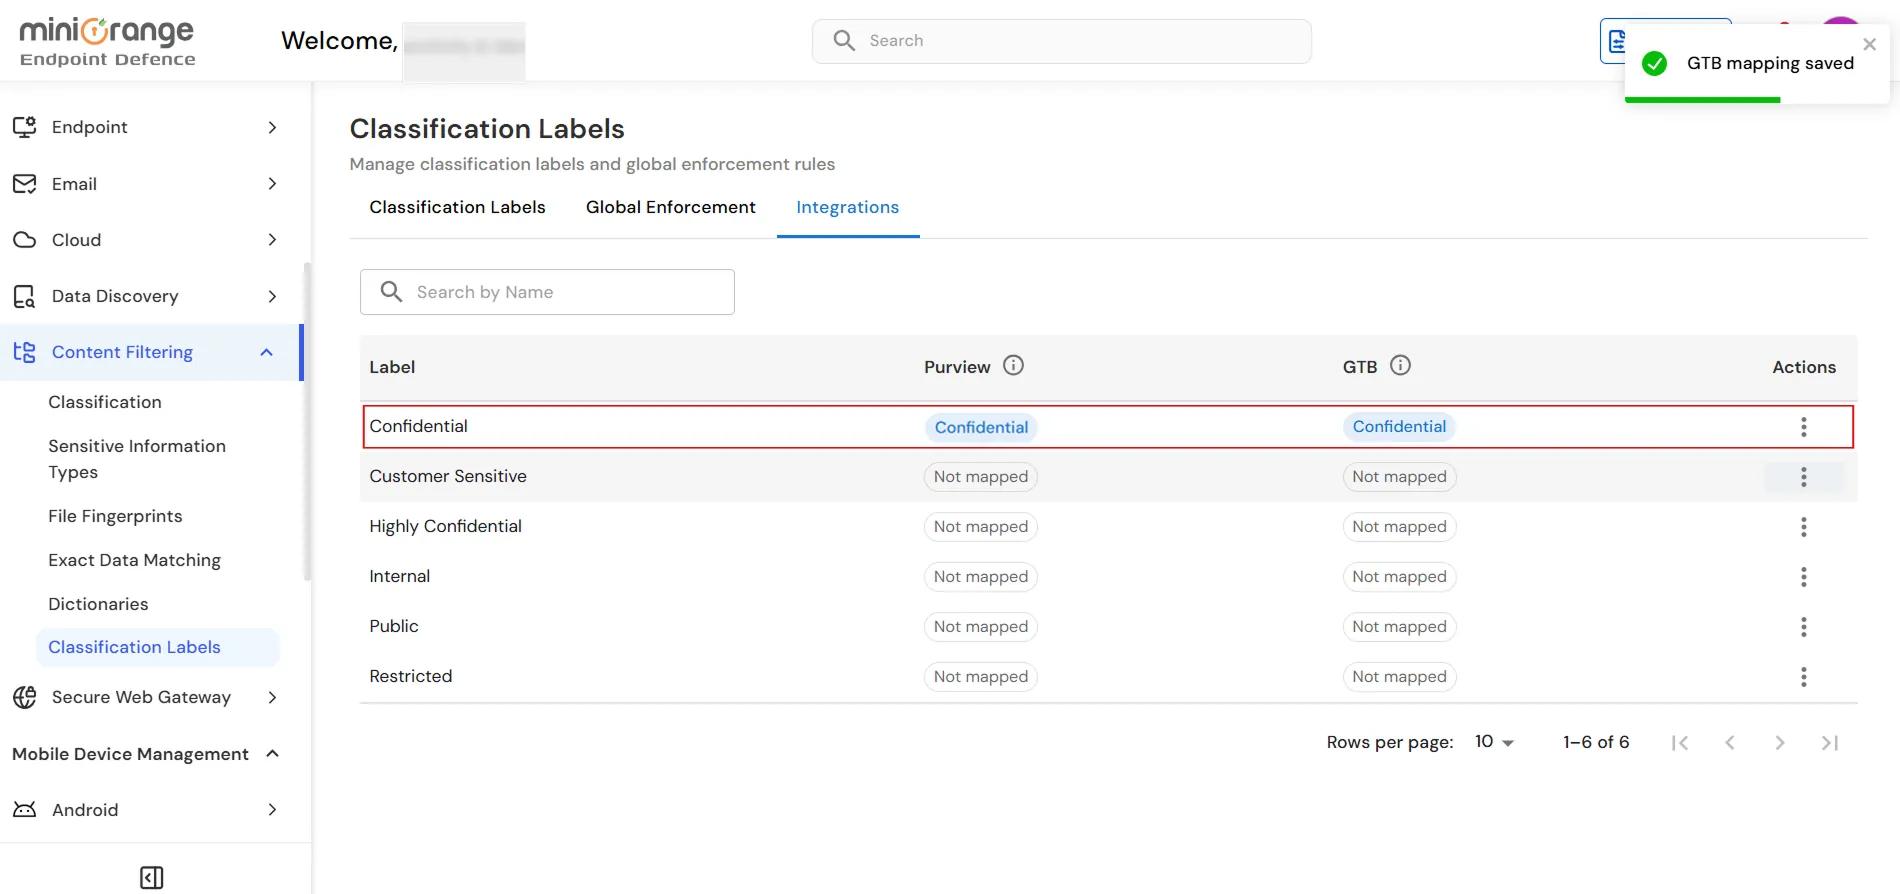
- After saving the mapping, verify that the configured Microsoft Purview sensitivity label is displayed for the corresponding classification label under the Integrations tab.
- Configure GTB Integration:
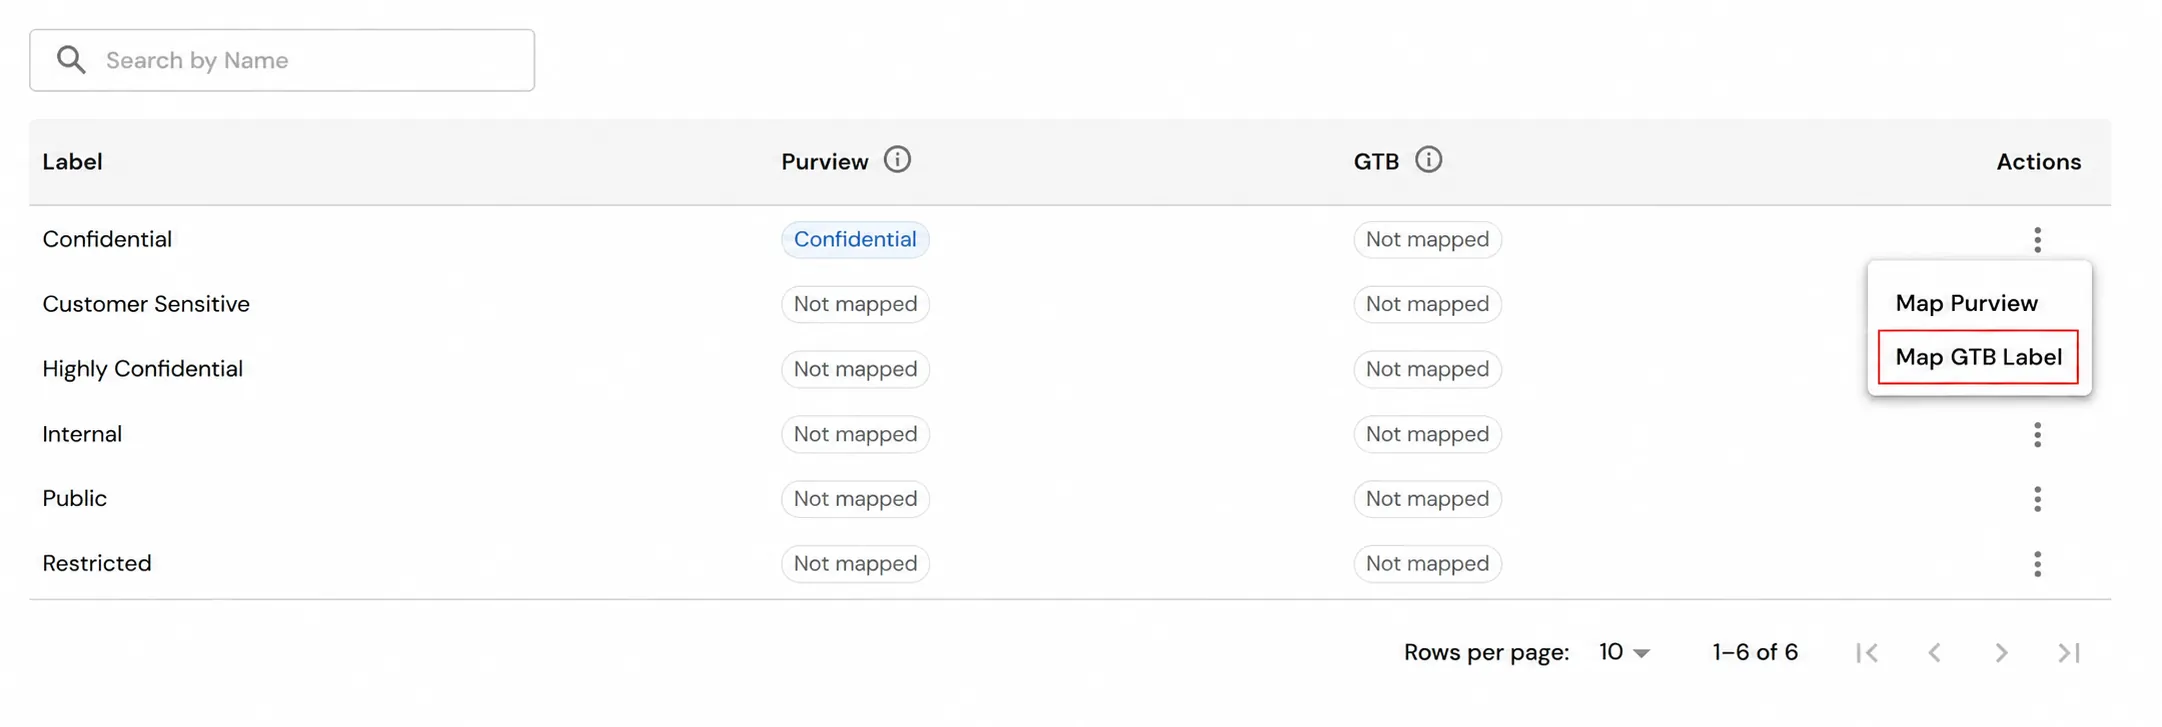
- Under the GTB column, locate the classification label that you want to map and click the corresponding Actions menu.
- From the Actions menu, click Map GTB Label to configure the GTB classification mapping.
- In the GTB classification value field, enter the value that GTB writes to files for the corresponding classification label. For example, enter Confidential.
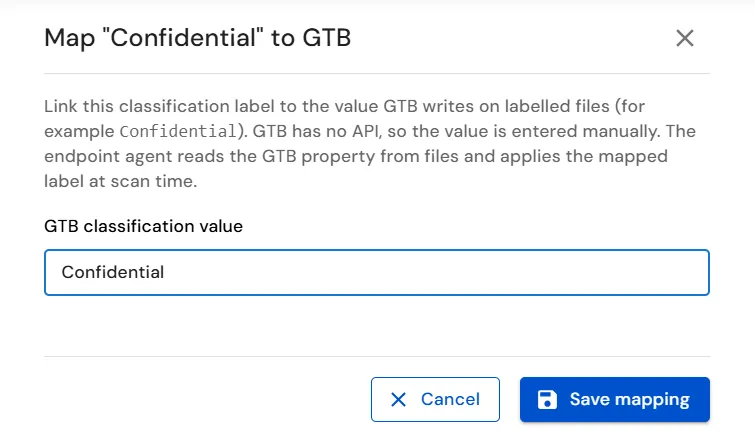
- Click Save mapping to save the GTB classification mapping.
- Verify that the Confidential label displays the configured GTB value, such as Confidential, under the GTB column in the Integrations tab.
You have successfully configured Classification Labels using our DLP solution. If you encounter any issues during the configuration, please feel free to contact us at uemsupport@xecurify.com.