- Home
- DLP
- How to configure Data Classification using miniOrange DLP
Configure Data Classification with miniOrange DLP
Classifications help organize and categorize sensitive data based on predefined rules and detection criteria. By creating custom classifications, administrators can group related sensitive information types and apply consistent content filtering policies across the organization. Using classifications simplifies policy management, improves data visibility, and enables more accurate identification of sensitive content before it is shared or transferred.
Prerequisites
There are a couple of things you need to check before you start with the setup:
- You must have the required privileges to create and configure Classifications in the miniOrange DLP dashboard.
Configuration Steps
Step 1: Configure Classification
- Sign in to your DLP Admin dashboard.
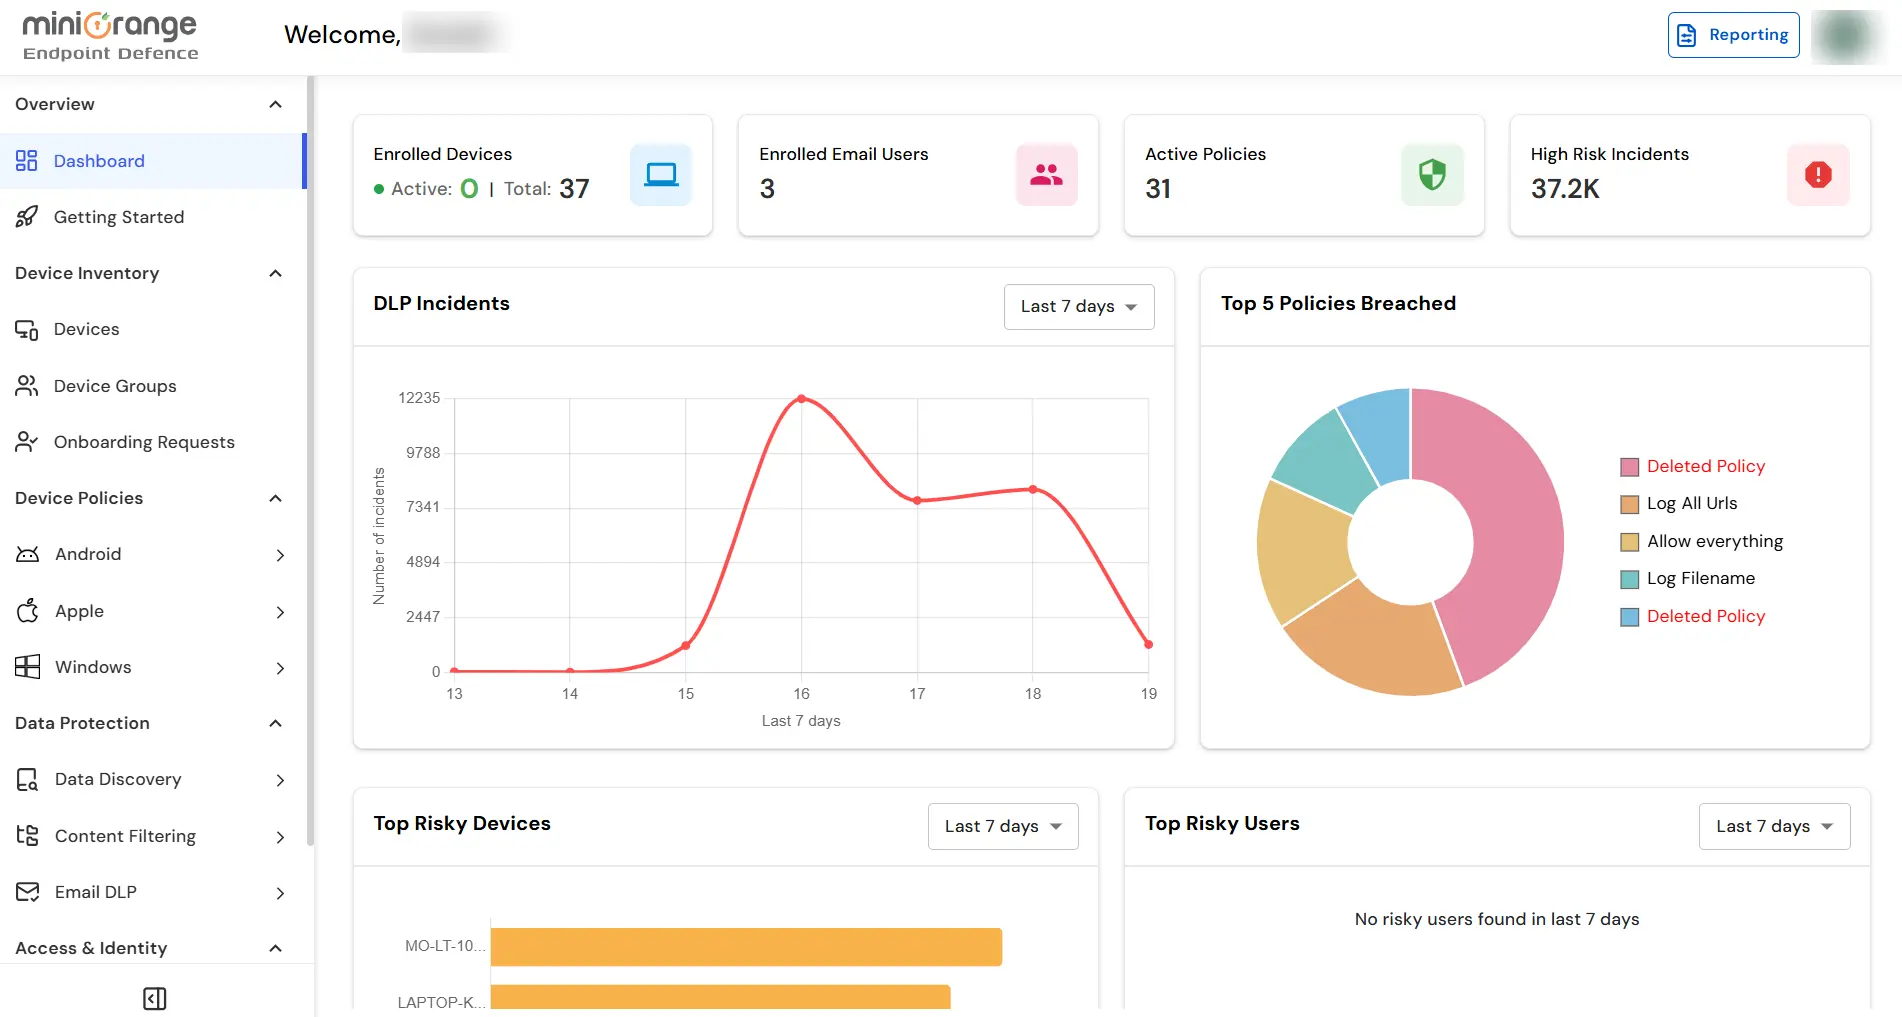
- On the dashboard, navigate to the left menu panel and click Content Filtering → Classification.
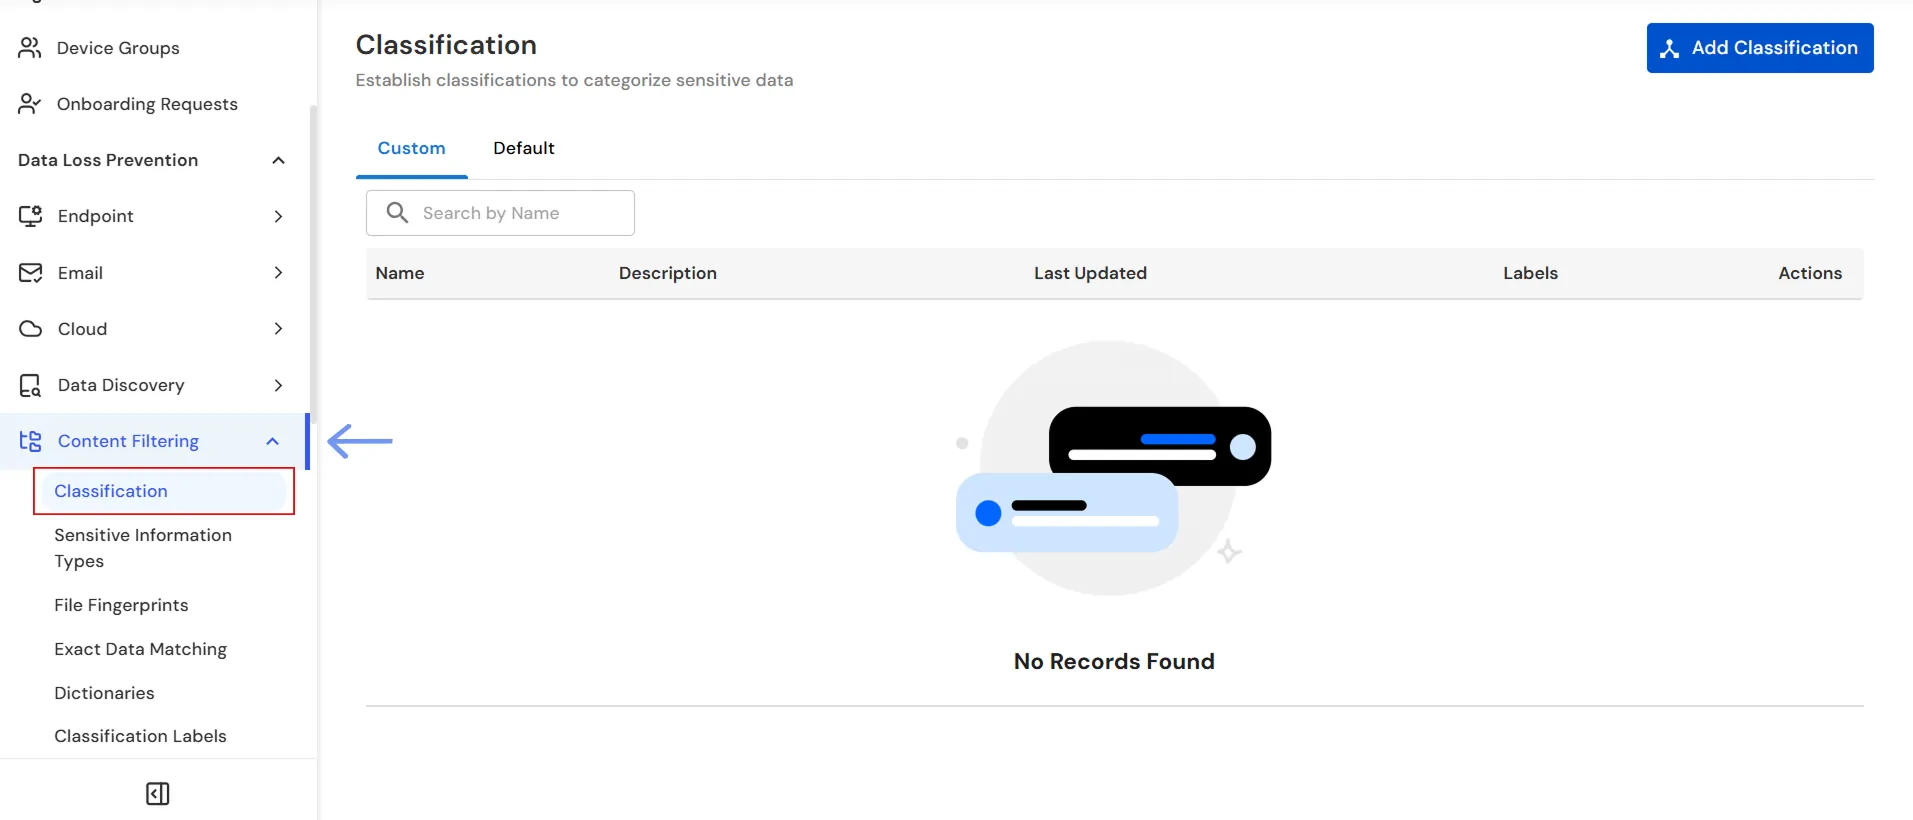
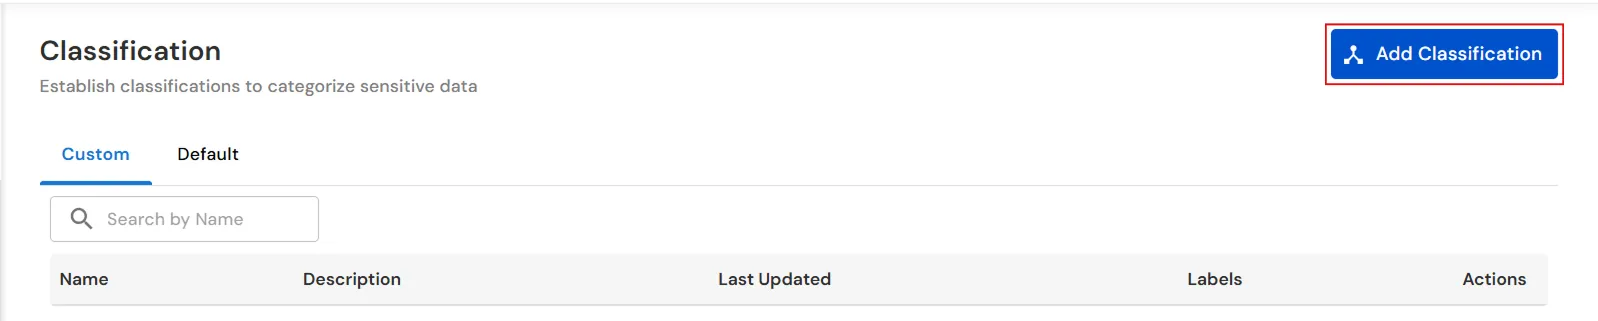
- Click the Add Classification button to create a new custom classification.
- In the Name field, enter a unique name for the classification. For example, you can enter Financial Documents to group sensitive financial information under a single classification.
- In the Description field, provide a brief description explaining the purpose of the classification.
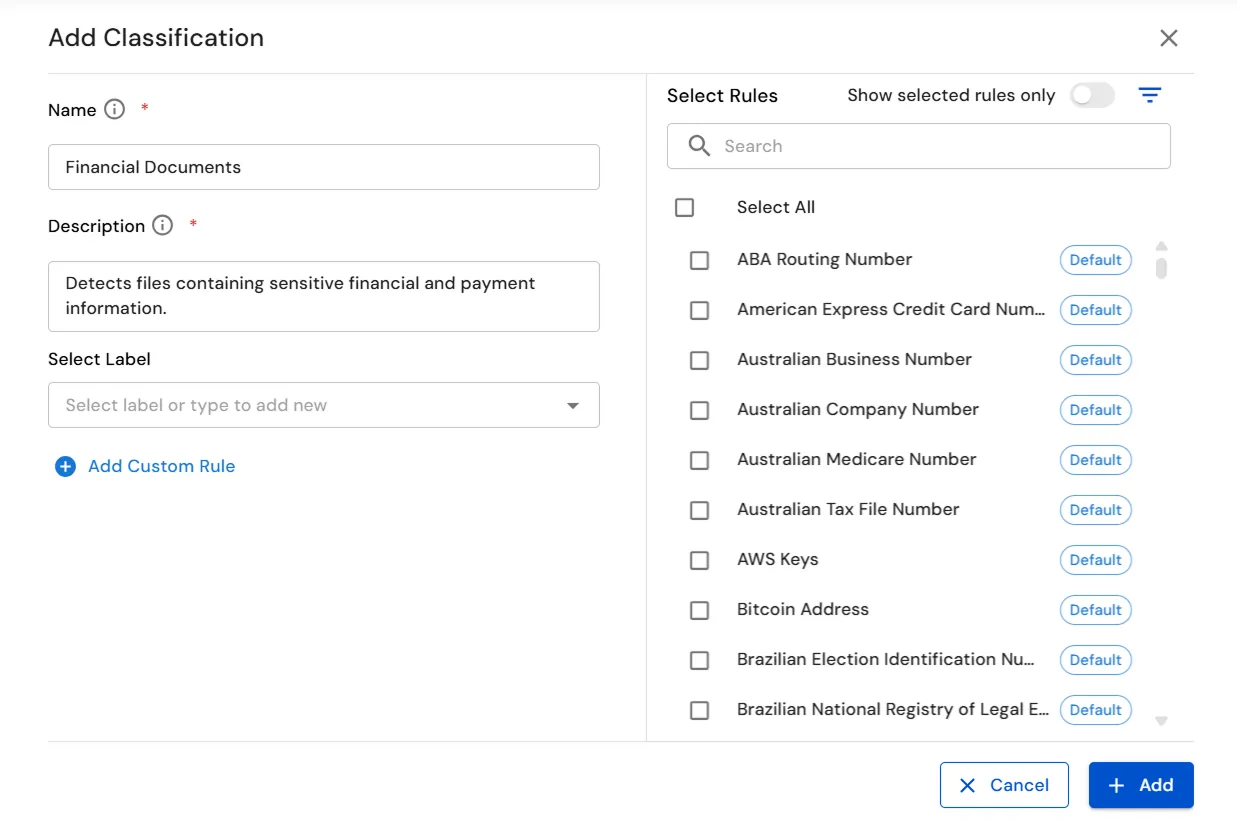
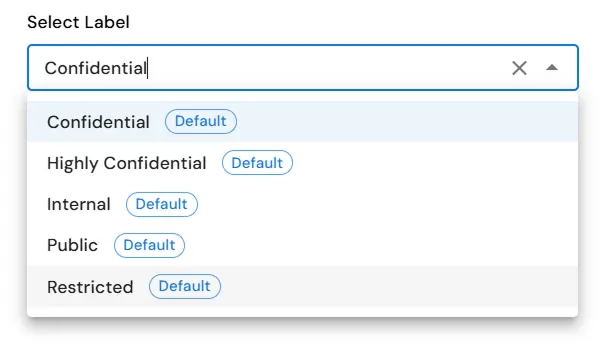
- (Optional) Under Select Label, choose an existing label from the dropdown or type a new label to create one. Labels help organize classifications and make them easier to identify while creating Content Filtering policies.
- (Optional) Click Add Custom Rule to create a custom detection rule when the required rule is not available in the existing rule list.
- In the Rule Name field, enter a unique name for the custom rule.
- Under Criteria, select the required Type from the dropdown and enter the corresponding Occurrences and Criteria Value to define the conditions for the rule.
- Click the + icon next to Criteria to add additional criteria, if required.
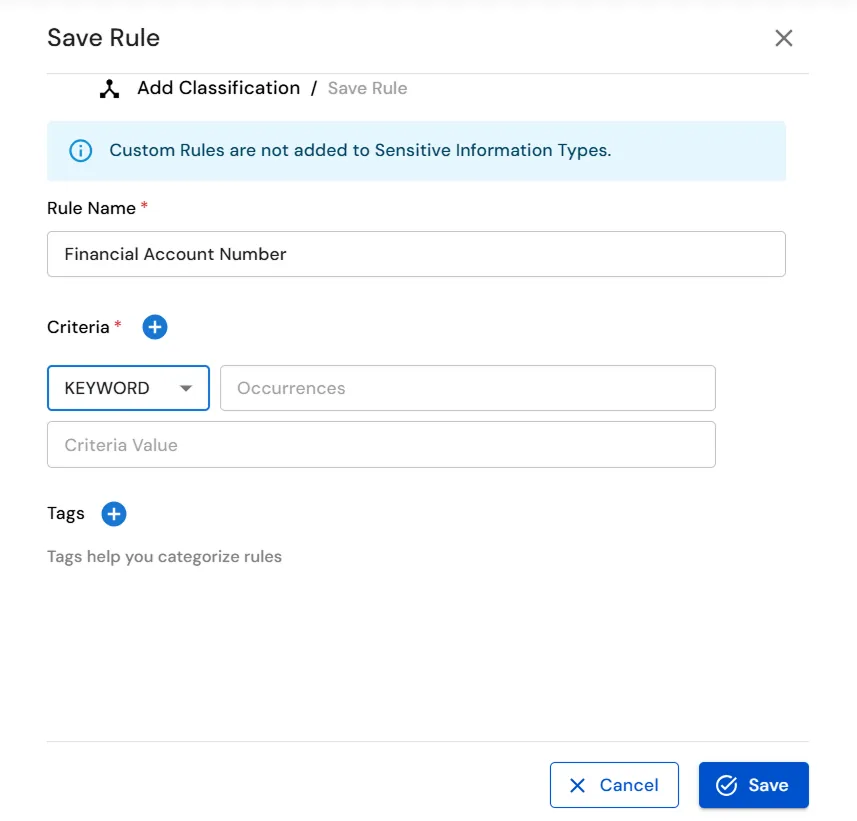
- (Optional) Under Tags, click the + icon to assign tags to the custom rule.
- In the Select Tags window, use the Search Tags field to find the required tag.
- Expand the appropriate tag category, such as Compliance, Region, or Country, and select the required tag.
- Verify that the selected tag appears under Selected Tags.
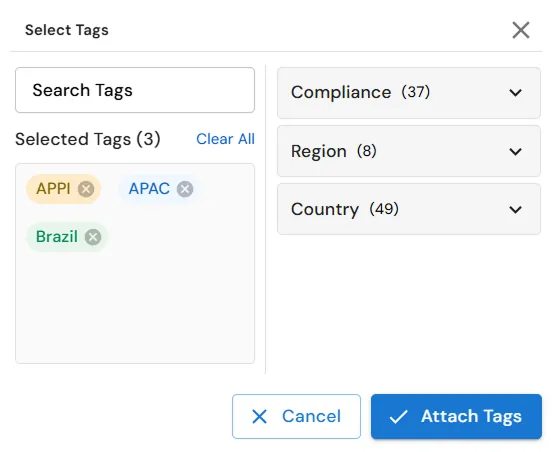
- Click Attach Tags to associate the selected tag with the custom rule.
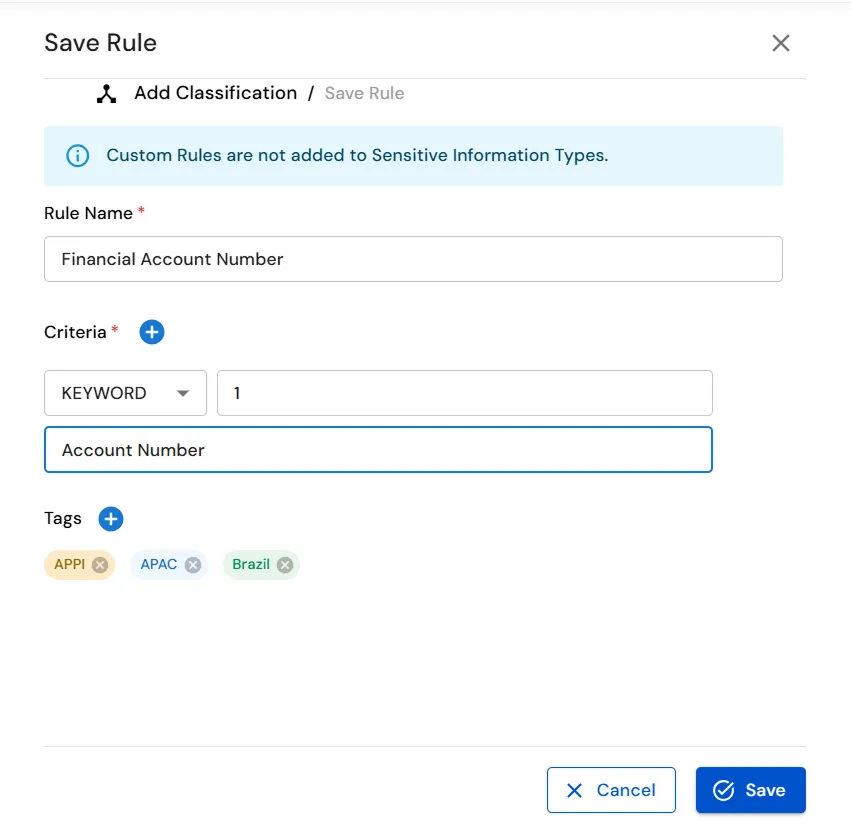
- After configuring the custom rule, verify the Rule Name, Criteria, and Tags, if applicable, and then click Save to create the custom rule.
- Verify that the custom rule you created appears under Custom Rules in the Add Classification window.
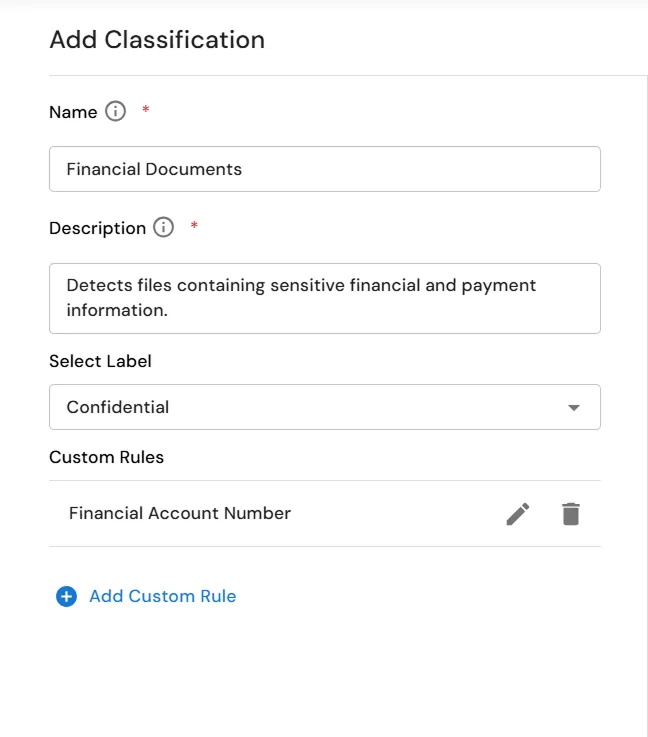
- Under Select Rules, select the required predefined rules to include them in the classification.
- Use the Search field to find a specific rule, or select Select All to include all available rules.
- (Optional) Enable Show selected rules only to display only the rules selected for the classification.
- Verify that the required predefined rules are selected and that any custom rules you created are listed under Custom Rules.
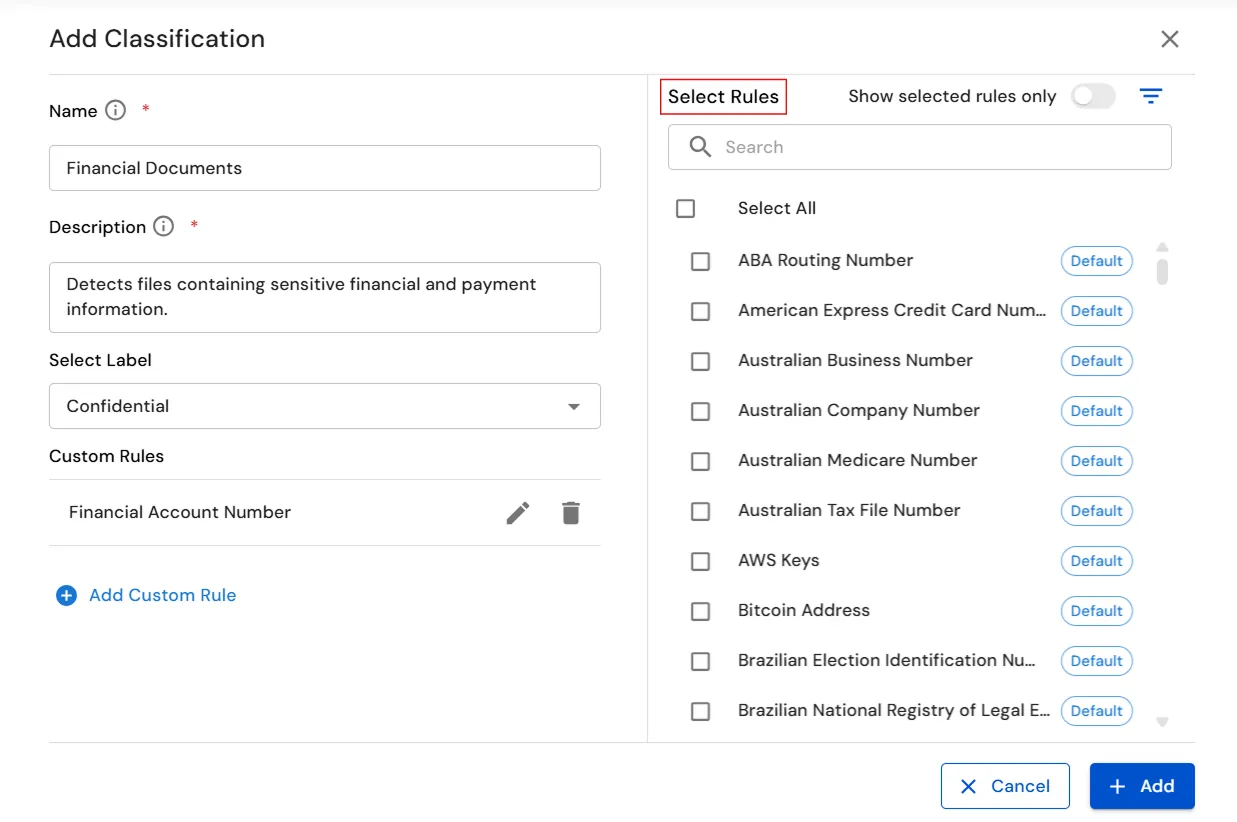
- After configuring the required rules, click Add to create the classification.
- Verify that the newly created classification appears under the Custom tab with the configured Name, Description, and Label.
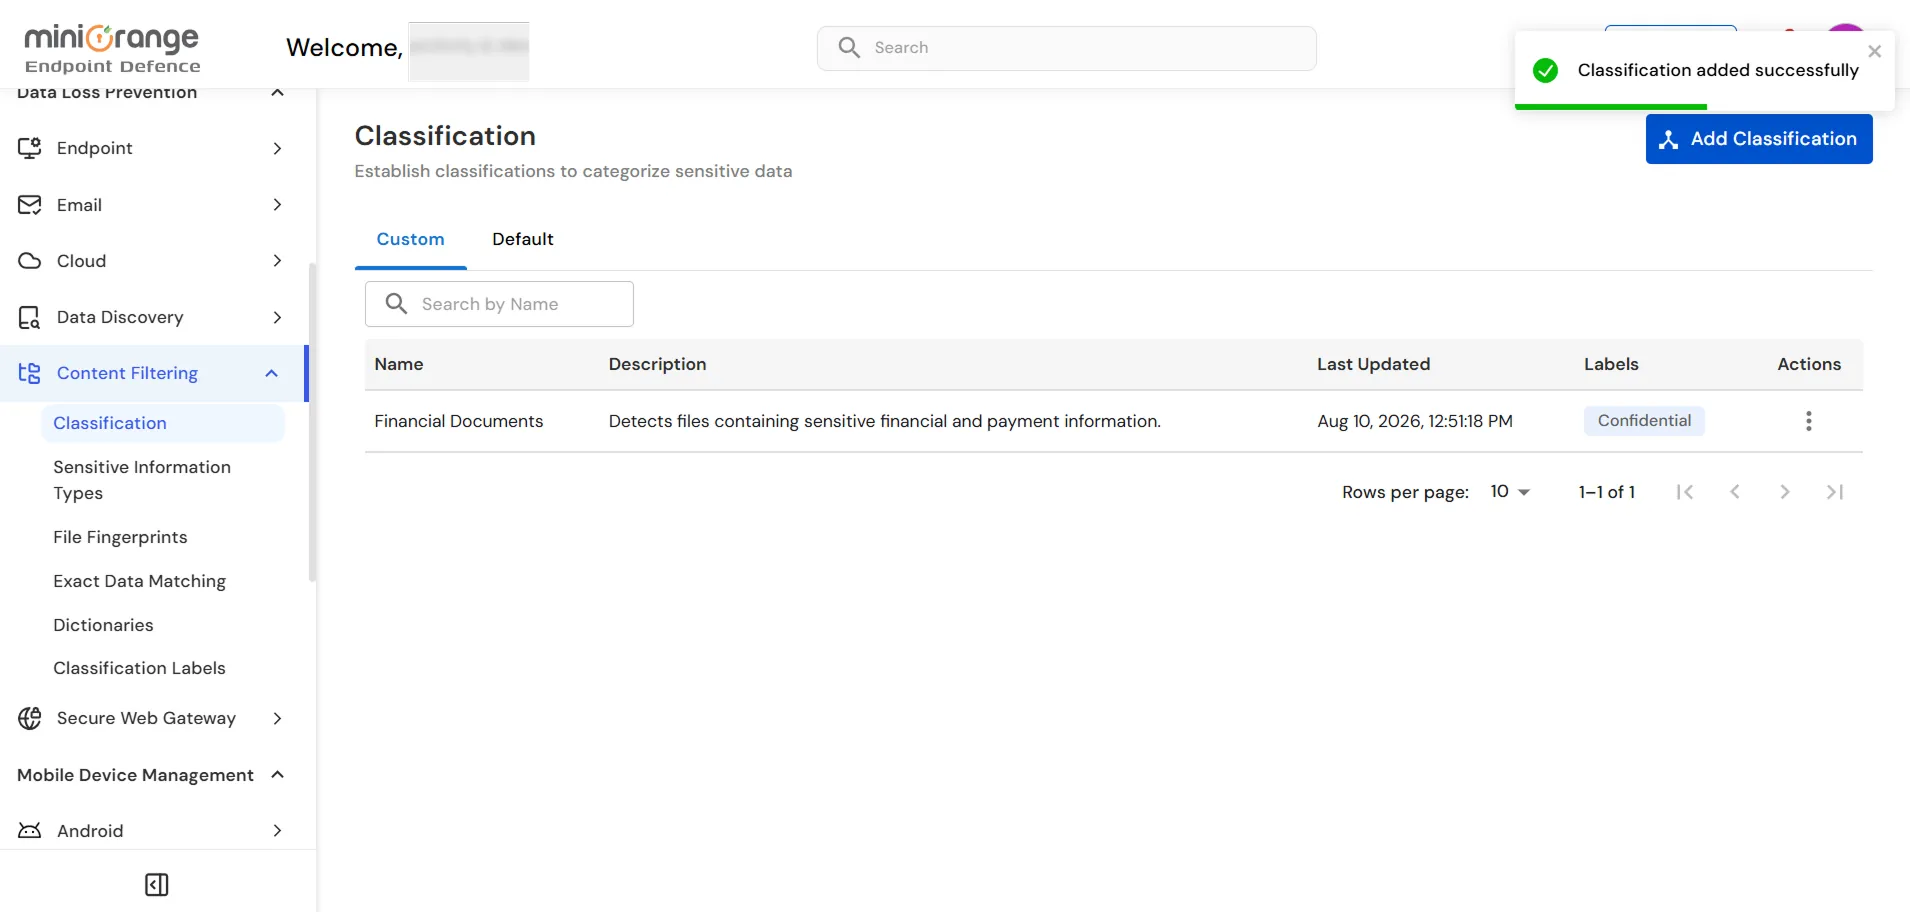
You have successfully configured a Classification using our DLP solution. If you encounter any issues during the configuration, please feel free to contact us at uemsupport@xecurify.com.