- Home
- DLP
- How to configure Exact Data Matching (EDM) using miniOrange DLP
Configure Exact Data Matching (EDM) with miniOrange DLP
Exact Data Matching helps identify sensitive data by comparing data against predefined datasets and matching exact records. By uploading and managing datasets, administrators can detect specific sensitive information and improve the accuracy of data identification across the organization. It enables organizations to identify and protect sensitive records by detecting exact matches within files and data transfers.
Prerequisites
There are a couple of things you need to check before you start with the setup:
- You must have the required privileges to create and configure Exact Data Matching in the miniOrange DLP dashboard.
Configuration Steps
Step 1: Configure Exact Data Matching
- Sign in to your DLP Admin dashboard.
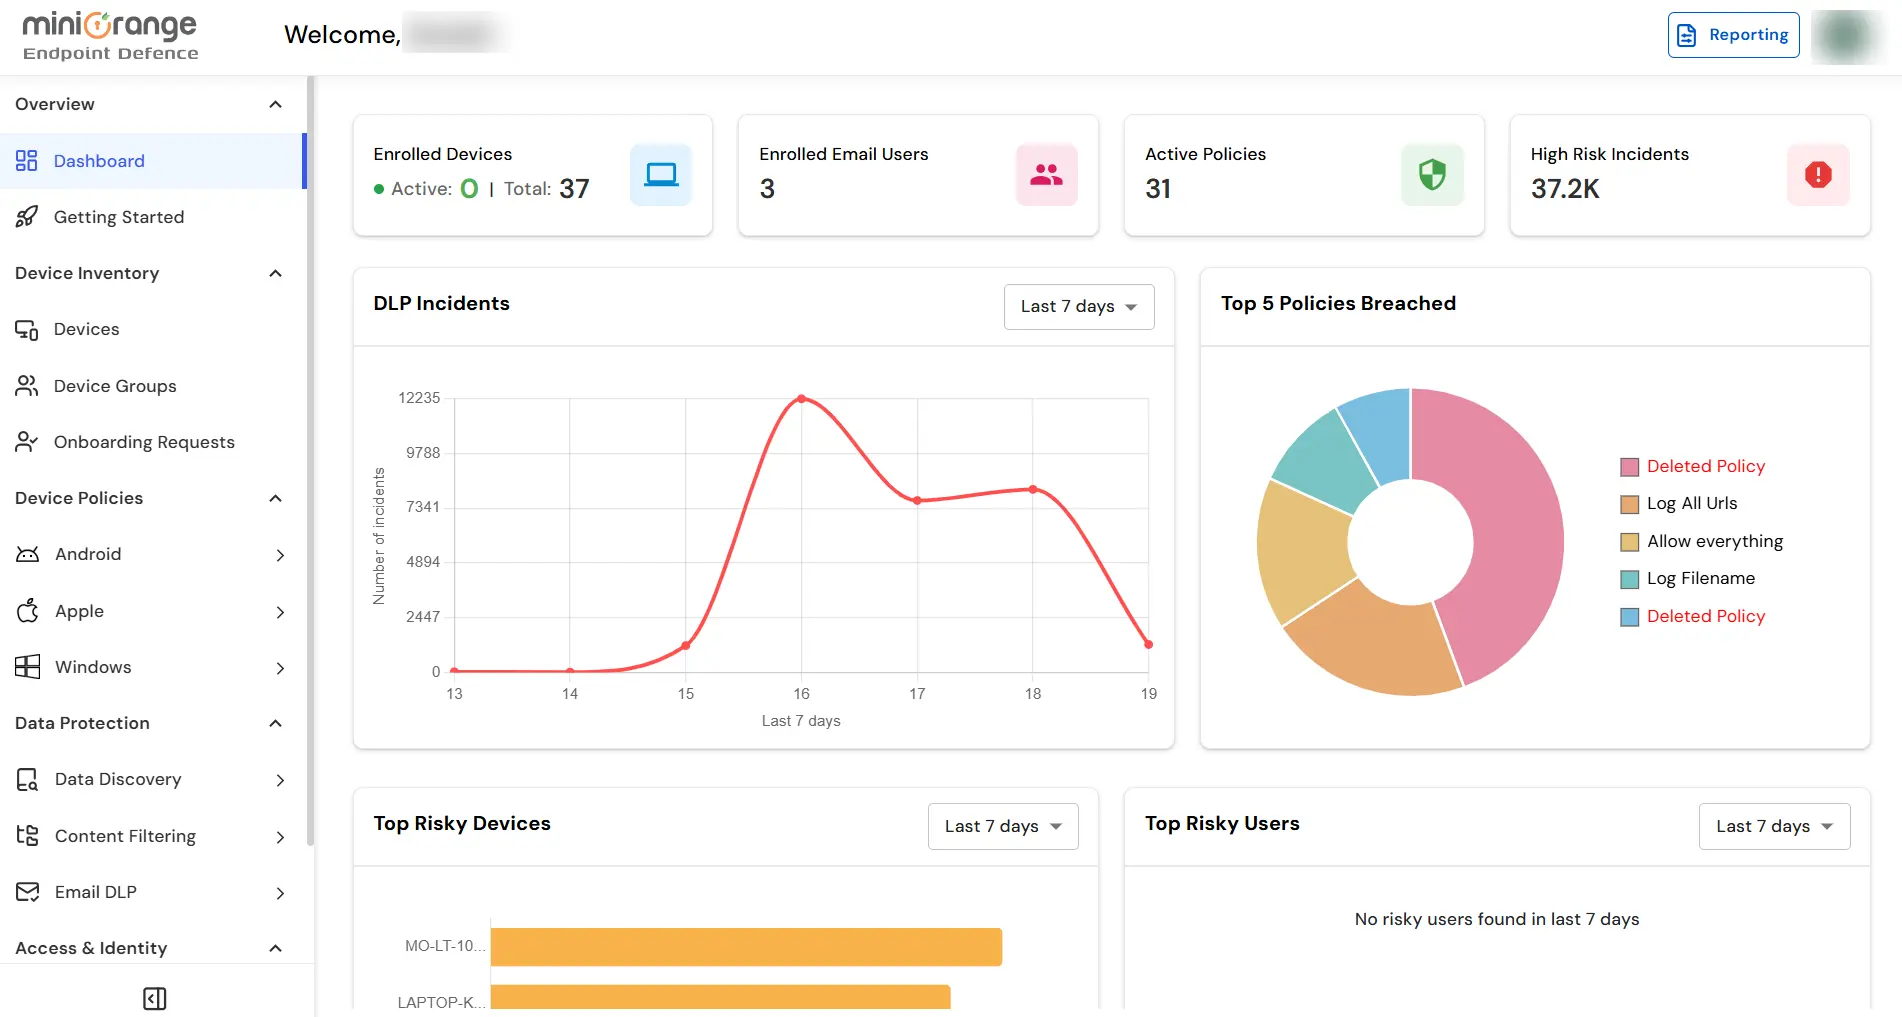
- On the dashboard, navigate to the left menu panel and click Content Filtering → Exact Data Matching.
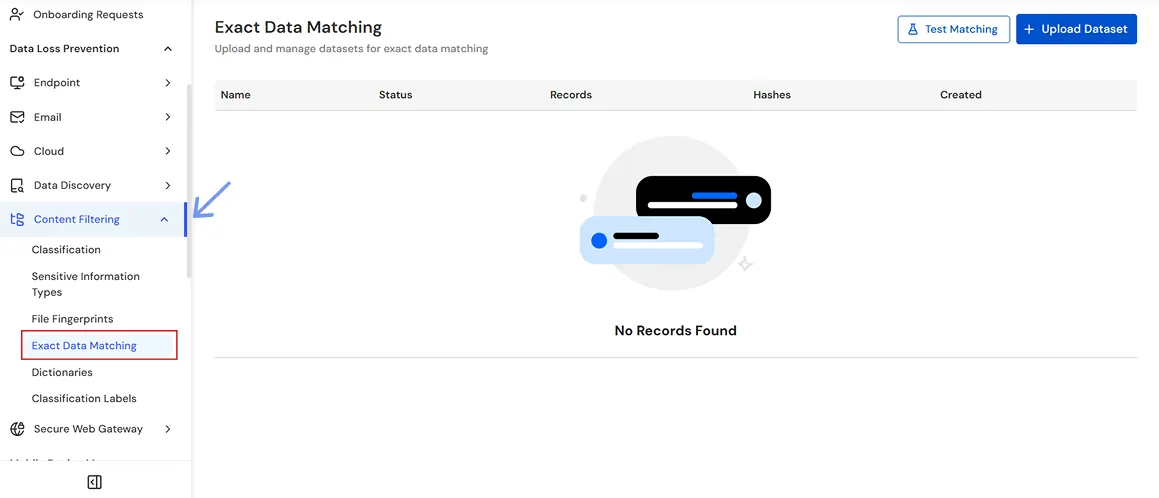
- Click the Upload Dataset button to upload a dataset for Exact Data Matching.

- In the Upload EDM Dataset window, enter a unique name for the dataset in the Name field. For example, enter Customer Records.
- (Optional) In the Description field, enter a brief description of the dataset. For example, enter Sample customer data for testing Exact Data Matching.
- Under CSV File, click Click to select a CSV file and upload the CSV file containing the data you want to use for Exact Data Matching.
- Ensure that the uploaded CSV file contains no more than 50,000 rows per dataset.
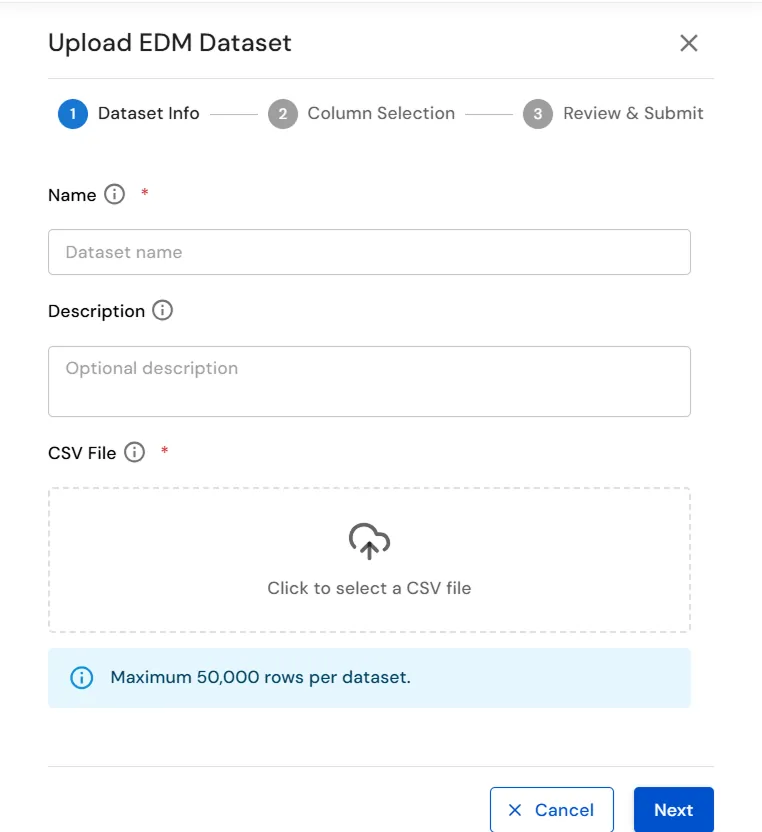
- Click Next to proceed to Column Selection.
- In the Column Selection step, select the columns that contain the sensitive data you want to use for Exact Data Matching.
- For this example, select the Customer ID column.
- After selecting a column, use the Normalizer dropdown to choose how the values in the selected column should be normalized before matching.
- The available normalization options are None, Digits Only, Alphanumeric, Strip Separators, and Phone.
- For this example, select None because the Customer ID values such as CUST1001 should be matched without applying any normalization.
- Only the selected columns are hashed for matching, while unselected columns are ignored.
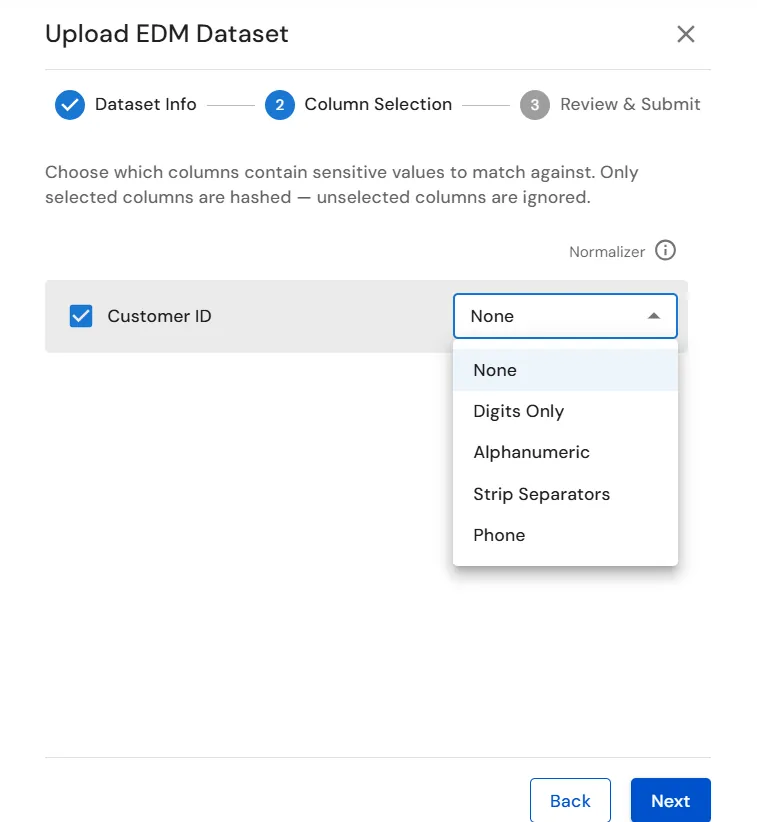
- After selecting the required columns and configuring the normalizer, click Next to proceed to the Review & Submit step.
- In the Review & Submit step, review the dataset configuration, including the Name, Description, uploaded File, and the selected Columns to Hash.
- Verify that the required column, such as Customer ID, is listed with the configured Normalizer.
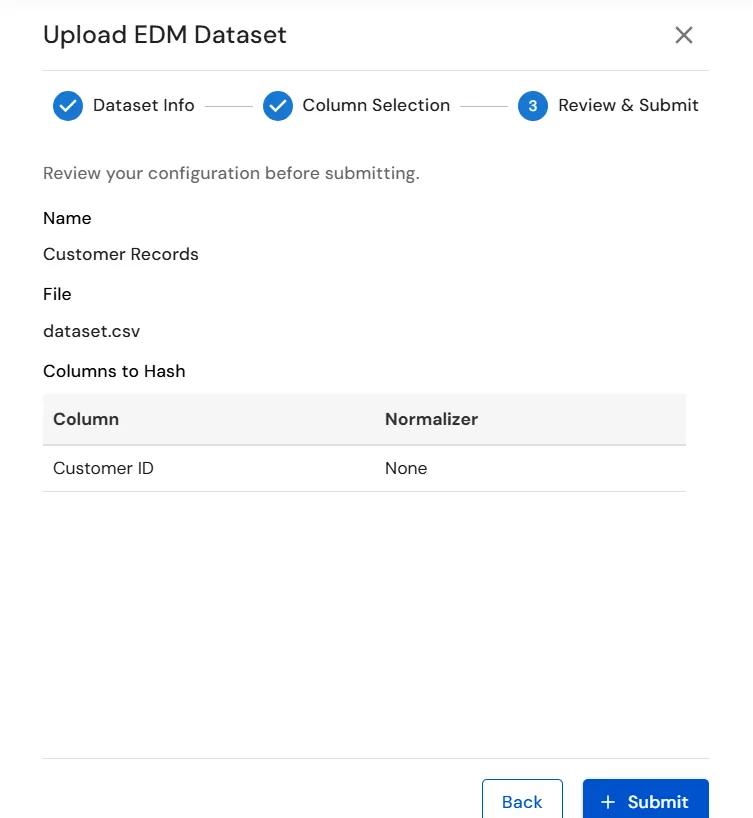
- If the configuration is correct, click Submit to upload and create the EDM dataset.
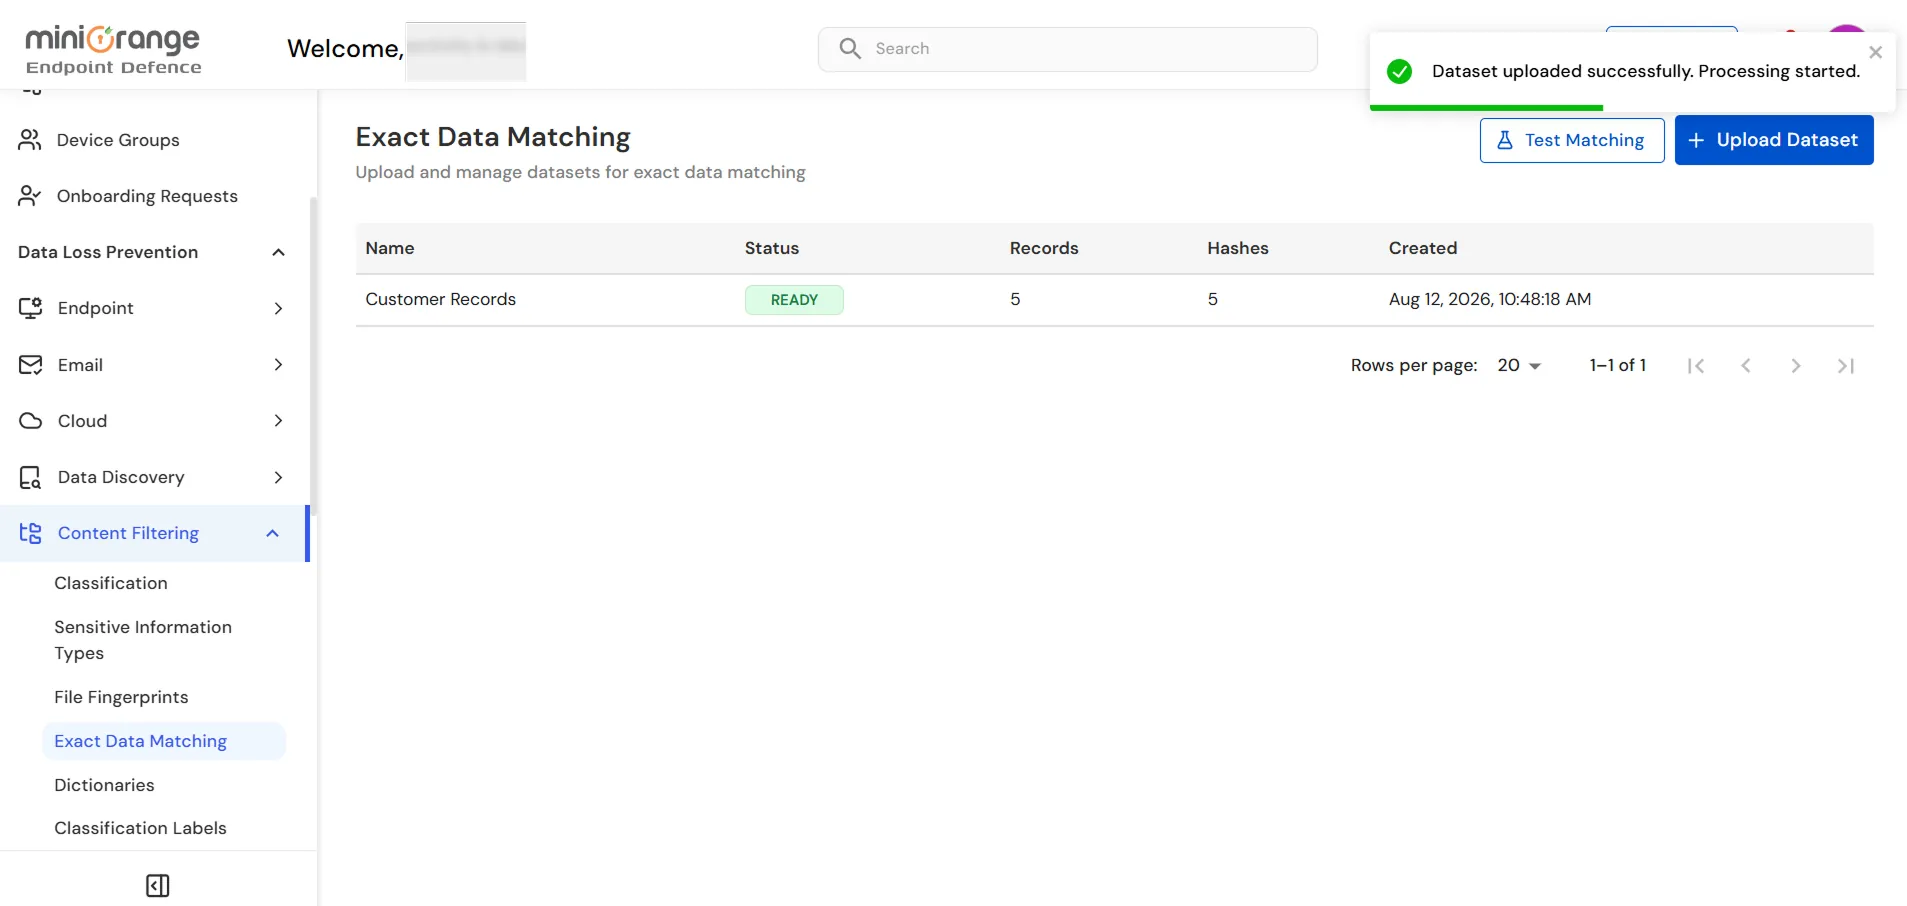
- After submitting the dataset, verify that a confirmation message indicates that the dataset was uploaded successfully and processing has started.
- Wait for the dataset processing to complete, and verify that the dataset status changes to READY.
- Verify that the dataset displays the expected number of Records and generated Hashes.
Step 2: Test Matching
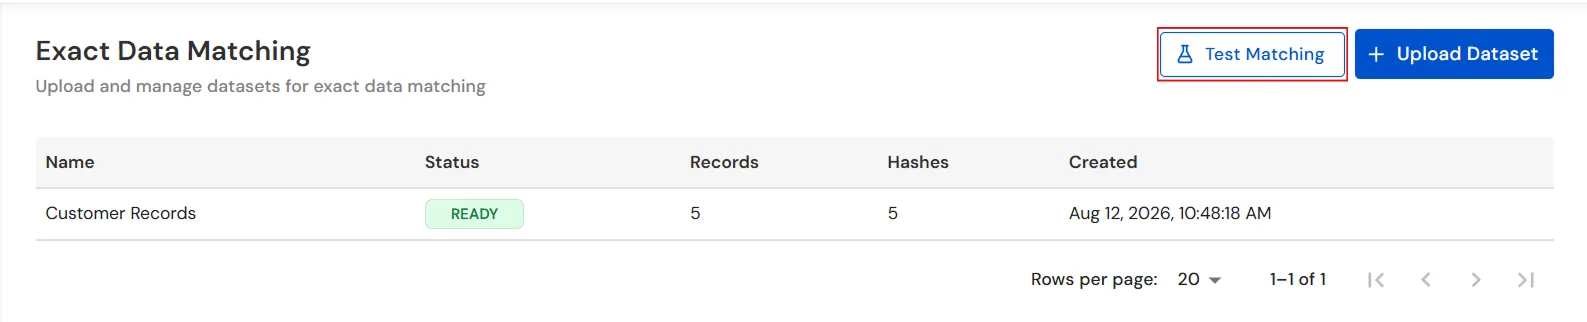
- Click the Test Matching button to test the uploaded dataset against a test file.
- In the Run EDM Test window, under Select Datasets, select one or more datasets with READY status that you want to test.
- Under Text to Test, enter the text that you want to check for exact matches against the selected dataset.
- For example, if the dataset contains customer IDs, enter sample text containing a customer ID, such as CUST1001.
- Verify that the entered text does not exceed the maximum limit of 50,000 characters.
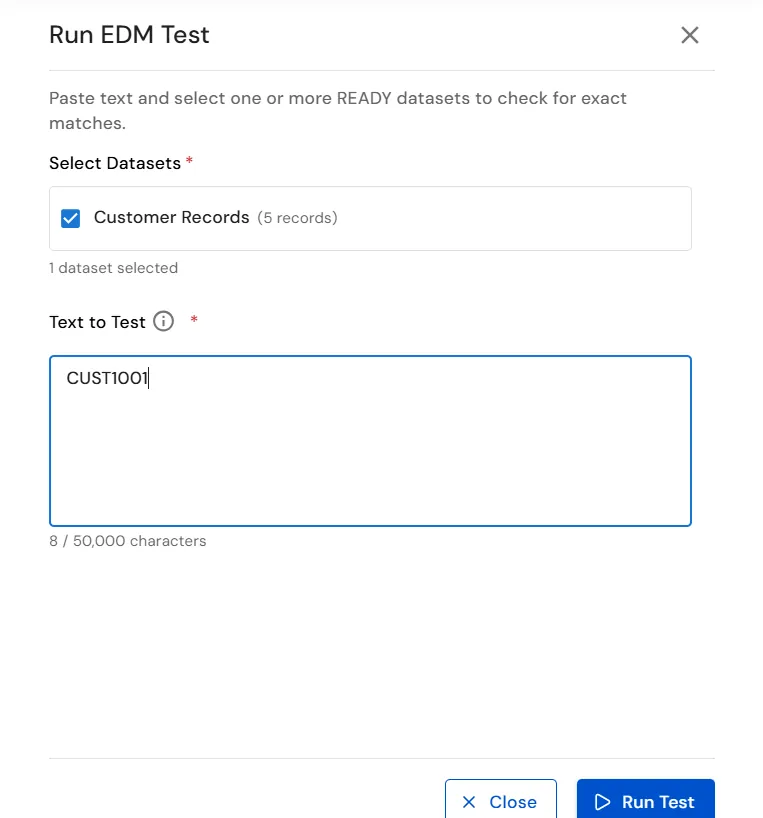
- Click Run Test to check the entered text against the selected EDM datasets.
- Review the Test Results to verify whether the entered text matched any records in the selected EDM dataset.
- Verify the Matches Found, Tokens Checked, and Result values displayed for the test.
- A Matched result indicates that the tested text contains an exact match with data from the selected EDM dataset.
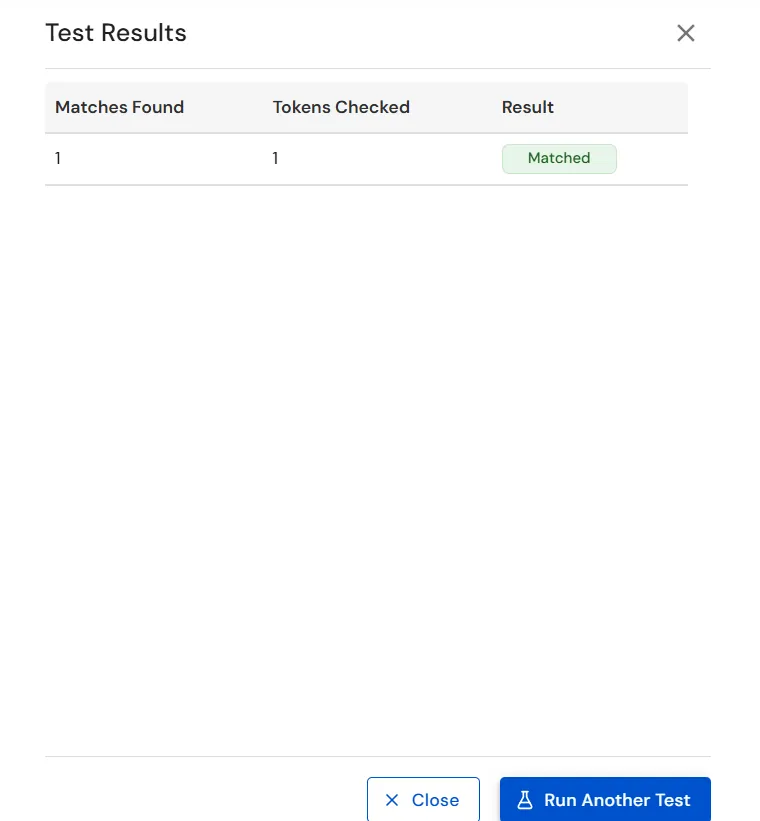
- Click Close to exit the test results window, or click Run Another Test to perform another EDM matching test.
You have successfully configured and tested Exact Data Matching using our DLP solution. If you encounter any issues during the configuration, please feel free to contact us at uemsupport@xecurify.com.