- Home
- DLP
- How to Configure Policy Relaxation using miniOrange DLP
How to Configure Policy Relaxation in miniOrange DLP
The Policy Relaxation feature in miniOrange Endpoint Defence allows administrators to temporarily grant access to restricted resources on managed Windows devices. Administrators can select specific devices and destinations, set access duration, and manage approval workflows while maintaining endpoint security and control.
Prerequisites
Before you begin the configuration, ensure you have the required access:
- You need Administrator access to your DLP dashboard.
Configuration Steps
Step 1: Configure a Policy Relaxation
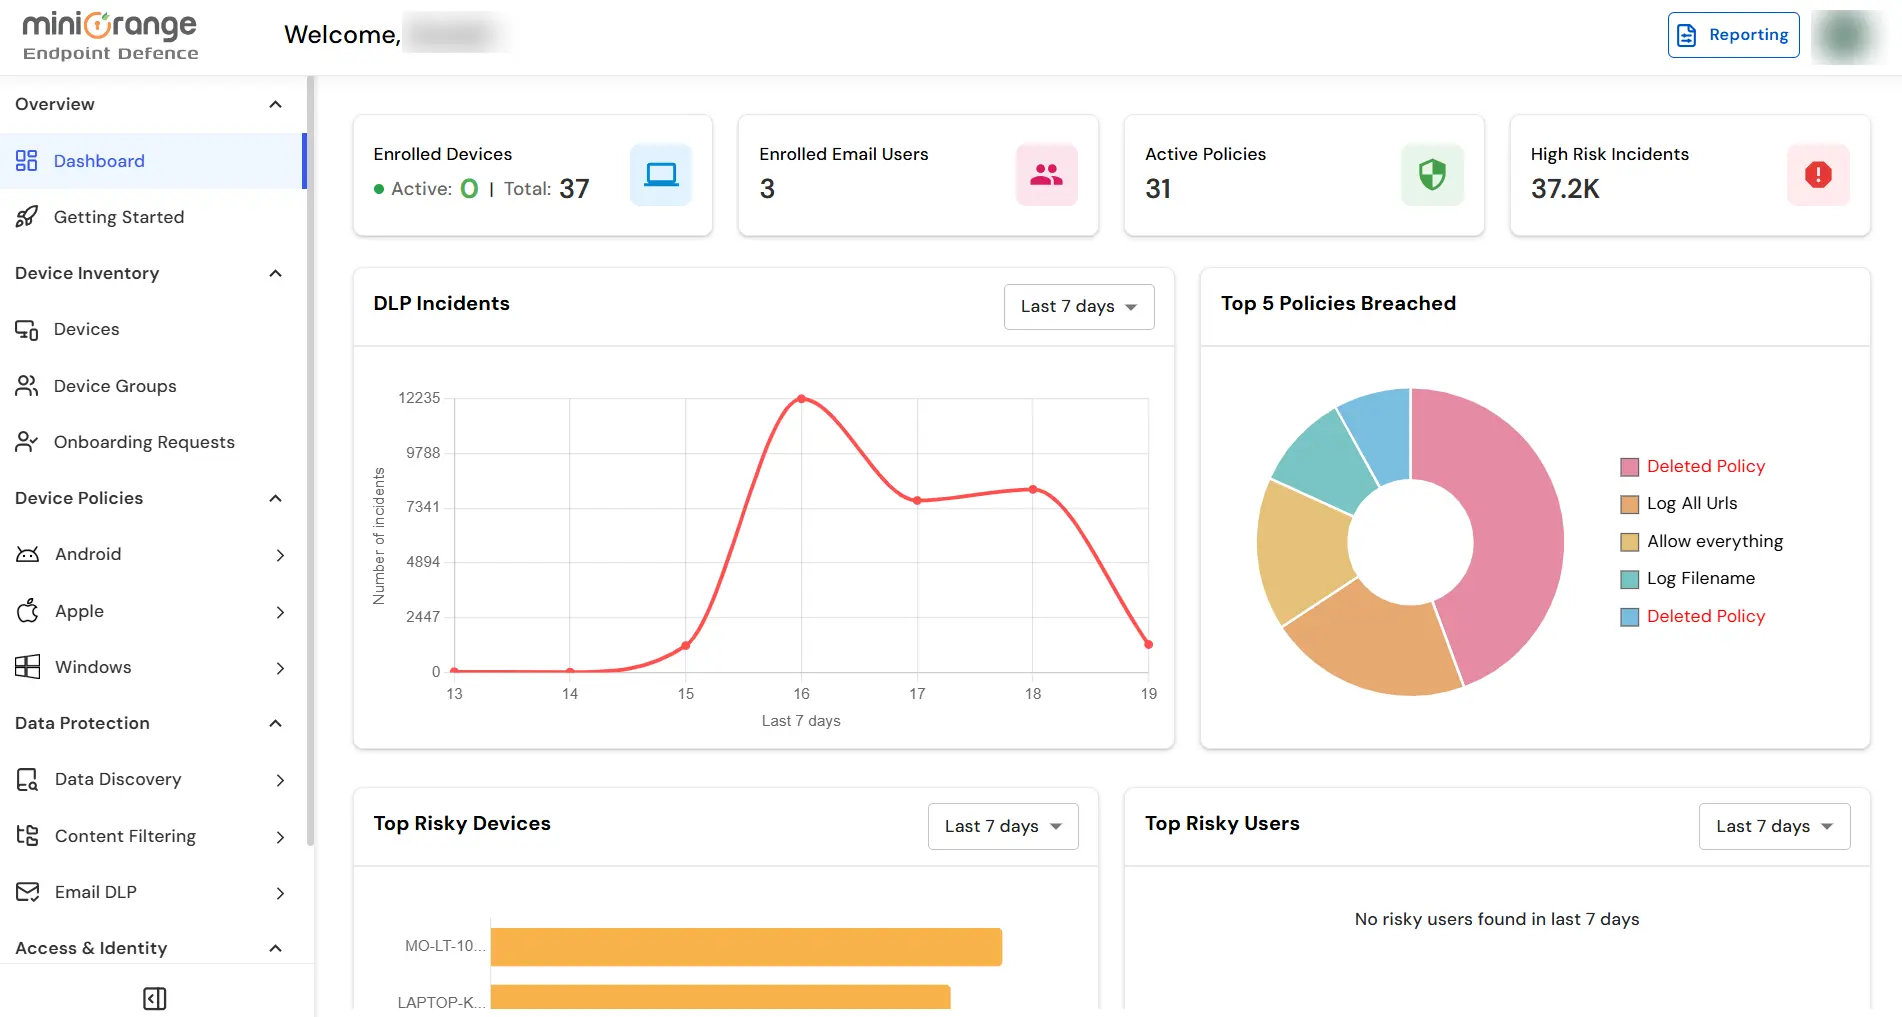
- Sign in to your DLP Admin dashboard.
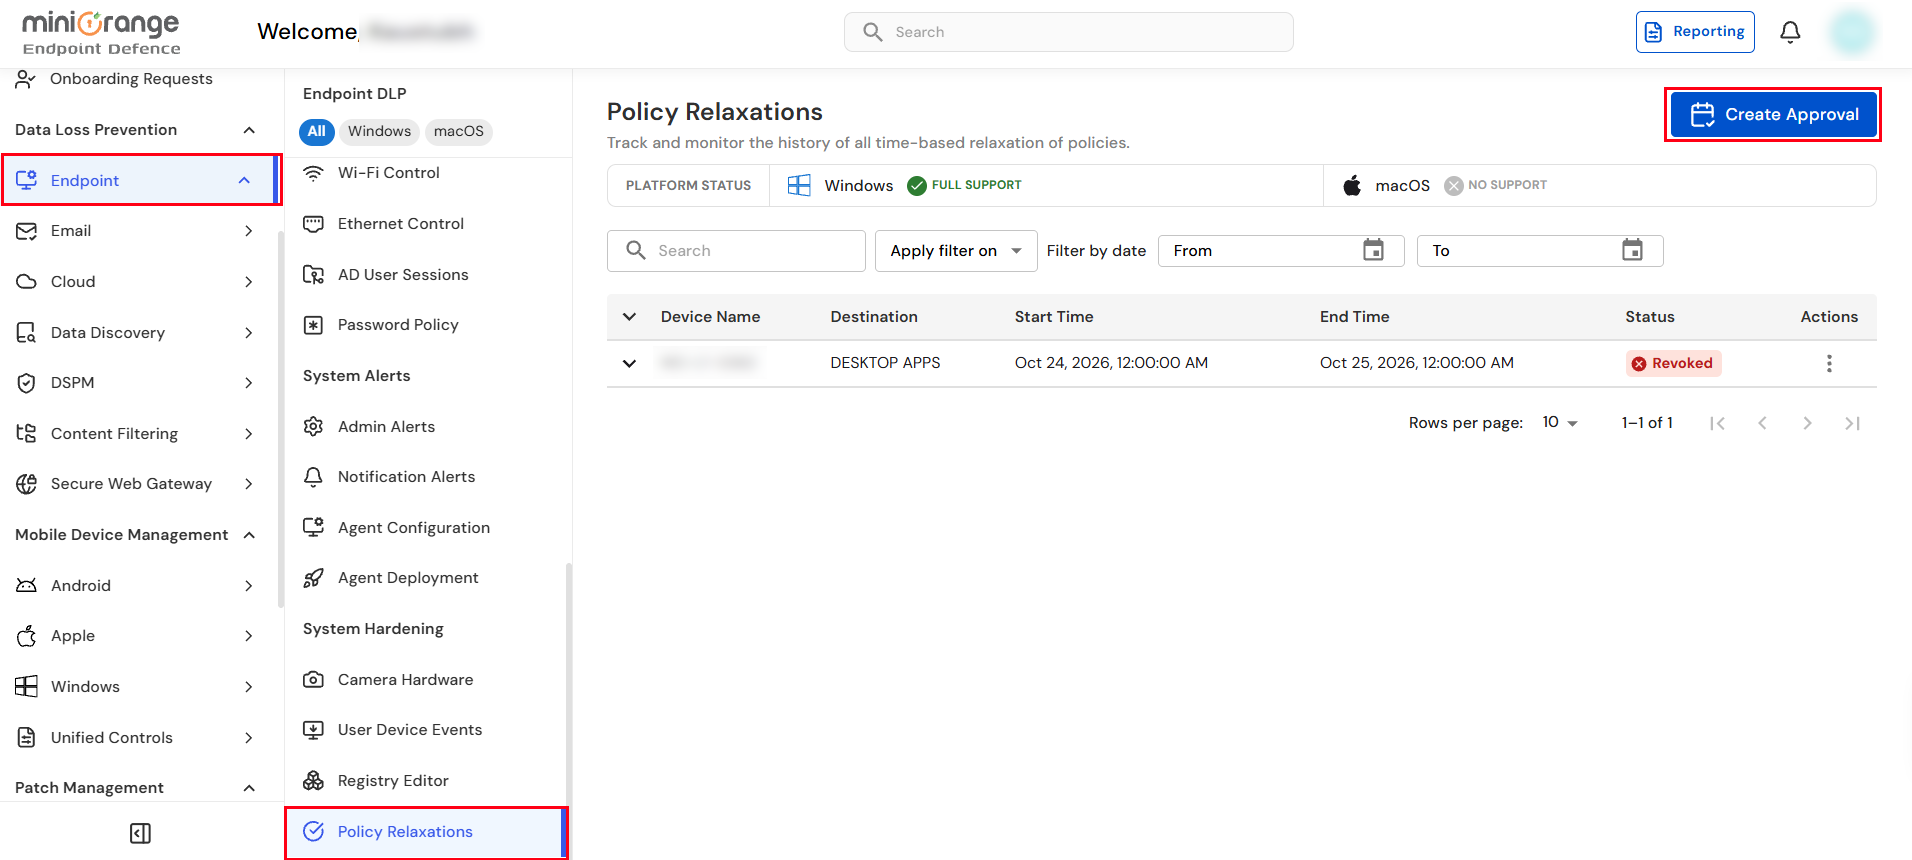
- On the dashboard, navigate to the left menu panel and click Endpoint → Policy Relaxations.
- Click Create Approval to create a new policy relaxation.
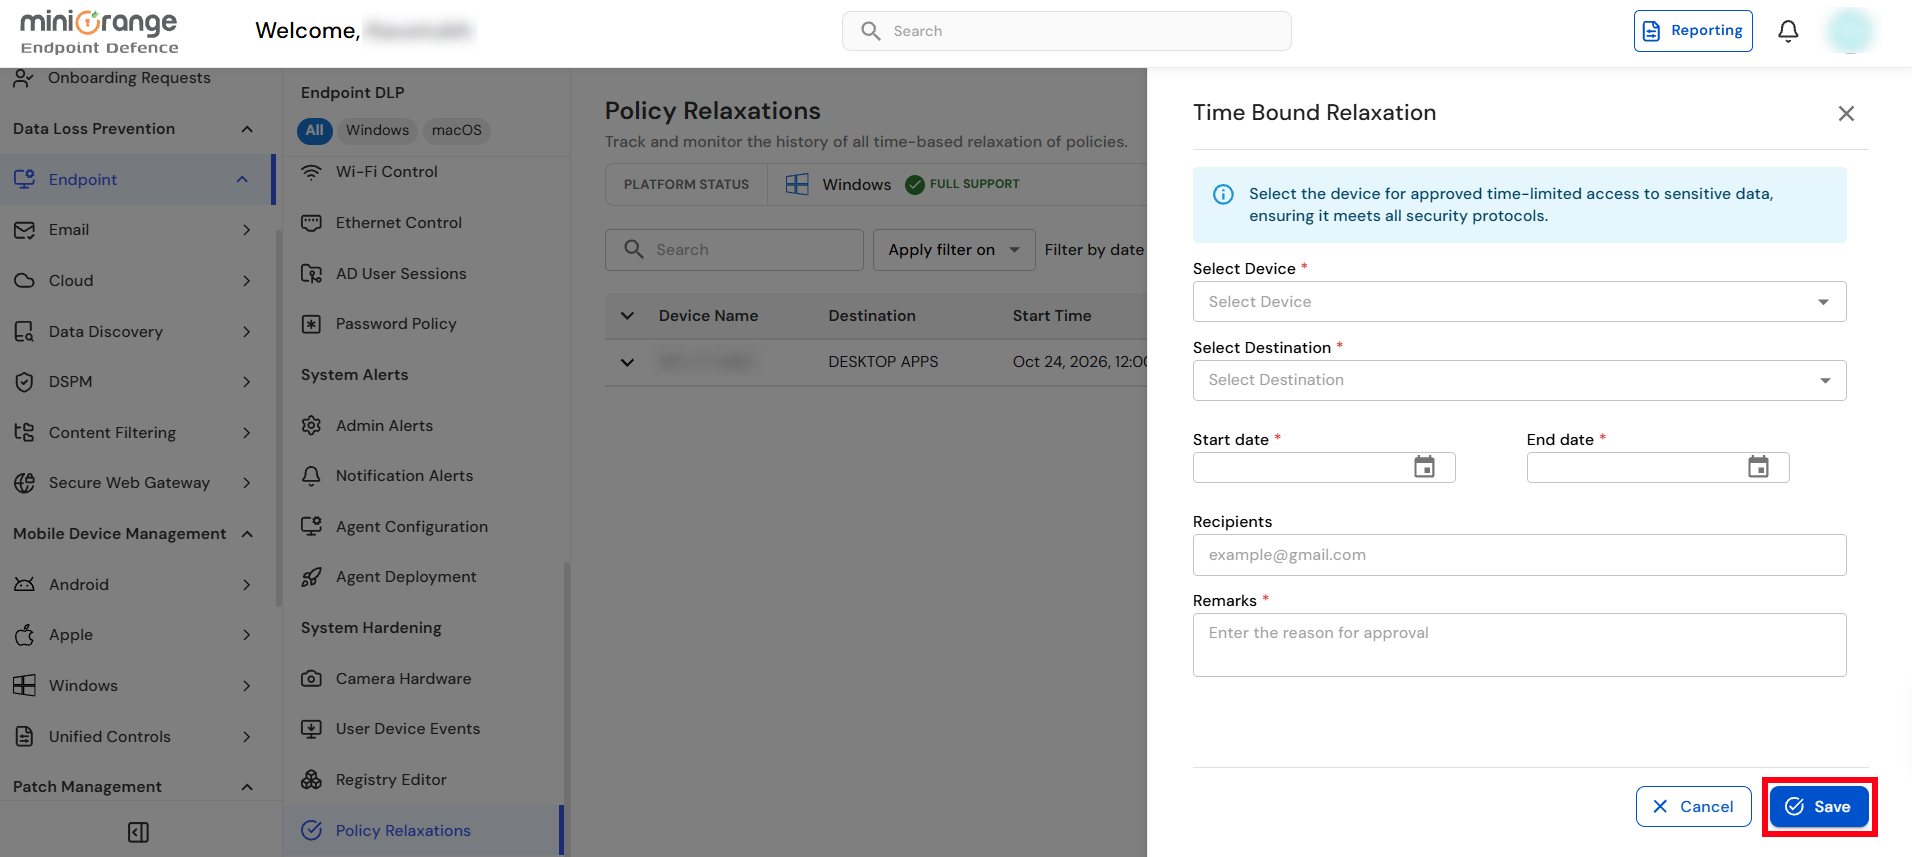
- Under Select Device, choose the required device.
- Under Select Destination, select the resource for which temporary access is required, such as USB or Desktop Apps.
- Set the Start date and End date to define the relaxation period.
- Enter the recipient email address and provide the reason for the relaxation in the Remarks field.
- Click Save to create the approval.
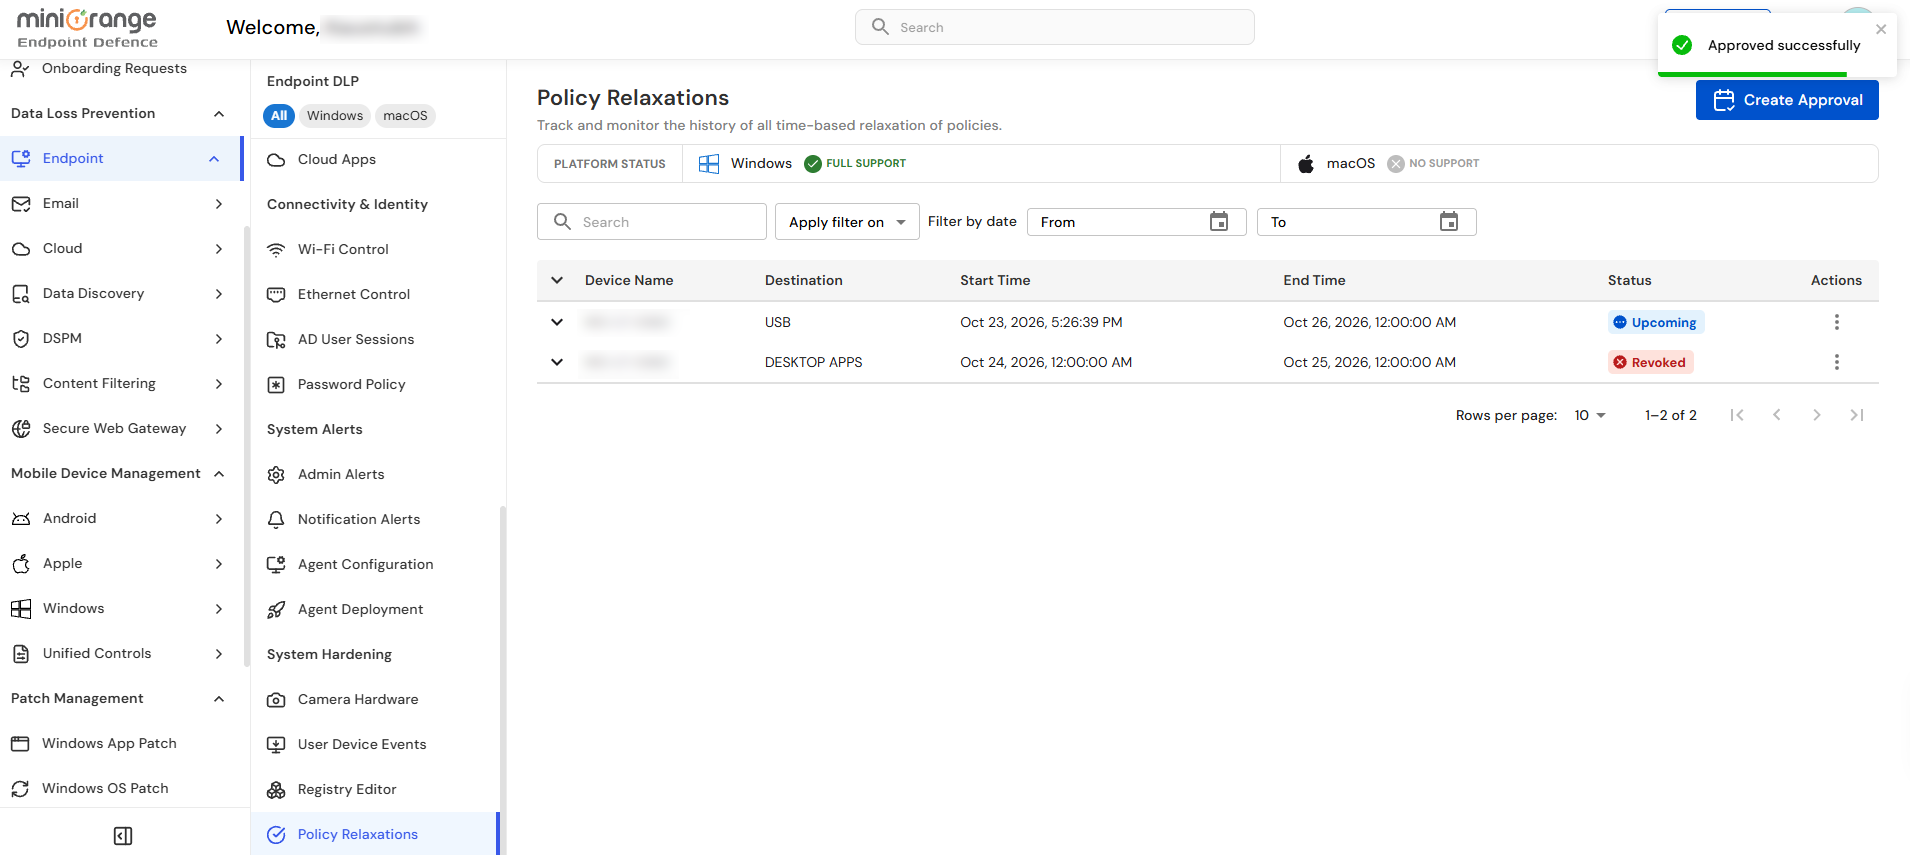
- Verify that the newly created policy relaxation appears in the list with the appropriate device, destination, start time, end time, and status.
Step 2: Revoke a Policy Relaxation
- To revoke a relaxation, open the Actions menu for the corresponding record and click Revoke.
You have successfully configured the Policy Relaxation using our miniOrange DLP solution. If you encounter any issues during the configuration, please feel free to contact us at uemsupport@xecurify.com.