- Home
- DLP
- How to Configure Roles and Privileged Users using miniOrange DLP
Configure Roles and Privileged Users with miniOrange DLP Solution
The Role and Privileged User Management feature in miniOrange Endpoint Defence helps organizations manage administrative access to the endpoint management dashboard. It enables administrators to create roles, assign privileges, and create privileged users with appropriate access permissions. This helps organizations enforce access control and improve endpoint management security.
Prerequisites
Before you begin the configuration, ensure you have the required access:
- You need Administrator access to your DLP dashboard.
Configuration Steps
Step 1: Create a New Role
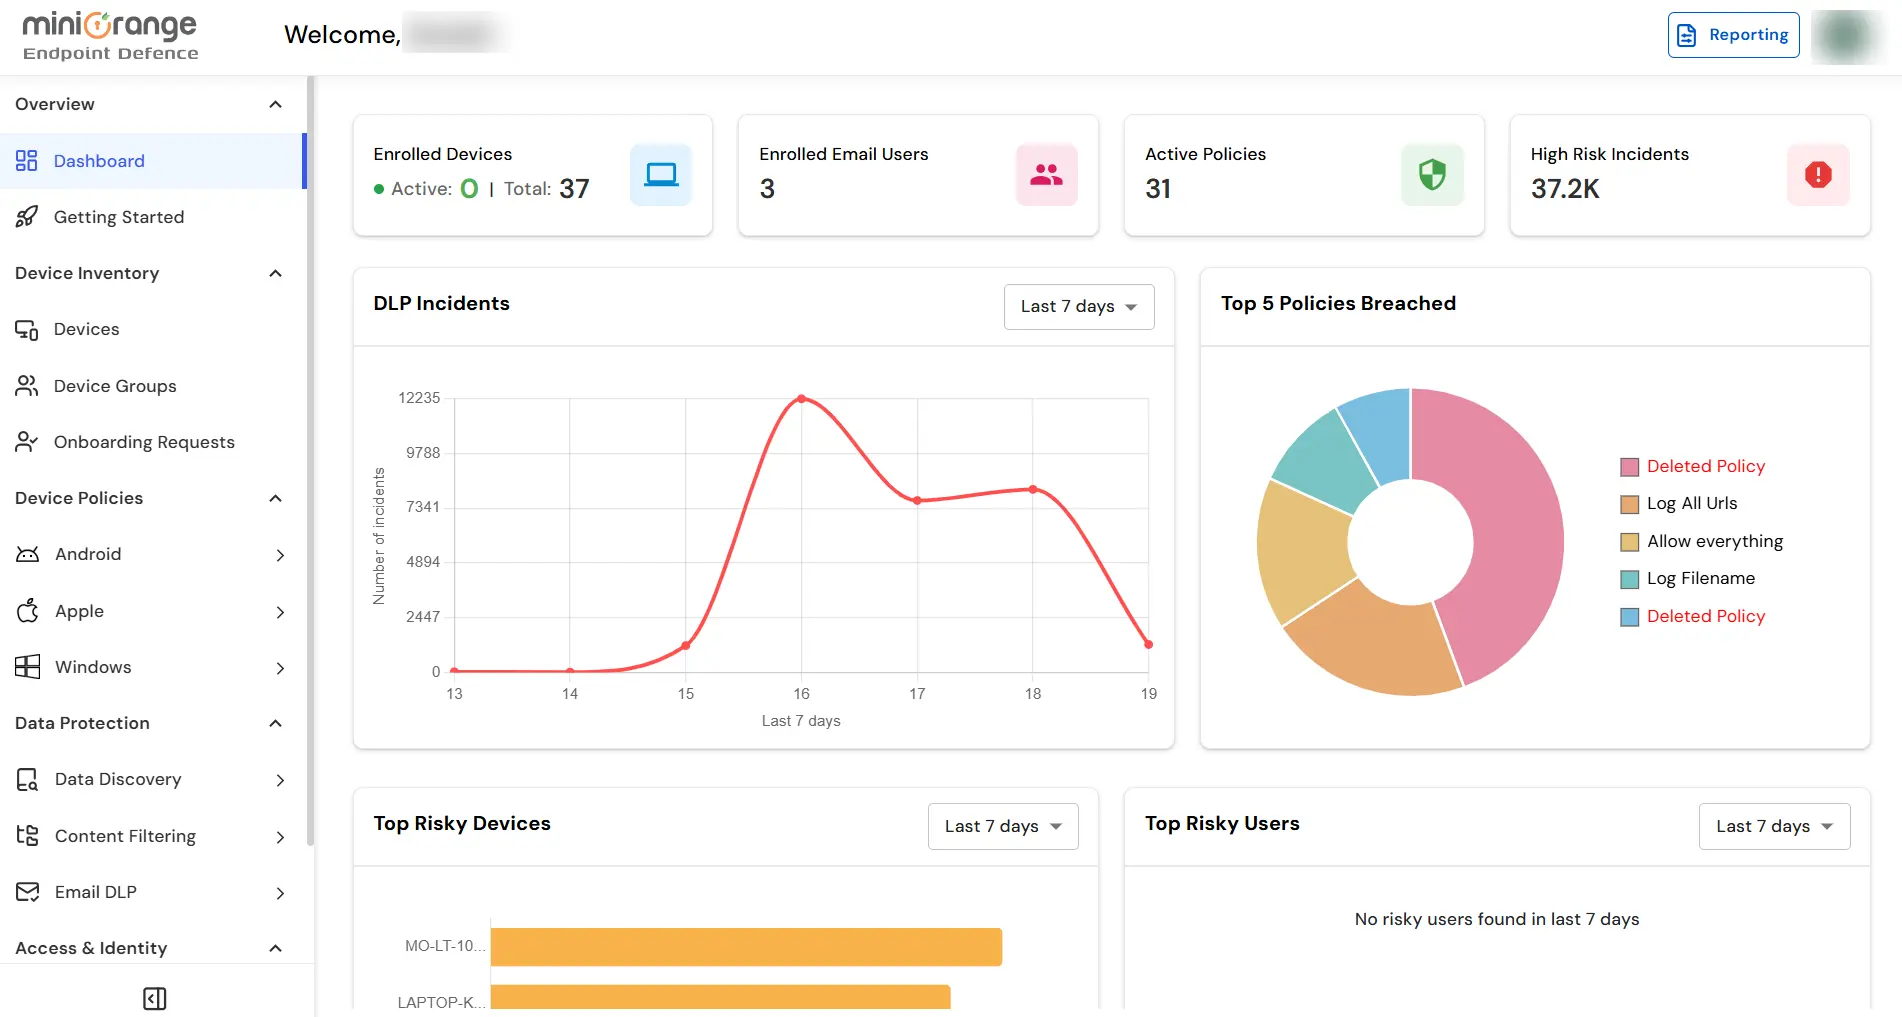
- Sign in to your DLP Admin dashboard.
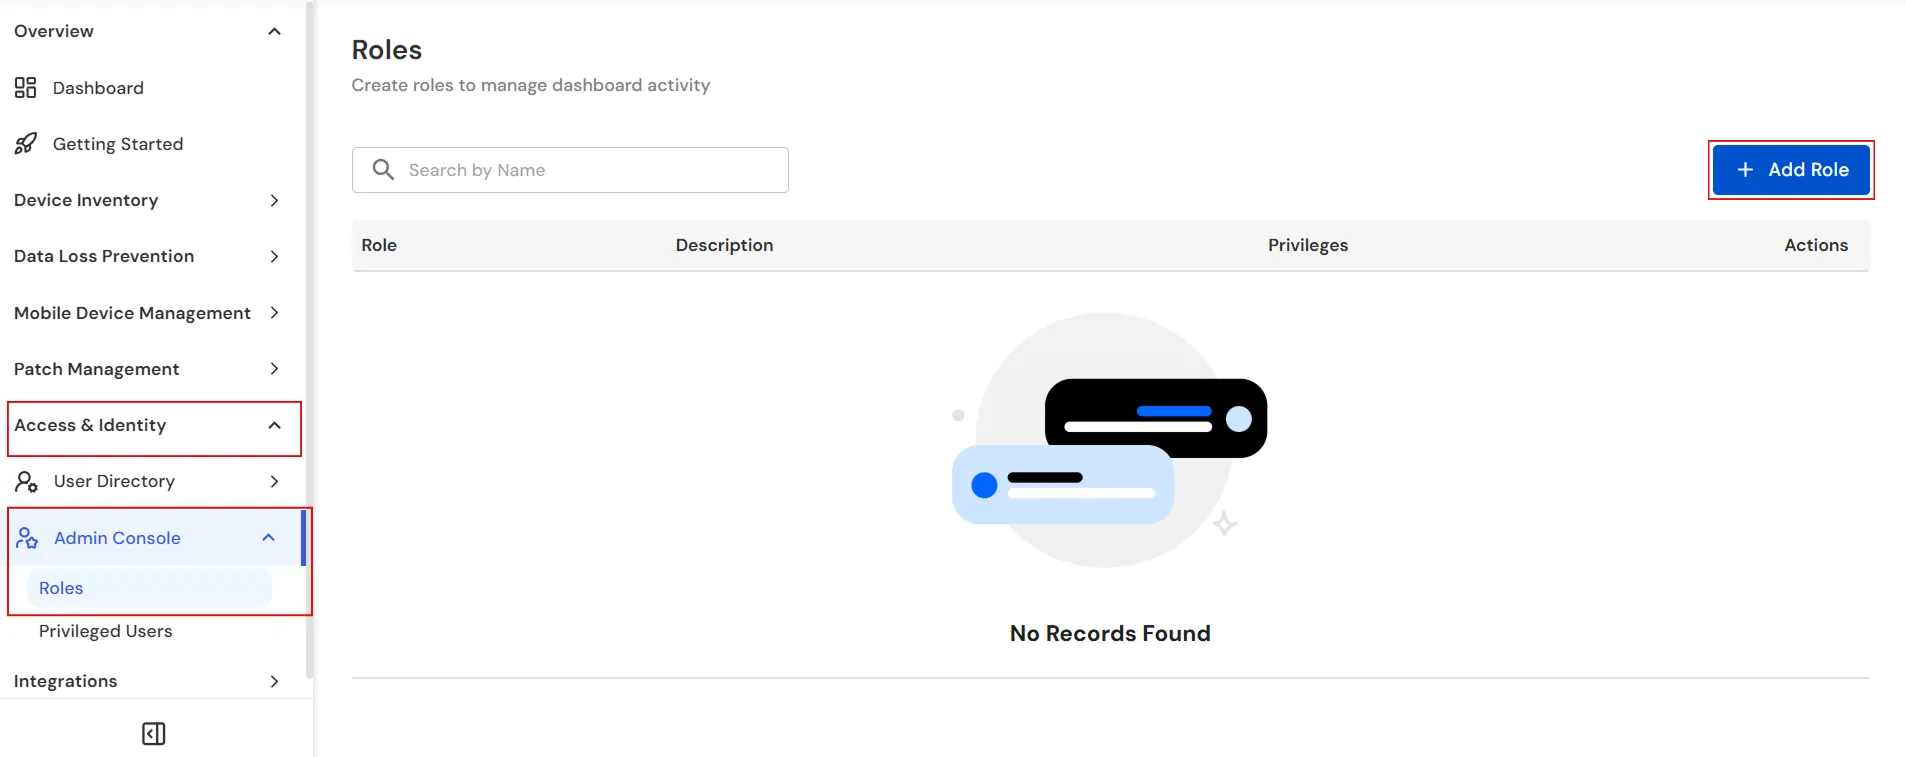
- On the dashboard, navigate to the left menu panel and click Access & Identity → Admin Console → Roles.
- Click the Add Role button to create a new role by providing a unique role name.
- After entering the Role Name, add a description of the role in the Description field.
- Under Select Privileges, choose the required privileges for the role.
- Use the privilege categories such as View, Create, Edit, Delete, and Other to filter permissions.
- Select the required permissions, or click Select All to assign all available privileges.
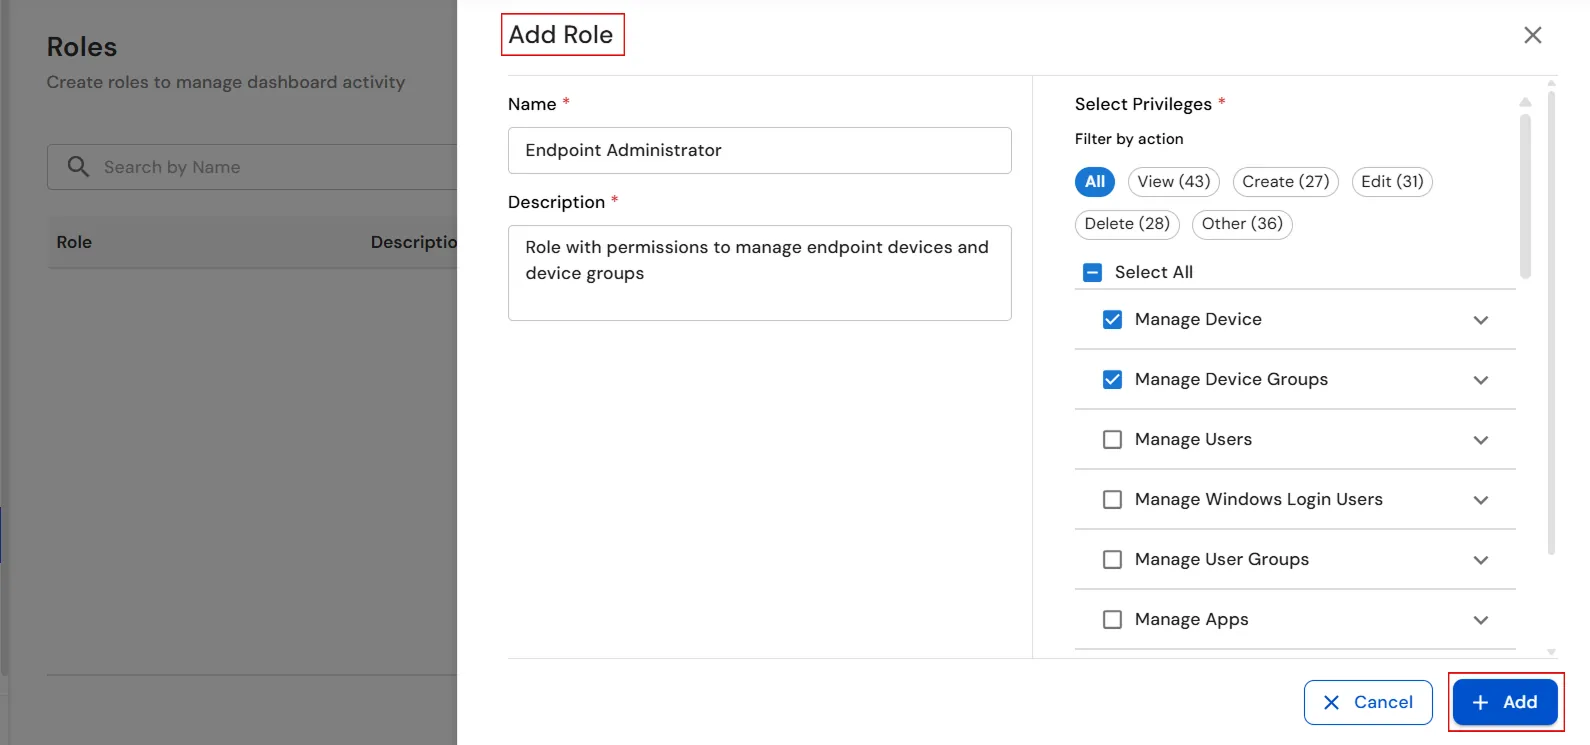
- Click Add to create the role.
- Verify that the role appears in the Roles list and that the assigned privileges are displayed correctly.
Step 2: Create a Privileged User
- Click Privileged Users under Admin Console to assign the newly created DLP Admin role to a user.
- Click the Create User button to add a privileged user.
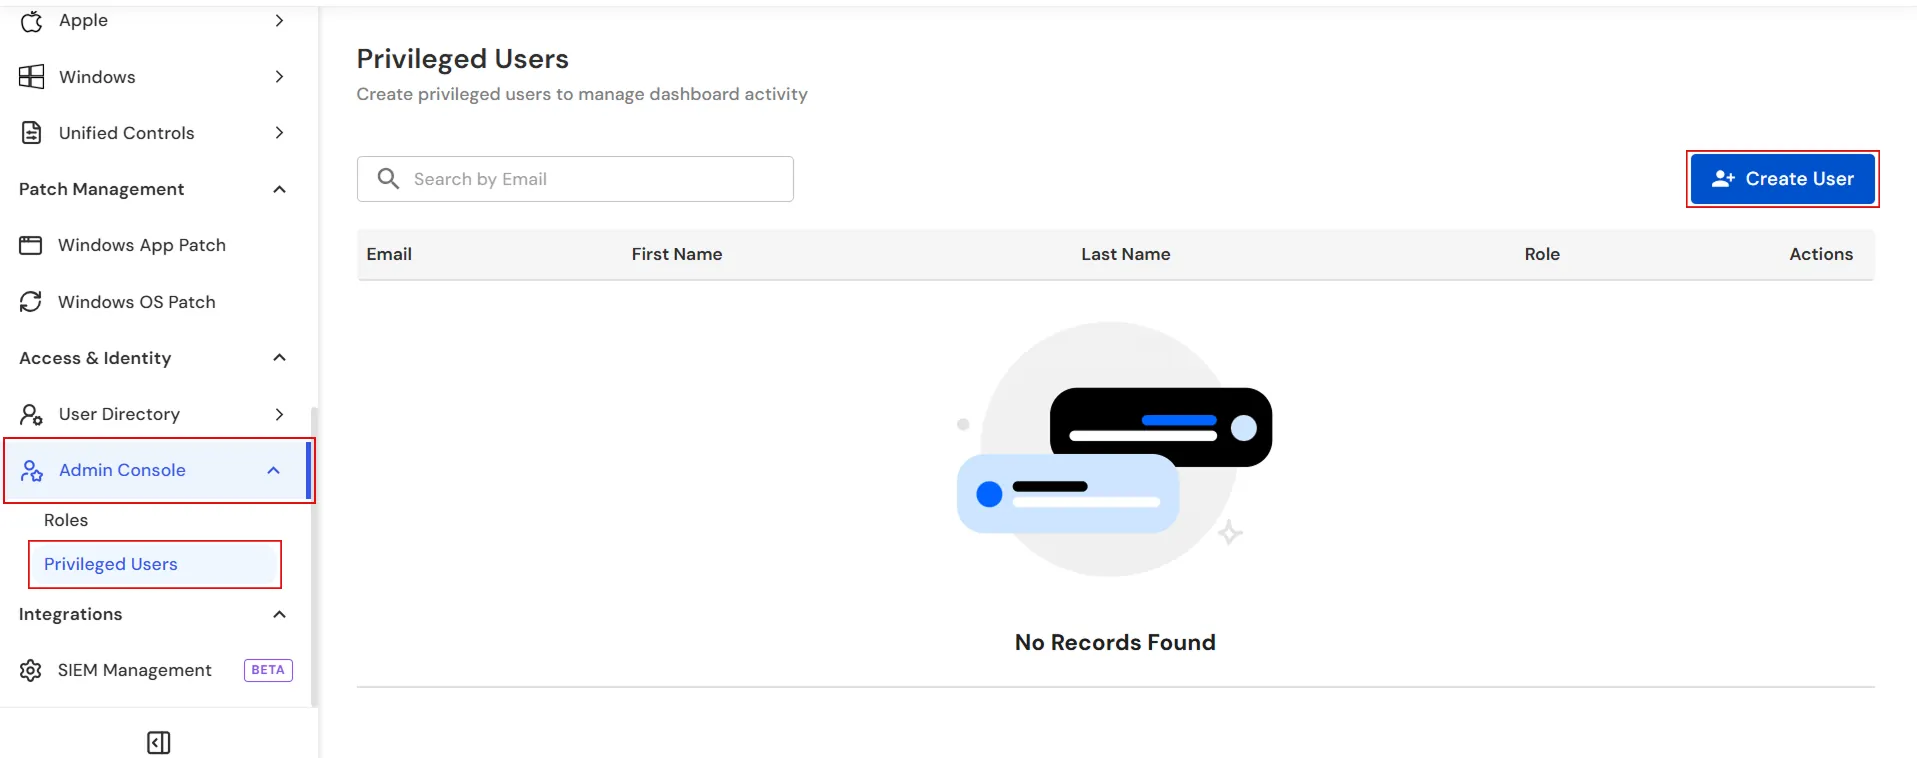
- Enter a valid email address in the Email field.
- Enter the user’s first name in the First Name field.
- Enter the user’s last name in the Last Name field, if applicable.
- Set a secure password in the Password field.
- Select the required role from the Role dropdown.
- Enable Send Account Setup Email to send an account activation email to the user.
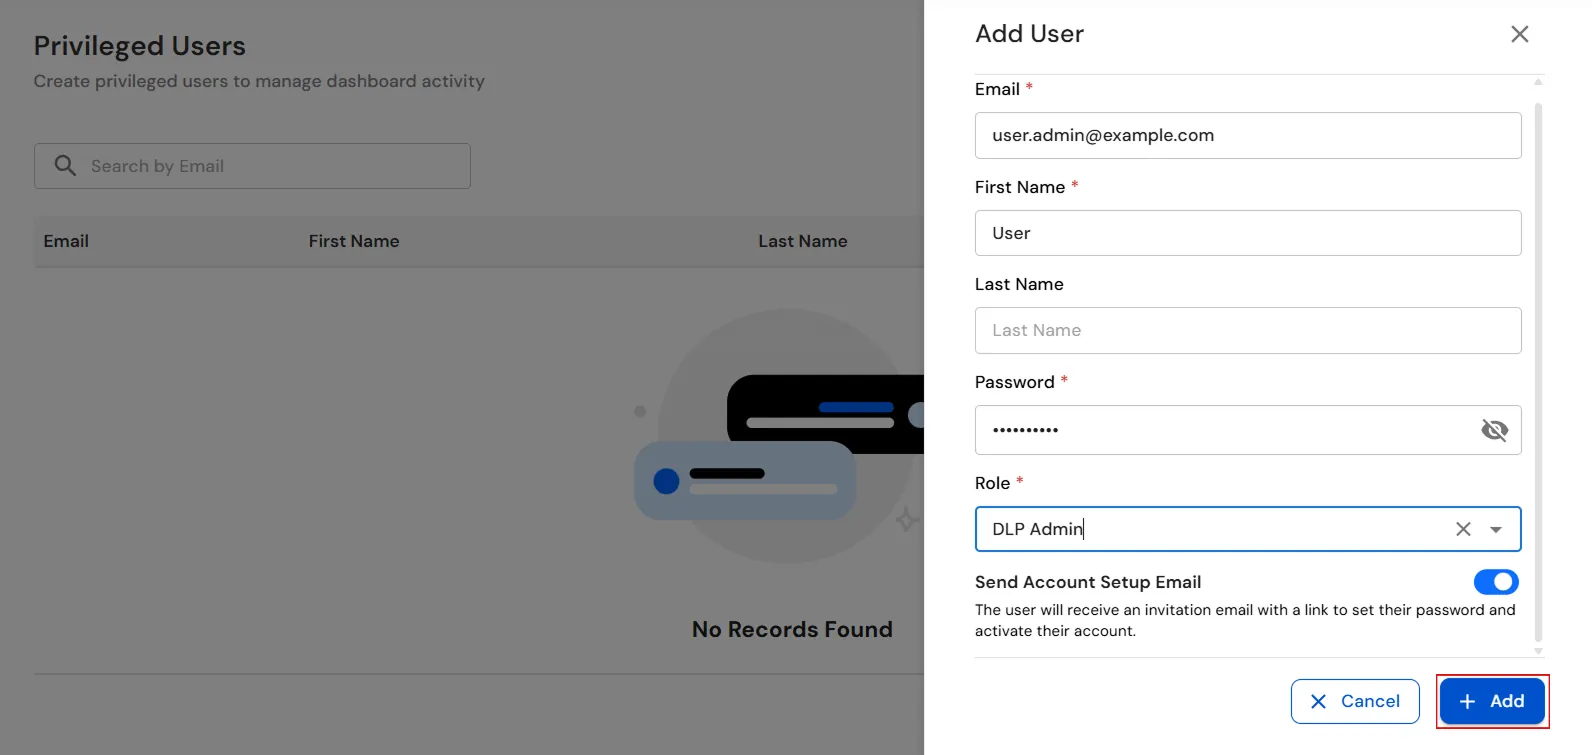
- Click Add to create the privileged user.
- Verify that the newly created user appears in the Privileged Users list.
- Confirm that the user’s email address and assigned DLP Admin role are displayed correctly.
- The privileged user has been successfully created.
You have successfully created a role and assigned it to a privileged user using our DLP Software. If you encounter any issues during the configuration, please feel free to contact us at uemsupport@xecurify.com.