- Home
- DLP
- How to Set Up Screenshot Blocking Policy in miniOrange DLP
How to Set Up Screenshot Blocking Policy in miniOrange DLP
Screenshot Blocking Policies help prevent users from capturing sensitive information displayed on their screens. By configuring screenshot blocking policies, administrators can control screenshot activity, apply blocking rules based on applications and device groups, and reduce the risk of sensitive information being captured or shared.
Prerequisites
There are a couple of things you need to check before you start with the setup:
- You need Administrator access for your DLP dashboard.
Configuration Steps
Step 1: Configure Screenshot Blocking
- Sign in to your DLP Admin dashboard.
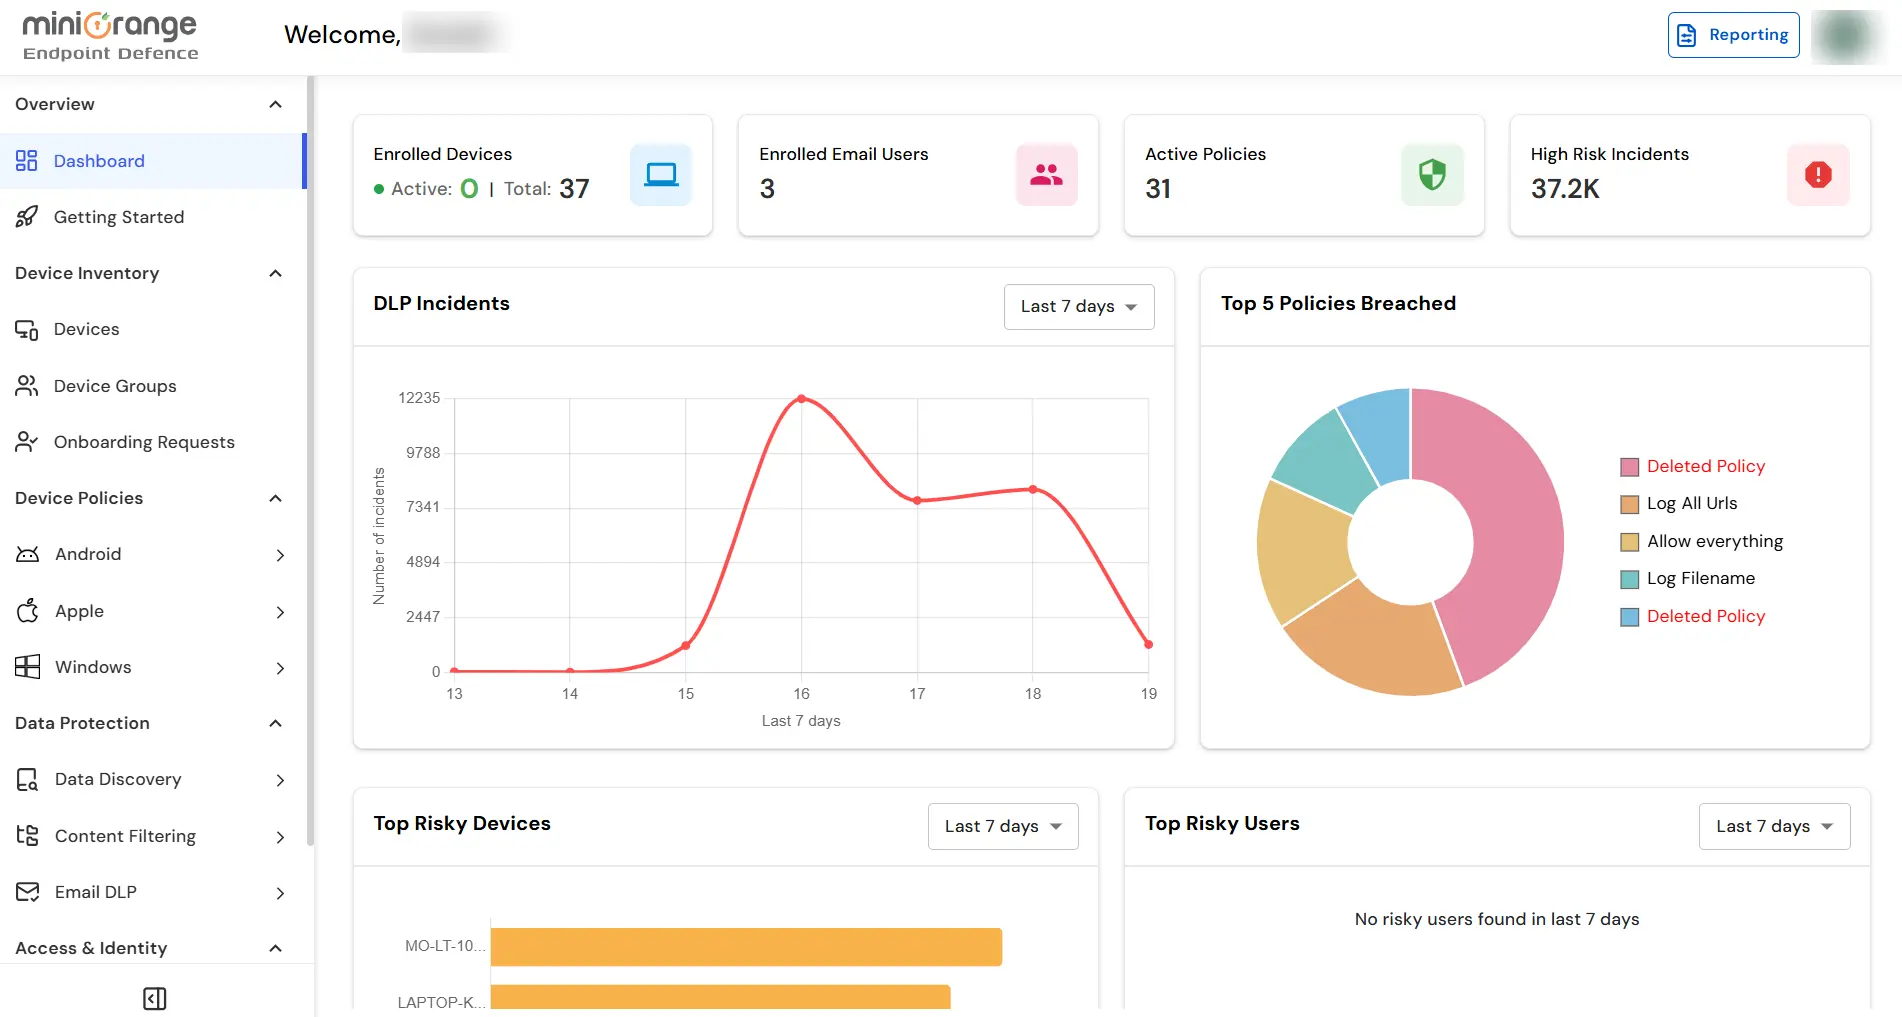
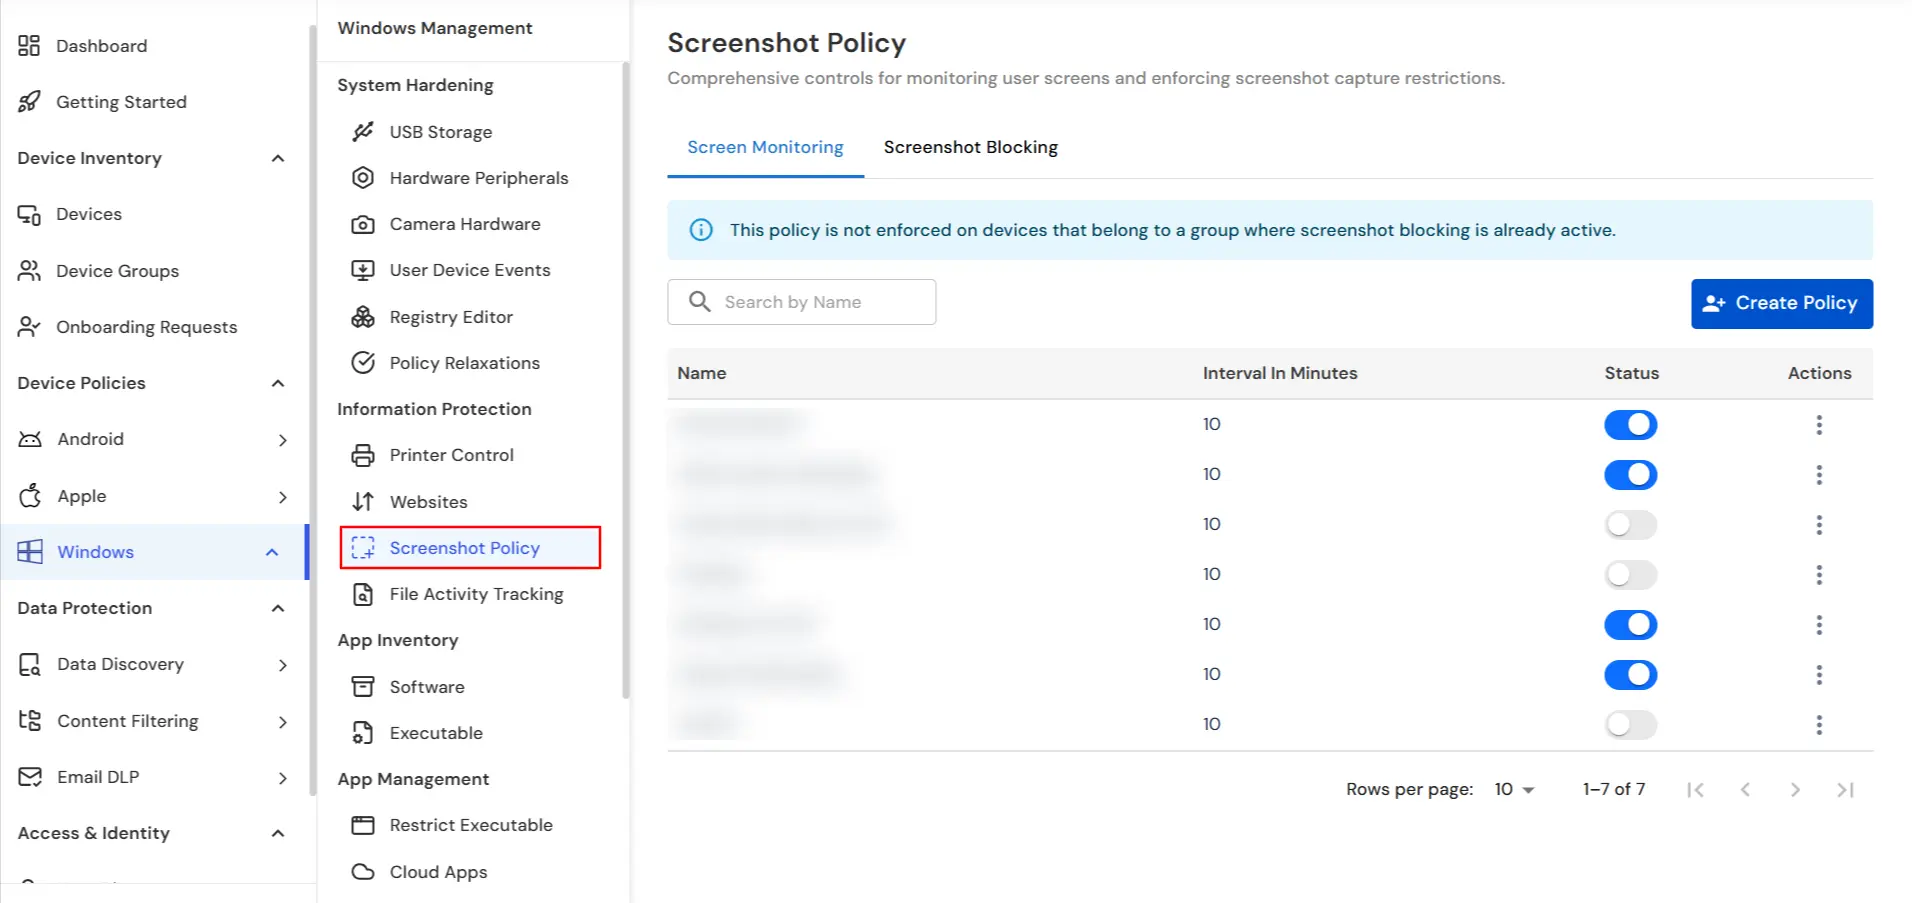
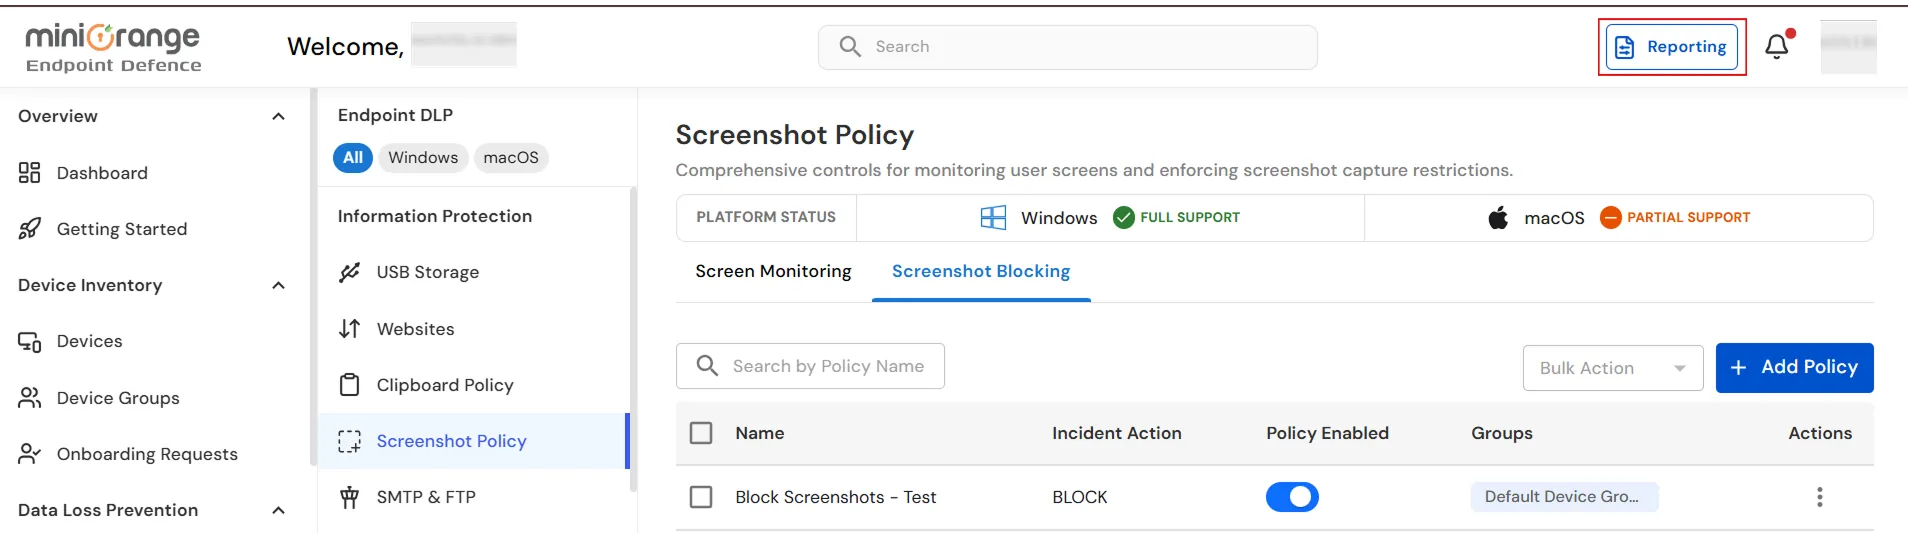
- On the dashboard, navigate to the left menu panel and then click on Endpoint → Screenshot Policy.
Step 2: Add Policy
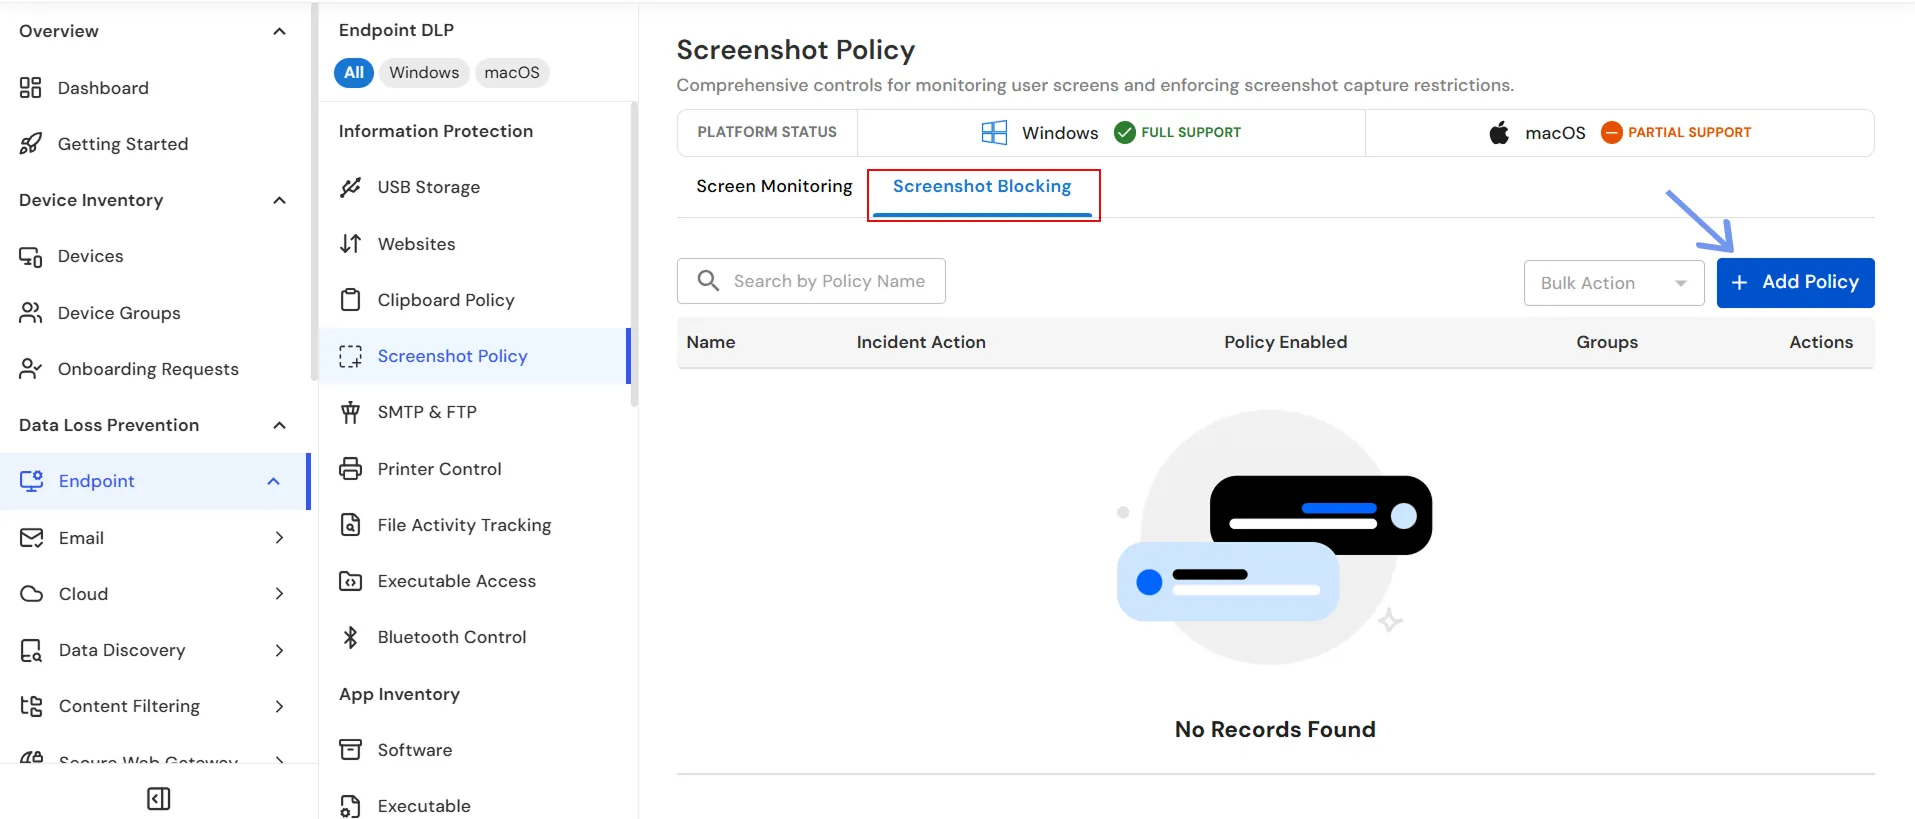
- Under Screenshot Policy, select the Screenshot Blocking tab.
- Click Add Policy to create a new screenshot blocking policy.
- In the Policy Name field, enter a unique name for the screenshot blocking policy.
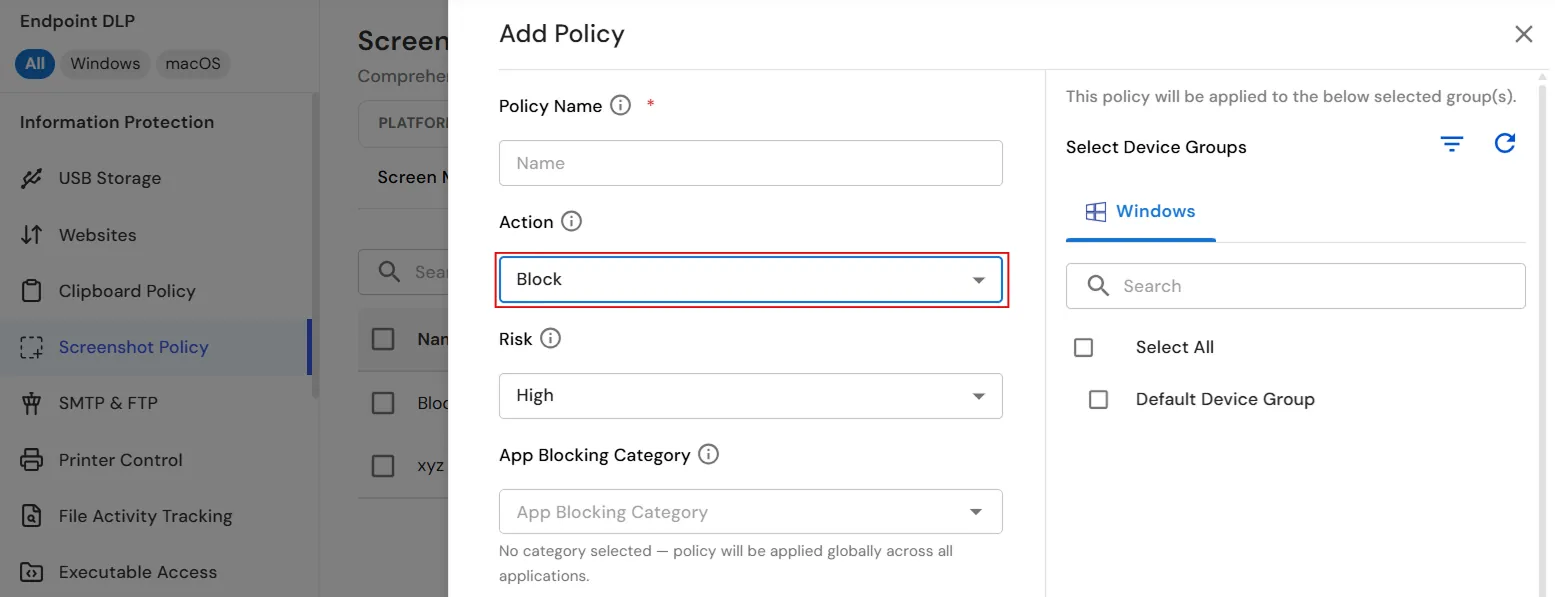
- Under Action, select the action you want to apply to screenshots:
- Block — Prevents screenshots based on the configured policy.
- Log — Records screenshot activity without blocking screenshots.
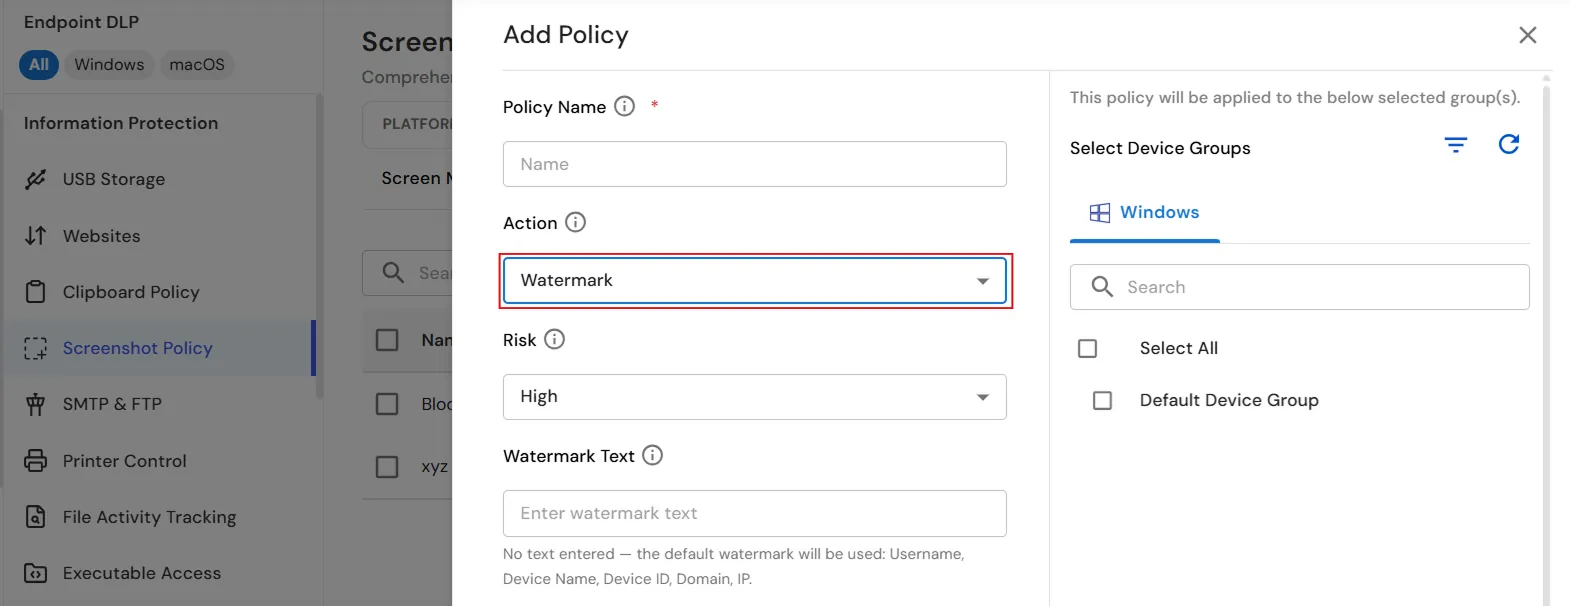
- Watermark — Applies a watermark to screenshots. You can use the default watermark or specify custom watermark text.
- If you select Block:
- Under Risk, select the appropriate risk level: Low, Medium, or High.
- Under App Blocking Category, select an application category if you want to restrict screenshots for specific applications. If no category is selected, the policy is applied globally across all applications.
- For a global screenshot blocking policy, leaving App Blocking Category unselected also restricts screen sharing.
- For an application-specific policy, select the required application category. The selected application is hidden from screenshots, screen recording, and screen sharing.
- If you select Log:
- Under Risk, select the appropriate risk level: Low, Medium, or High.
- If you select Watermark:
- Under Risk, select the appropriate risk level: Low, Medium, or High.
- In the Watermark Text field, enter the text you want to display as the watermark.
- Leave the Watermark Text field empty to use the default watermark. The default watermark includes Username, Device Name, Device ID, Domain, and IP.
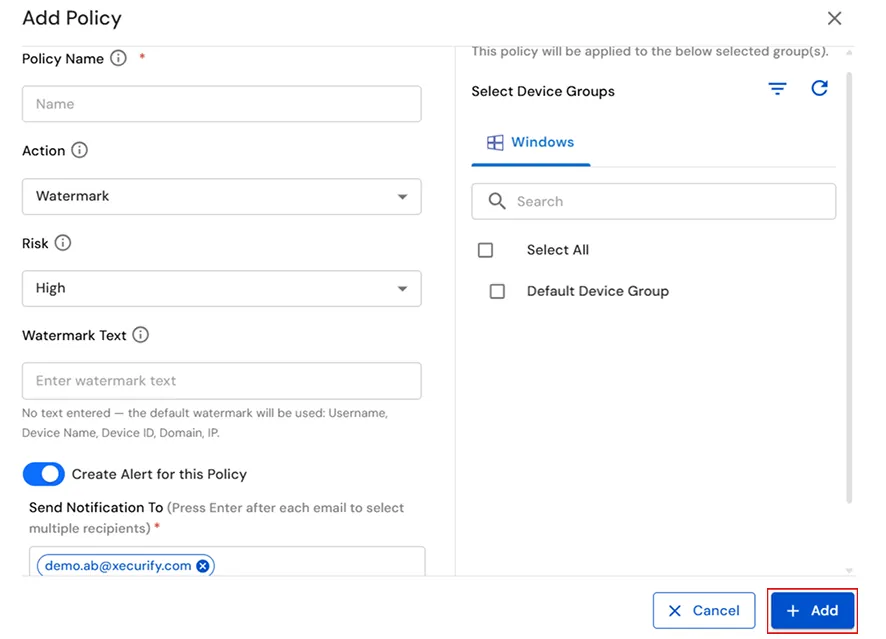
- Enable Create Alert for this Policy to receive notifications when the policy is triggered.
- In the Send Notification To field, enter the email address of the recipient who should receive the notifications. Press Enter after each email address to add multiple recipients.
- Under Select Device Groups, select the device group(s) to which you want to apply the policy. For example, select Default Device Group.
- Click Add to create the screenshot policy.
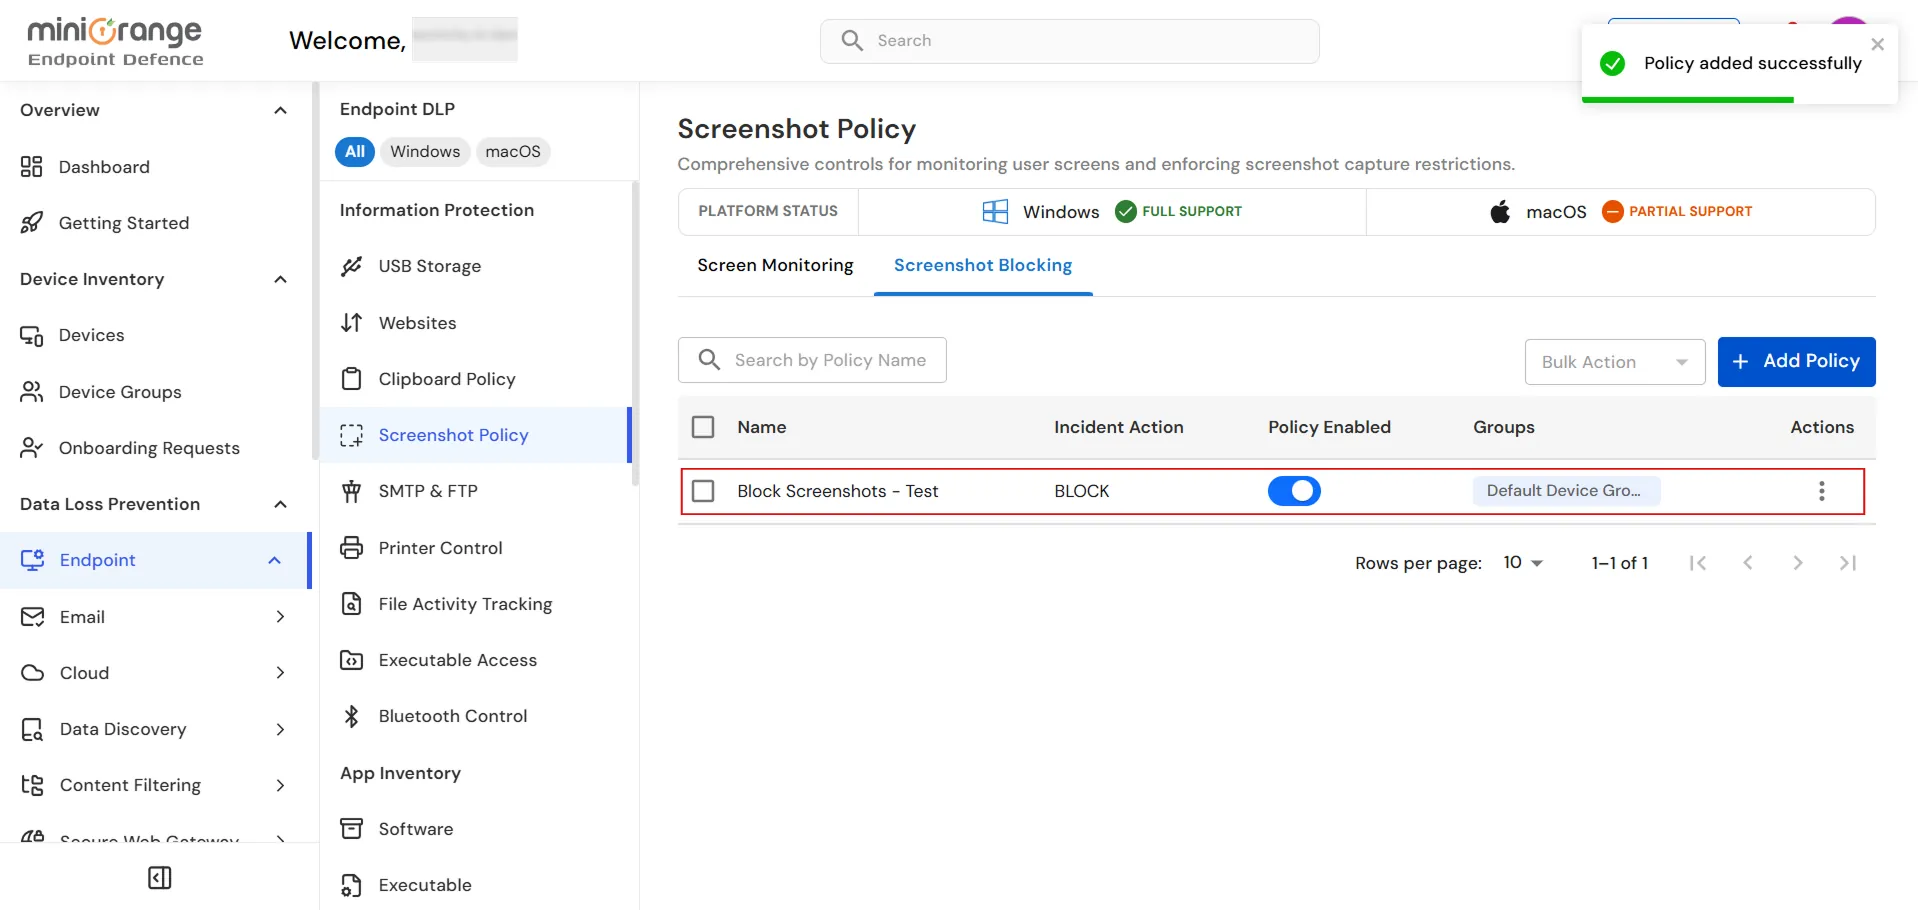
- Verify that the newly created policy appears under the Screenshot Blocking tab with the selected action displayed under Incident Action.
- Verify that the Policy Enabled toggle is enabled.
- Verify that the selected device group is displayed in the Groups column.
Step 3: Reporting
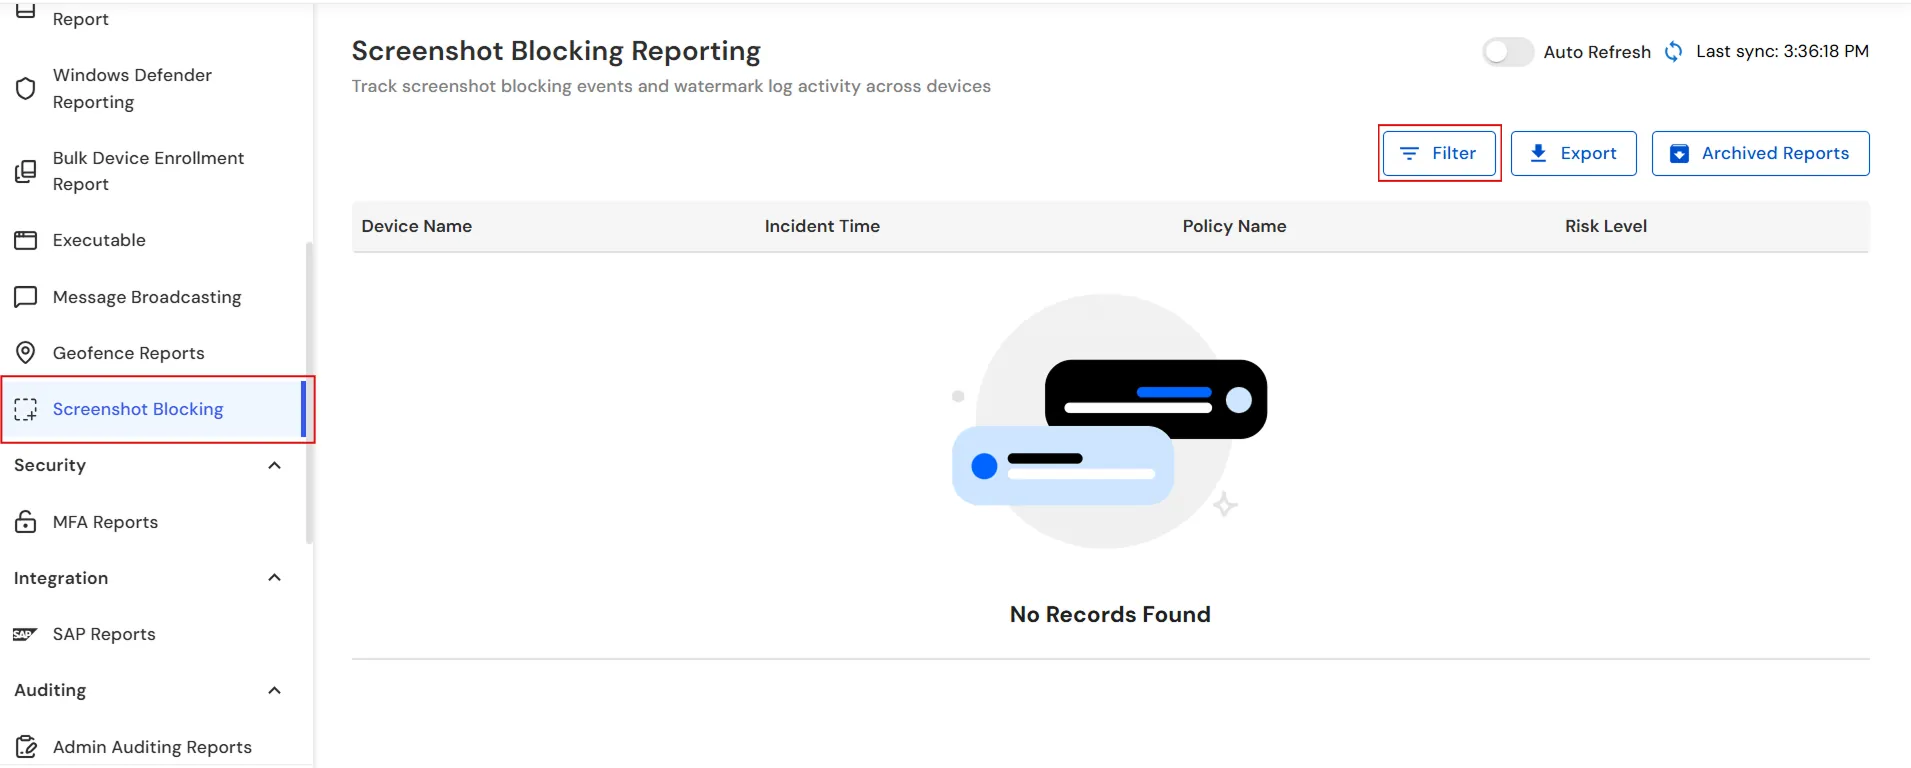
- Go to Reporting → Screenshot Blocking to view screenshot blocking events and activity.
- In the left panel under the Screenshot Blocking tab, review the available screenshot blocking events.
- Click Filter to narrow down the screenshot blocking reports.
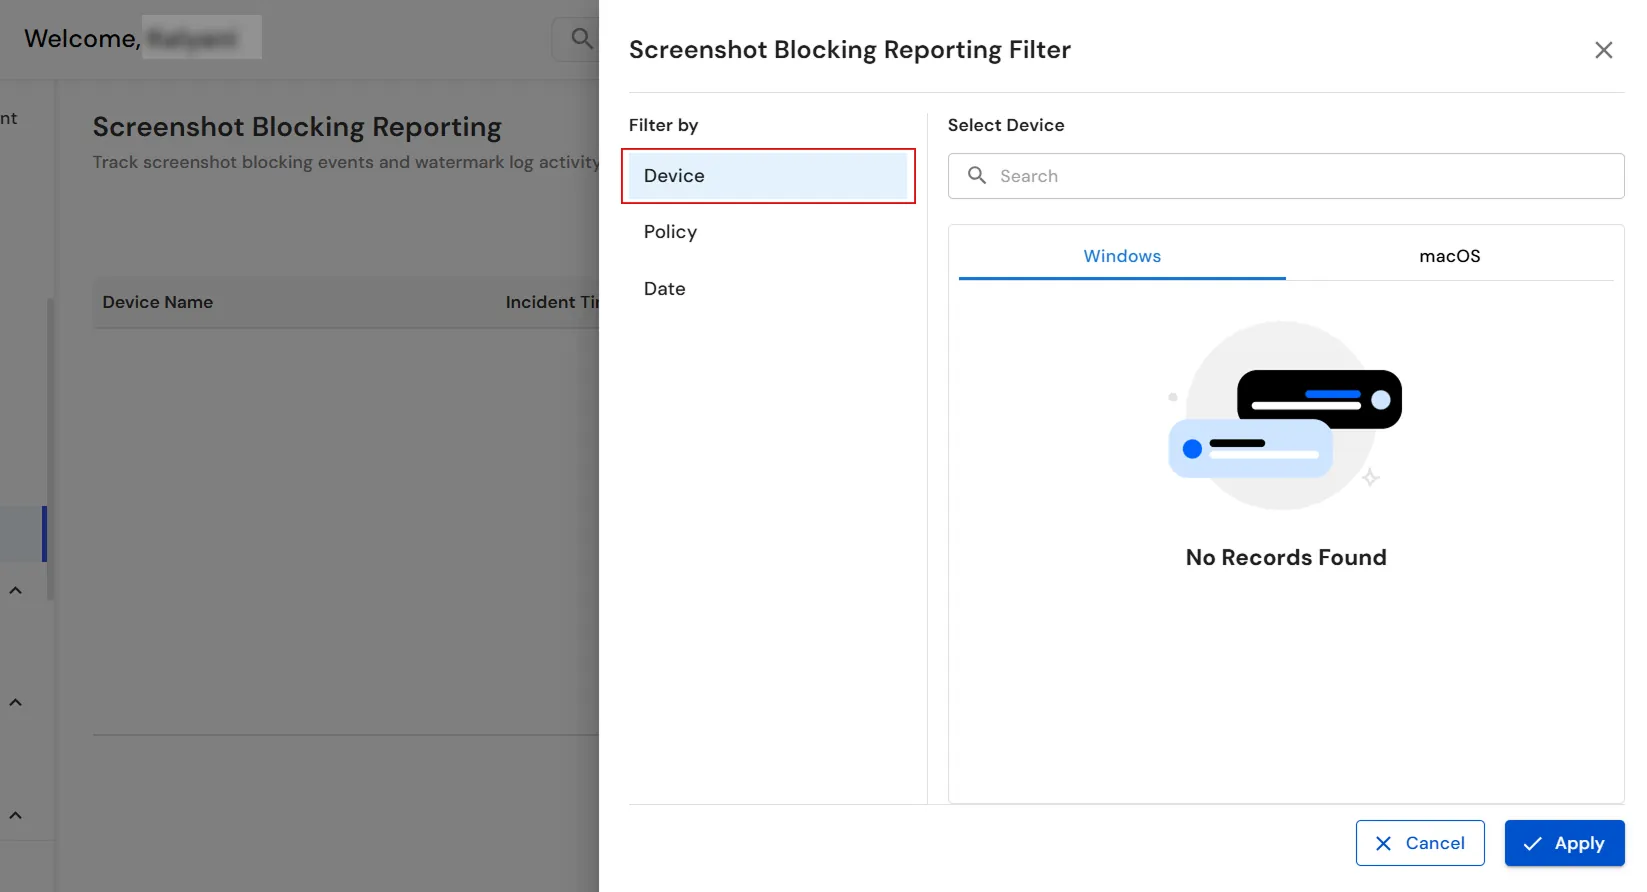
- Under Device, select the required device or switch between the Windows and macOS tabs to find a device.
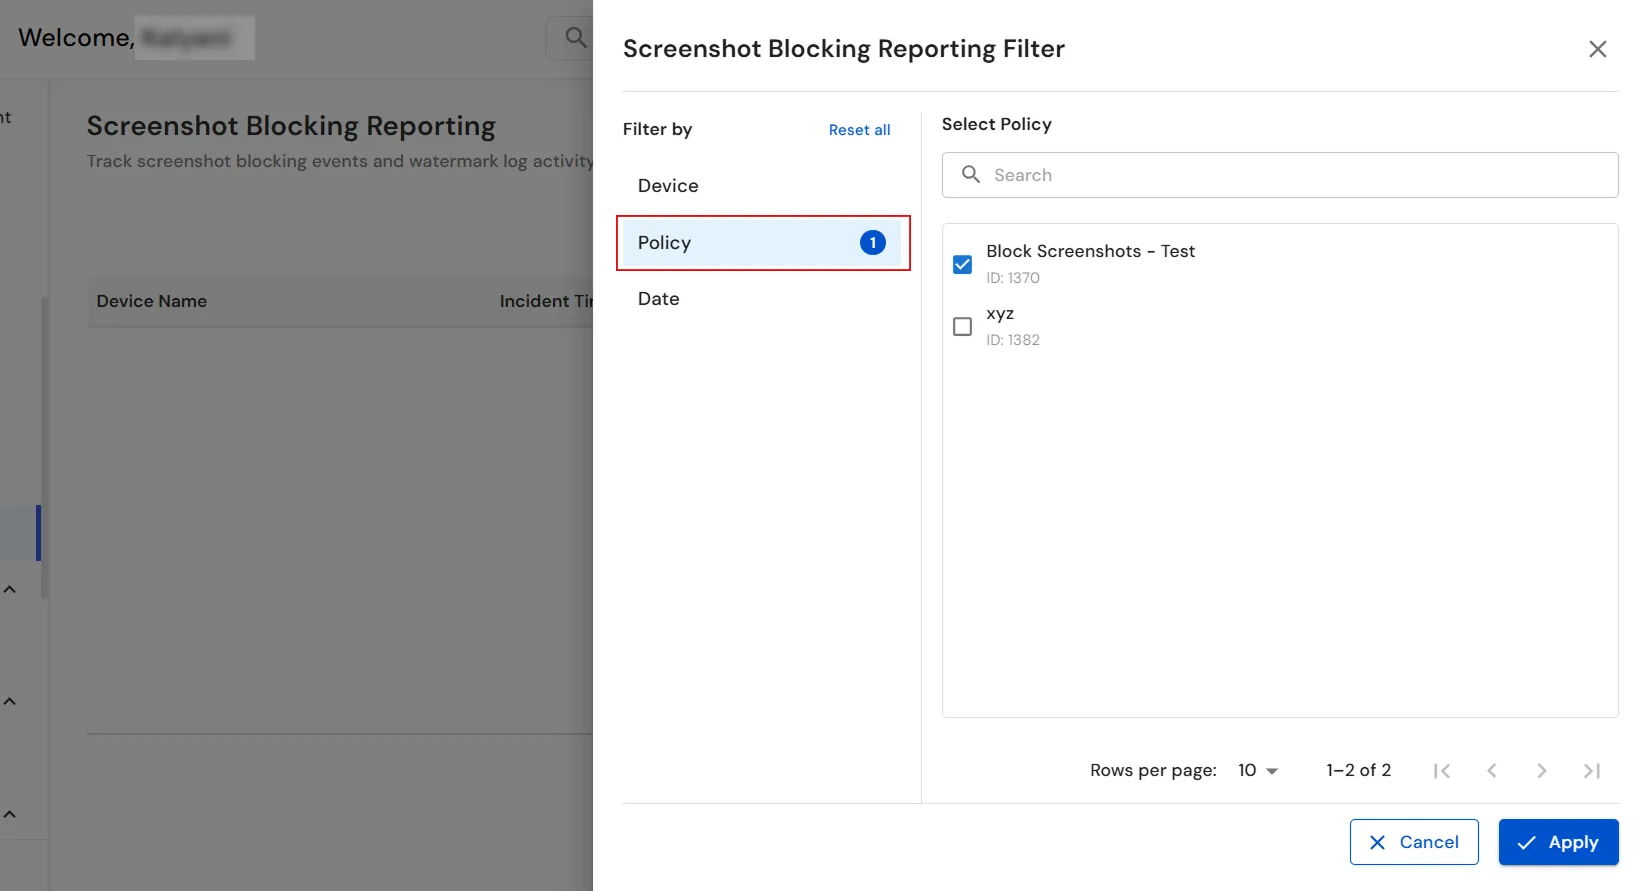
- Under Policy, select the required screenshot blocking policy.
- Under Date, select the From and To date and time to specify the reporting period.
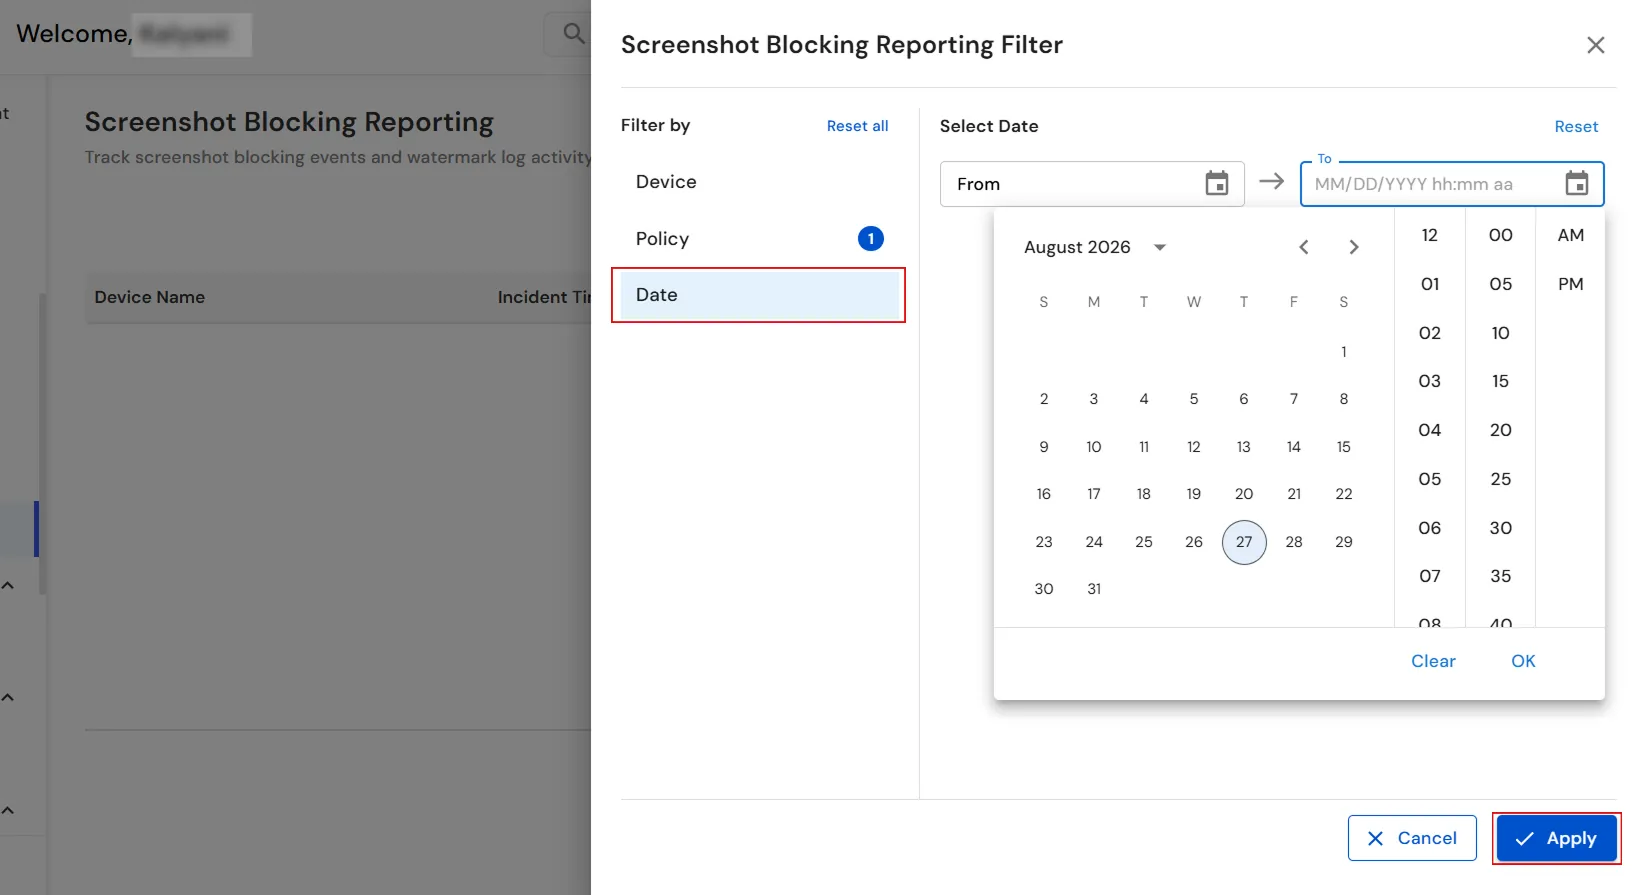
- Click Apply to view the reports matching the selected filters.
- Click Export to download the screenshot blocking report for further analysis or record keeping.
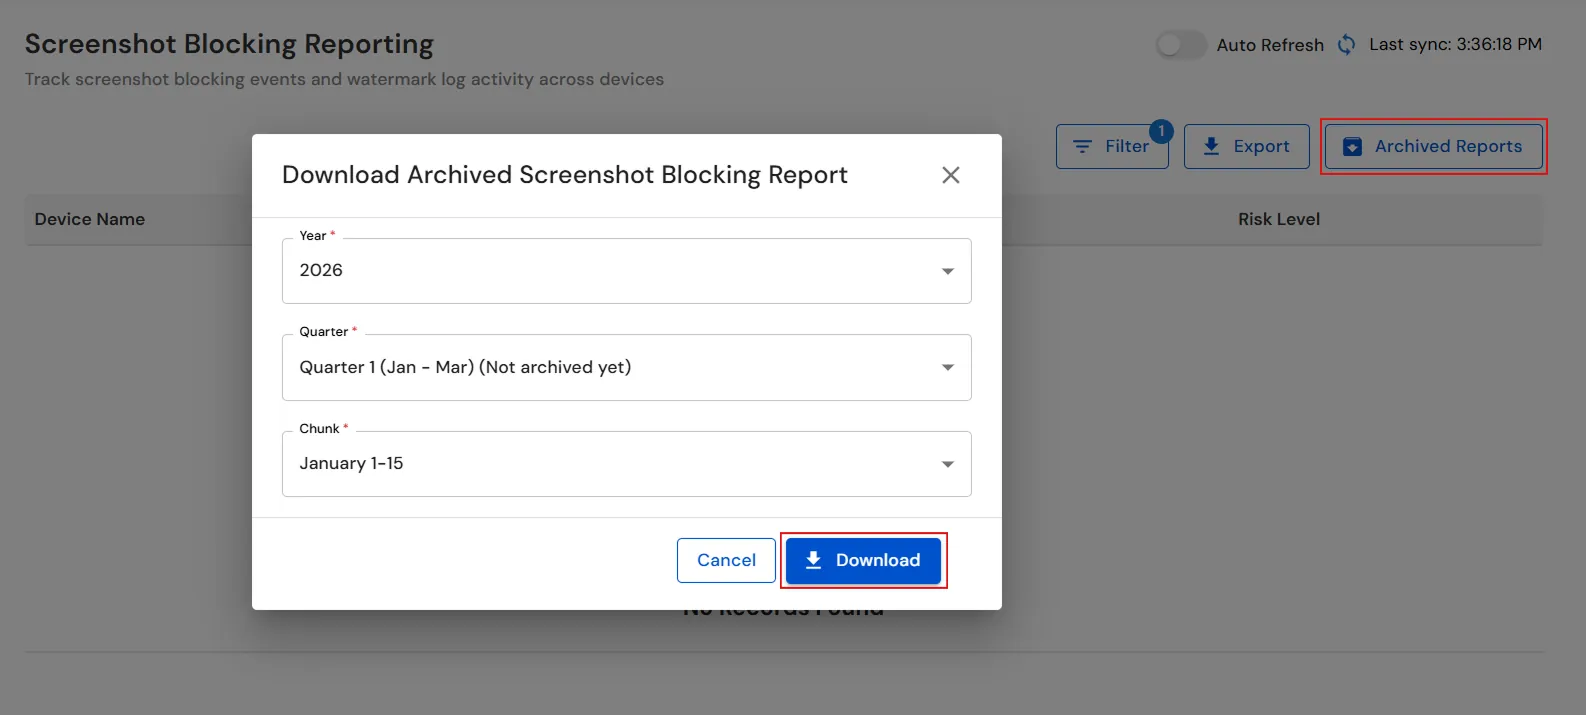
- Click Archived Reports to open the Download Archived Screenshot Blocking Report window.
- Select the required Year, Quarter, and Chunk.
- Click Download to download the archived screenshot blocking report.
You have successfully configured the Screenshot Blocking Policy and reviewed the corresponding reports using our DLP solution. If you encounter any issues during the configuration, please feel free to contact us at uemsupport@xecurify.com.