Provisioning for Jira & Confluence, backed by 10+ years of Atlassian expertise


Data Provisioning for Atlassian Cloud & Data Center
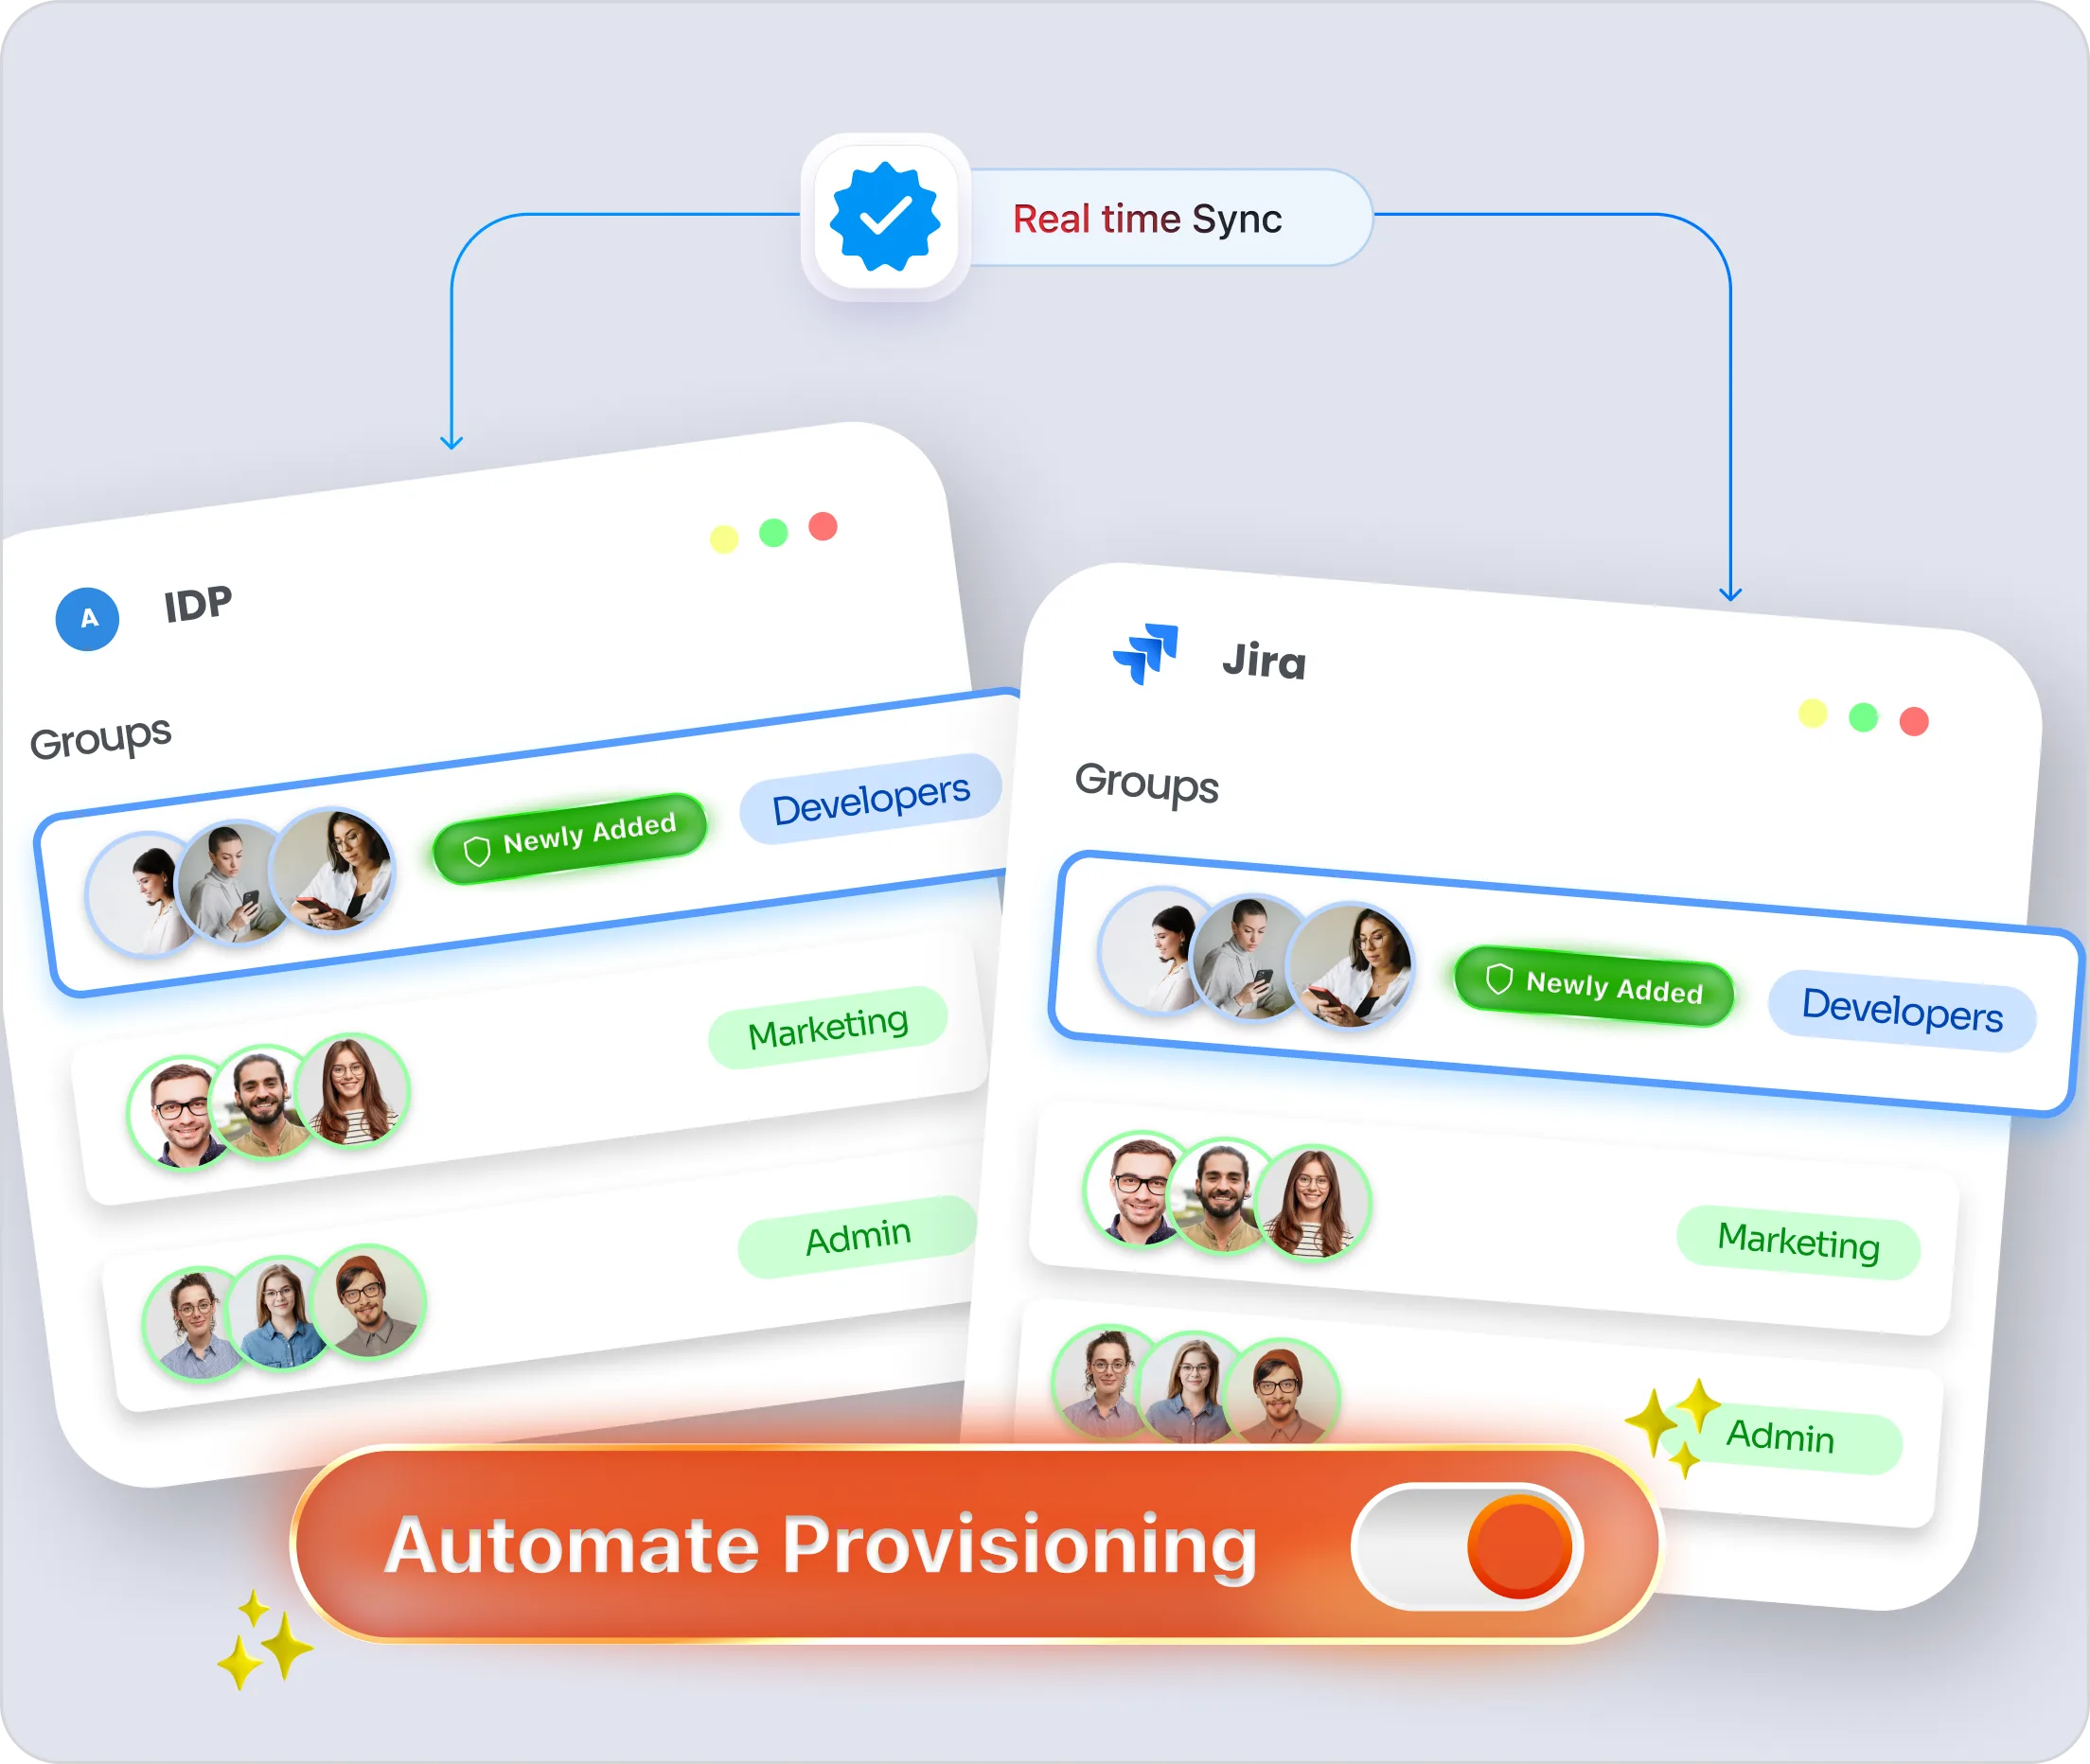
Automate user lifecycle from your Identity Provider, whether you're on Cloud or running your own Data Center.
SCIM/REST API based Provisioning for Atlassian Cloud
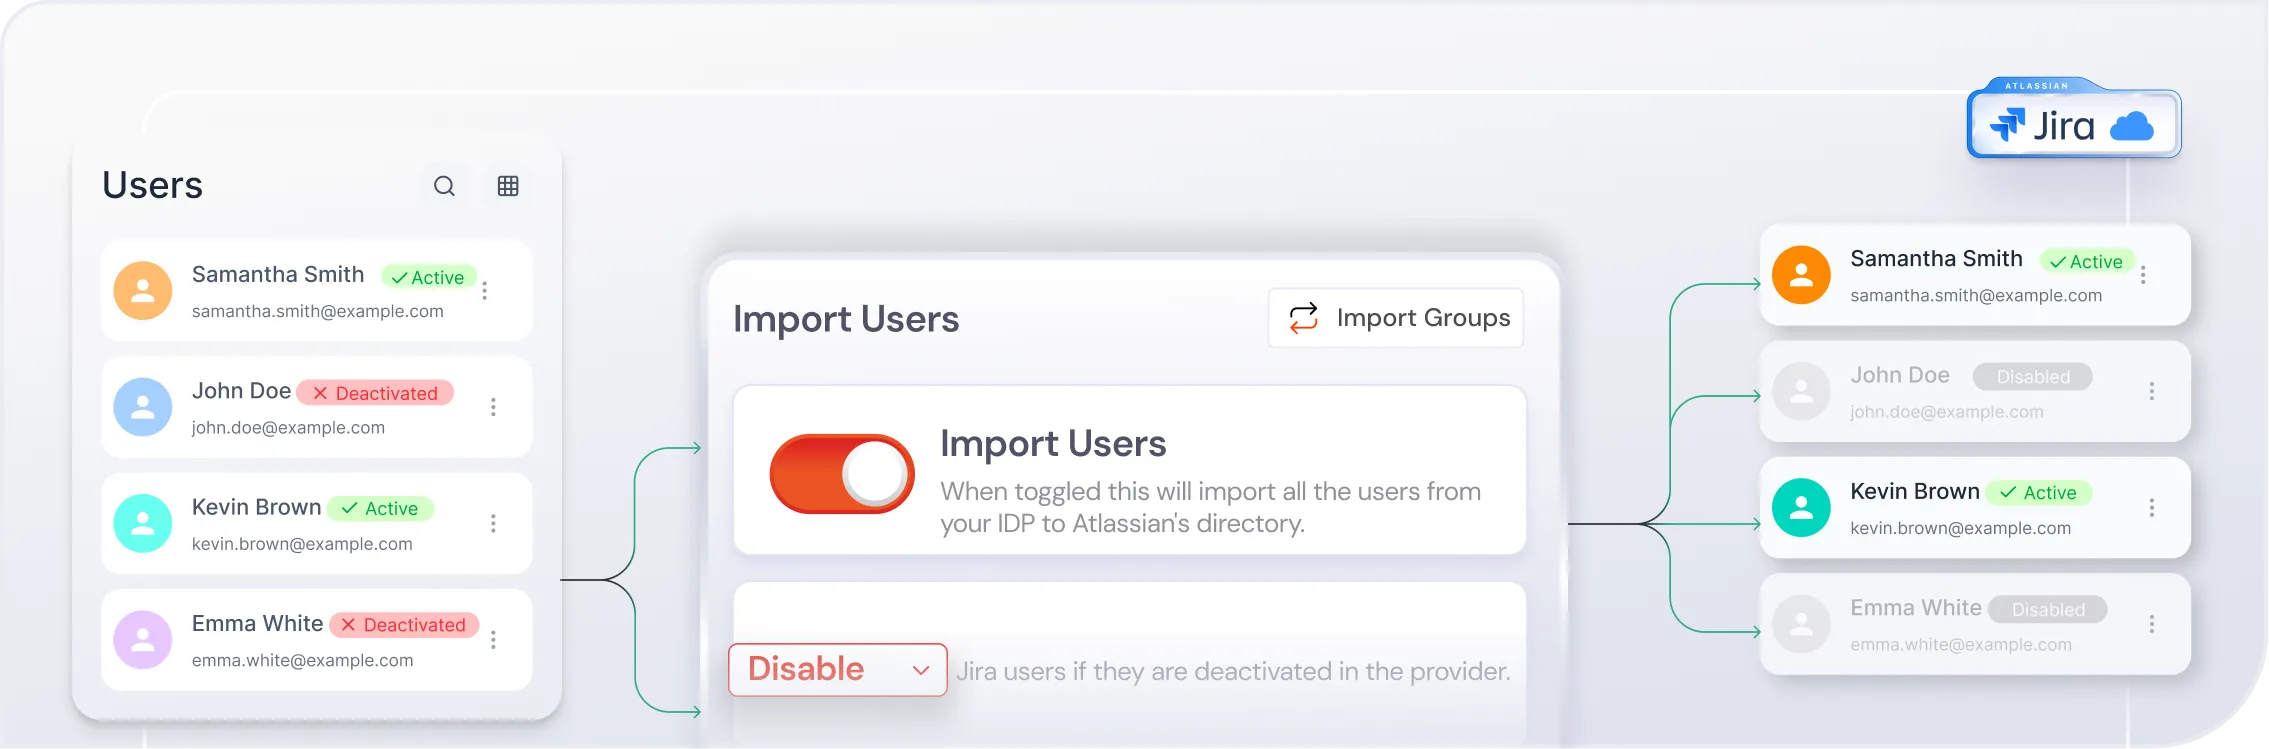
Provision/deprovision users to Jira and Confluence Cloud from any SCIM, LDAP, or REST API-based IDP like Keycloak. Supports domain-mapped sync, group filtering, auto activation, and attribute mapping.
SCIM/REST API based Provisioning for Atlassian Data Center
Provision and deprovision users across self-managed Jira, Confluence, Bitbucket, and Crowd. Connect multiple IDPs, sync LDAP directories, and keep configurations portable across instances.
Why Teams Choose miniOrange
Because managing access should be seamless, not a constant struggle.
3X
Faster Logins
50%
Cost Reduction
24x7
Technical Assistance
Enterprise SCIM/REST API Provisioning for Atlassian Cloud
-
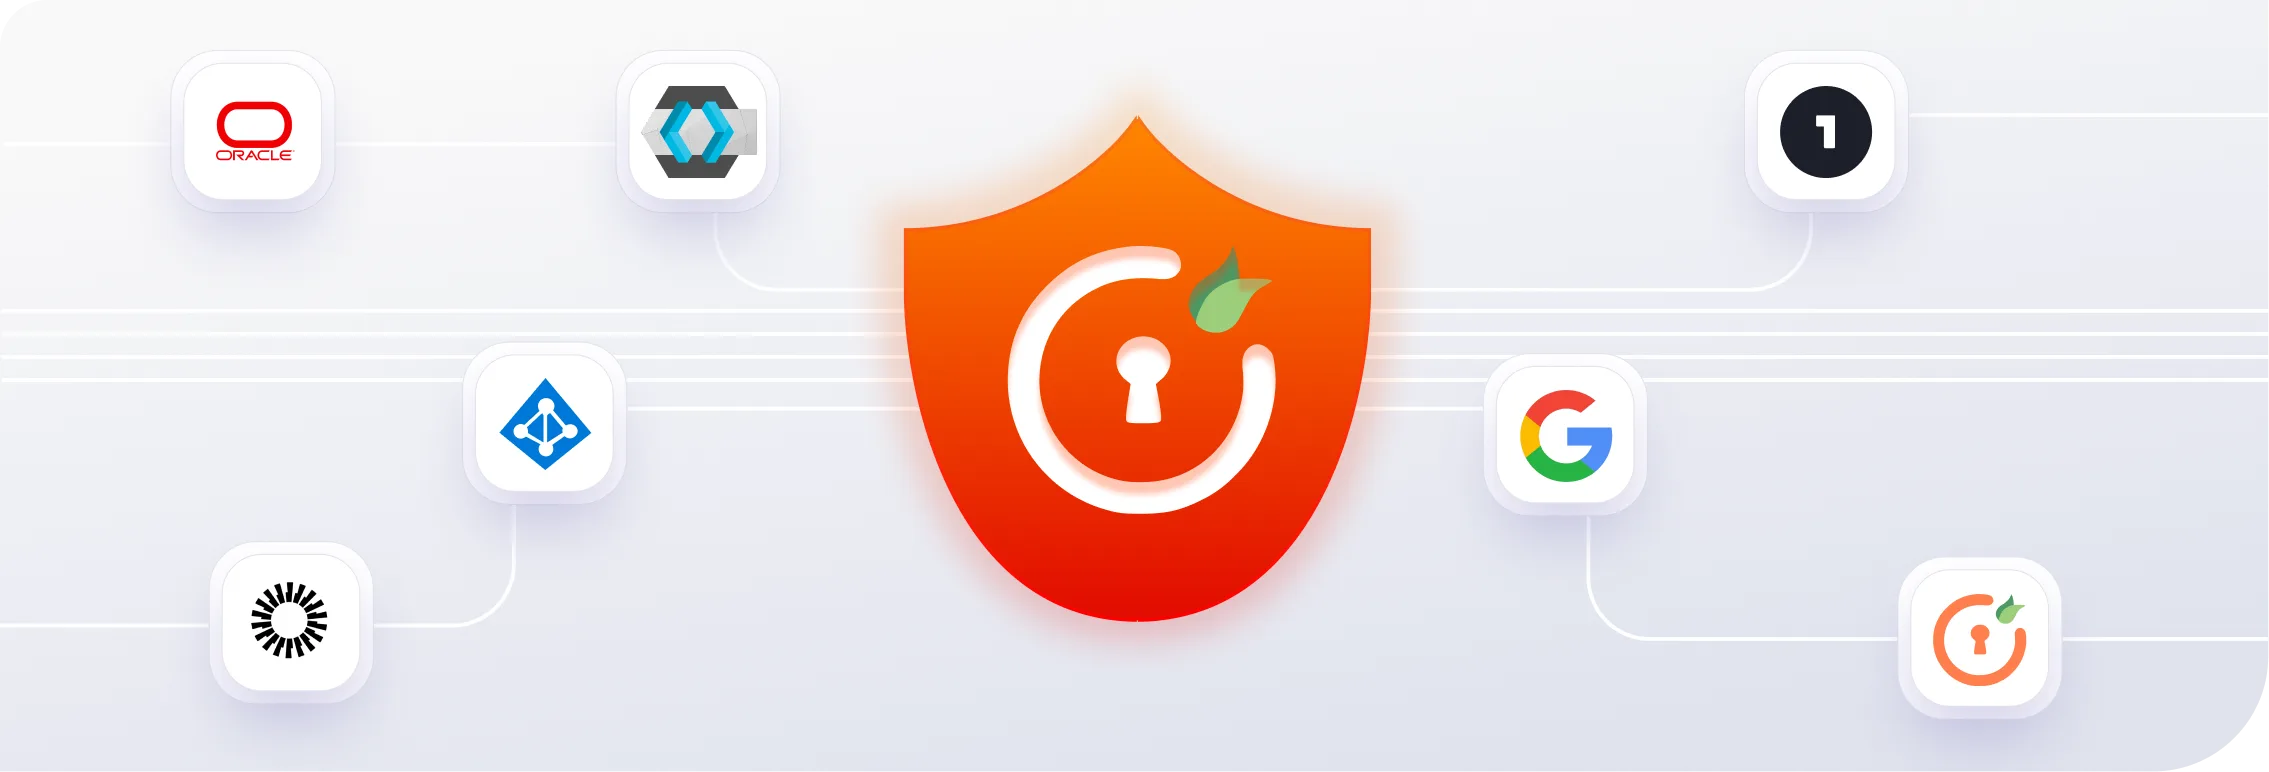
Multi-IDP Support
Sync users and groups from multiple IDPs simultaneously, including Okta, Azure AD, and any SCIM-based provider. Users/groups from any REST API based IDPs like Google, Keycloak, Partner.net, etc., can also be provisioned.
-
Attribute & Group Mapping
Automatically map IDP groups to Atlassian internal groups and sync custom user attributes to align access with organizational structure.
-
Auto User Deprovisioning
Automatically disable users when removed from your IDP, ensuring you only pay for active licenses and preventing unauthorized access.
-
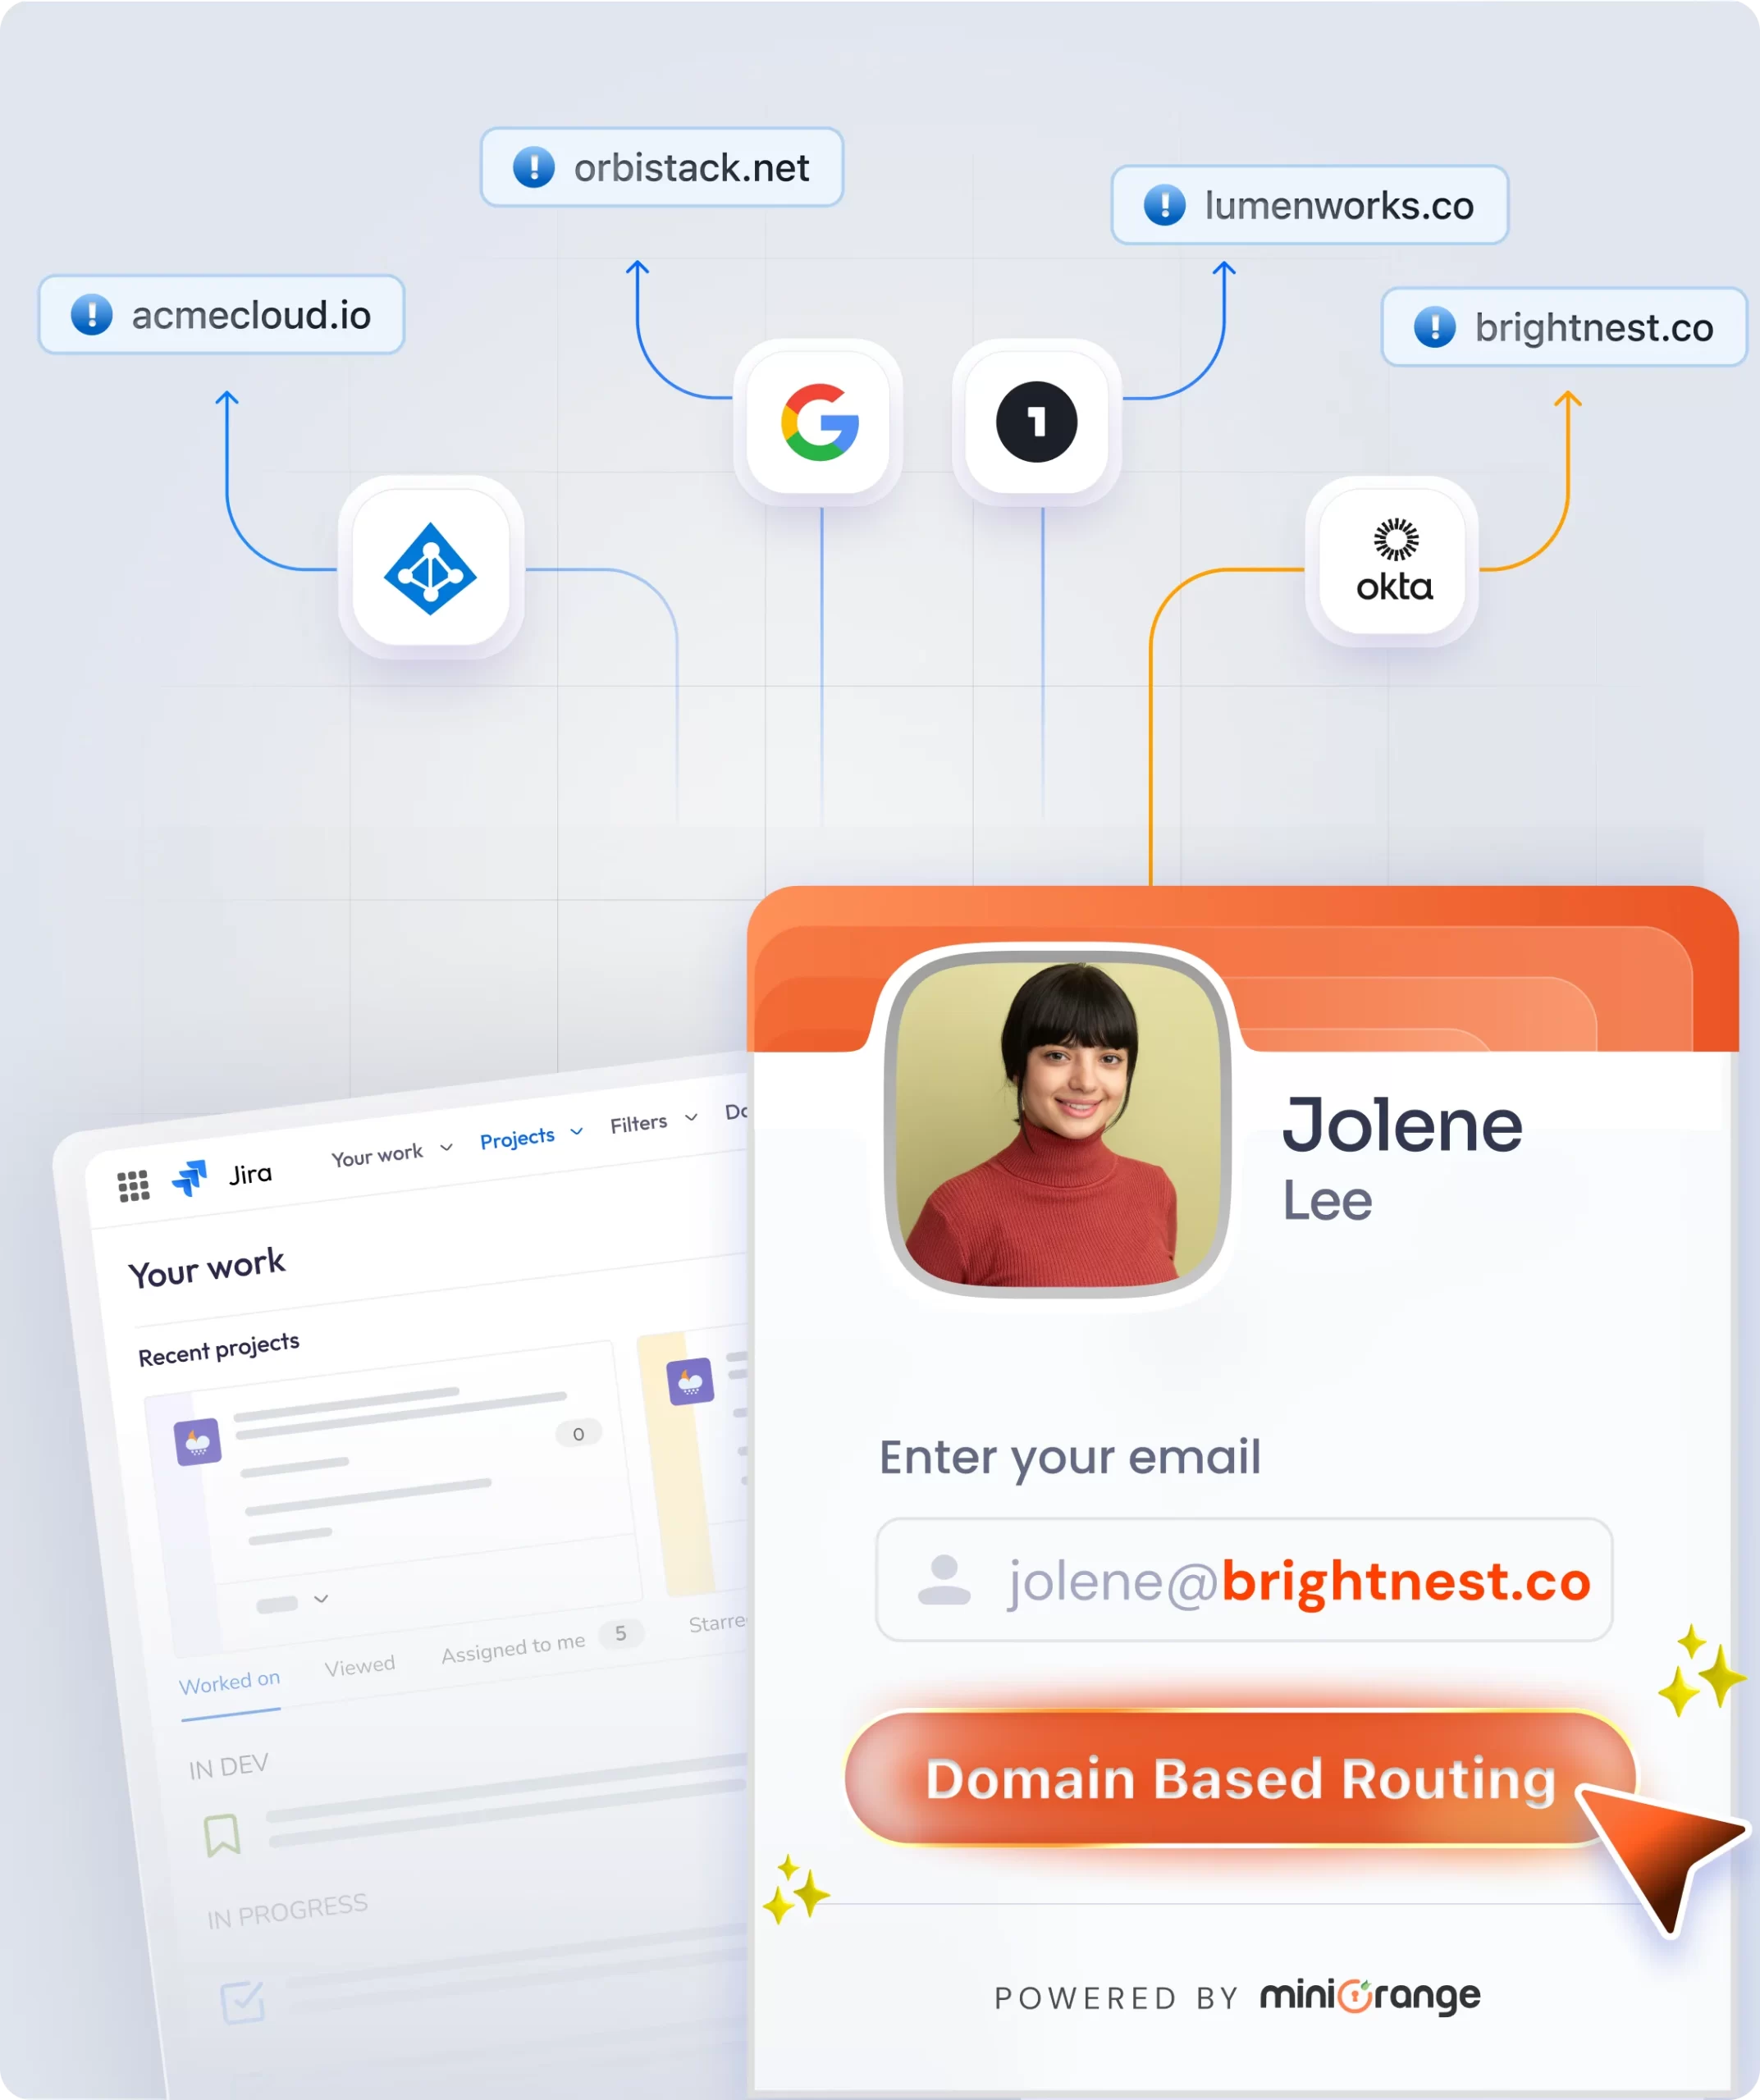
Domain-Based Routing
Route provisioning requests to the correct IDP configuration automatically based on the user email domain for seamless multi-tenant setups.
-
JIT & SCIM Provisioning
Create users just-in-time with SCIM-based IDP sync or trigger scheduled sync for REST API-based IDPs, giving you flexibility in how and when users are provisioned.
Leading SCIM Provisioning for Every Atlassian Data Center
-
Regex-Based Username Transform and Group Filtering
Create transformed usernames using regex transformations to ensure user matching, and provision only relevant users via group-based IdP filtering, reducing license costs.
-
Scheduled & Manual Sync
Run provisioning on a set interval, trigger it manually at any time, or sync users automatically upon successful SSO login.
-
Auto-Revoke License and Permissions
Revoke user permissions upon offboarding from the IdP, along with license removal, to reduce costs.
-
Migrate Users and Groups
Localized migration of Active Directory users from the LDAP Connector Directory to the Jira Internal Directory without losing existing user resources and permissions.
-
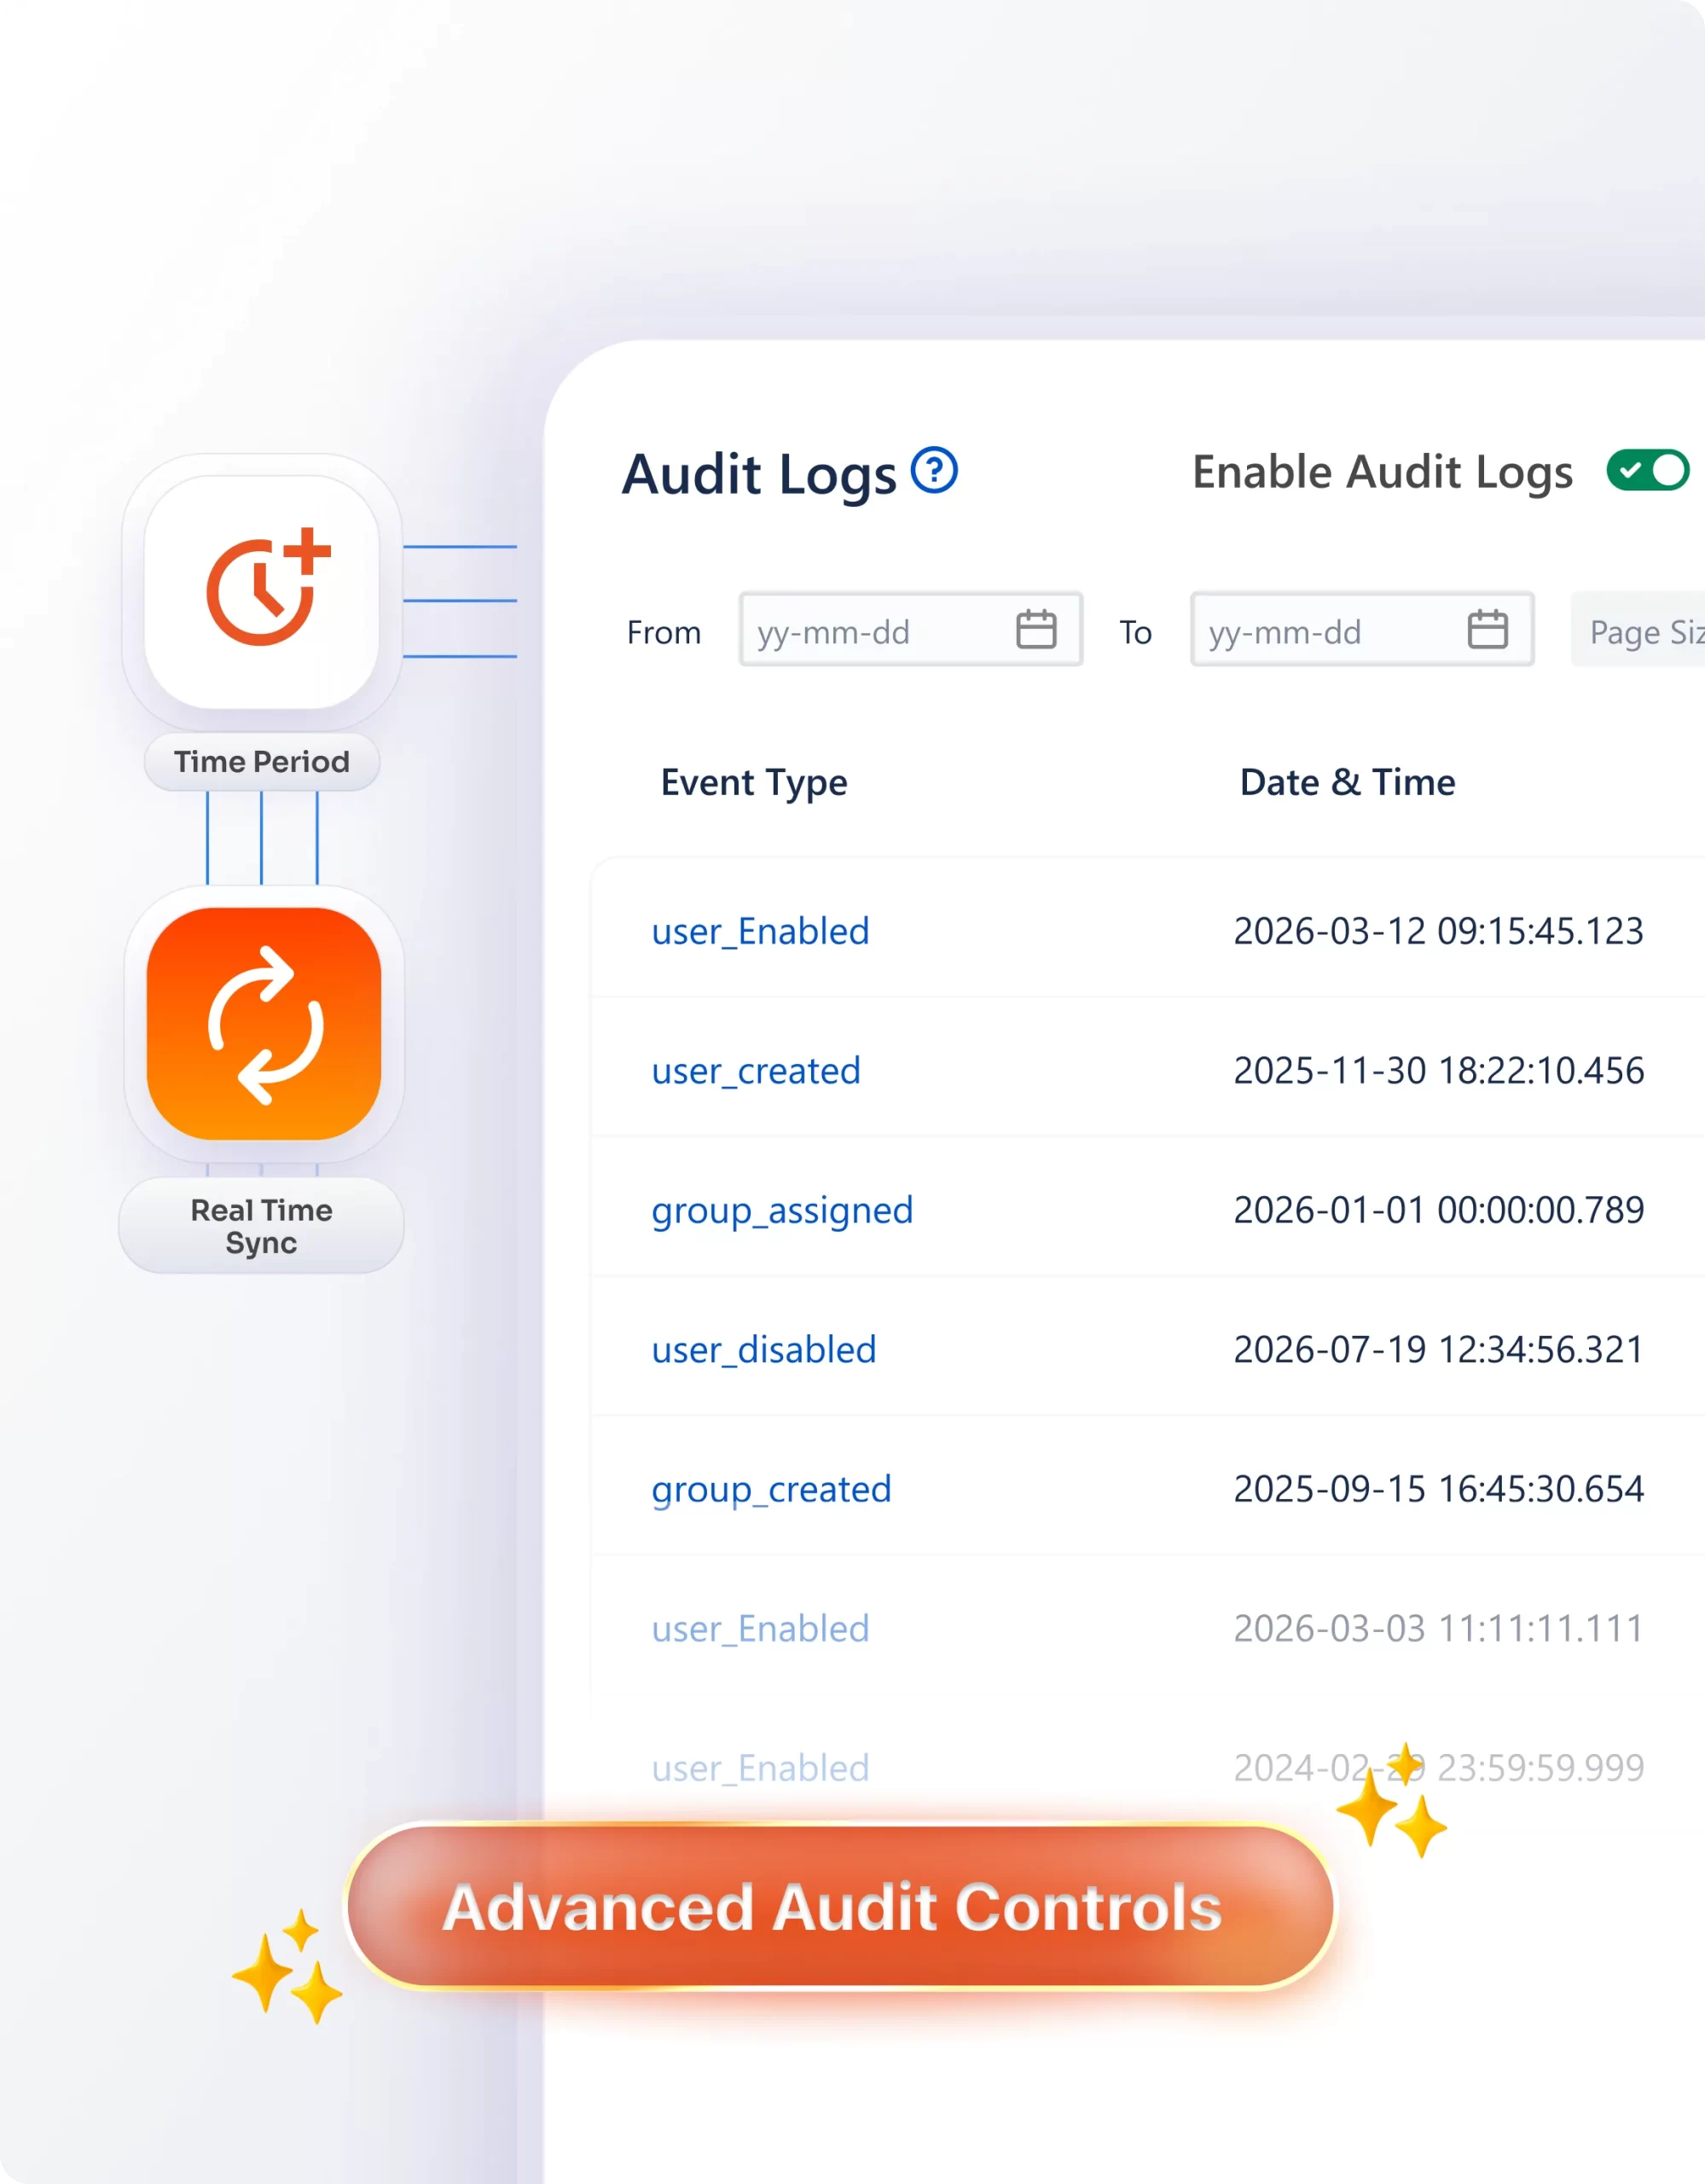
Admin & Audit Controls
Detailed provisioning logs, IDP-specific sync rules, and backup/restore tools give admins full visibility and control over every sync action.

Comprehensive Comparison
Why Teams Choose miniOrange SSO Over Native Atlassian Solutions


Globally trusted by 3000+
premium clients and counting!


Here’s what our awesome customers say
View All Reviews

This app is able to sync thousands of users and groups. We used it for an integration with OneLogin. It actually helped us a lot in a user migration. We had some issues at first but the support team was very helpful to solve it with us. I recommend miniOrange support for any app.
Charlie Misonne
Great option when customer users need to synced in via Identity providers and claiming customer domains is not feasible. Fantastic support from the team as well 🙂 Easy to install and setup, worked as expected. Was given very good technical support when it came to customizations for our organisation.
Alvin Chan
We are using this app for SCIM to get Azure users into Confluence. Setup was extremely easy, and we were pleased with the variety of options available. However, we did initially run into errors with the plug-in response missing a required attribute which resulted in SCIM failing for all our accounts.
Quin Dixon
Frequently Asked Questions
 Contact us
