Hello there!

Need Help? We are right here!

miniOrange Support
miniOrange Email Support
success

Thanks for your Enquiry.

If you don't hear from us within 24 hours, please feel free to send a follow-up email to info@xecurify.com

Search Results:

×

Configure Password Rotation Policy


Automatically or manually rotate the passwords PAM stores for system accounts, and control how and when the rotation happens.

What is Password Rotation?

Password Rotation changes the stored password for a System User and updates it on the target system and on PAM as well, without anyone needing to know or type the new value.

Password Rotation can be done via 4 methods:

  • On a scheduled basis
  • Immediately after someone finishes using the credential
  • Immediately before someone uses the credentials
  • Manually
  • Note: For password rotation, each System User must be associated with only one Resource. If the same System User is used across multiple Resources, configure a separate System User entry in PAM for each Resource and associate it accordingly. This ensures password rotation is managed independently for each Resource.

Supported Resource Types

Rotation currently works for:

  • SSH assets (via SSH).
  • RDP / Windows assets (via WinRM).
  • Active Directory accounts (via LDAPS - LDAPS is mandatory; an AD config without it can't be used for rotation).
  • Not supported: All the other resources except mentioned above do not support password rotation as of now. The password rotation for other resources is planned for further releases.

Before You Start: Windows Server Setup (Non-AD Only)

This only applies to an RDP/Windows asset whose Rotator Type is Non-AD - a Windows machine that isn't joined to Active Directory.

PAM rotates its local account password by connecting to the server over WinRM (Windows Remote Management) on TCP port 5985.

Before password rotation can succeed, the following prerequisites must be met. PAM does not configure, validate, or notify you about these requirements.

  • Enable WinRM on the server

    WinRM must be enabled on the target Windows machine. An administrator can enable it by running the following command from an elevated Command Prompt:

                      winrm quickconfig
                    

    This enables the WinRM service that PAM uses to connect to the server and update the password.

  • Allow Connectivity on TCP Port 5985

    TCP port 5985 must be accessible from PAM to the target server. If connectivity on port 5985 is blocked, PAM will be unable to perform password rotation. Ensure the port is allowed through:

    • Windows Firewall on the server
    • Any network firewalls
    • Security groups or access control policies between PAM and the server
  • Ensure Password Policy Compatibility

    PAM generates passwords based solely on the Password Policy assigned to the rotation policy. If the server enforces stricter rules than the configured Password Policy, the password change will be rejected and rotation will fail. To prevent this, ensure that the Password Policy matches or exceeds the server's password requirements. It does not verify whether the generated password complies with the target server's local password requirements, such as:

    • Minimum password length
    • Complexity requirements
    • Password history restrictions
    • Note: If any of the above prerequisites are not met, password rotation will fail. PAM does not perform pre-validation or provide warnings about missing requirements.

Note: These prerequisites apply only to Windows machines that are not domain-joined and use a system user with Rotator Type = Non-AD. For AD rotators, password rotation is performed through Active Directory and does not require WinRM.


Step 1: Set a Rotator on the System User

A System User needs a Rotator configured before it's eligible for rotation. This is the privileged account PAM uses to change the password on the target. A System User with no rotator configured can never be scheduled or manually rotated.
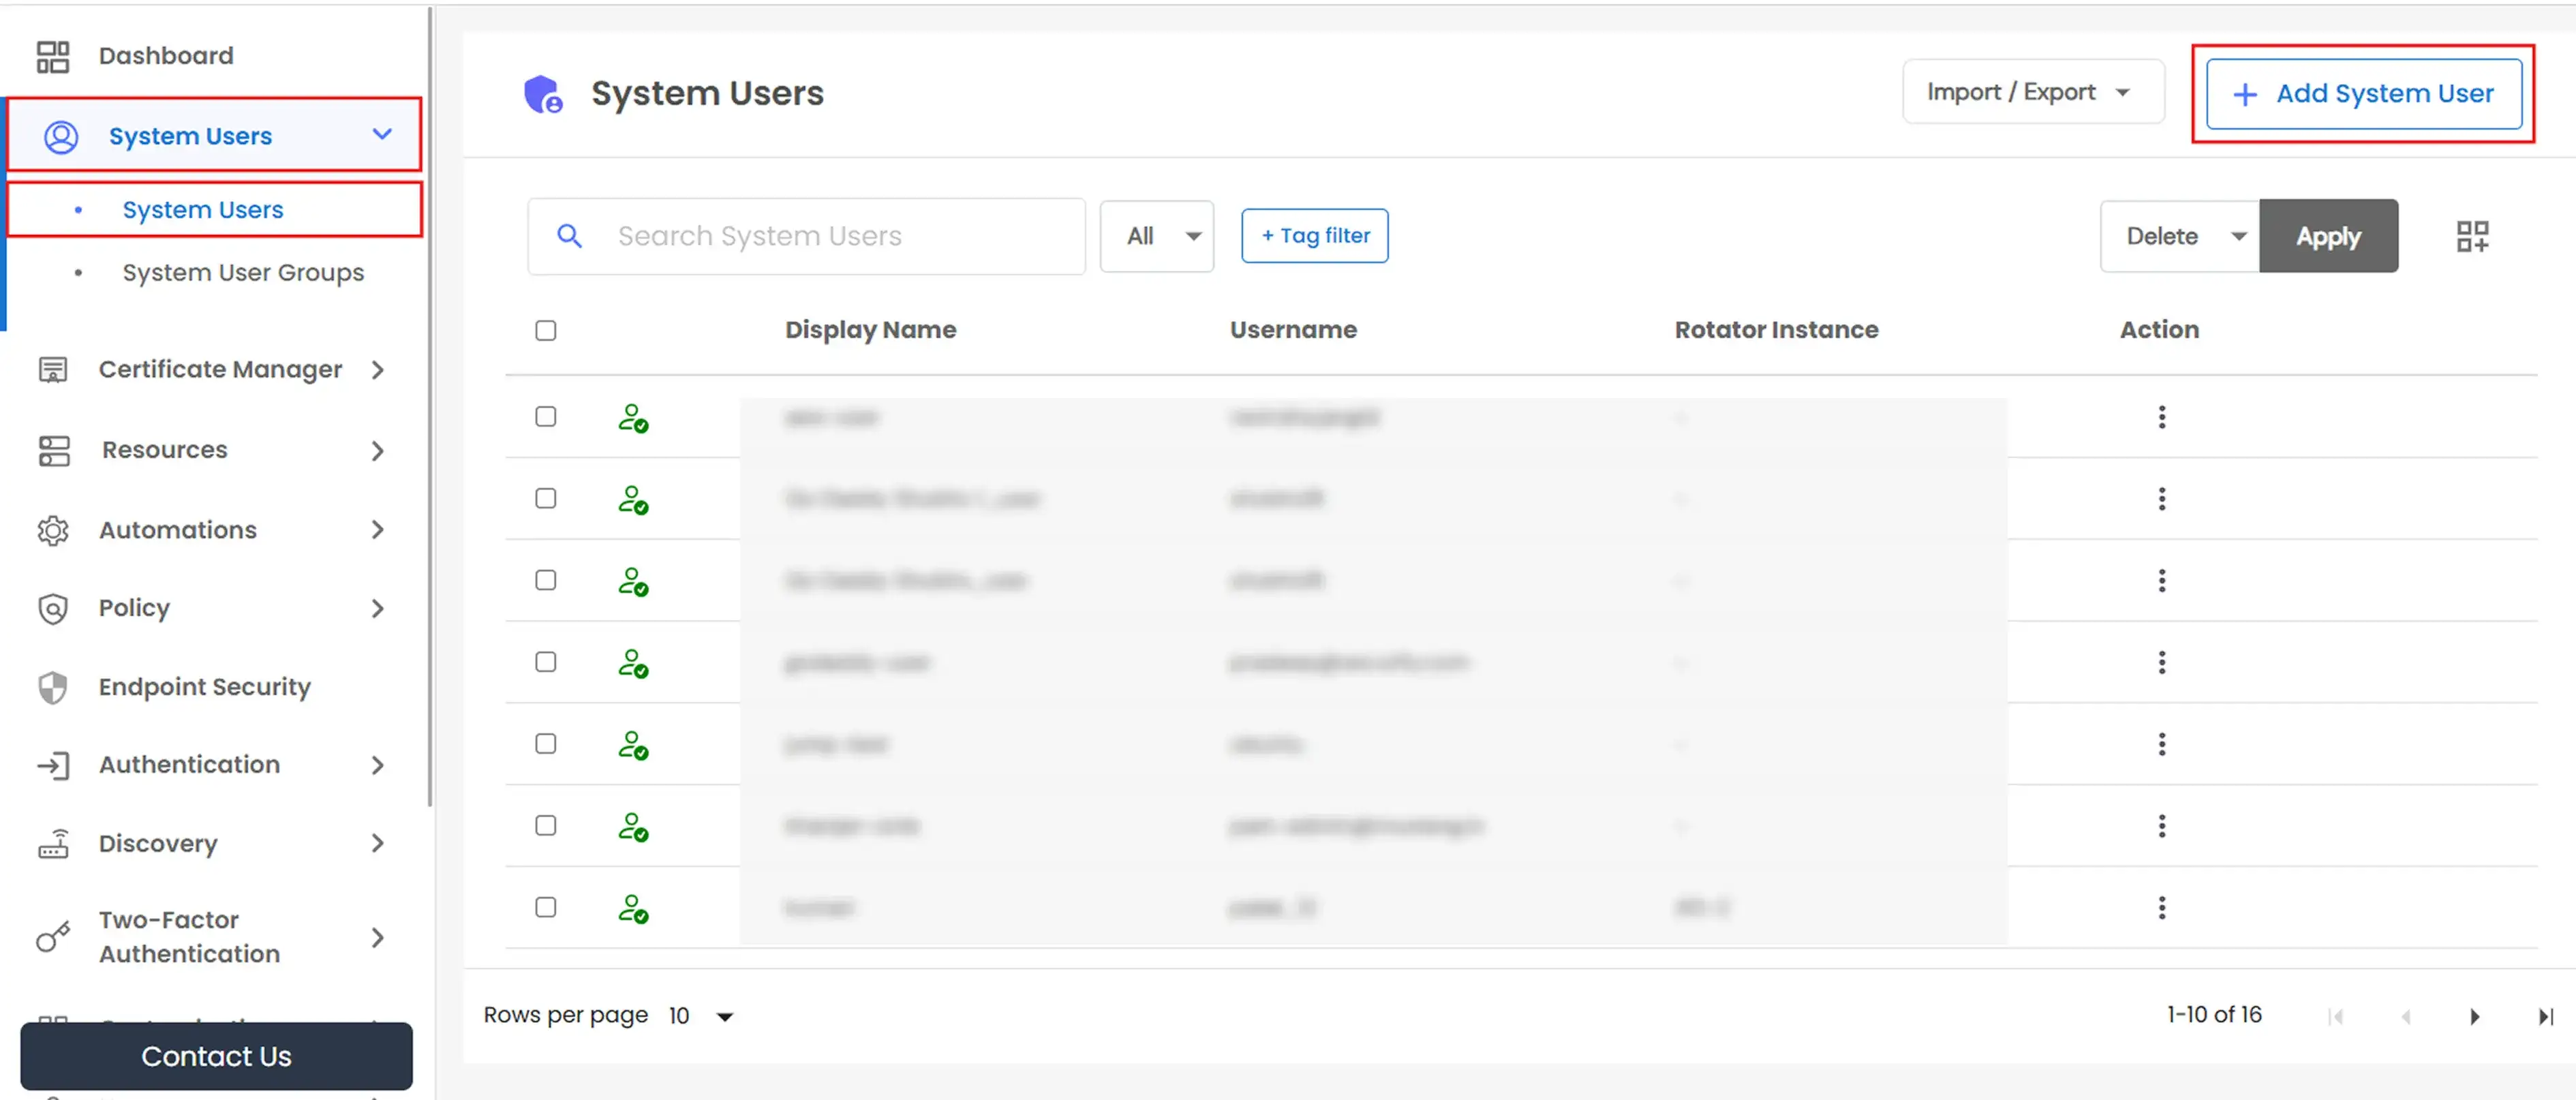
  • Go to System Users from the side menu, and click Add System User (or open an existing one to edit it).
  • Password Rotation Policy: Add System User

  • Complete Step 1: General and Step 2: Resources as usual.
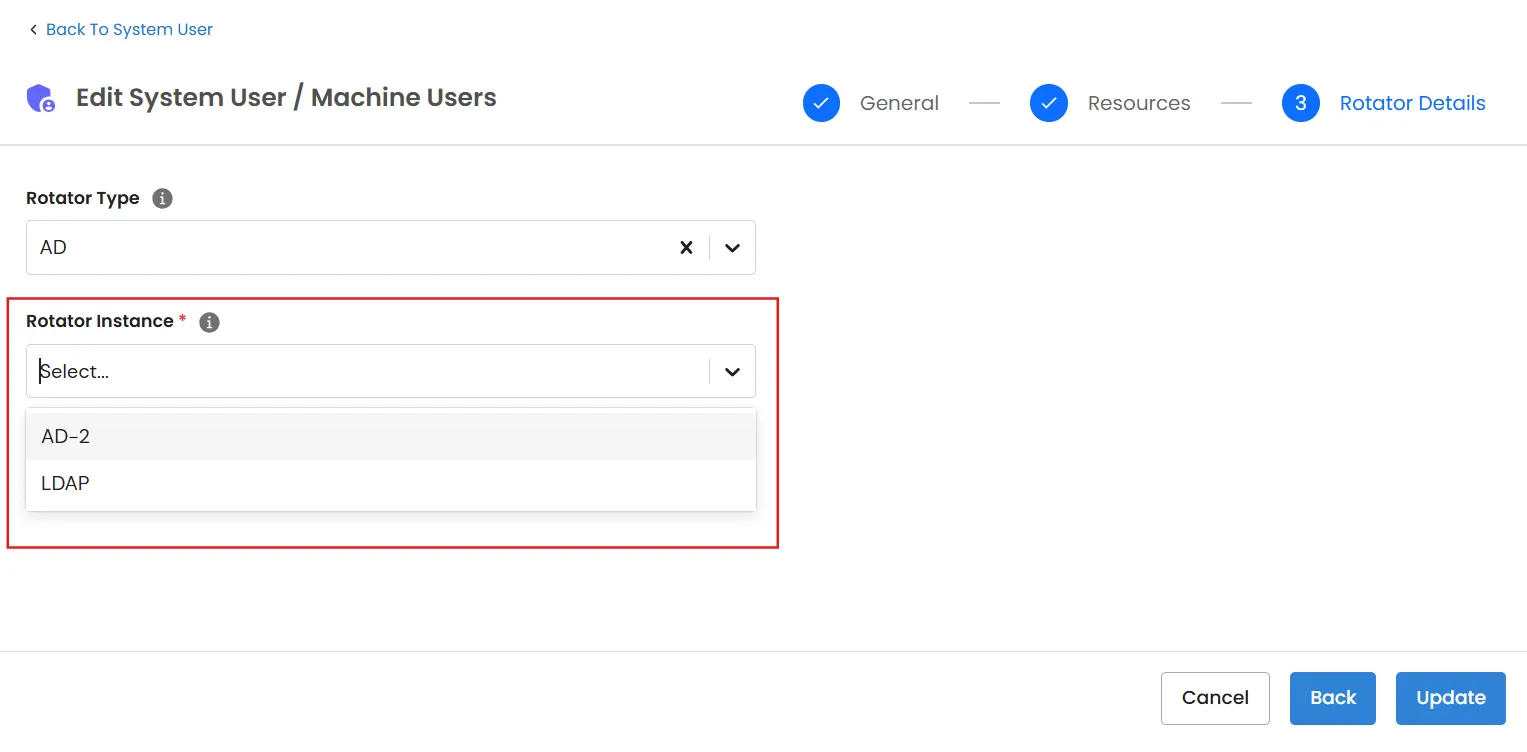
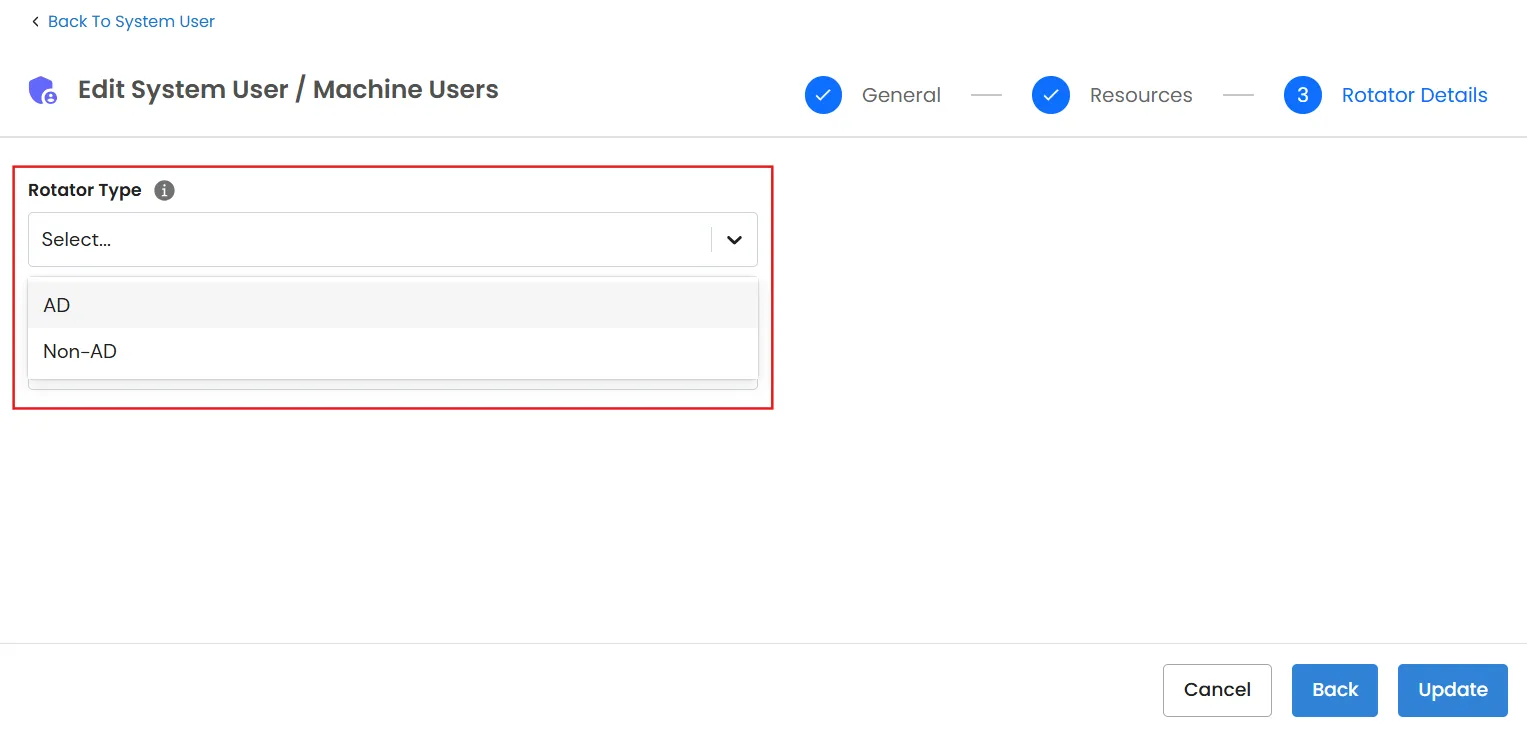
  • On Step 3: Rotator Details, set:
    • Rotator Type - AD or Non-AD.
    • Rotator Instance - For AD, pick a configured AD/LDAP config. For Non-AD, pick another System User with permission to change this account's password, or SELF if this user can rotate its own password (only offered while adding a brand-new user that already has a password set).
    Password Rotation Policy: Rotator Details

    Password Rotation Policy: Rotate Password

  • Complete the setup and save the System User.

Note: Server Local User and mTLS-type System Users don't have a Rotator Details step - their setup includes only General + Resources. Their rotation-related options (creating/deleting the account on the target, saving to the vault) are available directly on the General step instead.
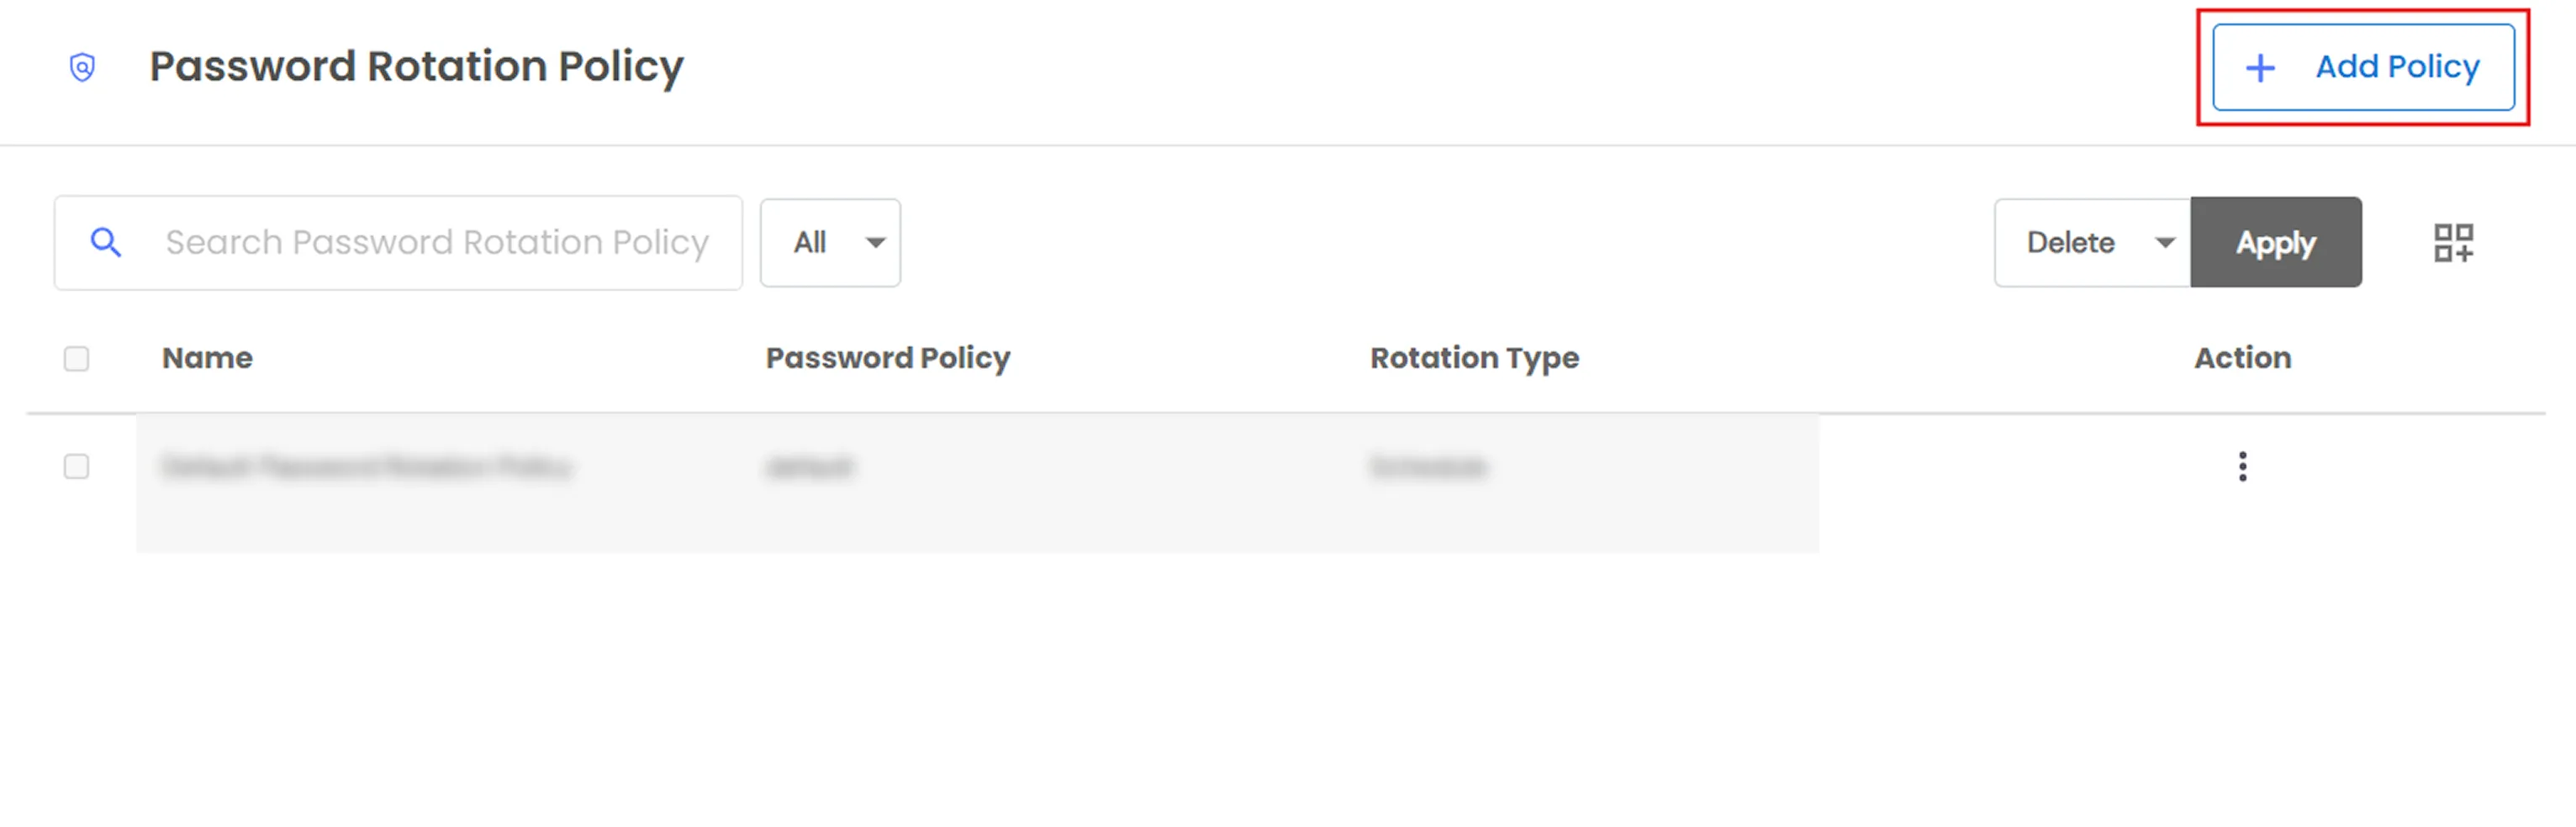
Step 2: Create a Password Rotation Policy

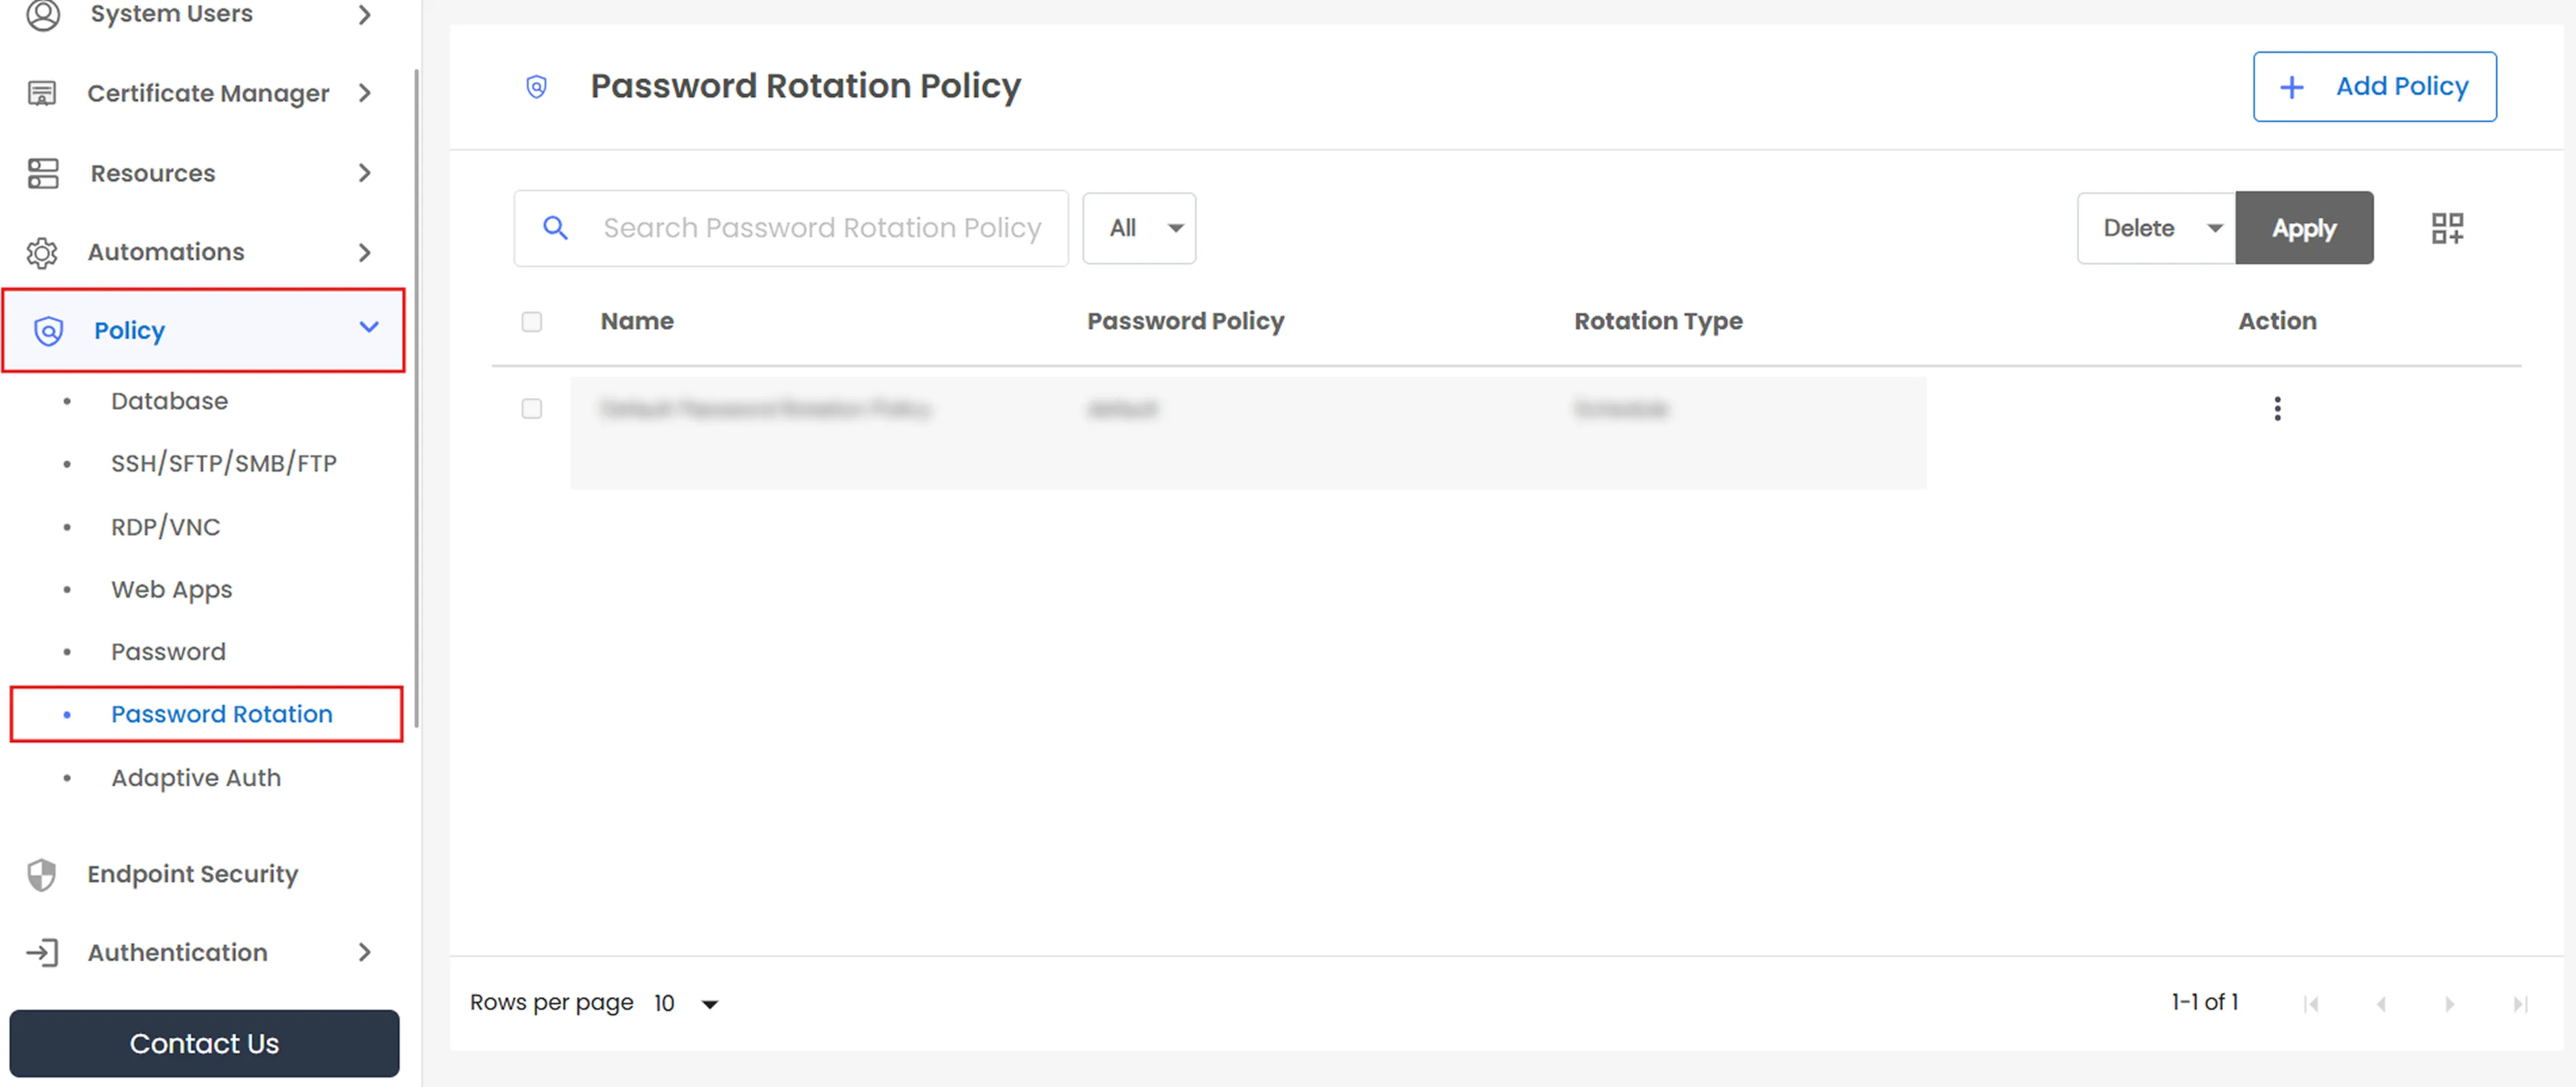
  • Go to Policy >> Password Rotation from the side menu.
  • Password Rotation Policy

  • Click Add Policy.
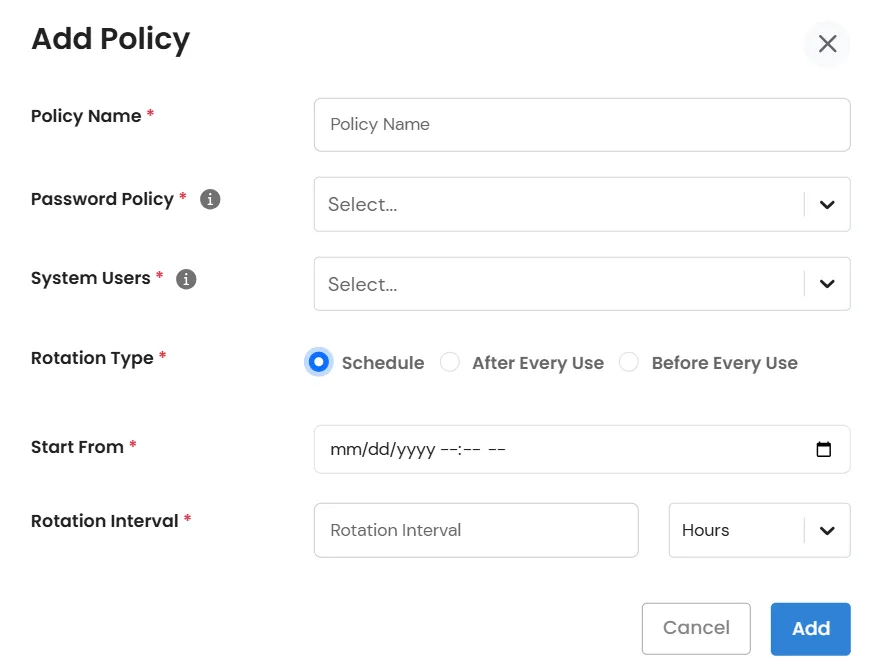
  • Password Rotation Policy: Add Policy

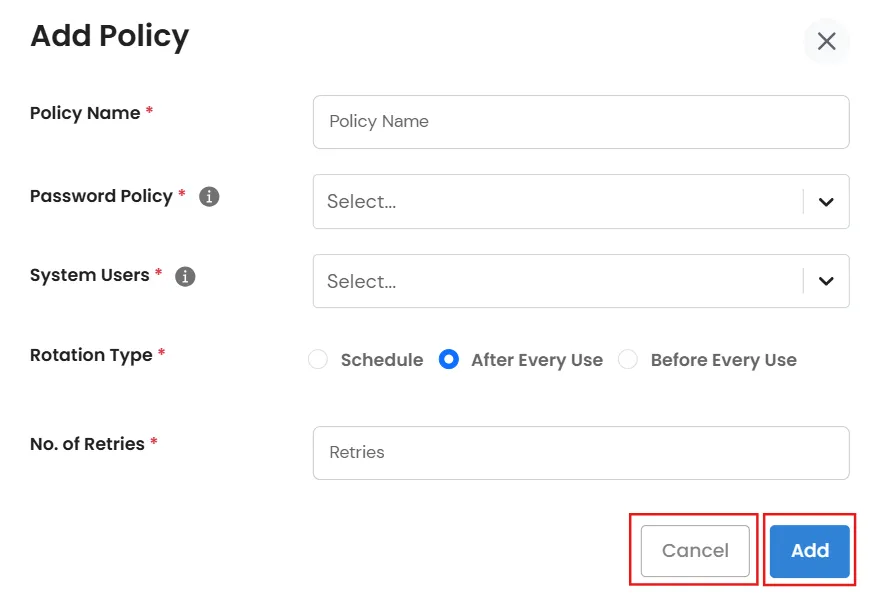
  • Fill in the form, from top to bottom:
    • Policy Name - required.
    • Password Policy - required. A separate policy (Policy >> Password, type "System User") that sets the complexity rules for the generated password. Tooltip on this field: "This policy only enforces password rules from the Password Policy".
    • System Users - required, multi-select. Tooltip: "Only system users having rotator details will be shown here". In practice, this list only offers System Users that have a rotator configured and aren't already assigned to another rotation policy.
    • Rotation Type - required, one of three radio options: Schedule, After Every Use, or Before Every Use. Choosing one reveals extra fields below. See the next section for what each option requires and how it works.
  • Click Add to save the policy, or Cancel to discard it.
  • Password Rotation Policy: Click Add or Cancel

  • Good to know: The Add Policy button only appears if the admin's role has both "Add Password Rotation policy" and "Add Database policy" permissions. This is a permission-check behavior in the current build, not something you configure intentionally. If a role has rotation permissions but the button isn't showing, also grant Database policy add access.
  • Rotation Type: Schedule

    Password Rotation Policy: Schedule

  • Rotates on a recurring interval, regardless of whether the credential was used. This is best for a standard shared service or admin account that you want rotated on a regular schedule - daily, weekly, monthly, and so on - independent of activity.
  • Two extra fields appear:
    • Start From - a date/time picker (can't be set in the past).
    • Rotation Interval - a number, next to a unit dropdown: Hours, Days, or Months.
    • Note: There's no cron-expression option and no timezone selector - the interval is a simple number + unit, and Start From uses your browser's local time.
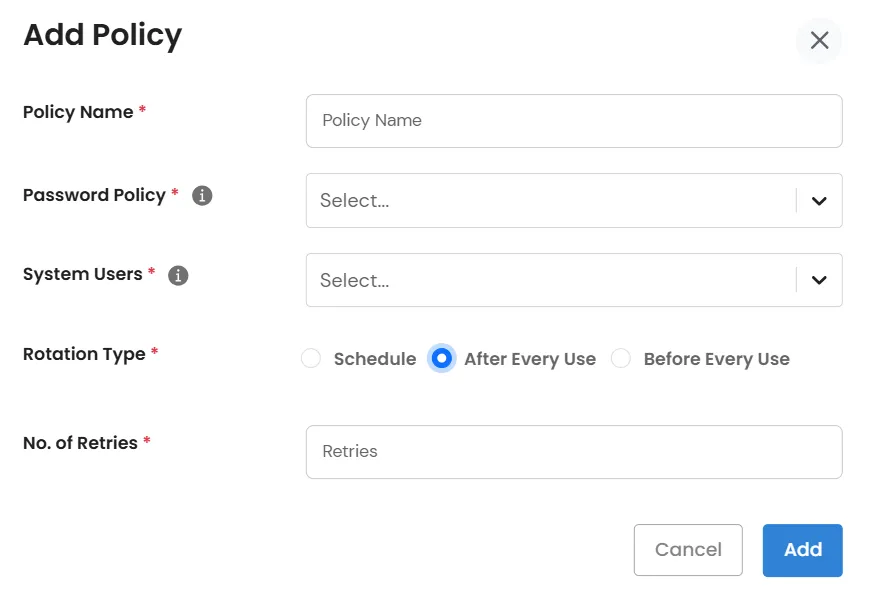
    Rotation Type: After Every Use

    Password Rotation Policy: After Every Use

  • Rotates the password once a session using that credential ends (that is, after check-in). This is useful for a shared privileged or break-glass account, so nobody's next checkout ever reuses a password from someone else's finished session.
  • One extra field appears: No. of Retries - specifies how many times PAM will retry the rotation if it fails before giving up.
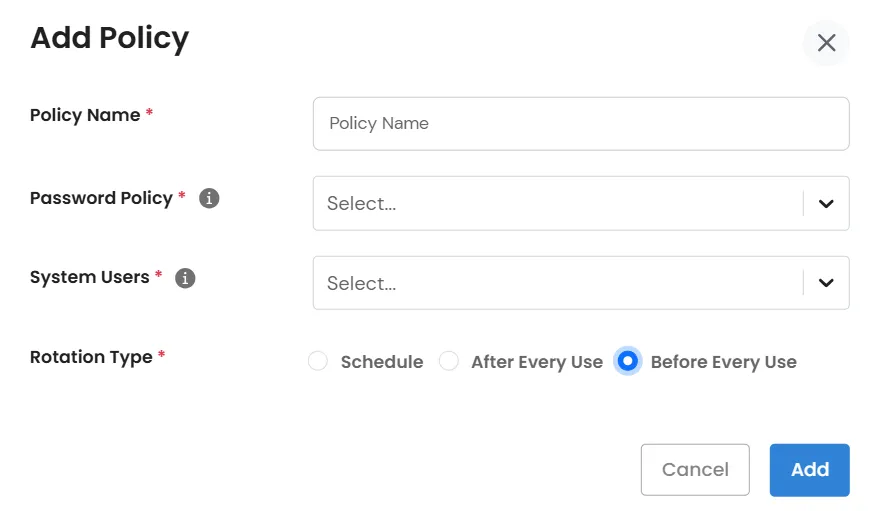
  • Rotation Type: Before Every Use

    Password Rotation Policy: Before Every Use

  • Rotates the password immediately before the resource is accessed, so every access starts with a freshly rotated password.
  • No extra fields appear for this type.

Editing or Deleting a Policy

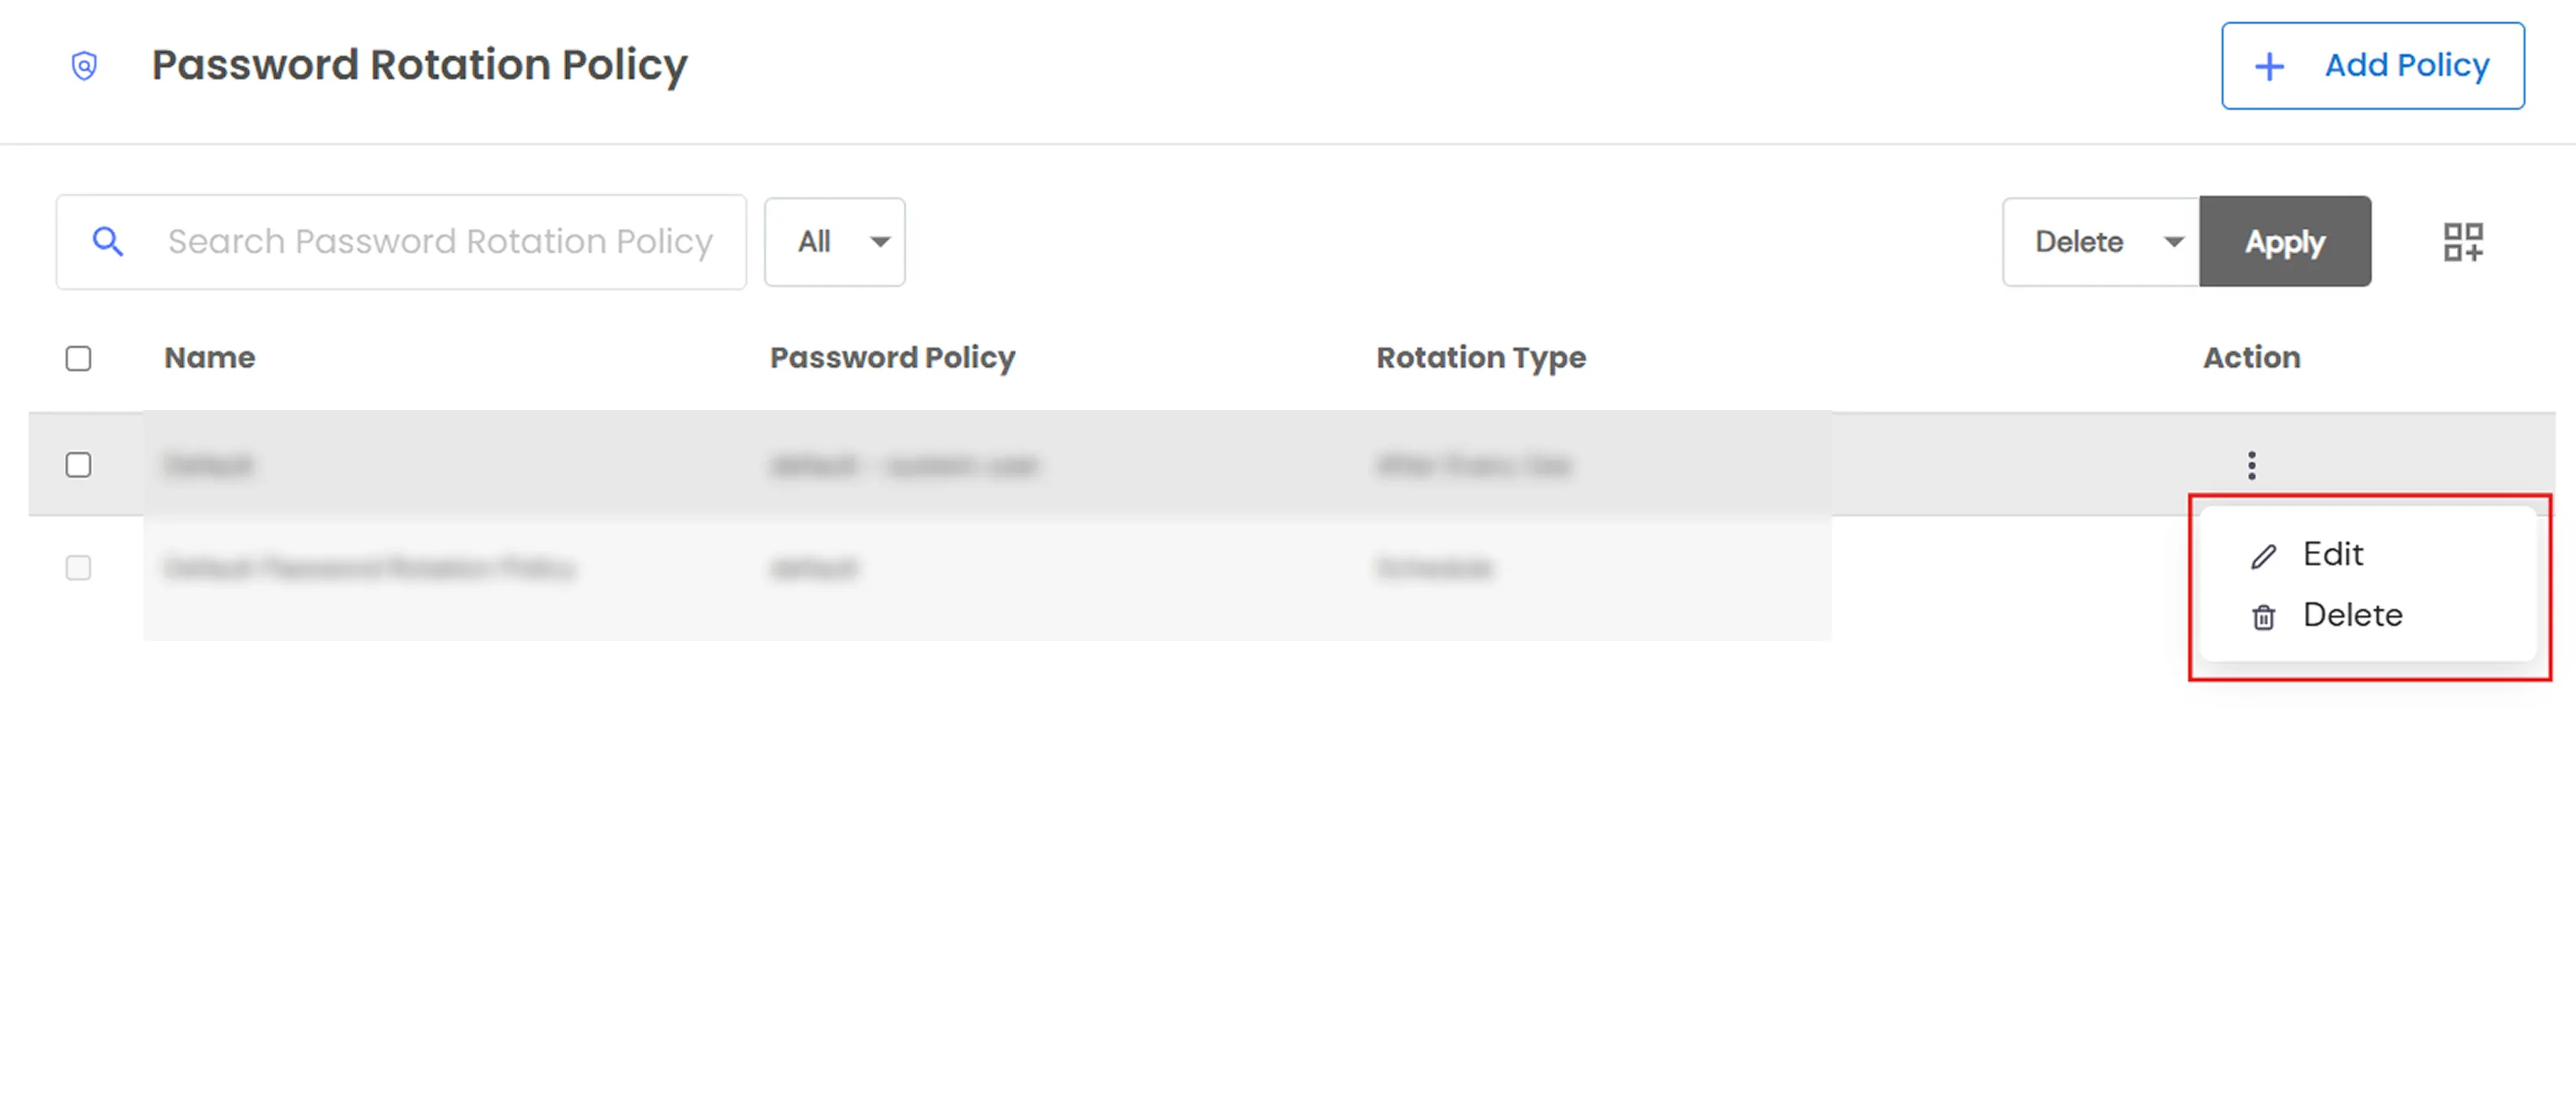
  • On the Password Rotation list, open a row's action menu (three dots) and choose Edit or Delete.
  • Password Rotation Policy: Choose Edit & Delete

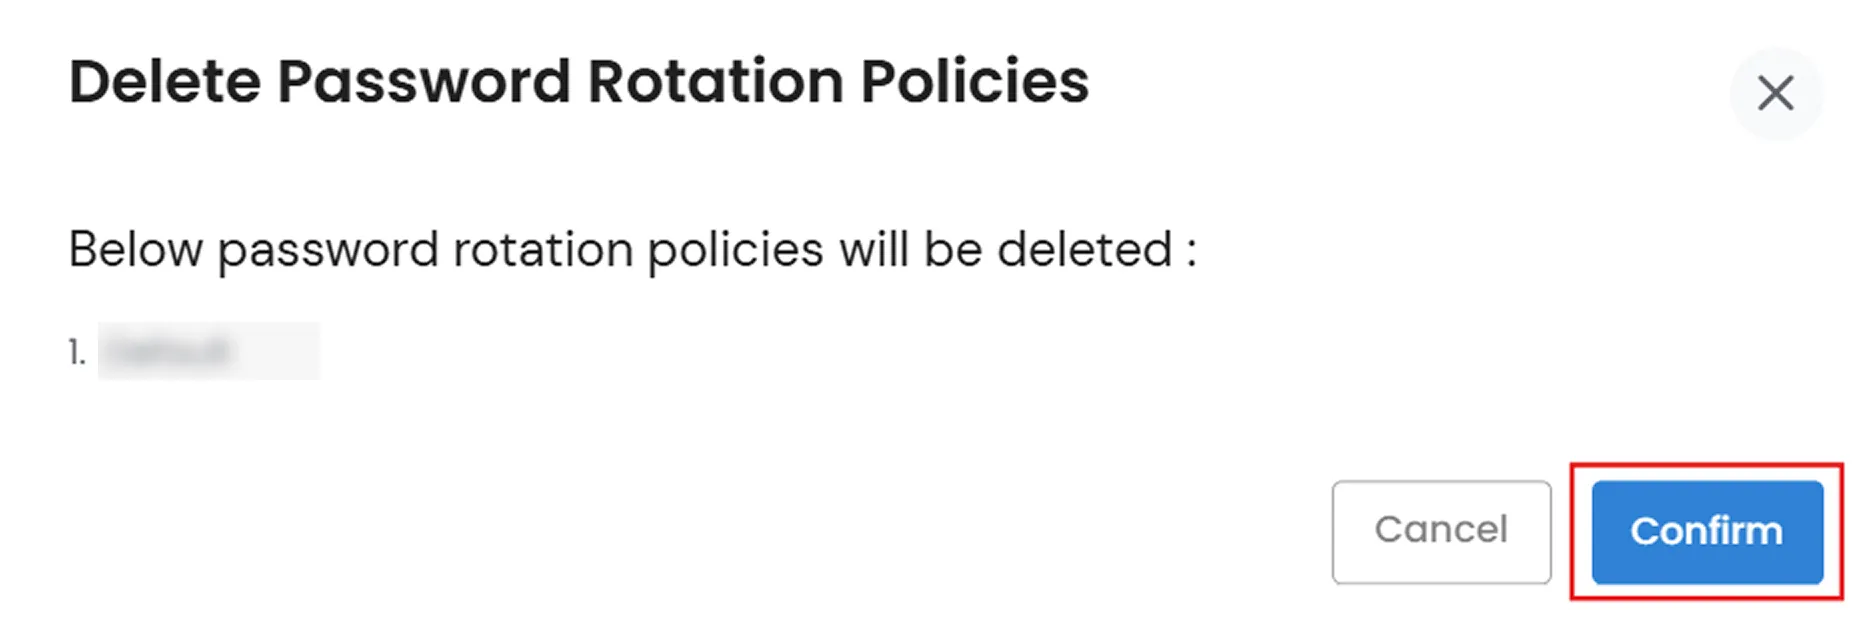
    Password Rotation Policy: Click Confirm

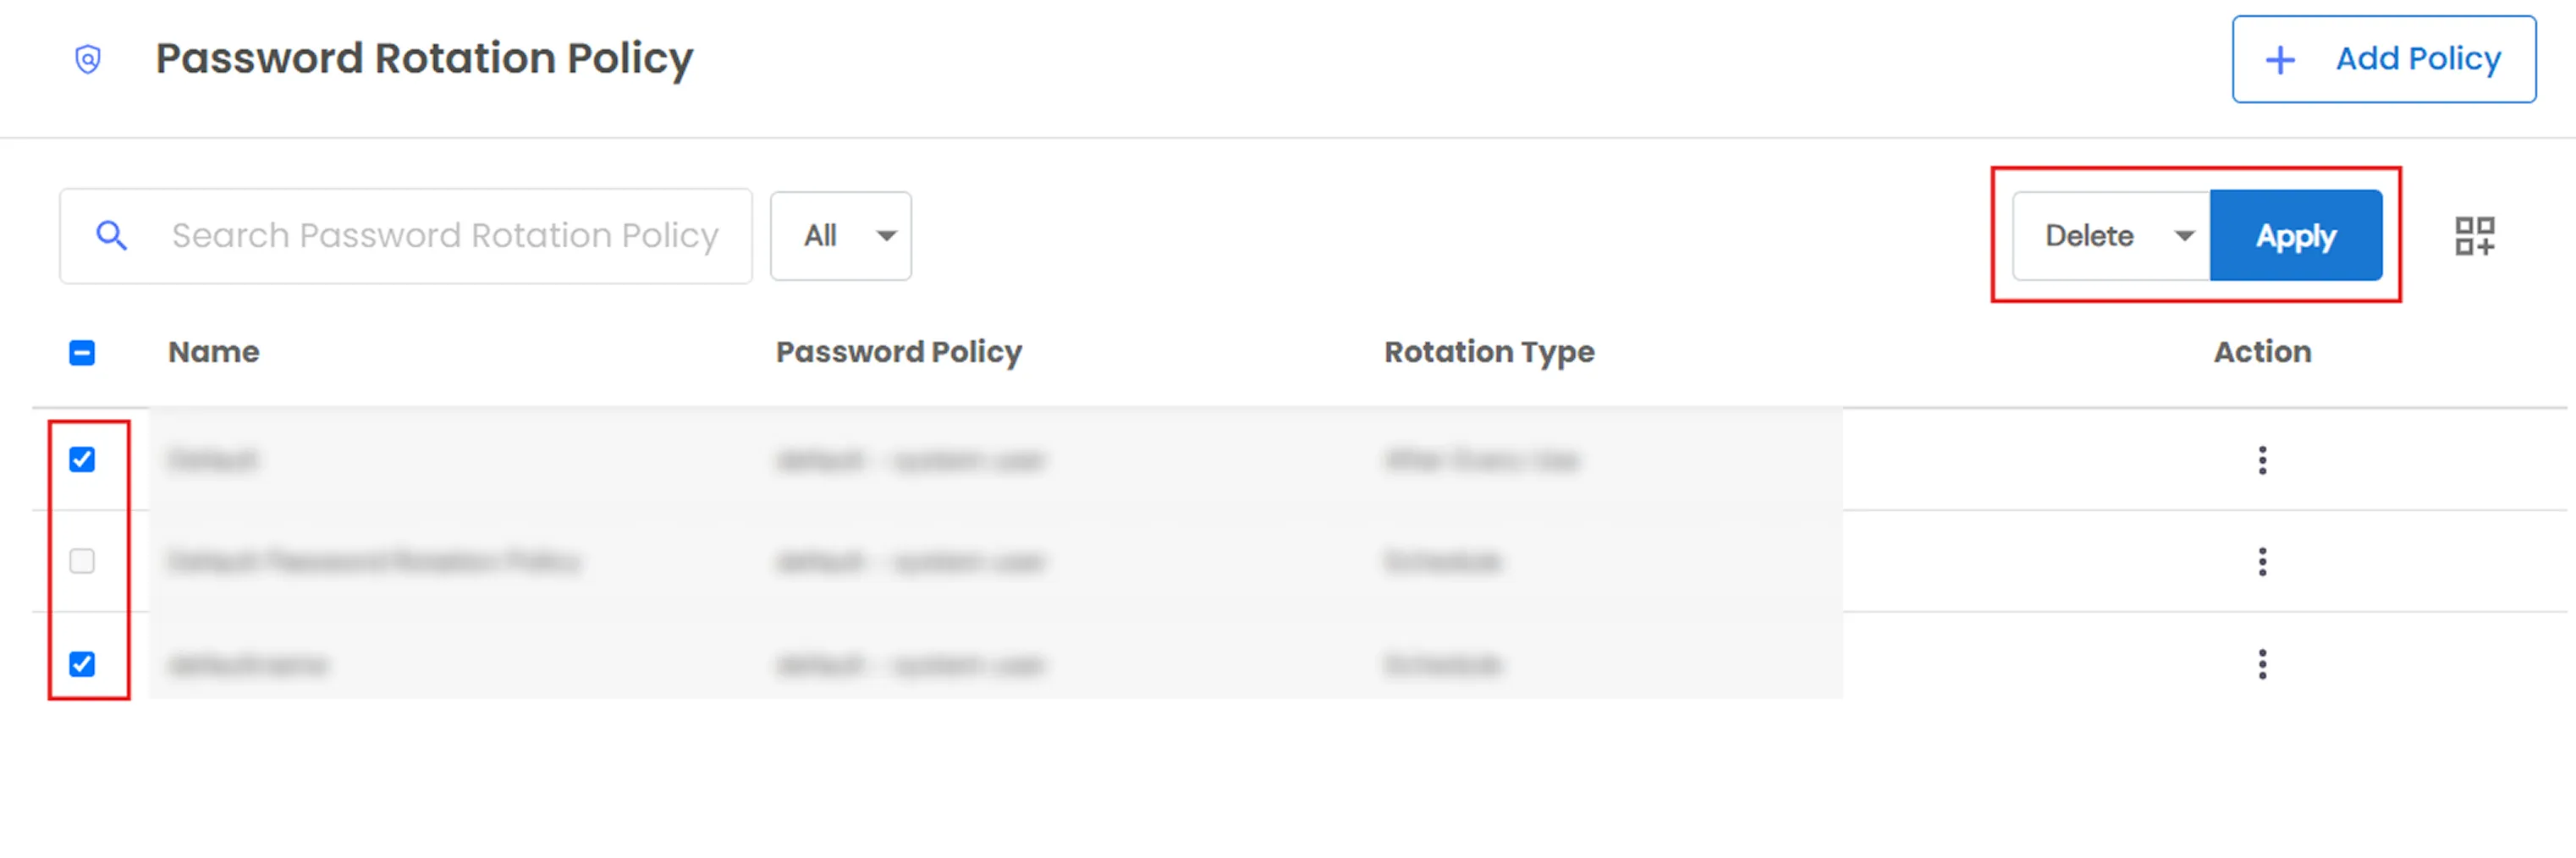
  • To delete several at once, select their checkboxes and use the list's Action dropdown >> Delete, then confirm in the Delete Password Rotation Policies dialog.
  • Password Rotation Policy: Delete

    Note: The built-in Default Password Rotation Policy can be edited like any other policy, but it can't be deleted - individually or in bulk. Its row checkbox is disabled, so it can't be selected for a bulk action either.

Manually Rotating a Password

You don't have to wait for a schedule - an admin can rotate a System User's password on demand.
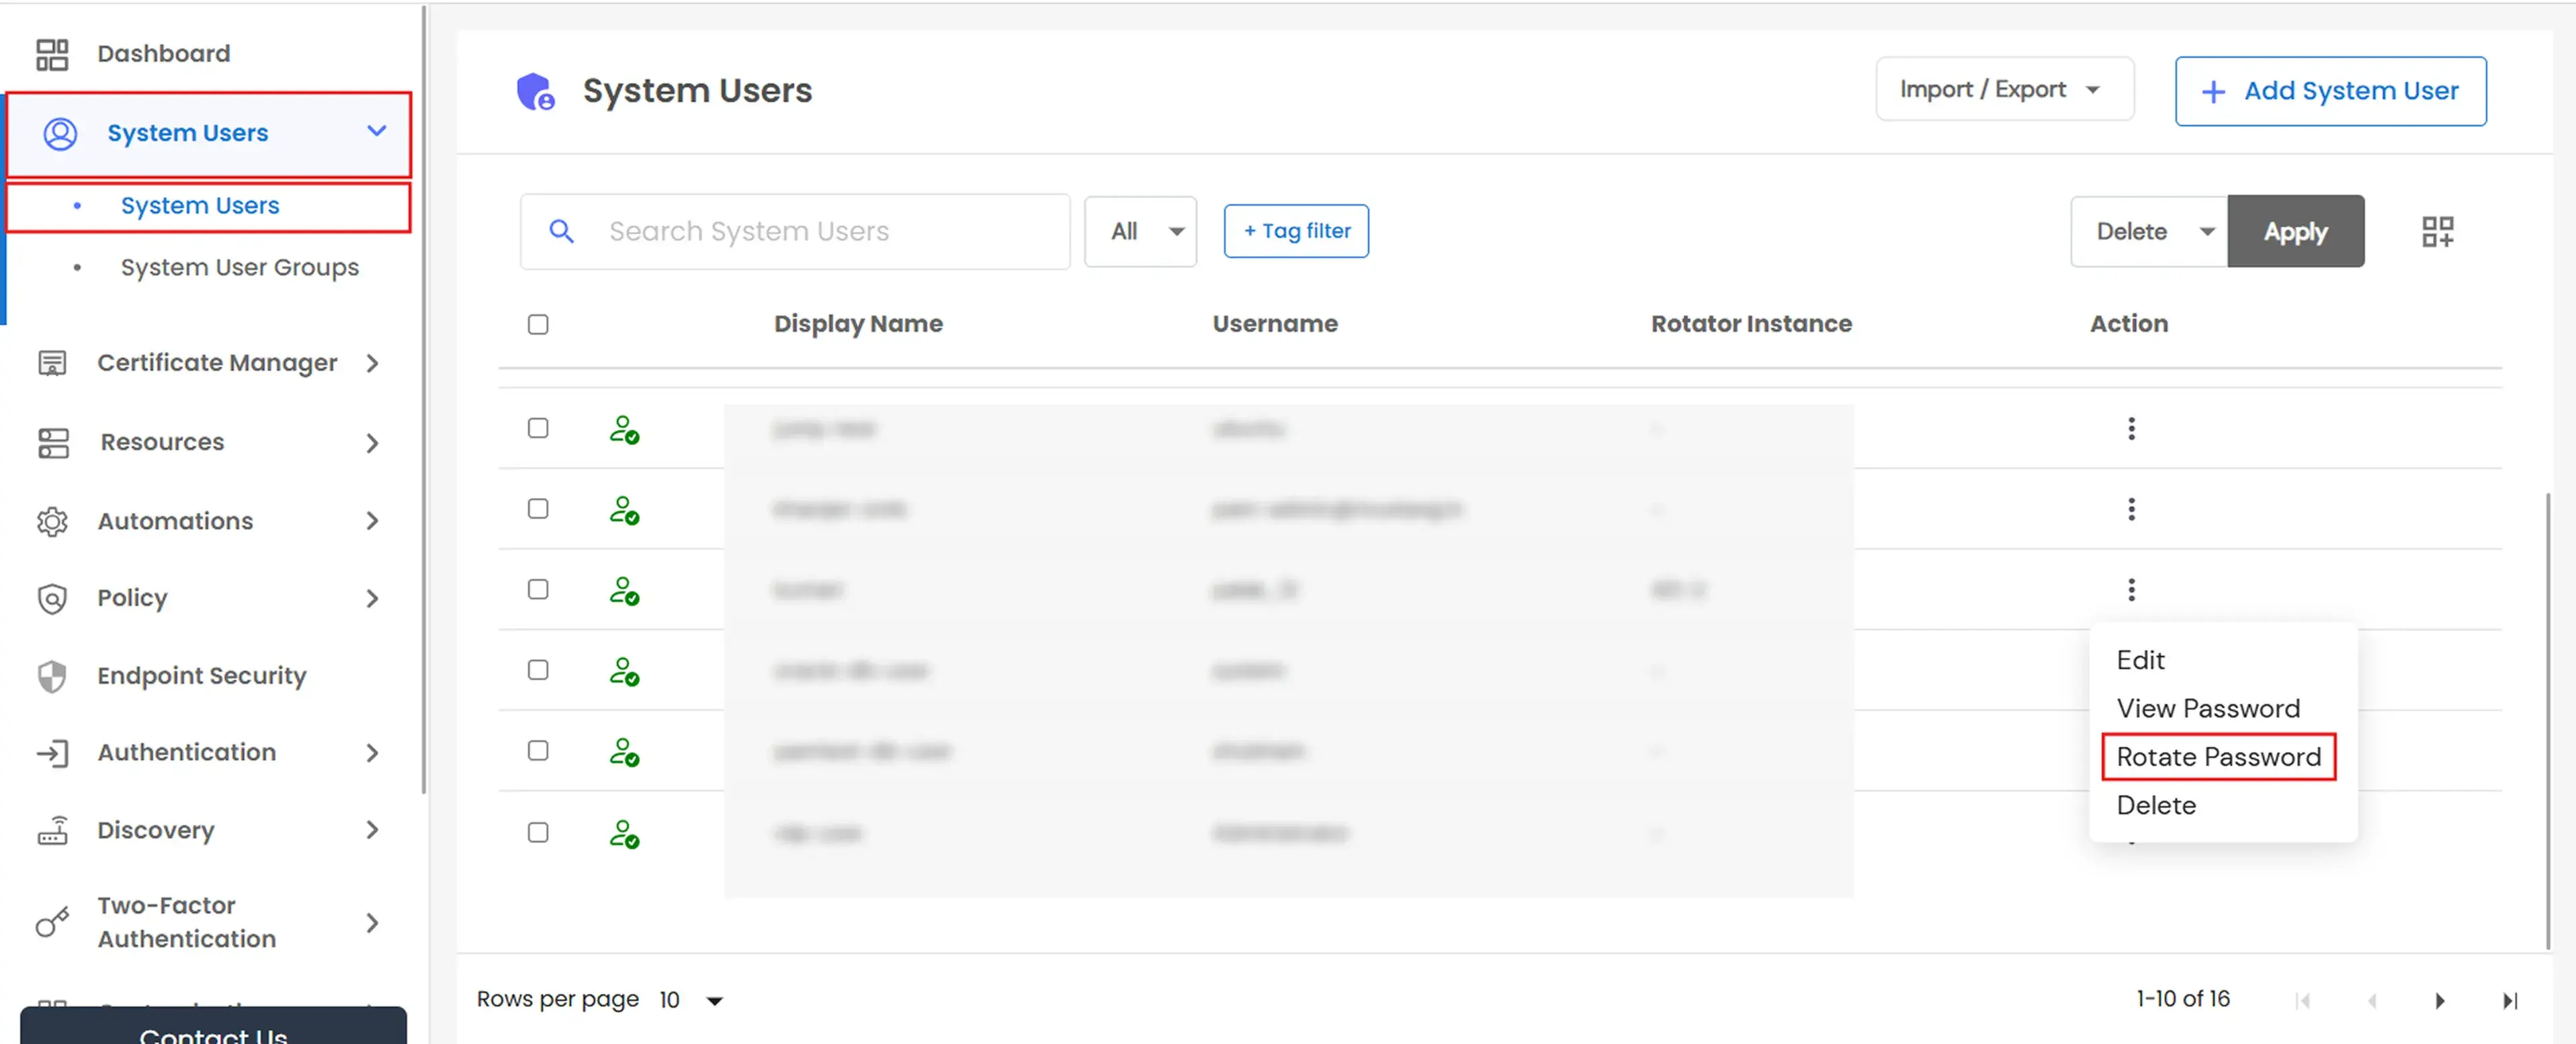
  • Go to System Users from the side menu.
  • Either open one row's action menu and click Rotate Password, or select multiple rows' checkboxes and choose Rotate Password from the list's Action dropdown.
  • Password Rotation Policy: Rotate Password

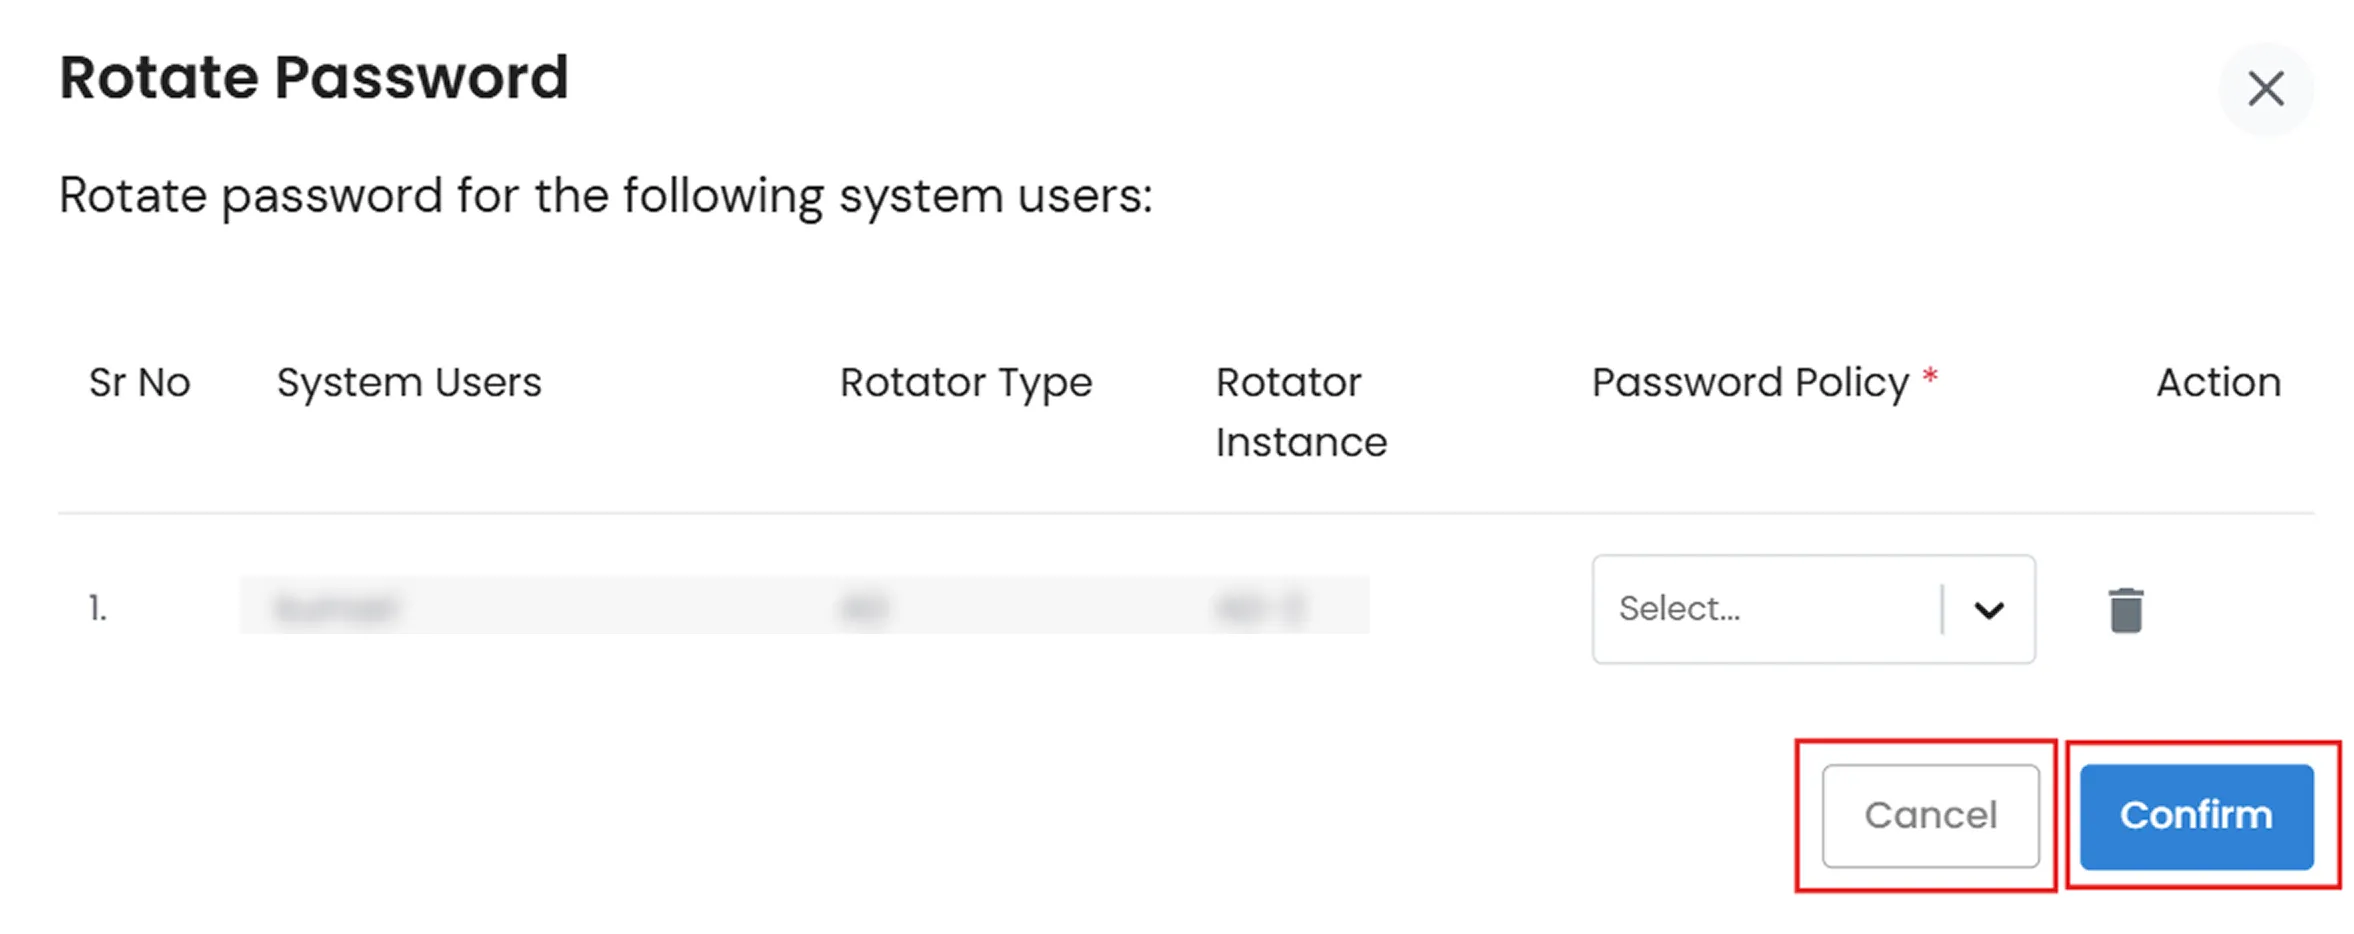
  • The Rotate Password dialog lists every selected user in a table - Sr No, System User, Rotator Type, Rotator Instance, and a required Password Policy picker for each row.
  • Rows that can't be rotated show an inline error and are skipped automatically. You can also remove a row yourself using its delete icon.
  • Pick a Password Policy for each remaining row.
  • Click Confirm (or Cancel to back out).
  • Password Rotation Policy: Password Confirm

    Note: Rotate Password is unavailable for a user with no rotator configured, no rotatable resource attached, or one used as an AD/LDAP bind credential. A bind credential is shown as disabled with the message: "This system user is used as bind credential and cannot be rotated".

What Happens If a Rotation Fails?

  • Rollback: If PAM changes the password on the target but a later step fails, it attempts to revert the target account to its previous password automatically.
  • Retries: Only After Every Use rotations retry automatically, using the No. of Retries you configured. Schedule and Before Every Use rotations don't retry - a failure waits for the next trigger.
  • No manual "retry now" button: There is no button in the UI to manually retry a failed rotation.
  • Audit and notifications: Every attempt - success or failure - is recorded for audit and triggers notifications. See Notifications and Emails below.

Notifications and Emails

Rotation notifications and emails are configured under Custom Templates, not on the policy itself:

  • Email - Custom Templates >> Email >> Password Rotation. Sends a report email with merge tags {{status}}, {{rotation_time}}, {{rotation_type}}, and {{rotated_by}}.
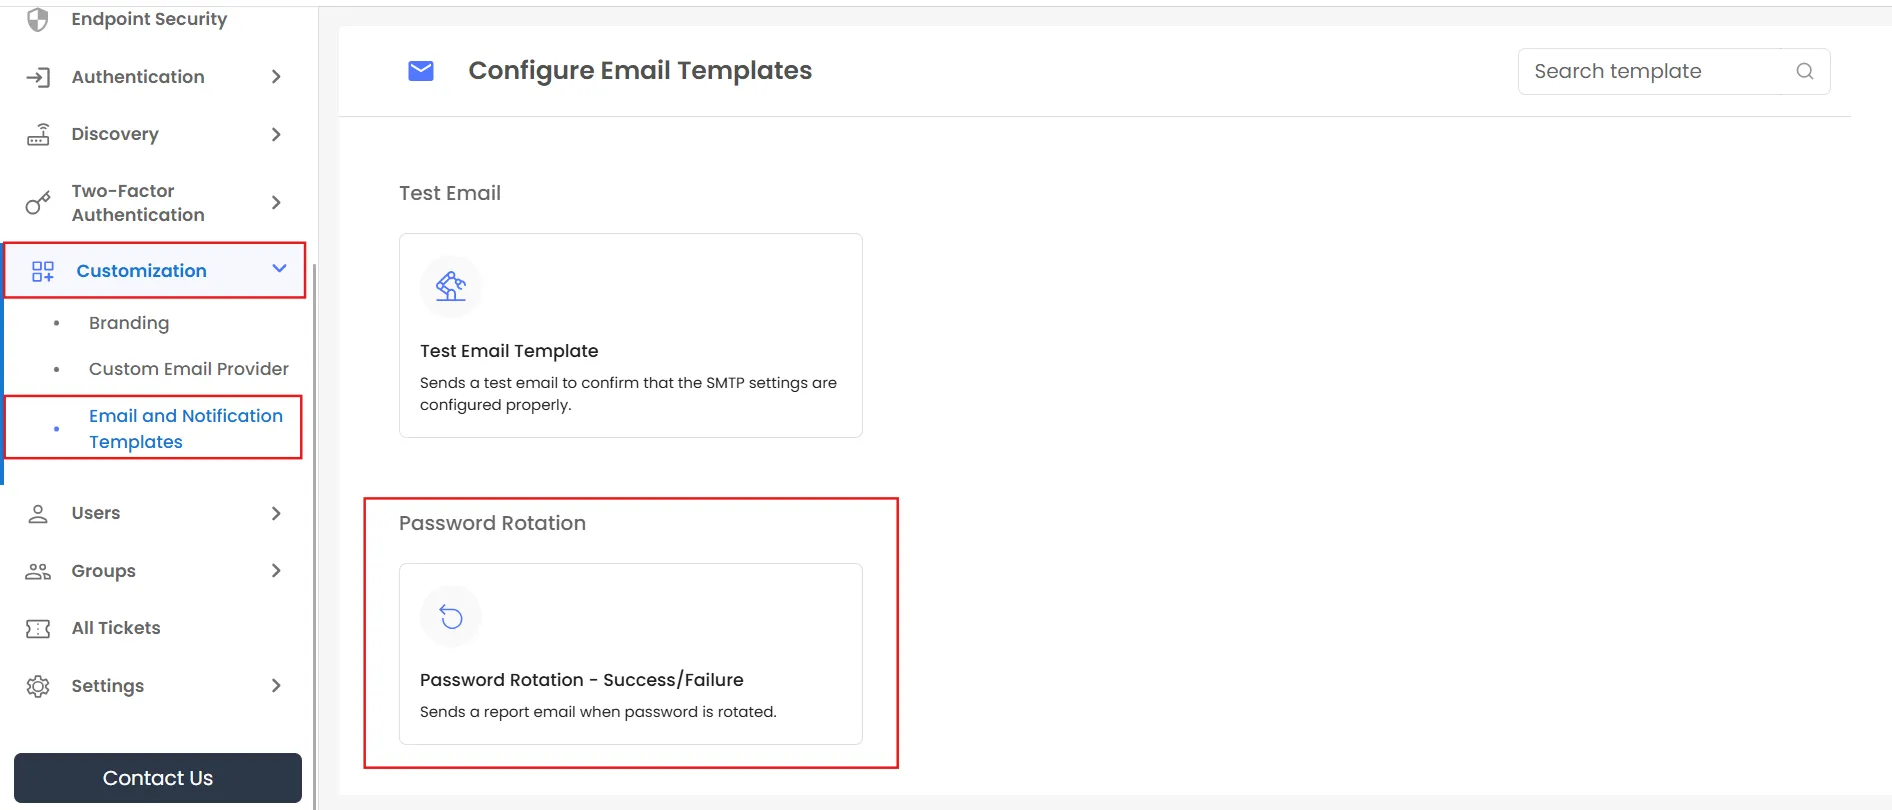
  • Password Rotation Policy: Email Password Rotation

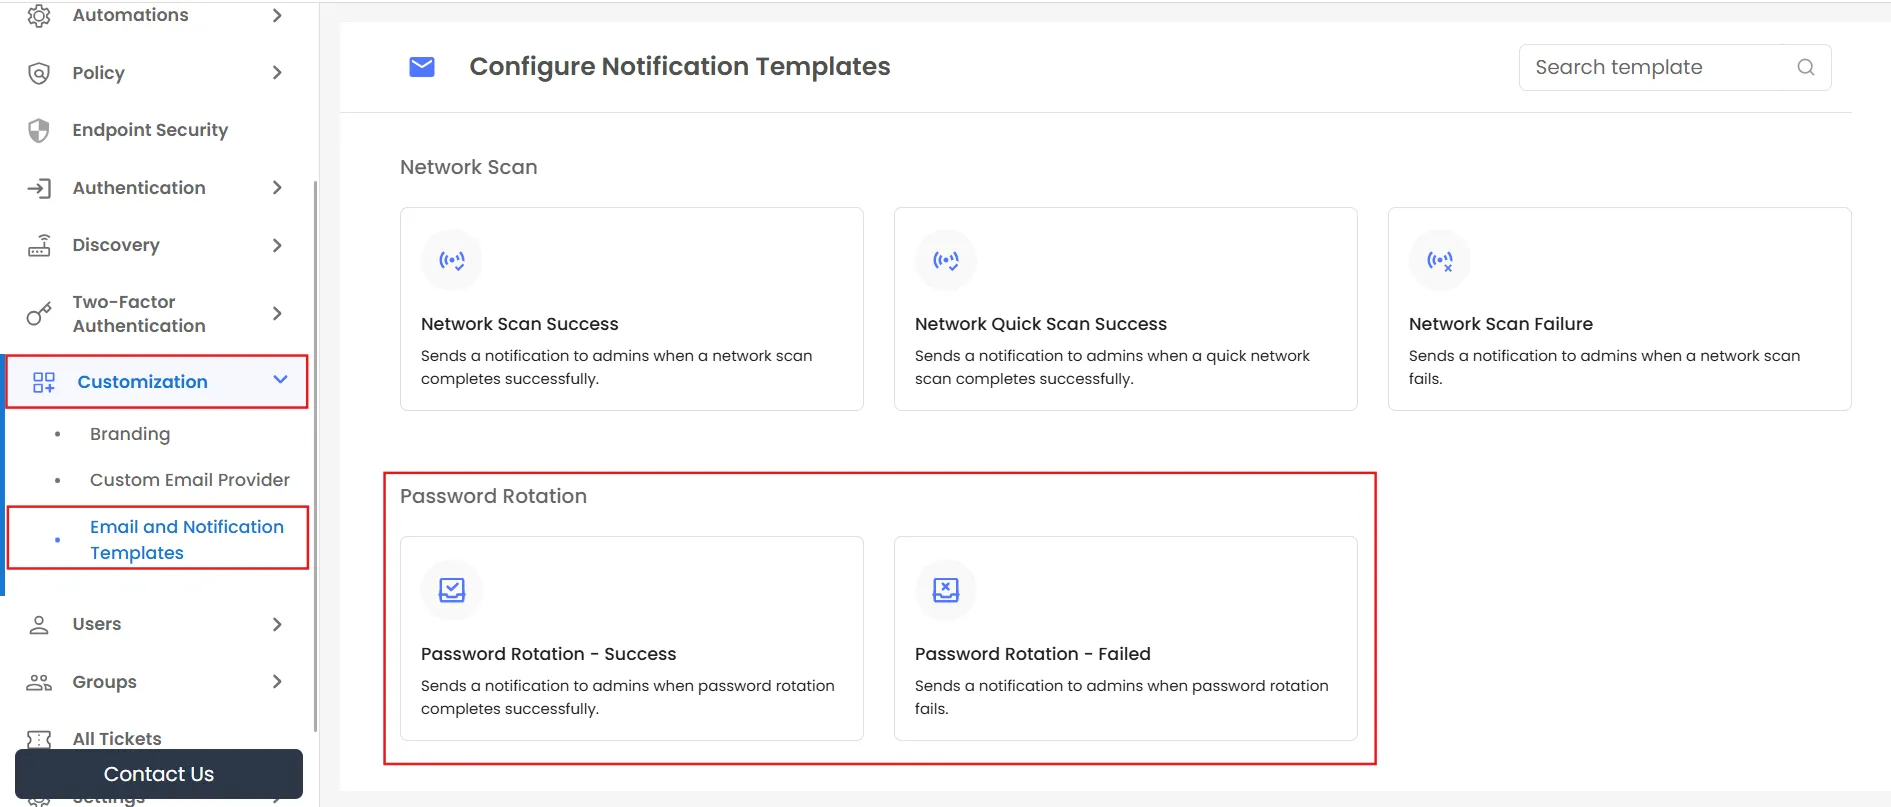
  • In-app notifications - Custom Templates >> Notification >> Password Rotation >> Success and Password Rotation >> Failed, sent to admins after each attempt.
  • Password Rotation Policy: Notification Password Rotation

    Note: These are after-the-fact notices only - there's no "upcoming rotation" advance warning.
Viewing Rotation History

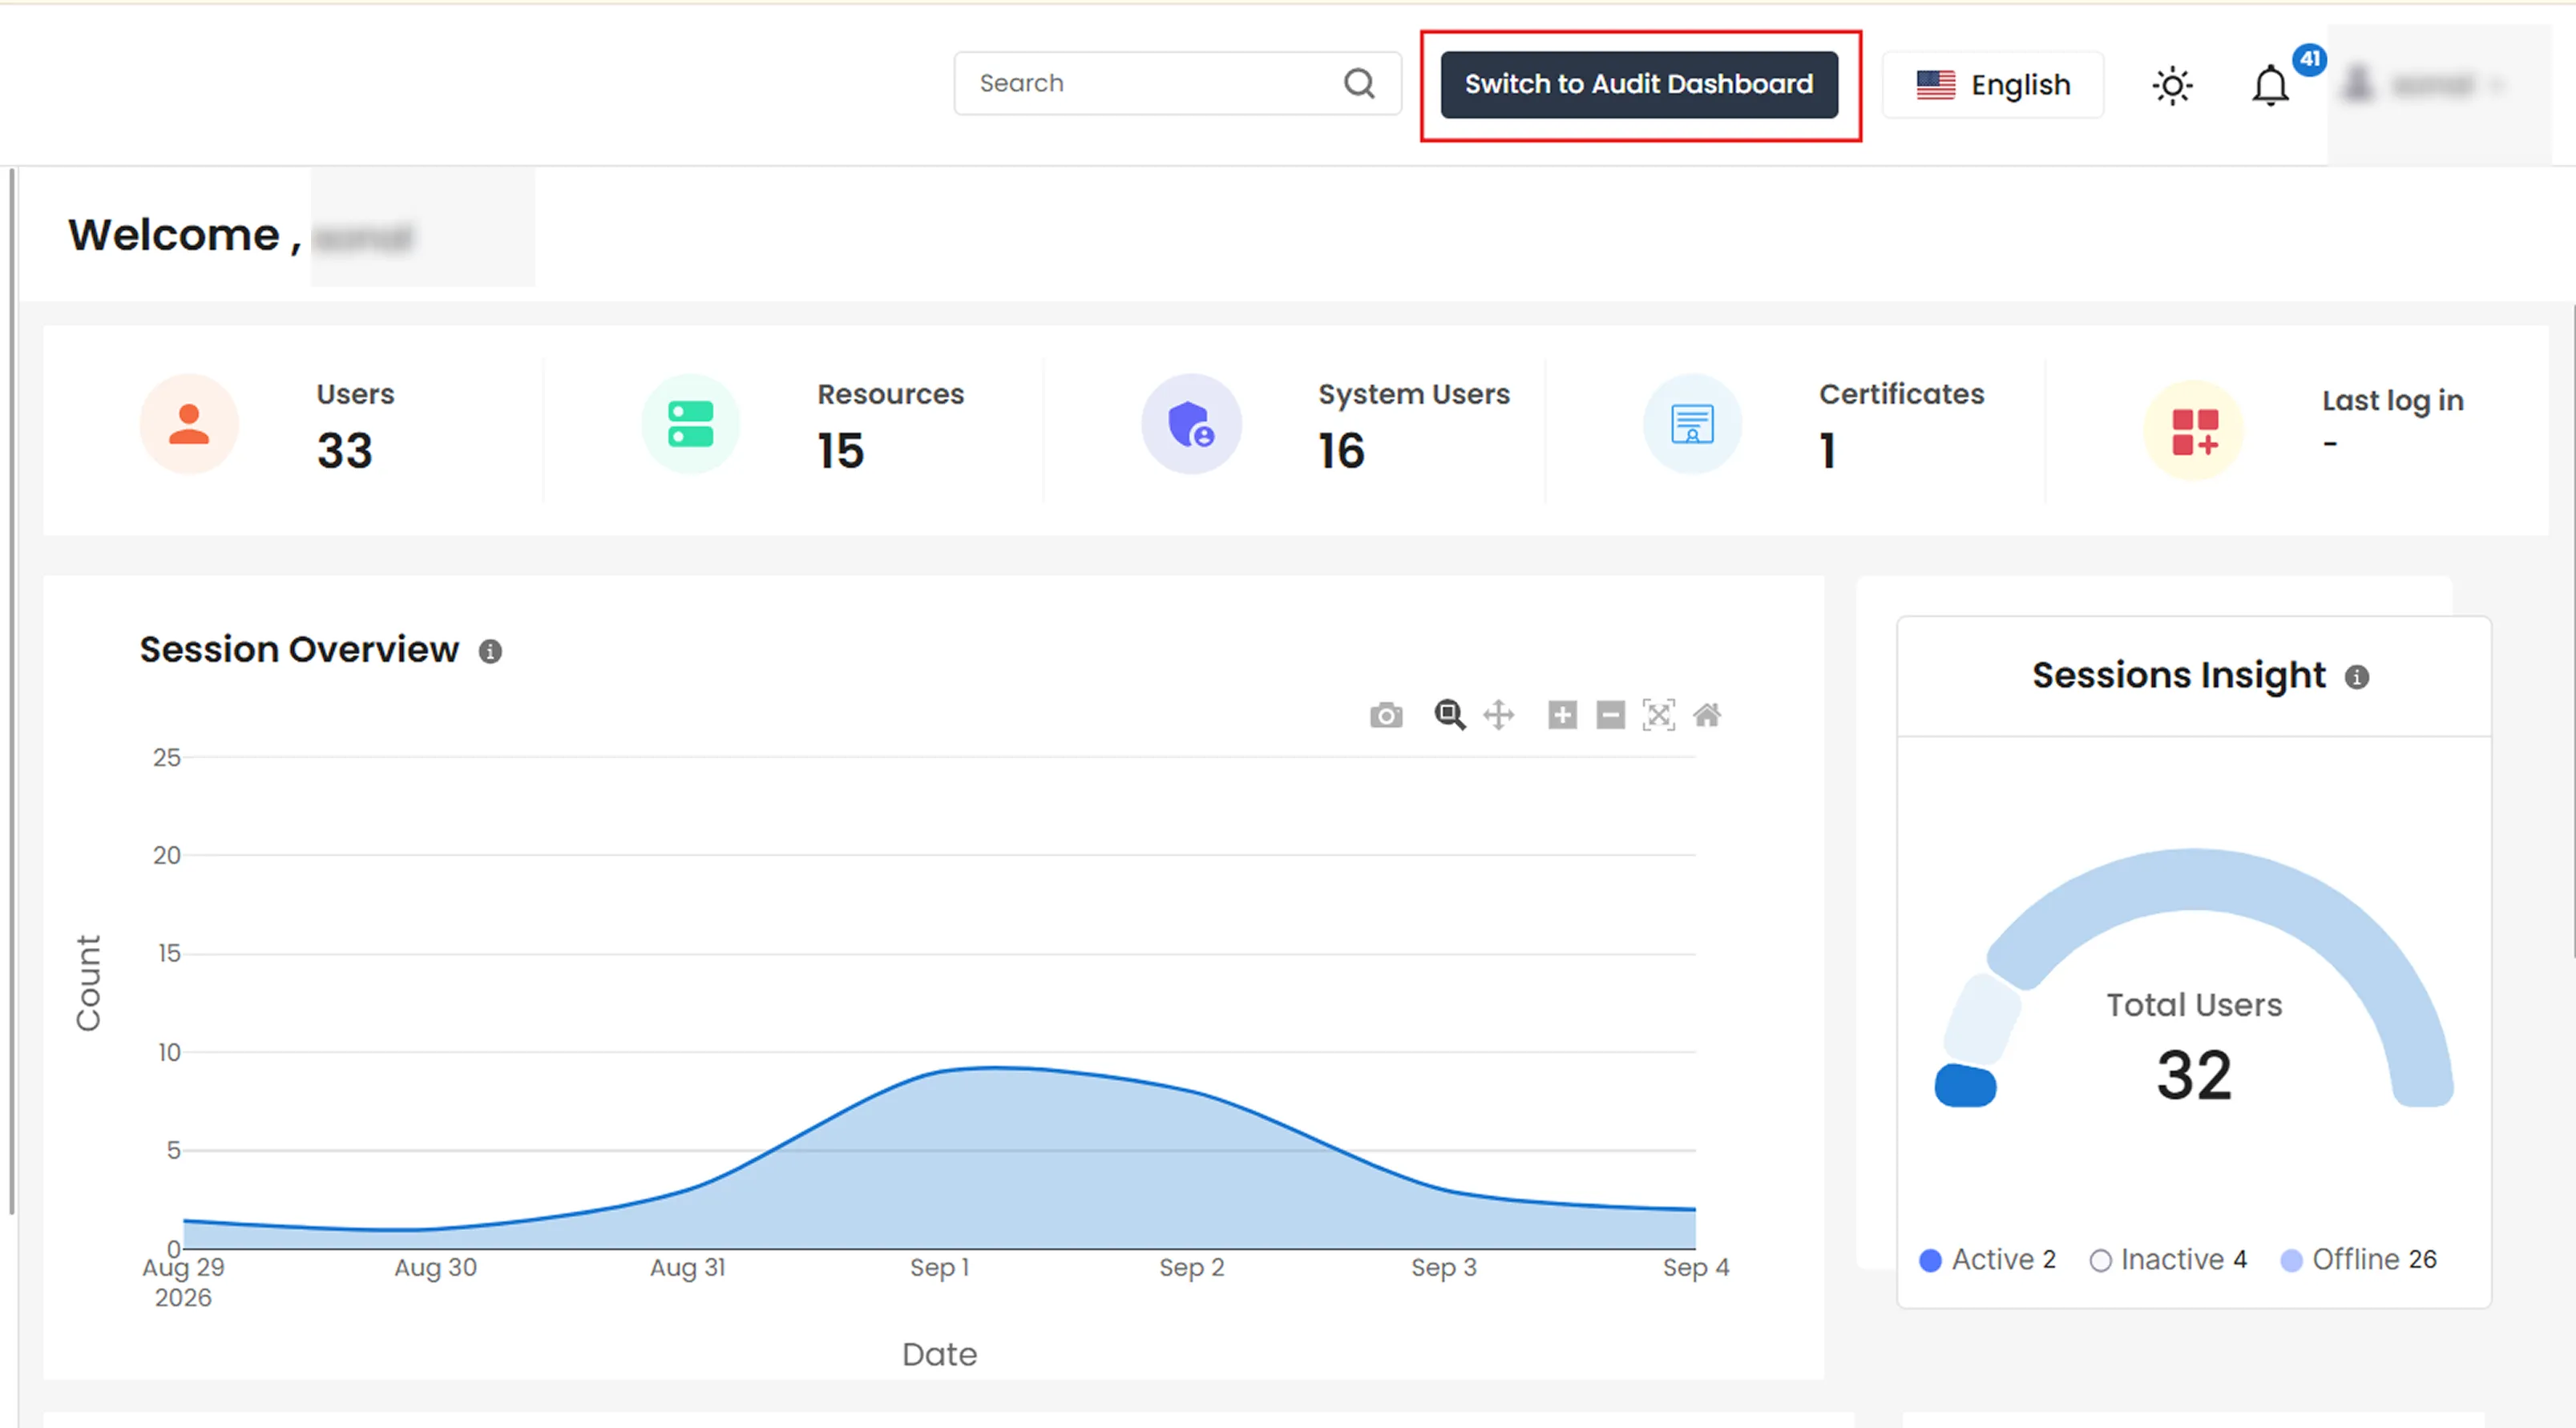
  • Click on Switch to Audit Dashboard.
  • Password Rotation Policy: Switch to Audit Dashboard

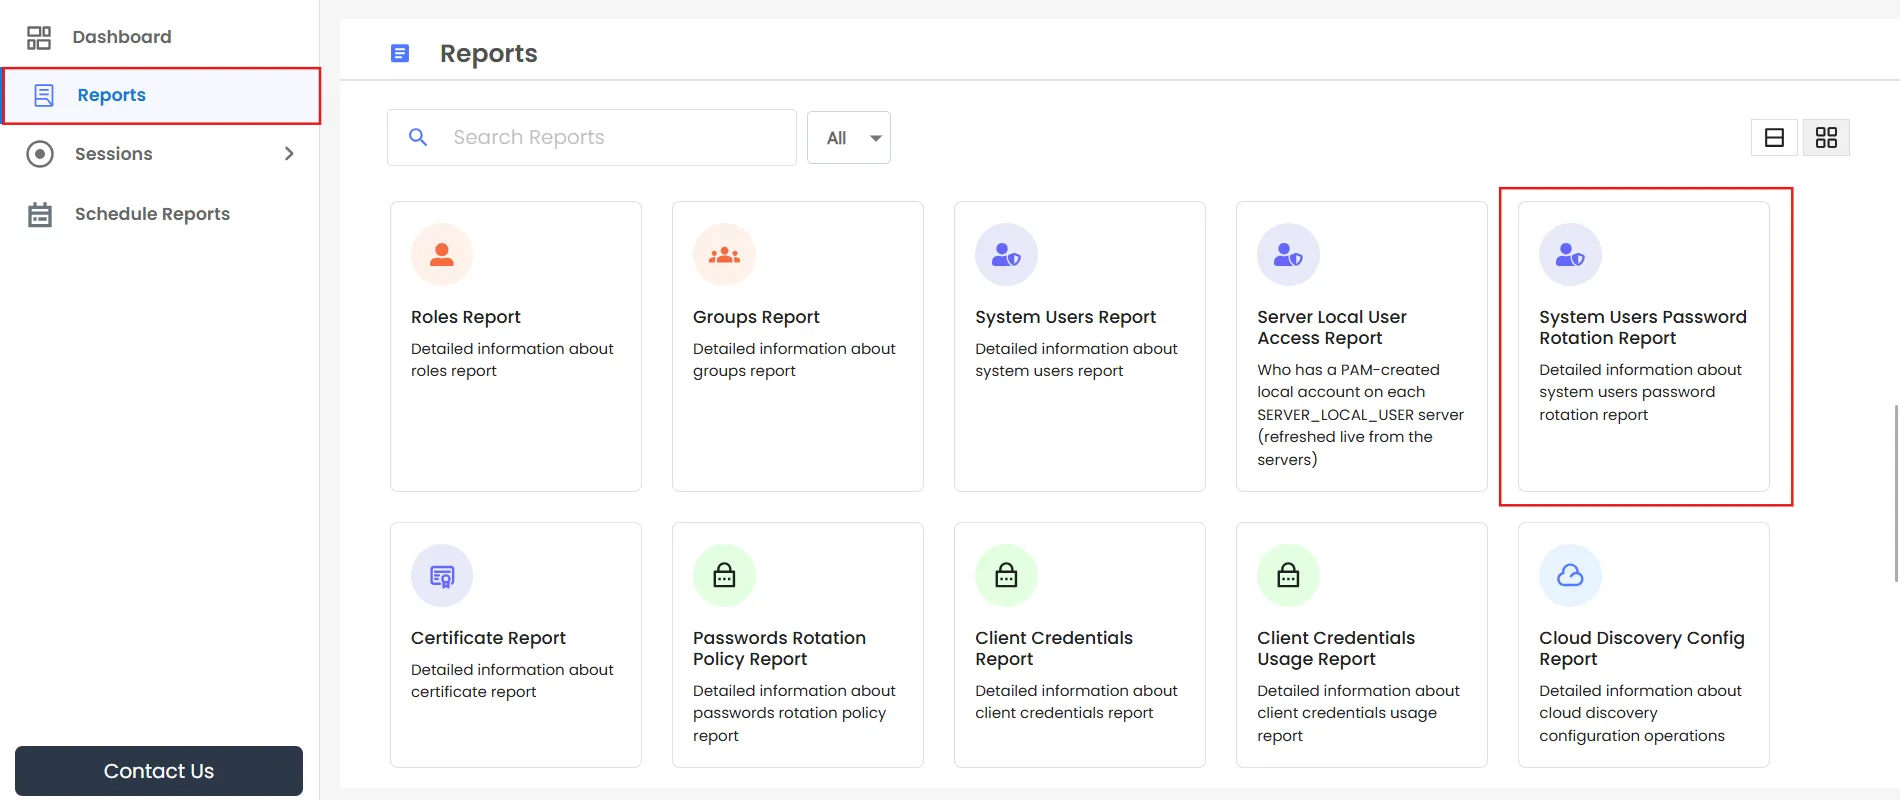
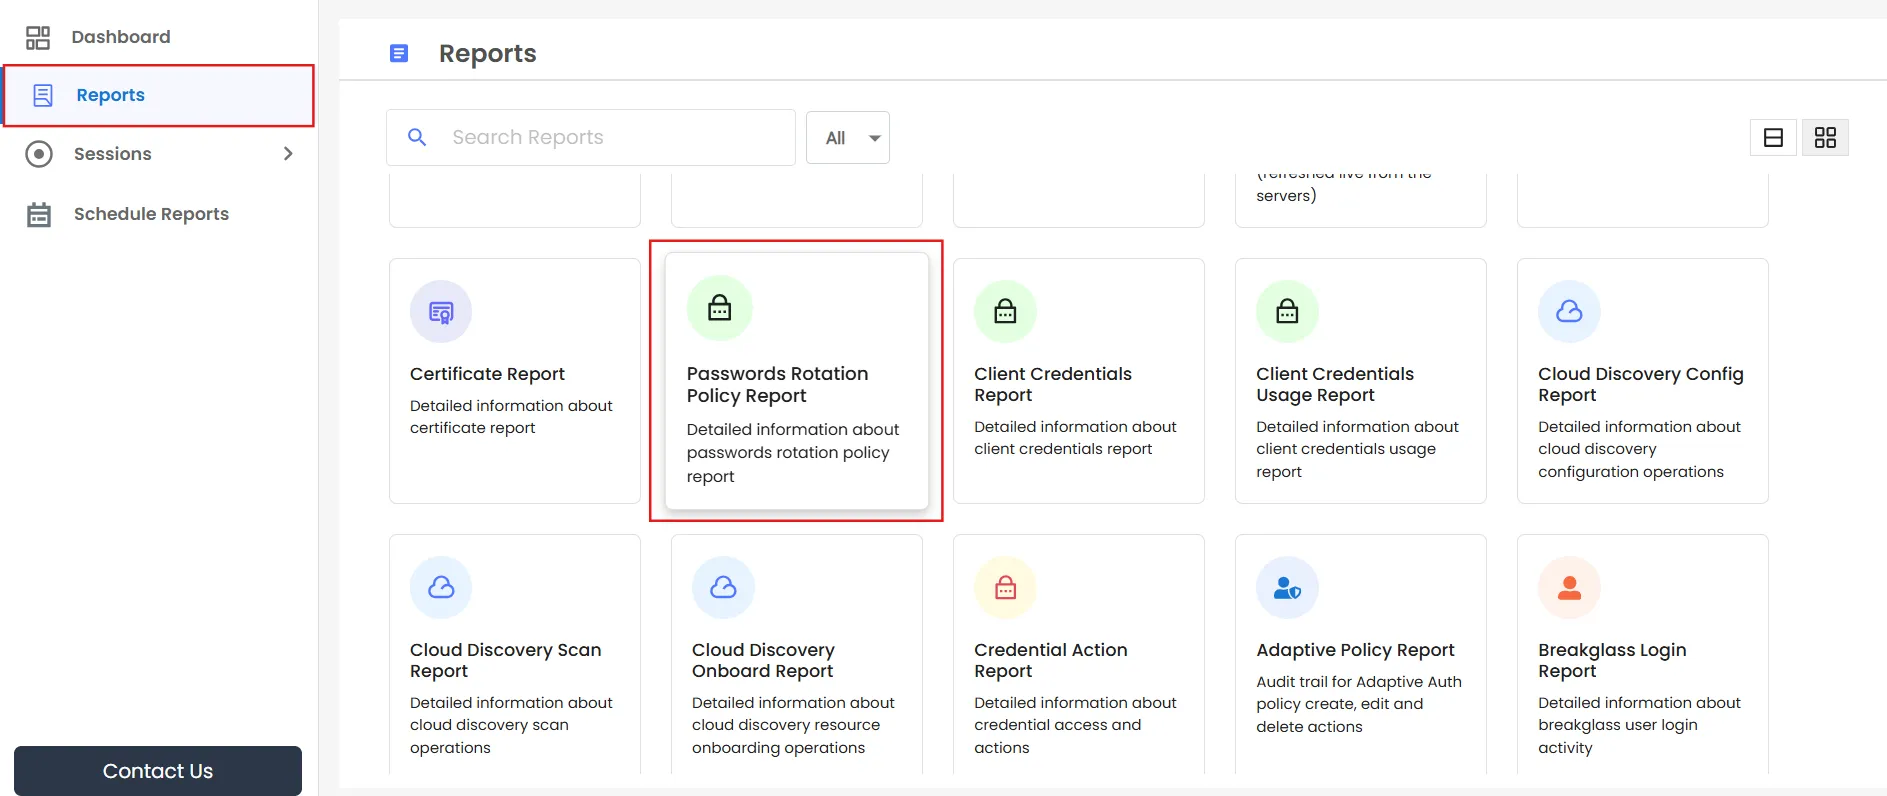
  • Go to Reports >> Password Rotation Reports for two report views:
  • Report What it shows
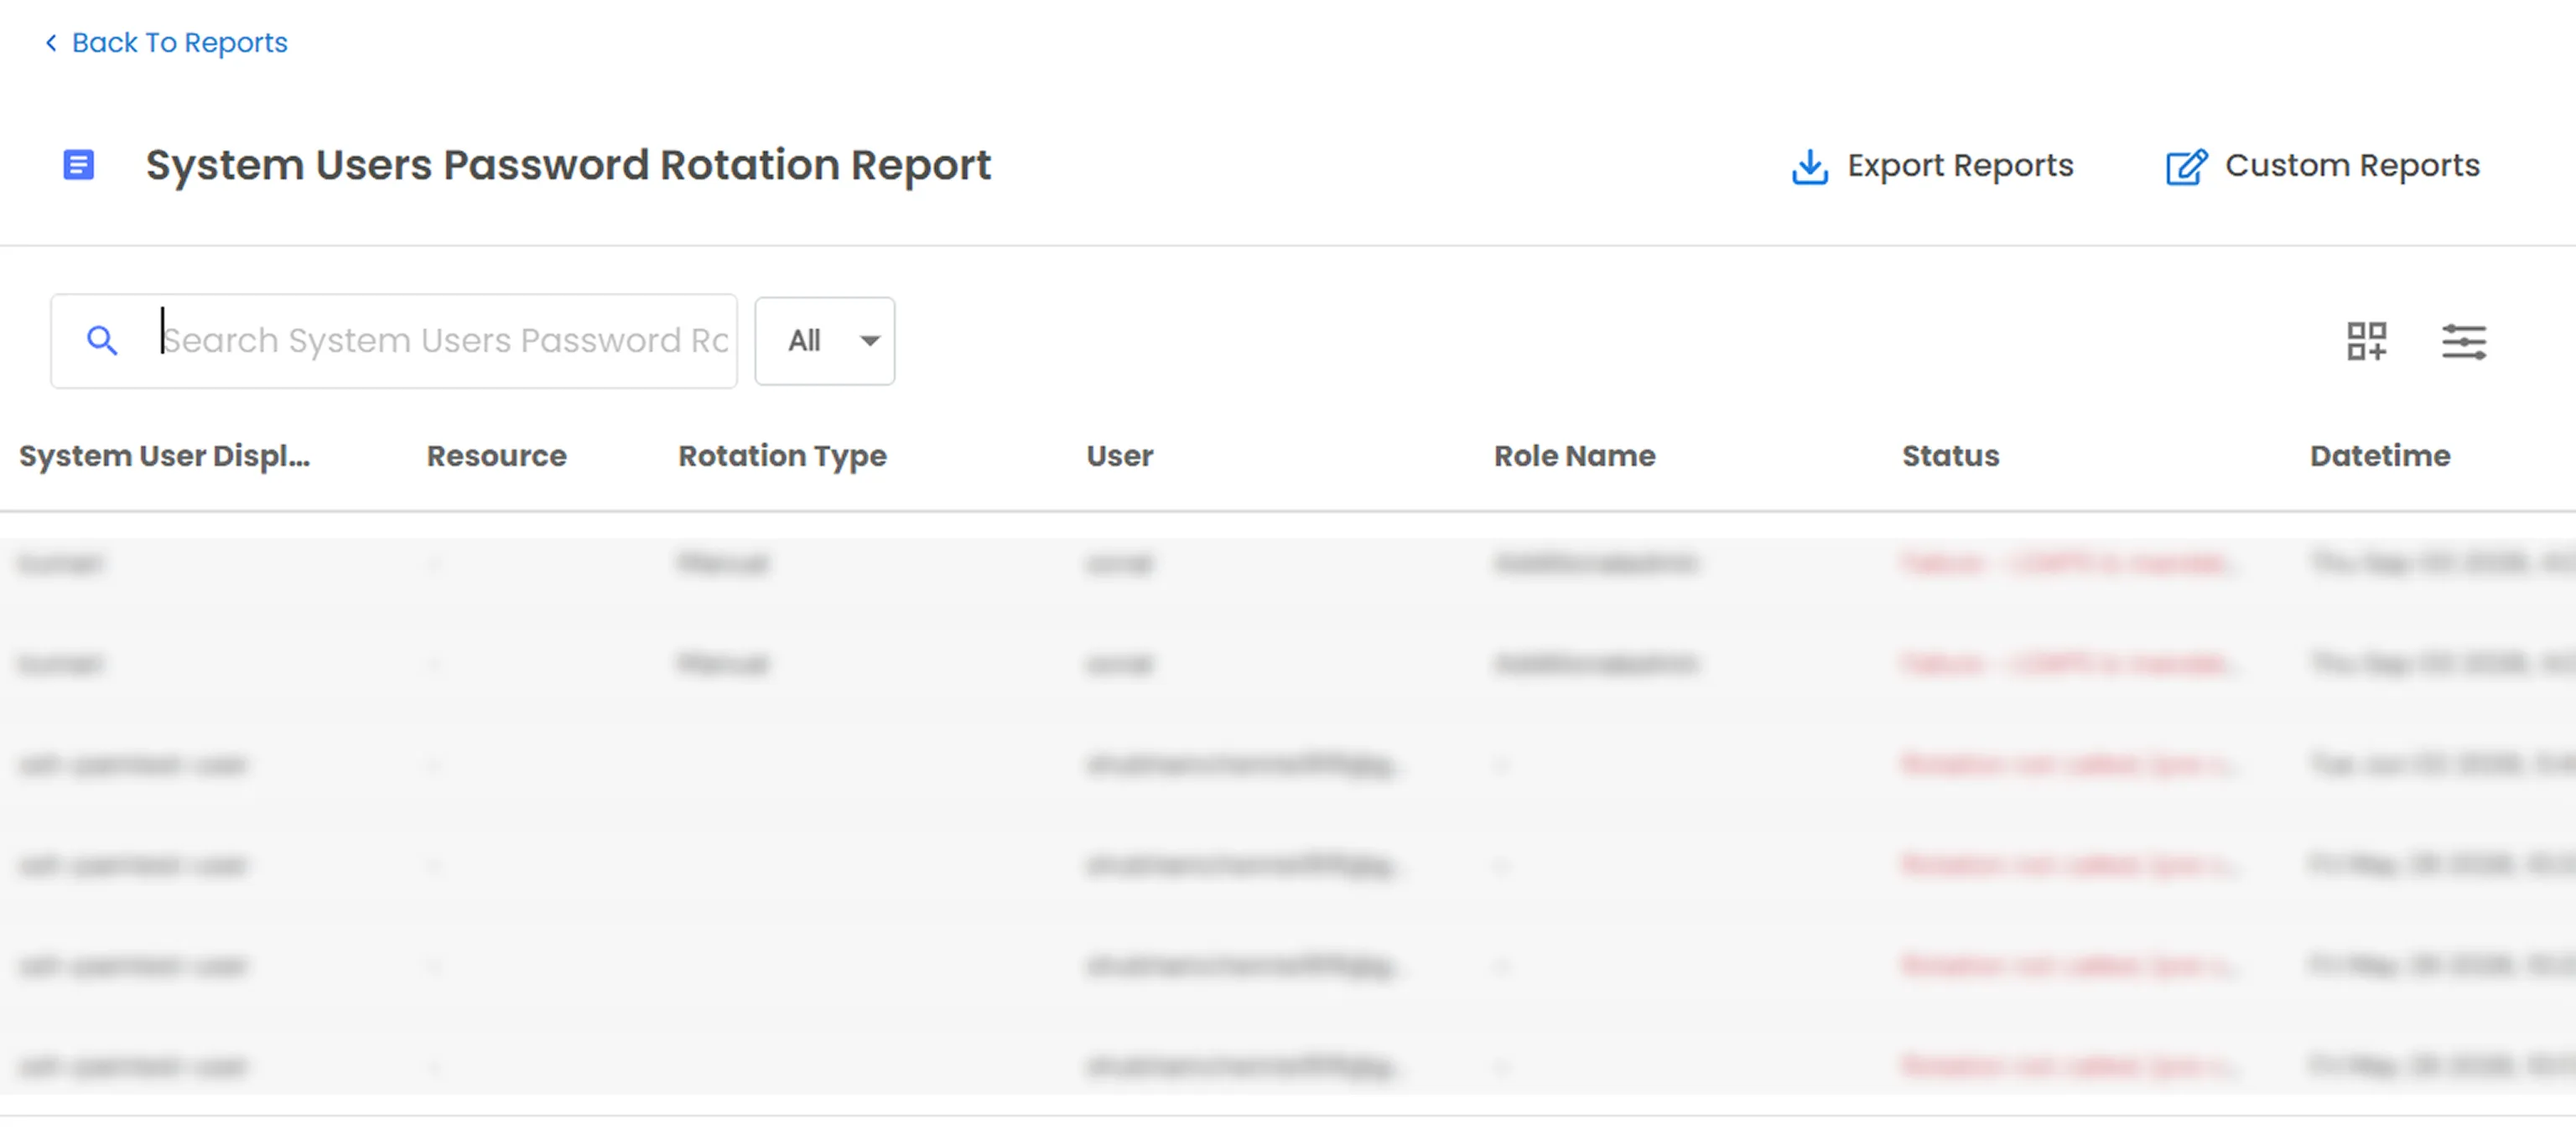
    System Users Password Rotation Report Per-rotation-event log: System User, resources rotated, rotation type, policy, who triggered it, role, status (success/failure), and timestamp.
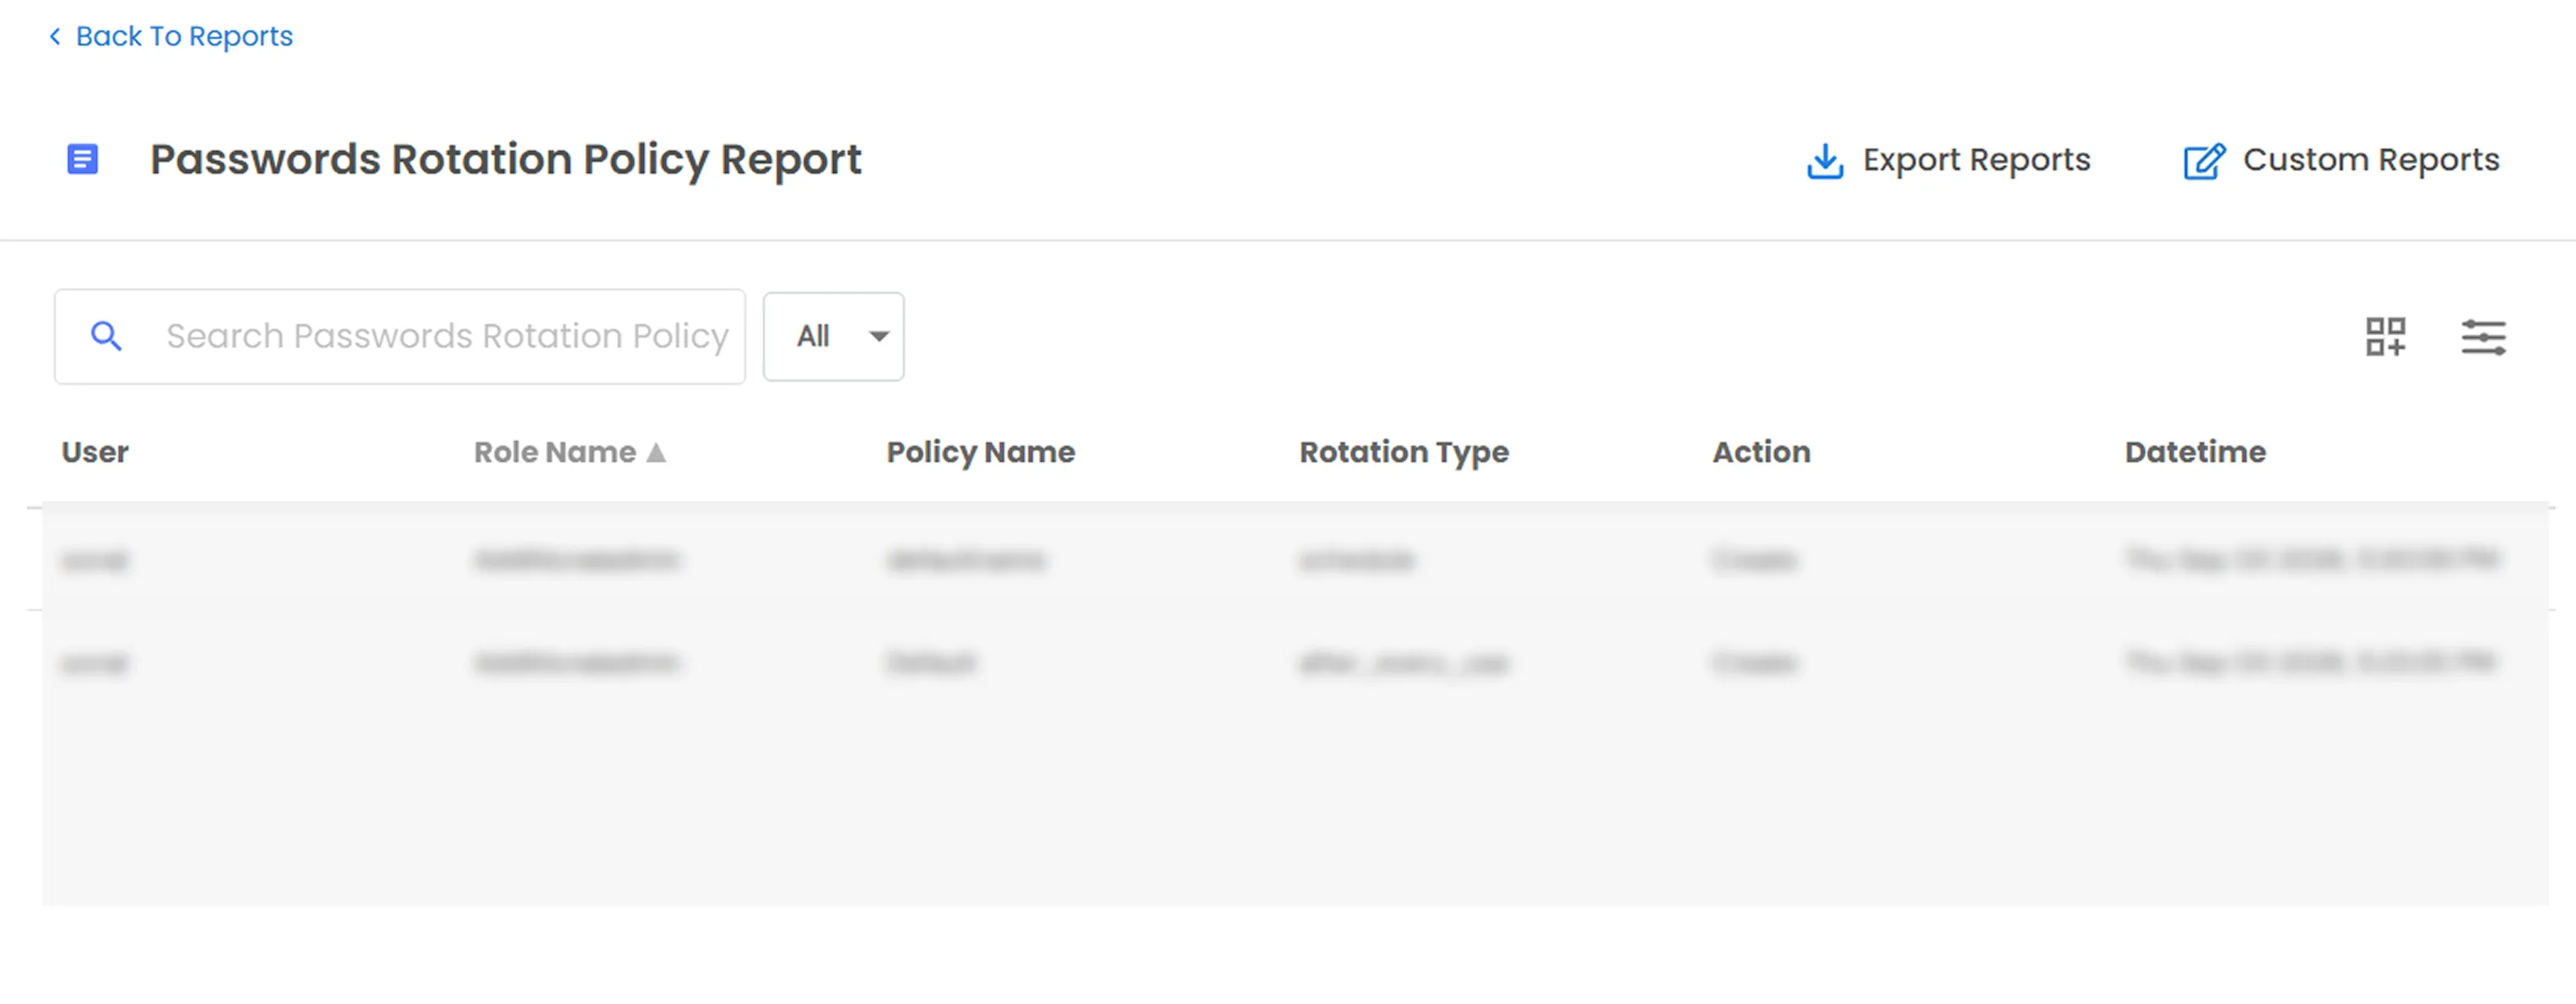
    Passwords Rotation Policy Report Policy-level view of rotation activity, including rotation type and related policy details.x
    Password Rotation Policy: System Users Password Rotation Report

    Password Rotation Policy: Details System Users Password Rotation Report

    Password Rotation Policy: Passwords Rotation Policy Report

    Password Rotation Policy: Details Passwords Rotation Policy Report

Good to Know

  • No manual rotation button on an individual resource's page - rotation is triggered from System Users only.
  • There's no dedicated "exclude from rotation" toggle - a user is excluded by simply not assigning it a rotator or not adding it to a policy.
  • Rotation is agentless: PAM connects directly to the target over SSH/WinRM/LDAPS/DB driver using the rotator account's own permissions - there's no installable agent or custom script/connector to configure.