SSO via miniOrange
Let admins and end users log into the PAM dashboard using their miniOrange account, instead of a separate PAM username and password.
What is SSO ?
SSO stands for Single Sign-On. It means someone can log into the PAM dashboard using an account they already have somewhere else, instead of remembering a separate PAM username and password.
PAM gives you two ways to set this up. You can only use one at a time - turning one on automatically turns the other off:
- miniOrange - covered on this page. You connect PAM to a miniOrange account, and miniOrange acts as your Identity Provider - the service that checks the person's login and tells PAM who they are.
- External - using your own Okta, Azure AD, GitHub, or similar Identity Provider directly. See External Identity Providers for that flow.
If you're not sure which one you need: if your company already uses a miniOrange account, use this page. If your company uses Okta, Azure AD, GitHub, or something similar instead, use External Identity Providers.
Step 1: Turn On SSO
- Go to Authentication >> SSO from the side menu and click the miniOrange card.
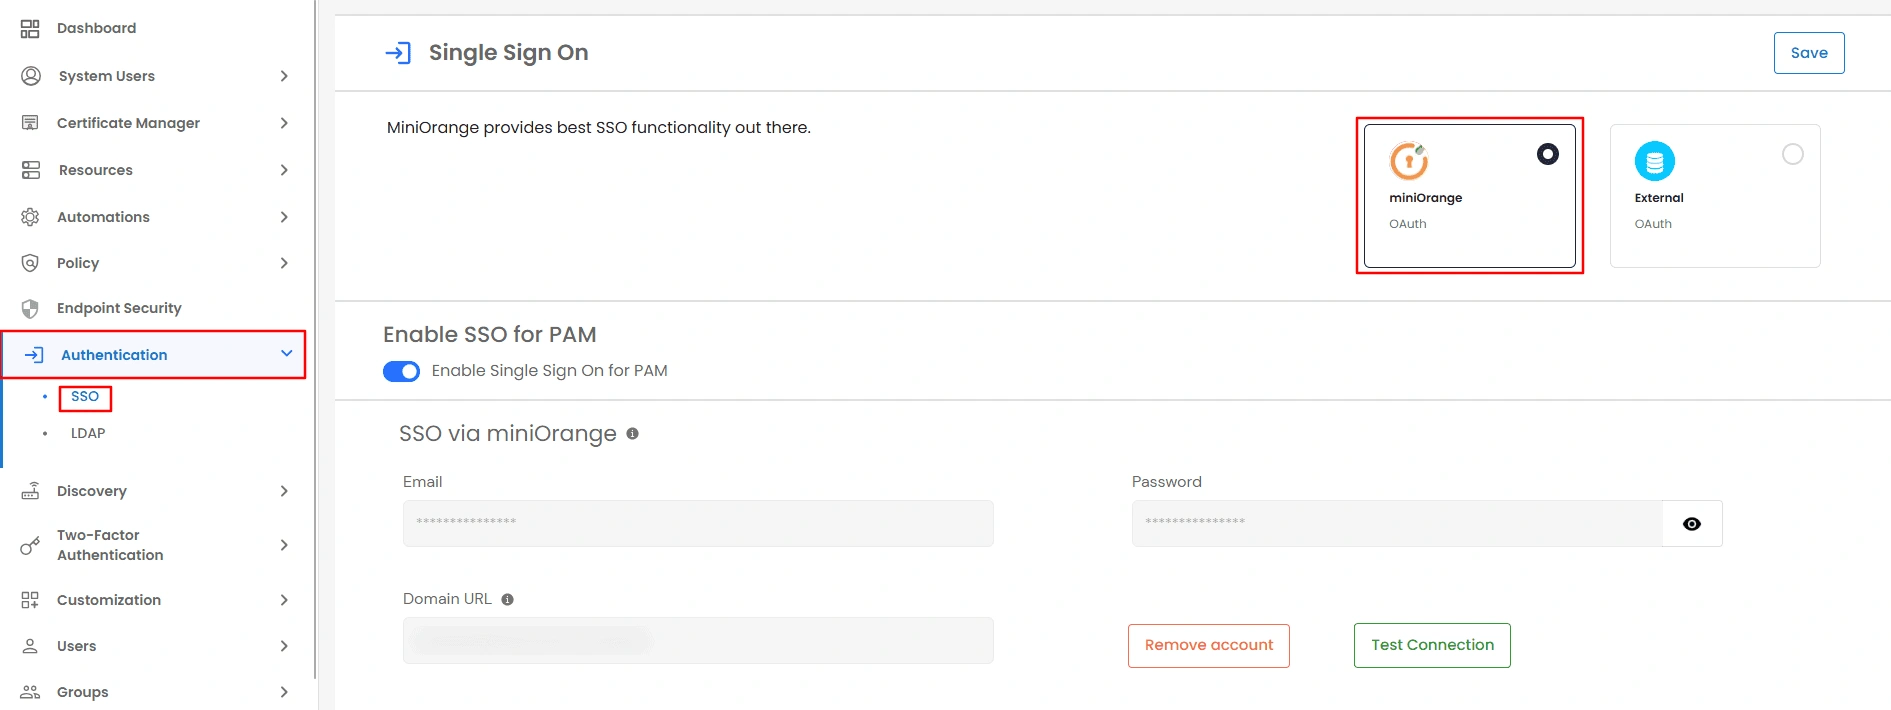
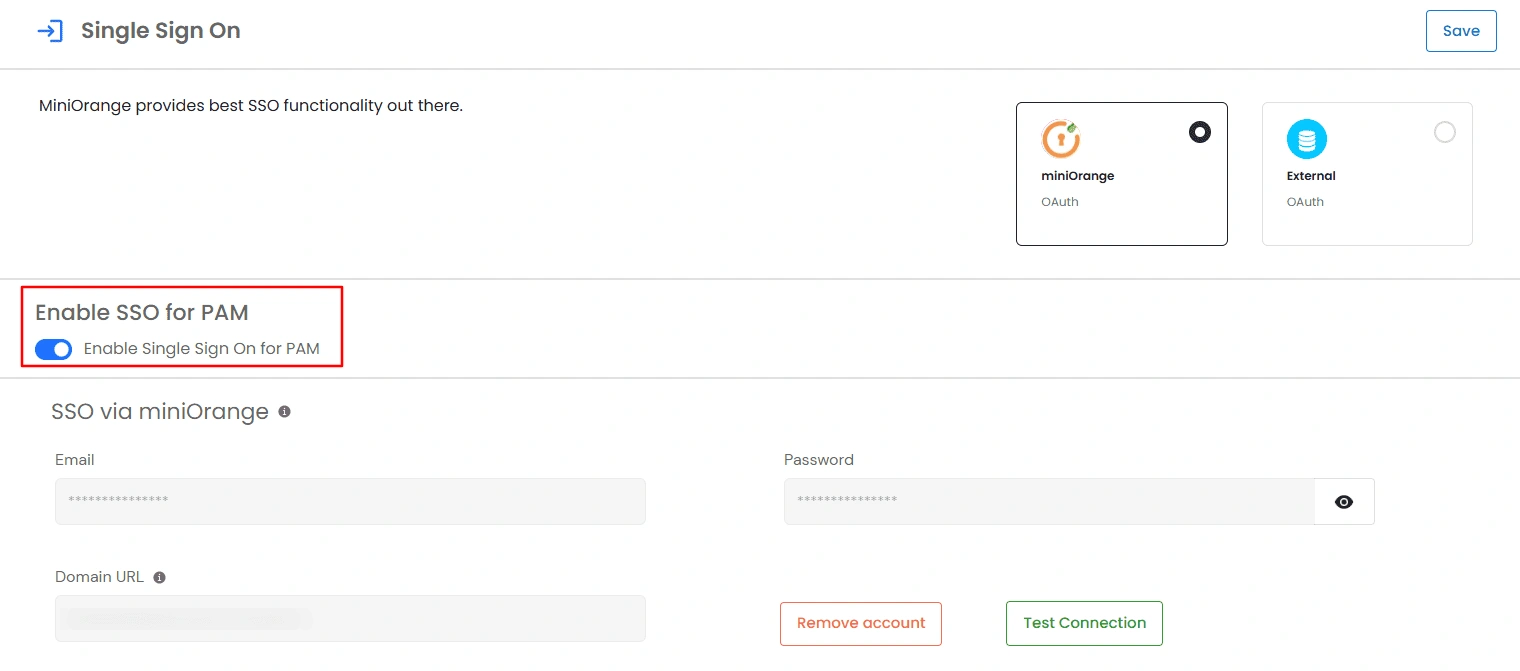
- Turn on Enable SSO for PAM.
Step 2: Connect Your miniOrange Account
Enter the login details for your organization's miniOrange account - not your own personal email and password, but the account your organization uses with miniOrange:
- Email - the email address for that miniOrange account.
- Password - the password for that account.
- Domain URL - the web address tied to your miniOrange account. If your organization uses miniOrange's cloud service, add
/moas to the end of it. If your organization runs miniOrange on its own servers instead, use the different format shown in the tooltip next to this field. Check with whoever manages your miniOrange account if you're unsure.
- Click Save.
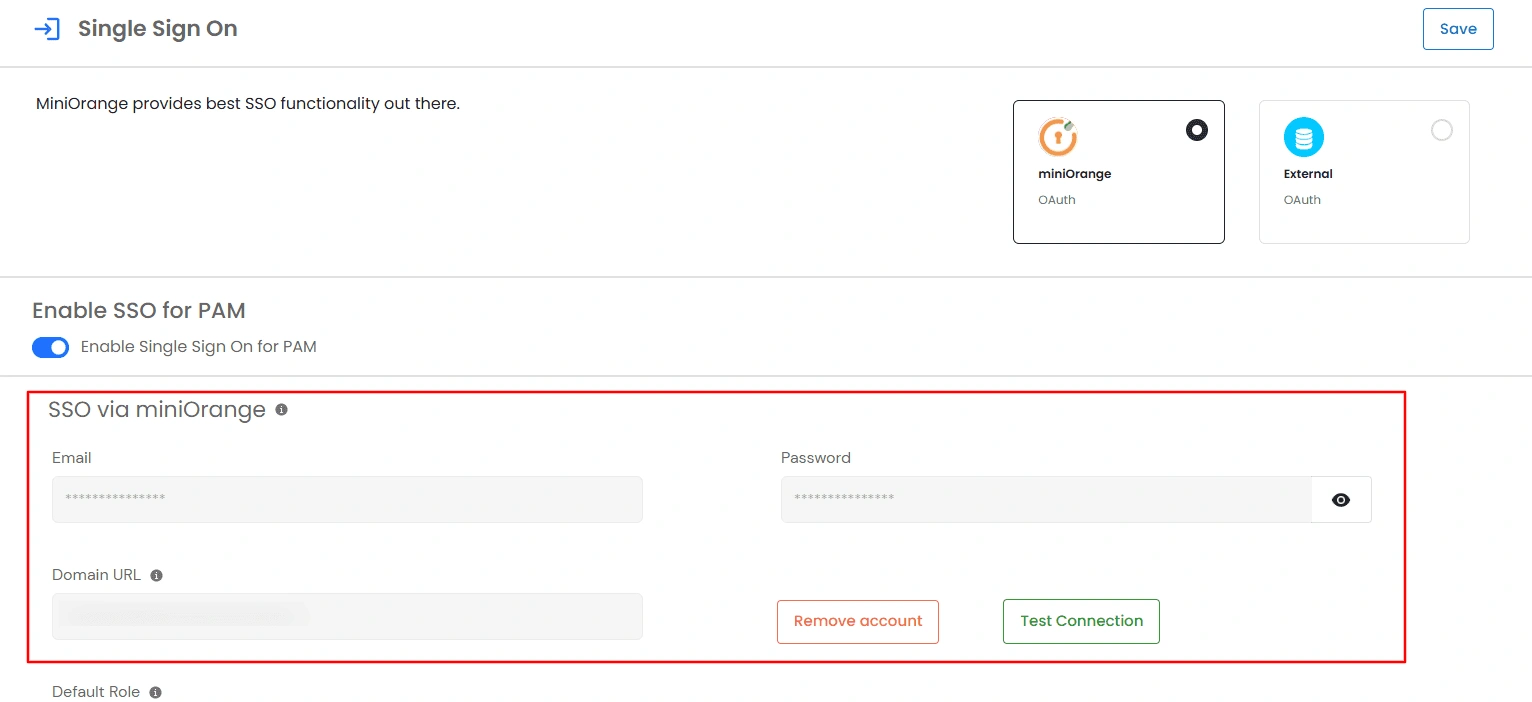
- Note: Once you save, these three fields are locked and their values are hidden - you can't click in and edit them afterward. If you need to connect a different miniOrange account later, use Remove account (further down this page) first, then set it up again.
Step 3: Set a Default Role
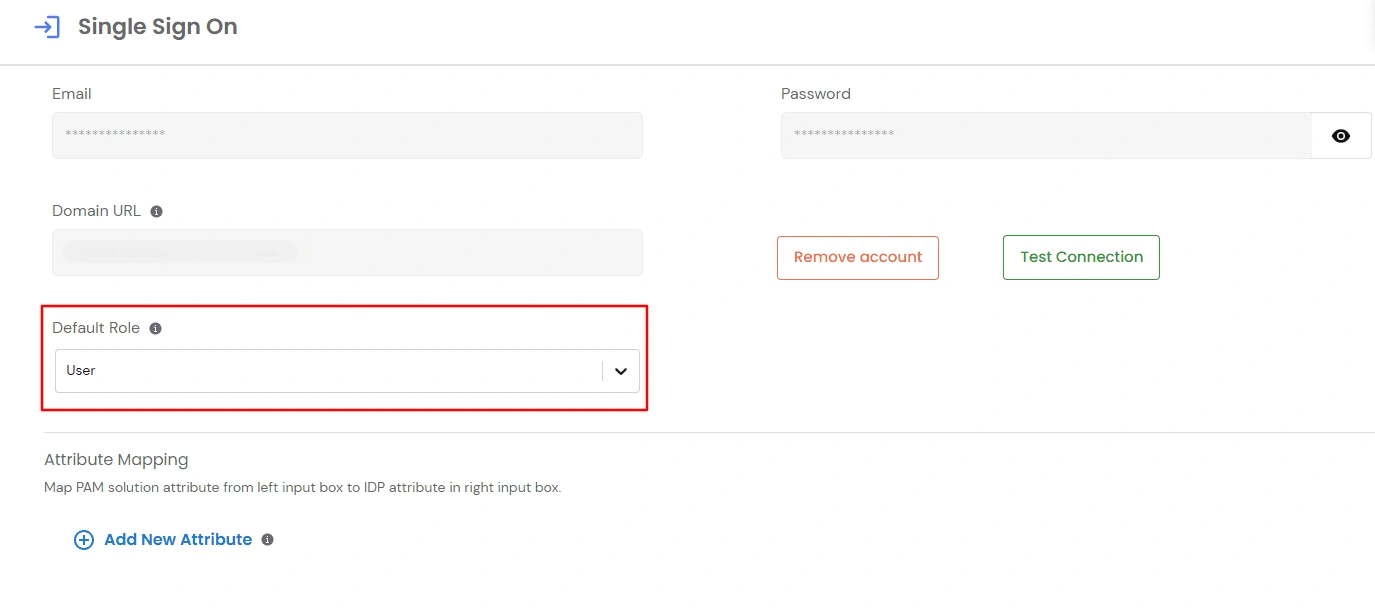
- Choose a Default Role -this is the role automatically assigned to anyone logging in through SSO for the first time. A role decides what someone is allowed to see and do once they're logged into PAM.
- If you skip this, PAM automatically uses the Enduser role.
Step 4 (Optional): Map Attributes
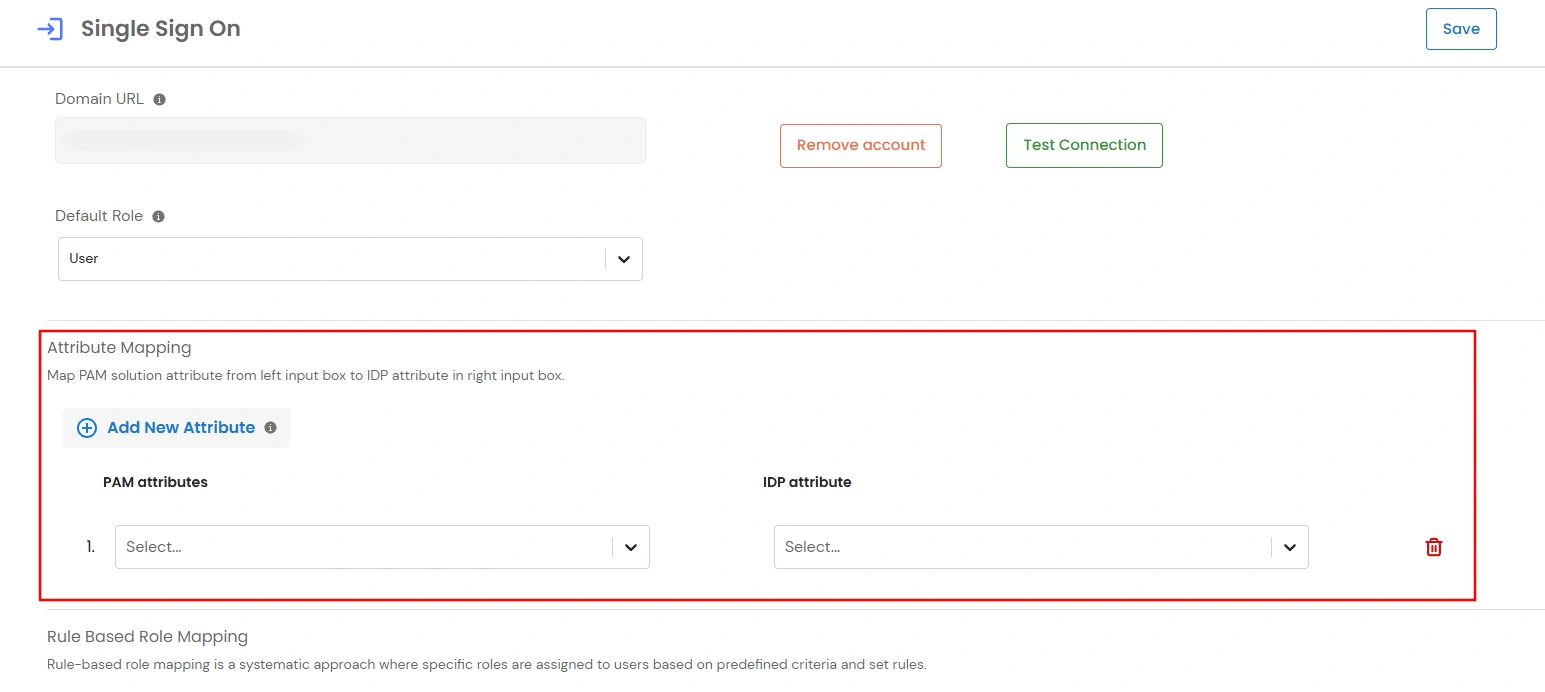
When someone logs in, miniOrange sends PAM some information about them-such as their email or name. These pieces of information are called attributes.
This step lets you tell PAM which attribute from miniOrange should fill in which field in PAM.
- Click Add New Attribute to add one.
- If you add even one attribute mapping, you must also add one that maps to Email. PAM won't let you save the configuration without an Email mapping, since it needs an email address to identify each person.
Step 5 (Optional): Rule-Based Role Mapping
- Use this if different people should get different roles automatically, instead of everyone getting the same Default Role from Step 3. A matching rule overrides the Default Role.
- For example, you could set a rule so that anyone whose miniOrange account says they're in the IT department automatically gets an Admin role in PAM, while everyone else still gets the regular Default Role.

Step 6: Test the Connection
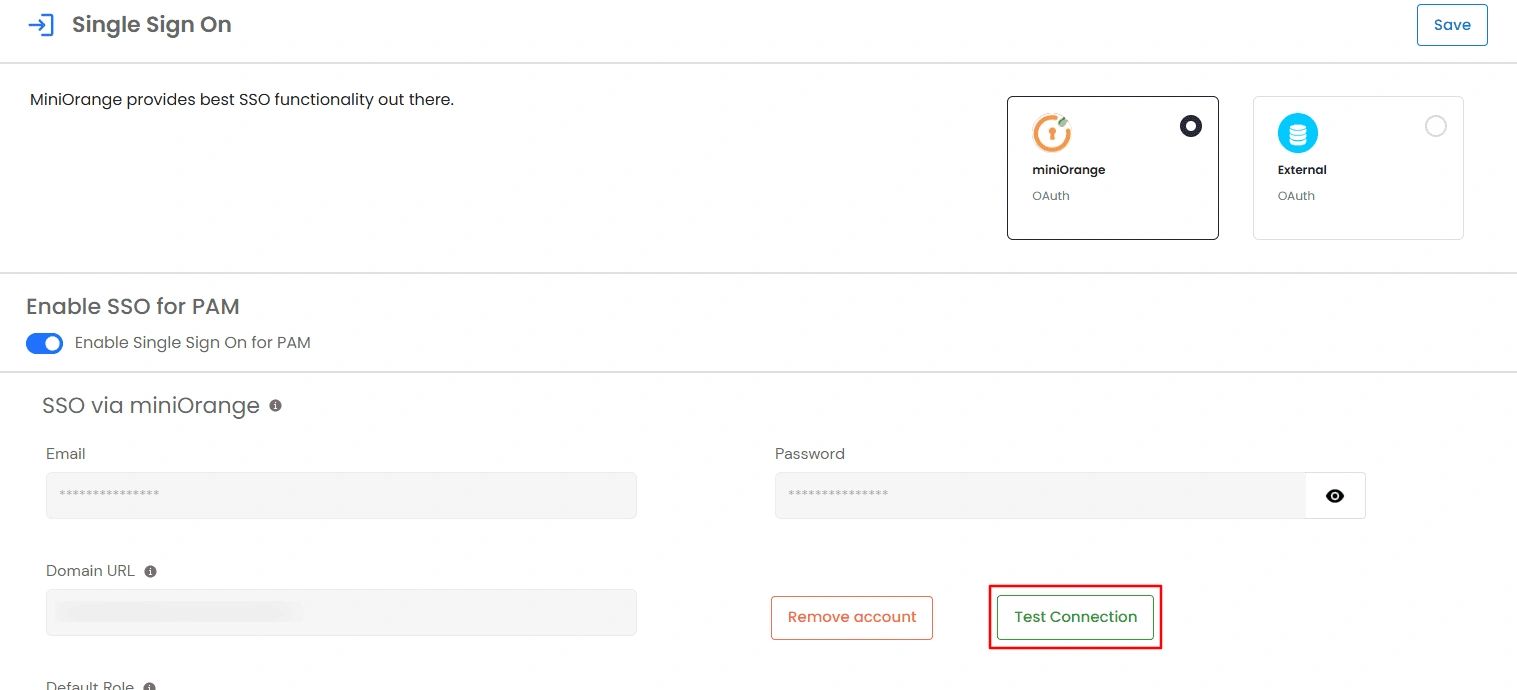
- Click Test Connection.
- A popup opens and tries logging in through your miniOrange account, so you can see whether everything was set up correctly.
- Do this before telling your team to start using SSO.
What Happens the First Time Someone Logs In
- You don't need to create accounts for people ahead of time. The first time someone successfully logs in through SSO, PAM automatically creates their account.
- They get the Default Role from Step 3, unless one of your Rule Based Role Mapping rules from Step 5 applies to them. In that case, they get the role defined by the matching rule.
Removing the miniOrange Connection
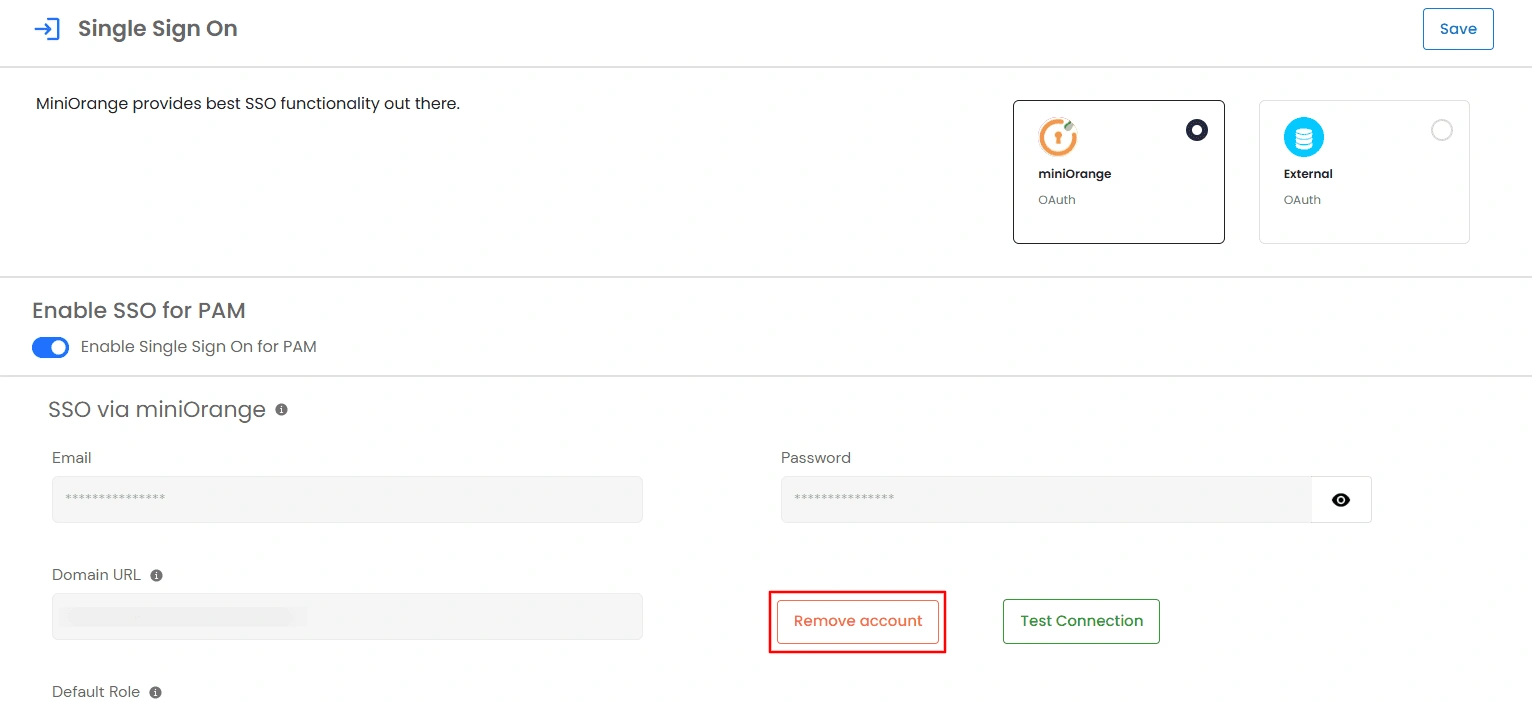
- Click Remove account to disconnect your miniOrange account and stop using this SSO method.
- Warning: This also turns off miniOrange-based Two-Factor Authentication (2FA) for everyone. This includes SMS, Email, and Call codes, Push Notification, QR Code, and the miniOrange Authenticator app, since they all rely on the same miniOrange connection. If your organization uses any of these for 2FA, check the Configure MFA Methods for Users handbook page before removing the account.
Note: On the External page, you'll also see a miniOrange option in its provider dropdown. That's a completely different and unrelated setup-don't confuse it with this page. See External Identity Providers if you're configuring that option.

