Hello there!
Need Help? We are right here!
Need Help? We are right here!
Search Results:
×miniOrange PAM allows you to integrate a custom SMTP email provider to send system alerts, password reset emails, and other notifications. This feature ensures that all outbound communication is routed through your secure and preferred email gateway.
This guide walks you through configuring the SMTP settings, understanding each field, and testing the setup before activation.
Follow these steps to locate and configure your custom email provider:
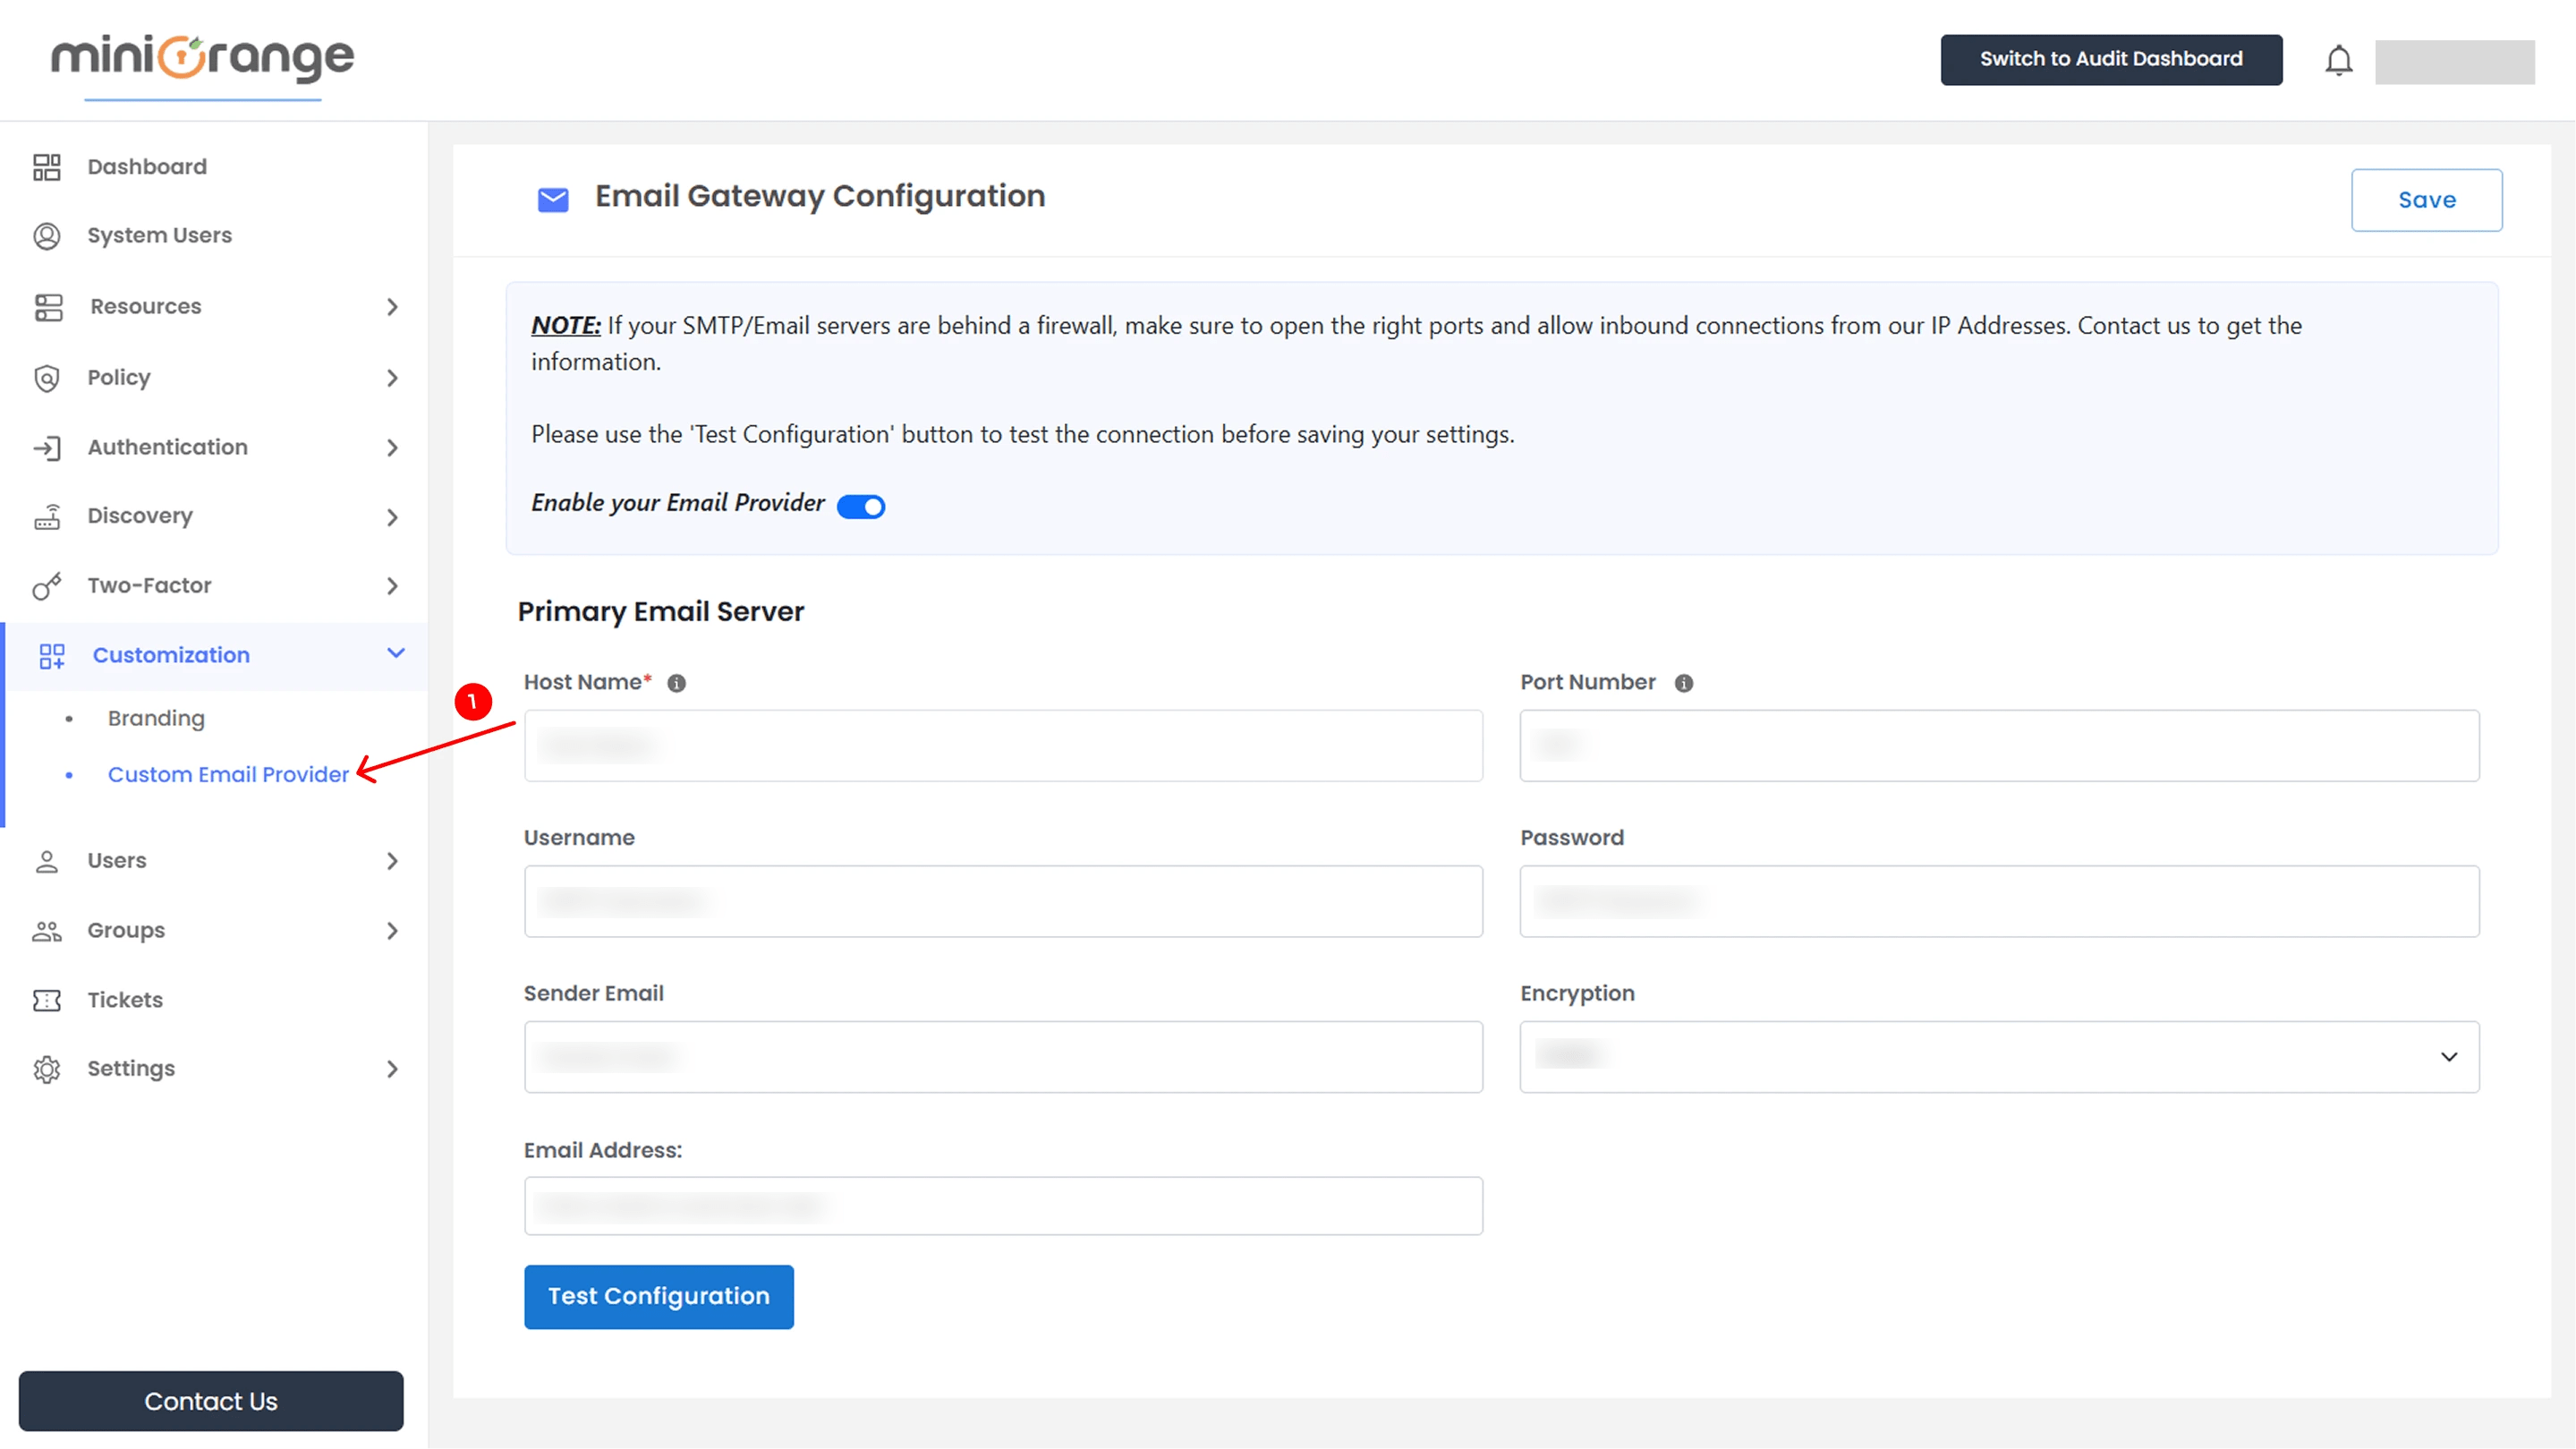
Note: If your SMTP/Email servers are behind a firewall, ensure the correct ports are open and allow inbound connections from miniOrange IP addresses. Contact our support team to obtain the IP range.
| Field: | Description: |
|---|---|
| Host Name | Hostname or IP address of your SMTP server |
| Port Number | Port used by your server (e.g., 465, 587). Avoid using port 25 due to common provider restrictions |
| Username | Your SMTP account’s login name |
| Password | Your SMTP account’s login password |
| Sender Email | The email address from which system emails will be sent |
| Encryption | Dropdown options: TLS, SSL, or None |
| Email Address | Default email address used for sending notifications |
Once all fields are filled
