Hello there!

Need Help? We are right here!

Support Icon
miniOrange Email Support
success

Thanks for your Enquiry. Our team will soon reach out to you.

If you don't hear from us within 24 hours, please feel free to send a follow-up email to info@xecurify.com

Search Results:

×

BigCommerce User Sync & Provisioning


When you use BigCommerce Store Sync Integration, you're making sure that all your store's important information, like products, inventory, and orders, stay the same and updated everywhere they're used. This helps avoid mistakes and makes things like managing products and orders easier.

User Provisioning is like managing who can do what in your online store. You can create new accounts for people, give them certain jobs, and control what parts of the store they can use. This is important for keeping things safe, helping your team work together, and giving users a customized experience if they have accounts on your site. Both of these things together make your online store work better, be safer, and grow smoothly.

Prerequisites to provision users in BigCommerce

  • Access to miniOrange Admin Dashboard
  • BigCommerce store credentials (Client ID, Client Secret, Access Token)
  • Required API permissions configured in BigCommerce

Provisioning & Deprovisioning Scenarios


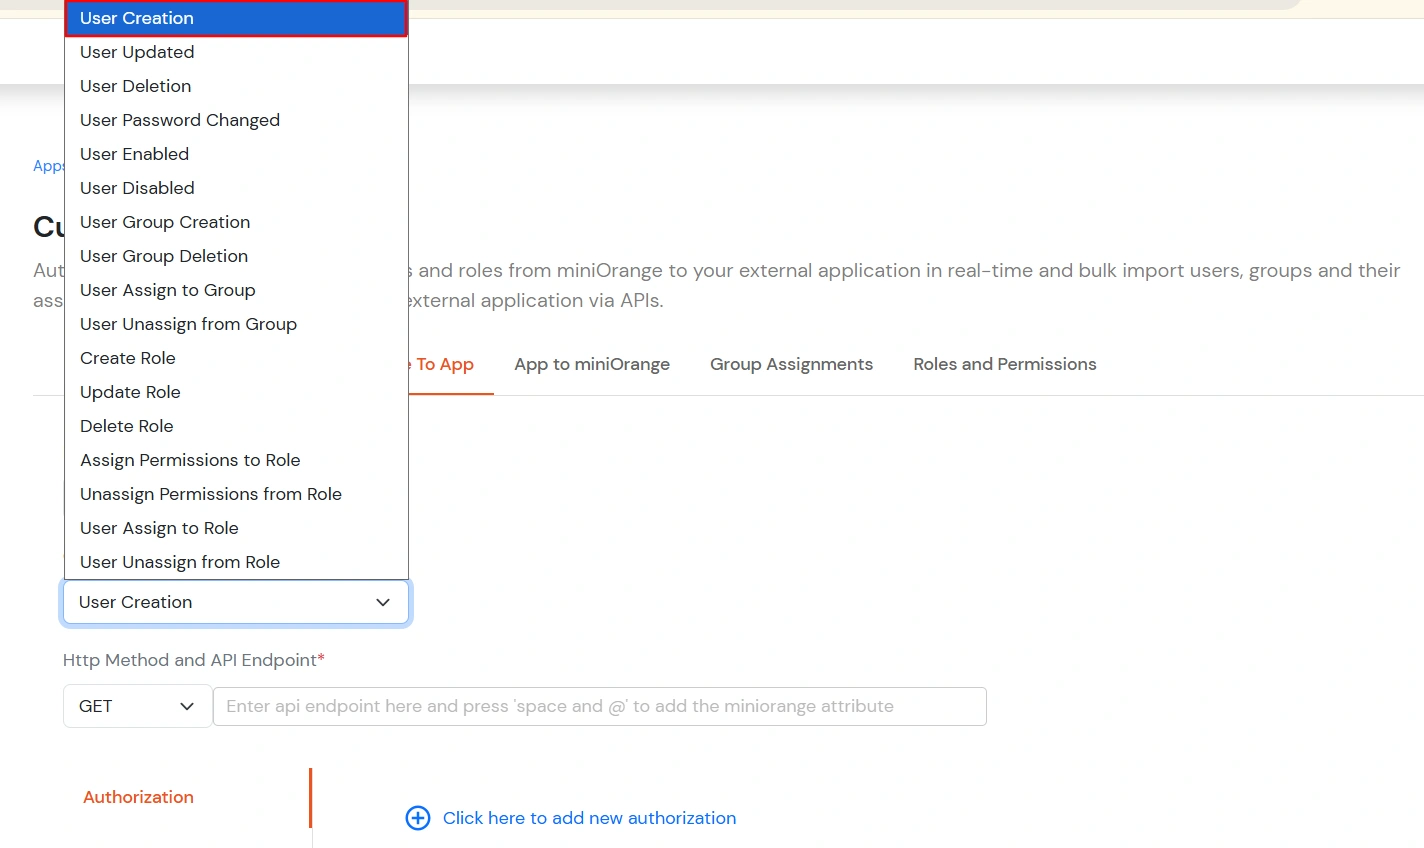
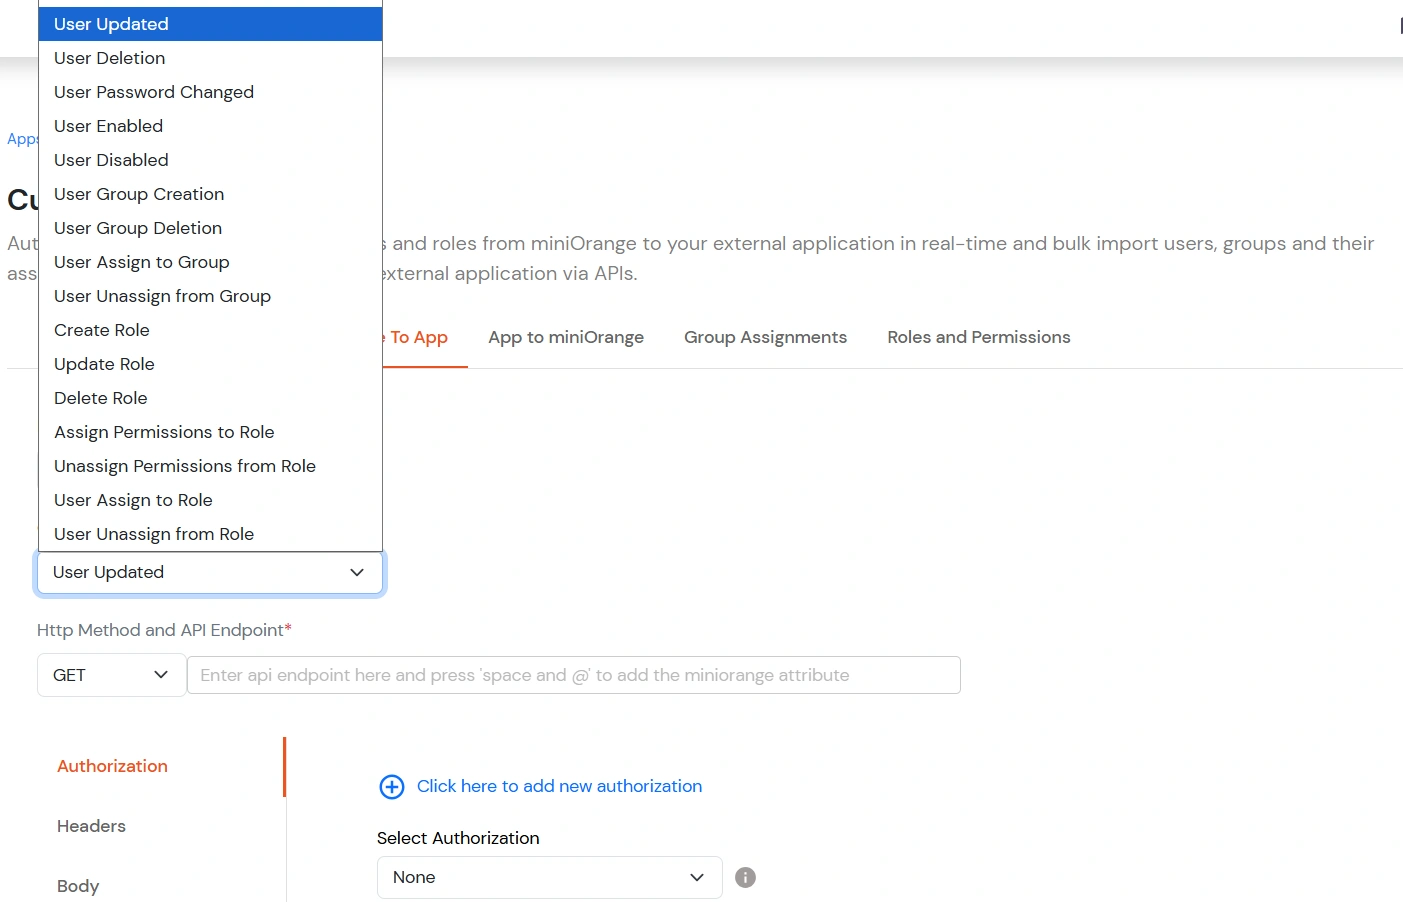
miniOrange provides Provisioning solutions for all scenarios of user management (provisioning), which includes AD Integration, LDAP Integration and automated provisioning for all External Applications such as BigCommerce, Google Workspace, Workday, etc.


Follow the step-by-step guide given below to setup BigCommerce Provisioning


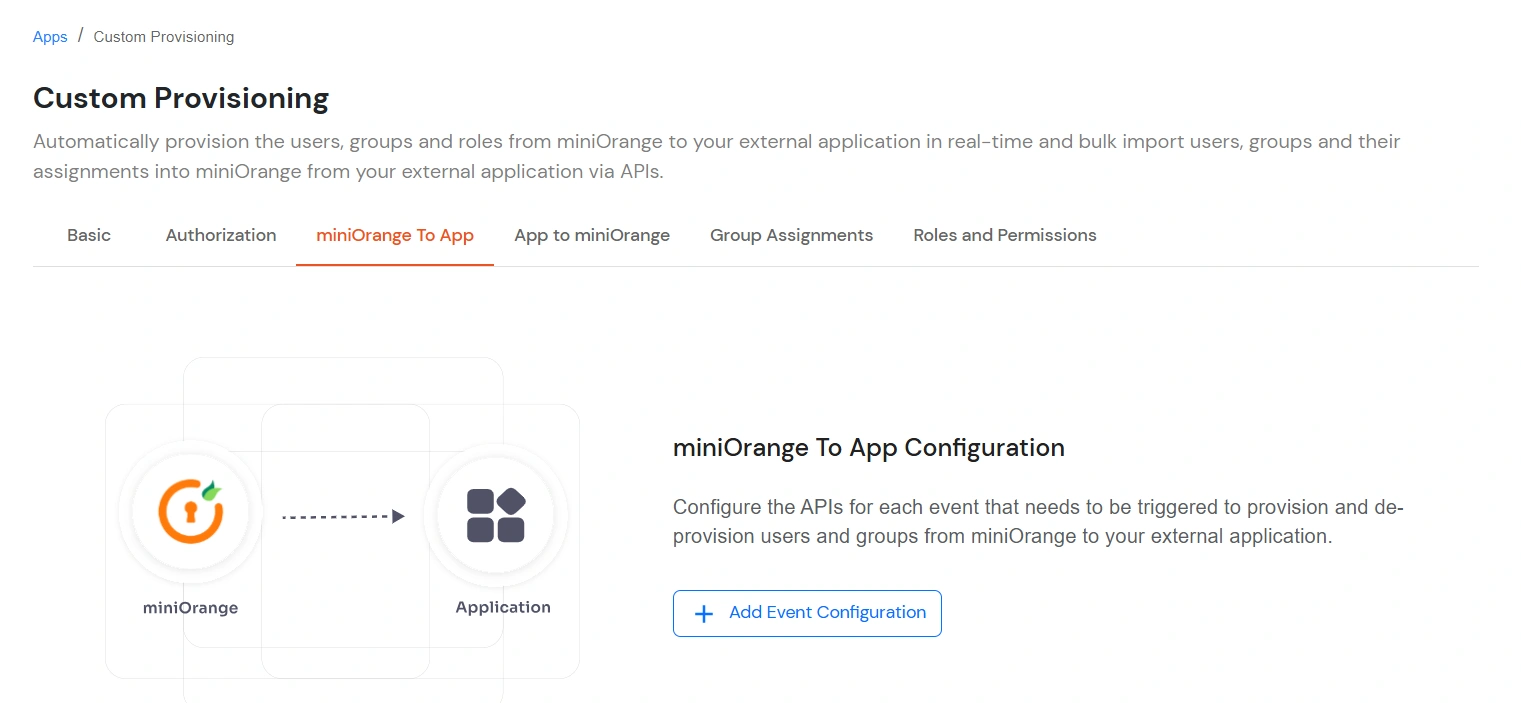
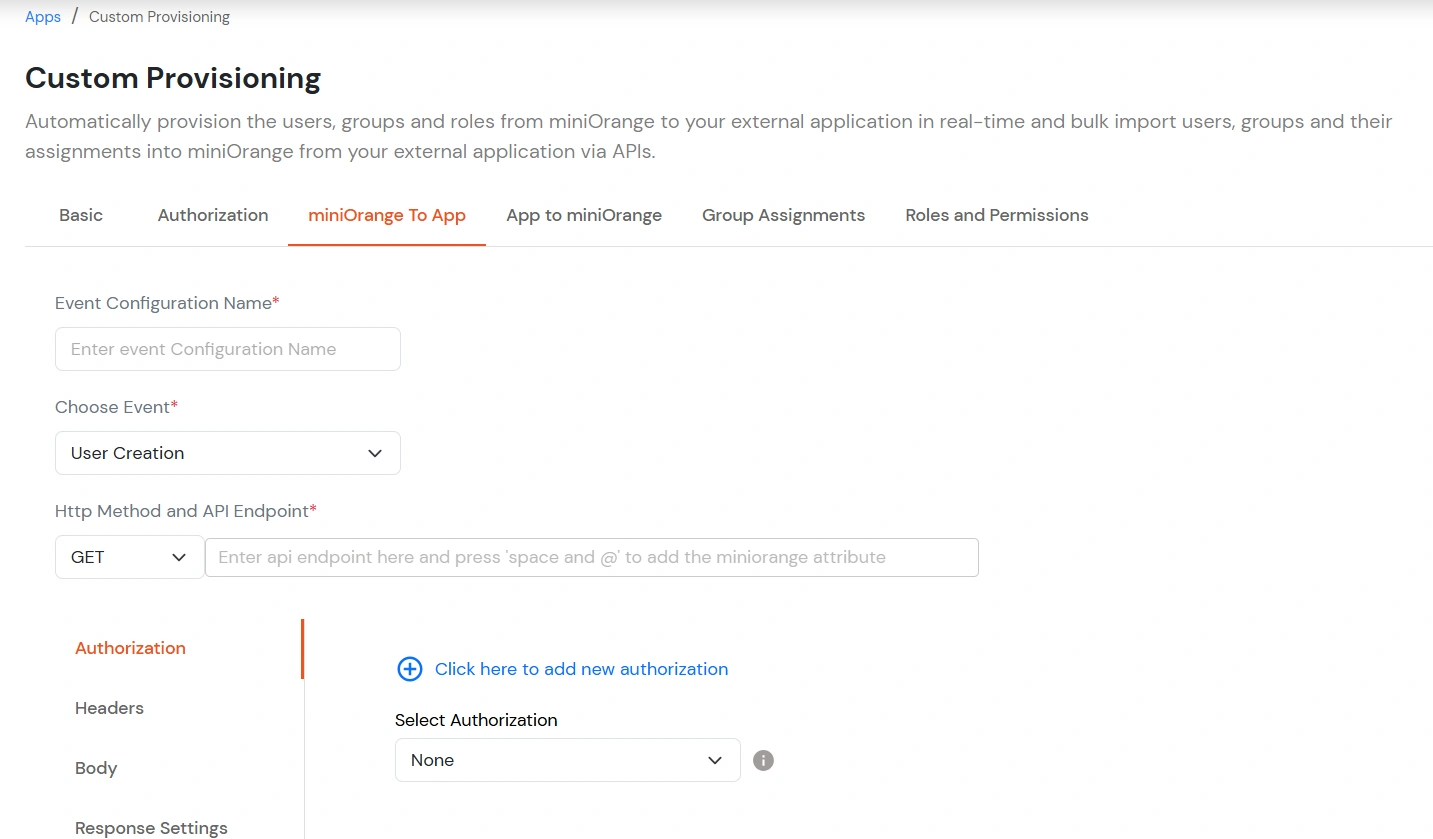
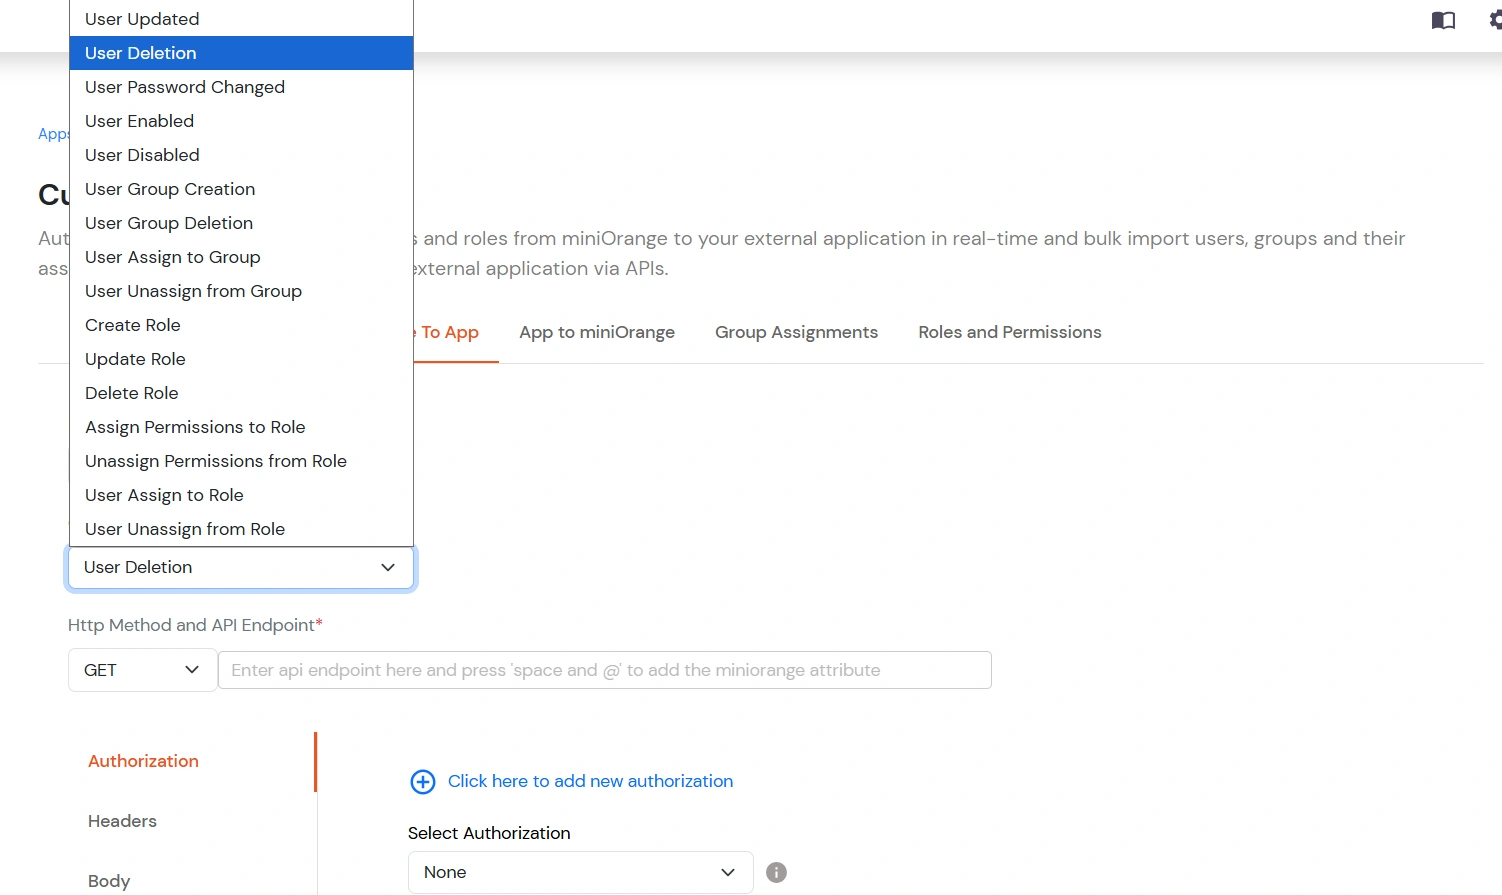
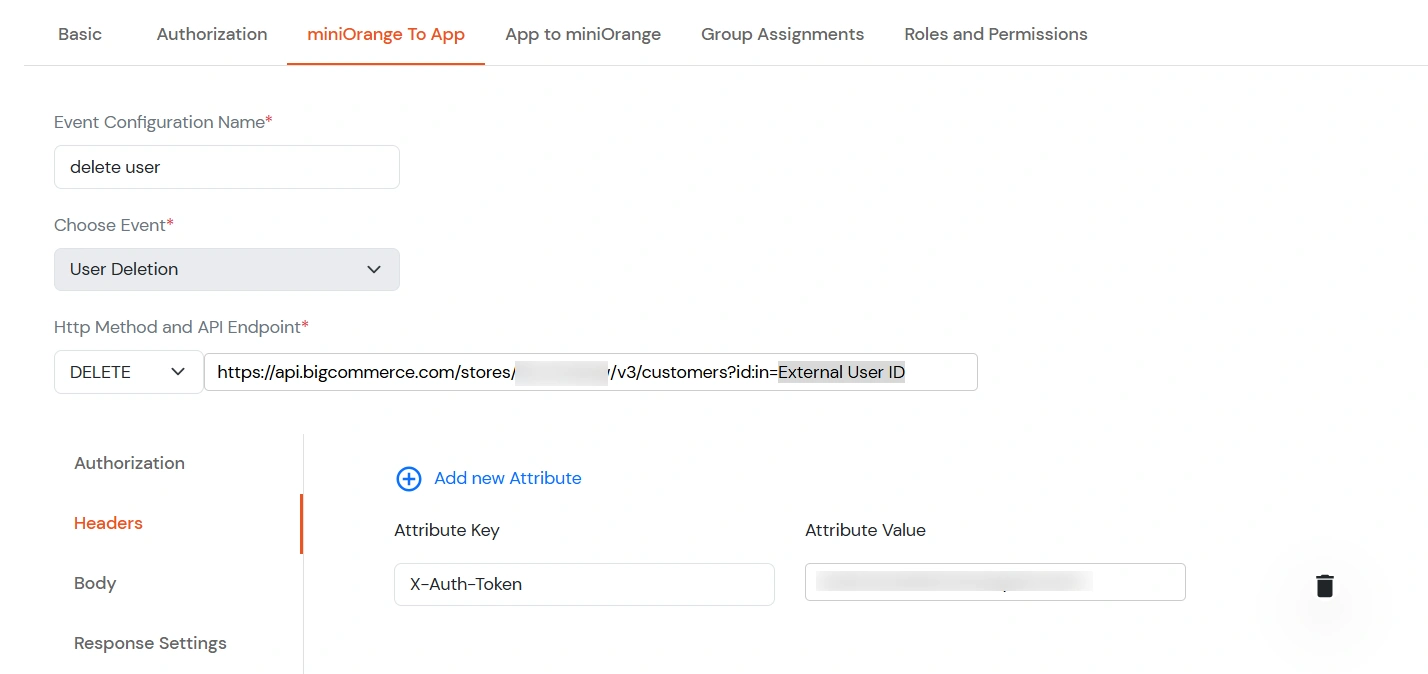
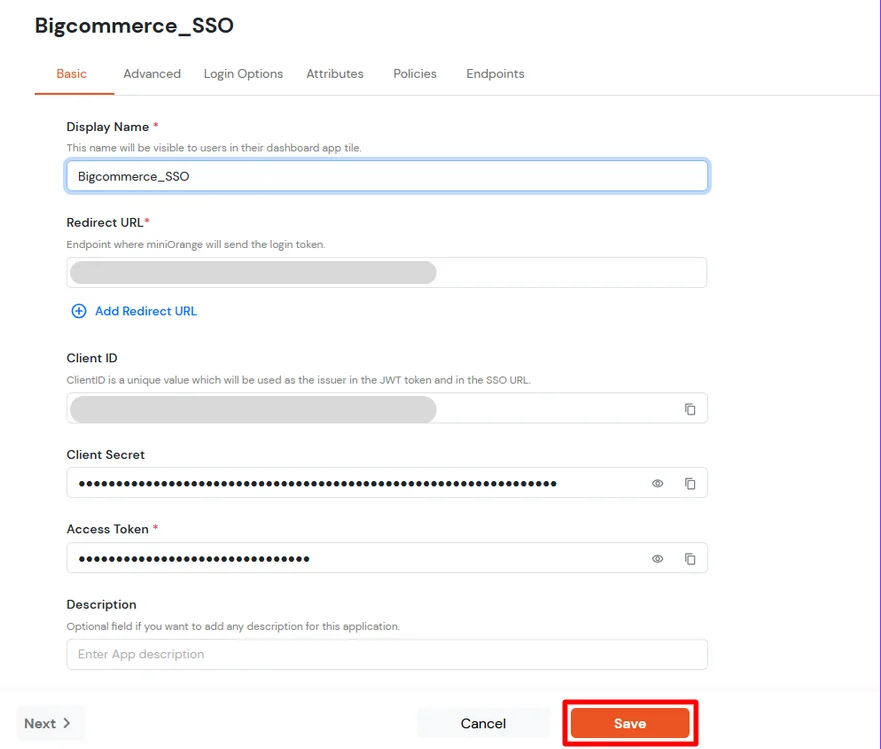
miniOrange to BigCommerce synchronization enables automated user provisioning and lifecycle management using Custom API integration. Any user created, updated, or deleted in miniOrange is automatically synchronized with BigCommerce.

1. Setup Provisioning for BigCommerce

  • Login into miniOrange Admin Console.
  • Go to Apps and click on Add Application button.
  • miniOrange Admin Console: Apps tab with Add Application

  • Under Choose Application, select Provisioning from the All Apps dropdown.
  • miniOrange Admin Console: Choose Application – select Provisioning from All Apps

  • Click Custom Provisioning Application
  • miniOrange: Select Custom Provisioning application

  • Enter the Display Application Name and then click on Next.
  • Custom Provisioning: Enter Display Application Name and Next

2. User Creation Configuration

  • Navigate to the miniOrange to App tab to configure provisioning events.
  • Custom Provisioning: miniOrange to App tab for event configuration

  • Add the Event Configuration Name and the API endpoint.
  • Custom Provisioning: Event Configuration Name and API endpoint

  • Select Event Type: User Creation.
  • Custom Provisioning: Event Type set to User Creation

  • In the Request Settings section, set the Method to POST and the Endpoint to https://api.bigcommerce.com/stores/{store-hash}/v3/customers.
  • Replace the store-hash in the API URL with your actual BigCommerce store hash value.
  • Custom Provisioning: Request Settings – POST and BigCommerce v3 customers endpoint

  • In the Headers section, enter 
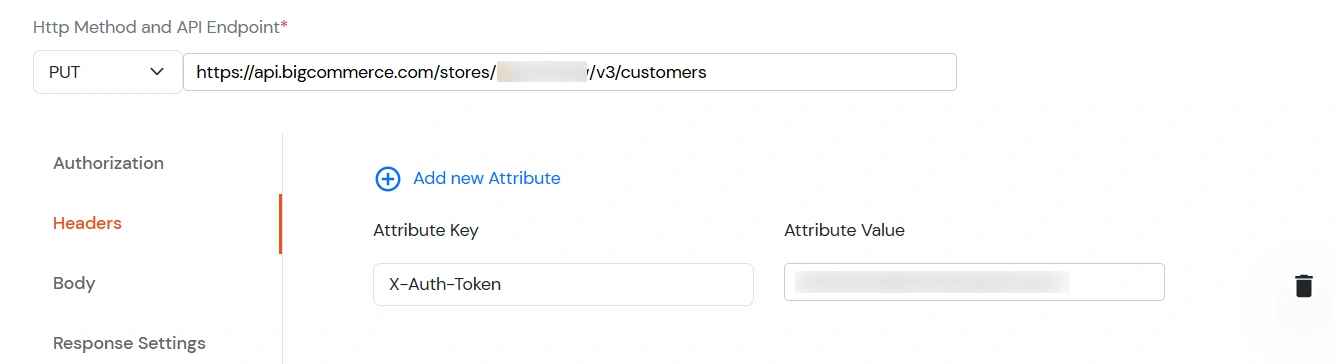
X-Auth-Token as the Attribute Key and the Access Token as the Attribute Value.
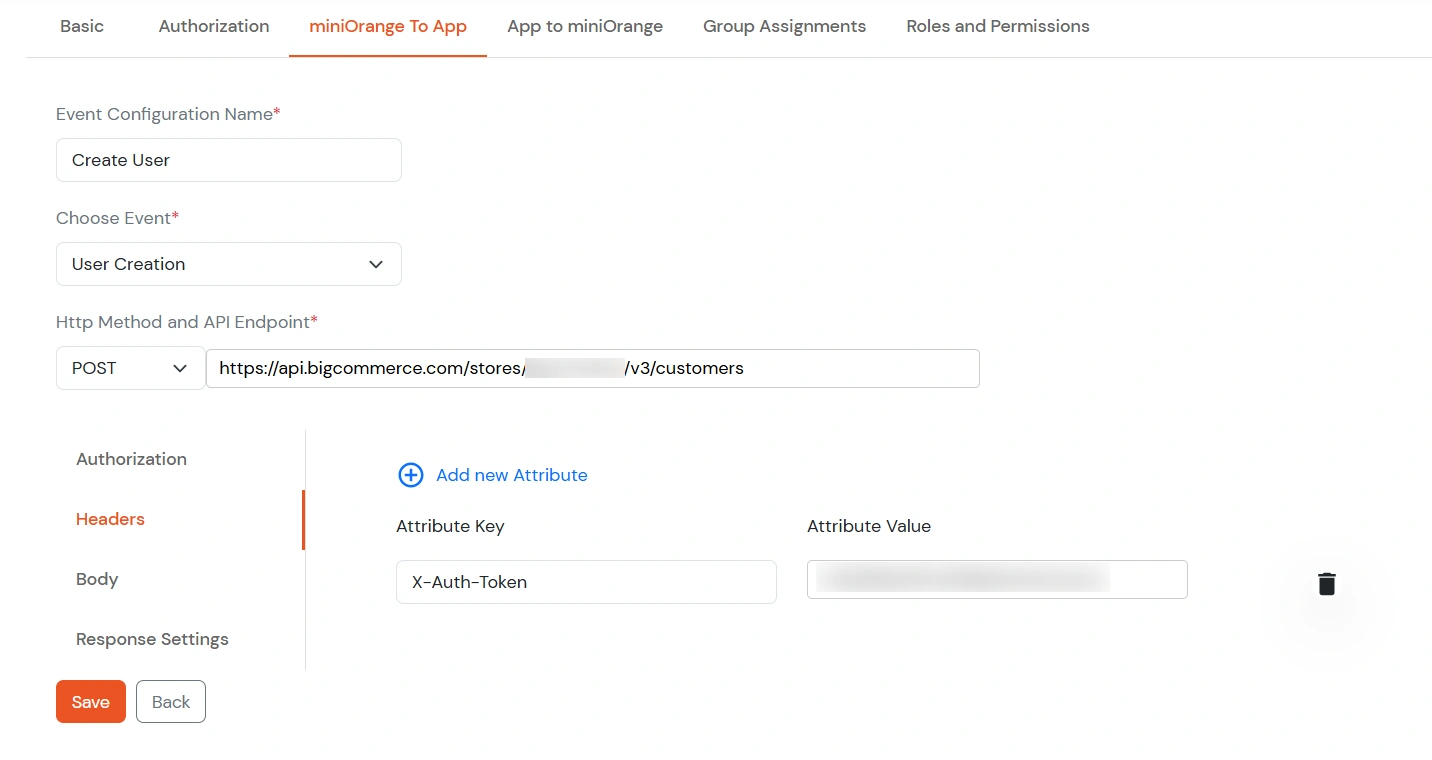
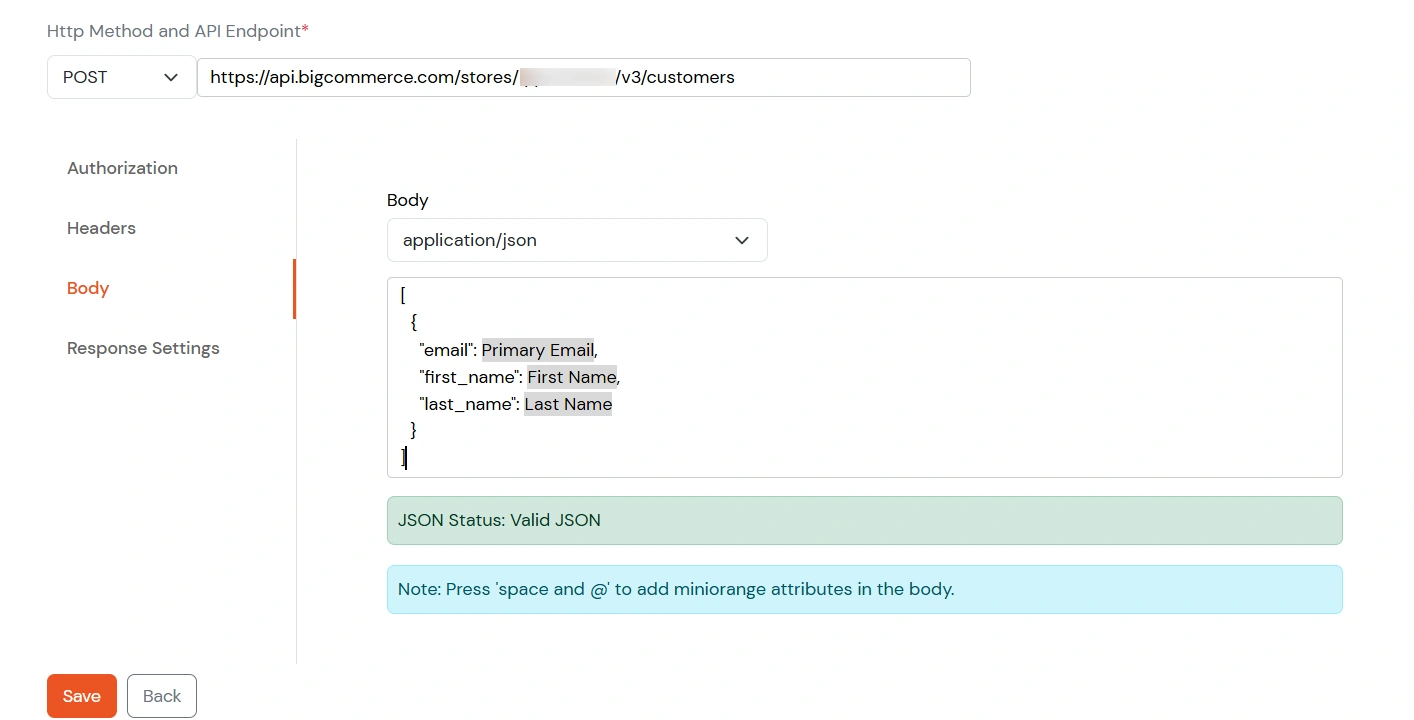
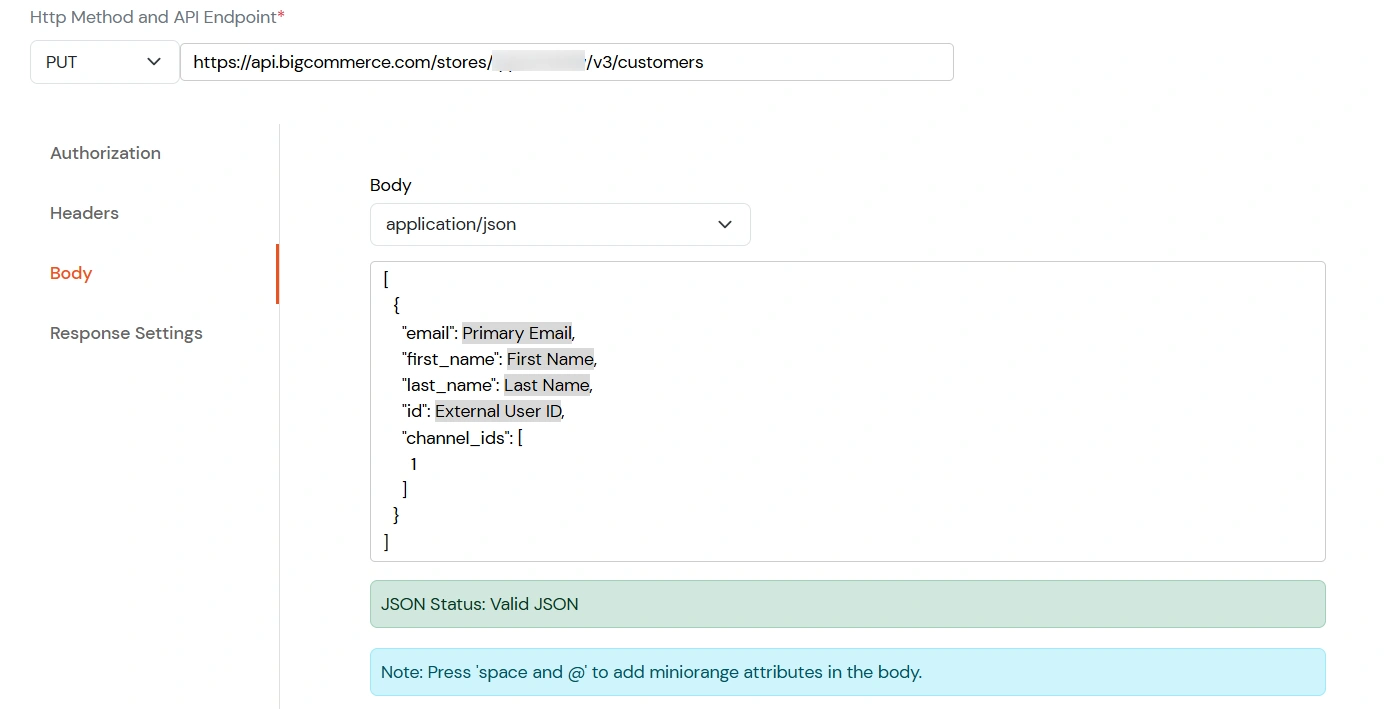
  • Custom Provisioning: Headers – X-Auth-Token key and Access Token value

  • In the Request Body, Select application/json.
  • Custom Provisioning: Request body content type application/json

  • Enter the required user attributes as given below: [ { "email": Primary Email, "first_name": First Name, "last_name": Last Name } ]
  • Custom Provisioning: Request body mapping for email, first_name, last_name

  • In the Response Settings section, enter the External Identifier Key as data[0].id .
  • Custom Provisioning: Response Settings – External Identifier Key data[0].id

  • Click Save.

3. Verification

  • Create a user in miniOrange it will sync into bigcommerce.
  • Navigate to Reports >> Provisioning Reports.
  • Verify user sync status.
  • miniOrange Provisioning Reports: verify user sync status

4. User Update Configuration

  • Select Event Type: User Updated.
  • Custom Provisioning: Event Type set to User Updated

  • Set the Method to PUT and the Endpoint to
    https://api.bigcommerce.com/stores/{store-hash}/v3/customers.
  • Custom Provisioning: User update – PUT method and BigCommerce customers endpoint

  • Add the X-Auth-Token header.
  • Custom Provisioning: User update – X-Auth-Token header

  • Configure request body
  • Custom Provisioning: User update – request body configuration

  • Click Save.

5. User Deletion Configuration

  • Select Event Type: User Deleted.
  • Custom Provisioning: Event Type set to User Deleted

  • Set the Method to DELETE and the Endpoint to 
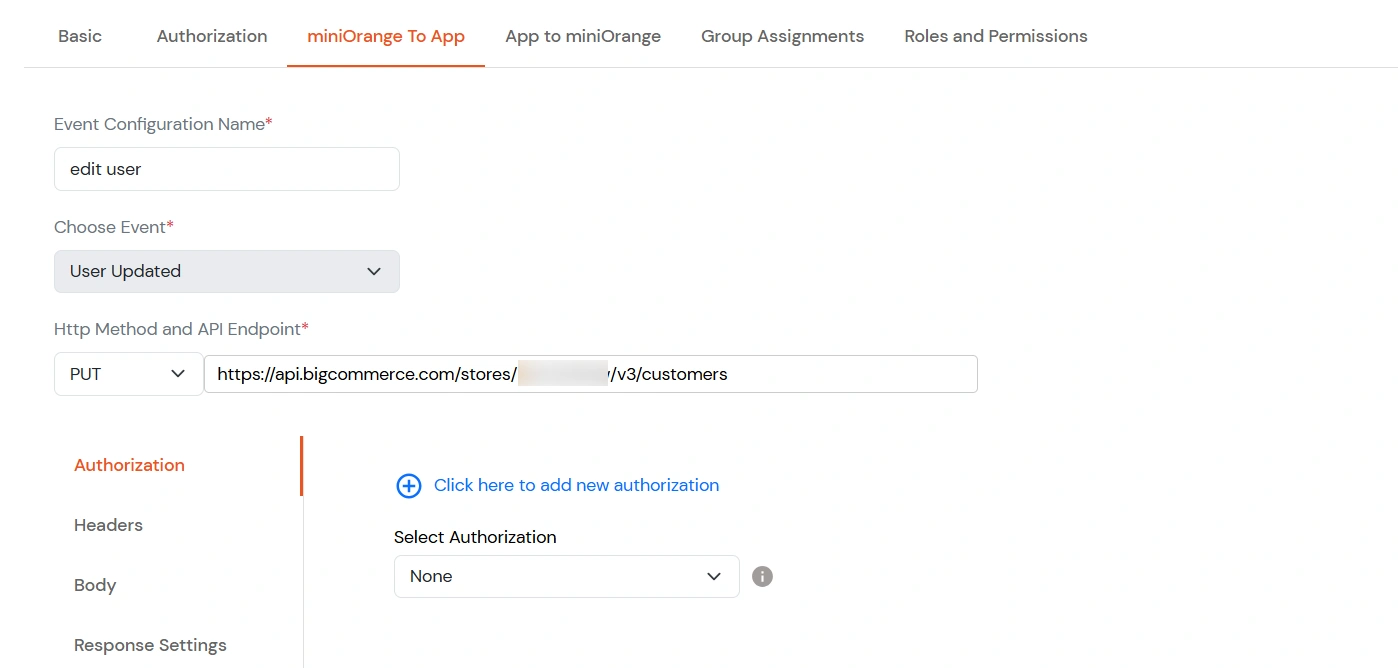
https://api.bigcommerce.com/stores/{store-hash}/v3/customers?id:in=External User ID.
  • Custom Provisioning: User deletion – DELETE method and customers endpoint with External User ID

  • Add the X-Auth-Token header.
  • Custom Provisioning: User deletion – X-Auth-Token header

  • Save configuration.

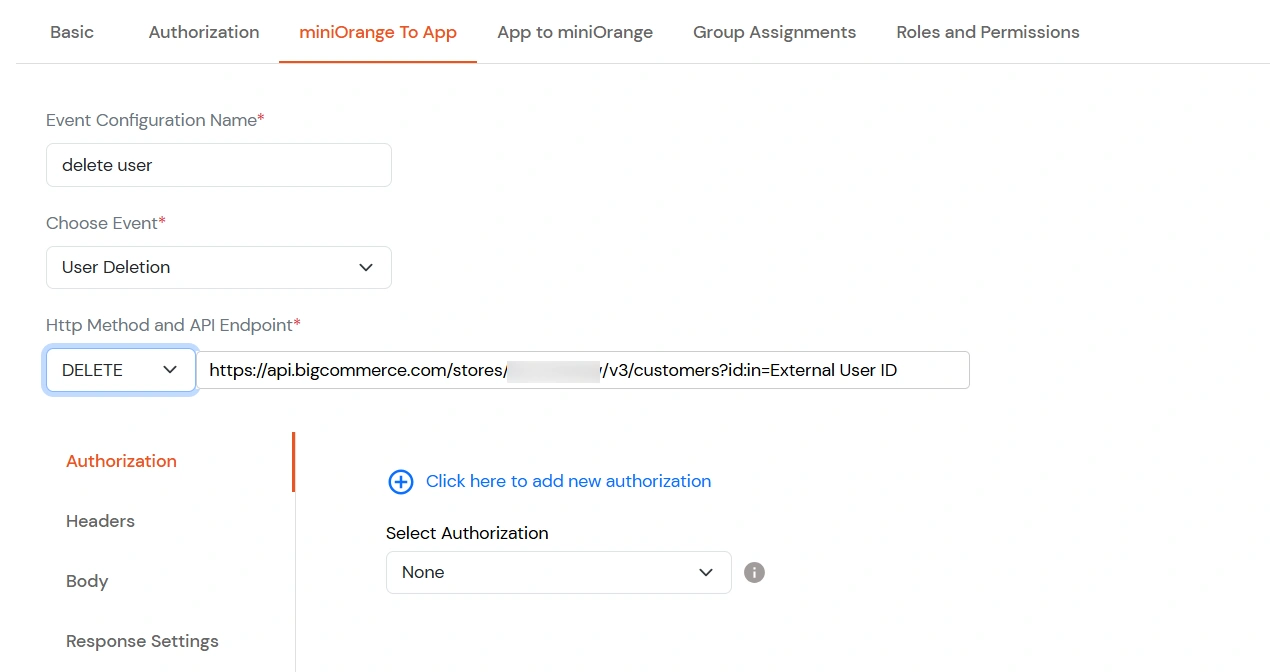
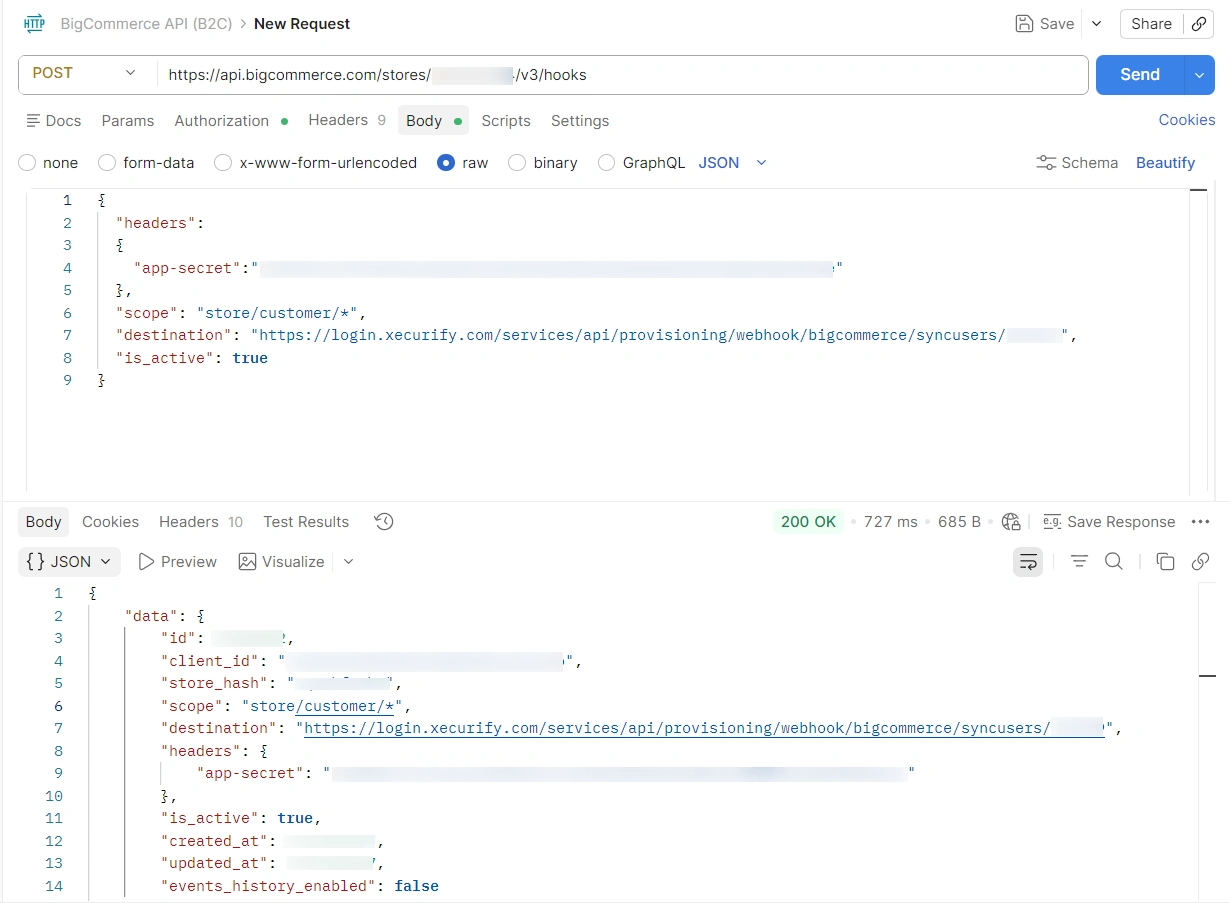
This section explains how customer changes made in BigCommerce are automatically synchronized to miniOrange in real time using webhook-based integration.
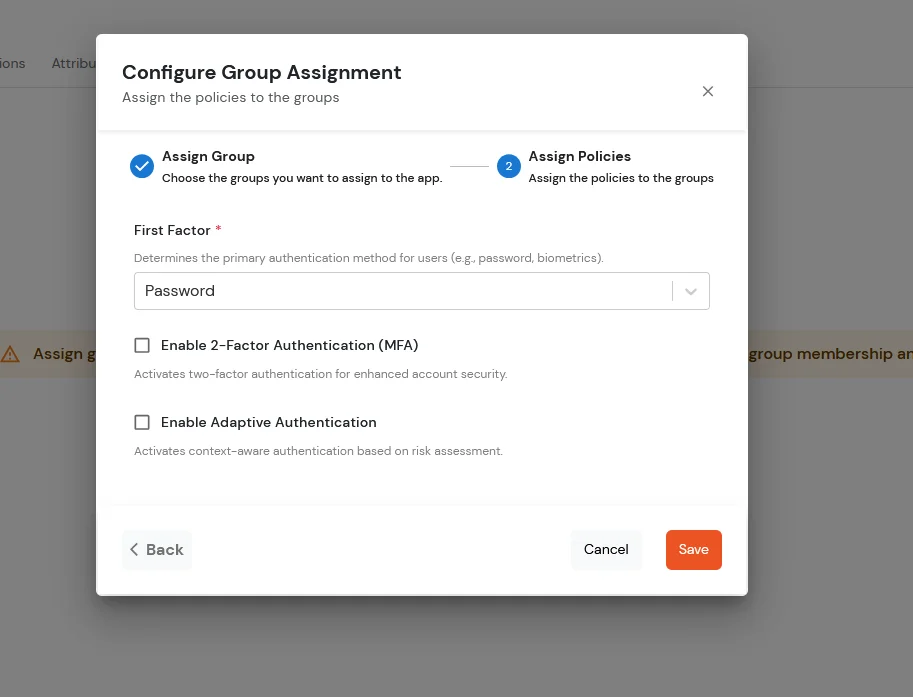
1. Configure BigCommerce Application in miniOrange

  • Login into miniOrange Admin Console.
  • Go to Apps Click on Add Application button.
  • miniOrange Admin Console: Apps tab with Add Application

  • In the Choose Application section, open the dropdown list of All Apps and select JWT.
  • miniOrange Admin Console: Choose Application – select JWT

  • In the next step, search for BigCommerce application from the list and click on it.
  • miniOrange: Select BigCommerce JWT application from the list

  • Enter the following values in the respective fields.
  • BigCommerce JWT app: basic details, redirect URL, Client ID, Client Secret, Access Token

  • Enter the Client ID, Client secret and Access token which we have downloaded during API creation in BigCommerce Console.
  • Navigate to Policies tab.
  • Click on Assign Group button.

    BigCommerce JWT app: Policies tab – Assign Group

  • On the Assign Group section.
  • Choose the DEFAULT group.
  • Click on the Next button.

    BigCommerce JWT app: Assign Group – choose DEFAULT group

  • Assign the policies to the group. Here, you can choose the primary authentication method for users. From the dropdown under First Factor, select Password.
    First Factor Password
  • Click on Save.

    BigCommerce JWT app: Assign policies – First Factor Password

2. Webhook Configuration

  • Create Webhook.
  • Send a POST request to the following API in Postman.
    https://api.bigcommerce.com/stores/{store_hash}/v3/hooks.
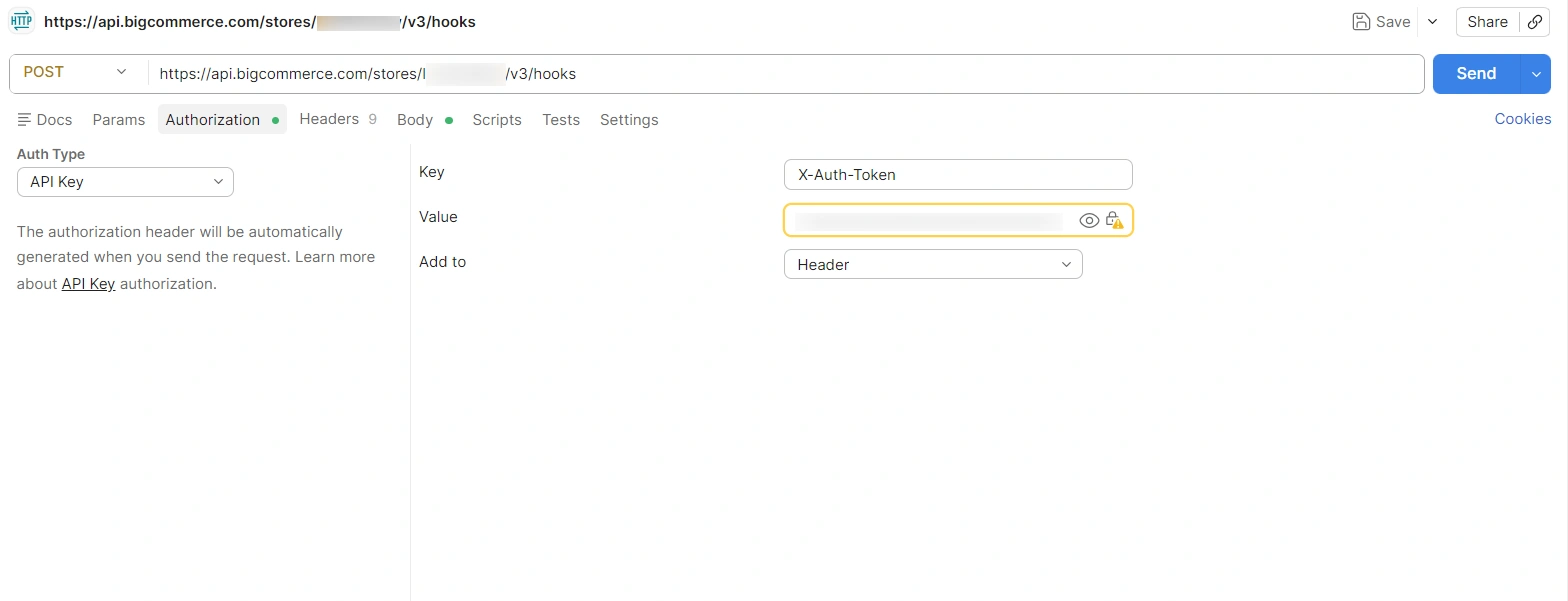
  • Add the X-Auth-Token header and set the Access Token as its value.
  • BigCommerce API: Create webhook – POST to v3/hooks with X-Auth-Token header

  • Request Body
                               {
                               "headers": {
                               "app-secret": "Client Secret"
                               },
                               "scope": "store/customer/*",
                               "destination": "https://login.xecurify.com/services/api/provisioning/webhook/bigcommerce/syncusers/{customerId}",
                               "is_active": true
                               }


  • BigCommerce webhook: JSON request body with scope, destination, and app-secret headers

  • Replace appSecret with the miniOrange app secret and {customerId} with the customer ID; after this, creating or updating a user in BigCommerce will automatically create or update the user in miniOrange.


View Provisioning Reports

How to access Provisioning Reports?

  • Navigate to Reports in the left-hand navigation pane, search for Provisioning, and select Provisioning Report.
  • Provisioning Report

  • Filter the reports by specifying Enduser Identifier and Application Name criteria. Additionally, choose the desired timespan for the reports. Once done, click on the Search.
  • Search Provisioning Report

  • Alternatively, you can directly click on Search to retrieve all provisioning reports based on time without applying any specific filters.


External References

Want To Schedule A Demo?

Request a Demo


Our Other Identity & Access Management Products