Steps to setup Hubspot provisioning
Setting up user provisioning in HubSpot is essential for managing access and ensuring a smooth onboarding process for your team. This guide provides a comprehensive overview of the steps needed to configure HubSpot provisioning effectively. By following these steps, you can streamline user management, automate access to necessary tools, and enhance security through predefined roles.
Whether you're onboarding new employees or managing user access, this guide will help you optimize your HubSpot experience and boost productivity from day one.
Follow the Step-by-Step Guide given below to setup Hubspot Provisioning
1. Create Custom Provisioning App
- Login into miniOrange Admin Console.
- Go to Apps and click on Add Application button.

- Under Choose Application, select Provisioning from the All Apps dropdown.
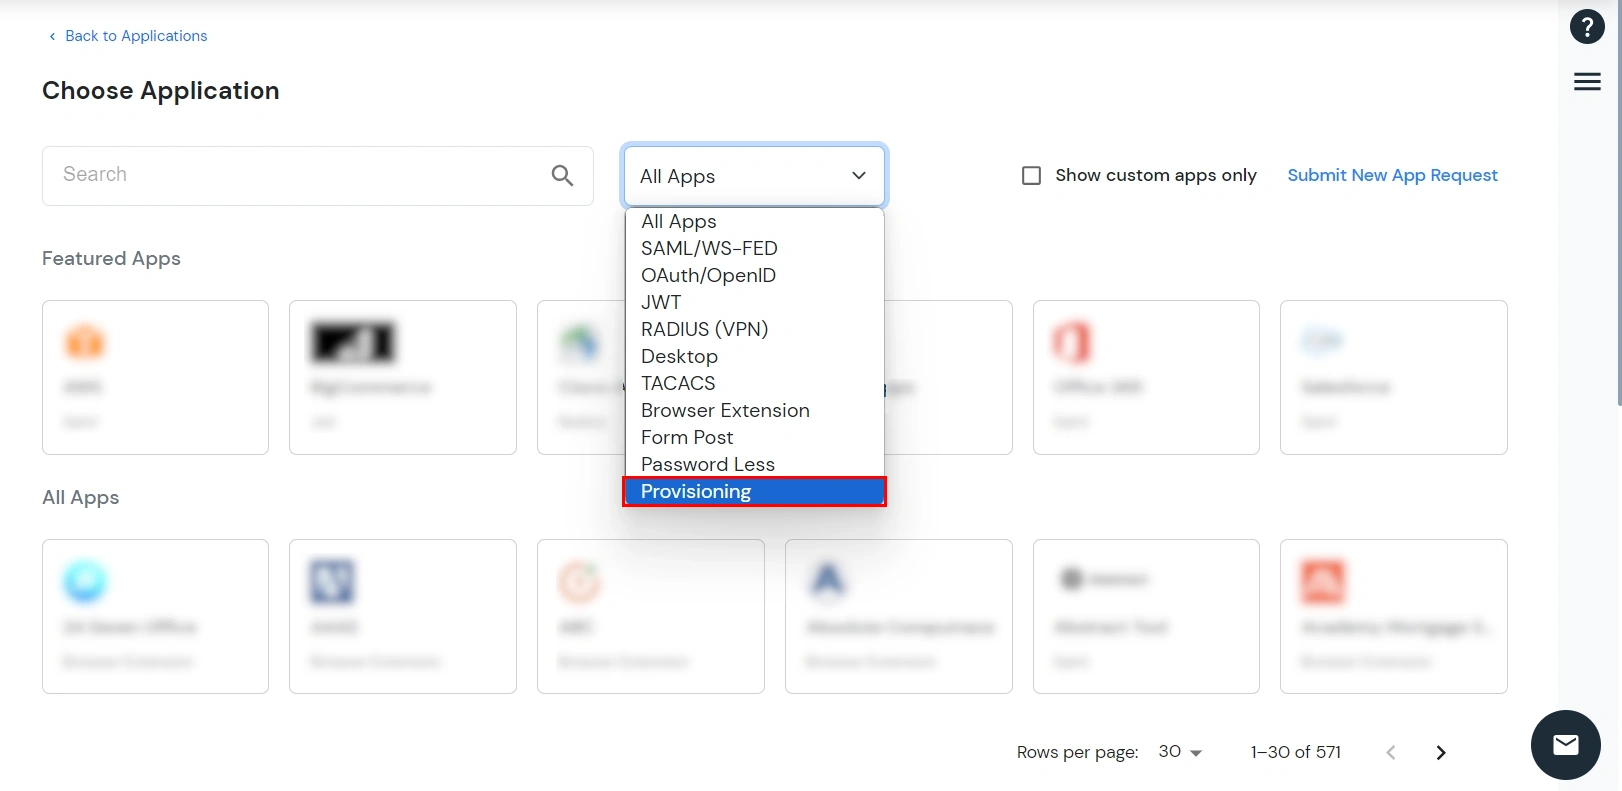
- Search for HubSpot in the search bar and select the HubSpot Sync application.

- Enter the App Name that you prefer and save this application by clicking on next.

2. Fetch Client ID and Client Secret from Hubspot
- Login into developer hubspot account.
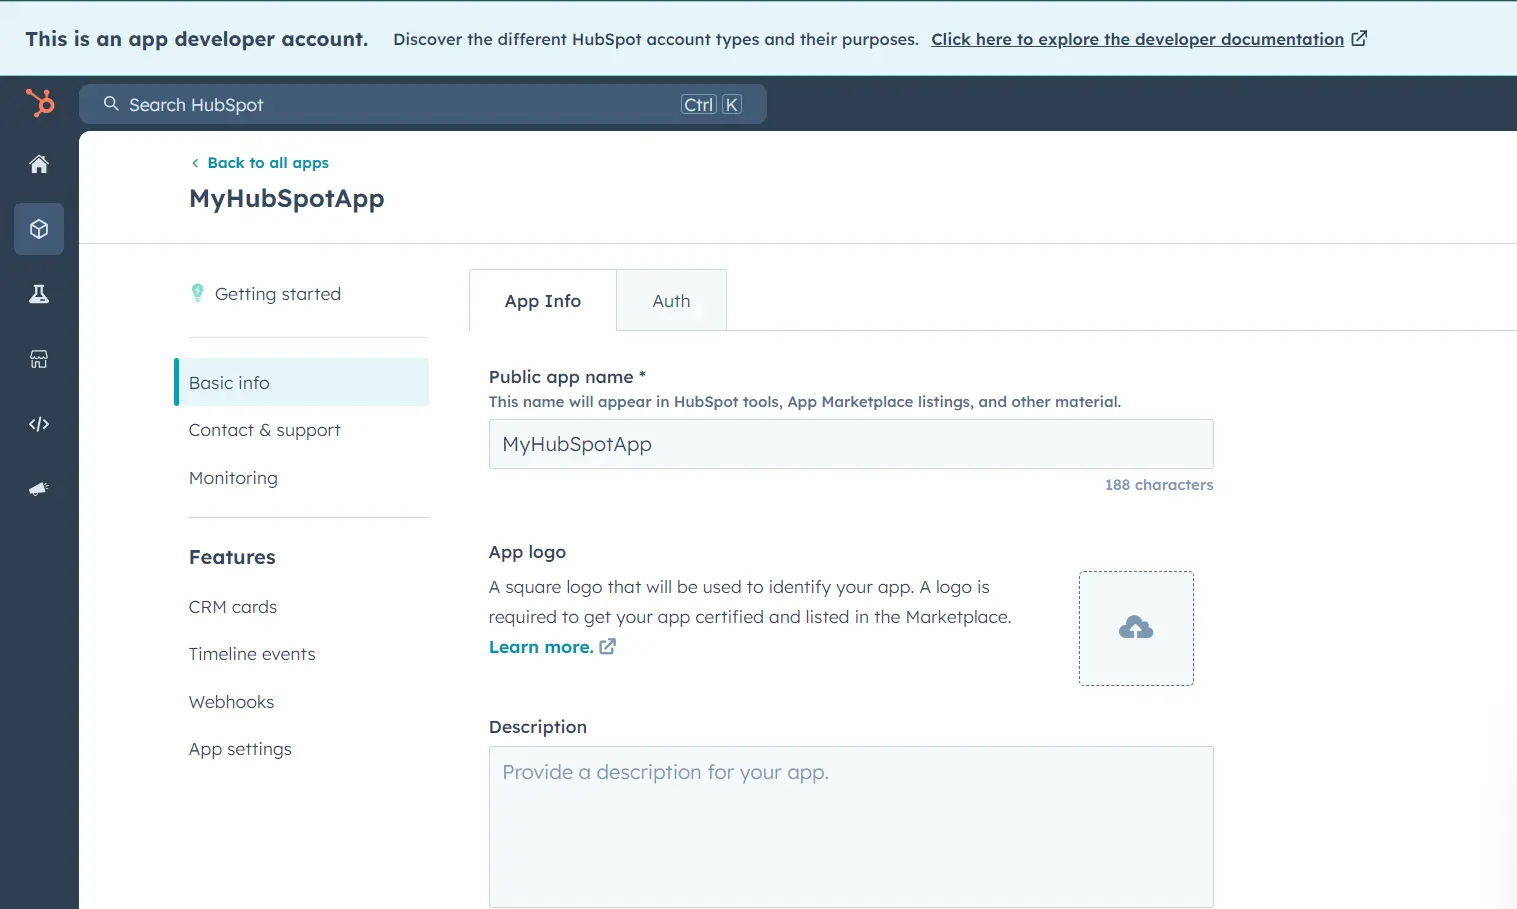
- Go to left sidebar and select Apps.

- Add the details of your app in the App Info section.
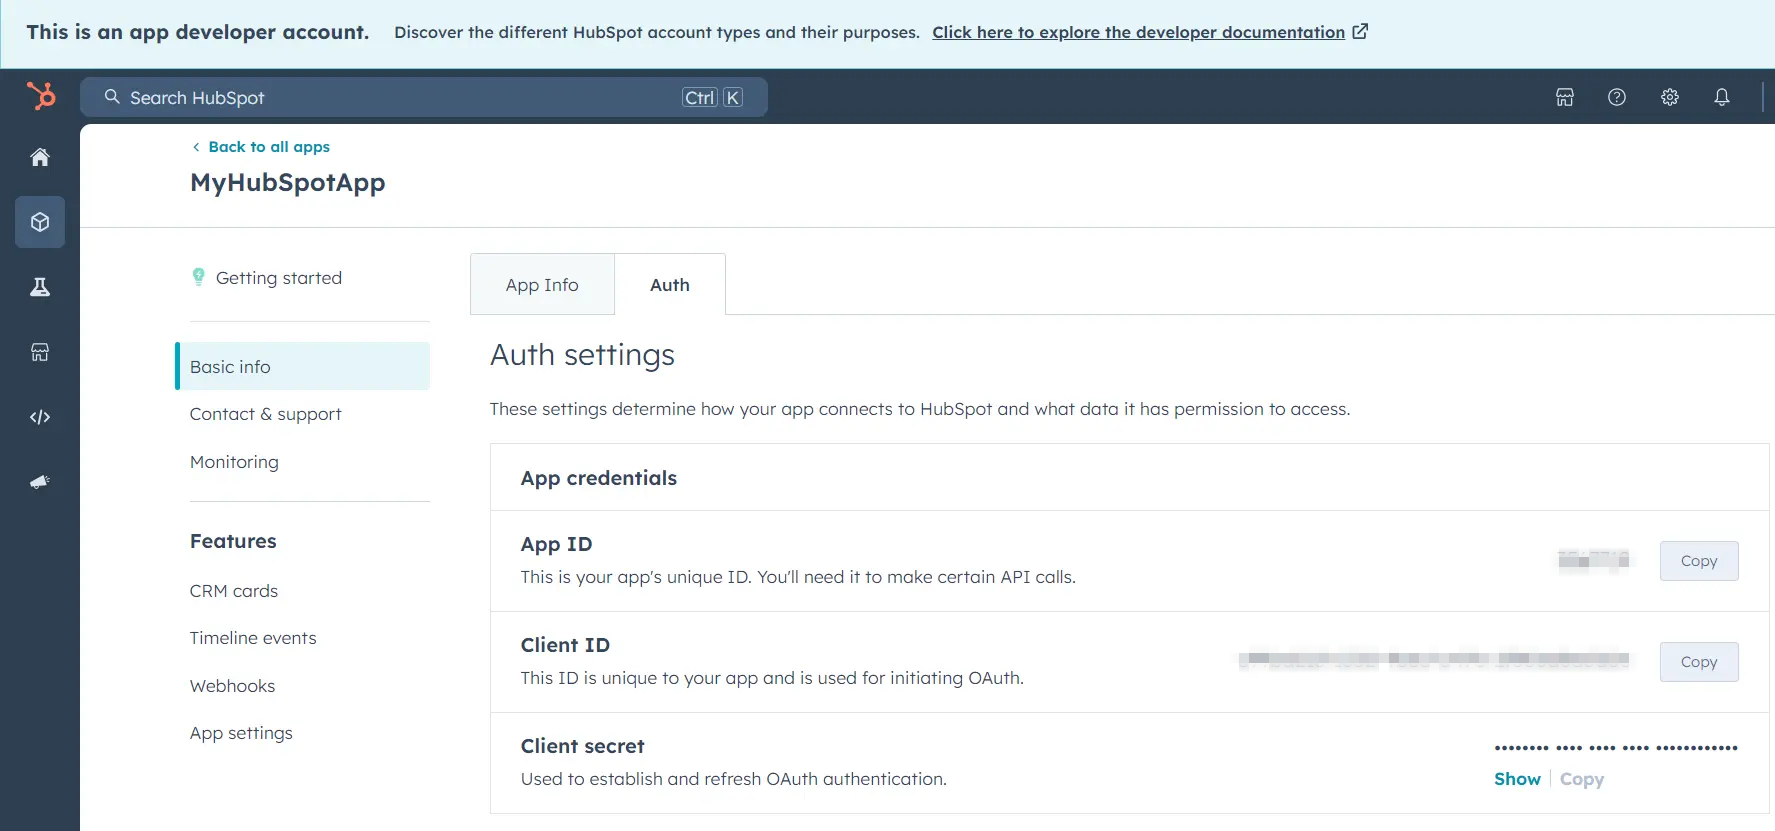
- Copy the client ID and client Secret and save them to add in your miniOrange portal.
3. Add authorization for the API’s
- Switch to Authorization Configuration and click on Add Configuration.
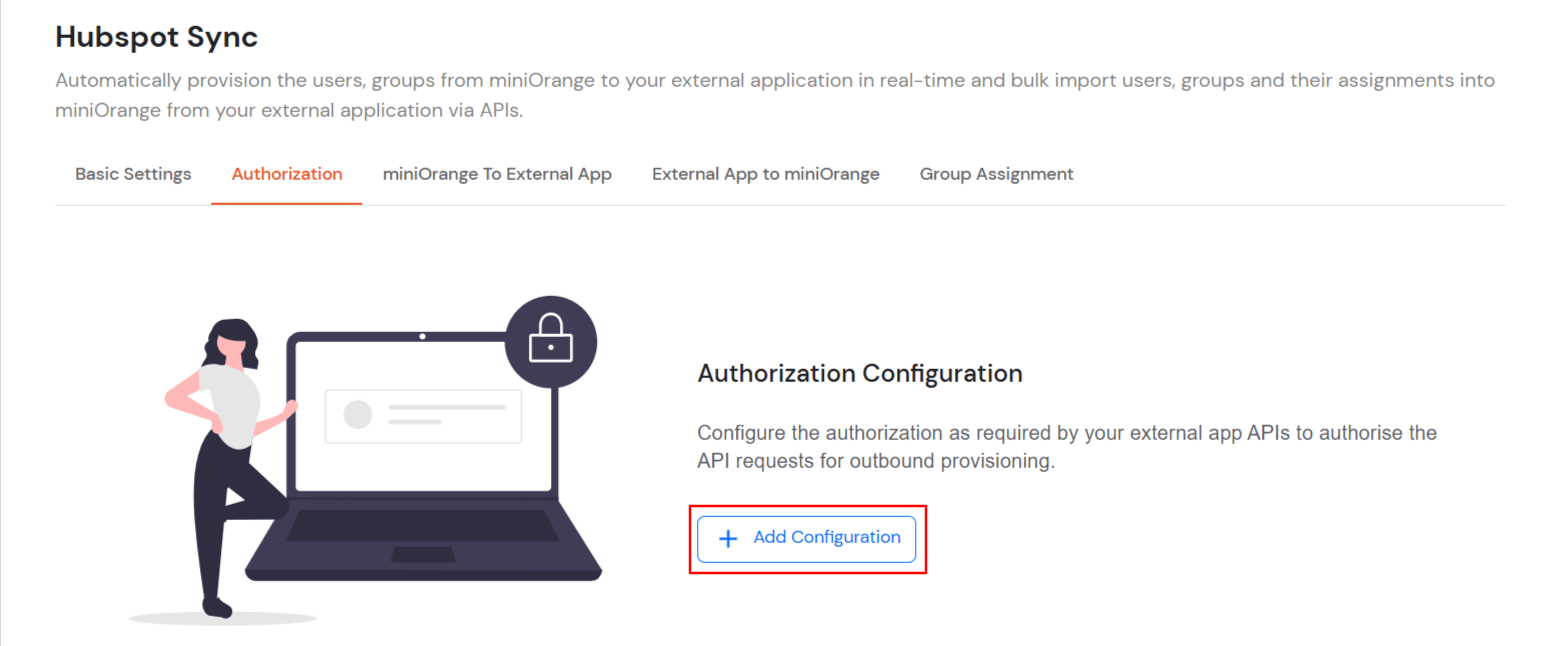
- Select OAUTH 2.0 and enter the client ID and client secret fetched from Step 2.
- Also enter following details as:
- Access Token: https://api.hubspot.com/oauth/authroize
- Scope: settings.users.write , settings.users.read
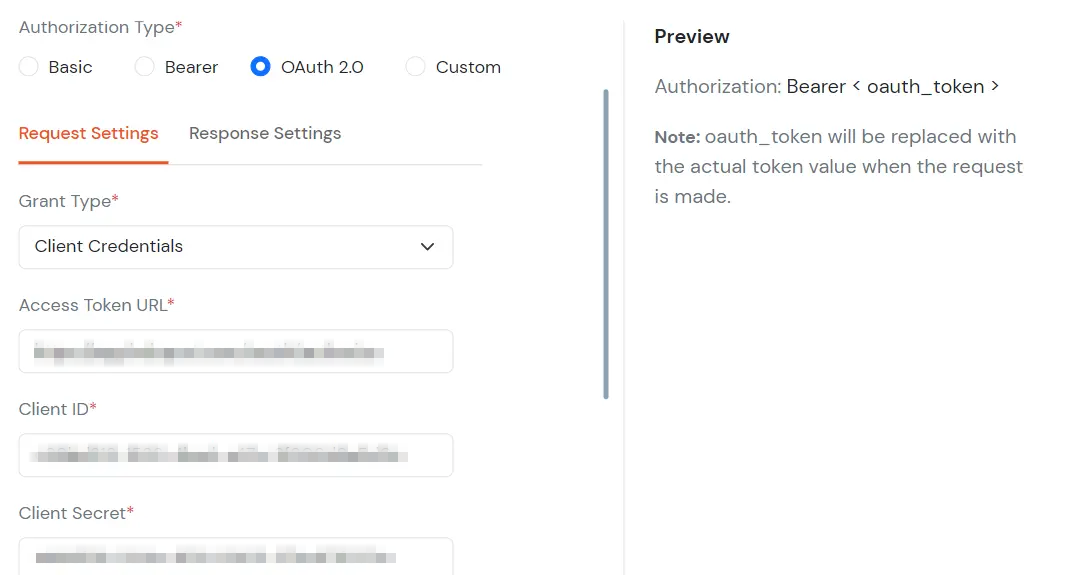
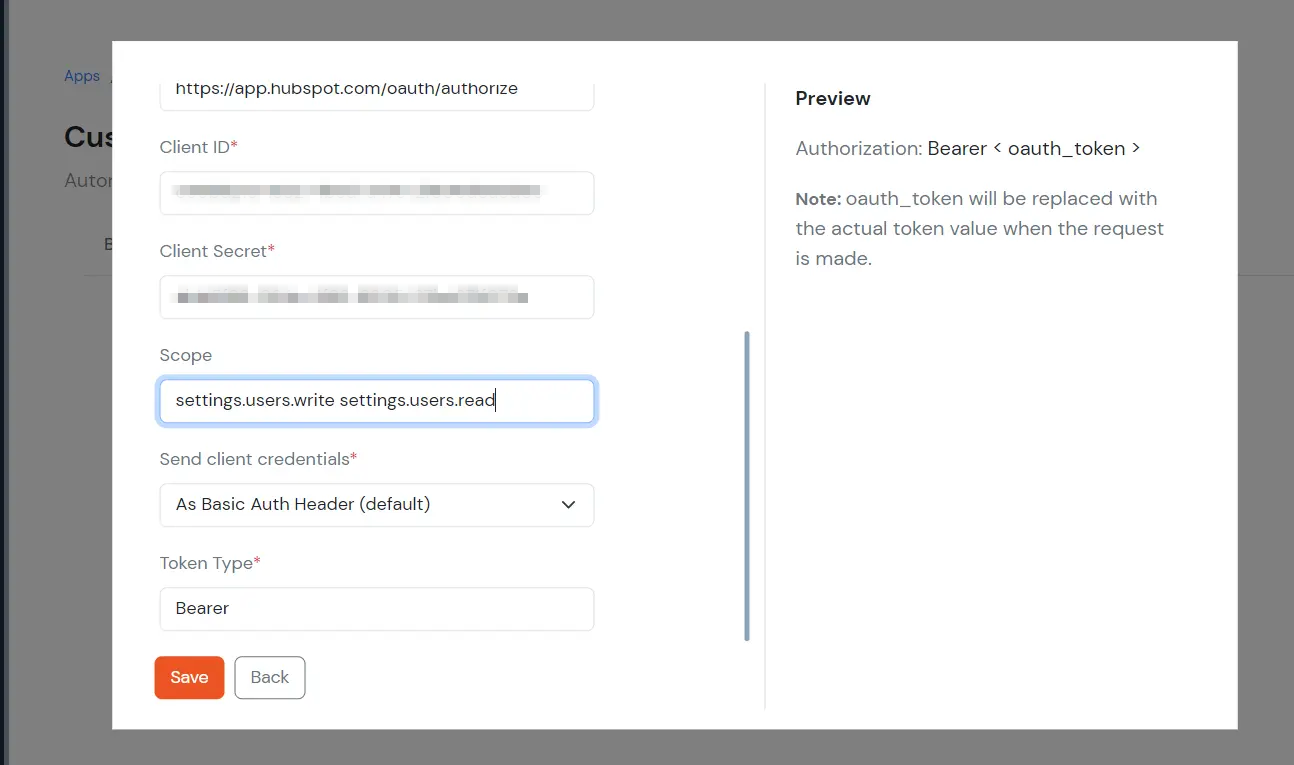
- Save the authorization configurations.
4. Create User
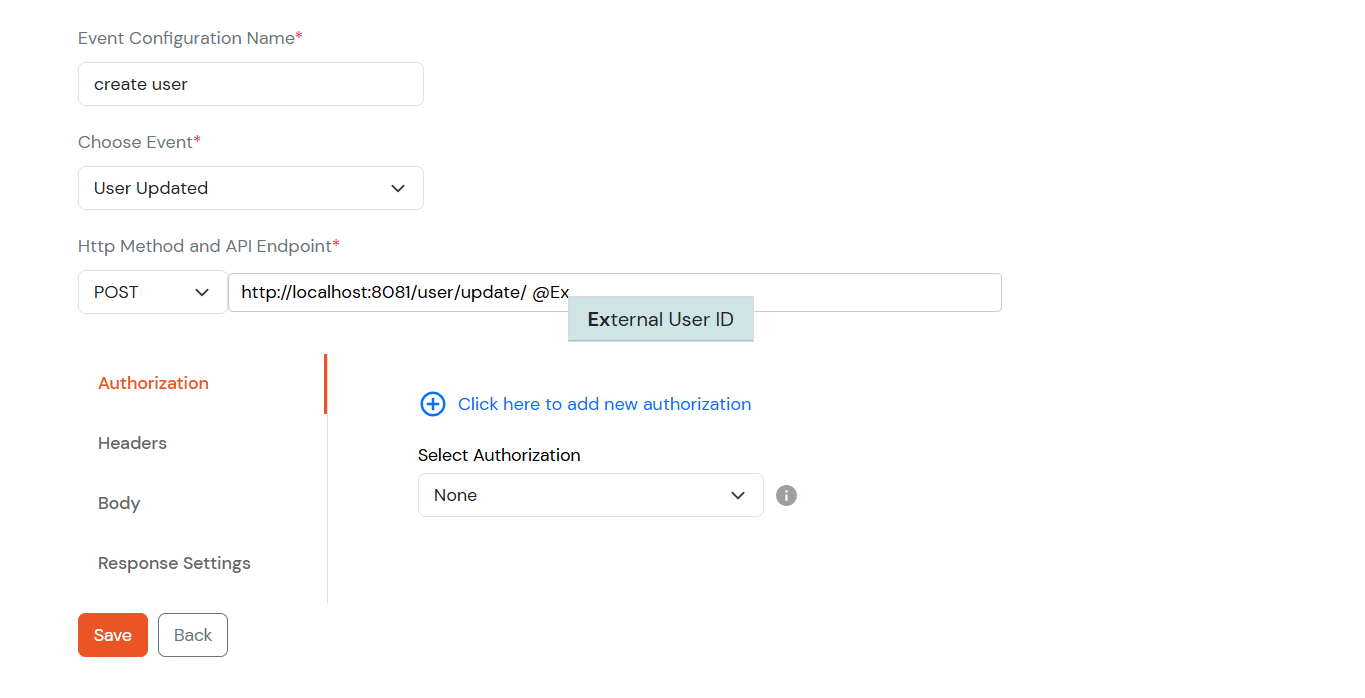
5. Update User
- If you want to use the user Identifier stored in URL, leave a space and use @External User Id.
6. Create Group
- Go to Groups >> Manage Groups from the left menu and click on Create Group on the top right corner of the page.
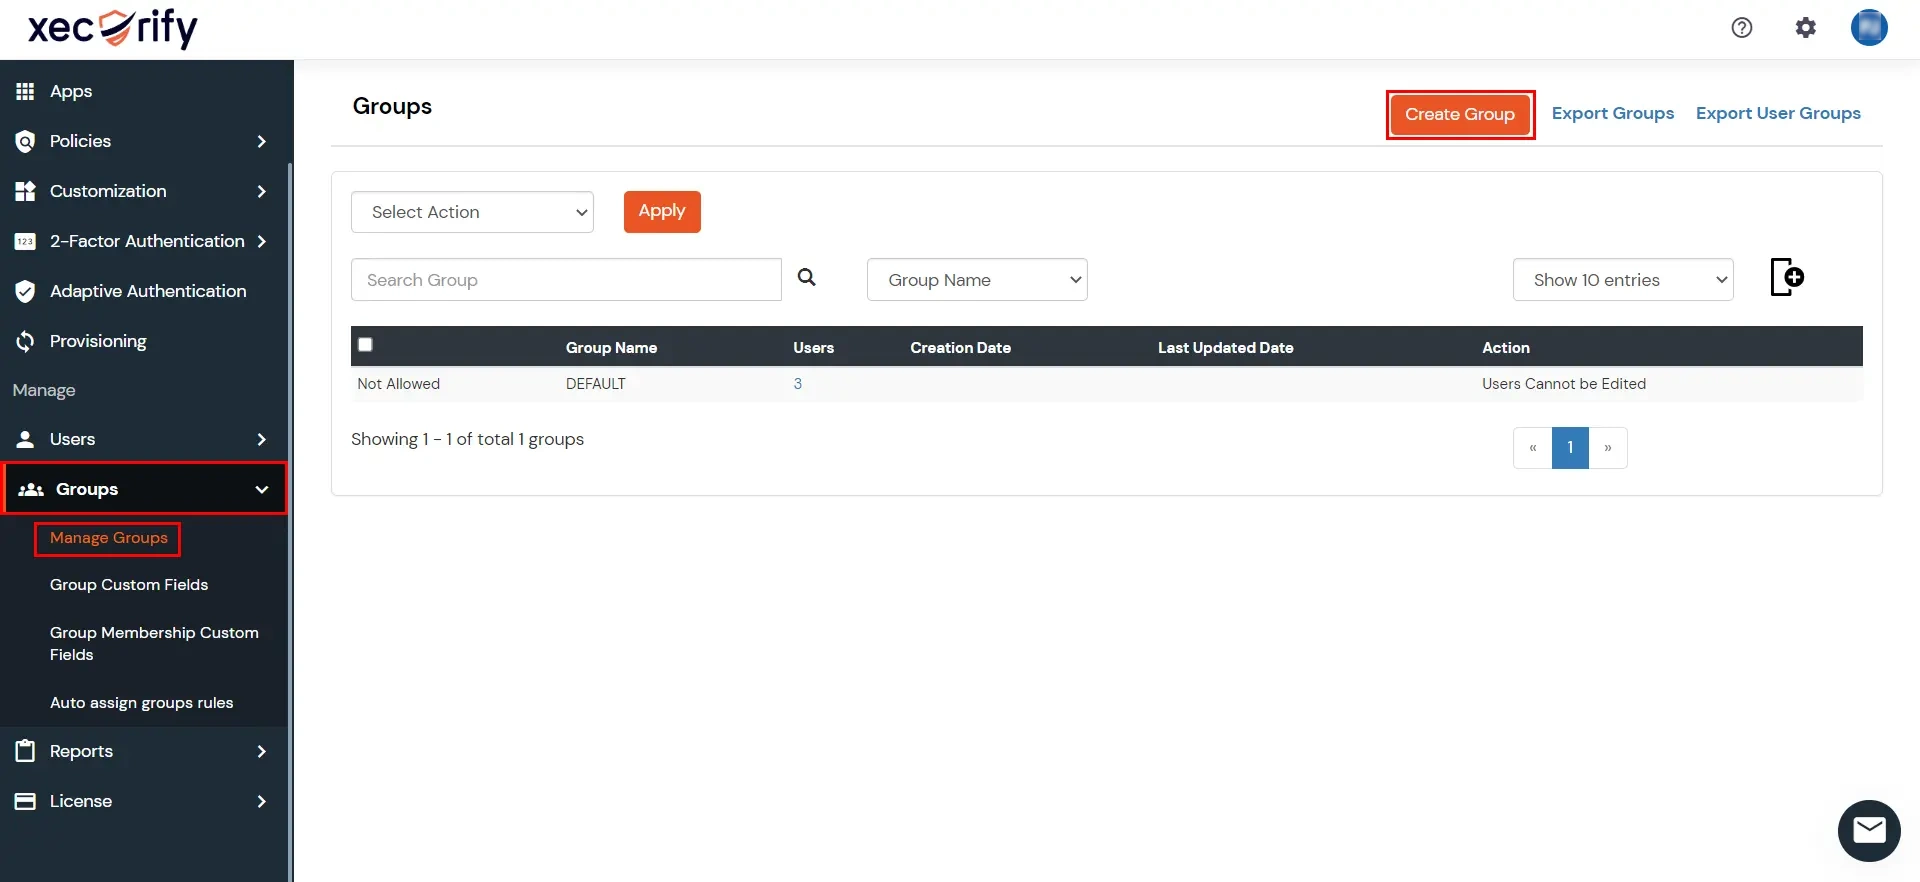
- Enter Group name and create the group.
7. Add Policy
- Go to Policies section, navigate to Add Policy tab.
- In Select Application section, select the application you have created in step2.
- In Configure Settings section, select the group you have created in step4 and enter the policy name with the required login method.
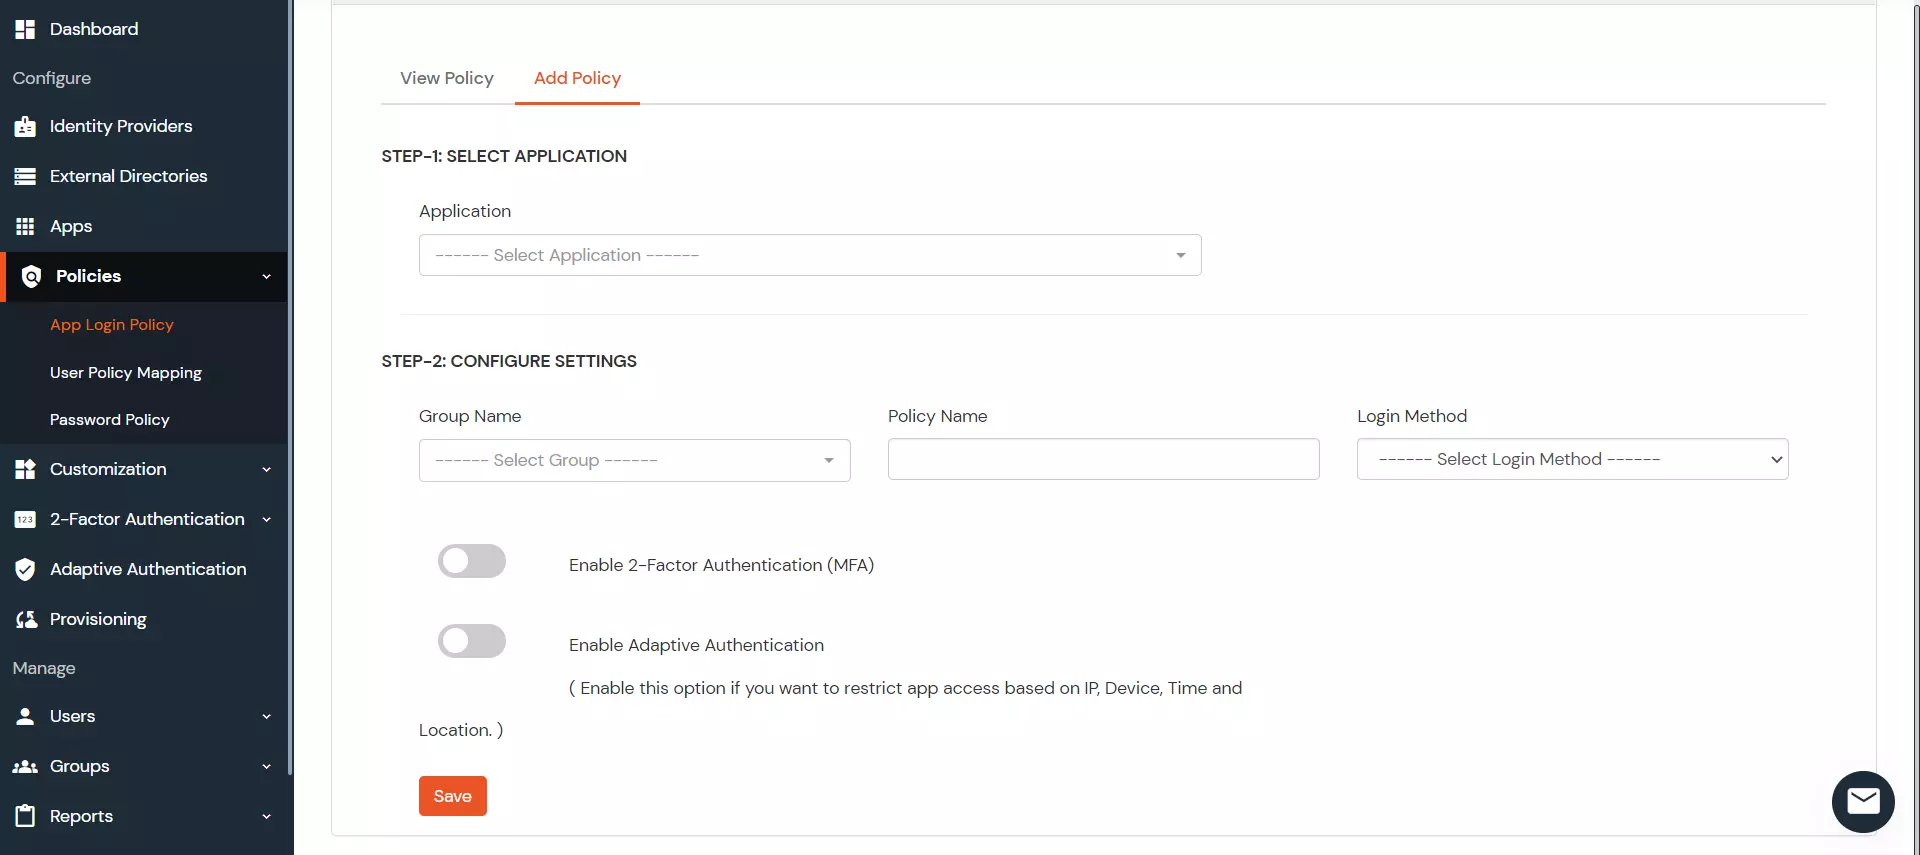
- Click on Save button.
8. Add Users
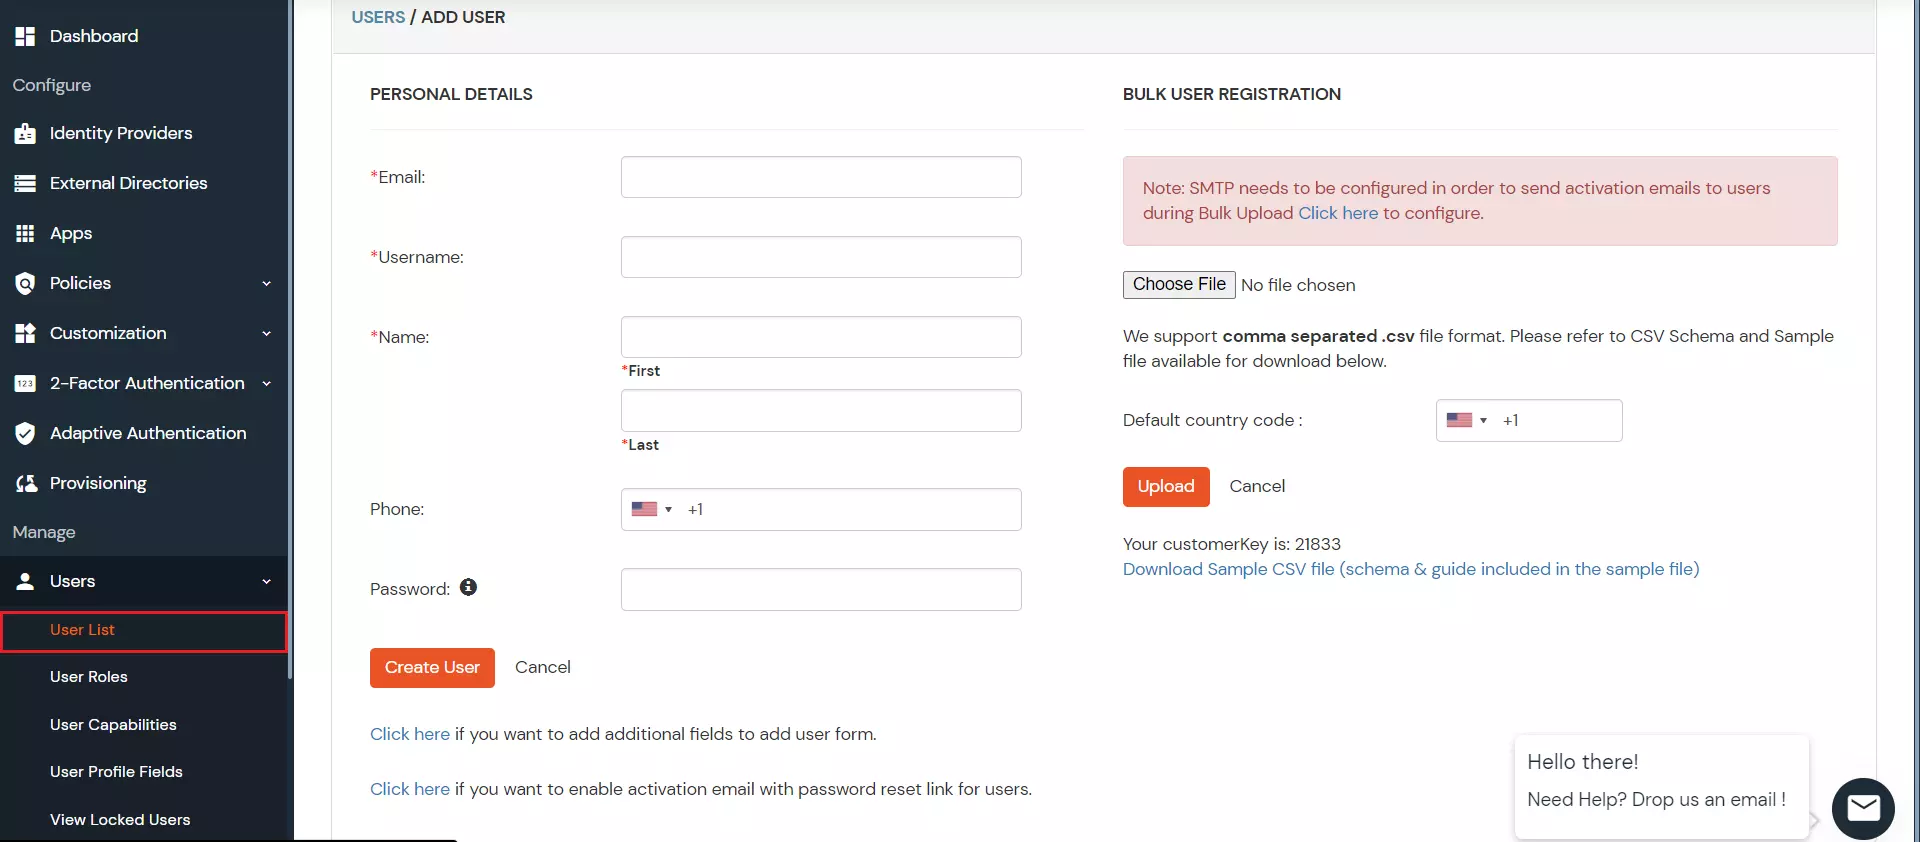
- Go to Users > Add User.
- Enter the Users Details and the user will be created.
9. Assign Users
- Go to Groups >> Manage Group.
- Assign the users to the Group you have created in step 6.

