Automations
What is Automation?
Rule-based provisioning or Automation enables administrators to set up specific rules that automatically manage the assignment of users to various groups and roles. This is particularly useful in scenarios where user attributes and actions need to trigger specific provisioning workflows.
Here’s a breakdown of how our automation rules work:
- Rule Definition: Administrators define rules based on user attributes and events. These rules specify the conditions under which certain actions should be taken. For example, a rule might specify that any user with the department attribute set to "Sales" should be added to the "Sales Team" group.
- Trigger Configuration: Triggers can be set up to initiate the provisioning process. Triggers, for now, include the creation of a new user account, updates to an existing user’s attributes. For example, a rule might be triggered whenever a new user is created or whenever a user’s department attribute is updated.
- Provisioning Actions: Once the rule trigger conditions are met, the specified provisioning actions are automatically executed. These actions involve assigning the user to specific groups or roles. For example, if a user's department changes to "Engineering," they might be automatically added to the "Engineering" role and given access to resources in line with the role they are assigned.
- Automation and Efficiency: Rule-based provisioning automates the user management process, reducing the need for manual intervention. This ensures that users are quickly and consistently provided with the appropriate access and resources based on their role or other attributes. It also helps maintain compliance with organizational policies by ensuring that access rights are granted or revoked in accordance with predefined rules.
Example Scenario:
Consider a company that wants to automate the provisioning of user accounts based on departmental changes:
- Rule: If a user’s department is set to "Finance," add them to the "Finance Team" group and assign them the "Finance Analyst" role.
- Trigger: The rule is triggered whenever a user’s department attribute is updated.
- Action: Once the department attribute is updated to "Finance," the user is automatically added to the "Finance Team" group and granted the "Finance Analyst" role.
Benefits of Rule-Based Provisioning:
- Consistency: Ensures that users are always assigned the correct roles and access rights based on predefined rules, eliminating inconsistencies that can arise from manual processes.
- Efficiency: Reduces the administrative burden of manually managing user access, allowing IT teams to focus on more strategic tasks.
- Scalability: Easily scales with the organization as rules can be applied uniformly across all users, making it easier to manage large numbers of users and complex organizational structures.
- Compliance: Helps maintain compliance with internal policies and external regulations by ensuring that access rights are automatically managed according to predefined criteria.
Provisioning & Deprovisioning Scenarios
miniOrange provides Provisioning solutions for all scenarios of user management (provisioning), which includes AD Integration, LDAP Integration and automated provisioning for all External Applications such as Asana, Google Workspace, Workday, etc
Prerequisites
- Default profile attributes which can be included in rule trigger : Email, username, first name, last name, Phone number and alternate email.
- Custom profile attributes are of the type : textbox, dropdown, checkbox and datepicker.
- The group and role that you want to assign users to, should be created or should exist beforehand.
- Any custom profile attributes that you want to use to assign users to groups or roles, should should be created or should exist beforehand.
- If the allowed values for custom profile attributes (like Dropdown and Textbox) are changed, the rule that uses that custom attribute in its trigger will also need to be updated manually, as it won't update automatically.
- Rule-based provisioning works in the following user creation or update flows: UI user creation or update, bulk user upload or update, user creation or update via miniOrange API endpoints, and new user creation from the sign-up page.
How to setup/configure Automation
- Add a rule:
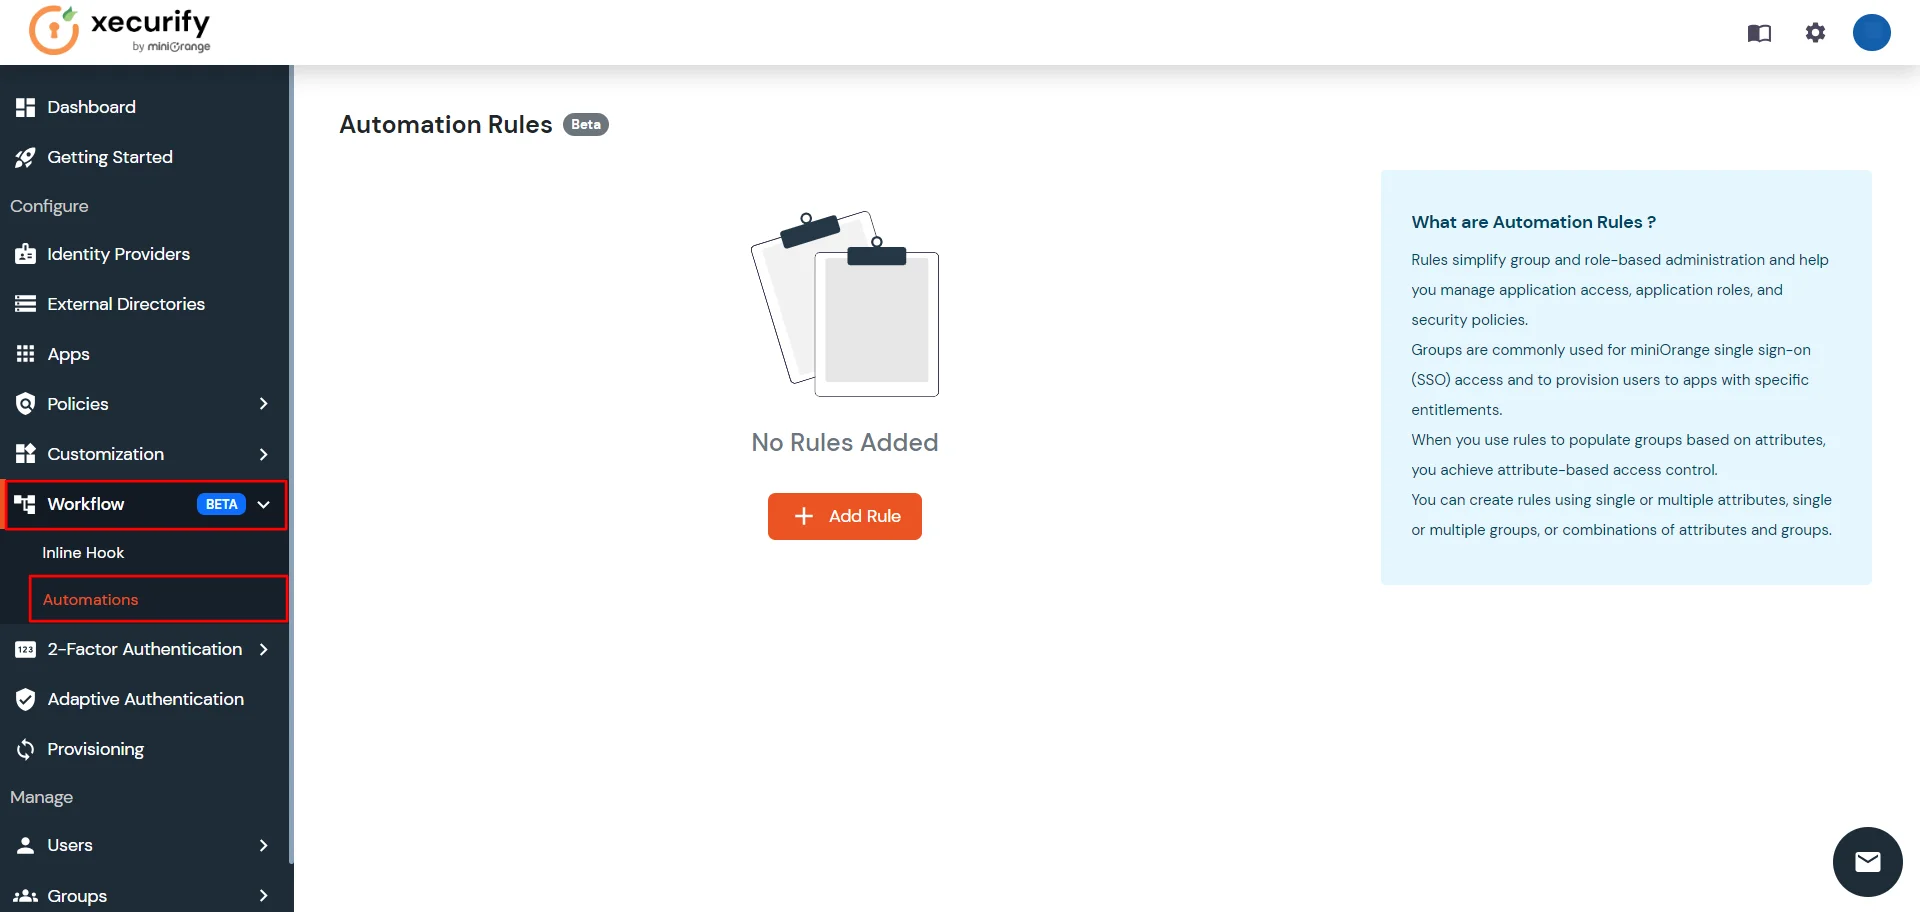
- Head over to the menu on the left side and go to Workflow > Automations. The Automation Rules page will open up.
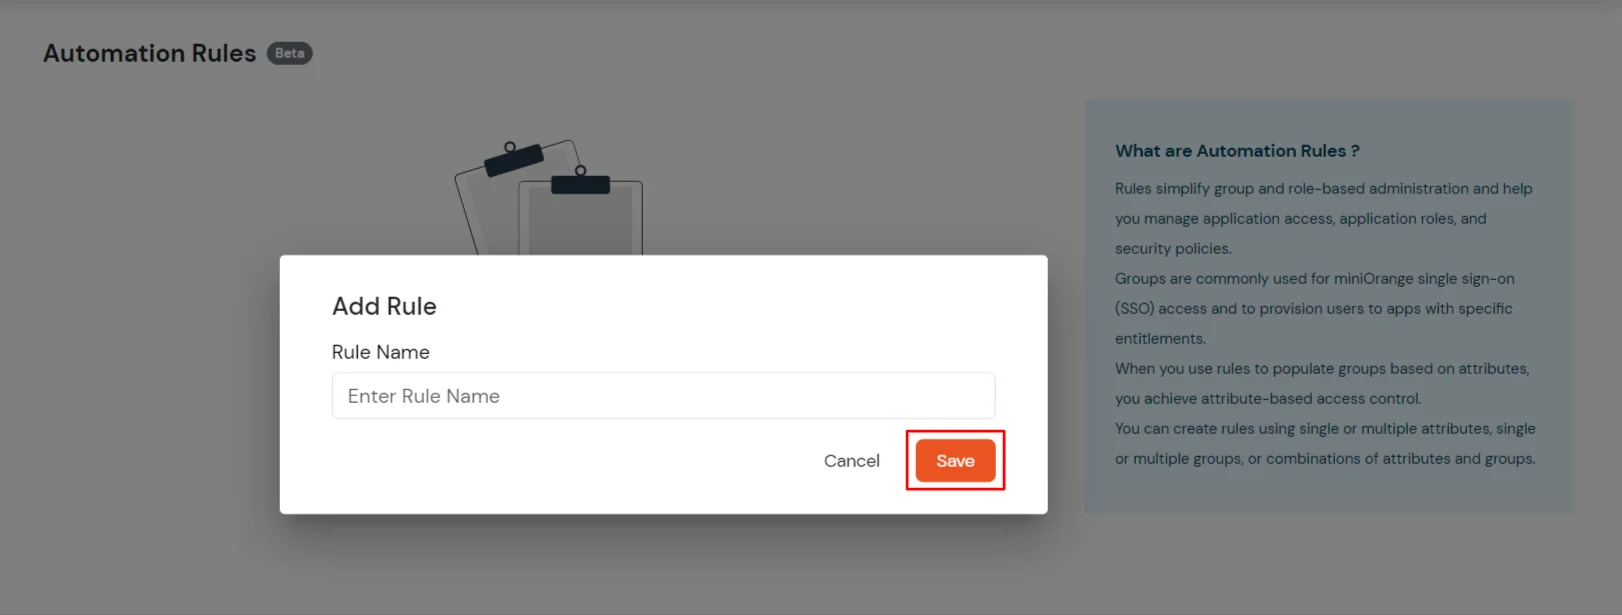
- To add a new rule click on the Add Rule button. A dialog box will appear. Enter the name of the rule and click save.

- Keep a relevant rule name, that will help you understand what the rule does when it executes; Example : A rule that assigns users to groups can be names GroupAssignmentRule or something similar to that.
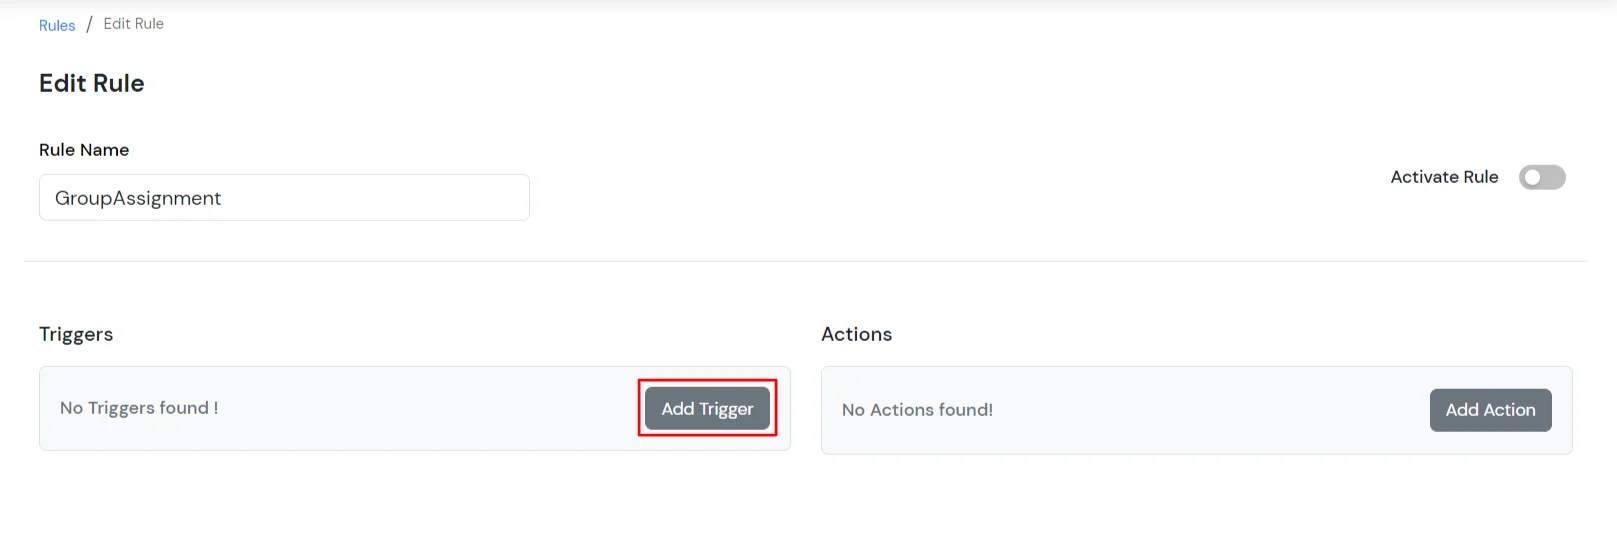
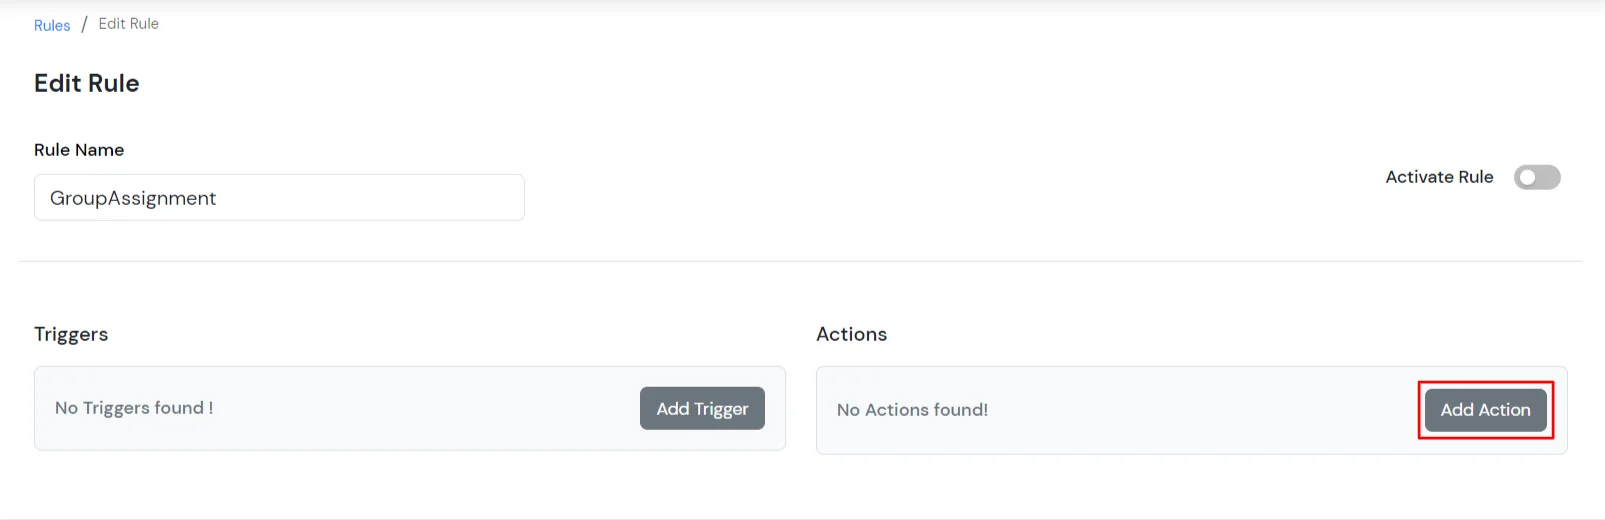
- After saving the rule, the page will redirect to the Edit Rule page. Here you can add the Rule Triggers and Rule Actions for the newly created rule.
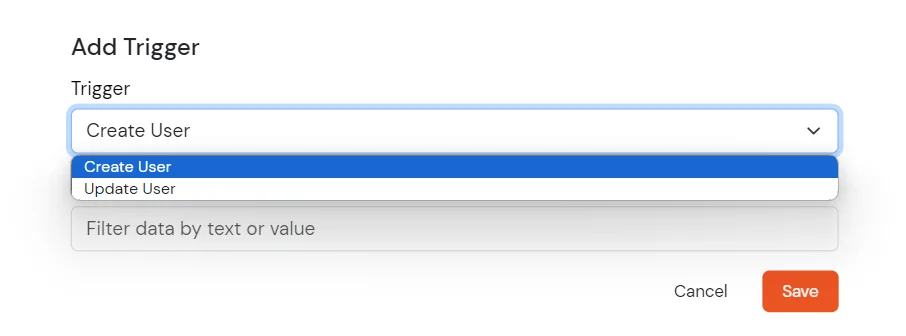
- Click on Add Trigger button to add trigger.
- Triggers can be 'Create User' or 'Update User', which implies that the respective actions will be performed, when the rule trigger is satisfied during either user creation or user updation.
- On clicking on Trigger Query Input, a list of Default and Custom profile attributes (if any created) will be displayed.
- The required attributes can be selected and a value can be passed for these attributes. If the attribute values for the user or users match the trigger query attribute values, the rule action will execute automatically.
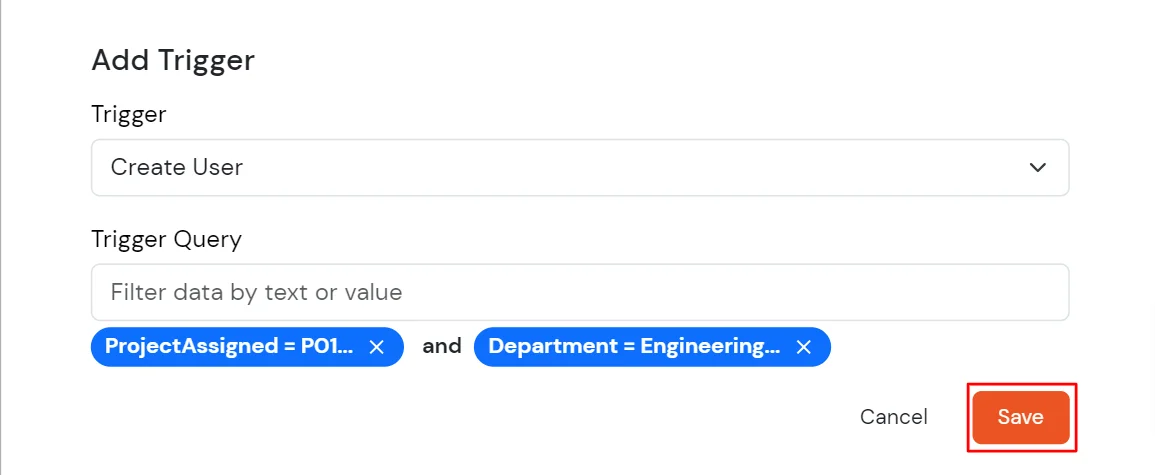
- Here, for instance, we have take Department = Engineering and ProjectAssigned = P01 as the trigger query.
- Click Save after creating the desired query.
Note :
- If a rule is created for group assignment during user updates, and the user is later updated again in a way that violates the rule, the user will not be automatically unassigned.
- And and Or operations:
- And : all conditions have to hold true for the rule to execute
- Or : any one condition should have to be true for the rule to be executed
- Currently, with complex rule triggers, you can choose either "AND" or "OR," but not both together. Multiple combinations are not allowed.
- Examples : Department = Engineering and ProjectAssigned = P01 and Intern = yes (this is allowed)
- Department = Engineering or ProjectAssigned = P01 or Intern = yes (this is allowed)
- Department = Engineering and ProjectAssigned = P01 or Intern = no (this is not allowed, It can be either all "AND" or all "OR".)
- With default profile attributes :
- Email, username, first name and last name : equal (=), not equal (!=), contains (co), greater than (>) and less than (<) operators will work
- Phone numbers : equal (=), not equal (!=), greater than (>) and less than (<) operators will work
- With custom profile attributes :
- Textbox : equal (=), not equal (!=), contains (co), greater than (>) and less than (<) operators will work
- Datepicker : greater than (>) and less than (<) operators will work
- Dropdown and checkbox : equal (=), not equal (!=), contains (co), greater than (>) and less than (<) operators will work
- Equal and not equals operator are case sensitive
- Contains operator is not case sensitive.
- Greater than and less than operators work lexicographically
Examples :
- Equals operator :
- Rule trigger : Create User; Email eq “test@email.com” | Rule Action : Group Assignment to group G01
- User created with email = “test@email.com” will be assigned to group G01
- Not equals Operator :
- Rule trigger : Create User; Email ne “test@email.com” | Rule Action : Group Assignment to group G01
- User created with email = “demo@email.com” will be assigned to group G01
- Contains Operator :
- Rule Trigger : Create User, Email co “domain” and Department co “engineer” | Rule Action : Group Assignment to group G01 and Role Assignment to role Engineer
- User created with email = “demo@domain.com” and department = “Engineering” will be assigned to group G01 and to role Engineer
- Greater than and less than operator :
- Rule Trigger : Create User, DOJ gt “01-08-2024” and DOJ lt “01-09-2024” | Rule Action : Group Assignment to Group “AugustBatch”
- User created with DOJ equals (say) “22-08-2024” will be assigned to group “AugustBatch”
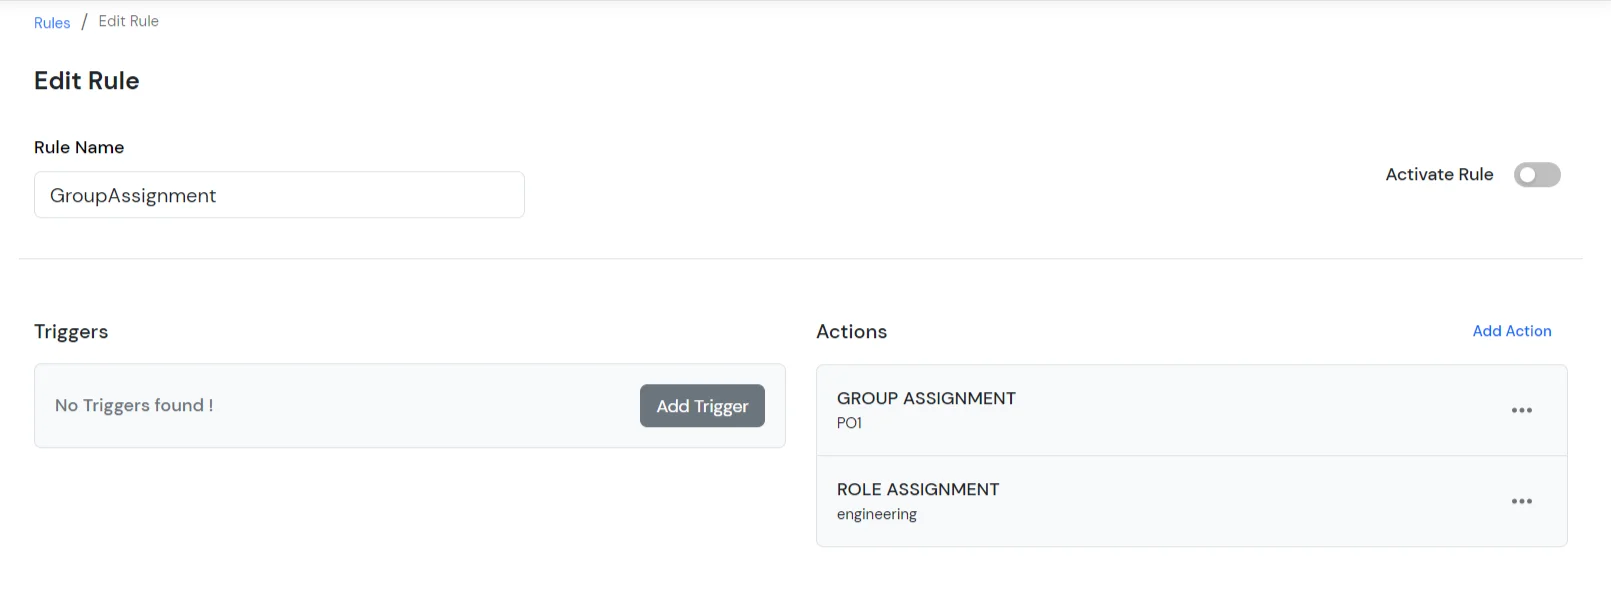
- Adding Actions :
- Click on Add Action button to add action(s).
- In Group Assignment or Group Deassignment, multiple groups can be added in the same action.
- In Role Assignment or Deassignment, only one role should be mentioned, as a user can be assigned to just one role at a time.
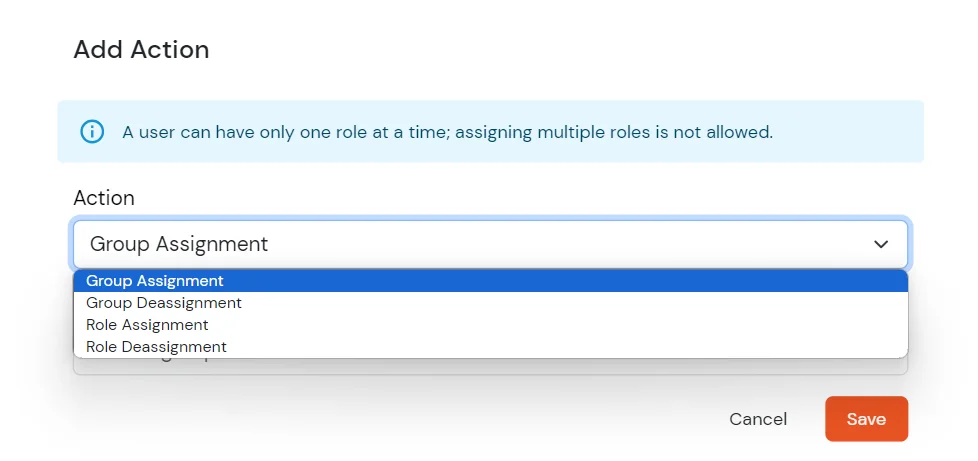
- Here, for instance, we have made 2 rule actions, one will assign the user(s) to group P01 and the second will assign user(s) to engineering role.
Note :
- Rule actions are executed in the order they are defined, one after the other.
- Users will always be assigned in DEFAULT group.

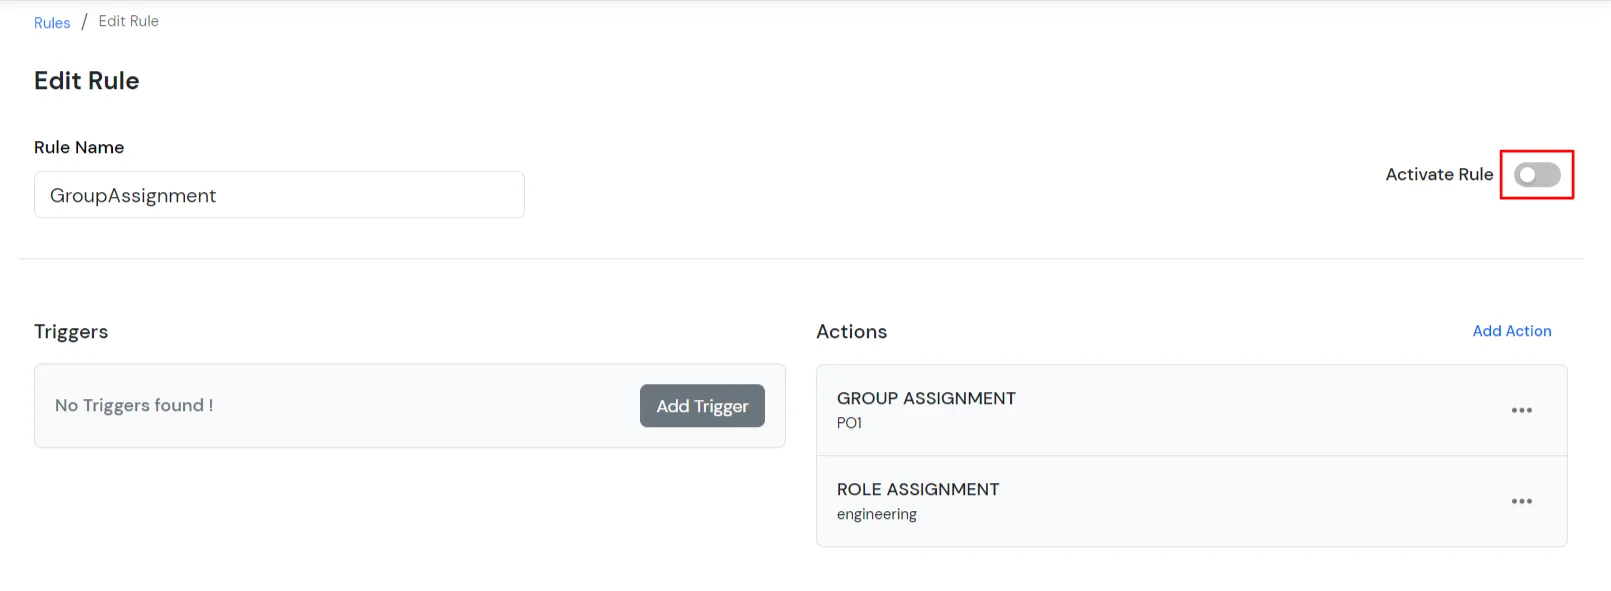
- After the rule trigger and action are configured, the created rule has to be activated, for it to be triggered during user creation or updation. This can be done in the following ways:
- Click on the toggle to activate rule.
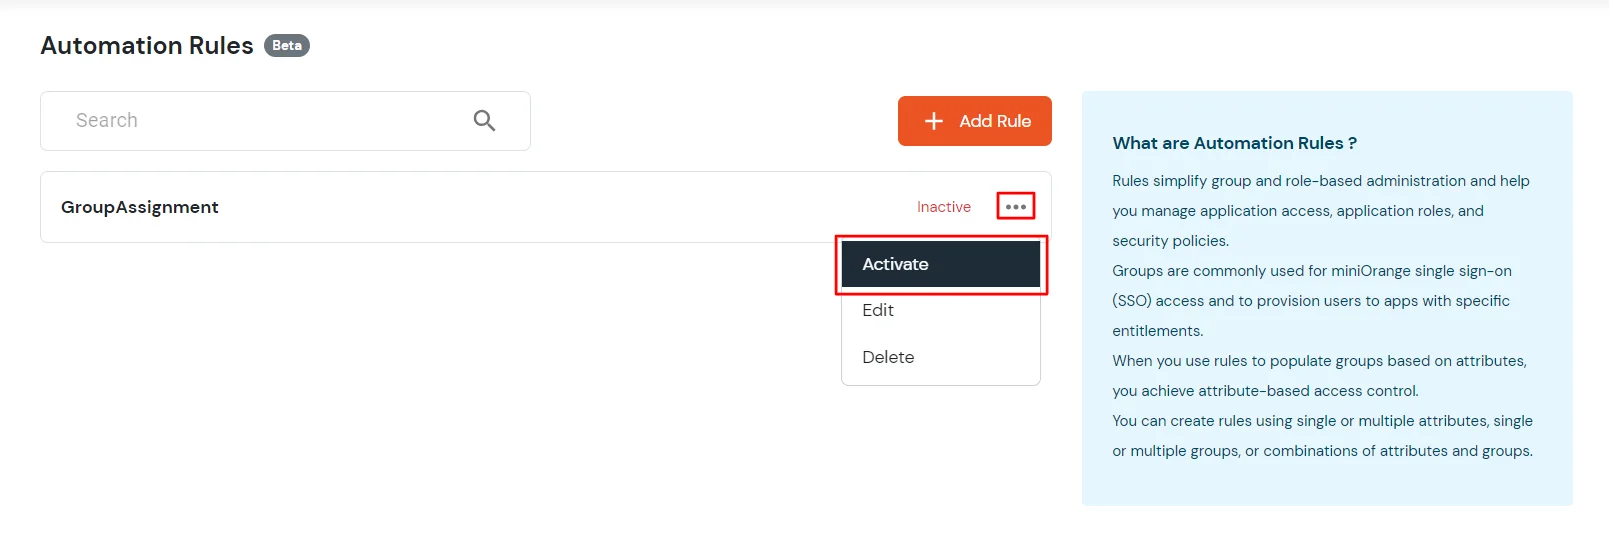
- Go to Workflow > Automation, click the three dots next to the rule, and select "Activate".
- Test the rule:
- If the rule trigger is for create user, then test by creating and user and checking if it is assigned to mentioned groups and roles.
- If the rule trigger is for update user, then test by updating an existing user and checking if it is assigned and/or unassigned from mentioned groups and roles.
- Head over to the Users >> User List section from the left menu and click on Add User button.
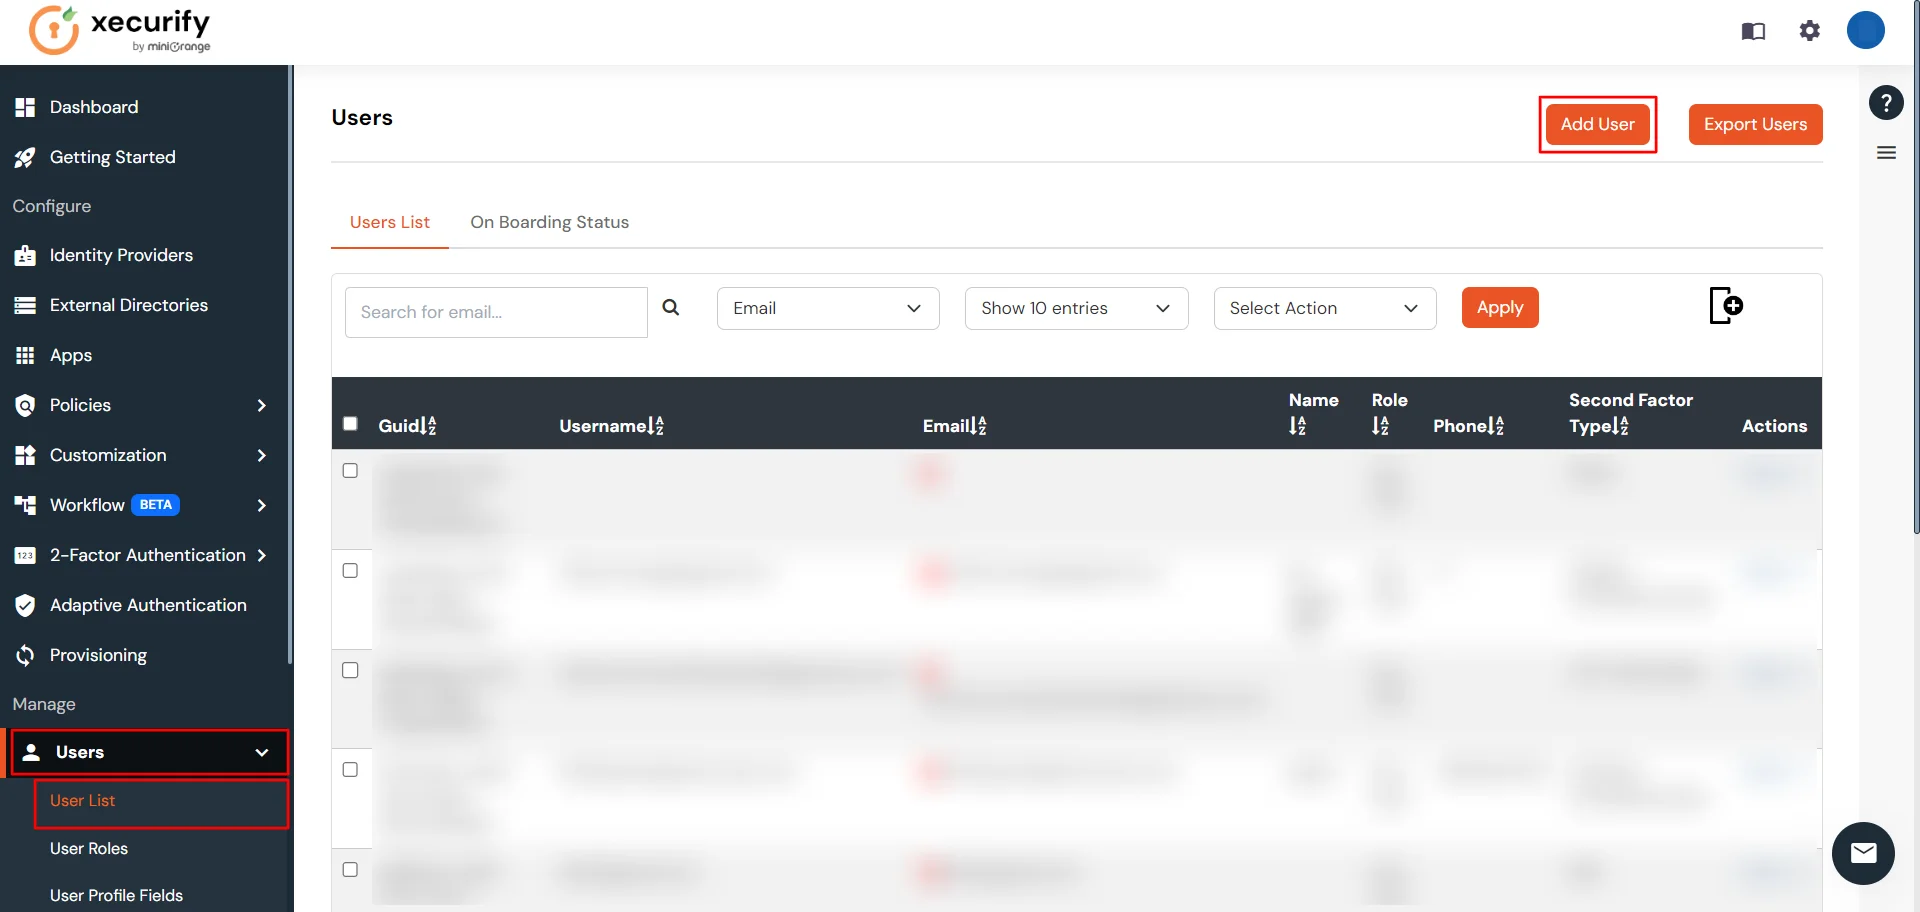
- If a user is created with Department=Engineering and ProjectAssigned=P01, it will be assigned to mentioned group and roles.
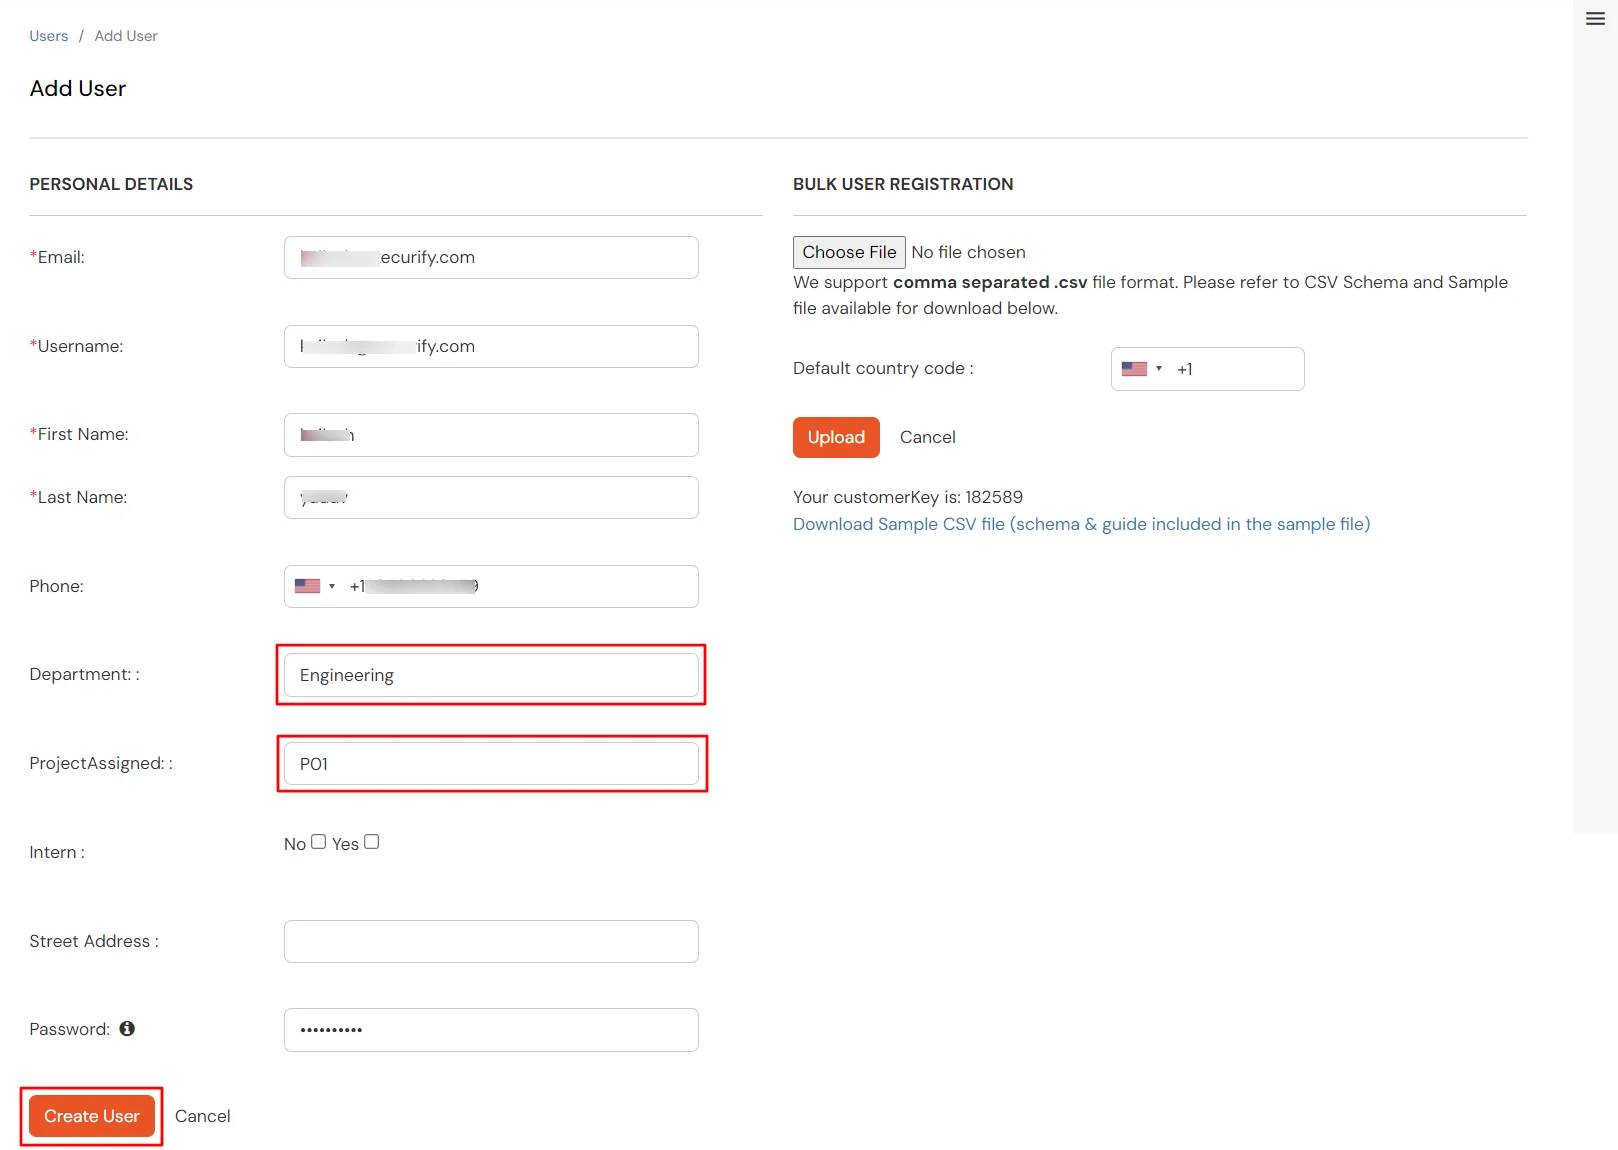
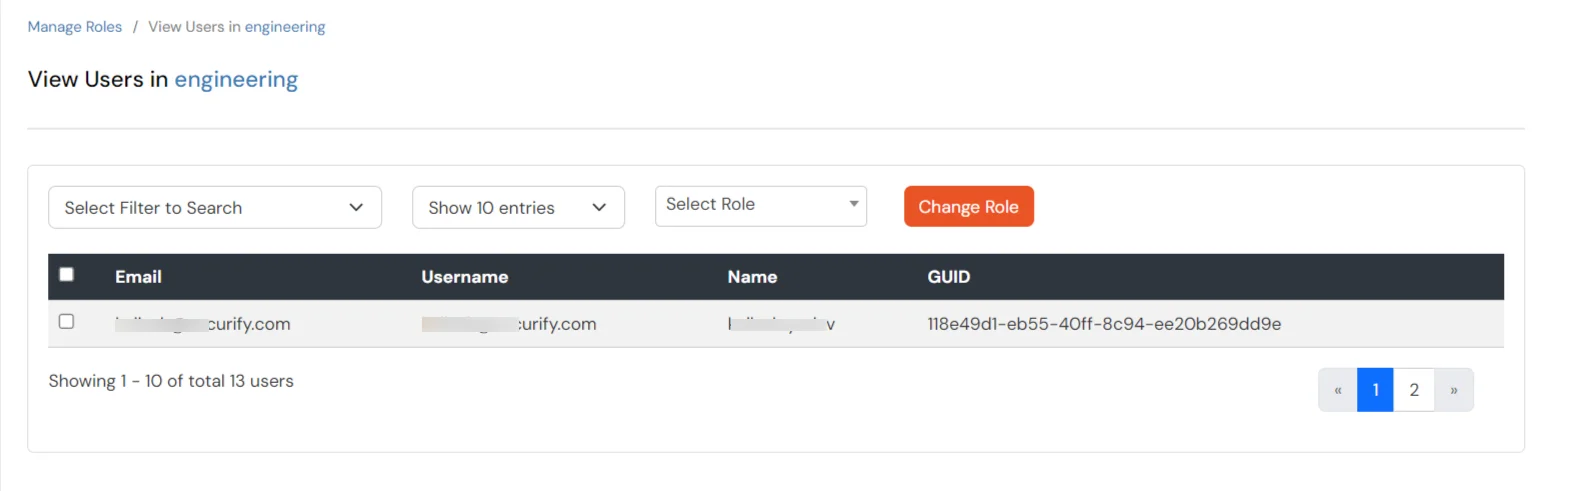
- Go to Users > User role and check if the user is assigned to Engineering role like follows :
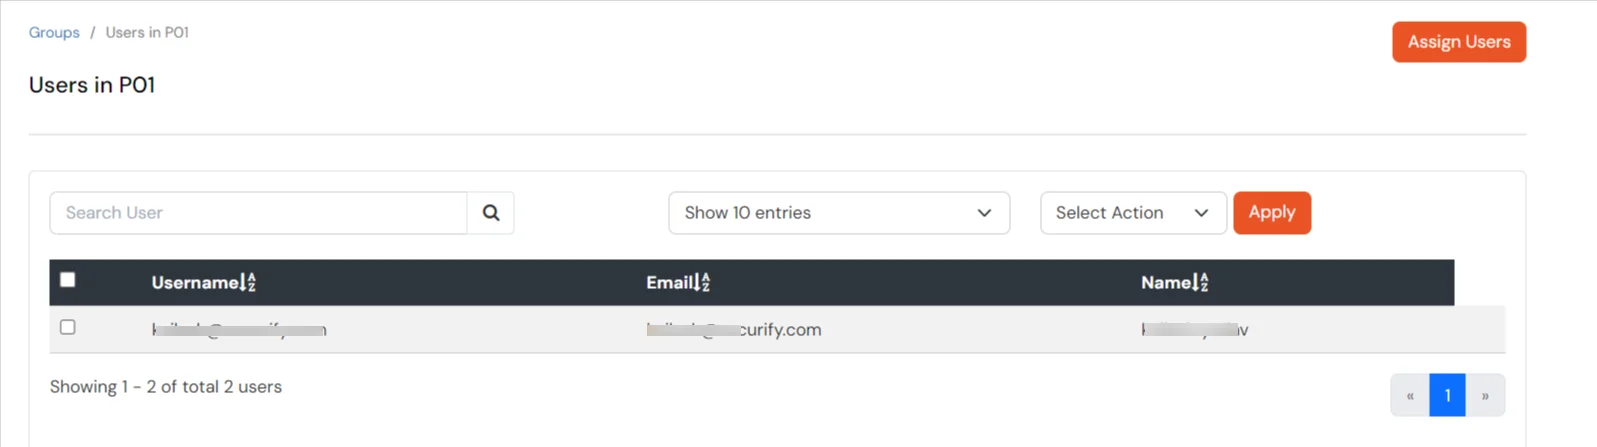
- Go to Groups > Manage Groups and check if the user is assigned to group named P01 like follows: