Client Credentials
Manage Client Credentials
The miniOrange PAM solution provides two default client credentials - Default Client Credential and mo-ssh-microservice-communication-key.
We also provide the feature to create custom client credentials with selected scopes. Admin or Additional admin who has the capability to add client credential and edit scopes. After logging in, you will be able to see a dropdown menu named Settings in the left sidebar.
- Click on Settings >> Client Credentials >> the dashboard area will change and client credentials will be visible in the rendered table.
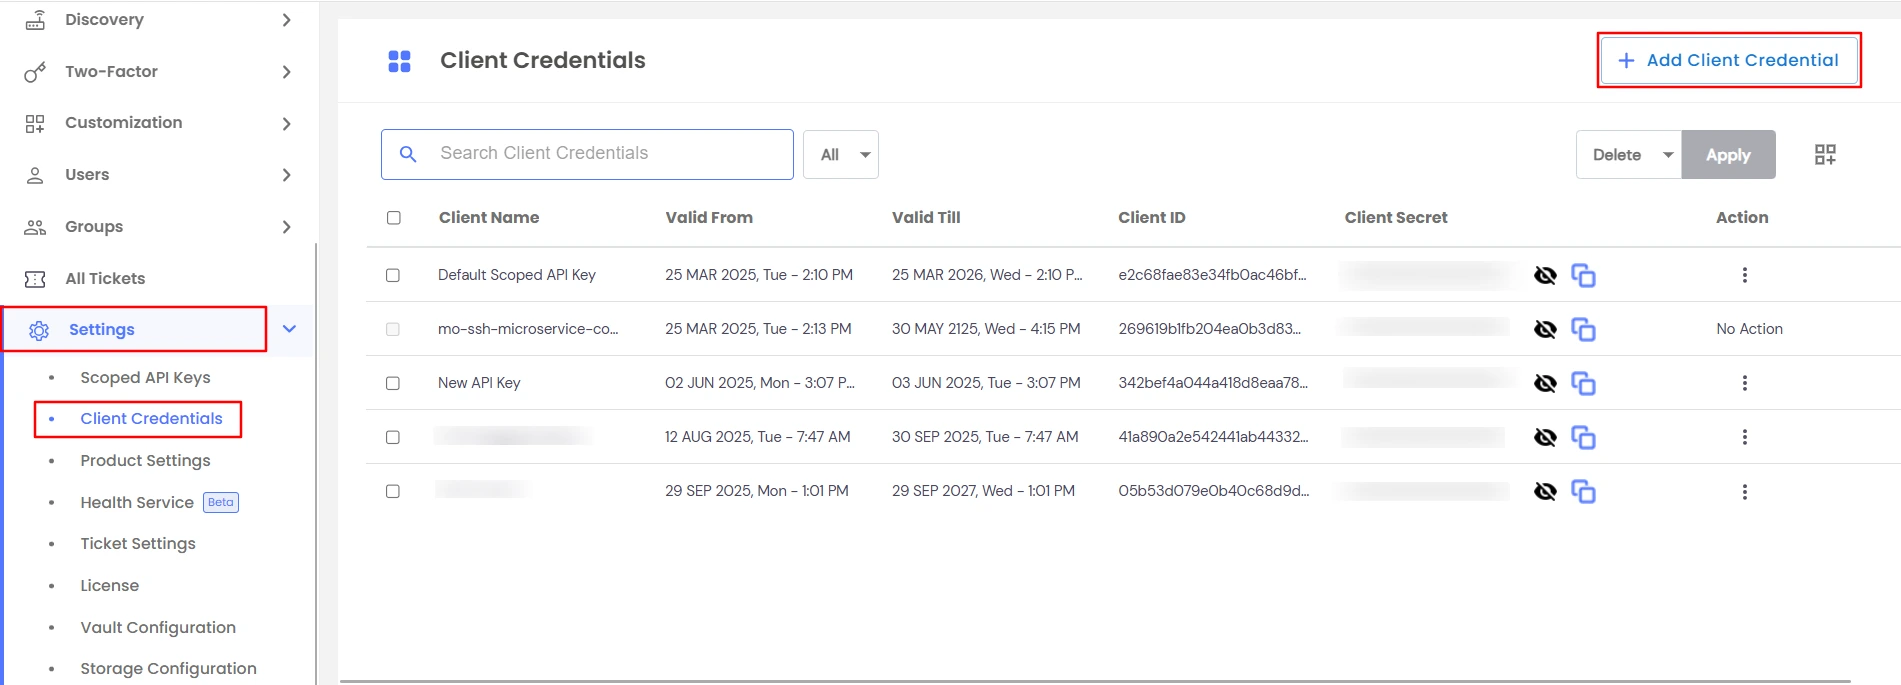
- The table contains information about each role which constitutes its Client Name, Valid Till, Valid From, Client ID, Client Secret, Action.
- To create a new client credential >> Click on the Add Client Credential button at the top right corner as shown below.
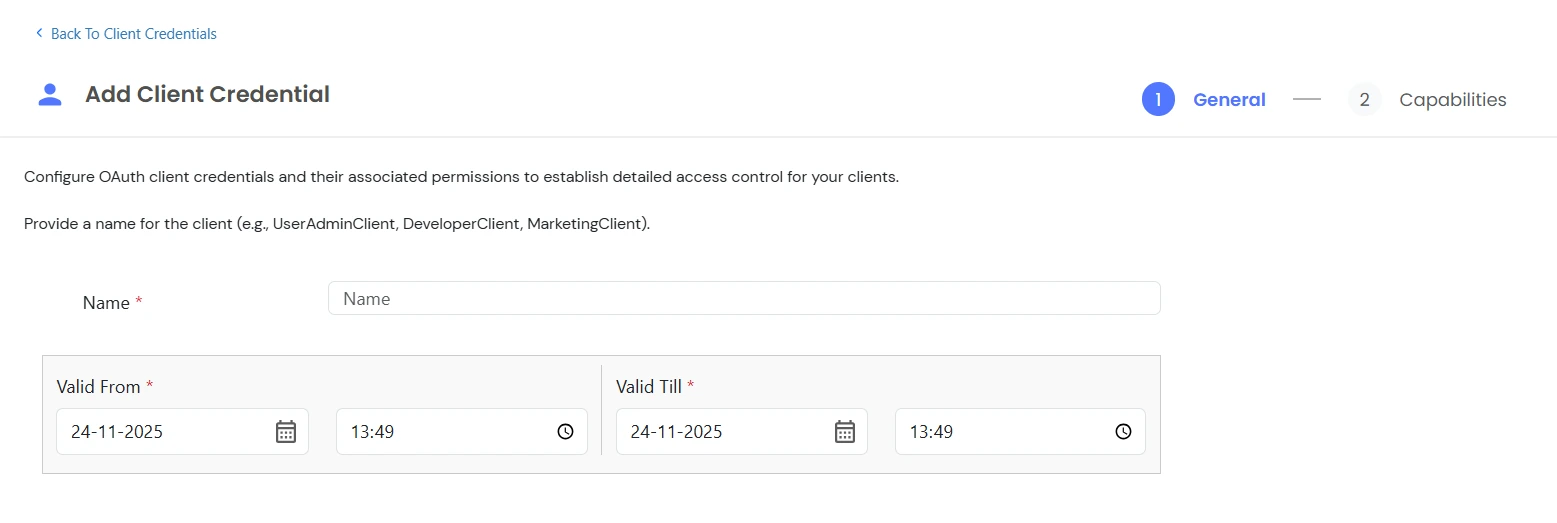
- The above action will prompt for the Name, Valid From, Valid Till, then click on Next button.
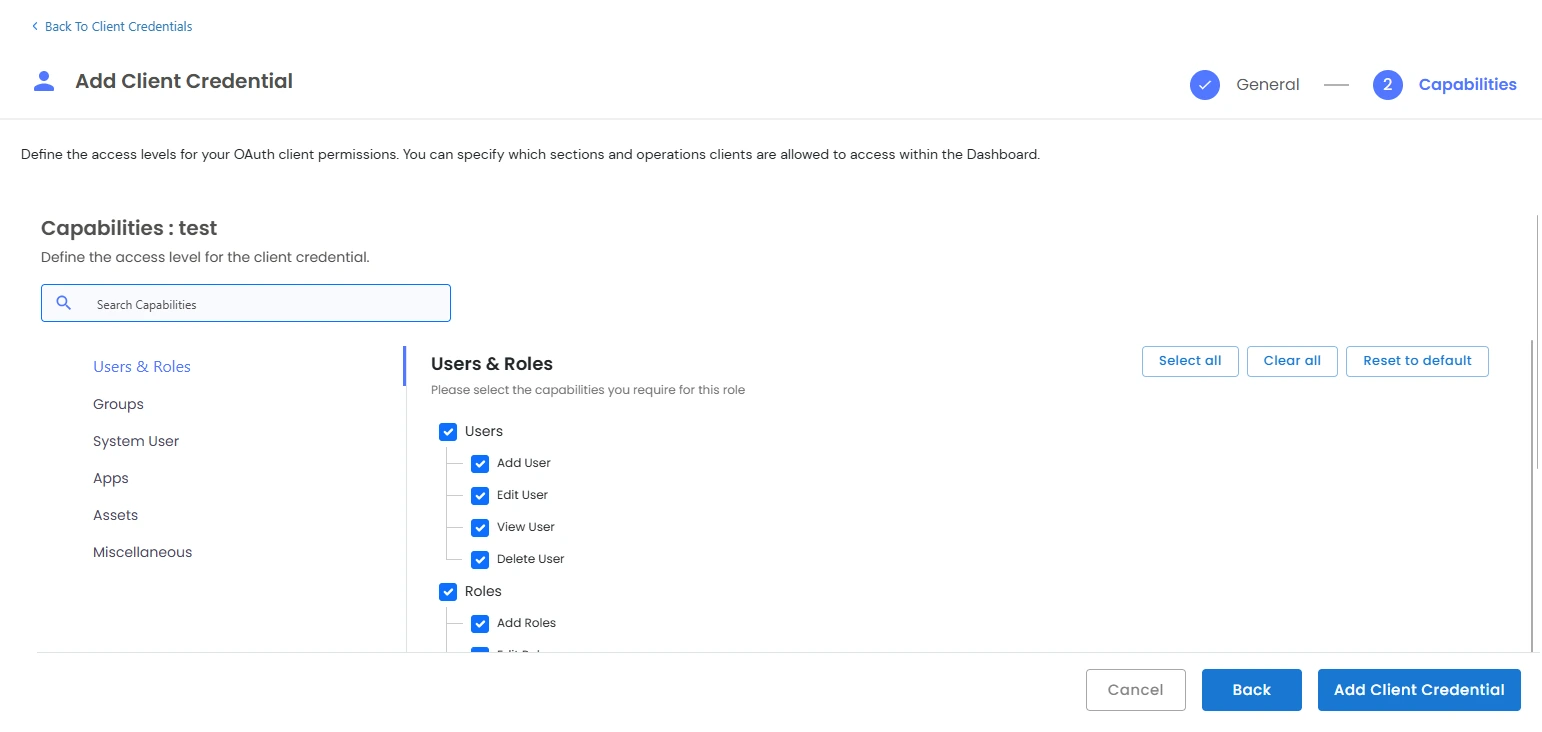
- All the scopes will then be visible on the Scopes page.
- Click on checkboxes to select or deselect scopes.
- Clear all will deselect all the scopes for the selected option.
- Select all will select all the scopes for the selected option.
- Reset to default will reset the scopes to the previous saved state.
- You can search for specific capabilities from the search bar.
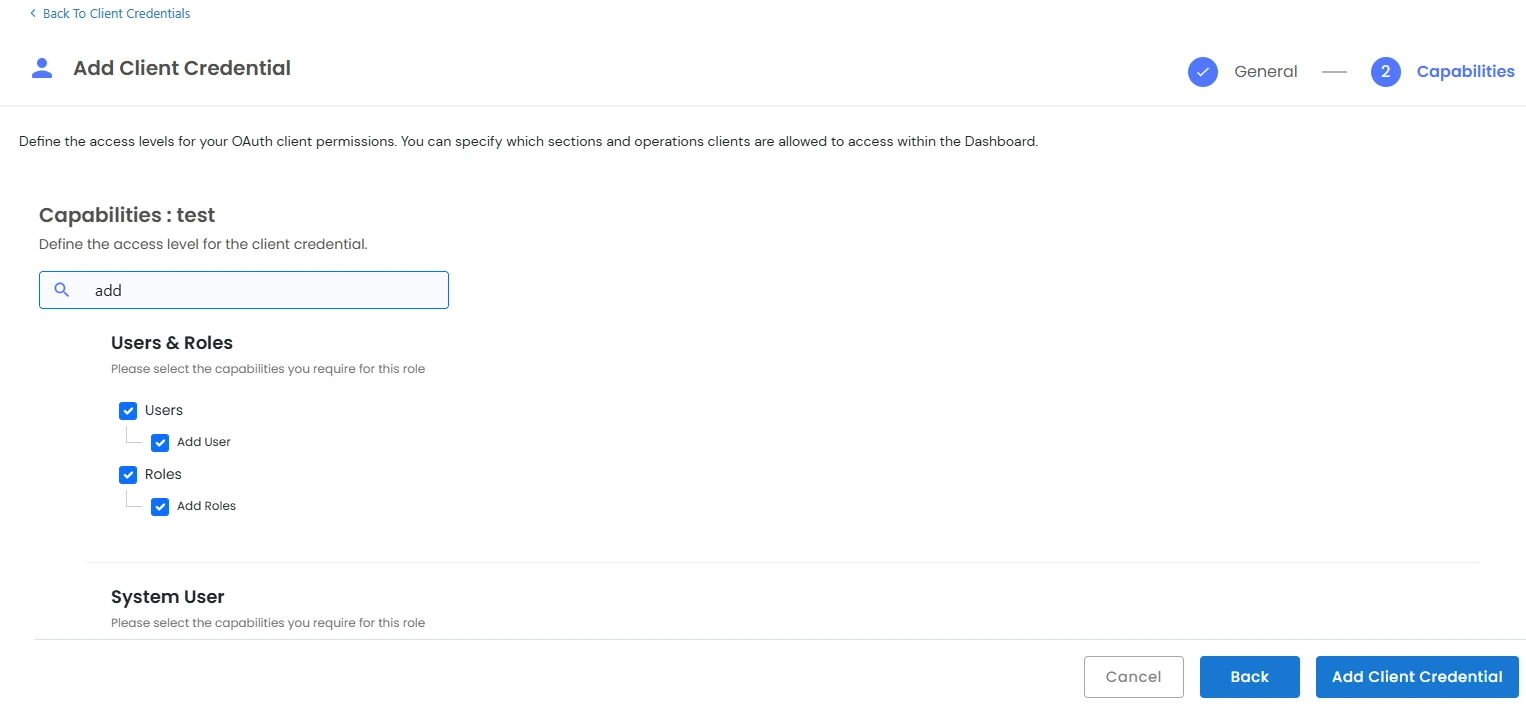
- Click on Add Client Credential to create the role with selected scopes. The new client credential will be displayed in the Client Credentials table.
- Edit Client Credential >> Click on the three dot icon under action column for the required role, this will open a dropdown menu >> click on edit button >> this will prompt the user to change the Name, Valid From and Valid Till as shown below.
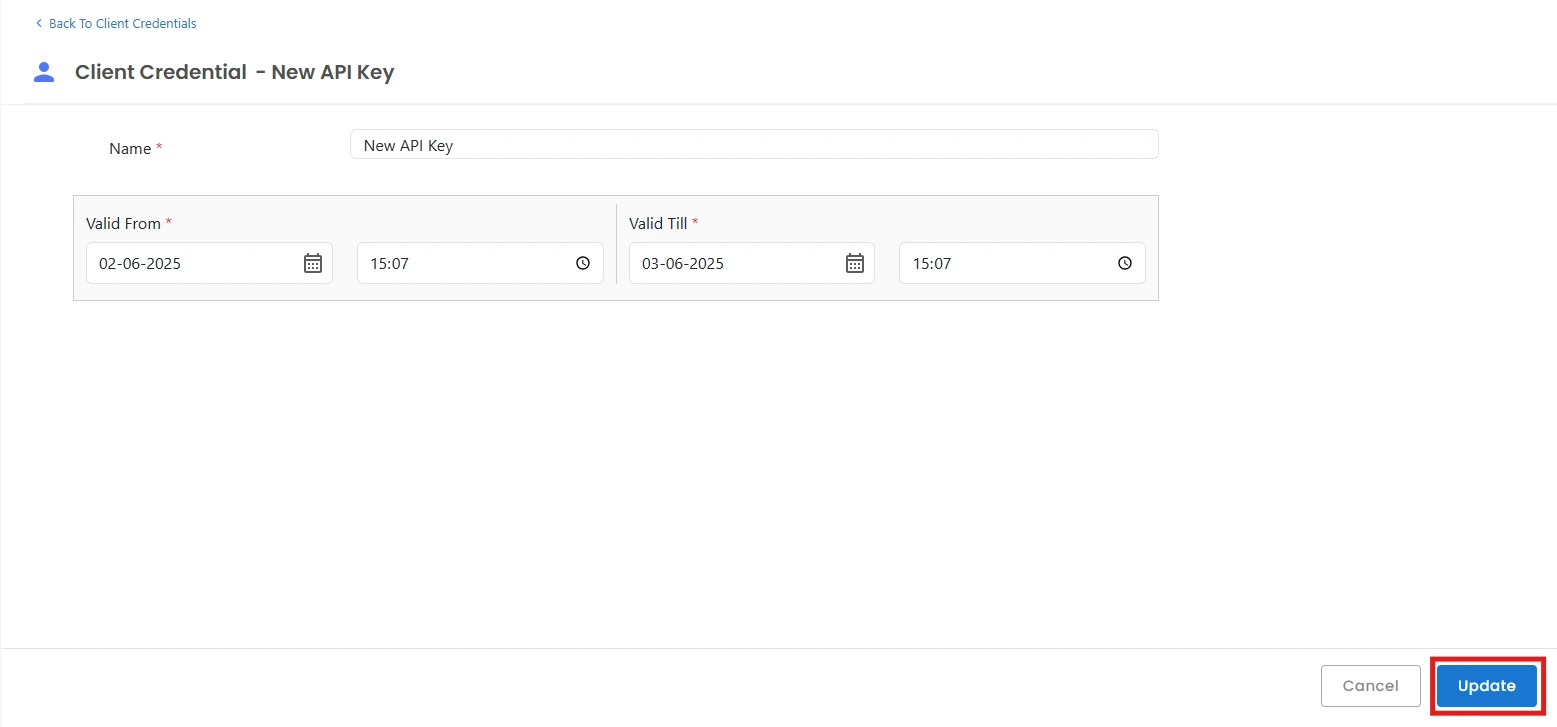
- Click on the Update button after editing the fields prompted in the window box.
- Edit Client Credential Scopes >> Click on the three dot icon under the action column for the required role, this will open a dropdown menu >> click on edit scopes button >> this will open edit scopes page.
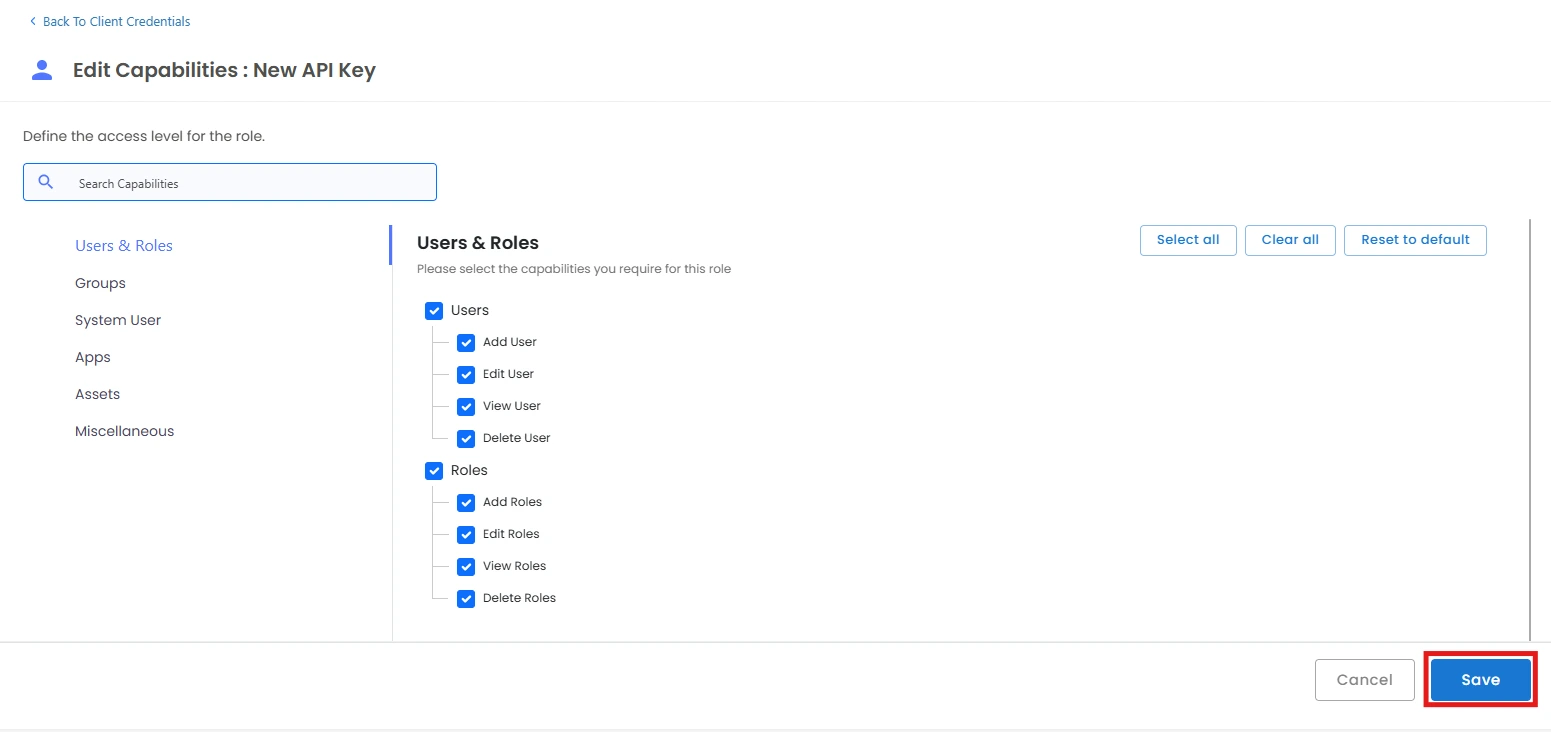
- Edit the scopes and click on Save button.
- Delete Client Credentials >> To delete a single role, click on the 3 dots icon under the action menu >> click on Delete >> the role will be deleted as shown below.
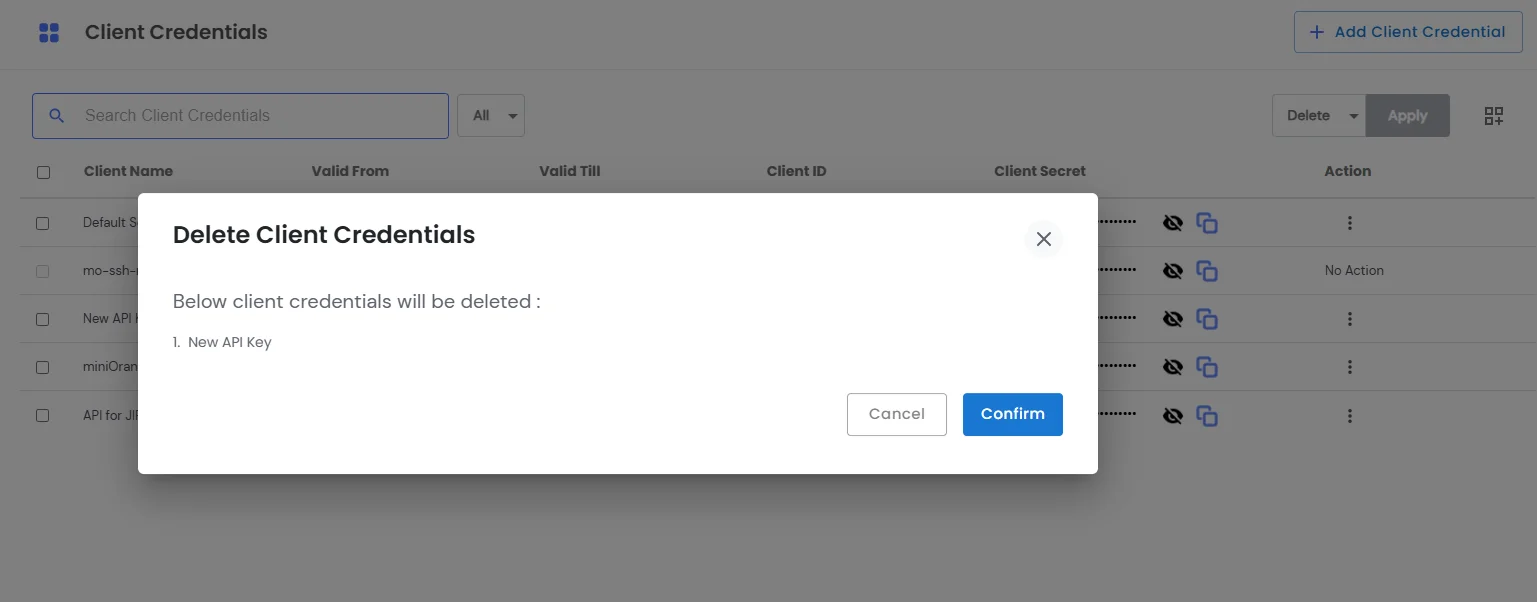
- To Delete Multiple Client Credentials, select the checkboxes of the required client credentials >> on the top right side of the client credentials table we can see a dropdown menu with the delete option selected followed by a blue apply button as shown below.
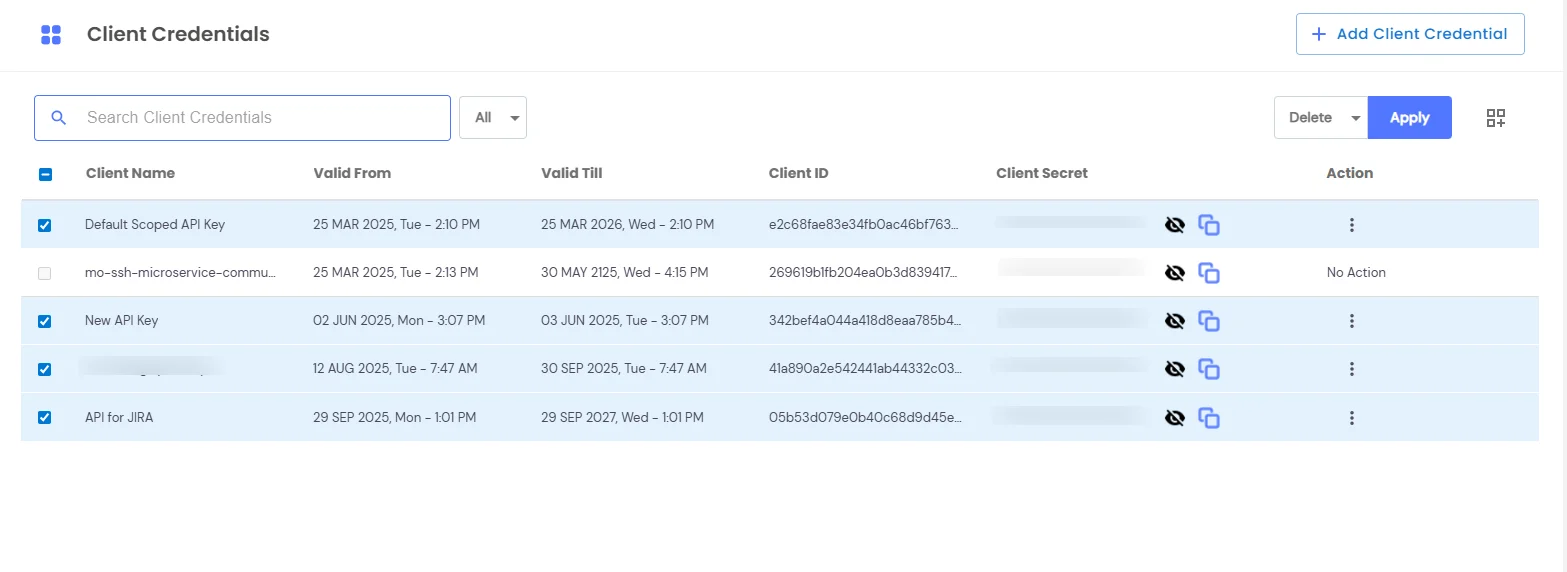
- Click on the apply button >> all the selected client credentials will be deleted.
- You cannot delete the mo-ssh-microservice-communication-key client credential.
Step-by-Step Set-Up Process:
Token-based Authentication
- Get Access Token: Exchange client credentials for a JWT access token
- Use Token: Include the Bearer token in API requests
Step 1: Obtain Your Client Credentials
Before you can use the OAuth Client Credentials, you need to have them created by a PAM administrator. If you’re the administrator, follow the Creating OAuth Client Credentials section below.
You’ll need: - client_id: A unique identifier for your application - client_secret: A secret key for authentication - customer_id: Your PAM Customer ID (e.g., “10001”).
Step 2: Request Access Token
This is your first API call - you exchange your client credentials for an access token.
- Create a new POST request
- Set the request body (select “raw” and “JSON”):
            {
                    "grant_type": "client_credentials",
                    "client_id": "your_client_id",
                    "client_secret": "your_client_secret",
                    "customer": "10001"

            }
Send the request
Expected Response:
                {
                    "access_token": "eyJhbGciOiJIUzI1NiIsInR5cCI6IkpXVCJ9.eyJjdXN0b21lcl9pZCI6IjEwMDAxIiwiaWF0IjoiMjAyNC0wMS0xNVQxMDozMDowMFoiLCJleHAiOiIyMDI0LTAxLTE1VDExOjMwOjAwWiIsImNsaWVudF9pZCI6MSwic2NvcGVzIjp7Li4ufSwiY2xpZW50X25hbWUiOiJNeSBBcHBsaWNhdGlvbiIsImdyYW50X3R5cGUiOiJjbGllbnRfY3JlZGVudGlhbHMifQ.signature",
                    "token_type": "Bearer",
                    "expires_in_minutes": 60
                }
Important: Save the access_token - you’ll use this for all subsequent API calls.
Step 3: Use Access Token for API Calls
For all subsequent requests, you’ll use the Bearer token from Step 2.
- Create a new request (GET, POST, PUT, DELETE as needed)
- Set the Authorization Header:
- Go to the Headers tab
- Add header: Authorize with value: Bearer
eyJhbGciOiJIUzI1NiIsInR5cCI6IkpXVCJ9... (your actual token)
- Send the request
Example API Calls:
                    GET https://{base_url}/pam/apps/users/user/
                    Headers:
                    Authorize: Bearer eyJhbGciOiJIUzI1NiIsInR5cCI6IkpXVCJ9...
Create User:
                POST https://{base_url}/pam/apps/users/user/
                Headers:
                Authorize: Bearer eyJhbGciOiJIUzI1NiIsInR5cCI6IkpXVCJ9...
                Content-Type: application/json
                Body:
                {
                "username": "newuser",
                "email": "user@example.com",
                "first_name": "John",
                "last_name": "Doe"
                }
Step 4: Handle Token Expiry
Tokens expire after 60 minutes. When you get an authentication error:
- Repeat Step 2 to get a new access token
- Update your requests with the new token
Available PAM APIs
The following PAM APIs support OAuth Client Credential authentication:
1. User Management APIs
- Endpoint: /pam/apps/users/user/
- Methods: GET, POST, PUT, DELETE
- Capabilities Required: users.user.view, users.user.add, users.user.edit, users.user.delete
- Description: Manage PAM users
2. Role Management APIs
- Endpoint: /pam/apps/roles/role/
- Methods: GET, POST, PUT, DELETE
- Capabilities Required: users.roles.view, users.roles.add, users.roles.edit, users.roles.delete
- Description: Manage user roles and permissions
3. Asset Management APIs
- Endpoint: /pam/apps/assets/asset/
- Methods: GET, POST, PUT, DELETE
- Capabilities Required: assets.view, assets.add, assets.edit, assets.delete
- Description: Manage IT servers and resources
4. System User APIs
- Endpoint: /pam/apps/assets/systemuser/
- Methods: GET, POST, PUT, DELETE
- Capabilities Required: system_user.view, system_user.add, system_user.edit, system_user.delete, system_user.rotate_password
- Description: Manage system users and credentials
5. Group Management APIs
- Endpoint:/pam/apps/groups/group/
- Methods: GET, POST, PUT, DELETE
- Capabilities Required: groups.view, groups.add, groups.edit, groups.delete
- Description: Manage user groups
6. Application Management APIs
- Endpoint: /pam/apps/apps/app/
- Methods: GET, POST, PUT, DELETE
- Capabilities Required: apps.view, apps.add, apps.edit, apps.delete
- Description: Manage apps
7. Ticketing APIs
- Endpoint: /pam/apps/ticket/ticket/
- Methods: GET
- Capabilities Required: miscellaneous.ticket.view_ticket
- Description: Access ticketing system