Hello there!
Need Help? We are right here!
Need Help? We are right here!
Search Results:
×In PAM systems, ticket settings define the rules for how users must request access to privileged resources. These settings typically require admins or users who have ticket settings access to set specific resource rules along with column and approval settings for streamlined operations.
These settings allow the system to check that the ticket is active and matches the user and resource before granting access. This ensures that access is controlled, temporary, and tied to a legitimate task, helping maintain security and accountability across sensitive systems.
In the miniOrange PAM dashboard, the ticket settings are divided into 3 sections:
Locate settings in the PAM dashboard and click on Settings >> Ticket Settings.
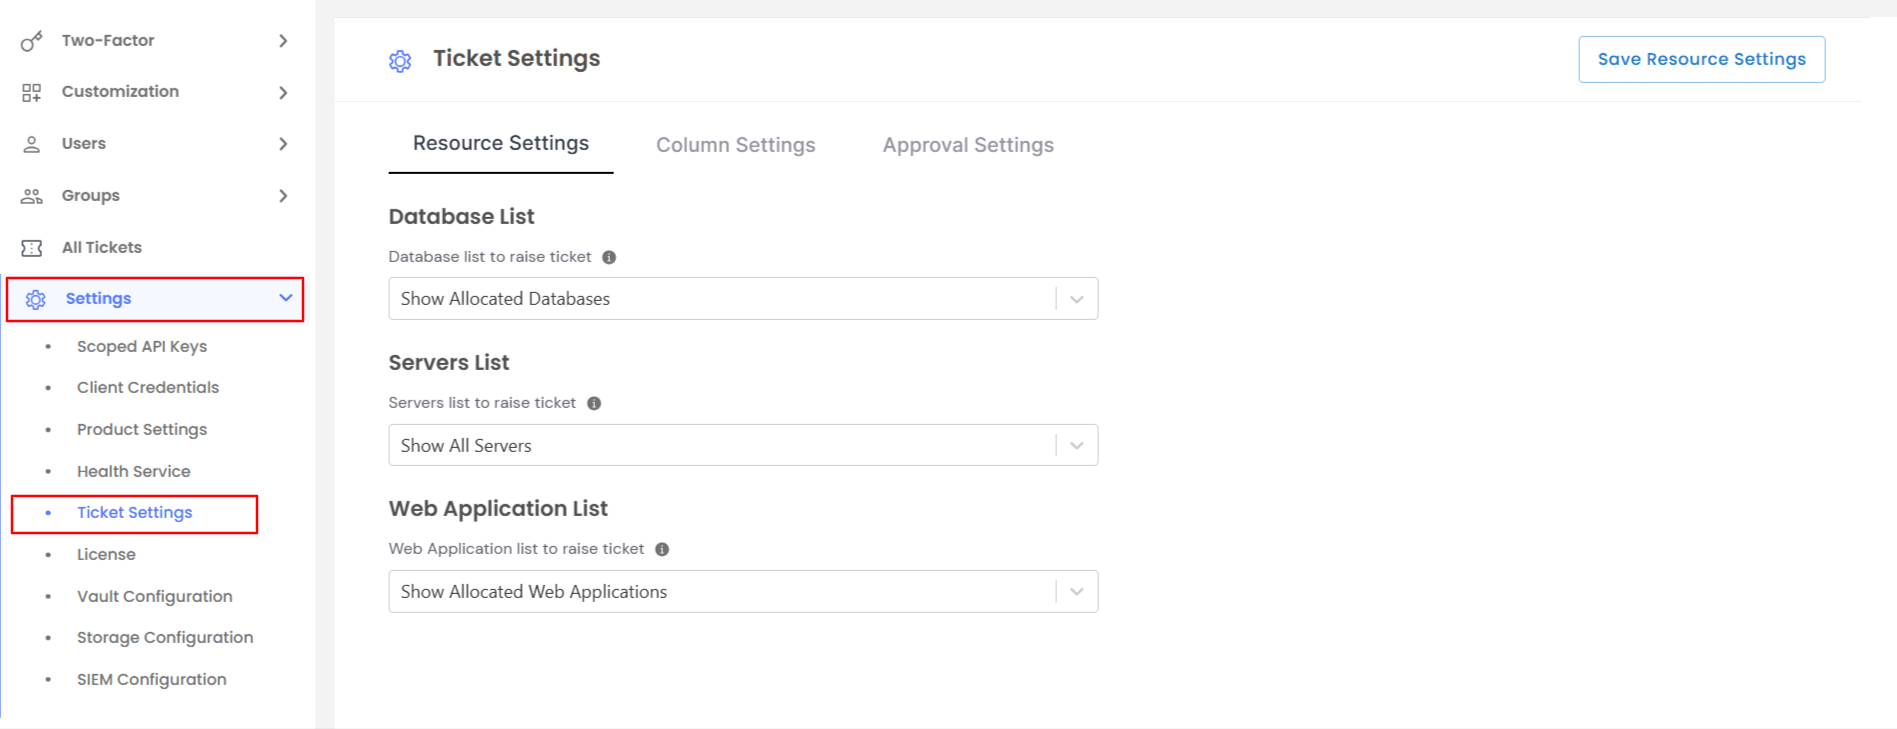
You will be redirected to the Resource settings.
In the resources, you can allocate a database, servers, or web applications for the tickets. If you wish to limit the resource, you can do so from here.
Tip: When a user creates a ticket, the system can be configured to grant access either to all resources or only to those specifically assigned to the user. This helps minimize unnecessary exposure to sensitive systems and ensures access is tightly controlled.
Note: Assign users in the right input box to the role in the left input box for the multiple approval of tickets raised.
Once you have saved your preferences, click on Save Resource Settings.
In this section, you can either keep the default settings, which include:
In addition to the above, you can also have customization options such as
| Single Line Text | Brief input fields |
| Paragraph Text | Extended text areas for detailed justifications |
| Dropdown | Predefined lists of different categories |
| Number | Numeric fields |
| Checkbox | Multiple selection options |
| Radio button | Single selection choices |
Once all the customizations are made, click on the Save Column Settings Button.
Reach the ticket settings and click on the approval setting. This setting will allow you to modify the workflow of the ticket approval process.
In the approval setting section, click on the add role button.
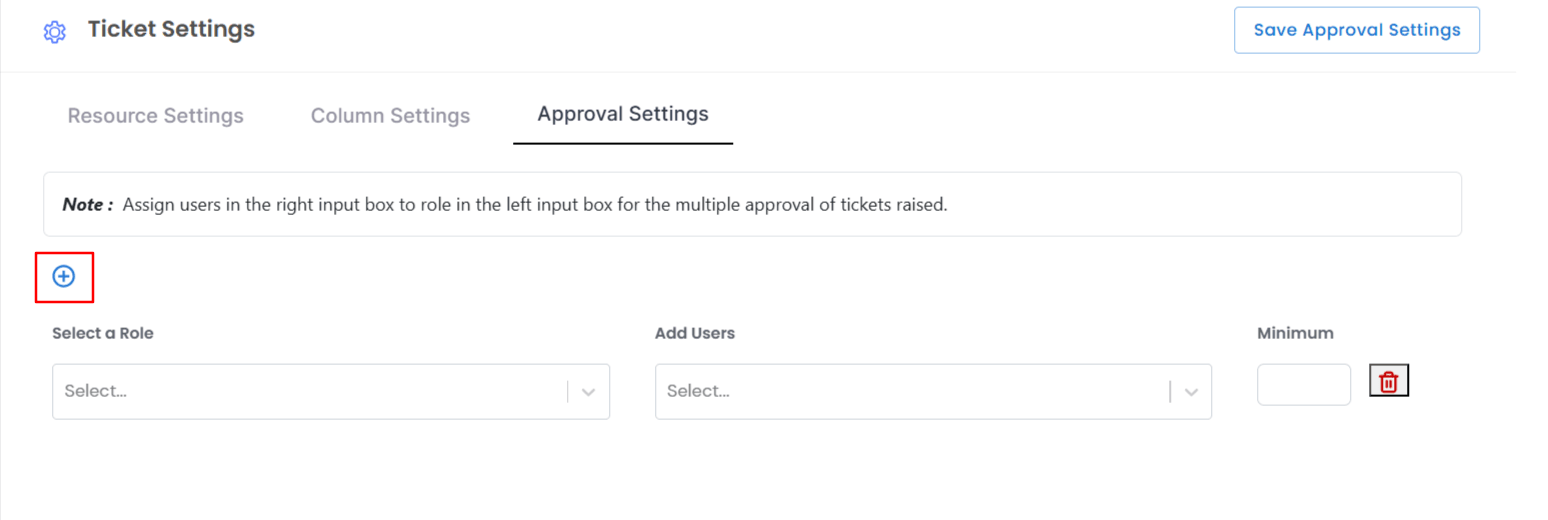
| Select a Role | Choose a role from the drop-down |
|---|---|
| Add Users | Add the user you want the role to be delegated to. These users serve as approvers for reviewing and approving access tickets. |
| Minimum | Add the minimum number of users that has to provide approval on the ticket |
Once all the sections are filled, click on the Save Approval Settings button.
E.g., User A requests access to a sensitive server through a ticket. The PAM system is set to require two approvals out of the three set approvers. At least User B (Senior Admin) and User C (Security Analyst) must approve, even if User D (Junior Admin) denies, the access is granted.