ASP.NET Single Sign-On (SSO)
ASP.NET JWT Single Sign-On (SSO) solution by miniOrange provides secure Single Sign-On access into ASP.NET application using a single set of login credentials. This is done using JSON Web Token (JWT) tokens and it can be easily integrated with ASP.NET built in any framework or language. You can enable social login for your users to get secure access to applications using any of their existing social providers such as Facebook, Twitter, Google, or LinkedIn.
With miniOrange ASP.NET SSO, you get:
- Seamless user login experience.
- Endless customizations to your login forms and pages.
- Simplified customer or user on-boarding.
Connect with External Source of Users
miniOrange provides user authentication from various external sources, which can be Directories (like ADFS, Microsoft Active Directory, OpenLDAP, AWS etc), Identity Providers (like Microsoft Entra ID, Okta, AWS), and many more. You can configure your existing directory/user store or add users in miniOrange.
Follow the step-by-step guide given below for ASP.NET Single Sign-On (SSO)
1. Setup Connector for application on IIS
- Download the ASP.NET connecter.
- Extract the downloaded asp-net-sso-connector zip file to get ASP.NET SAML 2.0 Connector.
- Add the connector as separate application on IIS.
- To Add Application in IIS Manager, copy the extracted folder to the following path: C:\inetpub\wwwroot.
- Open IIS manager. In the left panel, right click on your site and click Add Application.
- Add Alias Name for your application. For example: ssoapp
- Give the Physical path where you have copied the Application: C:\inetpub\wwwroot\asp-net-saml-sso-connector-xxx.

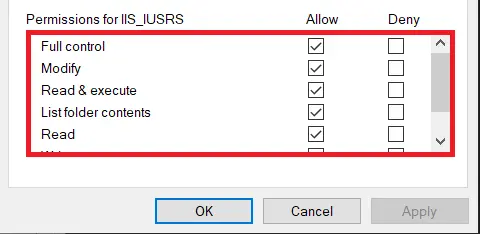
2. Steps to give authority/permission to users to use SAML Connector
- Go to this path C:\inetpub\wwwroot\
- Right click the asp-net-sso-connector-xxx and select Properties.
- Select the Security tab and click the Edit button.
- Select IIS_IUSRS in under Group or Usernames option.
- Give Full Control permission for IIS_IUSRS container as shown in the figure below:
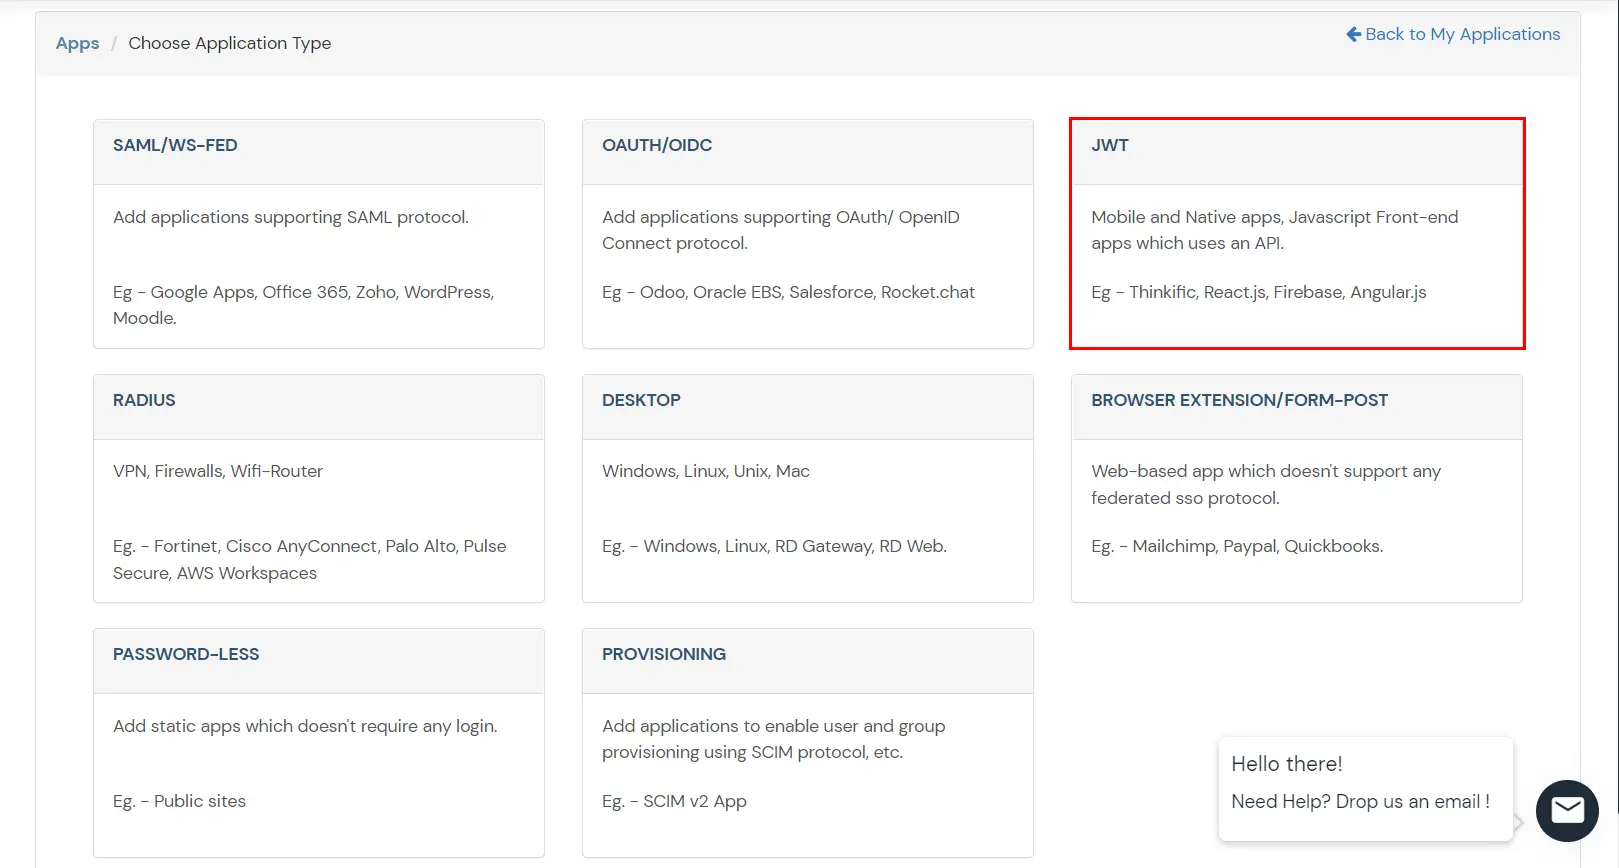
3. Configure ASP.NET in miniOrange
- Login into miniOrange Admin Console.
- Go to Apps >> Add Application button.

- In Choose Application Type click on Create App button in JWT application type.
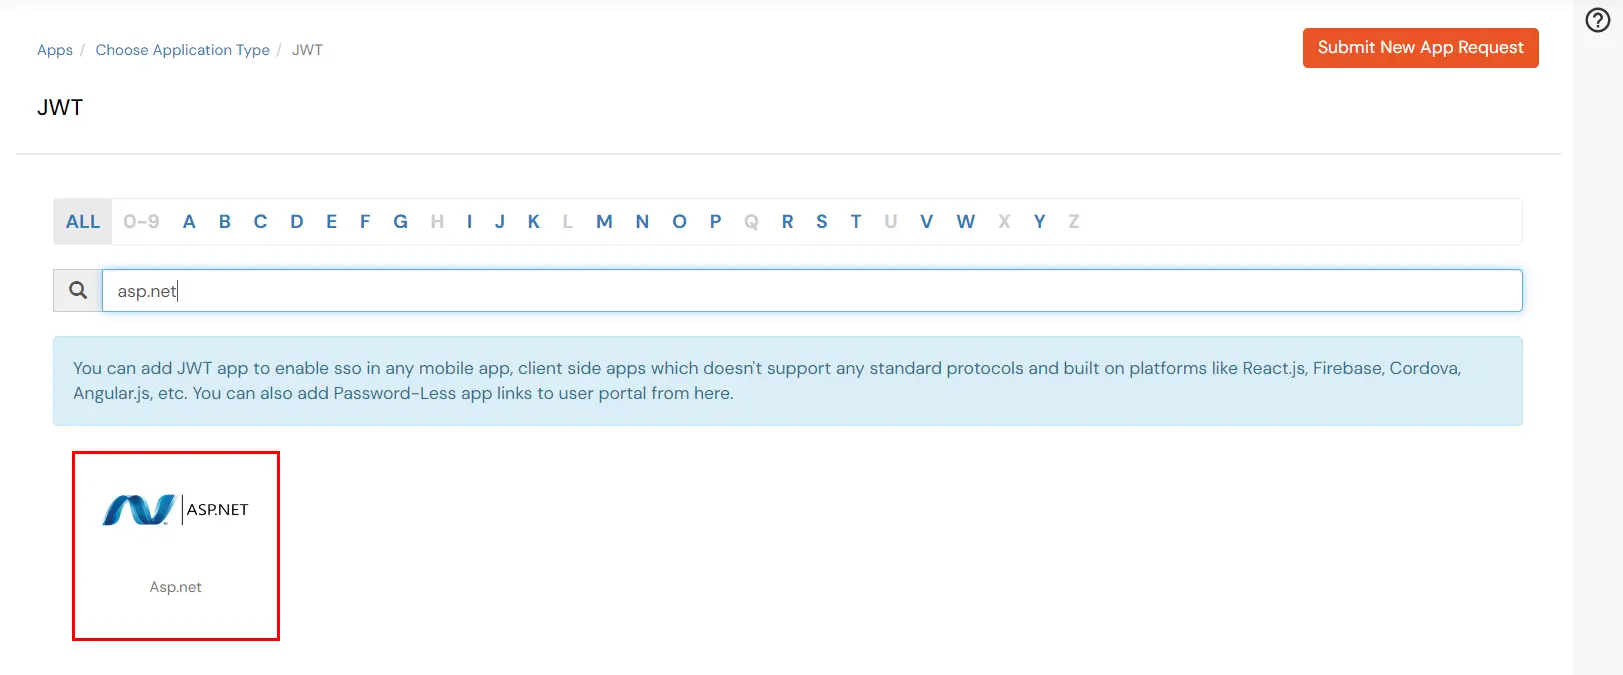
- In the next step, search for ASP.NET application from the list. If your application is not found, search for External / JWT App and you can set up your Application.
- Enter the details as given below.
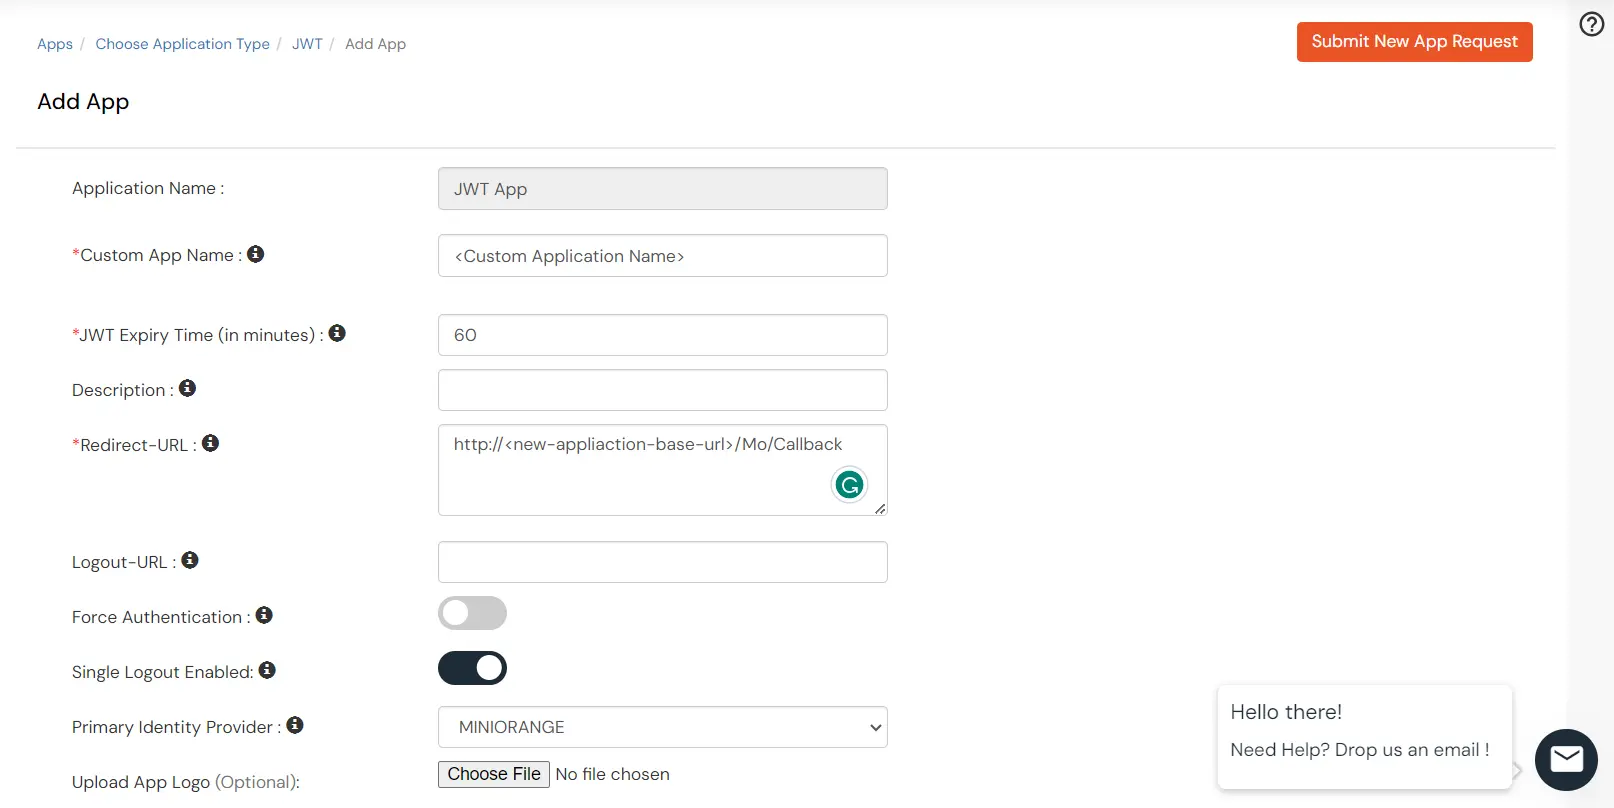
- Configure Redirect-URL which tells where to send JWT response. Redirect-URL should be an endpoint on ASP.NET where you want to achieve SSO. Enter the value as
http://<new-appliaction-base-url>/Mo/Callback
- Click on Save.
- Once the application is configured successfully, navigate to Select >> Edit against your configured application.
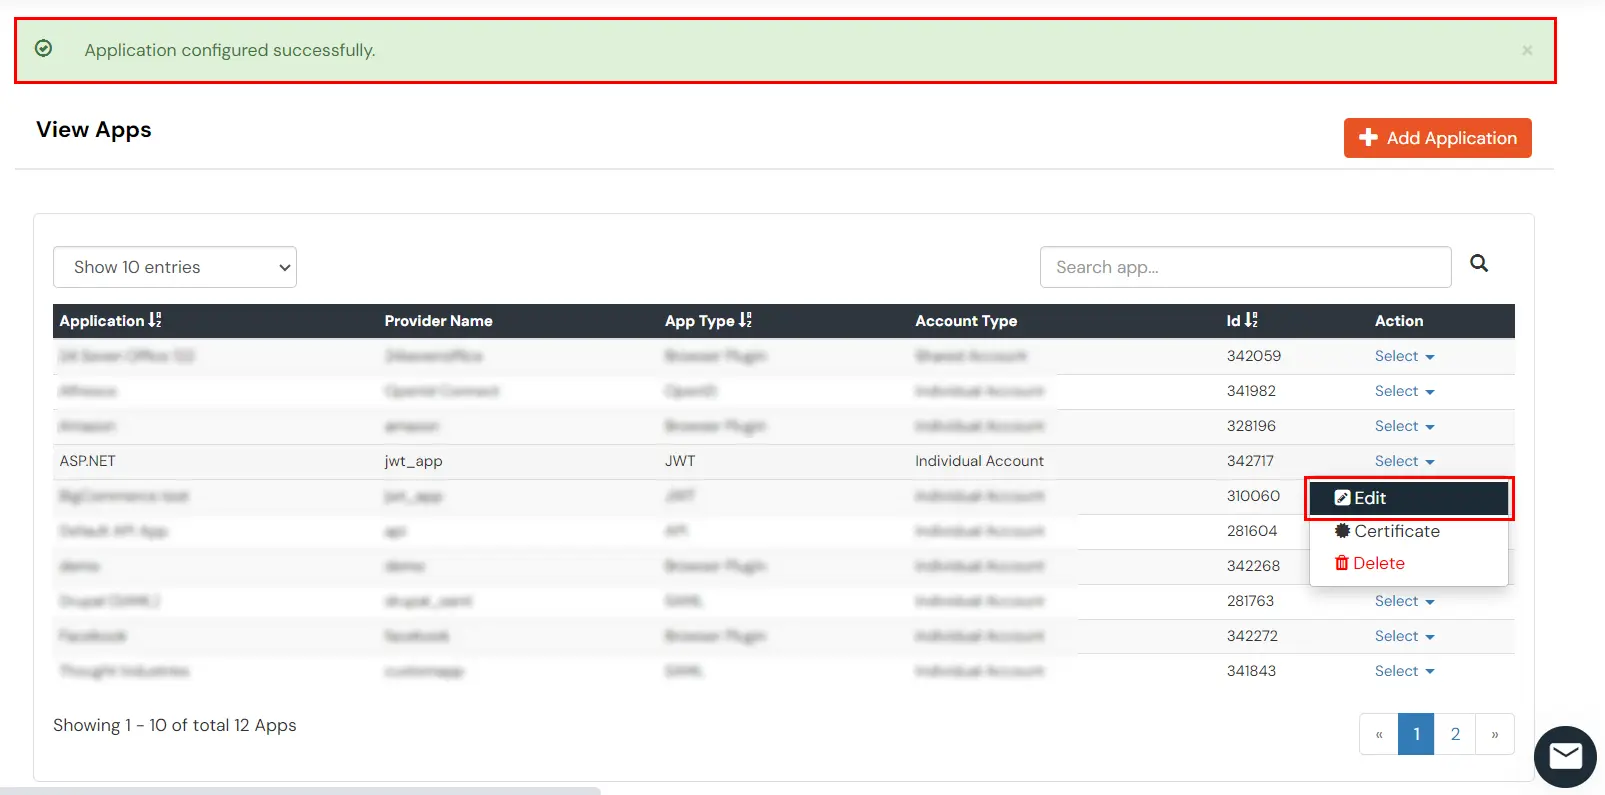
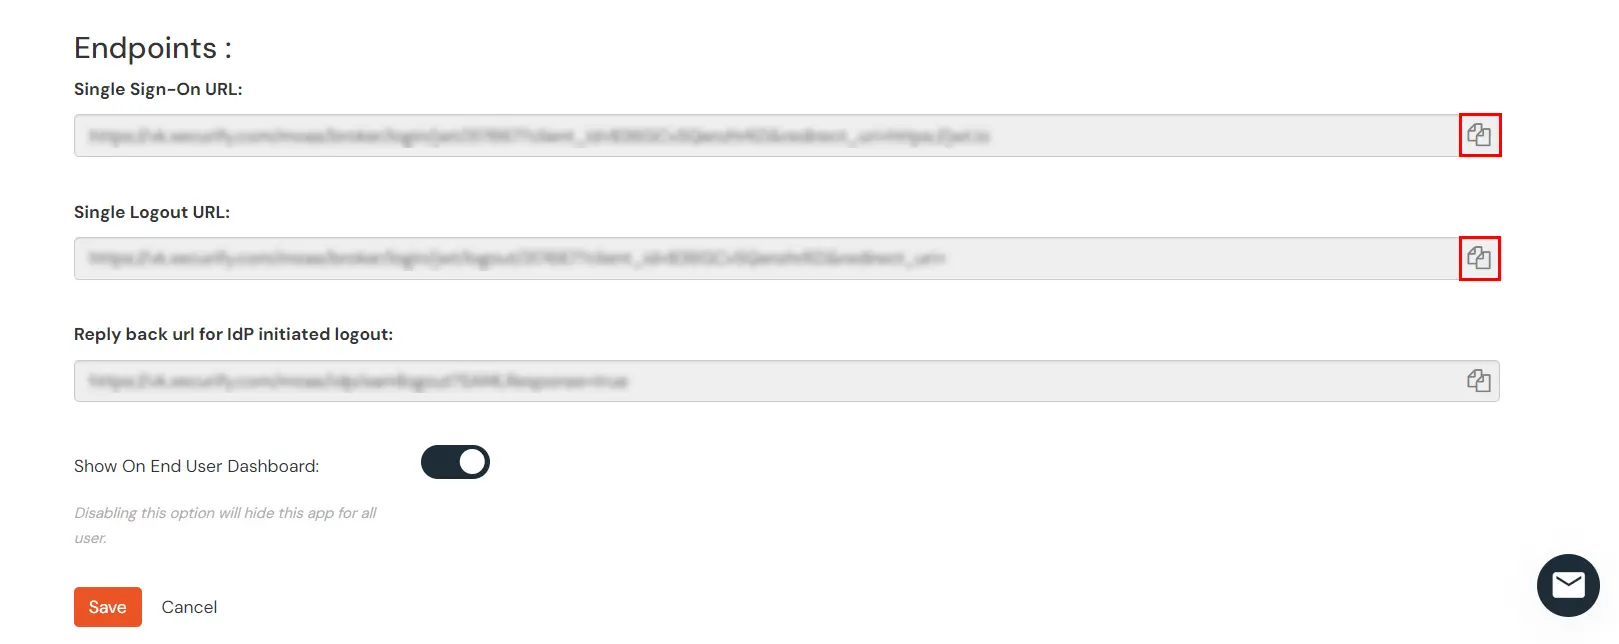
- Copy the Single Sign-On URL and Single Logout URL. We will require these values later.
4. Integration
- Go to the asp-net-sso-connector folder.
- Search for appsettings.json file and right click to edit.
- Put the above saved values in front of SSOURL and SLOURL respectively.
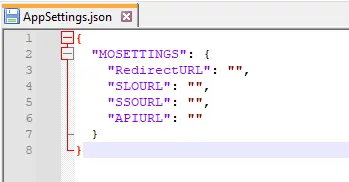
- miniOrange SSO connector will post the attributes which are coming from the IDP on your End Point URL, which can be fetched from body of the request .So first create Post endpoint in your application.
- Put this End Point under APIURL. Use the following URL as a link in your application from where you want to perform SSO:
https://<application-base-url>/MO/MOauthRedirect
For example you can use it as: <a href="https://<application-base-url>/MO/MOauthRedirect”>Log in</a>
External References
