Hello there!
Need Help? We are right here!
Need Help? We are right here!
Search Results:
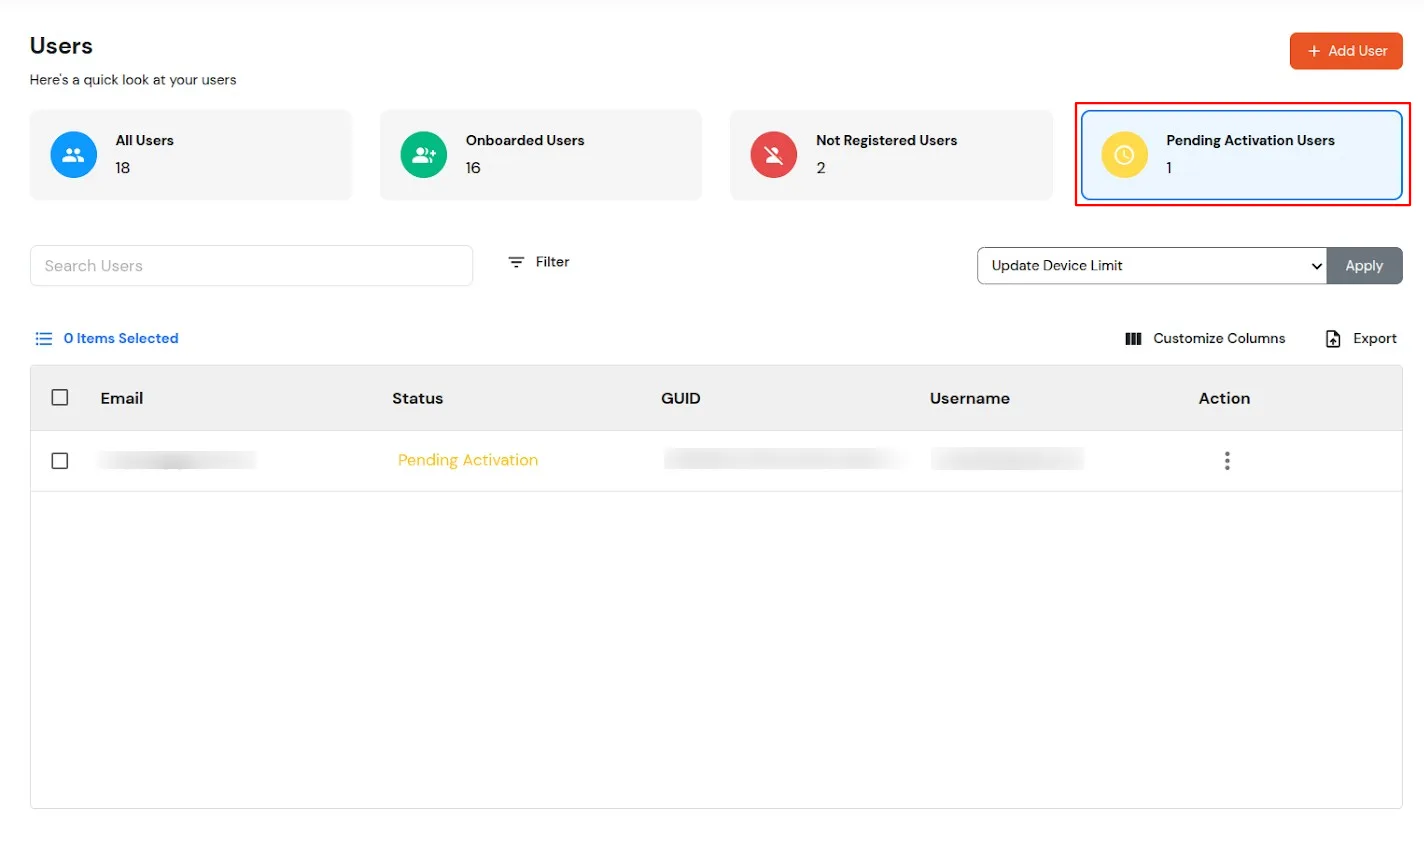
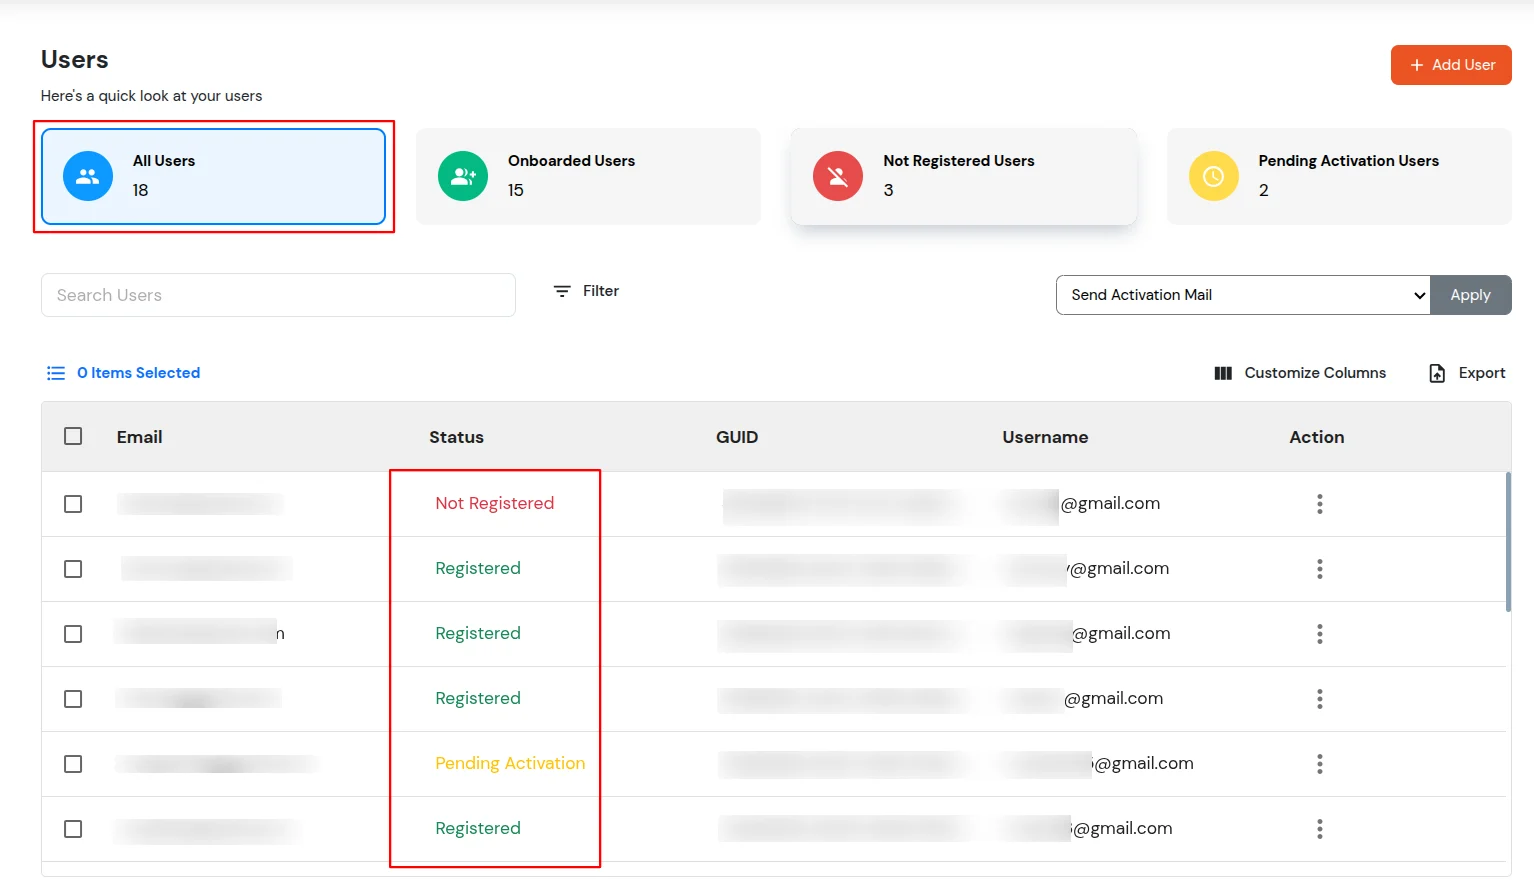
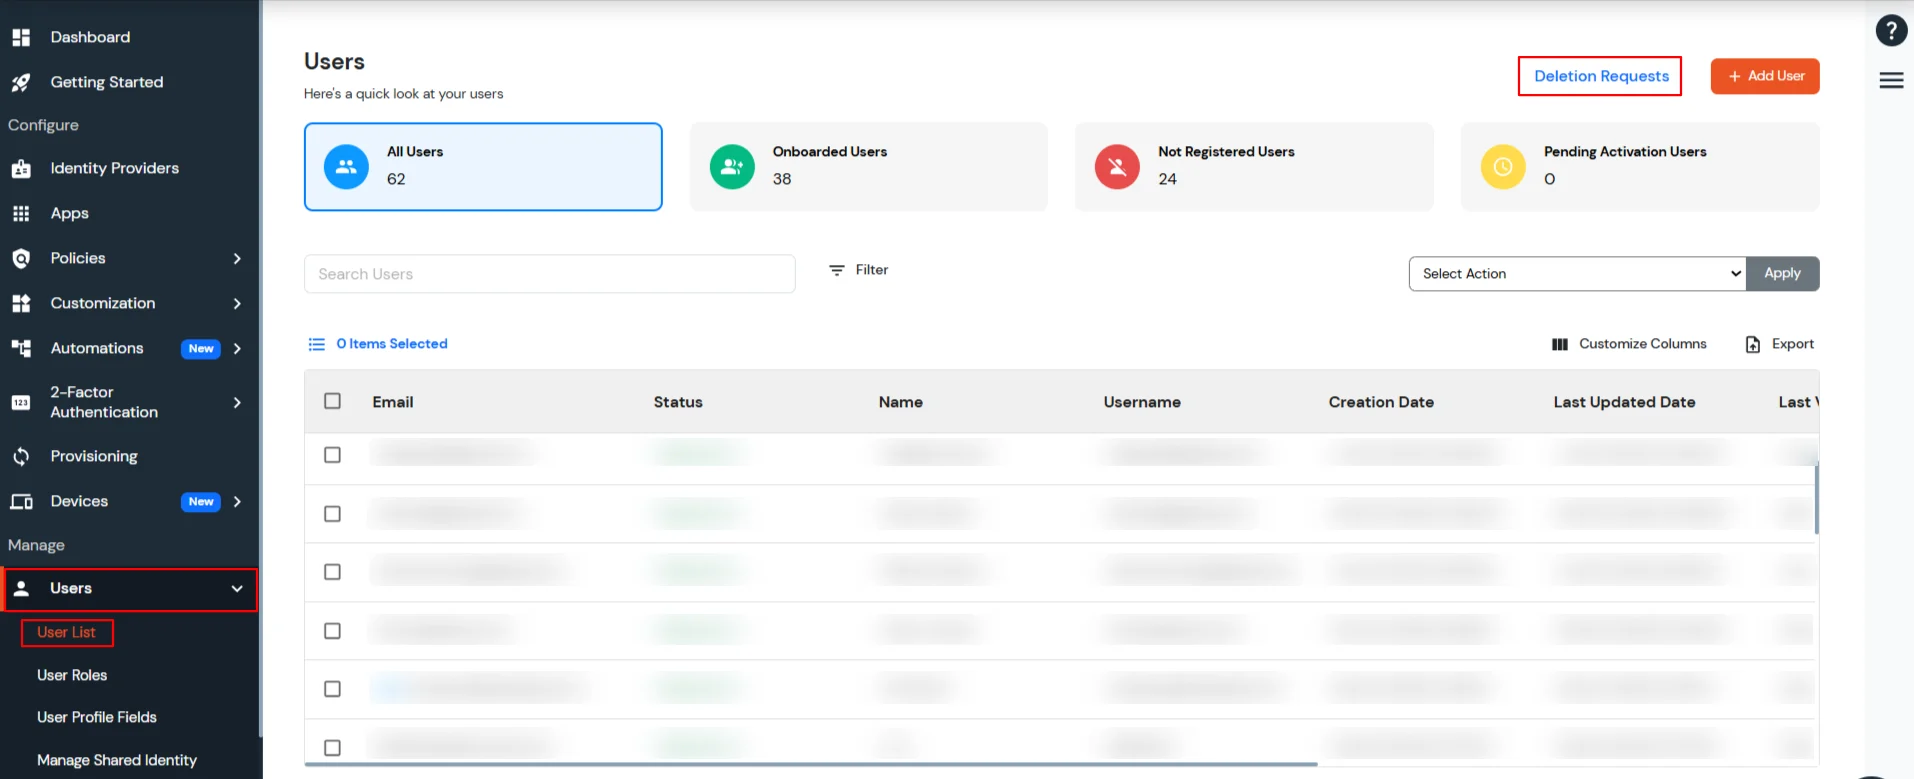
×In the Manage Users section, you can handle the entire user onboarding process. This section allows you to perform all user-related activities, including creating users, bulk user uploads, setting user device limits, managing user MFA, resetting passwords, and other related tasks. You can also enable or disable users and manage their login access.

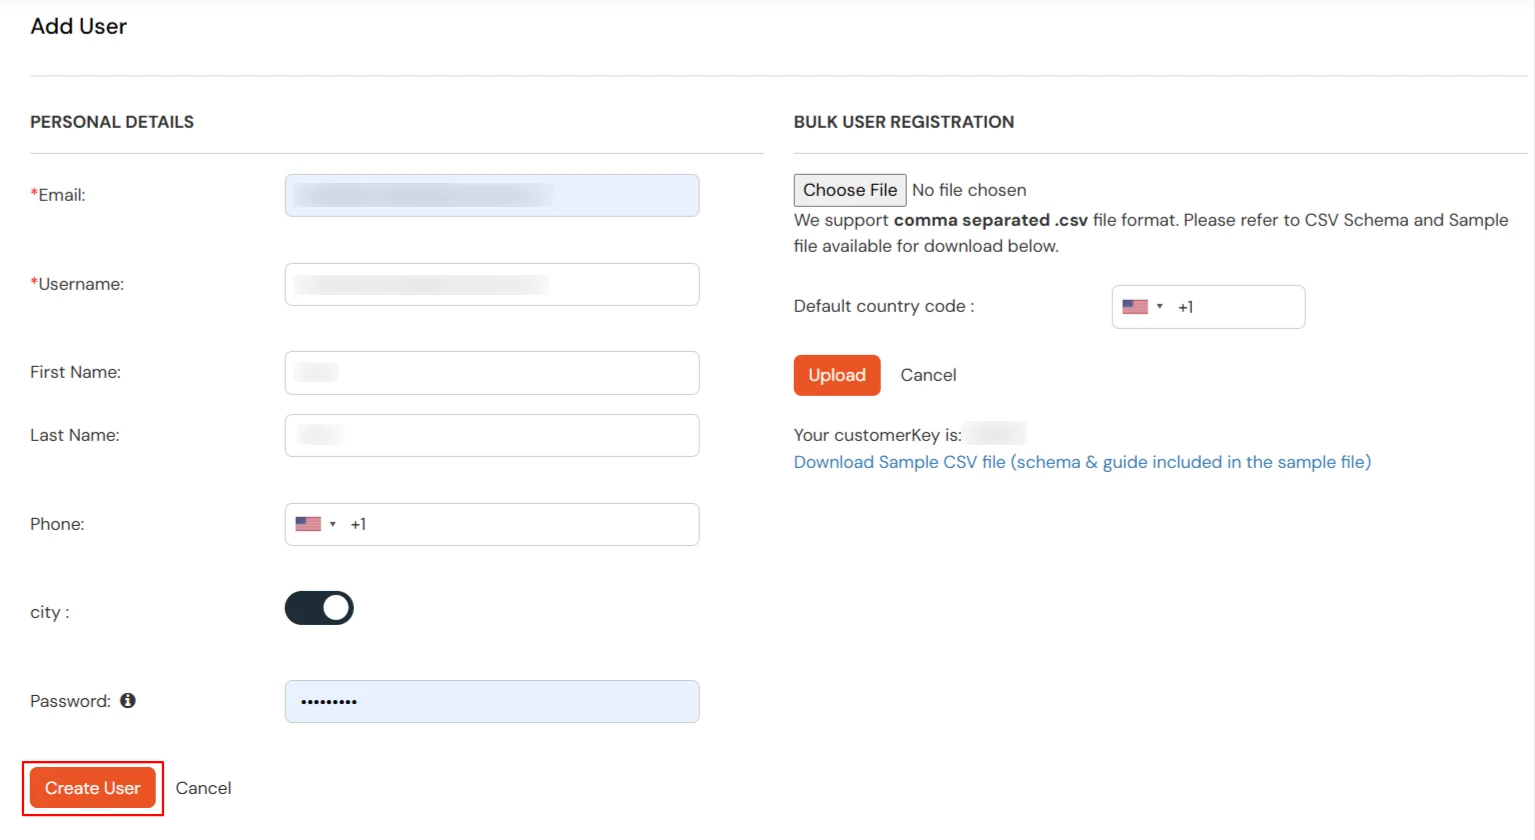
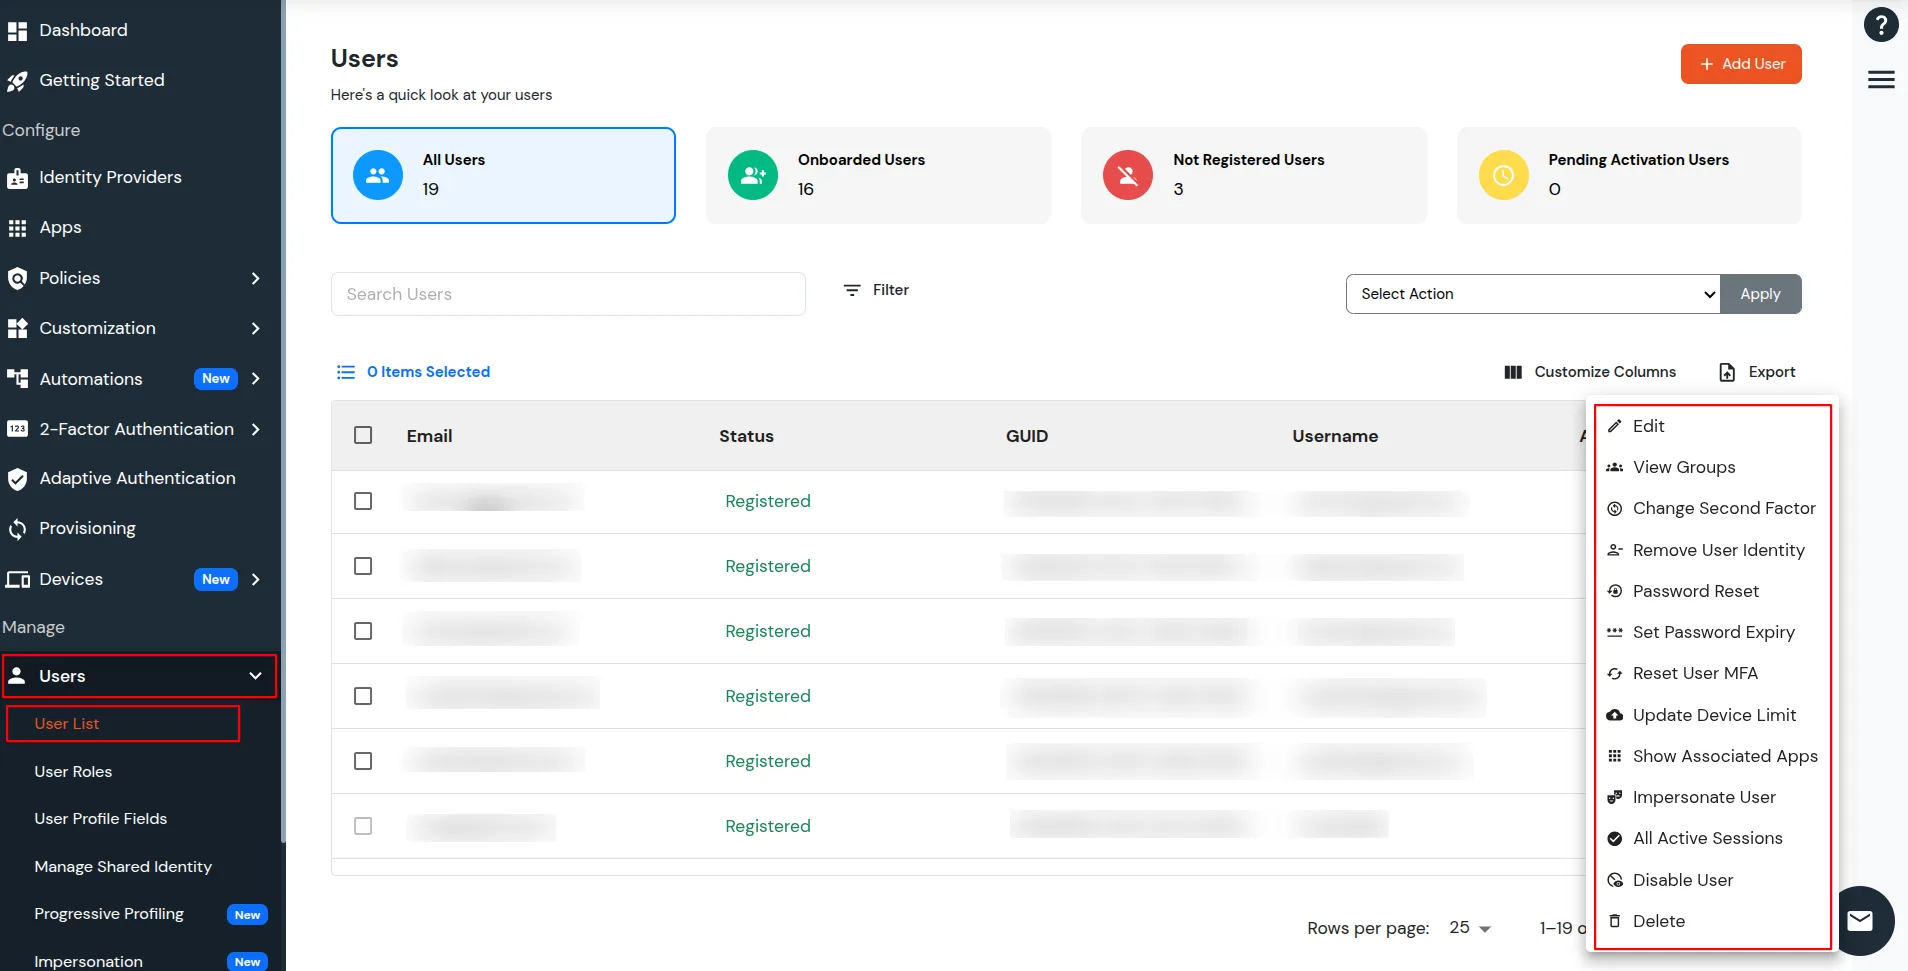
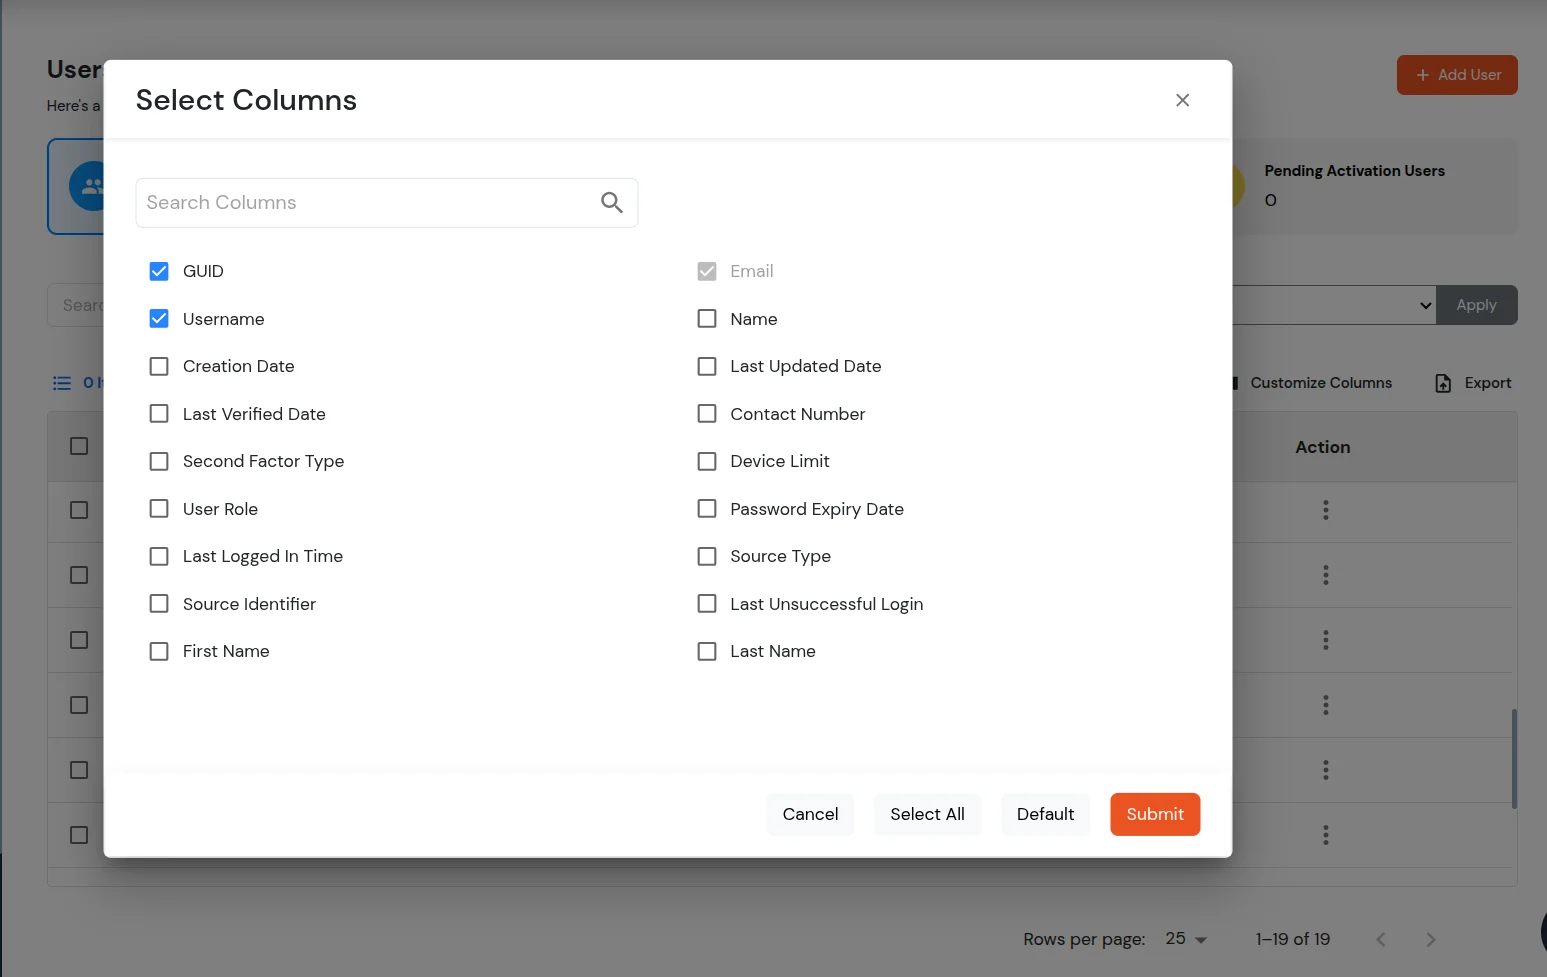
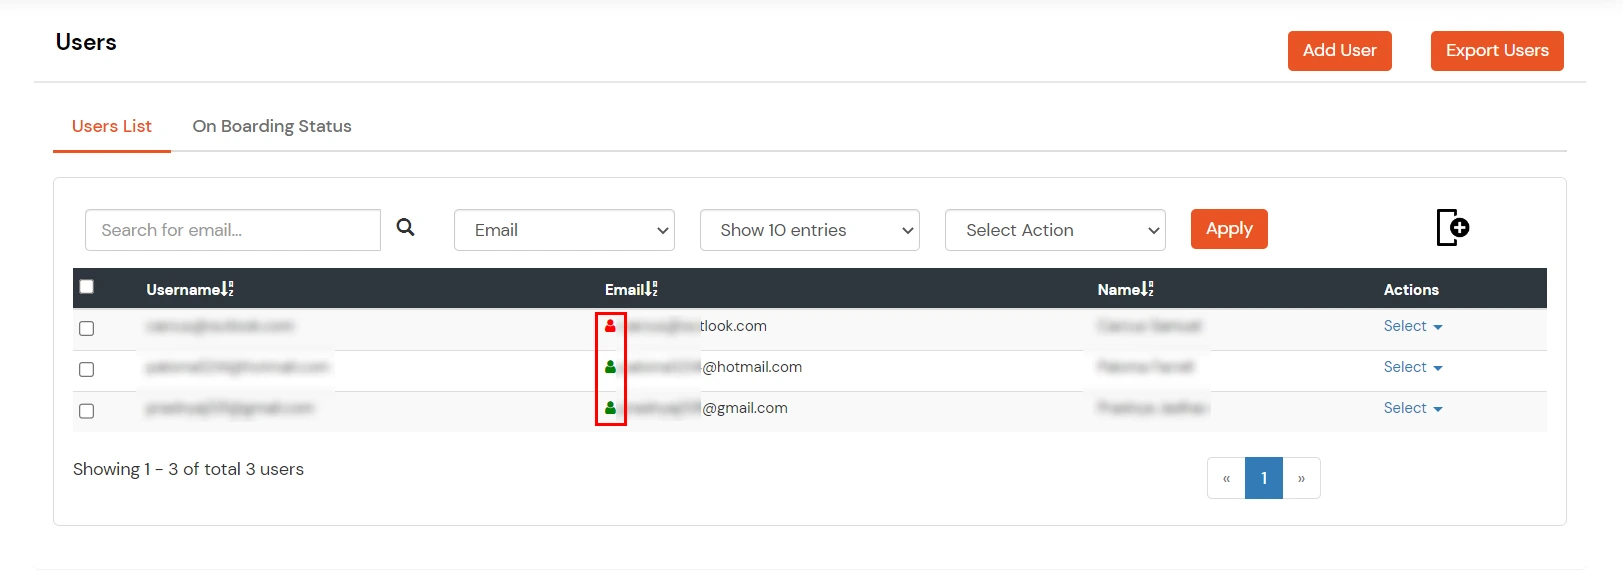
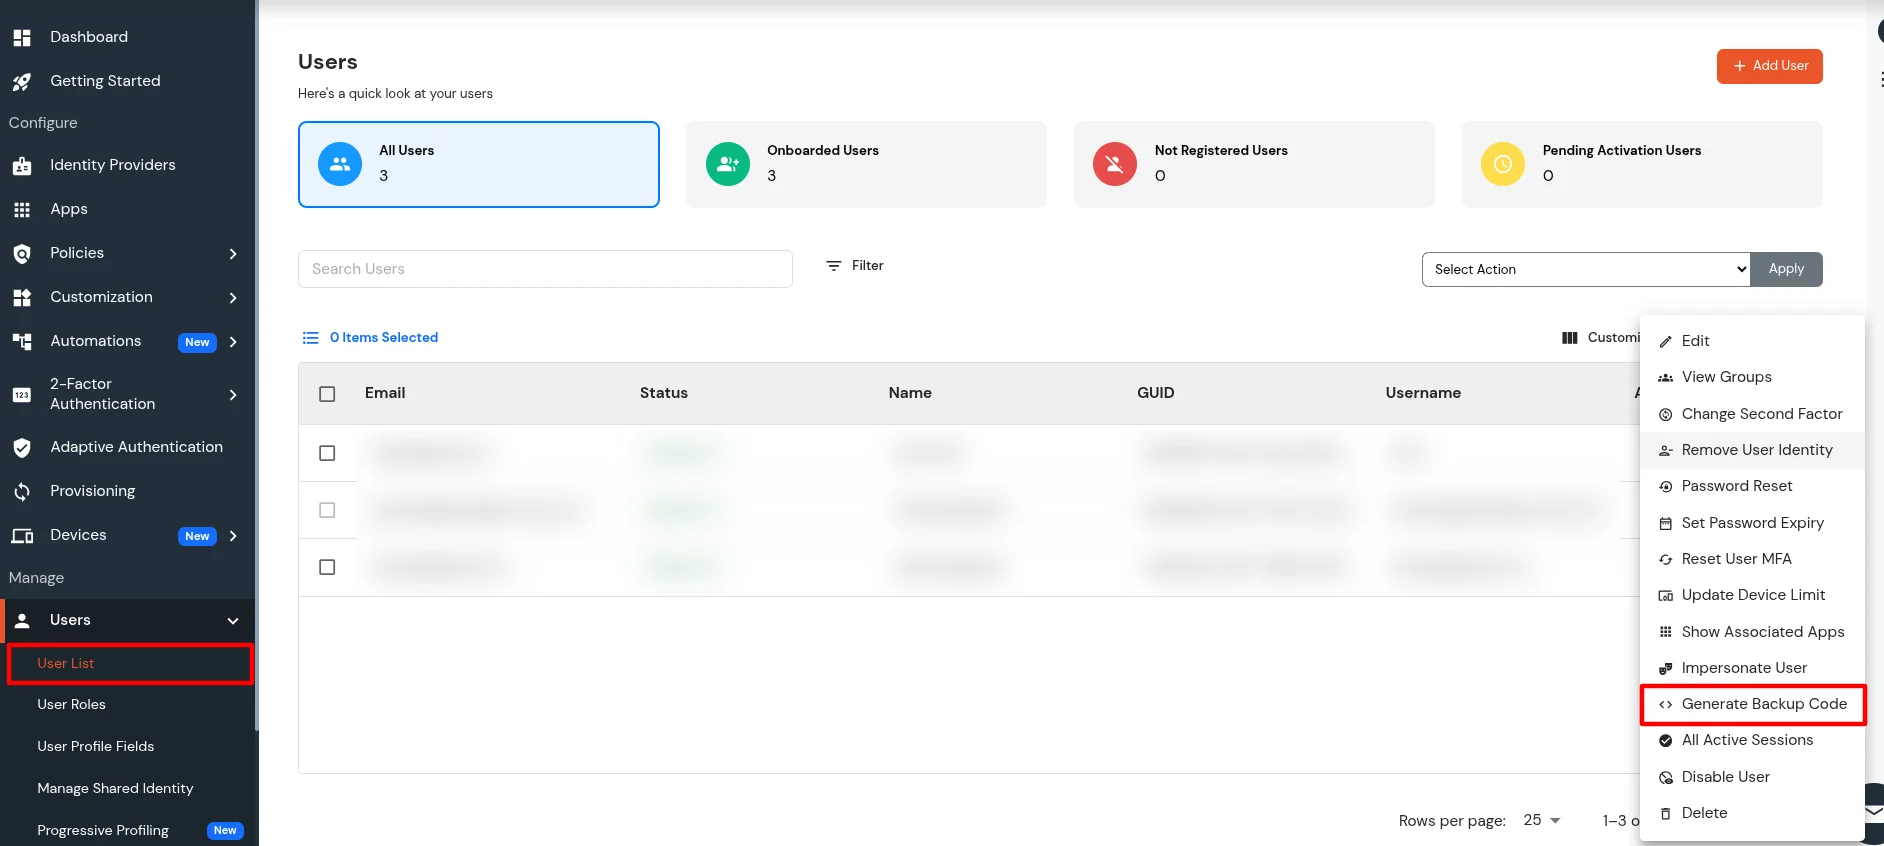
| Edit | Opens the User Edit window where you can update User profile details such as Email, Name, and Phone No. And if you have configured any custom User attributes, then those can also be updated from the edit page. |
| View Groups | This option opens the User Group Details screen where you can view all the groups the current user is part of. Additionally, you can perform the following operations from this Screen:
|
| Change Second Factor | This option opens a Modal from which you can select the 2FA method that you want to set as default for the User. If MFA is enabled for any application, then the user will be prompted for MFA with the 2FA method set as default for the user. Note : For Few of the 2FA methods, prior configuration from user dashboard is required. |
| Remove User identity | This option is used to remove the 2FA configuration as well as the Password for user. This is useful when you want the user to reset his password and 2FA methods similar to newly created user. |
| Password Reset | This option is used to send a Password Reset email to the user using which they can set a new password for their account. |
| Set Password Expiry | IF you set this, the current user password will expire on the provided date and will not work after that. They will receive an email with steps to set the new Password. |
| Reset User MFA | This will reset the user MFA method if MFA is enforced for the end users at the time of first login. |
| Update Device limit | This option opens a popup using which you can set/reset the Device registration Limit for the user. Based on the value set here, the user is allowed to register unique devices. You can also reset the device registration limit to the default value by clicking on the Reset to Default button. |
| Show Associated Apps | This option opens a view where you can see the applications linked to the user, such as apps the user is assigned to or has accessed, so you can review their application footprint from one place. |
| Impersonate User | This option lets an administrator open the selected user’s end-user dashboard and applications as that user would see them, for support and troubleshooting. Impersonation is logged for auditing. |
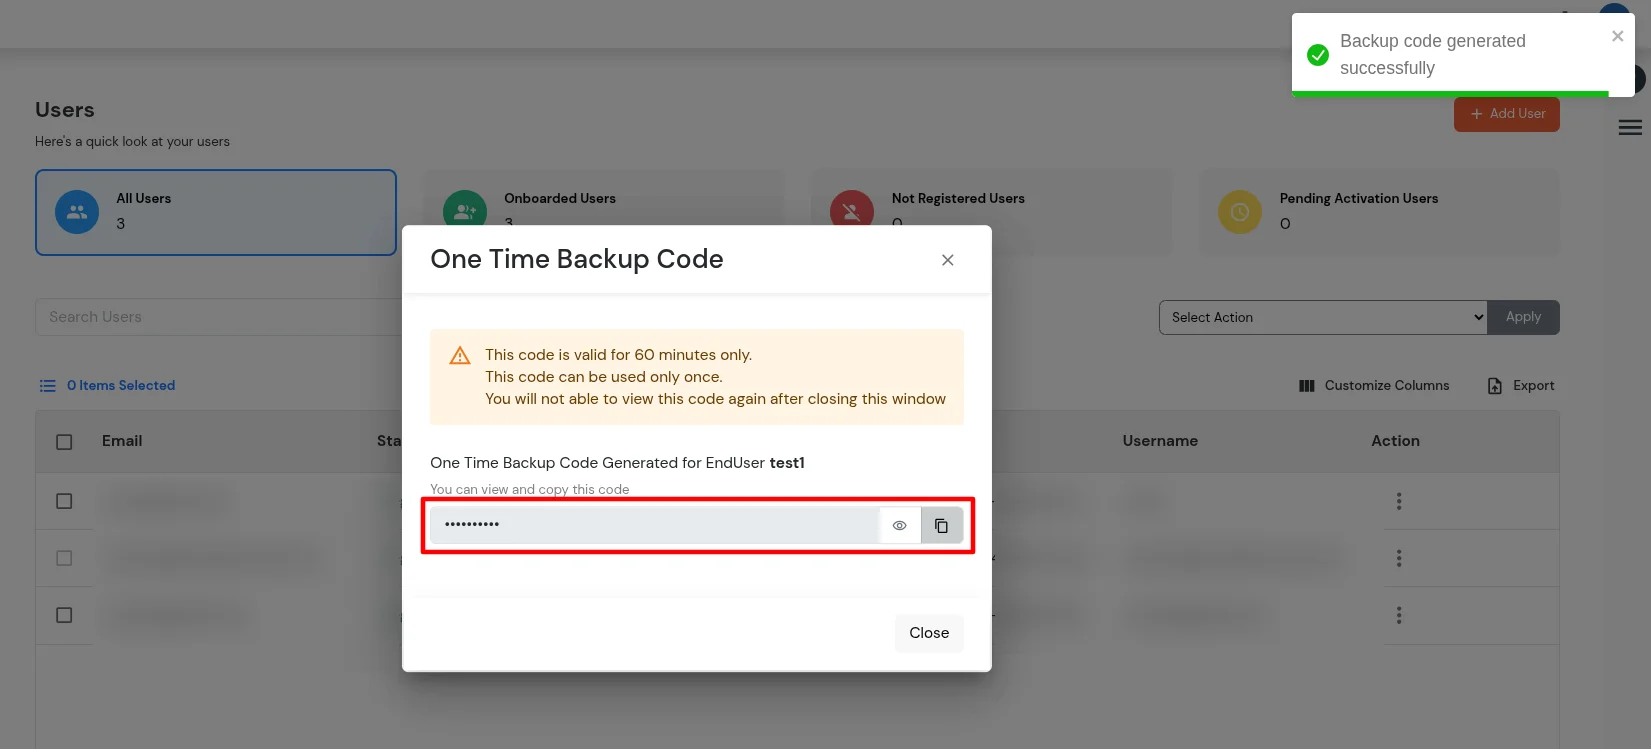
| Generate Backup Code | This option creates a backup authentication code for the user so they can complete 2FA when their usual second factor is not available. For detailed steps, see Generate backup code. |
| Delete | To delete a User and remove all details related to it. |
| Disable a User | This option is used when you want to disable the user logins without deleting user. If a user is disabled, he will not be able to login to any of the applications as well as the end-user dashboard To enable a disabled user, click on the select dropdown against it and select the Enable user option. |
| All Active Sessions | All active sessions of the selected user's devices are monitored and managed using this option. |
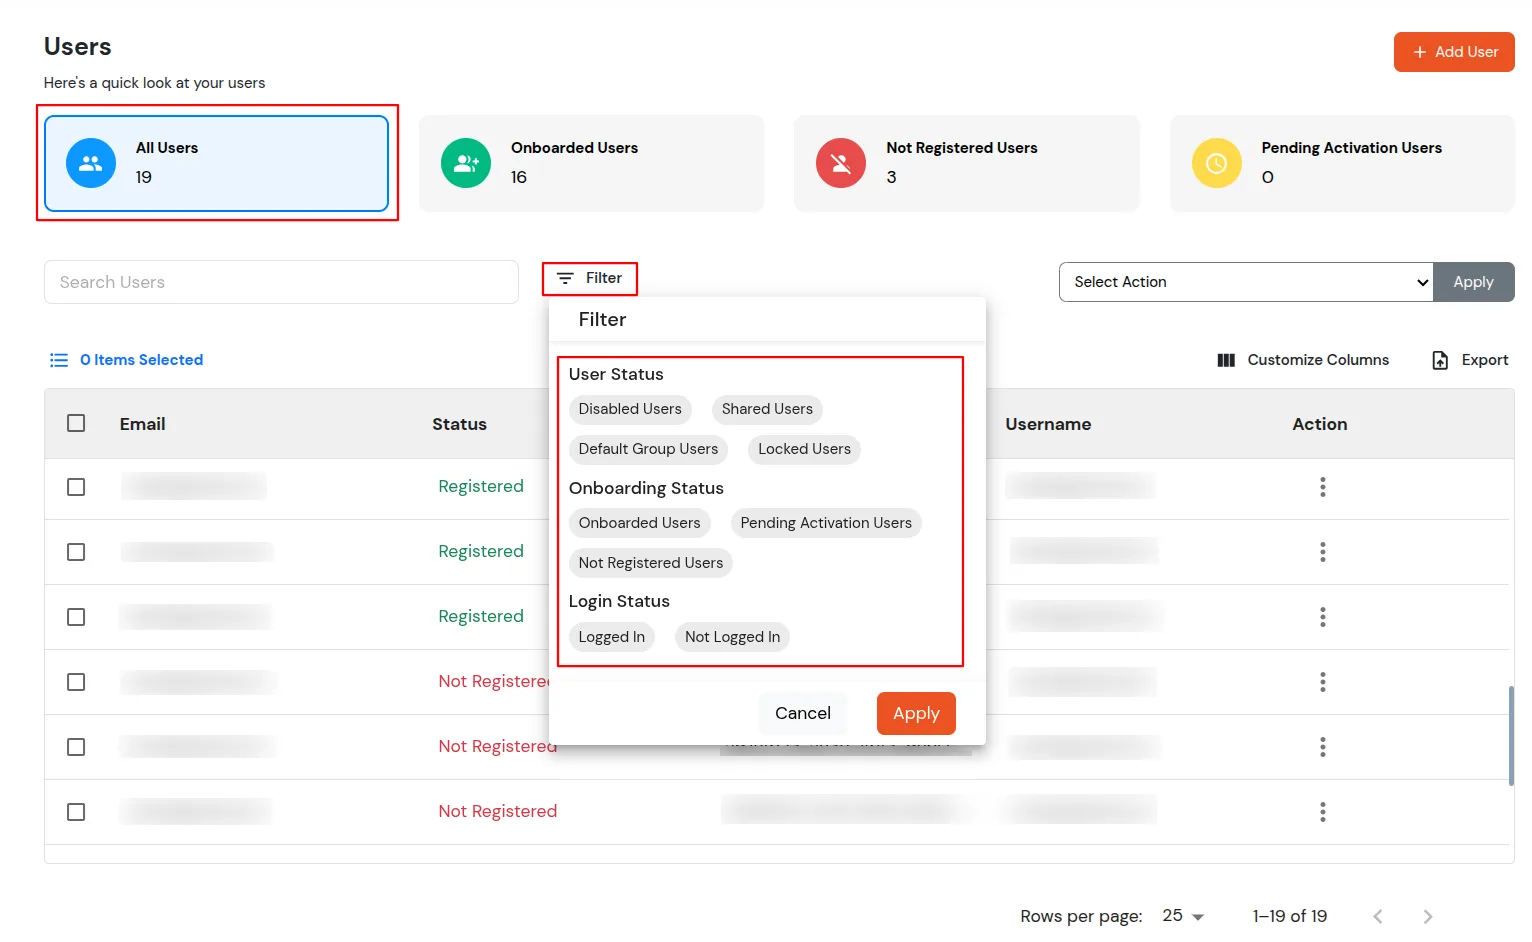

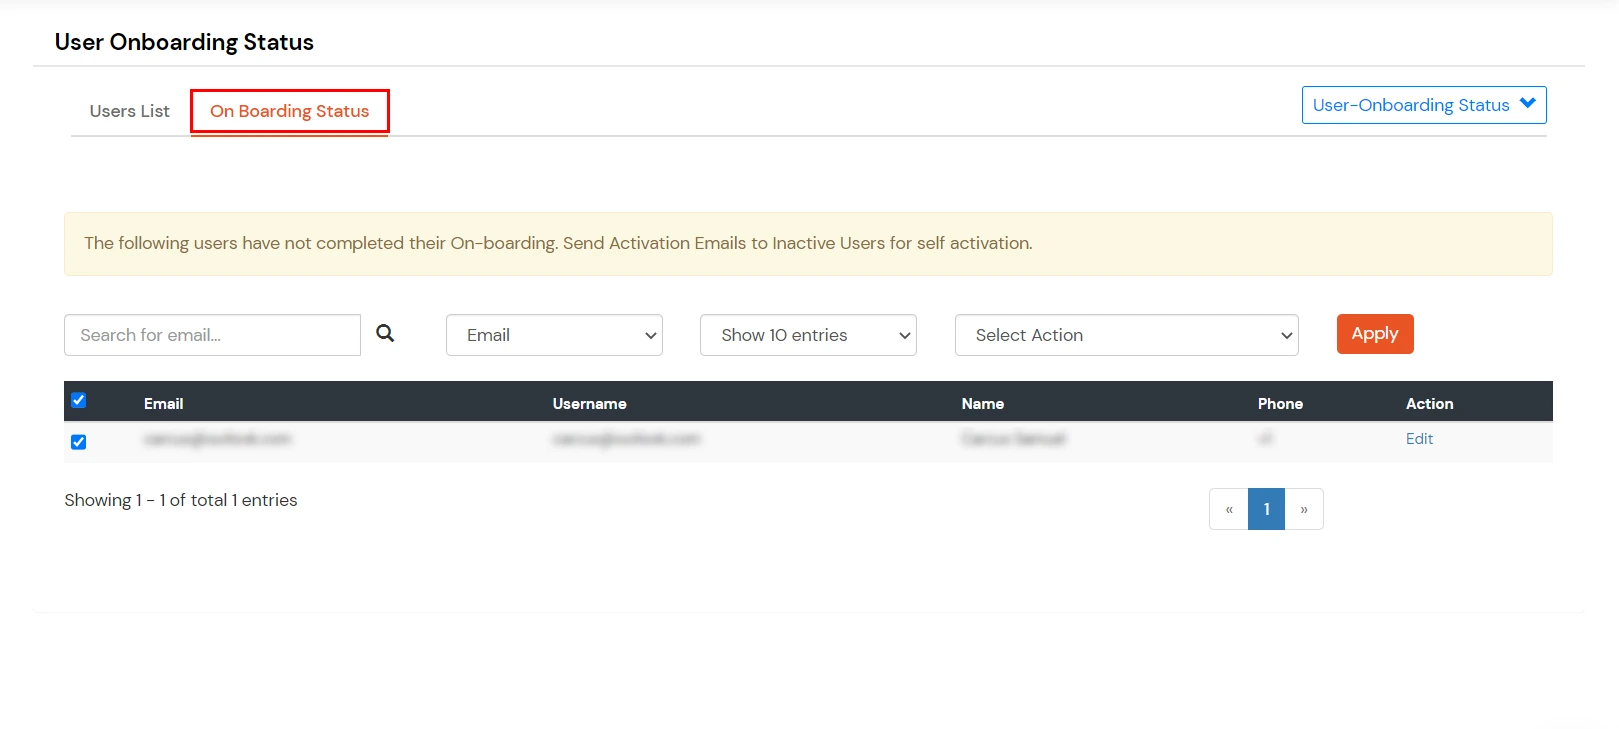
The User On-boarding section shows details about the users who have not completed their account onboarding process and have not set a password for their account, they will not be able to authenticate.
Note: Generate Backup Code appears in the user’s actions menu only when the related security-code settings are enabled as described in Configure Alternate 2FA Login Methods.
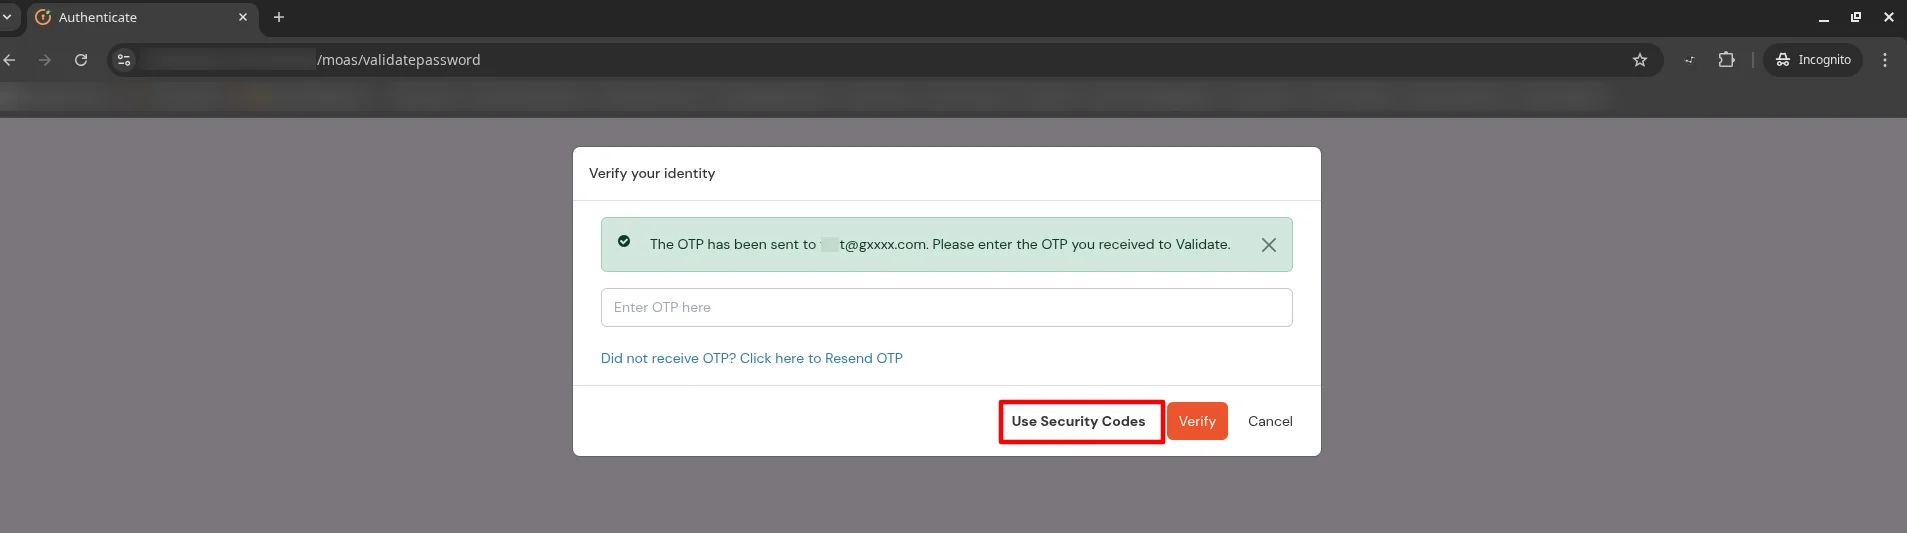
Access Account Deletion Requests
This section allows administrators to manage all self-account deletion requests submitted by end users.
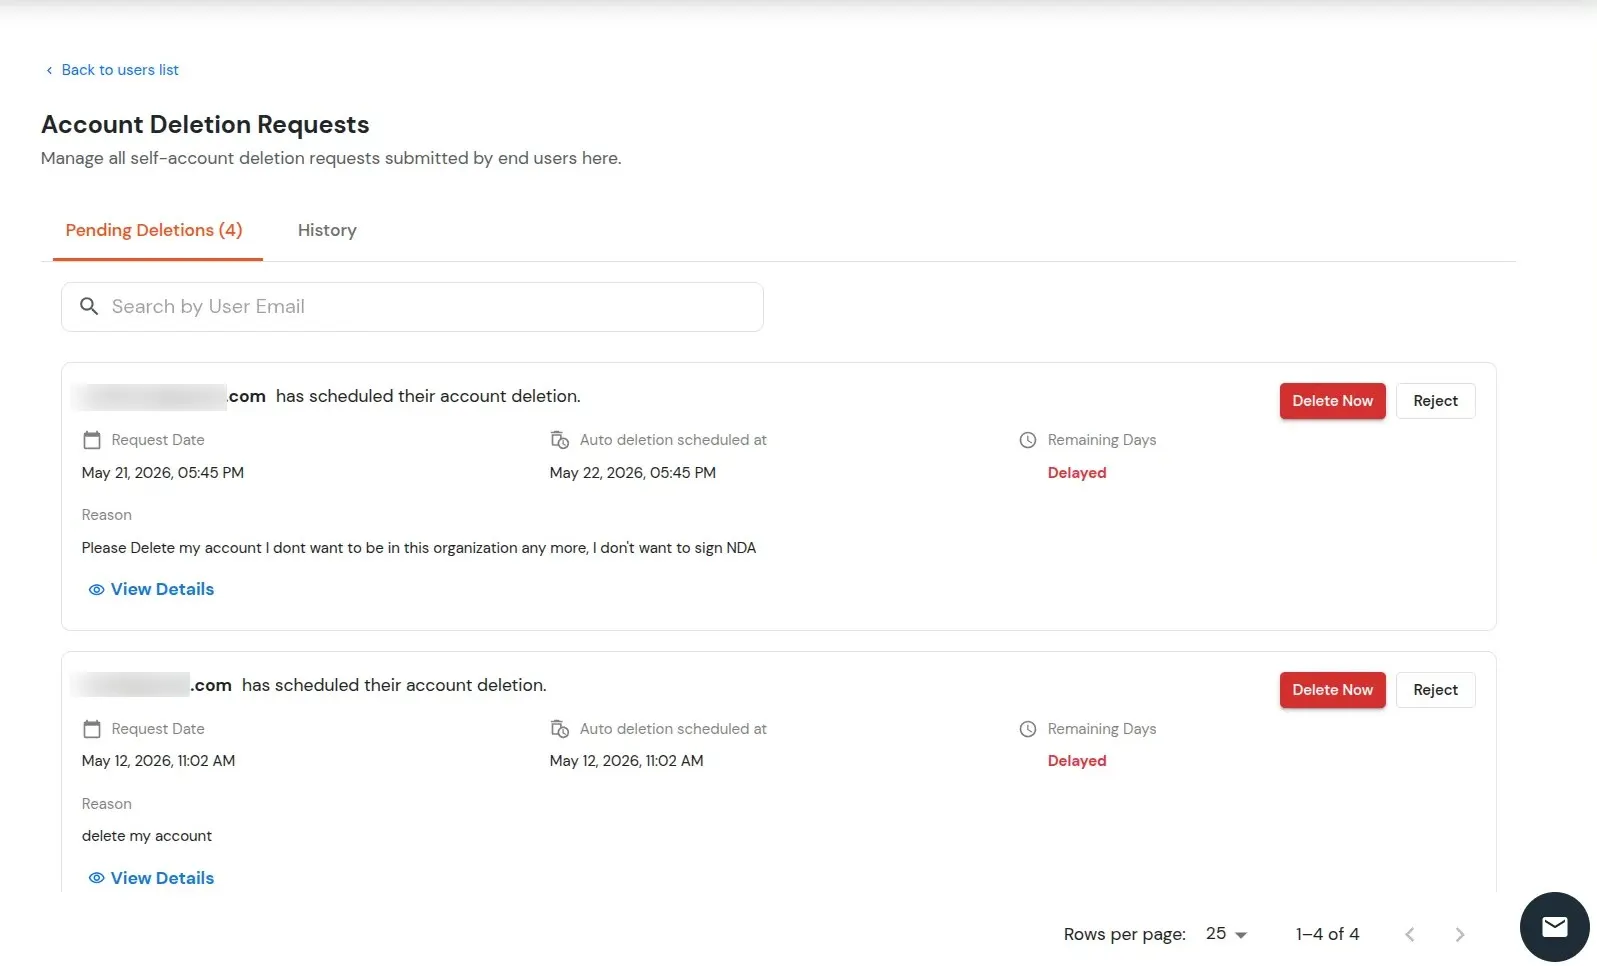
Scheduled Deletion
When a user raises a deletion request:
View Details
Use the View Details action to view complete request information, including:
Reject Request
Use the Reject action to cancel the scheduled deletion request.
Delete Now
History Tab