Hello there!
Need Help? We are right here!
Need Help? We are right here!
Search Results:
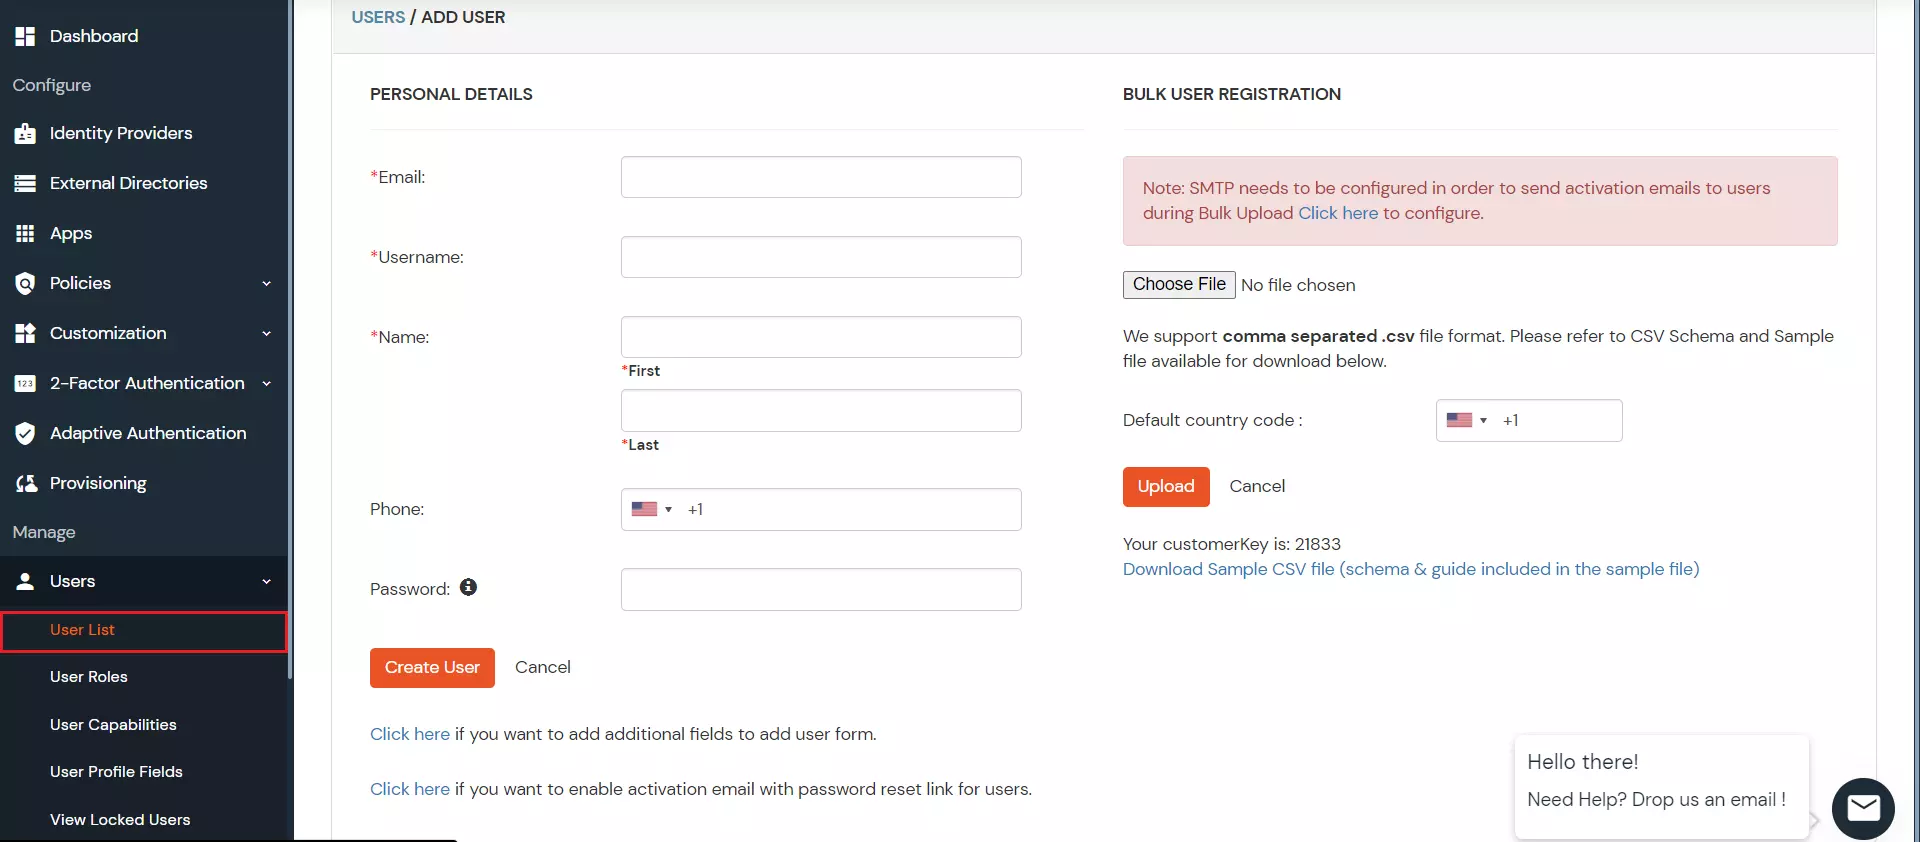
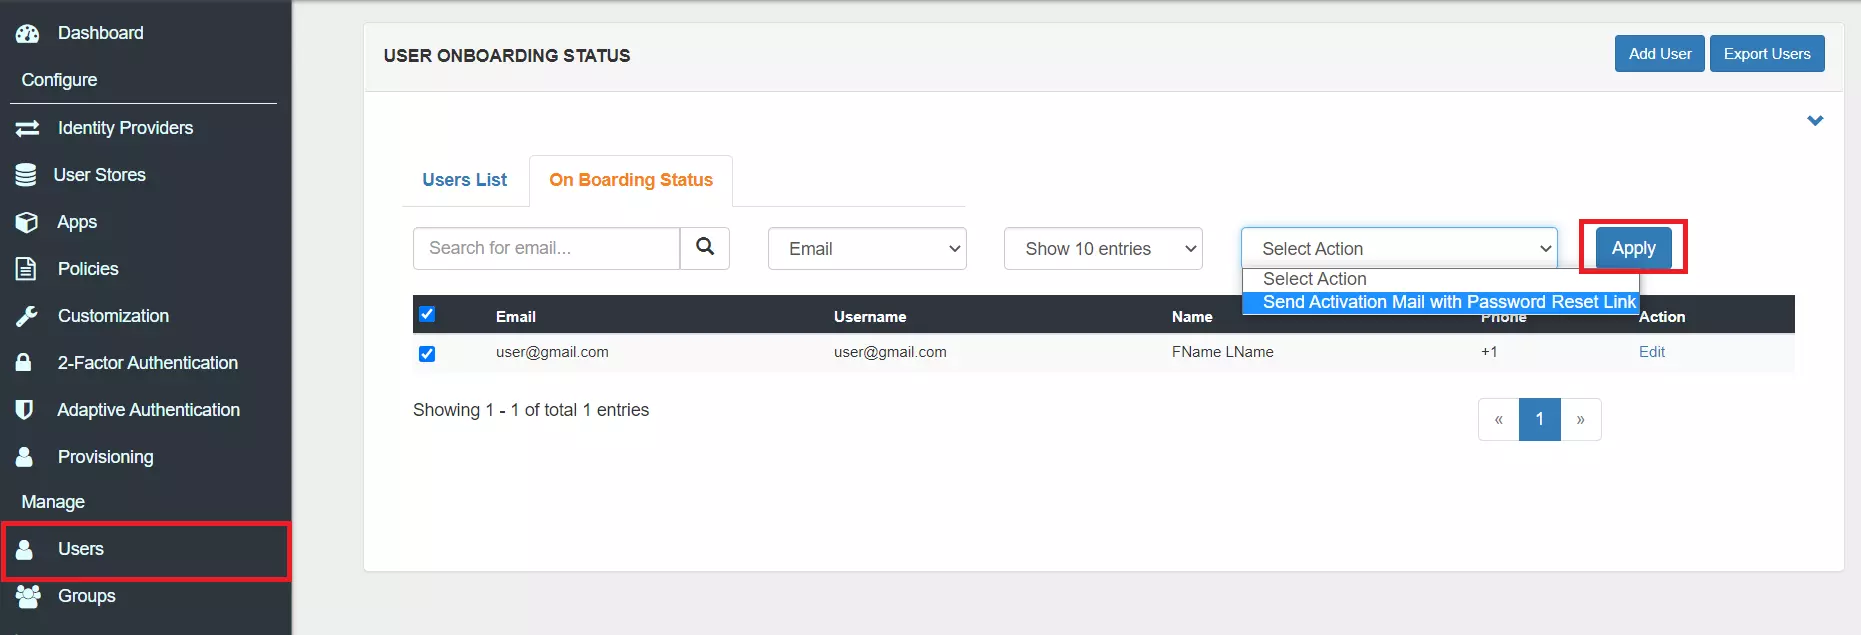
×Dayforce HCM User Provisioning allows to create account in a simplified way and link Dayforce HCM users' account to their existing or new apps. Dayforce HCM Provisioning automates user provisioning with their identities. Dayforce HCM User Provisioning enables a user to get instant access to their third-party apps with a single click.
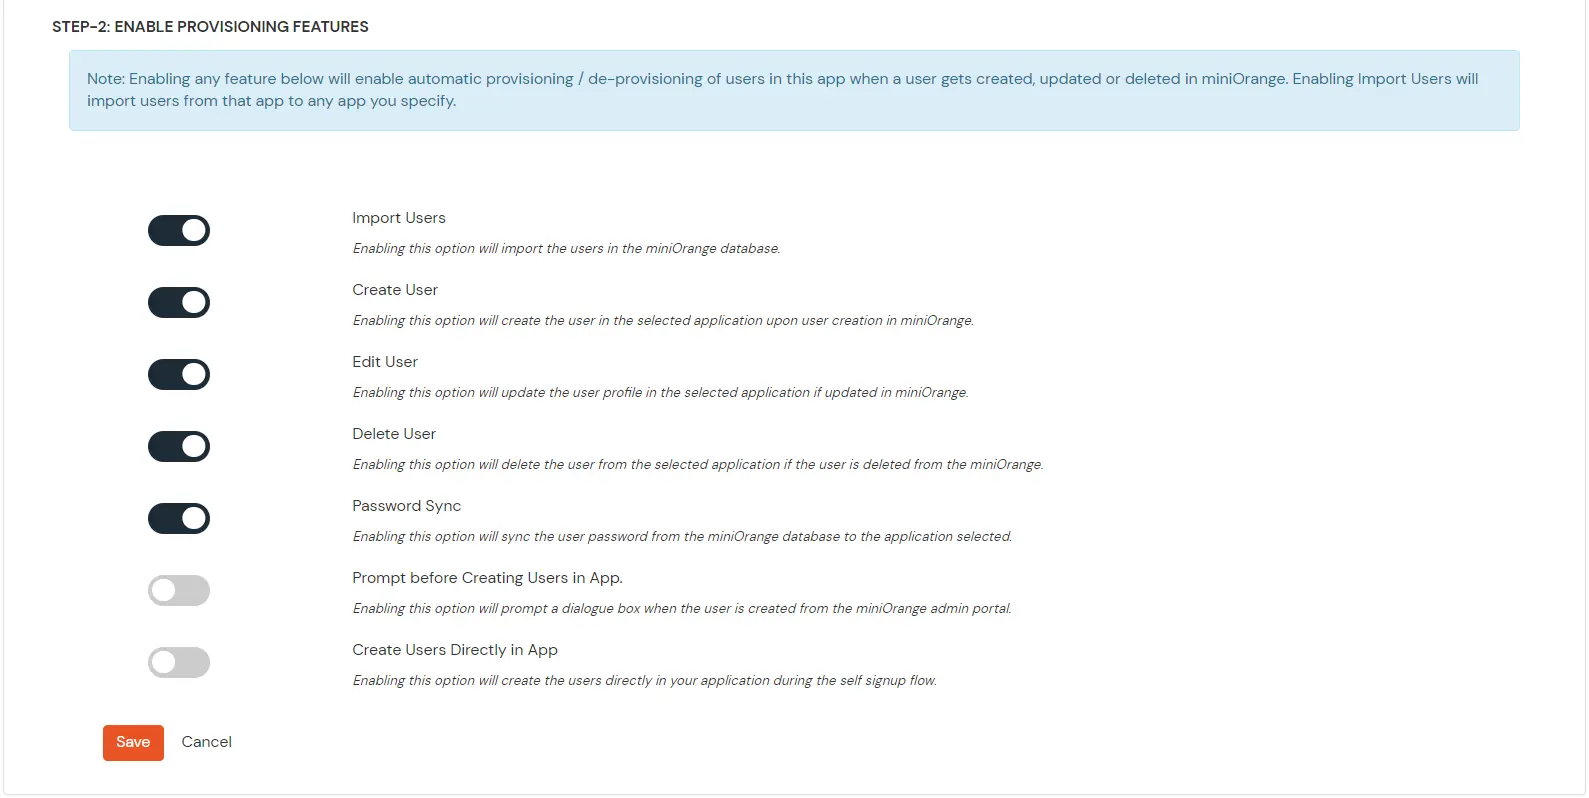
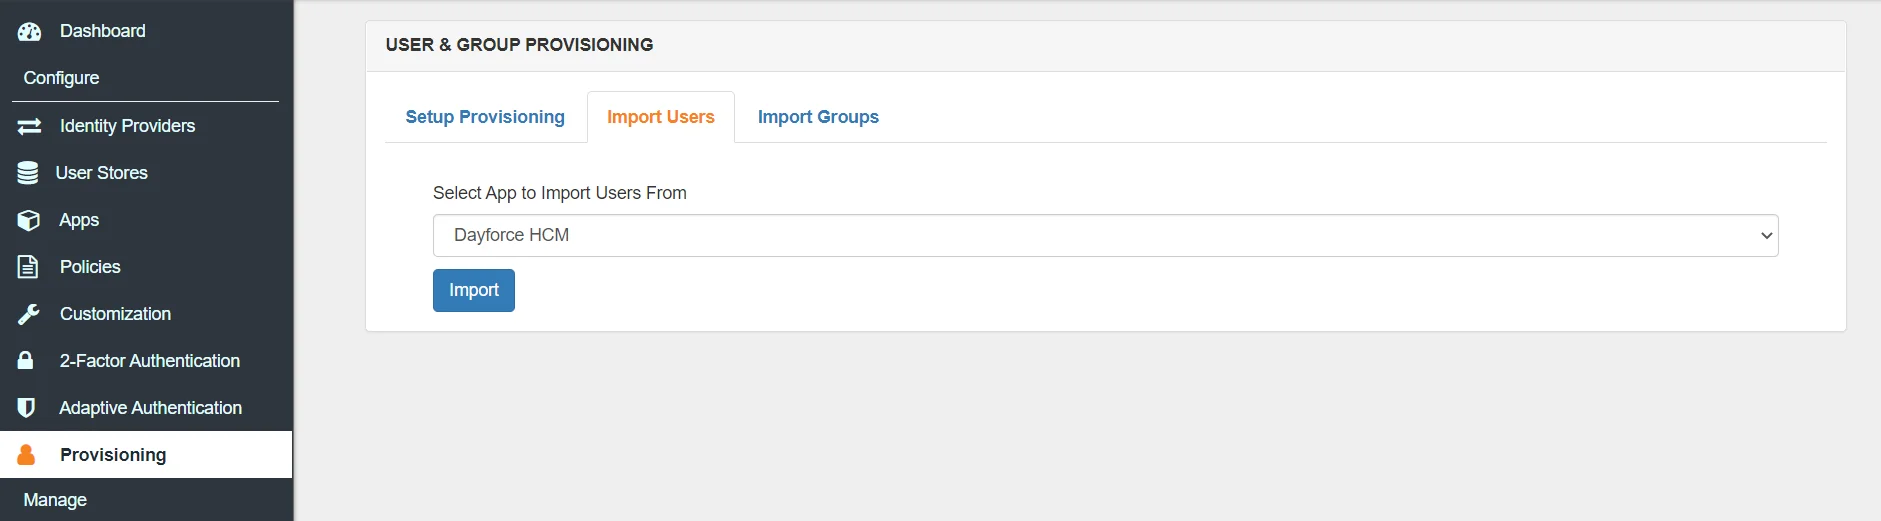
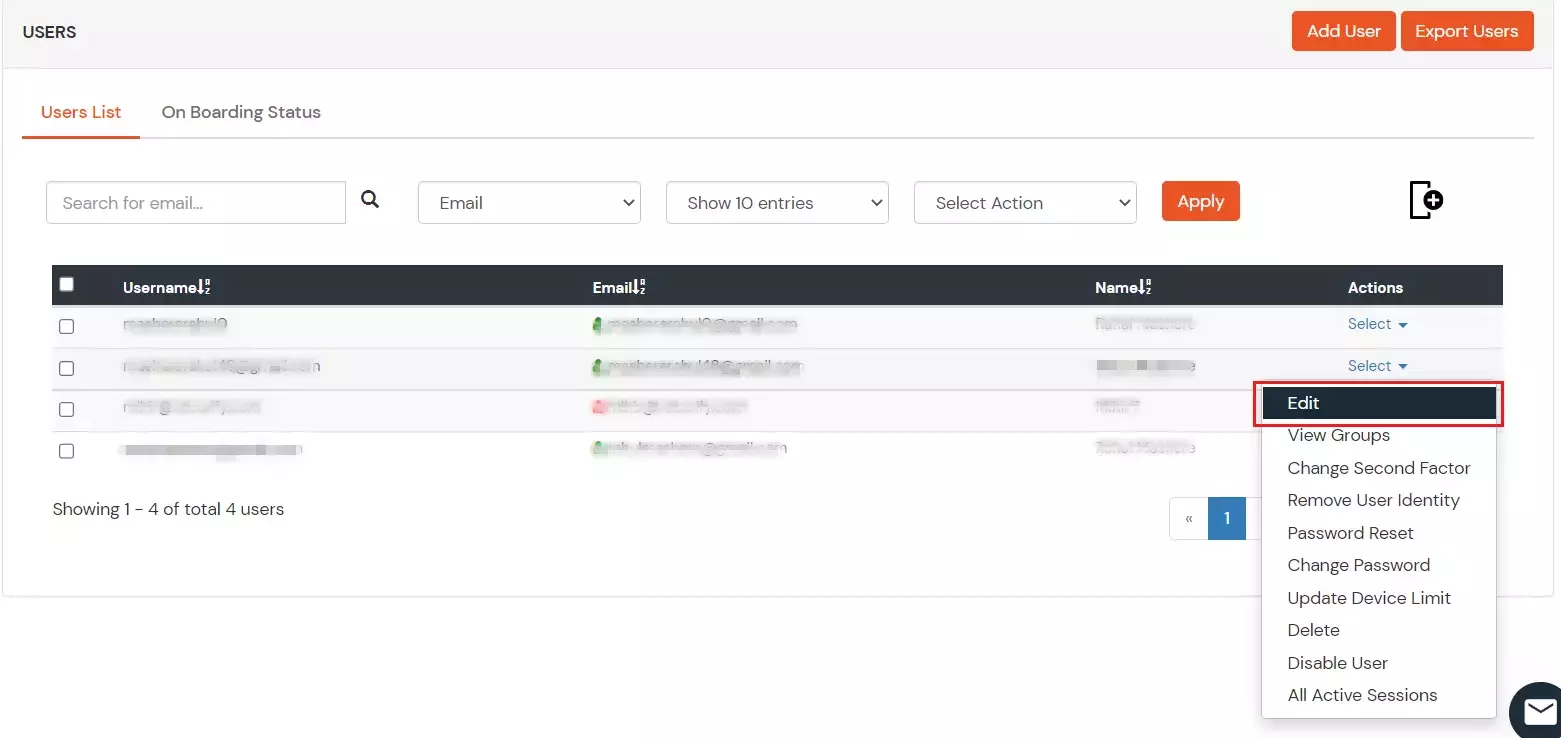
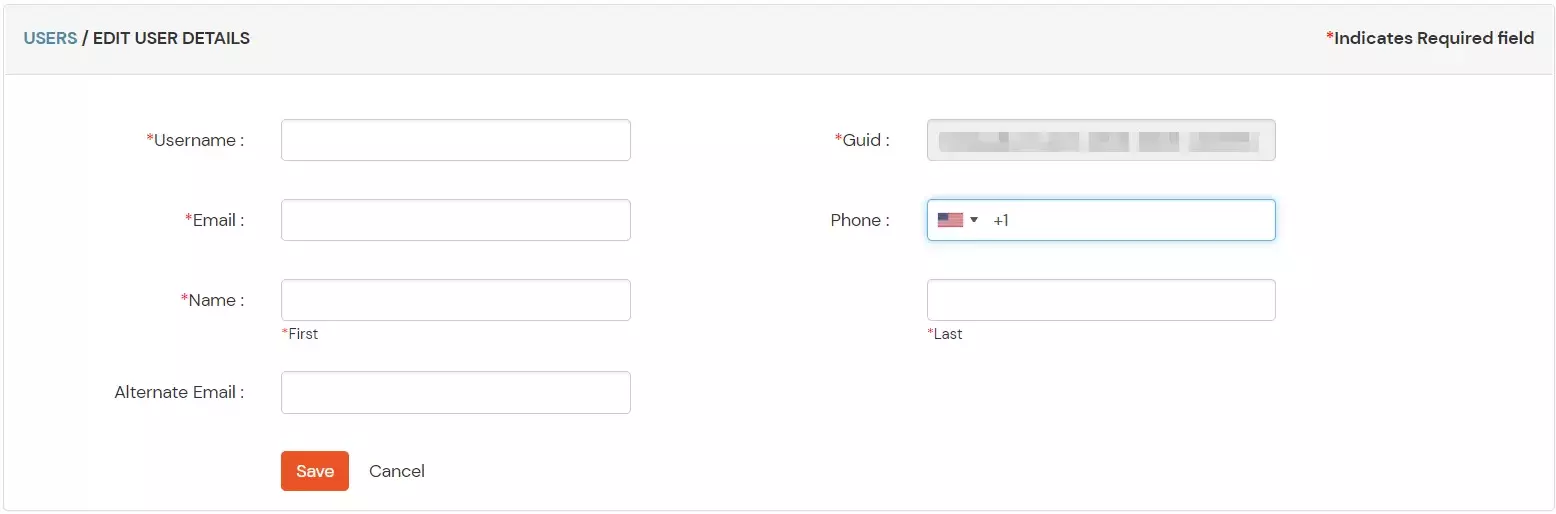
Dayforce HCM User Provisioning and deprovisioning actions are bi-directional, so you can create accounts inside an external application and import them into miniOrange, or alternatively create the accounts in miniOrange and then push them out to any linked external applications.
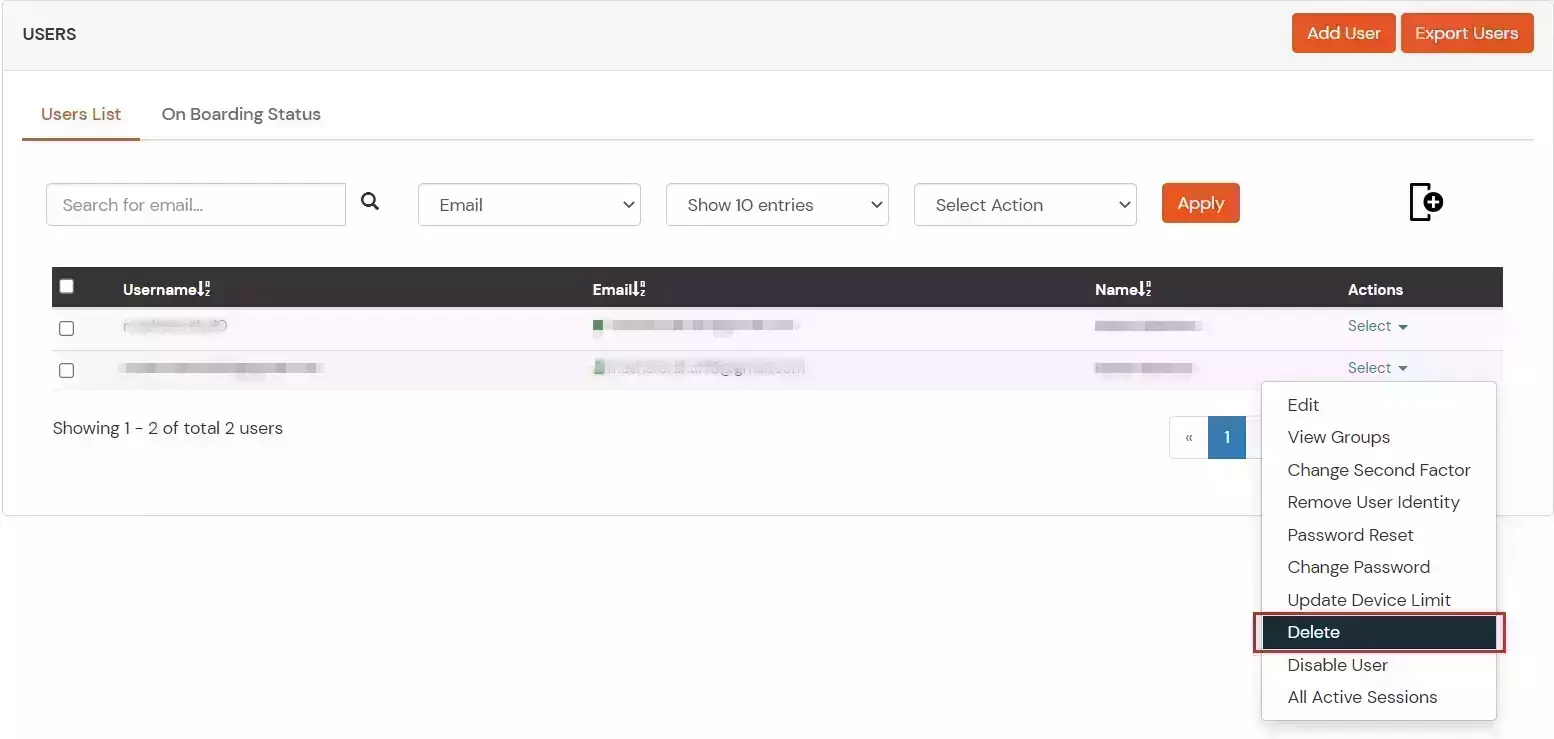
Dayforce HCM Deprovisioning means deleting a user and removing their access from multiple applications and network systems at once. Deprovisioning action is triggered when an employee leaves a company or changes roles within the organization. The deprovisioning features increase your organization's security profile by removing access to sensitive applications and content from people who leave your organization.
System for Cross-domain Identity Management (SCIM) is an open standard to automate user provisioning. SCIM standard is a communication medium between an Identity Provider (IDP) and a Service Provider (SP) that requires user identity information.
SCIM provides a defined schema for representing users and groups, and a RESTful API to run CRUD operations on those user and group resources.
With the SCIM protocol, user data is stored in a consistent way and can be shared with different applications. Since data is transferred automatically, complex exchanges are simplified and the risk of error is reduced.

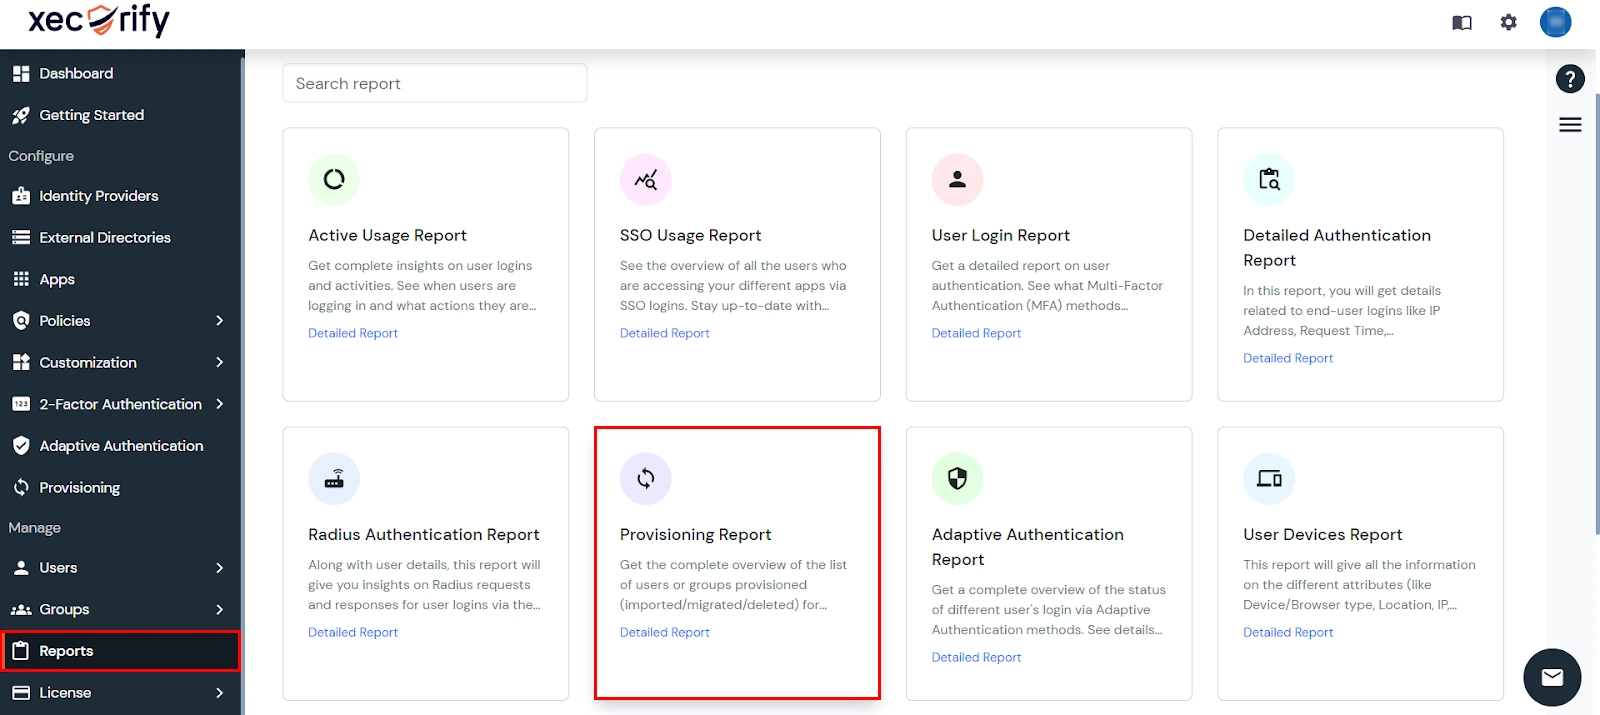
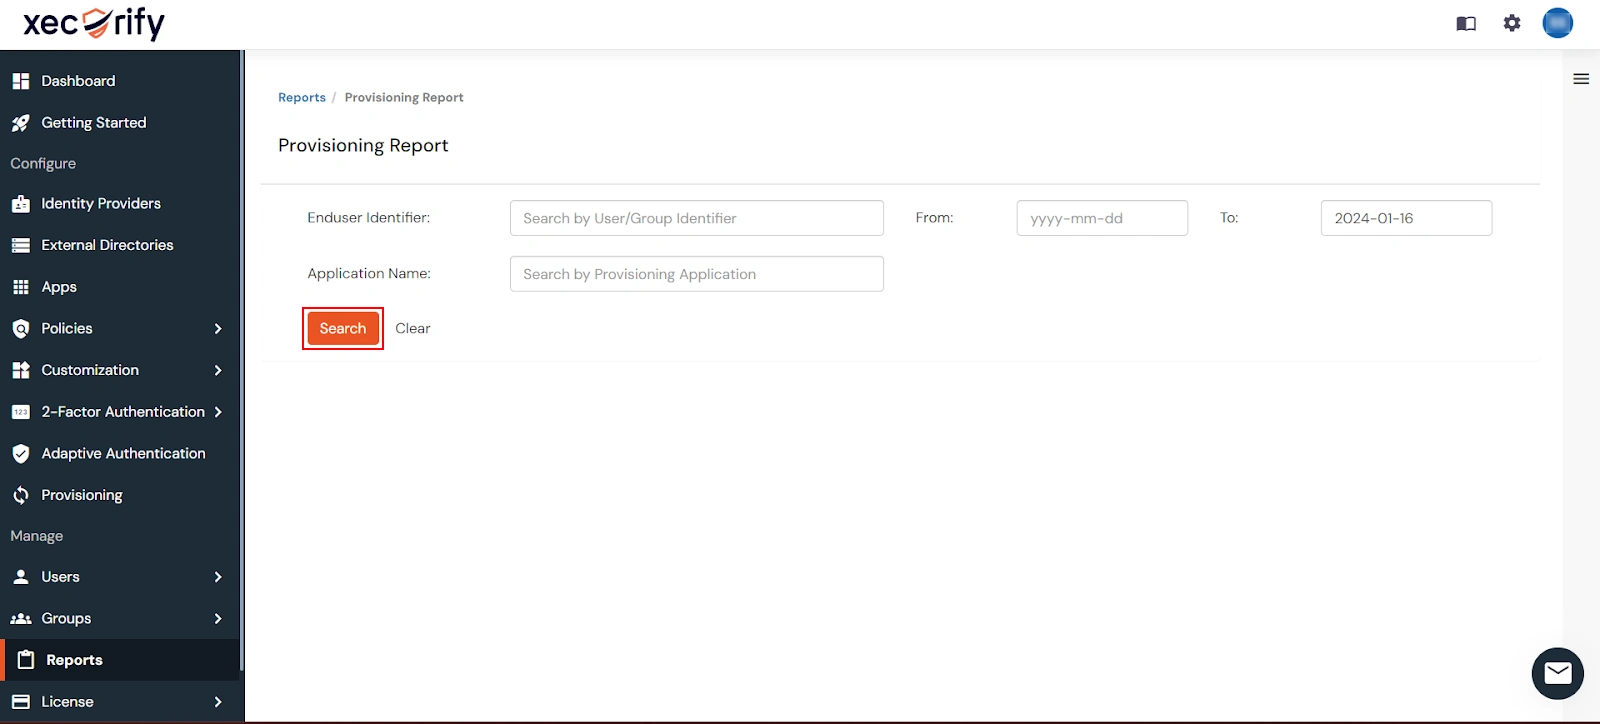
miniOrange provides solutions for all scenarios of provisioning, which includes AD Integration, LDAP Integration and automated provisioning for all External Applications such as Office 365, Google Workspace, Dayforce HCM, etc
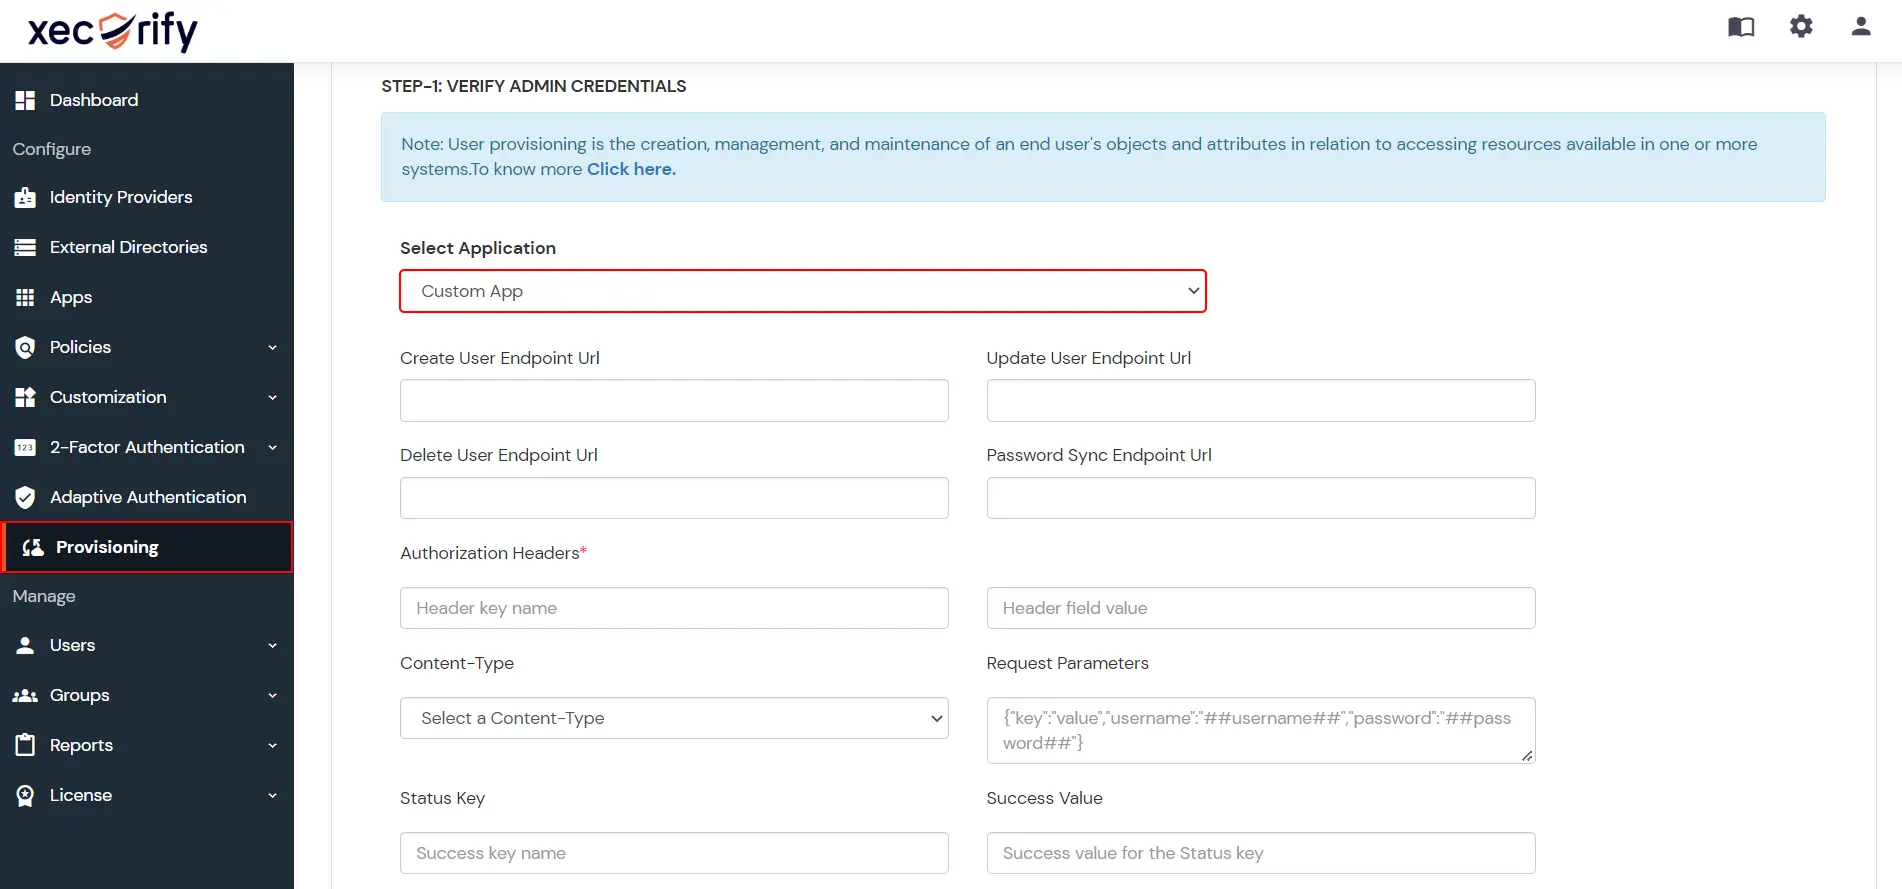
| Create User Endpoint Url | Enter the create user endpoint url |
| Update User Endpoint Url | Enter the update user endpoint url |
| Delete User Endpoint Url | Enter the delete user endpoint url |
| Password Sync Endpoint Url | Enter the password sync user endpoint url |
| Authorization Header Key Name | Enter the headers for the API call |
| Authorization Header Field Name | Enter the header field name for the API call |
| Content Type | Select the content type for API Request |
| Request Parameters | Enter the API Request parameters |
| Status Key | Enter the key containing the status of the ARI Response |
| Success Value | Enter the success value for the status key |
| Error message | Enter the key containing the error message |