Setup Mimecast as SMTP
An SMTP Server is an application that allows your device or server to receive and send Electronic Mails (e-mail) to various email receivers and senders. SMTP stands for Simple Mail Transfer Protocol and it is a standard for sending emails. They use a wireless carrier to route text/push messages to the inbox of email applications.
By default, miniOrange provides and uses its own SMTP Server to send OTPs to users. If you have a custom SMTP Server configured, you can use the same to send Emails from your miniOrange account. Check out our list of Supported SMTP Servers.
miniOrange IDP allows you to configure Mimecast as SMTP email provider hence giving you freedom to manage, monitor, and troubleshoot your email communications.
Note:
You can contact idpsupport@xecurify.com for adding your own SMTP/Email Server or if you need help with any SMTP Server integration.
Prerequisites
Follow the guide below to configure a custom SMTP server in your account:
1. SMTP Configuration for Mimecast
- To configure an SMTP authentication, you must create a specific user account for sending mail (e.g., xyz@domain.com):
- Log on to the Administration Console in your Mimecast account.
- Navigate to Directories | Internal Directories. A list of your domains is displayed.
- Select a Domain. A list of the domain's users is displayed.
- Click on the New Address button.
- Complete the dialog as follows:
- Enter the Email Address of the assigned account.
Note: We recommend not using an administrator account because if the SMTP auth username and password are shared widely (e.g., among people configuring the printers), there could be issues.
- Enter a Password for the account and make a note of it.
Note: Cloud passwords must be used to allow SMTP / POP submiss ion. Ensure the default application setting has cloud password enabled. See the Managing User Email Addresses page for further information.
- Enable the Password Never Expires setting.
- In addition, enable the Allow SMTP Email Submission setting.
- Click on the Save button.
- Now, login to the miniOrange IDP dashboard with your miniOrange credentials and if you are using miniOrange On-Premise IdP, then login with your on-premise IDP credentials.
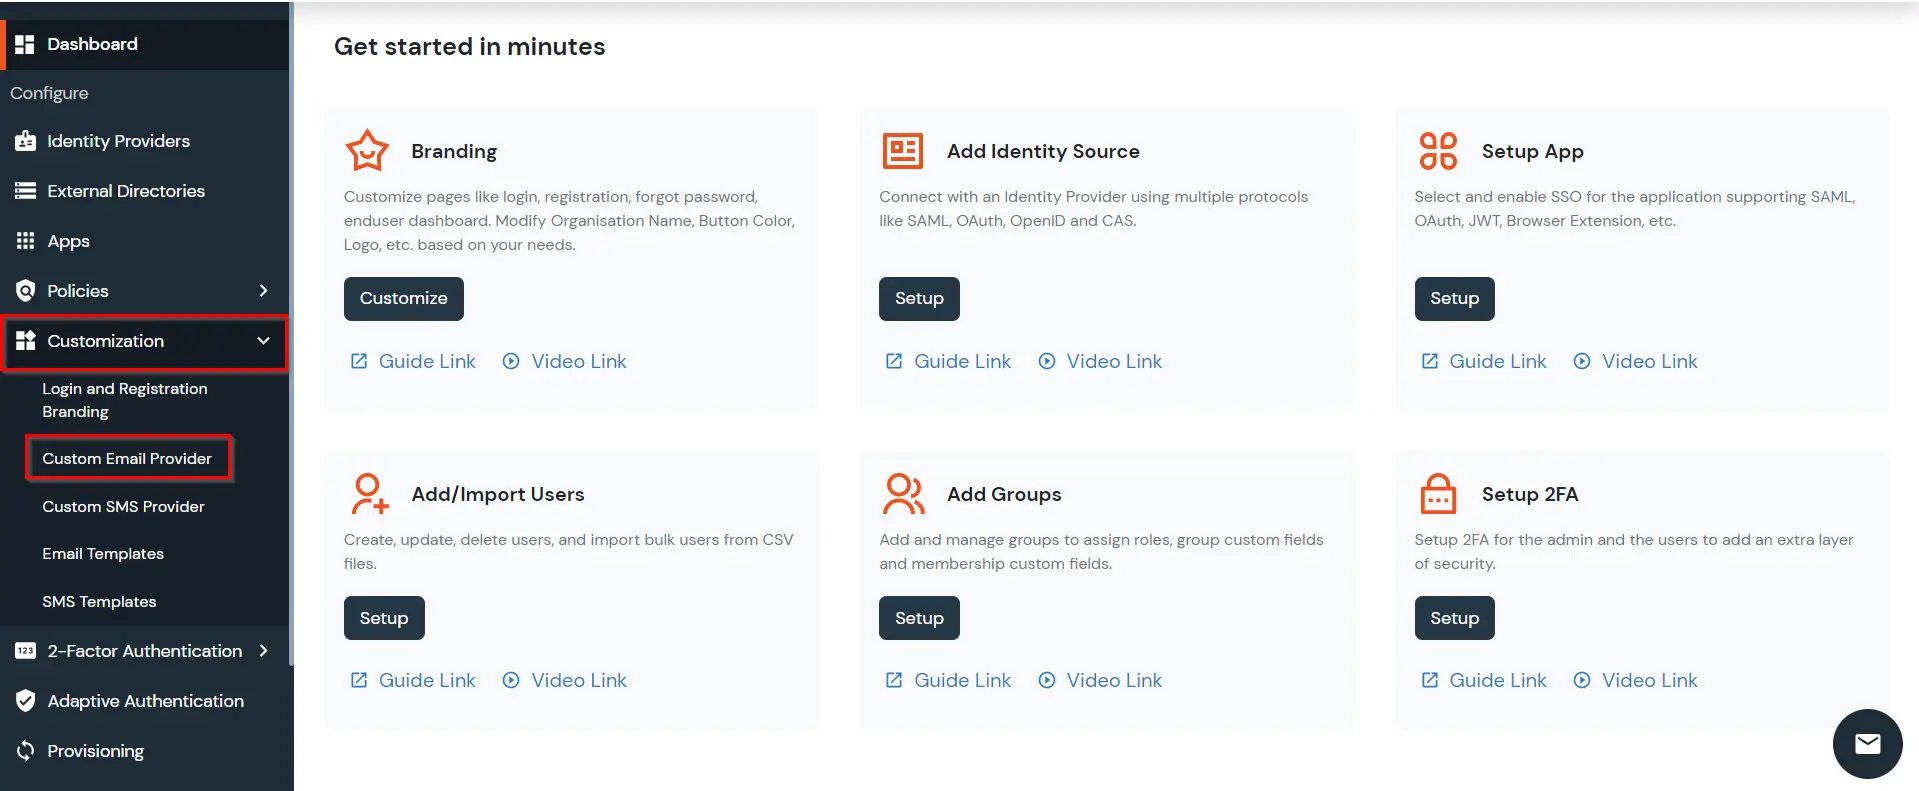
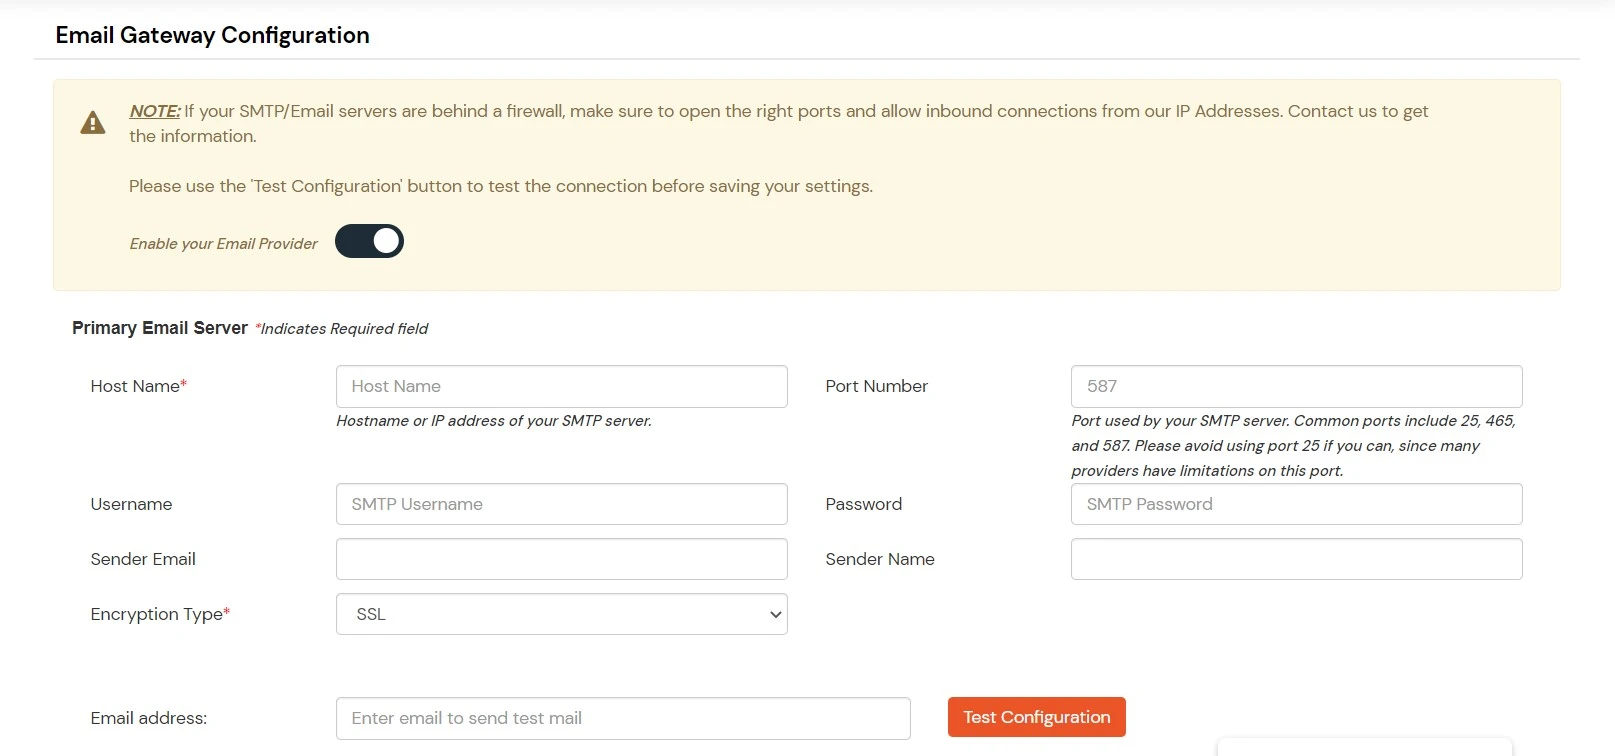
- Go to Customization -> Custom Email Provider and add the details which are available on the SMTP server side.


- Click on Save and follow the below steps to test the custom Email Provider.
2. Configuring the Device for SMTP
3. Test SMTP
- Once the SMTP is set, you can enter a test email and click on Test Configuration to be able to verfy if the SMTP flow is working or not.
