Hello there!

Need Help? We are right here!

Support Icon
miniOrange Email Support
success

Thanks for your Enquiry. Our team will soon reach out to you.

If you don't hear from us within 24 hours, please feel free to send a follow-up email to info@xecurify.com

Search Results:

×

Setup SparkPost as SMTP


An SMTP Server is an application that allows your device or server to receive and send Electronic Mails (e-mail) to various email receivers and senders. SMTP stands for Simple Mail Transfer Protocol and it is a standard for sending emails. They use a wireless carrier to route text/push messages to the inbox of email applications.

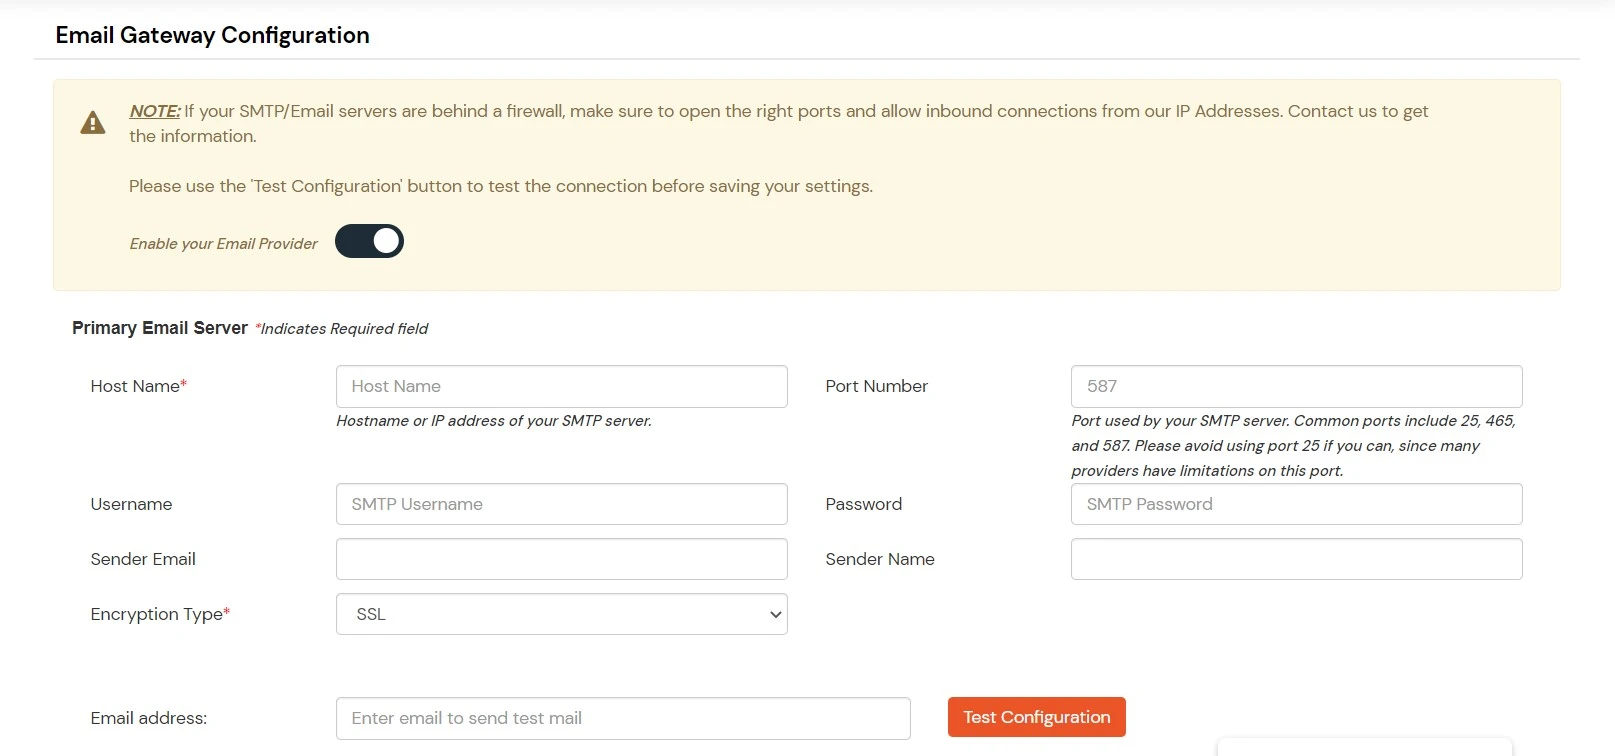
By default, miniOrange provides and uses its own SMTP Server to send OTPs to users. If you have a custom SMTP Server configured, you can use the same to send Emails from your miniOrange account. Check out our list of Supported SMTP Servers.

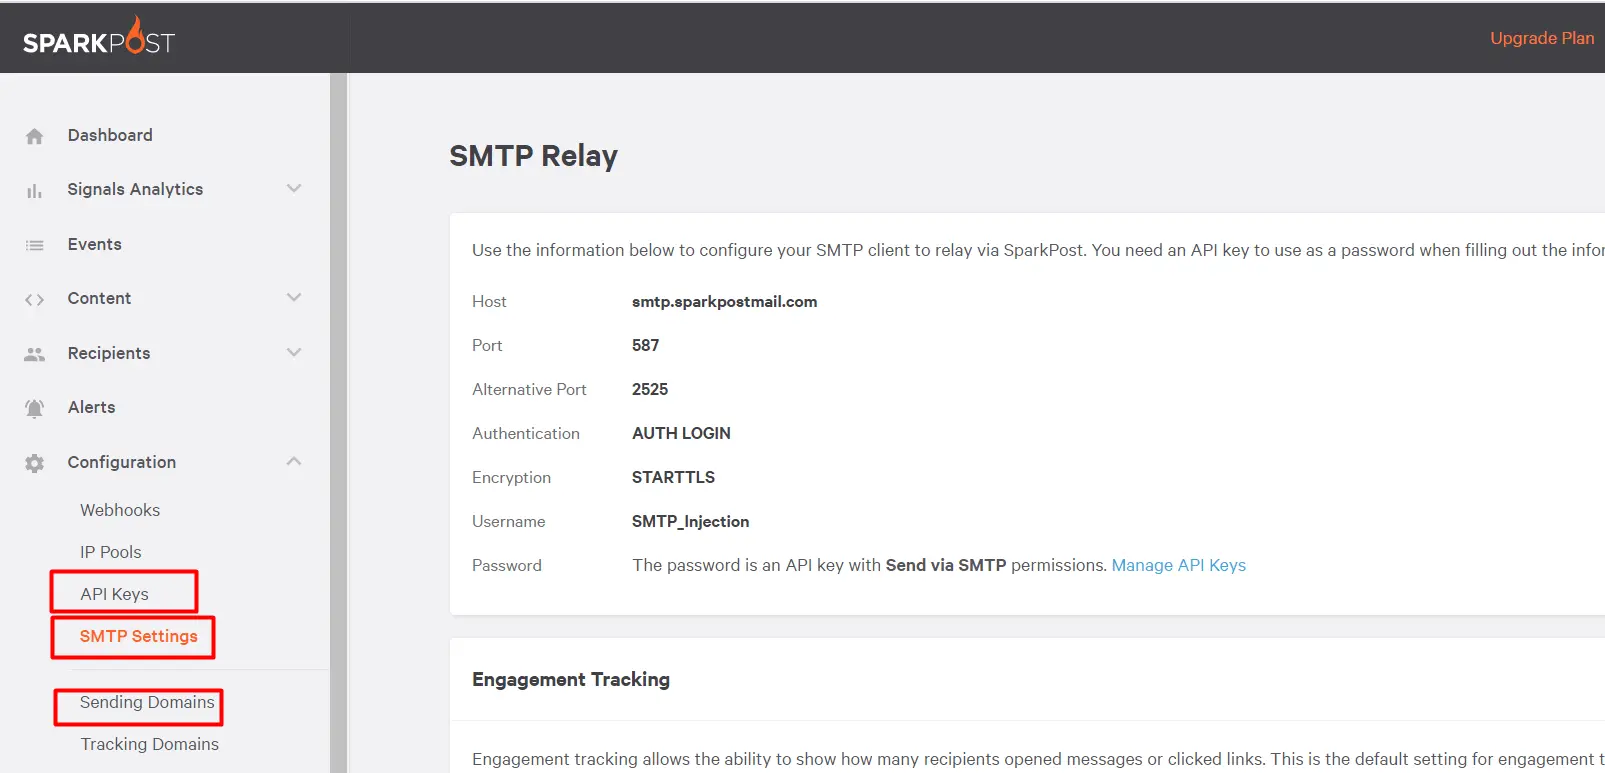
miniOrange IDP allows you to configure SparkPost as SMTP email provider hence giving you freedom to manage, monitor, and troubleshoot your email communications.


Note:

You can contact idpsupport@xecurify.com for adding your own SMTP/Email Server or if you need help with any SMTP Server integration.


Prerequisites

  • For Cloud Version - If your SMTP/Email servers are behind a firewall, make sure to open the right ports and allow inbound connections from our IP Addresses.

    You can whitelist the below IPs and open the given ports to make the request:

  • Region IP
    US 52.55.147.107
    EU 13.51.230.230
    AU 3.106.130.104
    54.206.97.196
  • For On-Premise Version - If your SMTP/Email servers are behind a firewall, make sure to open the right ports and allow inbound connections from your server's IP Addresses.

Follow the guide below to configure a custom SMTP server in your account:

1. SMTP Configuration for SparkPost

  • Log in to your SparkPost account.
  • Proceed to SparkPost Configuration > Sending Domains, and add your custom domain. SparkPost requires a verified sending domain.
  • Move to SparkPost Account API Keys, and click New API key. Copy this key value and ensure it has Transmissions: Read/Write access or Send via SMTP, enabled.
  • The hostname is smtp.sparkpostmail.com. The Username is SMTP_Injection.The port number can be saved as 587.The password is the API key saved from the previous step.
  • SparkPost SMTP dashboard

  • Now go to the miniOrange dashboard and login with your miniOrange credentials.
  • Note: Please login with your on-premise IDP credentials if you are using an on-premise IDP.

  • Go to Customization -> Custom Email Provider and add the details which are available on the SMTP server side.
  • SparkPost SMTP set-up

    SparkPost Gateway configuration

  • Click on Save and follow the below steps to test the custom Email Provider.

2. Test SMTP

  • Once the SMTP is set, you can enter a test email and click on Test Configuration to be able to verfy if the SMTP flow is working or not.
  • If you haven't registered a custom domain with SparkPost, you can send a maximum of five test emails from the sparkpostbox.com domain. For more details, see Transmissions: The Sandbox Domain.

Want To Schedule A Demo?

Request a Demo


Our Other Identity & Access Management Products