AWS Cognito Provisioning
AWS Cognito User Provisioning allows to create account in a simplified way and link AWS Cognito users' account to their existing or new apps. AWS Cognito Provisioning automates user provisioning with their identities.
Provisioning saves time when setting up new users and teams, and also manages access privileges through the user lifecycle. miniOrange can create, read, and update user accounts for new or existing users, remove accounts for deactivated users, and synchronize attributes across multiple user stores.
Provisioning & Deprovisioning Scenarios
miniOrange provides solutions for all scenarios of provisioning, which includes AD Integration, LDAP Integration and automated provisioning for all External Applications such as Office 365, Google Workspace, AWS Cognito, etc
Follow the Step-by-Step Guide given below for AWS Cognito Provisioning
1. Create AWS Cognito Provisioning application
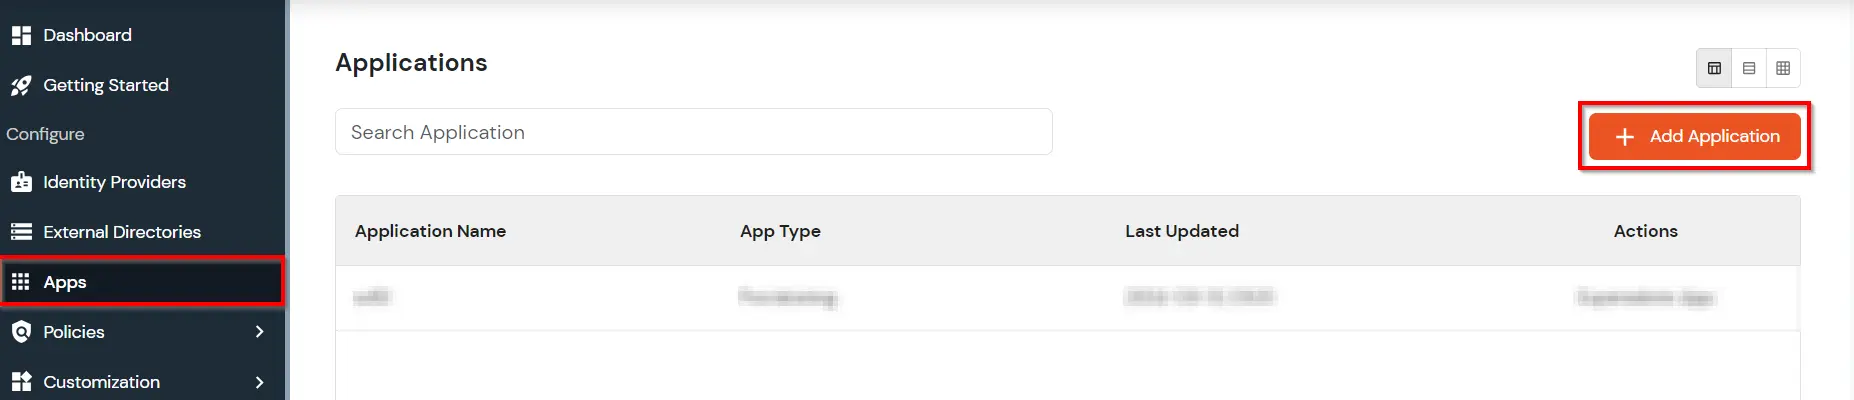
- Go to Apps -> Add Application from the side menu.
- In the Choose Application section, select Provisioning from All Apps dropdown.
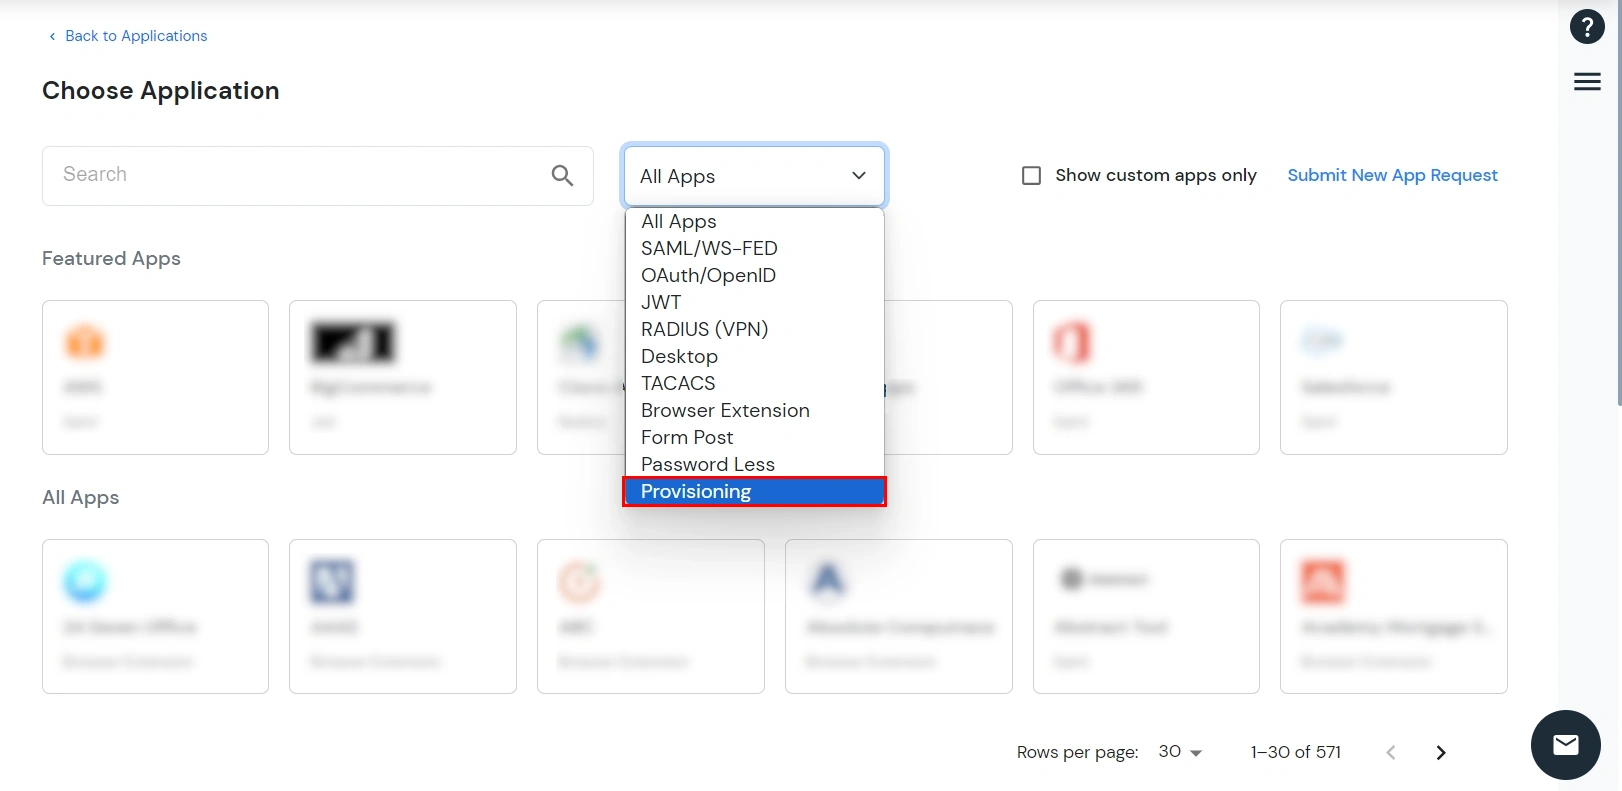
- Search for Cognito in the search bar and select the Cognito application.

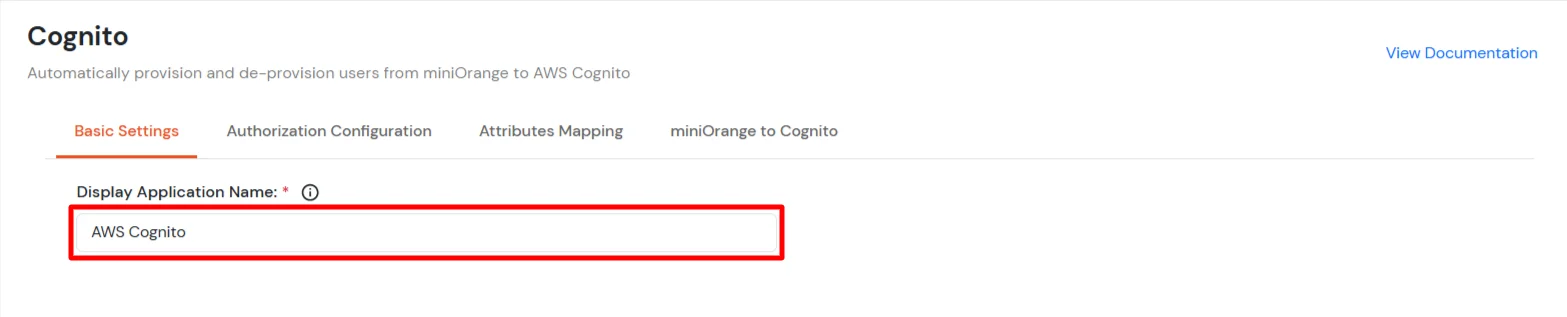
- Under Basic Settings, enter Display Application Name and click Save to add the app.
- In the Authorization Configuration enter the Access key ID, Secret Access Key and User Pool ID that you got in Step 2.
- Click Save & Next to continue.
2. Setup Provisioning in AWS Cognito
- Sign in to the AWS Management Console and open the IAM console at https://console.aws.amazon.com/iam/.
- In the navigation pane, select Users.
Note : Make sure that the user has permission to Create/Update/Delete and SetUserPassword for other users in the user pool. If not add below policies for the user.
- You can also refer to this document on how we can create policies in AWS.
{
"Version": "2012-10-17",
"Statement": [
	{
		"Sid": "Statement1",
		"Effect": "Allow",
		"Action": "cognito-idp:AdminCreateUser",
		"Resource": "<user-pool-arn>"
	},
	{
		"Sid": "Statement2",
		"Effect": "Allow",
		"Action": "cognito-idp:AdminUpdateUserAttributes",
		"Resource": "<user-pool-arn>"
	},
	{
		"Sid": "Statement3",
		"Effect": "Allow",
		"Action": "cognito-idp:AdminDeleteUser",
		"Resource": "<user-pool-arn>"
	},
	{
		"Sid": "Statement4",
		"Effect": "Allow",
		"Action": "cognito-idp:AdminSetUserPassword",
		"Resource": "<user-pool-arn>"
	},
}
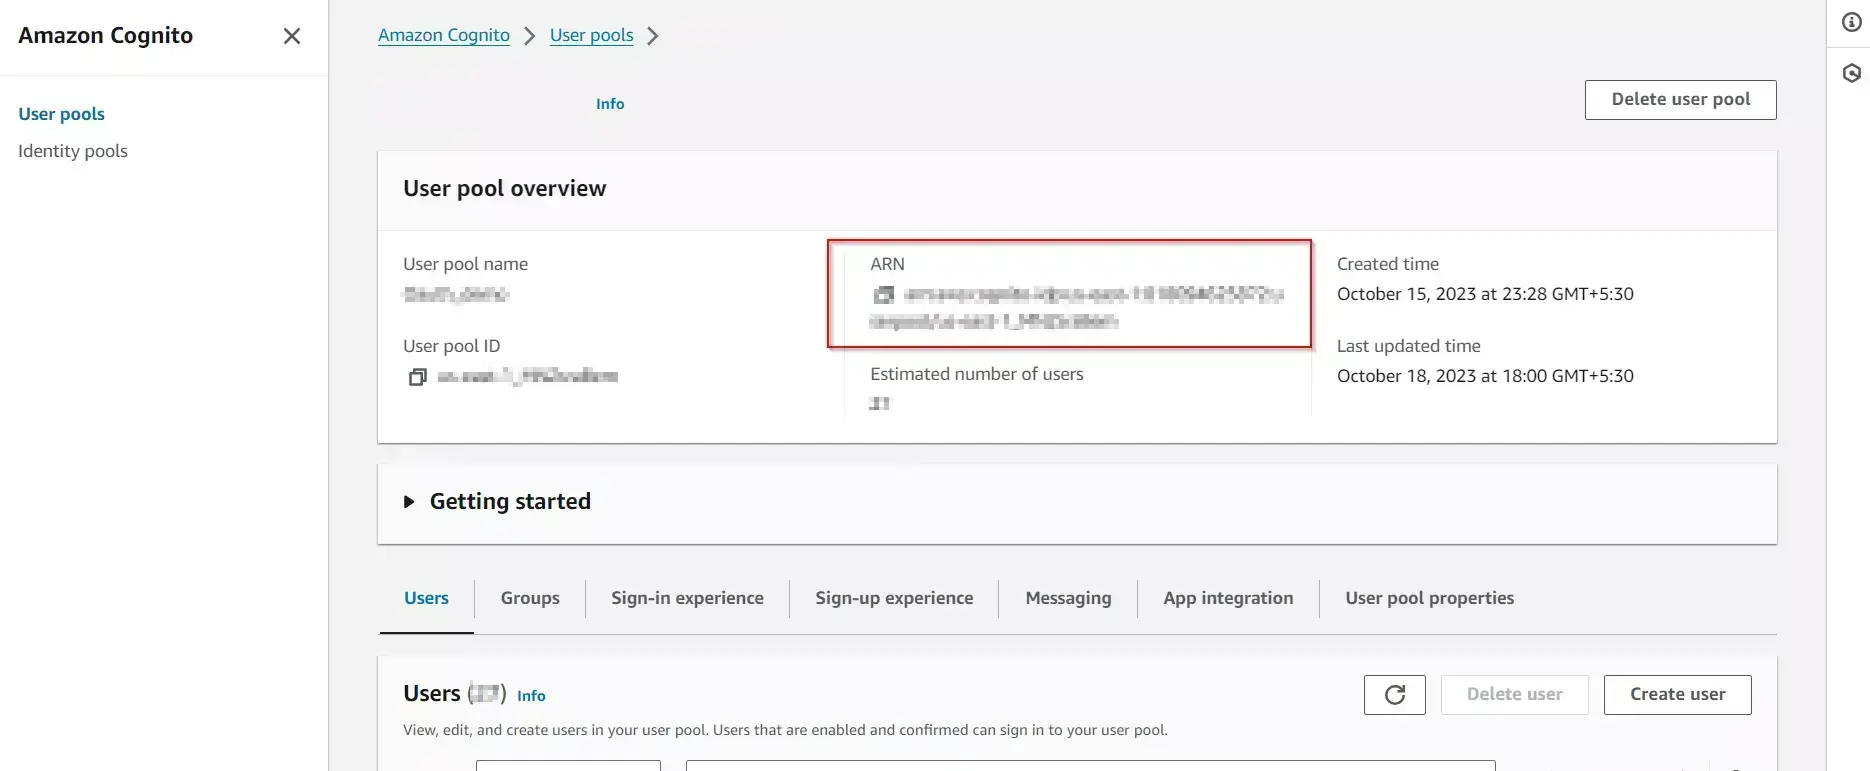
- Replace Resource with your User Pool ARN.
- To find your User Pool ARN go to your user pool here you will find a field named User Pool ARN as mentioned in the screenshot below.
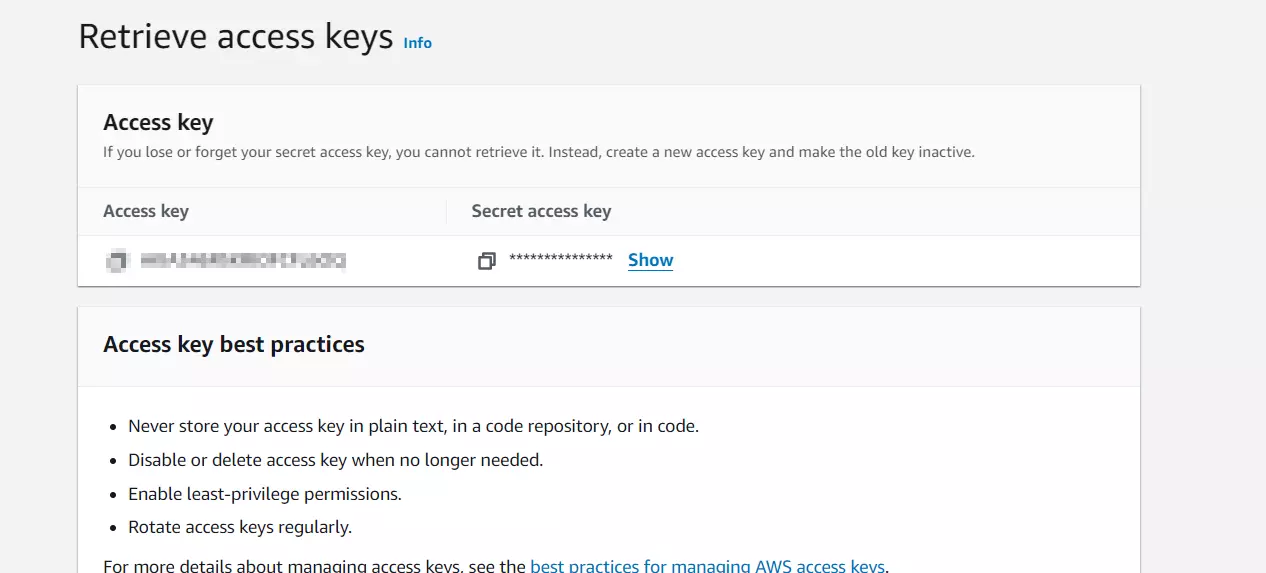
- Now go to Security Credentials and click on Create Access key.
- After that add your use case and click on next.
- Enter the description tag and click on Create Access Key.
- Copy the Access Key and Secret access key.
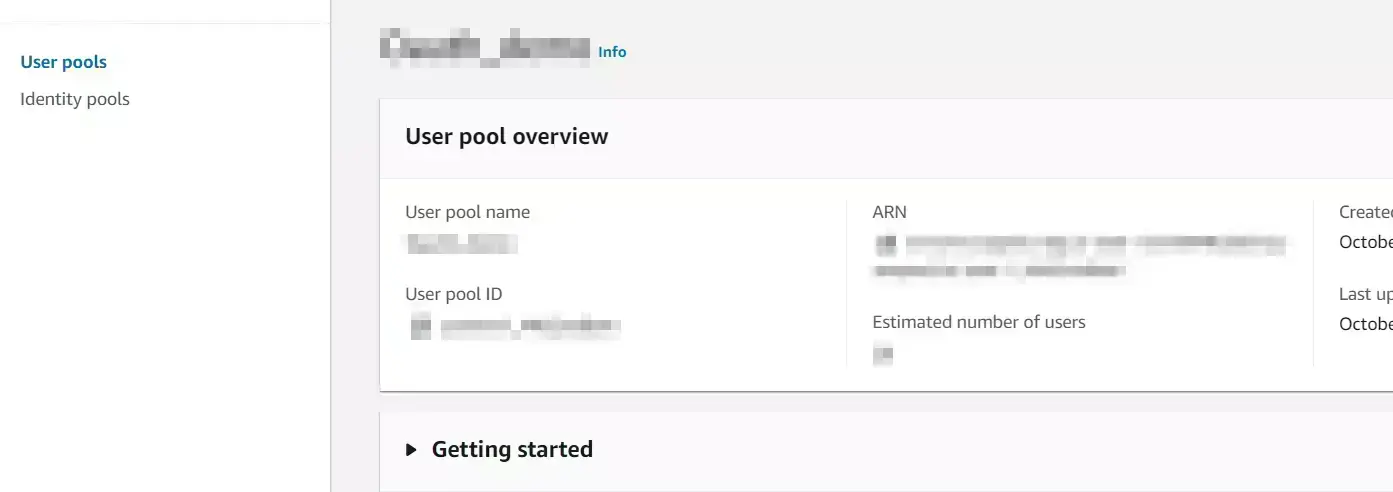
- Now open your user pool in which you want to provision users.
- Copy the User Pool ID.
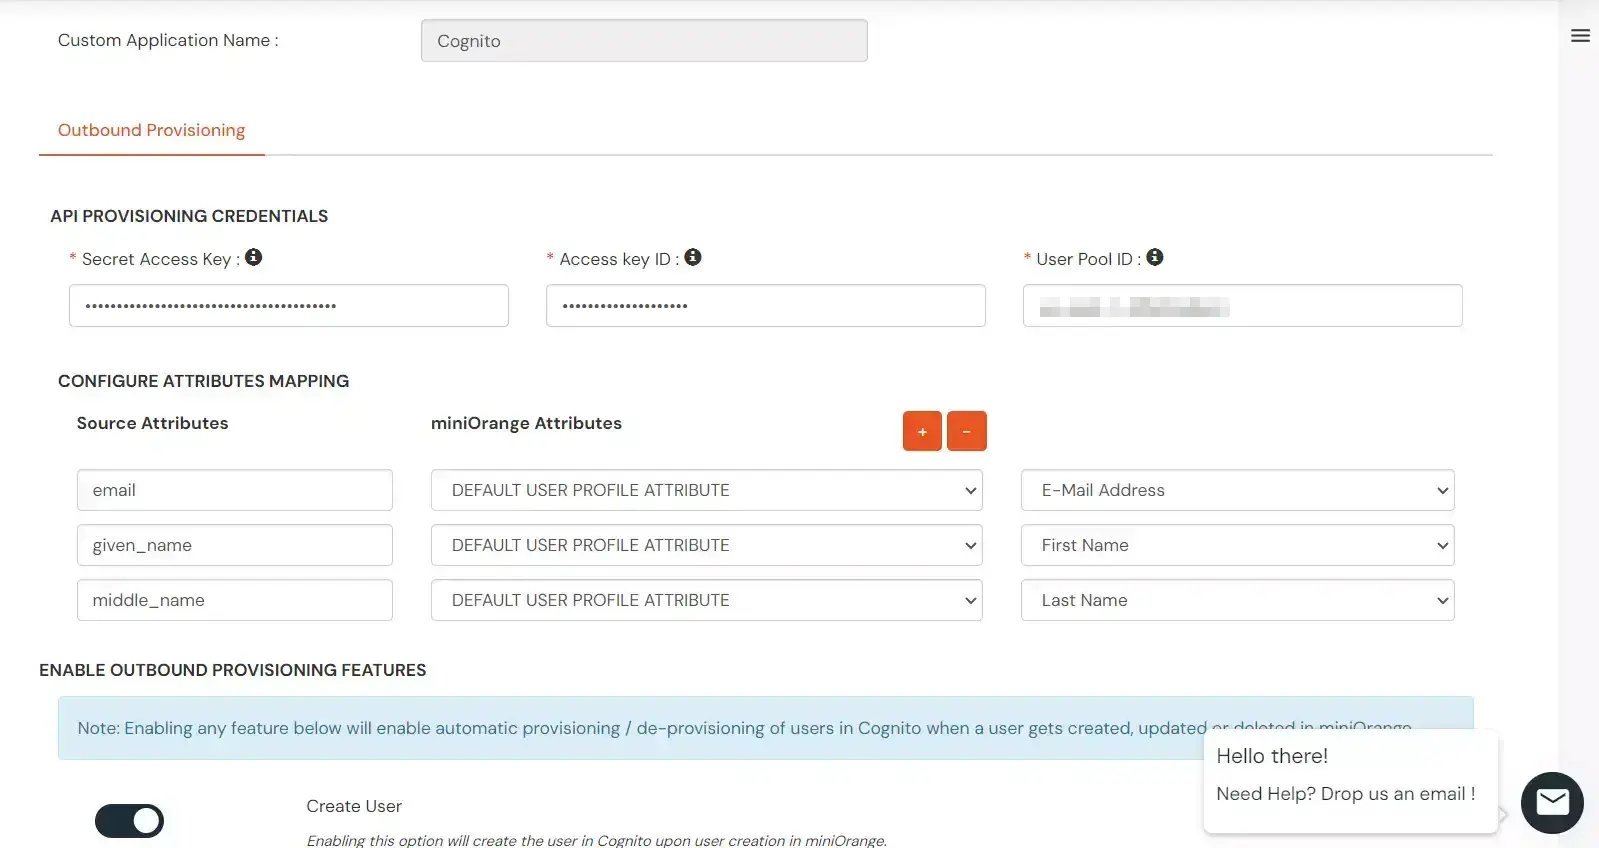
- Go back to the miniOrange Admin Dashboard where you created the Cognito app in step 1.
- Switch to the miniOrange to Cognito section to enable Create Users, Update Users, Delete Users and Password Sync based on your requirements.
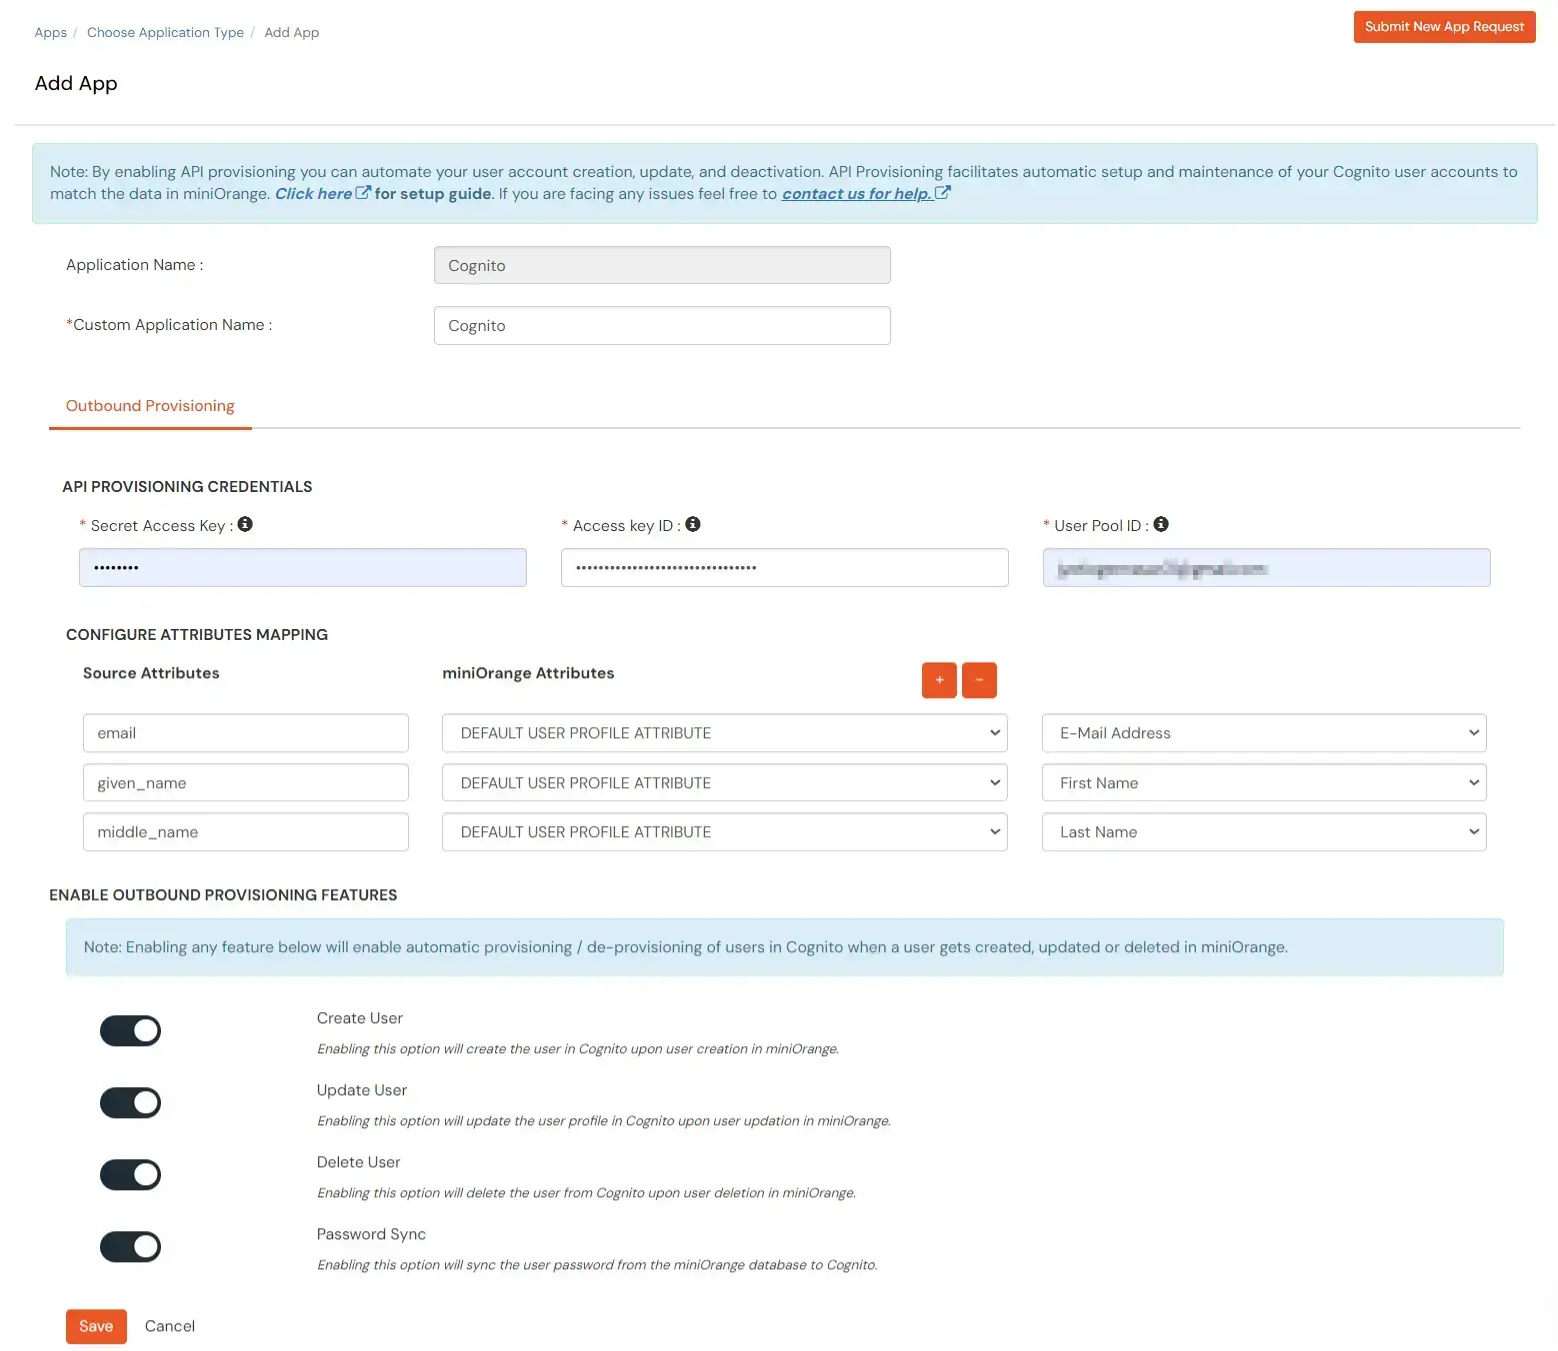
- Click Save to apply these changes.
3. Create App Policy
- Go to Policies >> App Login Policy from the side menu.
- Click on the Add Policy tab to add a new policy.
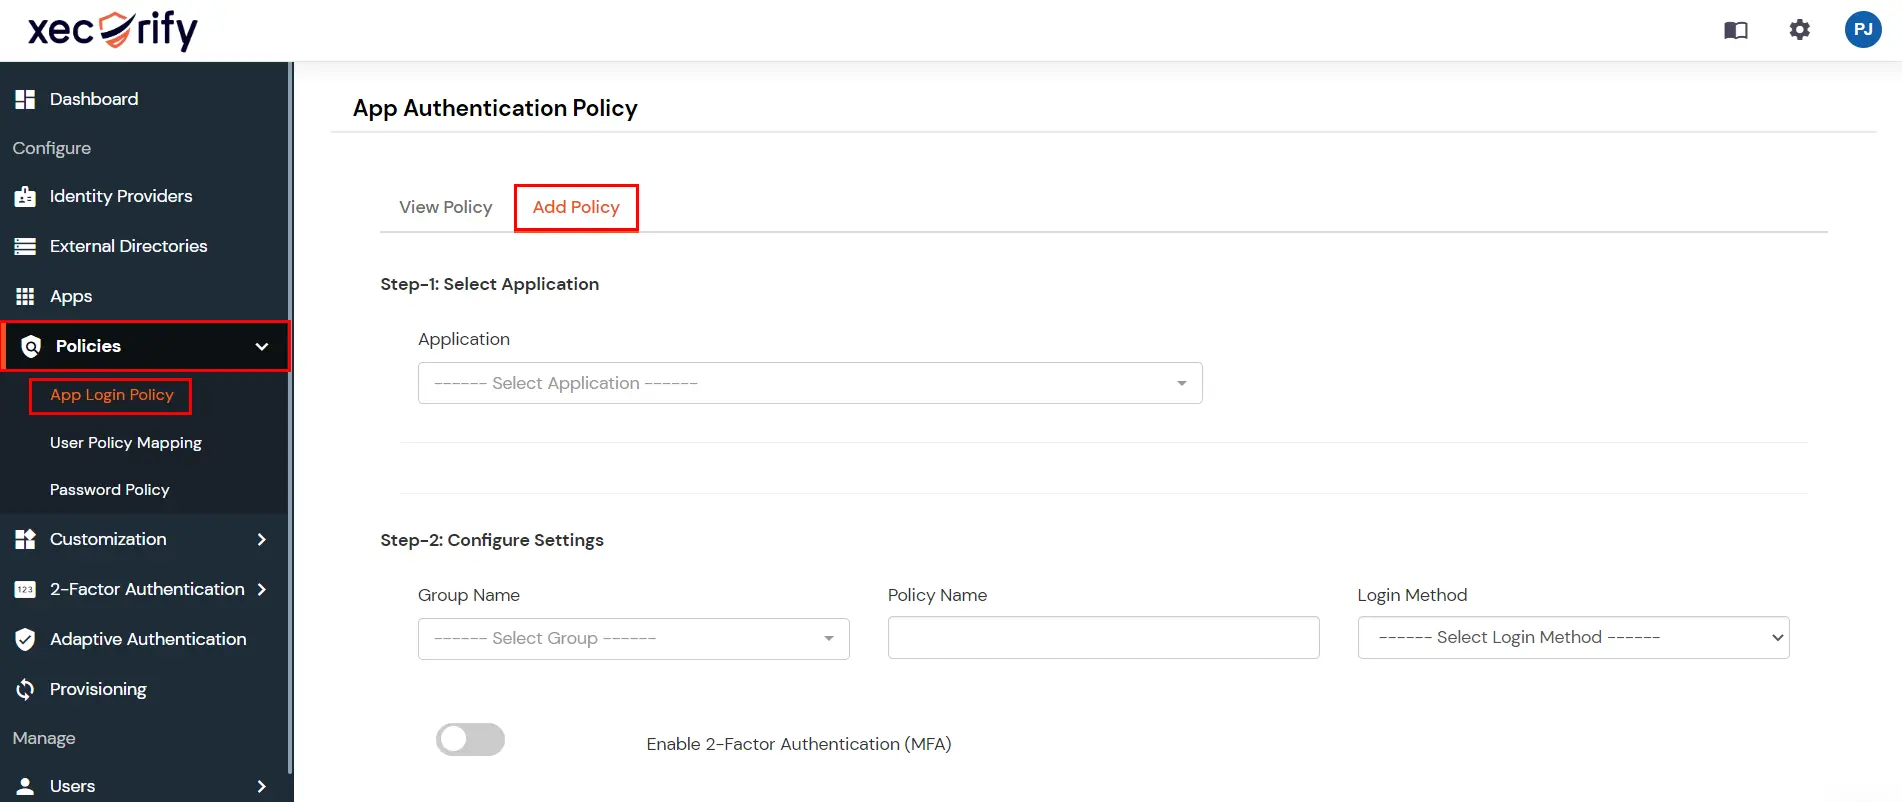
- For the application field, select the application which you created in the above steps.
- For the group field, select the group for which provisioning is to be enabled or simply select the DEFAULT group if provisioning is to be done for all users.
- Provide the policy name. For the login method, select password and click Save.
- Your configuration is now complete.
- Now on assigning user to the group would automatically provisioning the user. However group assignment is not required if it is DEFAULT group.
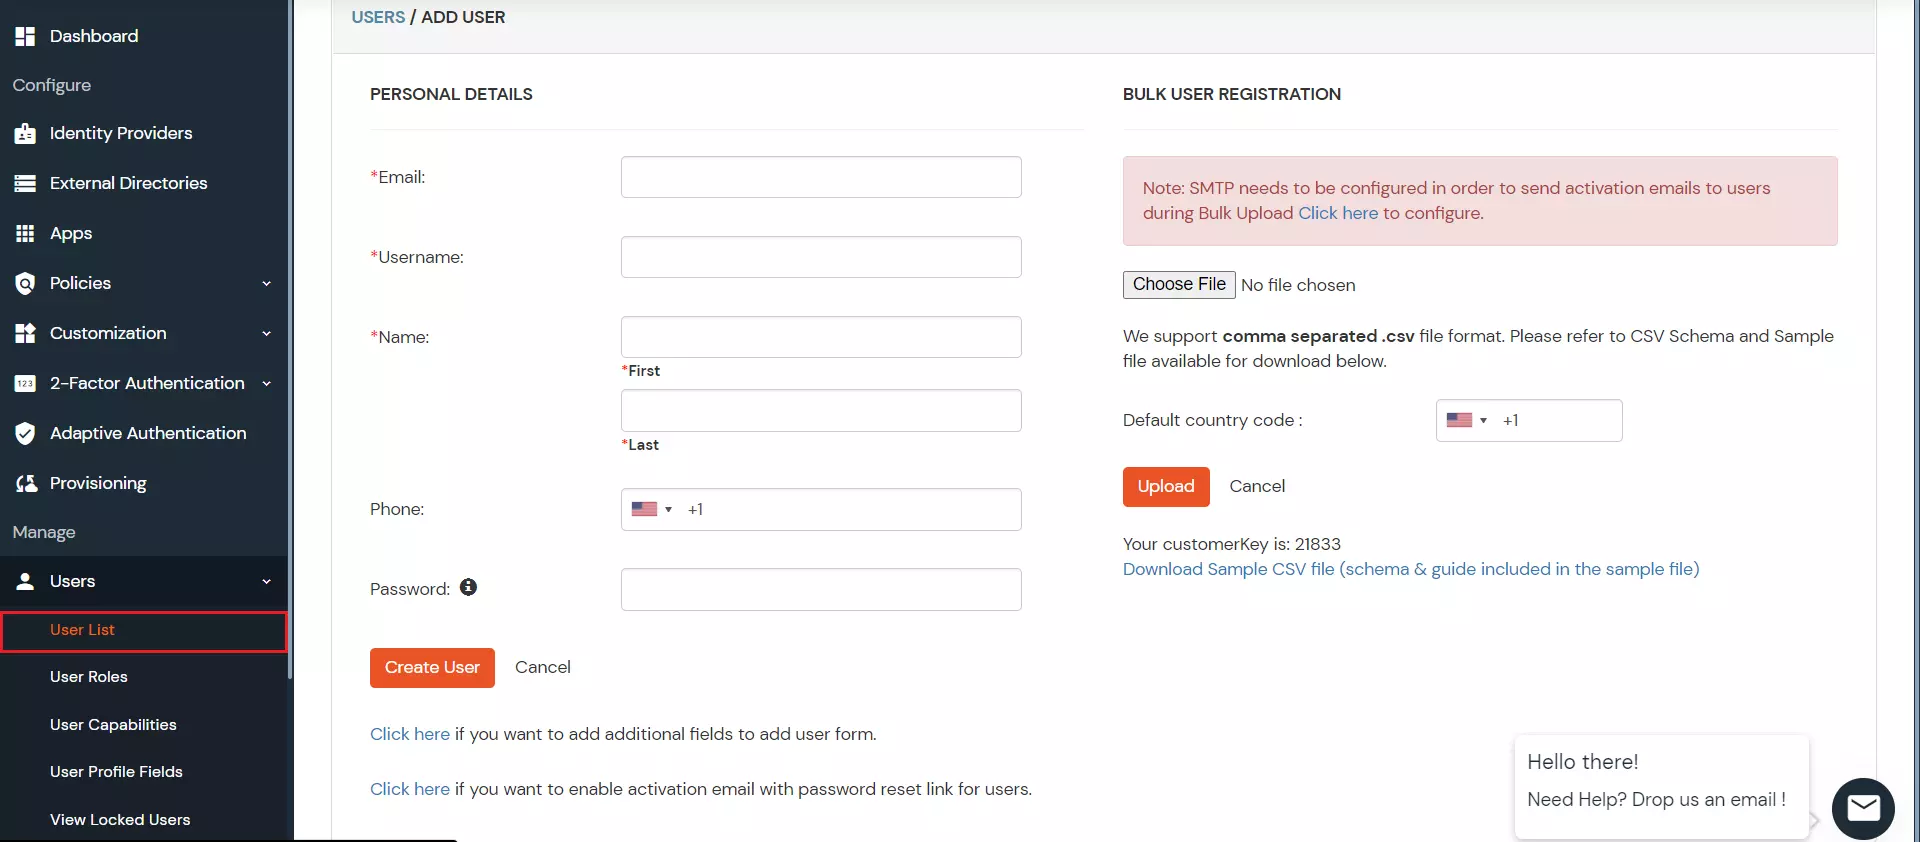
4. Add Users
- Go to Users > Add User.
- Enter the Users Details and the user will be created.
5. Update Users
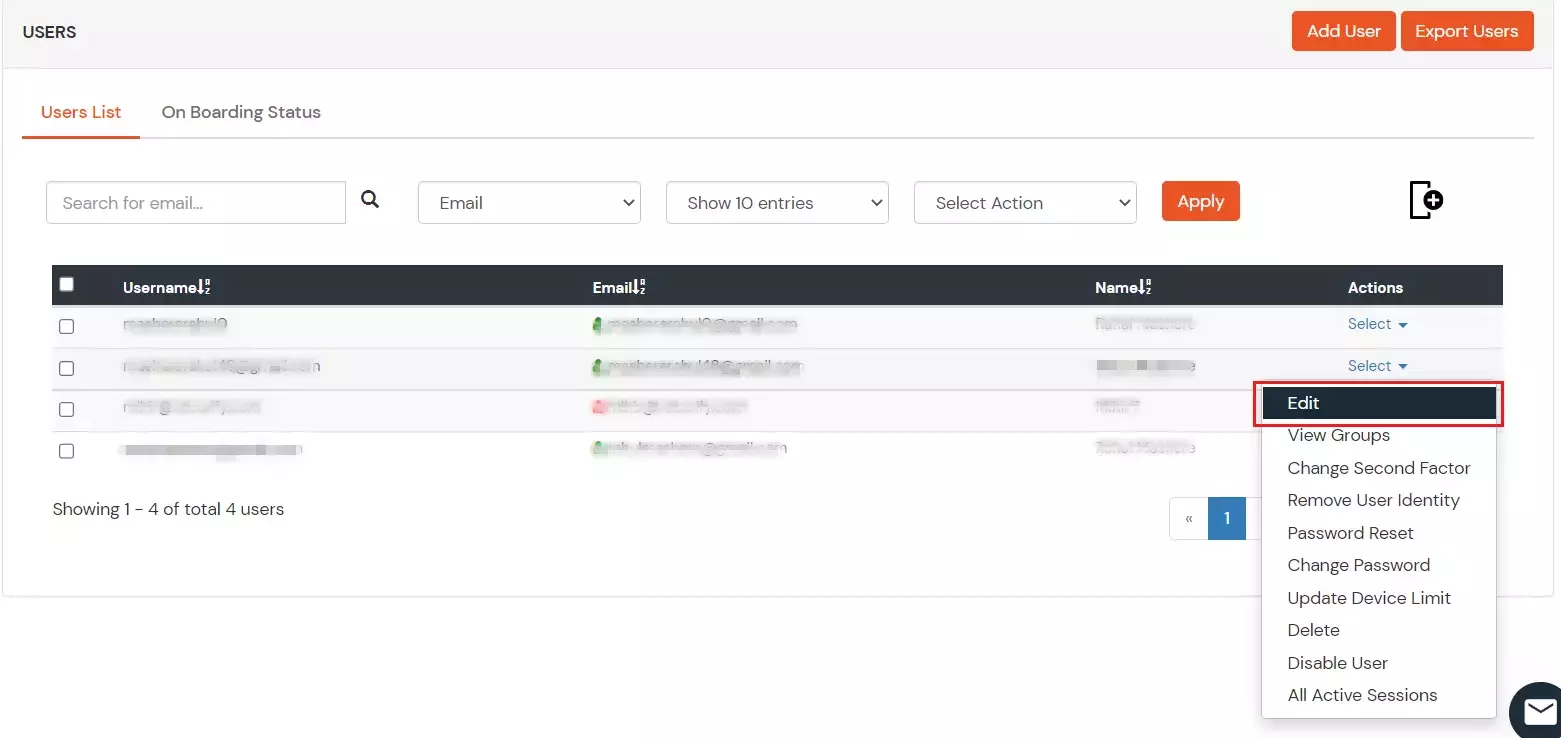
- To update user profile, Go to Users >> User List.
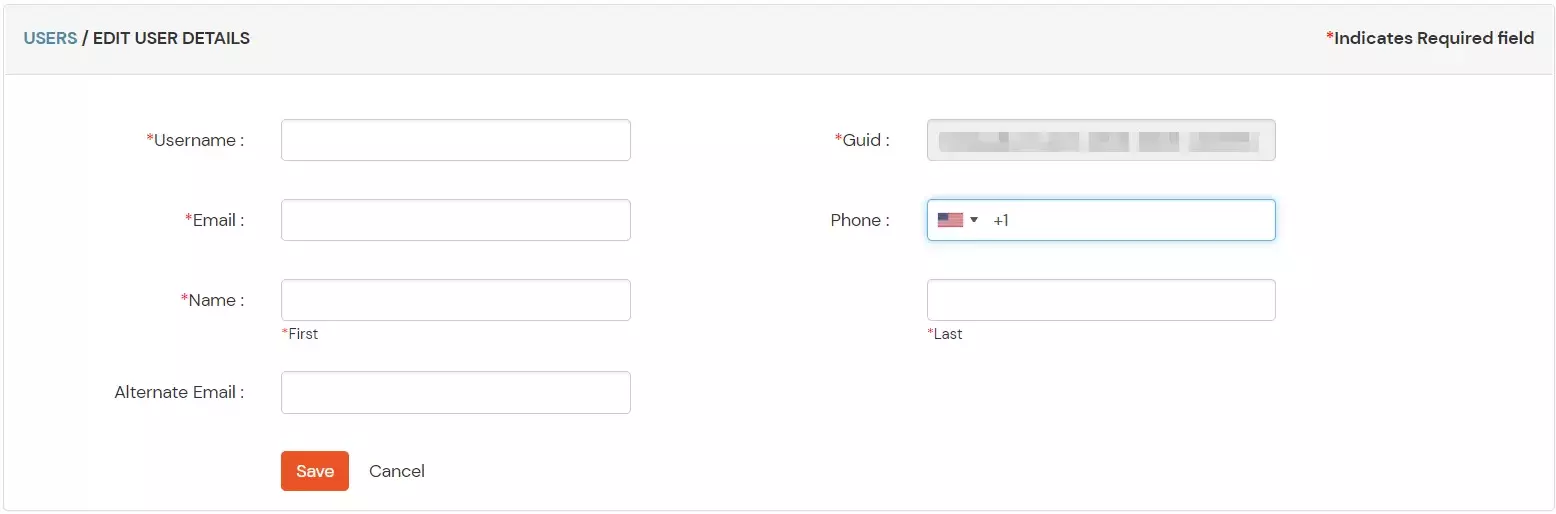
- Select a particular user and in Actions dropdown select Edit.
- Fill out user updated information and click on Save button.
6. Delete Users
- To delete user, Go to Users >> User List.
- Select a particular user and in Actions dropdown select Delete.
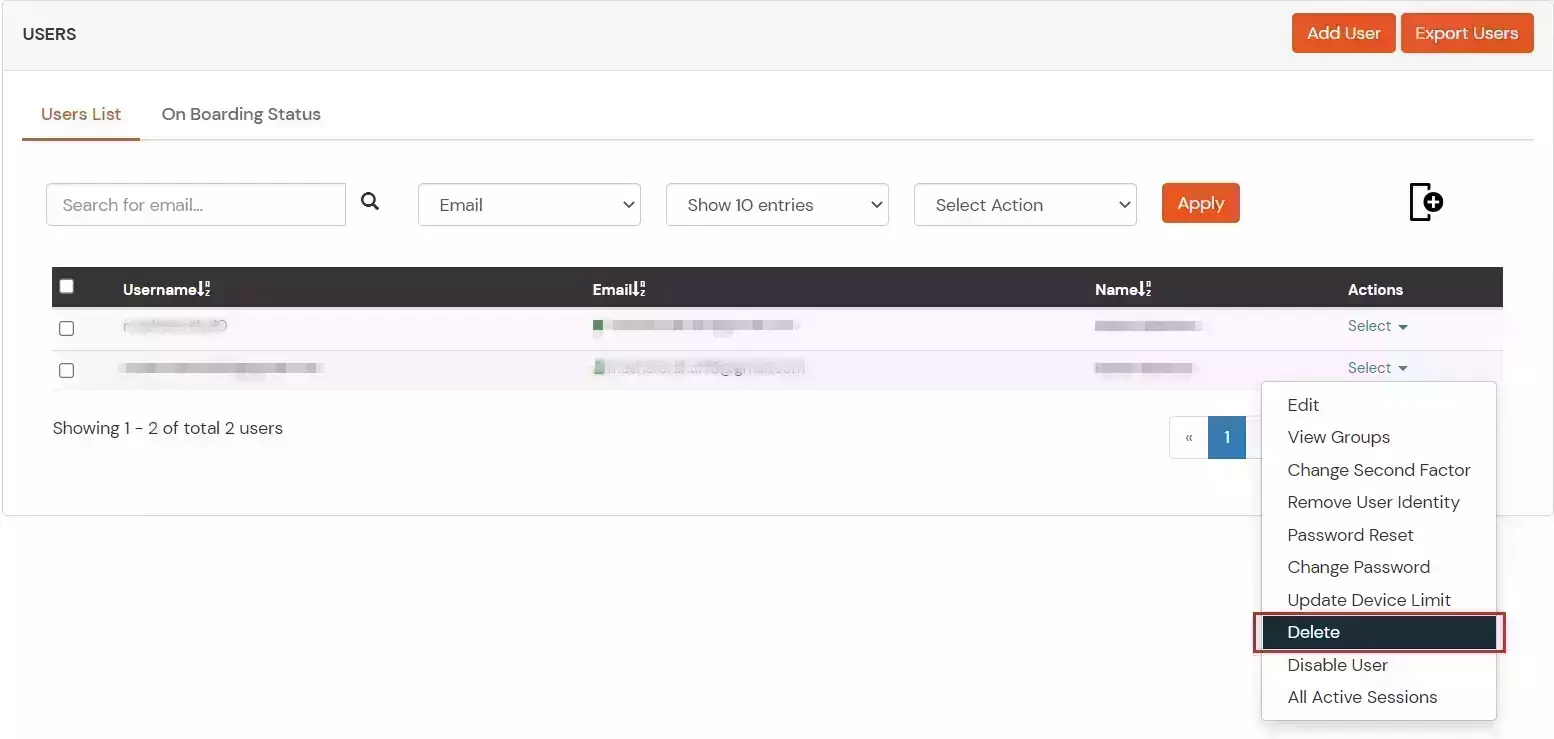
- A pop up will appear in which click on Yes button.

7. Create Custom Attribute
- Go to Users >> User Profile fields.
- Create a new Custom Profile Attribute and give it any name.
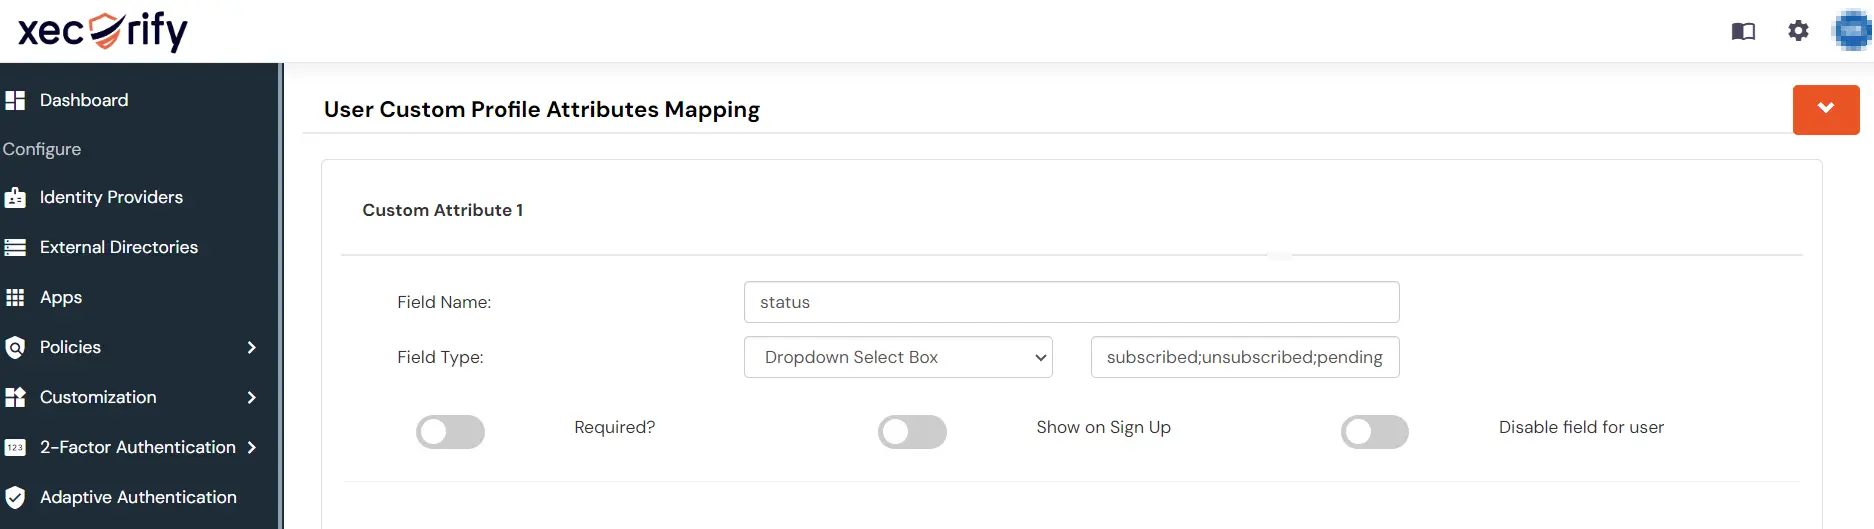
- Give a field name of your choice and select the field type as Dropdown and give the values separated by semicolon.
External References
