Brightspace Provisioning & Deprovisioning
Brightspace User Provisioning allows to create account in a simplified way and link Brightspace users' account to their existing or new apps. Brightspace Provisioning automates user provisioning with their identities. Brightspace User Provisioning enables a user to get instant access to their third-party apps with a single click.
Provisioning saves time when setting up new users and teams, and also manages access privileges through the user lifecycle. miniOrange can create, read, and update user accounts for new or existing users, remove accounts for deactivated users, and synchronize attributes across multiple user stores.
Deprovisioning means deleting a user and removing their access from multiple applications and network systems at once. Deprovisioning action is triggered when an employee leaves a company or changes roles within the organization
The deprovisioning features increase your organization's security profile by removing access to sensitive applications and content from people who leave your organization.
Prerequisites
- Brightspace Provisioning prerequisites
- You should sign-in to the Brightspace as an administrator with webhook access.
- miniOrange prerequisites
Provisioning & Deprovisioning Scenarios
miniOrange provides solutions for all scenarios of provisioning, which includes AD Integration, LDAP Integration and automated provisioning for all External Applications such as Office 365, Google Workspace, Brightspace, etc
Follow the Step-by-Step Guide given below to setup Brightspace Provisioning
1. Configure Brightspace Provisioning
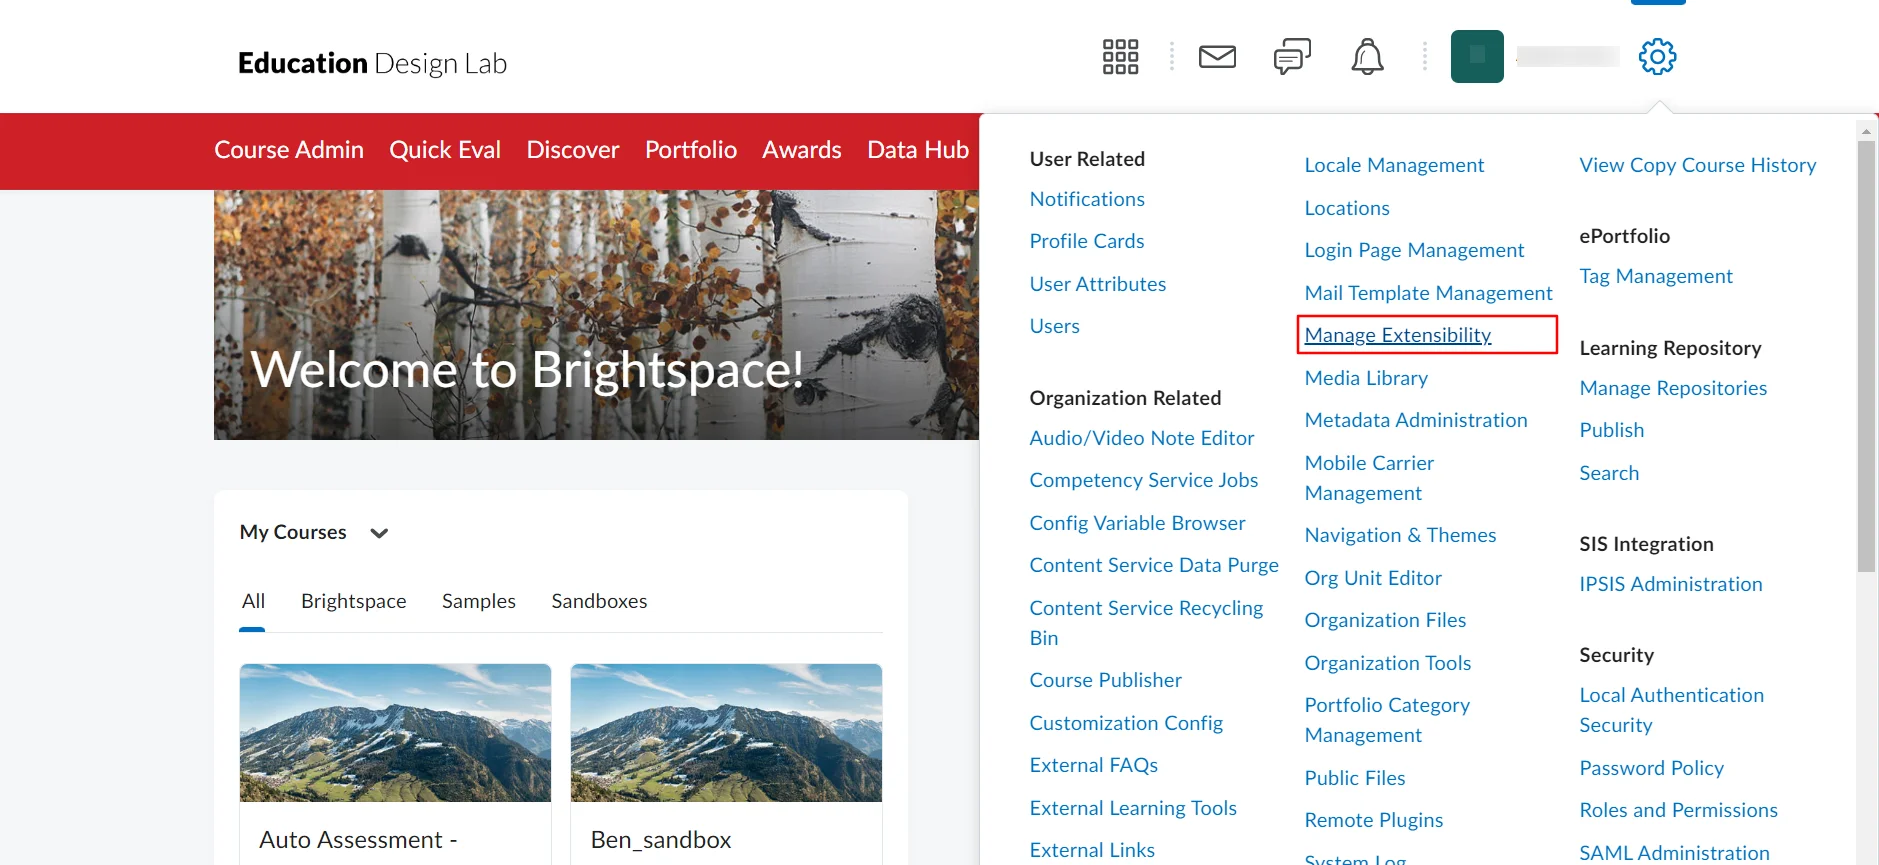
- On Brightspace portal select Admin tools and select Manage Extensibility.
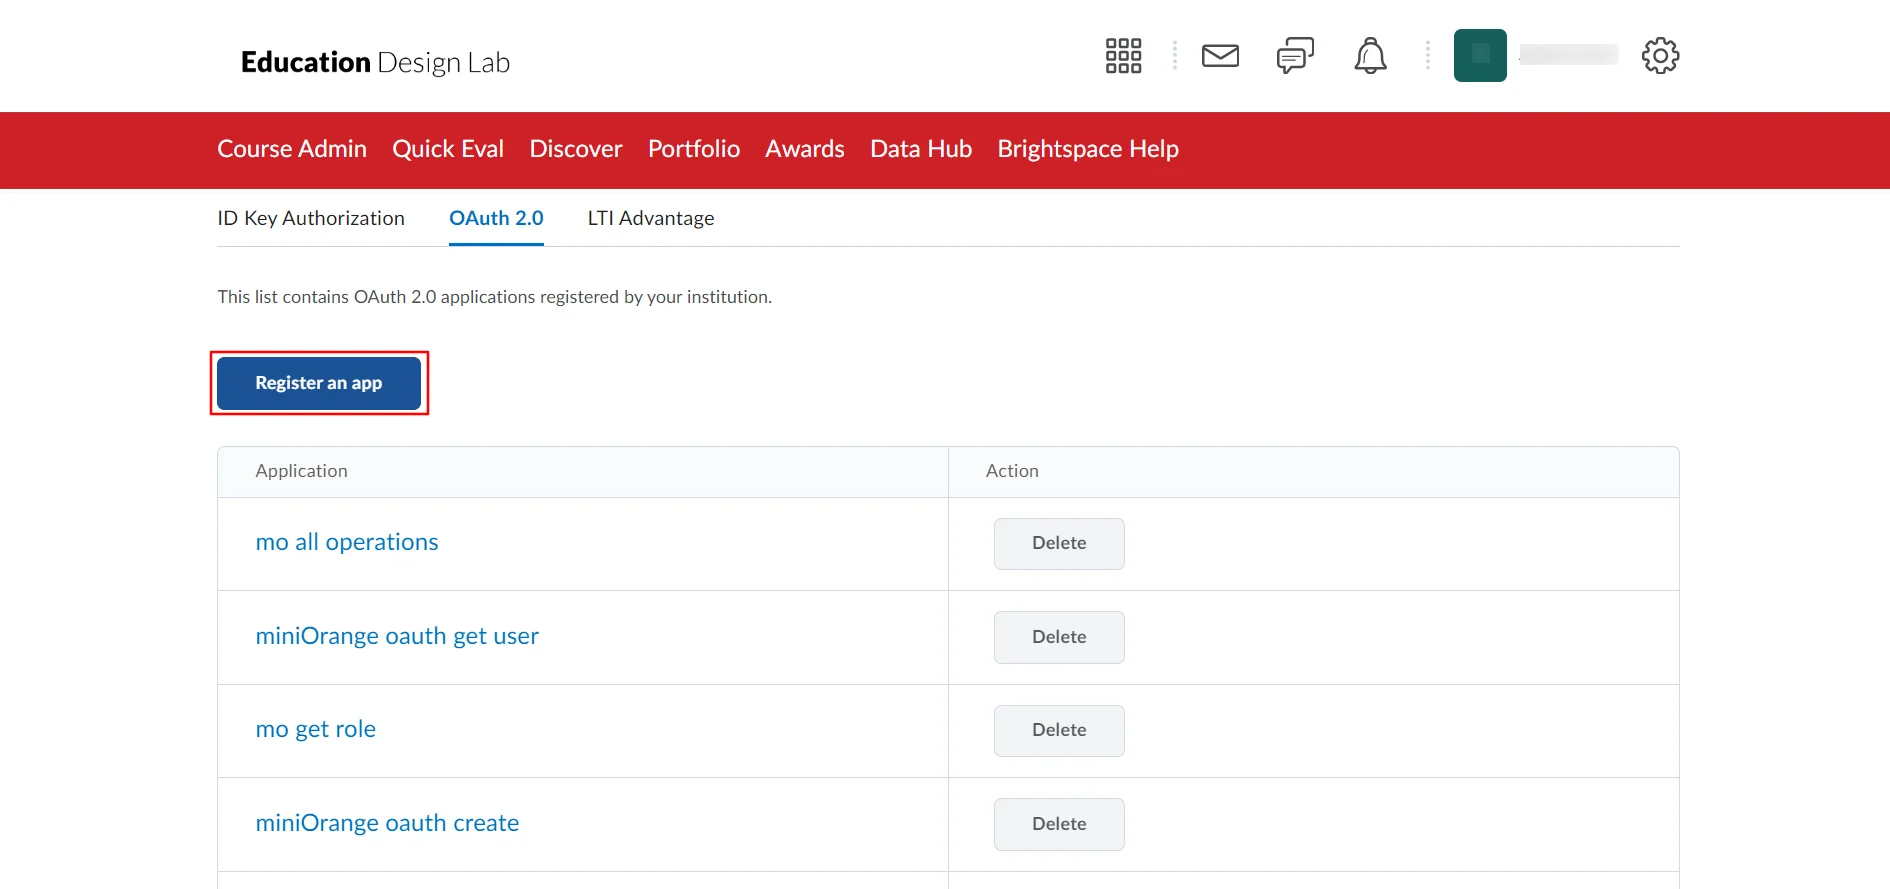
- Select OAuth 2.0 and click Register an app.
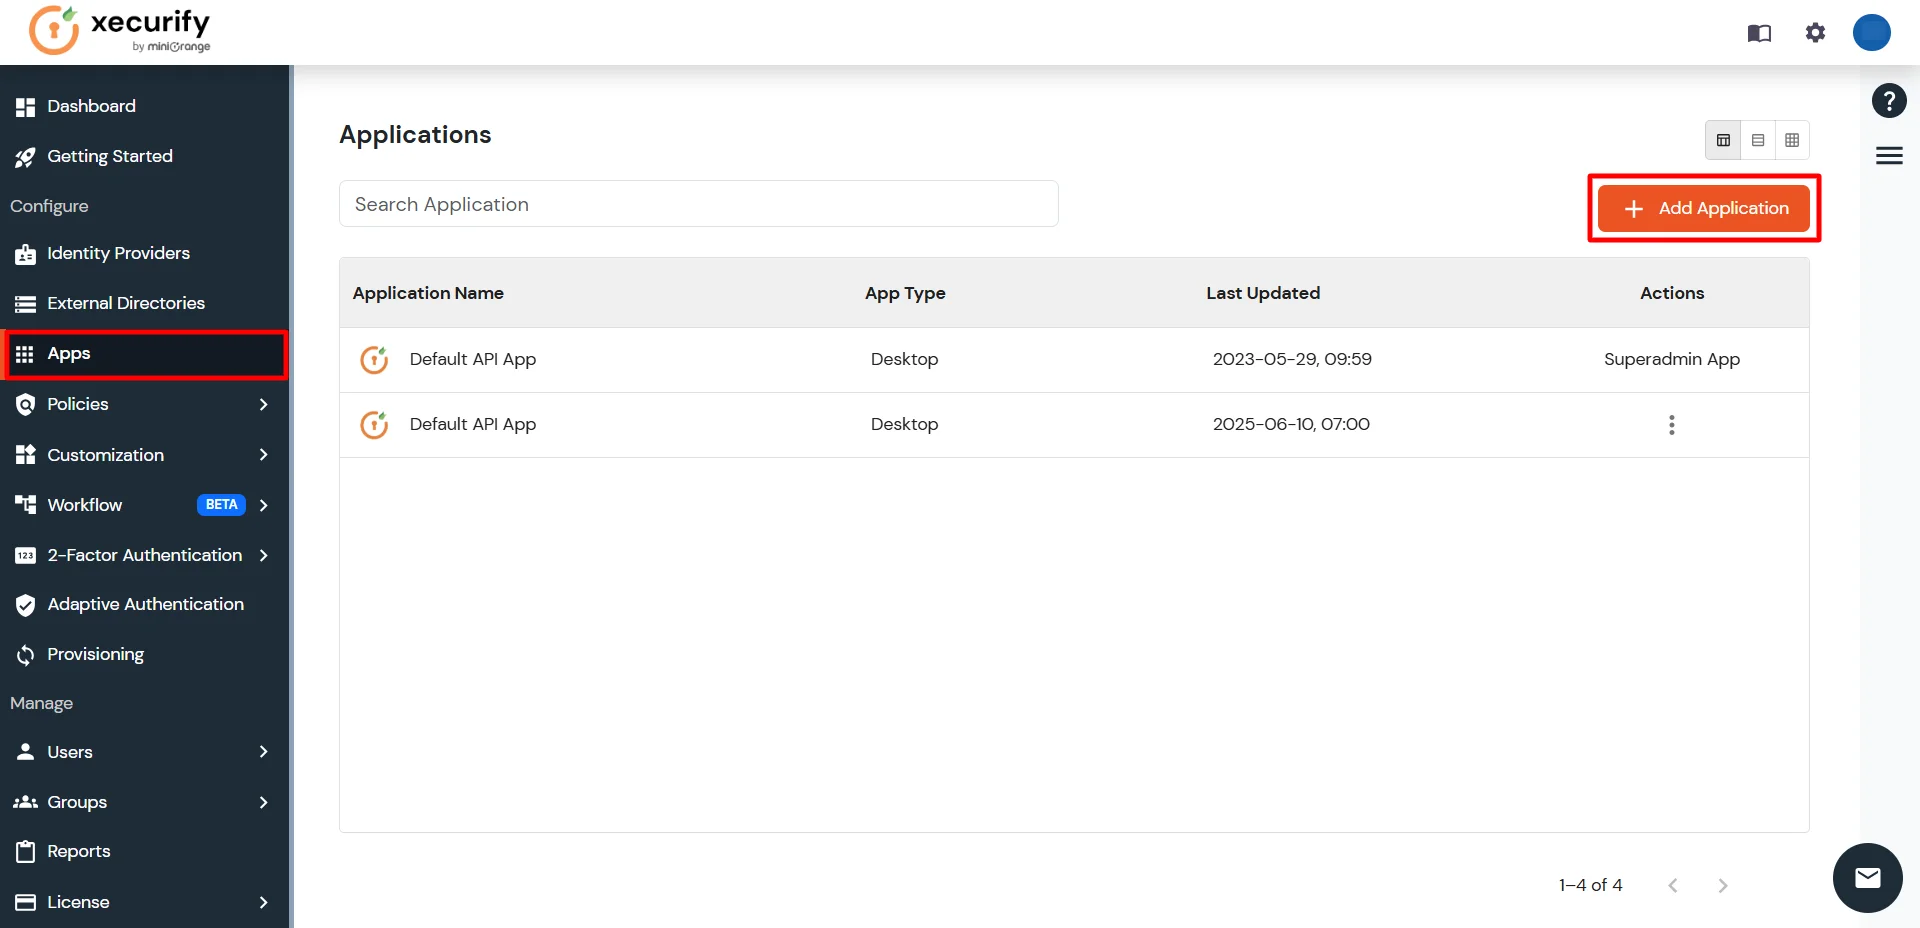
- Now, Log in to miniOrange Admin Console.
- Click on Apps from the left-side navigation bar. Then click on Add Application.
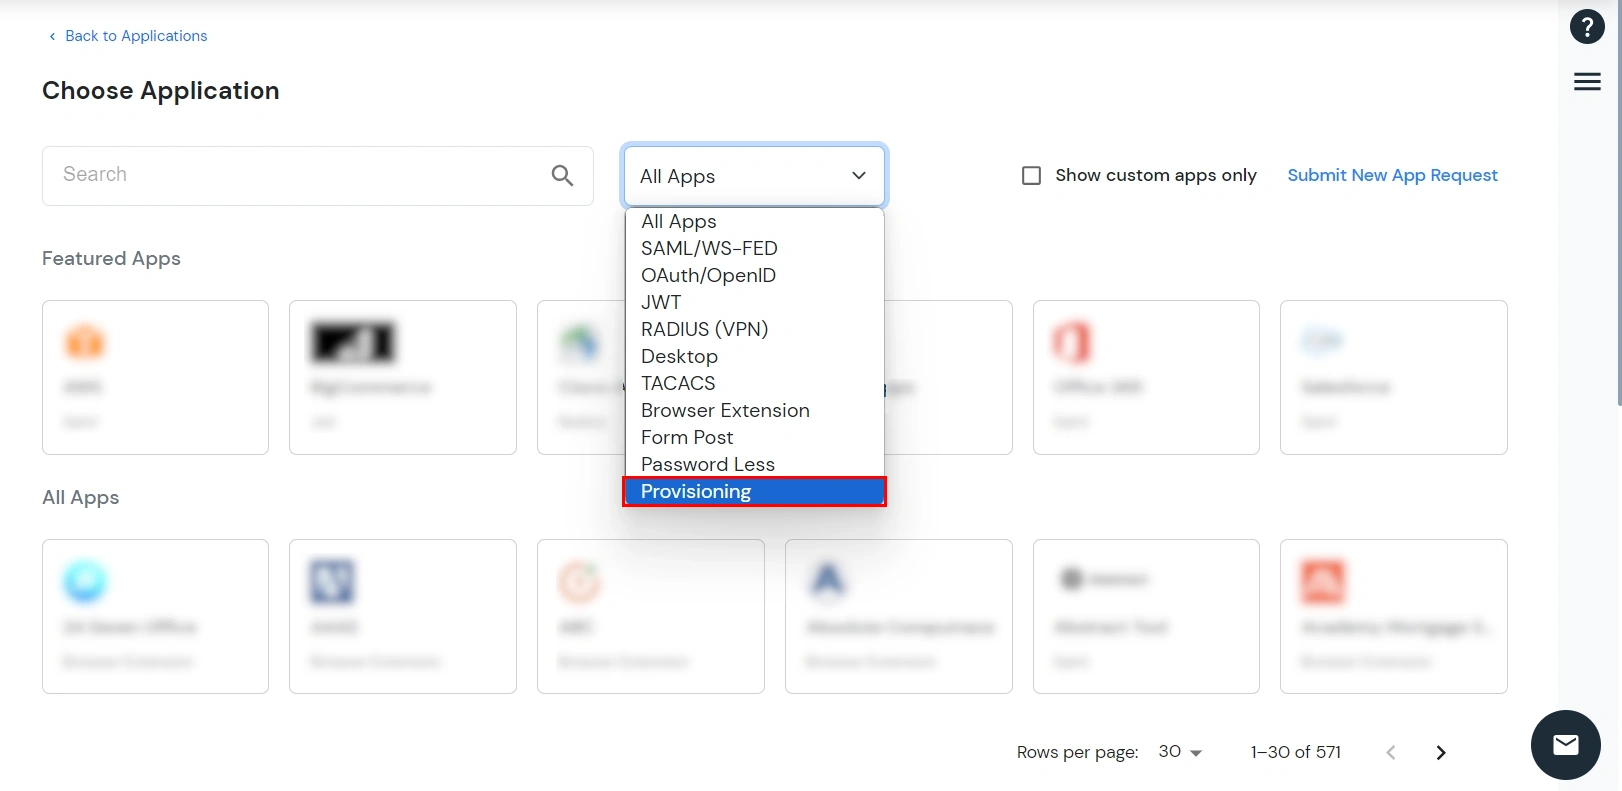
- Under Choose Application, select Provisioning from the All Apps dropdown.
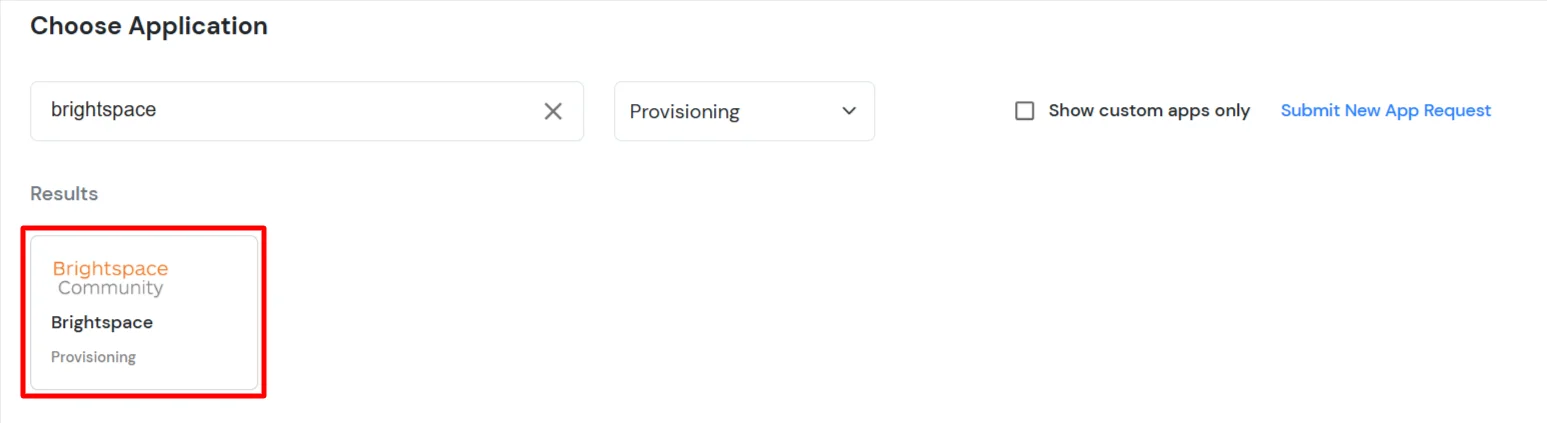
- Search for Brightspace in the list and select Brightspace Community.
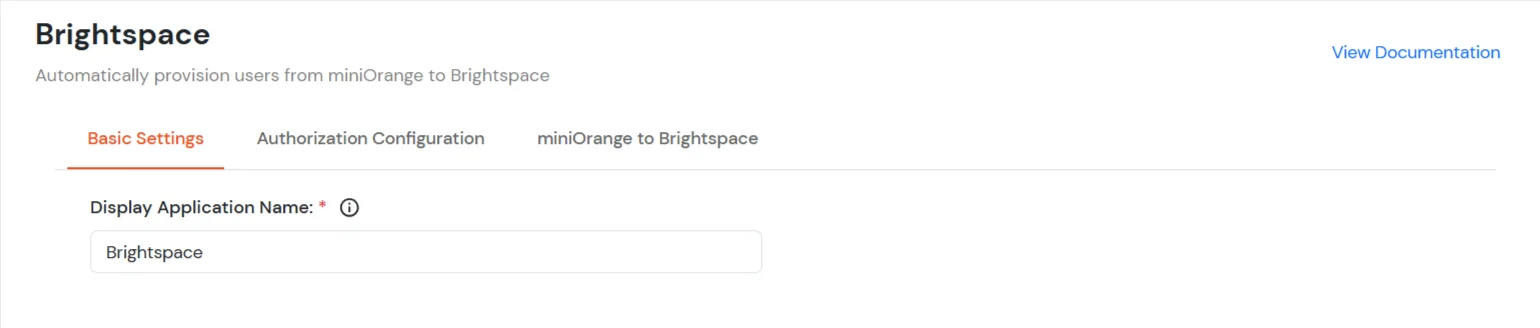
- Under the Basic Settings, enter Display Application Name and click on the Save & Next button.
- In the Authorization Configuration section, copy the Callback URL which will be required in the below step.
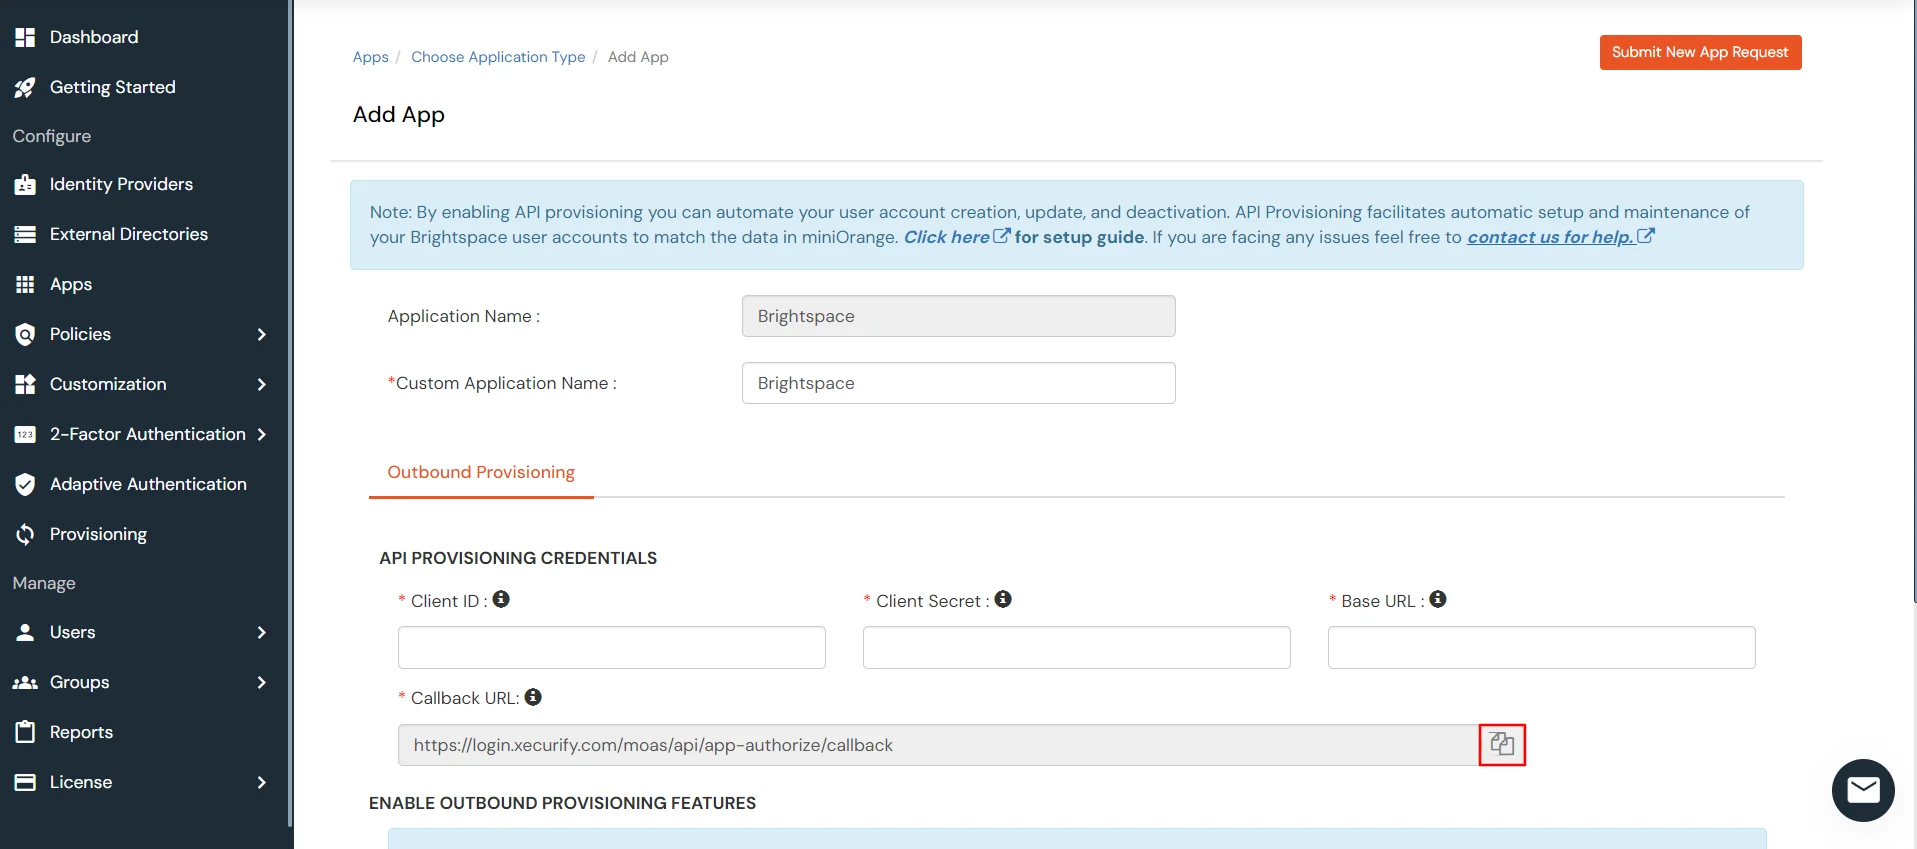
- Go to the Brightspace page and enter the following details:
- Enter Scope Value as enrollment:orgunit:read enrollment:orgunit:create enrollment:orgunit:delete role:detail:read users:userdata:create,read users:userdata:update
- Paste the "Callback URL" value copied from the miniOrange website in the Redirect URI box.
- Enter Access Token Lifetime as "72000" in the Access token box.

- You will receive values for Client Id and Client Secret after configuring the application. Copy these values.
- Go back to the Authorization Configuration section in miniOrange and paste the Client Id and Client Secret, and copy the base domain Brightspace URL in the Base URL field (For example: https://test.brightspace.com).
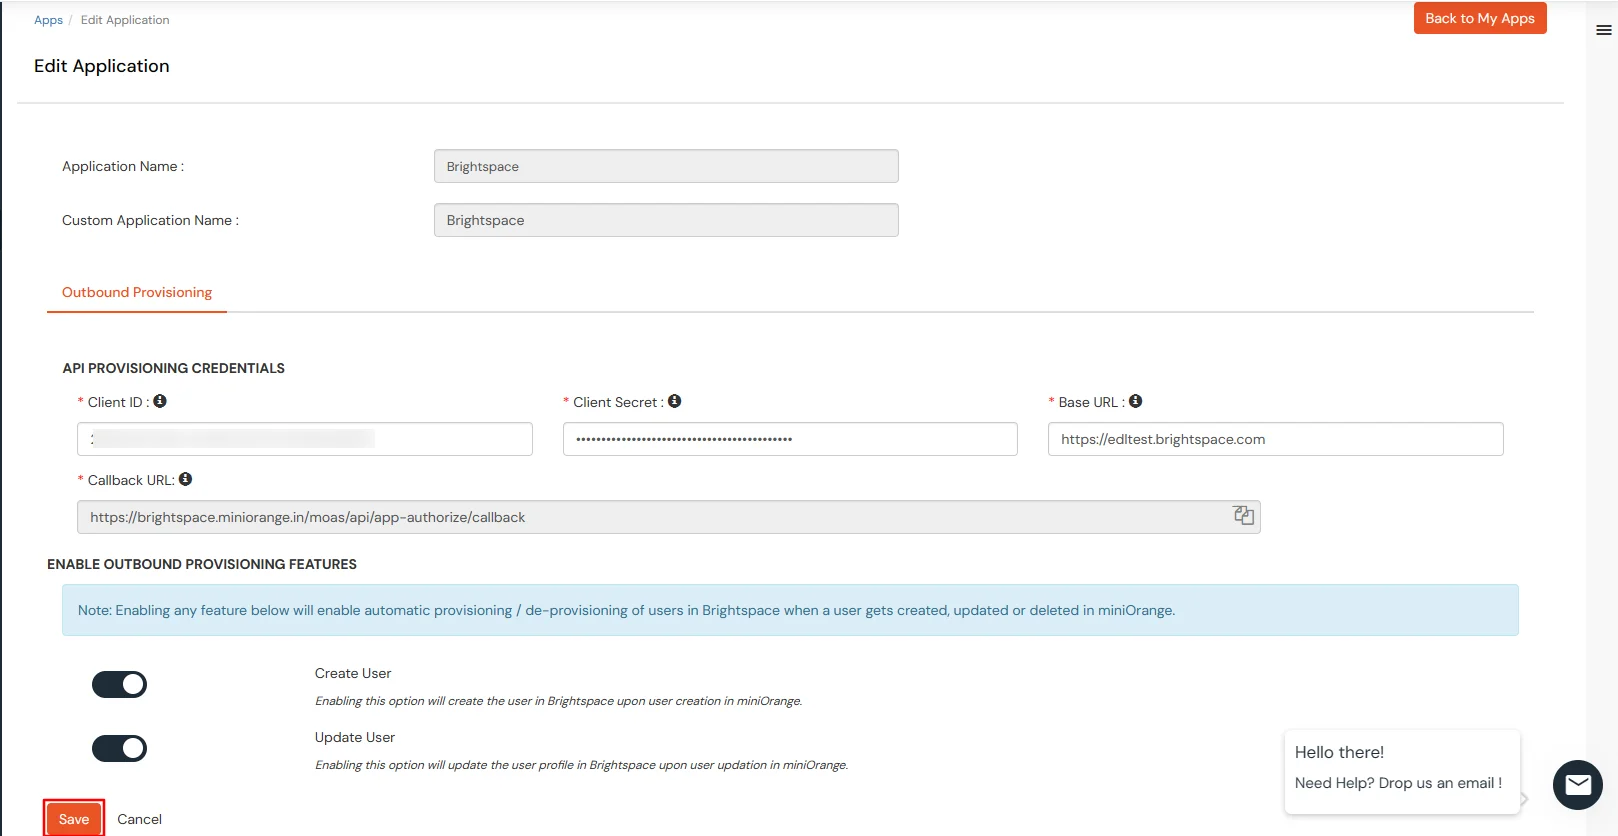
- Navigate to the miniOrange to Brightspace tab.
- In the Users section, you can enable or disable options as needed.
|
Attribute |
Description |
| Users |
Create Users |
Enabling this option will create the user in the selected application upon user creation in miniOrange. |
| Update Users |
Enabling this option will update the user profile in the selected application if updated in miniOrange. |
- Click Save to apply these changes.
2. Create App Policy
- Go to Policies >> App Login Policy from the side menu.
- Click on the Add Policy tab to add a new policy.
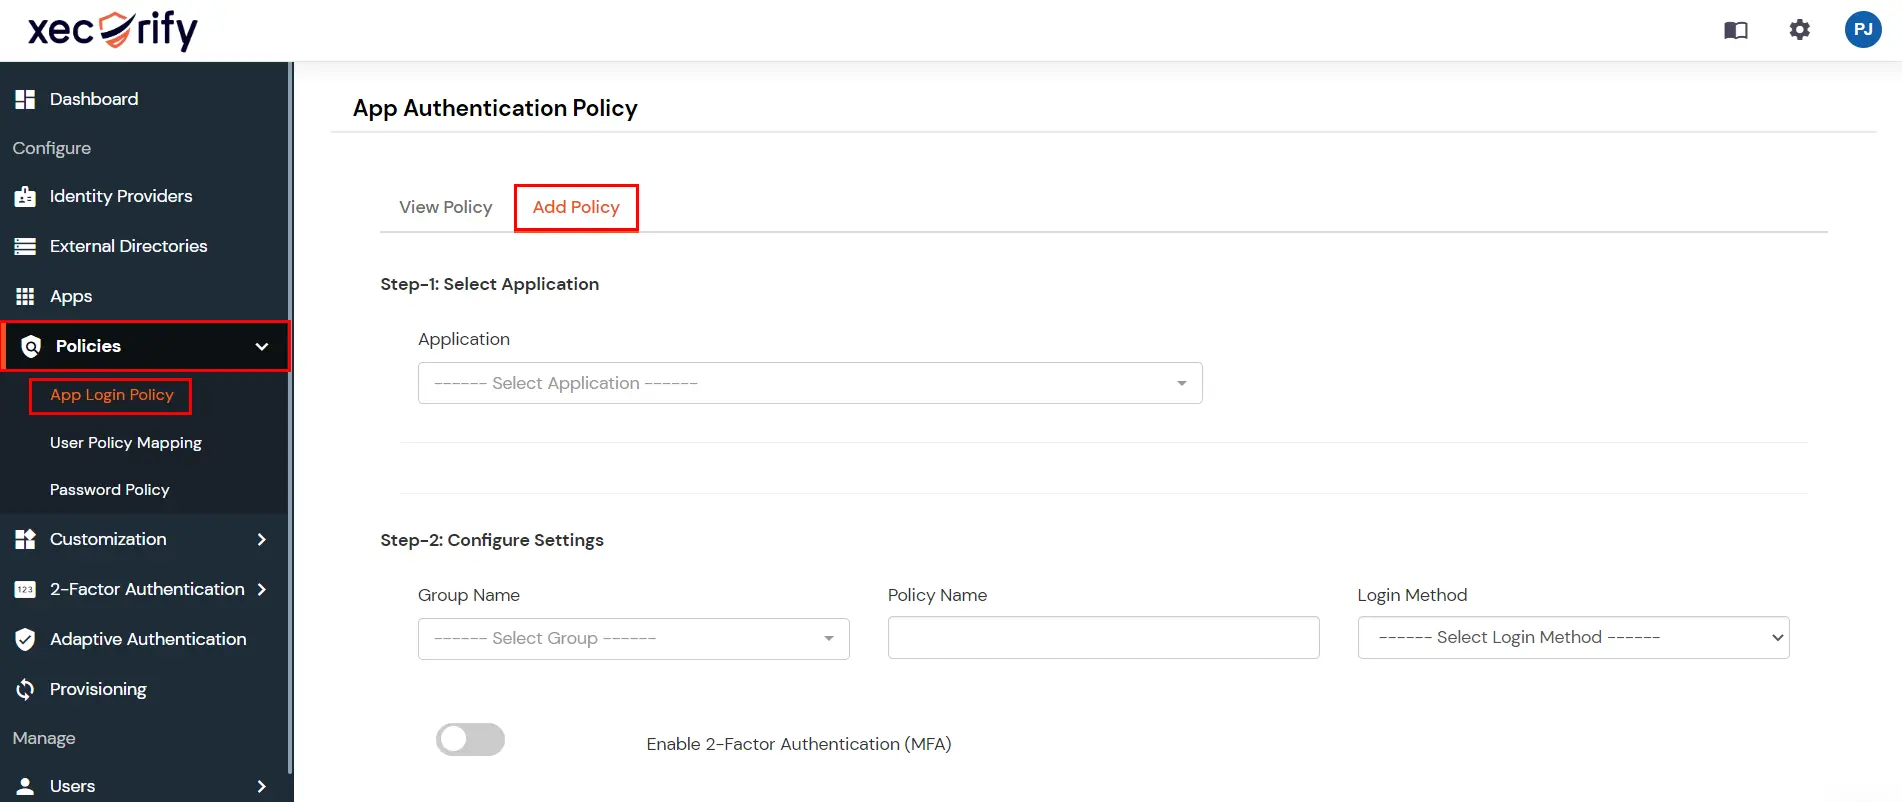
- For the application field, select the application which you created in the above steps.
- For the group field, select the group for which provisioning is to be enabled or simply select the DEFAULT group if provisioning is to be done for all users.
- Provide the policy name. For the login method, select password and click Save.
- Your configuration is now complete.
- Now on assigning user to the group would automatically provisioning the user. However group assignment is not required if it is DEFAULT group.
External References
