Hello there!
Need Help? We are right here!
Need Help? We are right here!
Search Results:
×miniOrange’s JavaScript OAuth Single Sign-On (SSO) solution enables secure, seamless authentication for applications built using popular JavaScript frameworks and libraries like React, Vue.js, Next.js, and Angular. By utilizing JSON Web Tokens (JWT), users can conveniently access multiple applications with just a single set of login credentials, significantly improving security and user experience.
Easily integrate OAuth 2.0 and OpenID Connect protocols into your existing JavaScript applications, effortlessly connecting them with identity providers such as Microsoft Entra ID, Okta, AWS Cognito, and others. Additionally, empower users with convenient social login options via providers like Google, Facebook, Twitter, and LinkedIn. Simplify your login processes, boost security, and deliver a smooth, frictionless experience across all your JavaScript-based apps with miniOrange SSO.
With miniOrange JavaScript OAuth SSO, you get:
miniOrange provides user authentication from various external sources, which can be Directories (like ADFS, Microsoft Active Directory, OpenLDAP, AWS etc), Identity Providers (like Microsoft Entra ID, Okta, AWS), and many more. You can configure your existing directory/user store or add users in miniOrange.
Please make sure your organisation branding is already set under Customization >> Login and Registration Branding in the left menu of the dashboard.

npm i mo-oauth-sdk
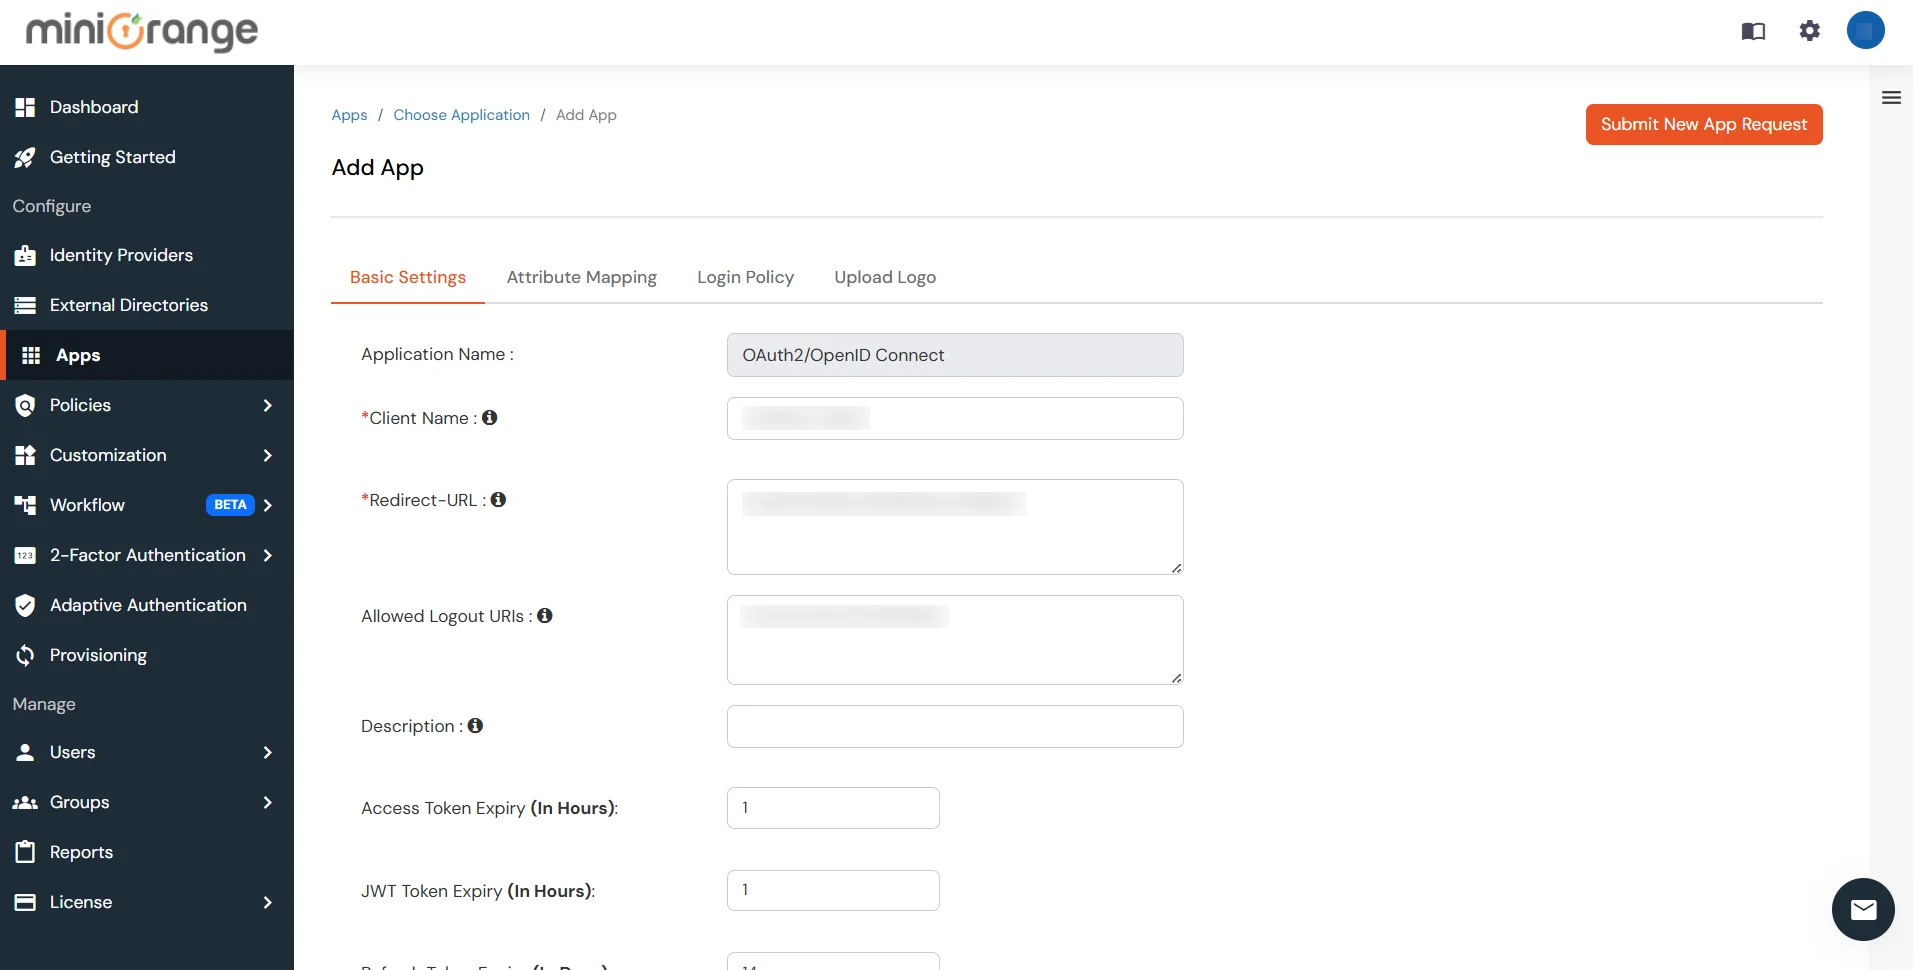
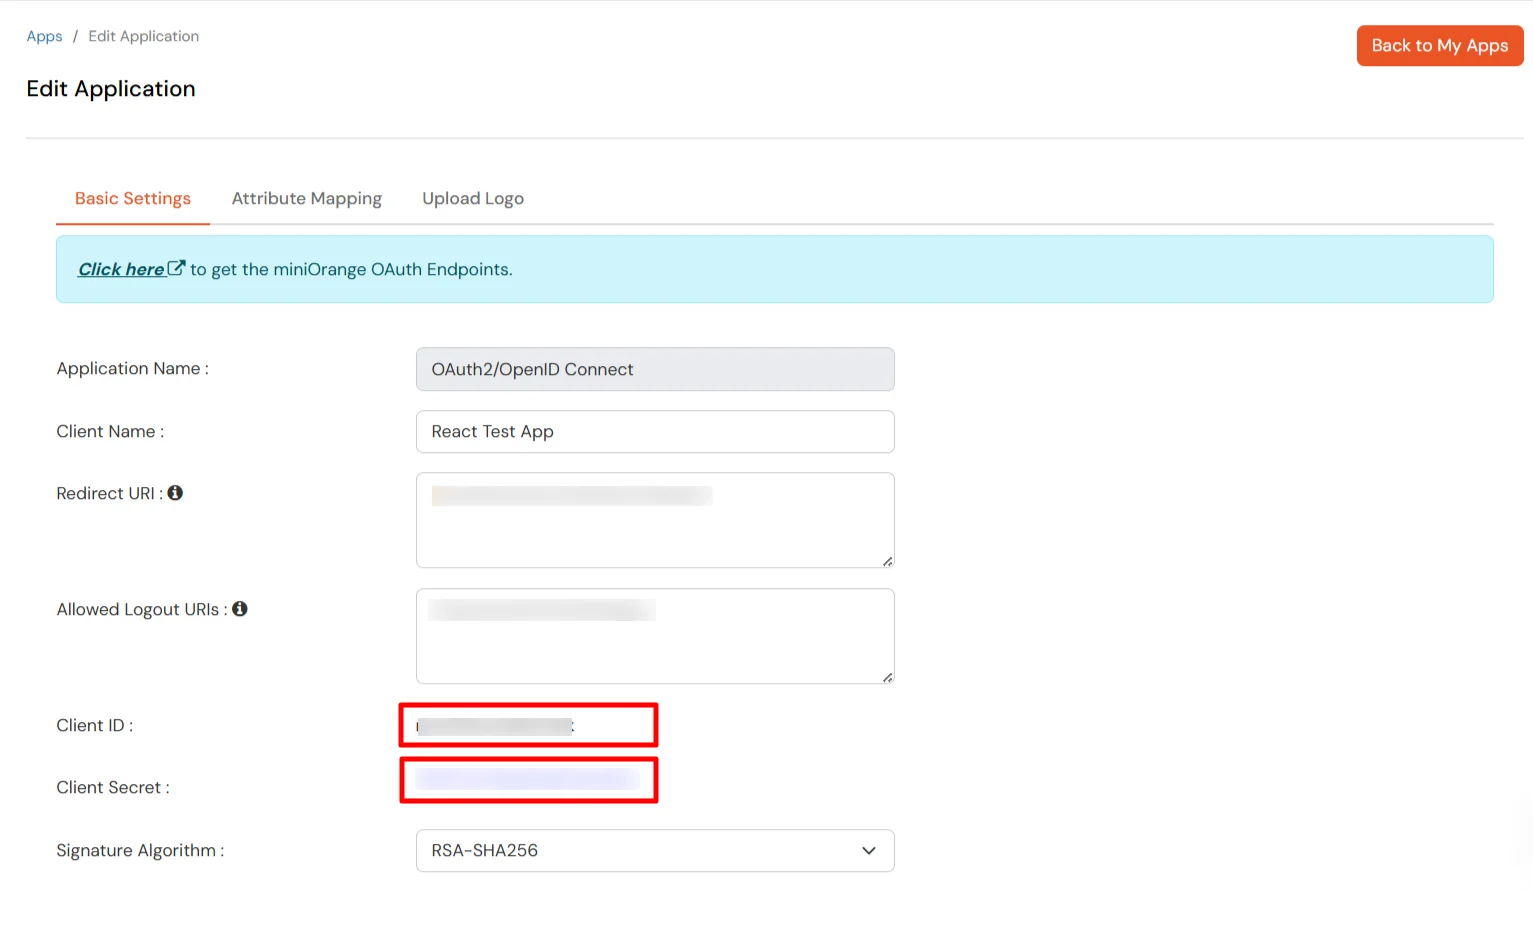
| Client_ID | Your application client id which we copied earlier from here |
| Client_Secret | Your application client secret which we copied earlier from here | BASE_URL | Your base URI should look like this: https://<YOUR_DOMAIN>.xecurify.com/moas. It is your branding name followed by xecurify.com/moas. |
| REDIRECT_URI | This is the same redirect uri we added while configuring the OAuth app in miniOrange. It should look like this: https://<your_domain>/sso/callback |
| LOGOUT_REDIRECT_URI | This is the same logout uri we added while configuring OAuth app in miniOrange. It should look like this: https://<your_domain>/login |
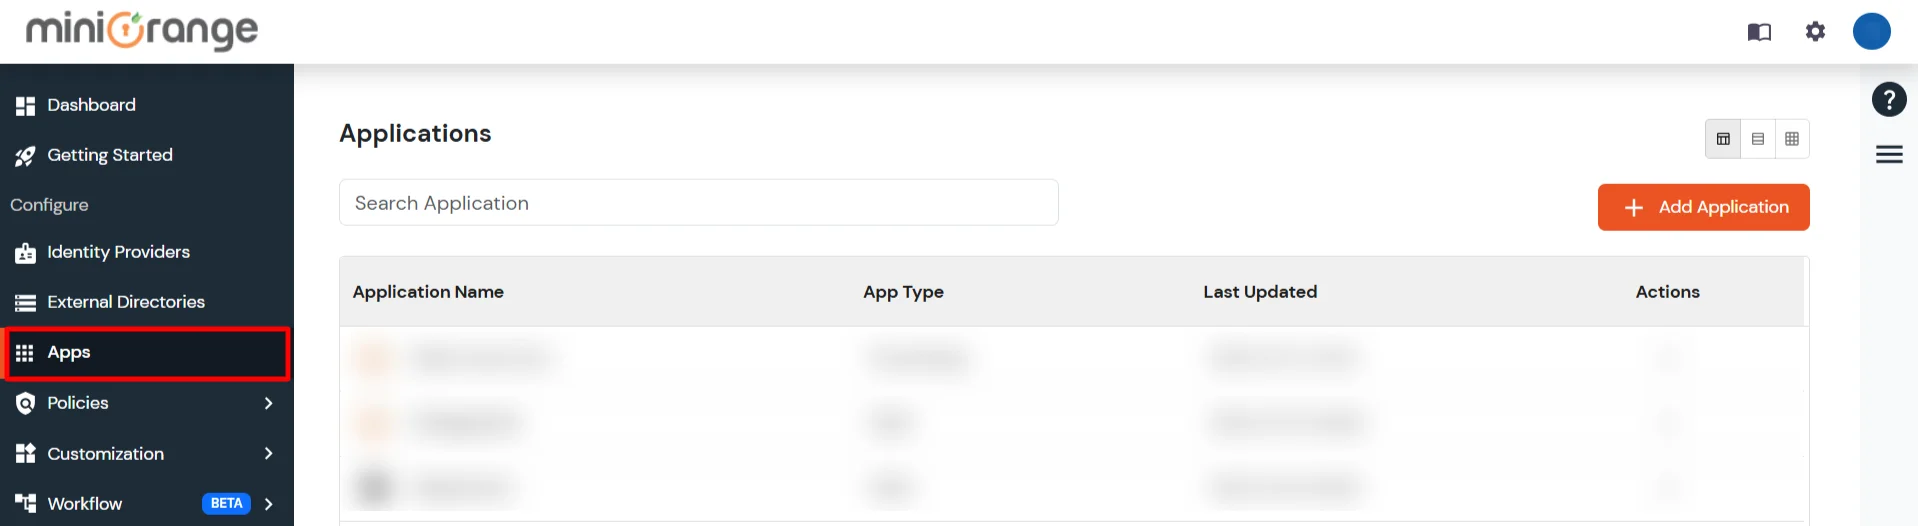
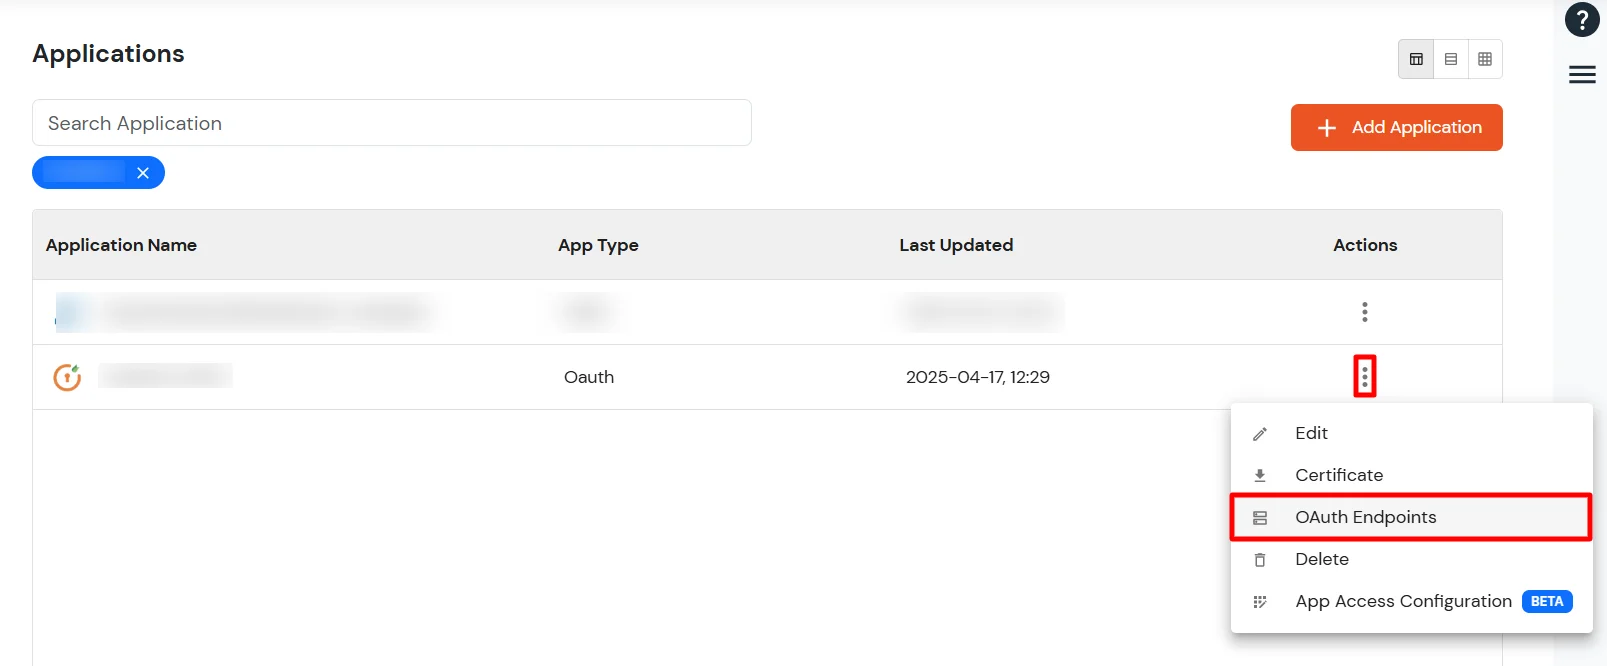
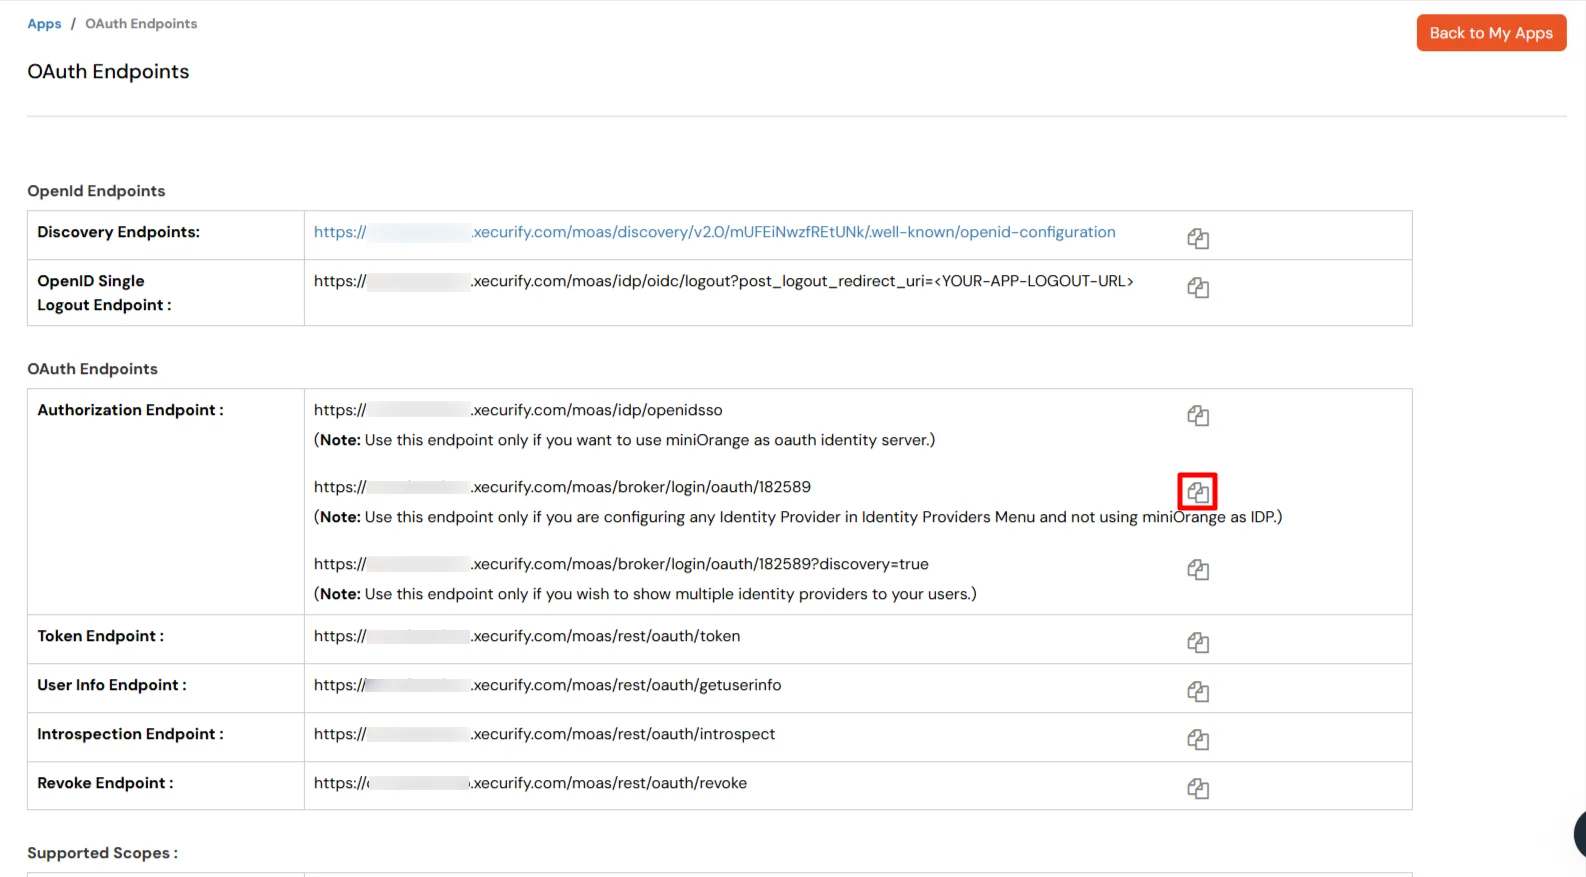
| BROKER_URI | If you are using external idp other than miniOrange then go to Apps > OAuth Endpoints > Authorization Endpoint > copy 2nd Broker URL |
Note: Store your app credentials securely in environment variables or a properties file, and use them here.
              import { OAuthConfig } from 'mo-oauth-sdk';
              const conf = new OAuthConfig();
              conf.setClientId(YOUR_CLIENT_ID);
              conf.setClientSecret(YOUR_CLIENT_SECRET);
              conf.setBaseUrl(YOUR_BASE_URL);
              conf.setRedirectUri(YOUR_REDIRECT_URI);
              conf.setLogoutRedirectUri(YOUR_LOGOUT_URI); //optional
              conf.setBrokerUri(YOUR_BROKER_URI); //optional
              export default config;
                      import {startAuthorization} from 'mo-oauth-sdk';
                      import conf from './Conf';  //Adjust path accordingly
                      .
                      .
                      .

                      const login = ()=>{
                        startAuthorization(conf)
                      }
Once the user successfully authenticates, the authorization server will redirect them to your application's /sso/callback route with authorization parameters.
To handle this:
You need to define the /sso/callback route in your application and create a component to handle it.
npm install react-router-dom
                            import React, { useEffect} from "react";
                            import { handleCallbackUri, TokenHandler} from 'mo-oauth-sdk';
                            import conf from './Conf'; //adjust the path accordingly


                            function Callback() {


                                useEffect(() => {
                                    const handleCallback = async () => {
                                    const { accessToken, refreshToken, error } = await handleCallbackUri(conf, window.location.href);


                                    if (error) {
                                    // Handle errors if any
                                    return;
                                    }
                                    //Store tokens securely in your preferred storage.
                                    if (accessToken) {
                                    // Process access token and retrieve user details
                                    const { user, error } = await TokenHandler.handleAccessToken(accessToken, conf);
                                    if (user) {
                                    // Store user details securely and navigate to dashboard
                                    } else {
                                    // Handle errors if any
                                    return;
                                    }
                                    }
                                };
                                handleCallback();
                                }, []);


                                return (
                                <div>
                                  <img src="https://i.gifer.com/ZKZx.gif" alt="Loading.." />
                                  </div>
                                );
                                }


                                export default Callback;
                            import { BrowserRouter as Router, Routes, Route } from "react-router-dom";
                            import Callback from "./Callback"; //adjust path accordingly
                            import Home from "./Home";
                                function App() {
                                return (
                                <Router>
                                <Routes>
                                    {/* Existing routes..*/}
                                    <Route path="/" element={<Home />} />

                                    {/* Add new SSO callback handler here*/}
                                    <Route path="/sso/callback" element={<Callback />} />
                                    </Routes>
                                    </Router>
                                );
                                }


                                export default App;
                            import { Routes } from '@angular/router';
                            import { CallbackComponent } from './callback/callback.component';


                            export const routes: Routes = [
                            { path: 'sso/callback', component: CallbackComponent }
                            ];
                            import { Component, OnInit } from '@angular/core';
                            import { handleCallbackUri, TokenHandler } from 'mo-oauth-sdk';
                            import conf from './Conf';  //adjust the path accordingly


                            @Component({
                            …
                            })


                            export class CallbackComponent  implements OnInit {


                            async ngOnInit(): Promise {
                            const { accessToken, refreshToken, error } = await handleCallbackUri(conf, window.location.href);


                            if (error) {
                            // Handle errors if any
                            return;
                            }


                            if (accessToken) {
                            // Store and Process access token to retrieve user details
                            const { user, error } = await TokenHandler.handleAccessToken(accessToken, this.myconfig);


                            if (user) {
                                // Store user details securely and navigate to dashboard
                            } else {
                                // Handle errors if any
                                return;
                            }
                            }
                            }
npm install vue-router@4
                            import { onMounted } from 'vue';
                            import { handleCallbackUri, TokenHandler } from 'mo-oauth-sdk';
                            import conf from './Conf'; //adjust the path accordingly


                            onMounted(async () => {
                            const { accessToken, refreshToken, error } = await handleCallbackUri(conf, window.location.href);


                            if (error) {
                            // Handle errors if any
                            return;
                            }


                            //Store tokens securely in your preferred storage.
                                if (accessToken) {
                                // Process access token and retrieve user details
                                const { user, error } = await TokenHandler.handleAccessToken(accessToken, conf);
                                if (user) {
                                // Store user details securely and navigate to dashboard
                                } else {
                                // Handle errors if any
                                return;
                                }
                                }
                            }
                            });
                                import { createRouter, createWebHistory } from 'vue-router';
                                import Home from './components/Home.vue';
                                import Dashboard from './components/Dashboard.vue';


                                const routes = [
                                {
                                // Your existing routes
                                },
                                {
                                //add callback route
                                path: '/callback',
                                name: 'Callback',
                                component: Callback
                                }
                                ];
                                const router = createRouter({
                                history: createWebHistory(),
                                routes
                                });


                                export default router;
                    import { logout} from "mo-oauth-sdk";
                    import conf from './Conf'; //adjust the path accordingly
                    const logoutUser= async()=>{
                        logout(conf);
                    }
                                import {isSessionActive} from "mo-oauth-sdk";

                                const validateToken=async() => {
                                    let response = await isSessionActive(conf, accessToken)
                                    if(response)
                                        //session is active do nothing
                                        else{
                                    //logout user and redirect to session expiration page
                                    }
                                }
                            import {  TokenHandler} from "mo-oauth-sdk";


                            const getNewToken= async()=>{
                                const refreshToken =  //fetch your stored refresh token
                                const {error, access_token} = await TokenHandler.getNewAccessToken(refreshToken, conf);

                                    if(!error){
                                        //update new access token
                                        return;
                                    }
                                    //handle errors if any
                                    console.log("Error in getting new access token..", error)
                                }
Expected Flow:
This completes the OAuth login process, allowing the user to access the application securely.
