Hello there!

Need Help? We are right here!

Support Icon
miniOrange Email Support
success

Thanks for your Enquiry. Our team will soon reach out to you.

If you don't hear from us within 24 hours, please feel free to send a follow-up email to info@xecurify.com

Search Results:

×

How to Setup the miniOrange RADIUS Proxy in Your System?


Remote Authentication Dial-In User Service (RADIUS) Proxy is an intermediary server that offers AAA (Authentication, Authorization, and Accounting) requests between network access devices (VPN or wireless access points), and user authentication sources, such as Active Directory (AD) or the miniOrange Identity Provider (IdP).

The miniOrange RADIUS Proxy offers a lightweight, modern solution for organizations that want to avoid the complexity of fully managing an on-prem infrastructure. By acting as an authentication gateway, the RADIUS Proxy allows smooth verification of users coming from both on-prem and cloud environments.

The miniOrange RADIUS Proxy can be integrated with an LDAP (Lightweight Directory Access Protocol) Gateway, and also supports the implementation of Multi-Factor Authentication (MFA)/Two-Factor Authentication (2FA).

This approach simplifies user management and allows organizations to securely authenticate and enforce policies.

You can easily install the miniOrange RADIUS Proxy in your infrastructure by following the steps given below.


Get Free Installation Help


miniOrange offers free help through a consultation call with our System Engineers to Install or Setup ADFS SSO solution in your environment with 30-day free trial.

For this, you need to just send us an email at idpsupport@xecurify.com to book a slot and we'll help you in no time.


Setting Up the miniOrange RADIUS Proxy Solution :

1. Setup RADIUS Proxy

  • Set up the Radius Proxy by following the instructions here.
  • Add your RADIUS applications in your miniOrange admin console , create authentication policies and configure Two-Factor Authentication (2FA) settings in your customer admin account by following the instructions here .
  • Log in to the Radius Proxy dashboard using miniOrange admin credentials.
  • Navigate to the RADIUS Management tab.
  • Configure Radius Proxy: Radius Dashboard

2. Register the Radius Client

  • Register the Radius client (added in Step 1) you want to authenticate through the RADIUS Proxy.
  • Configure Radius Proxy: Register Apps

  • Once registered, your application will appear in the list as shown below:
  • Configure Radius Proxy: Registered Apps

3. View Client Details

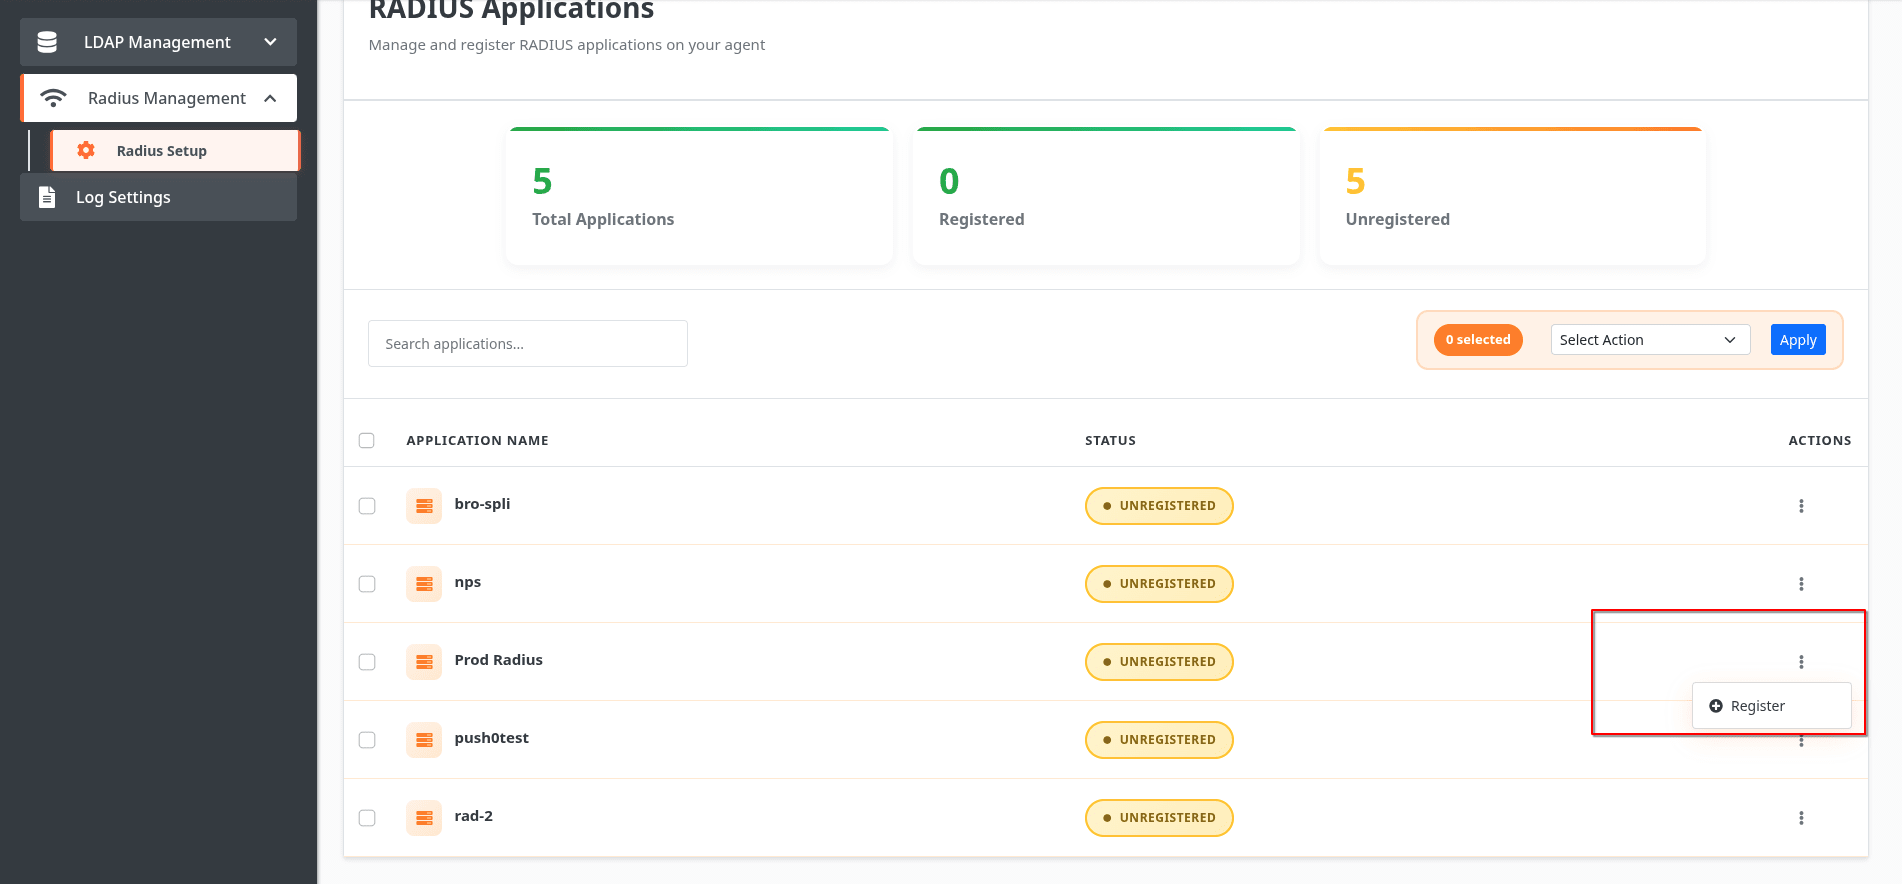
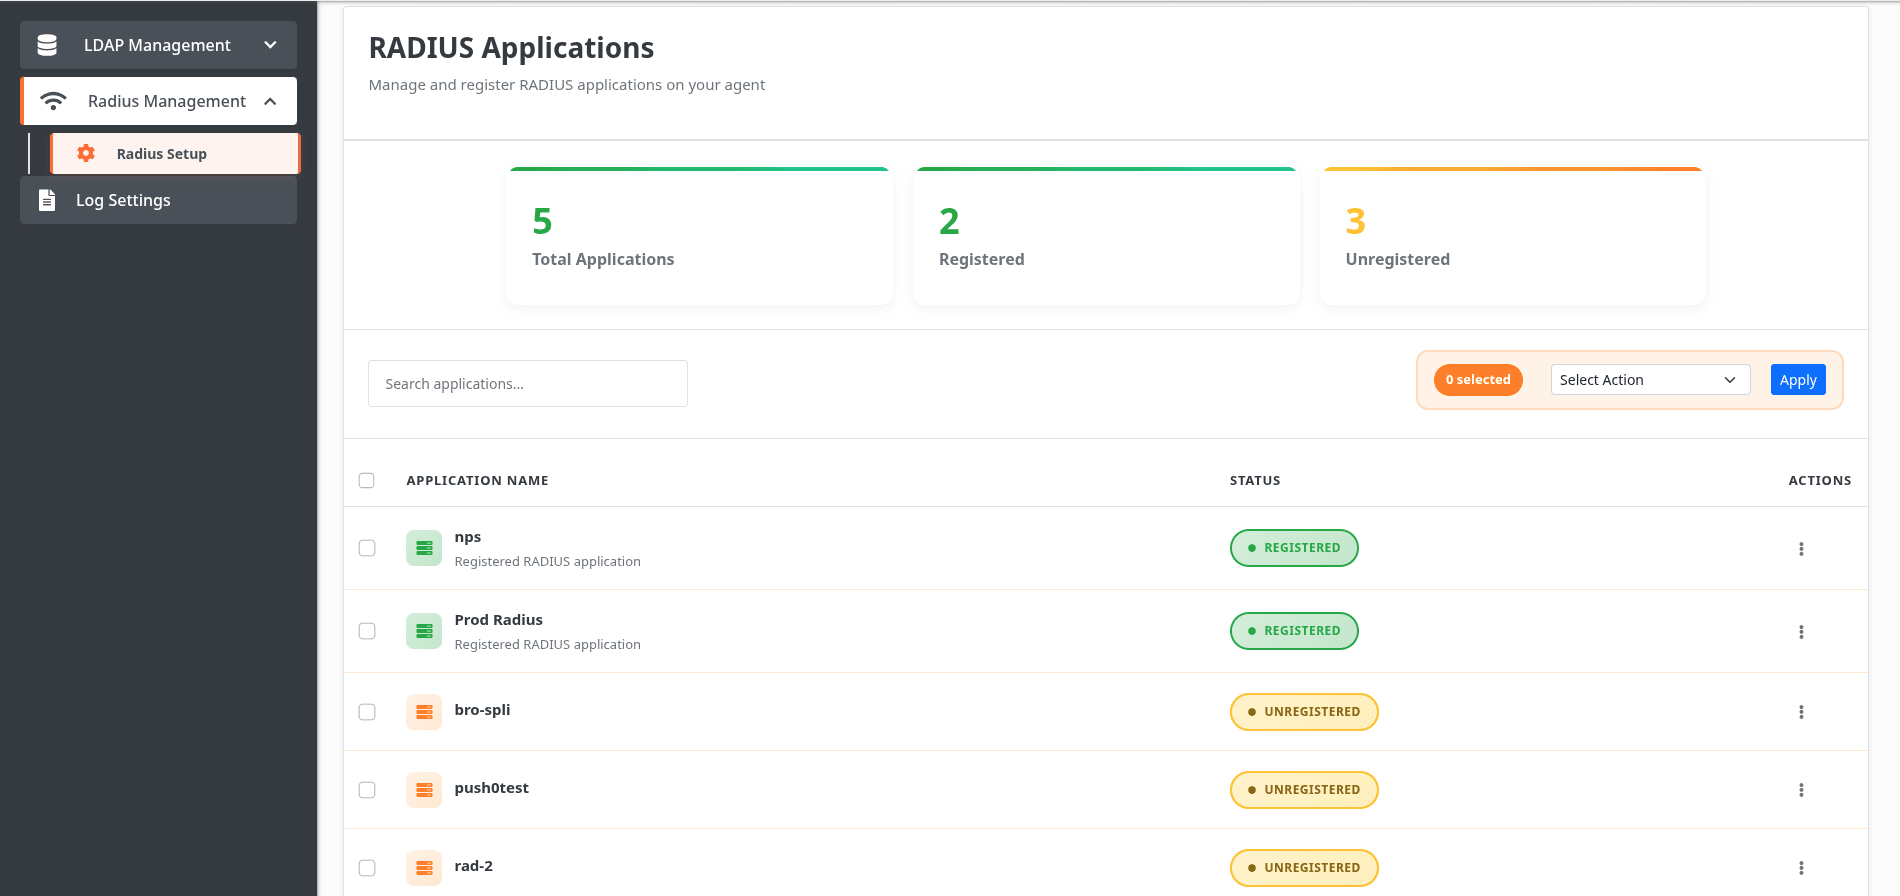
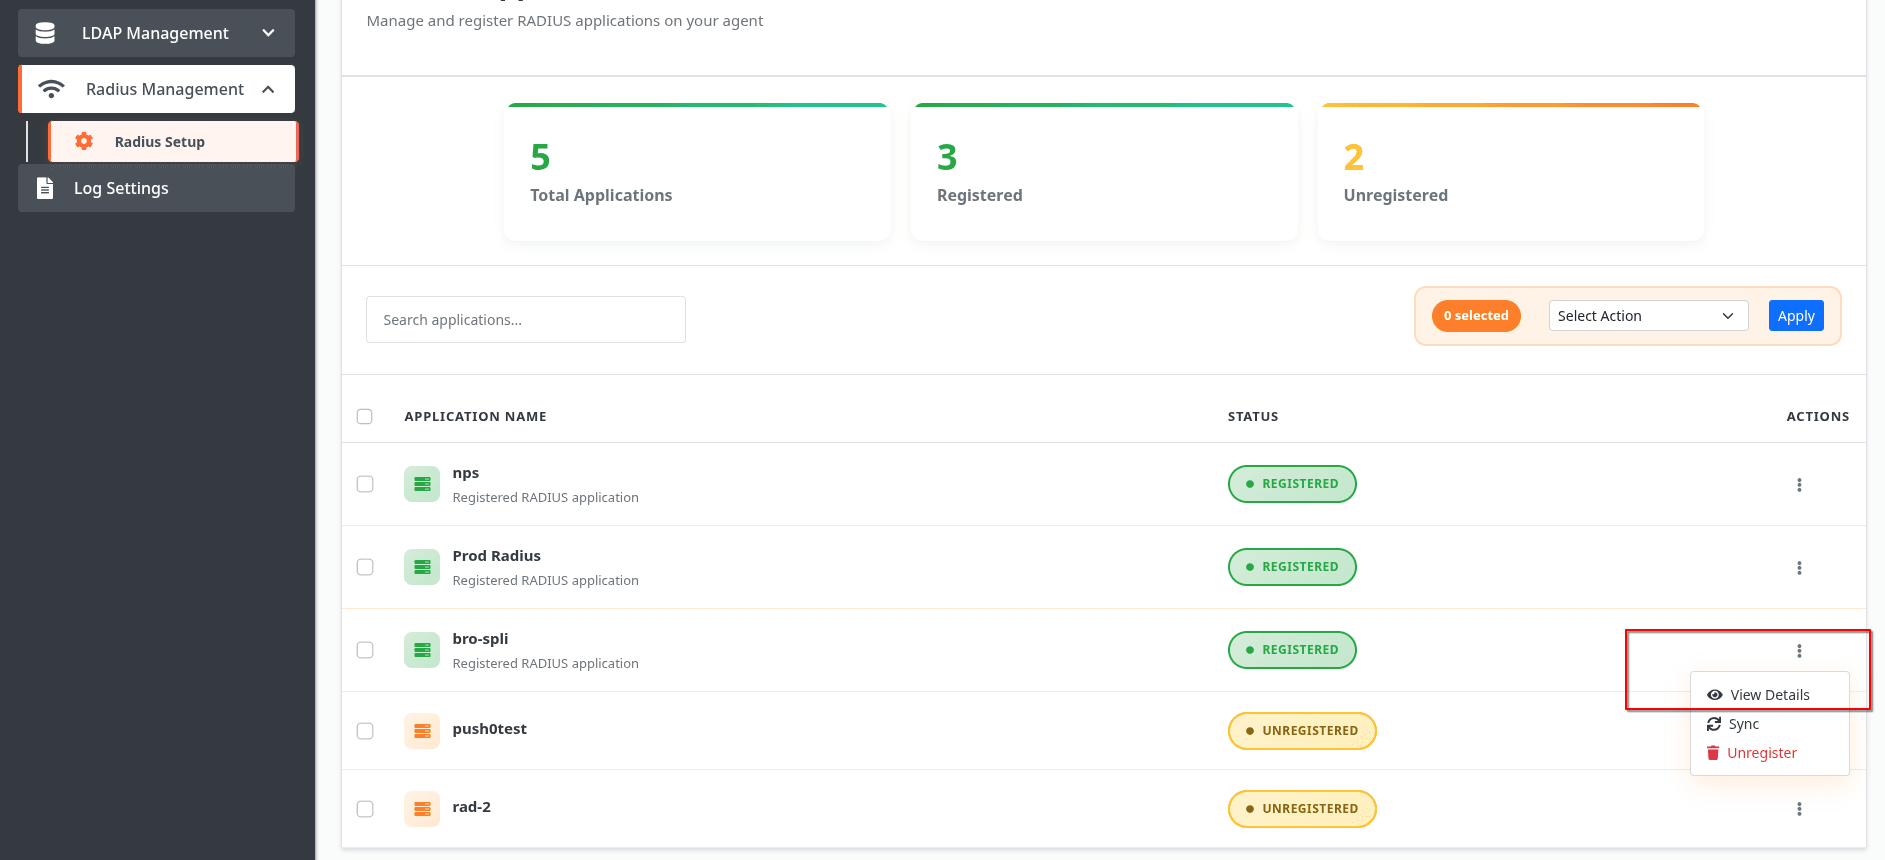
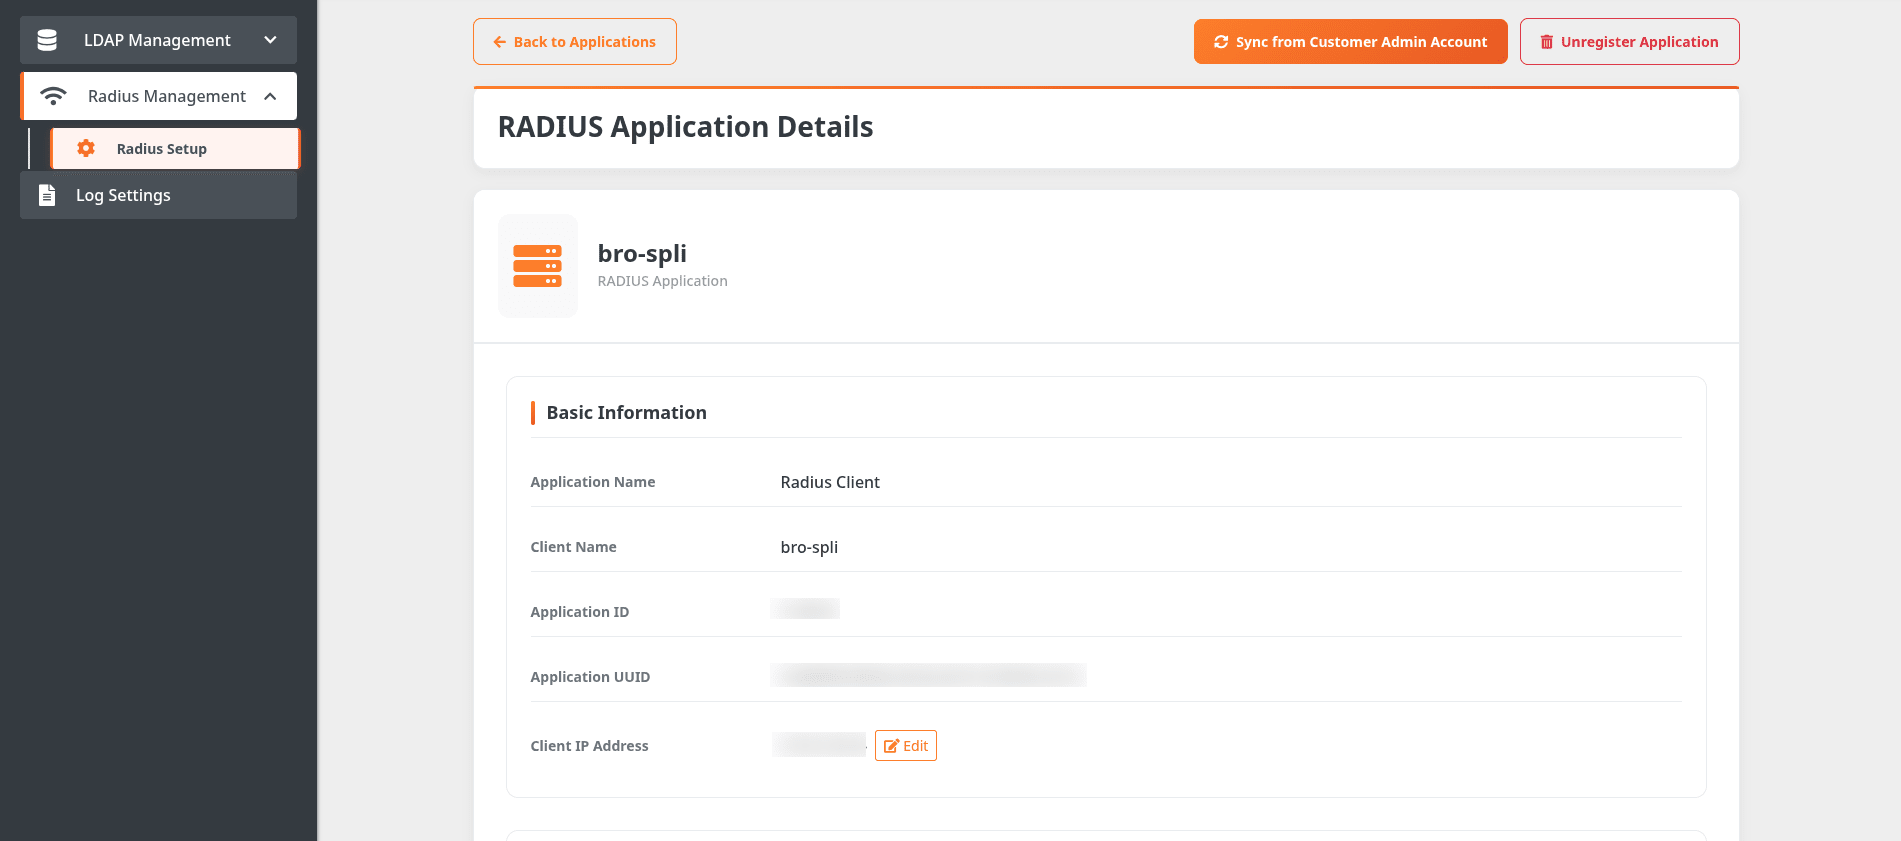
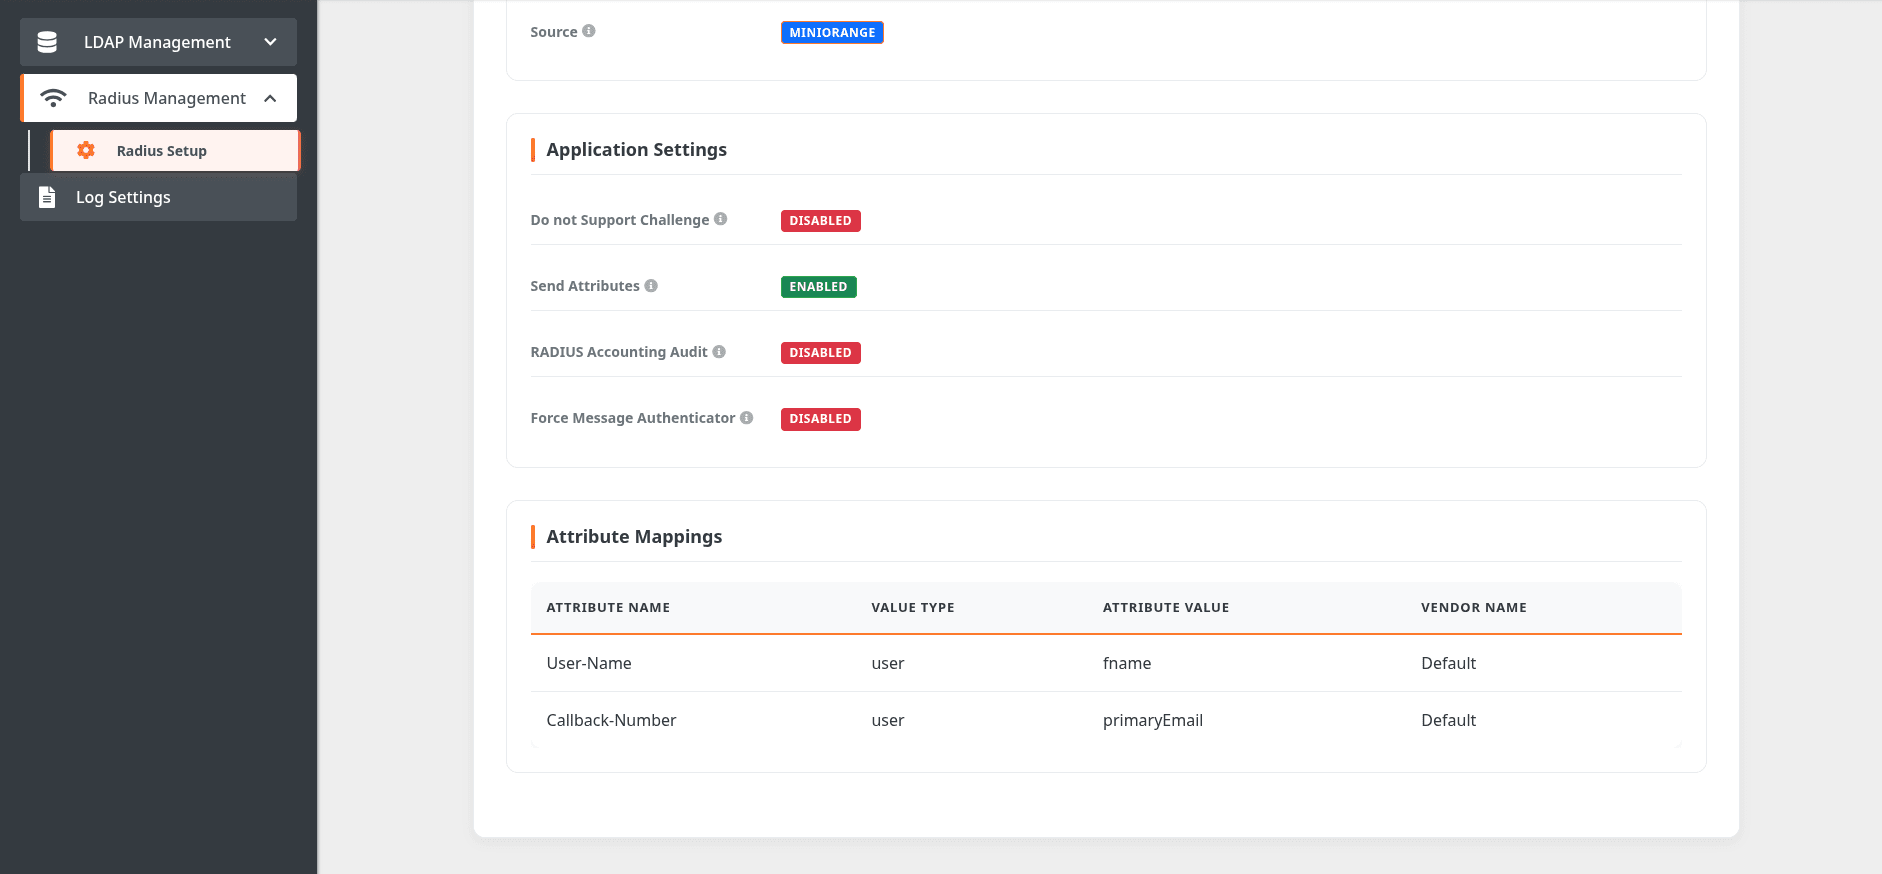
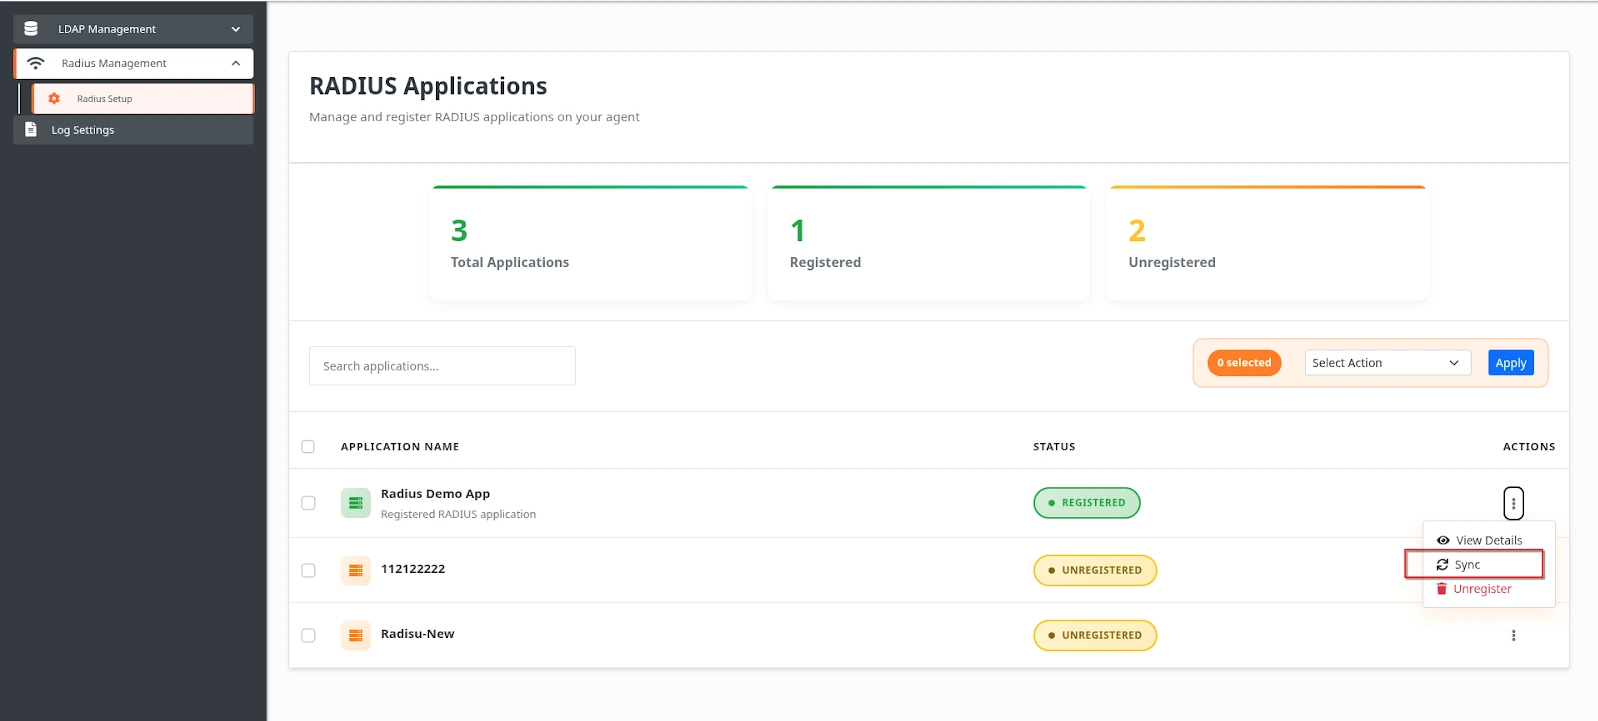
To review or verify your registered application's configuration:

  • Click View Details in the Action column next to your application.
  • Configure Radius Proxy: To View Details

  • Review the application settings displayed.
  • Configure Radius Proxy:  View Application Details

    Configure Radius Proxy: View Application Settings

4. Configure IP Addresses

  • If you need to add private IP addresses or modify the IP addresses that differ from those configured under RADIUS client app in miniOrange’s admin dashboard:
  • Configure Radius Proxy: Click on Edit IP

    Configure Radius Proxy: Click on Save IP

5. Configure RADIUS Server in Radius Client

  • Go to the admin dashboard of the RADIUS client.
  • Make changes to the RADIUS server configurations for authentication as per the below details.
    • Property Value
      RADIUS server IP address(es) Enter the IP address(es) of each miniOrange Radius Proxy server (comma-separated).
      Port Enter 1812 (or whichever port is configured on your miniOrange Radius Proxy).
      Shared secret code Enter the RADIUS secret shared with your miniOrange Radius Proxy.
      Protocol Choose PAP.
      Server timeout (in seconds) Increase the timeout to 20 seconds.
      Max retries Keep it default

6. Test Your Configuration

  • Launch the VPN client.
  • Enter Username and Password.
  • You can now enter the OTP/codes or allow the Push Notification or accept the link over SMS/Email.
  • You will be successfully authenticated and connected to VPN.

7. Update Application Settings

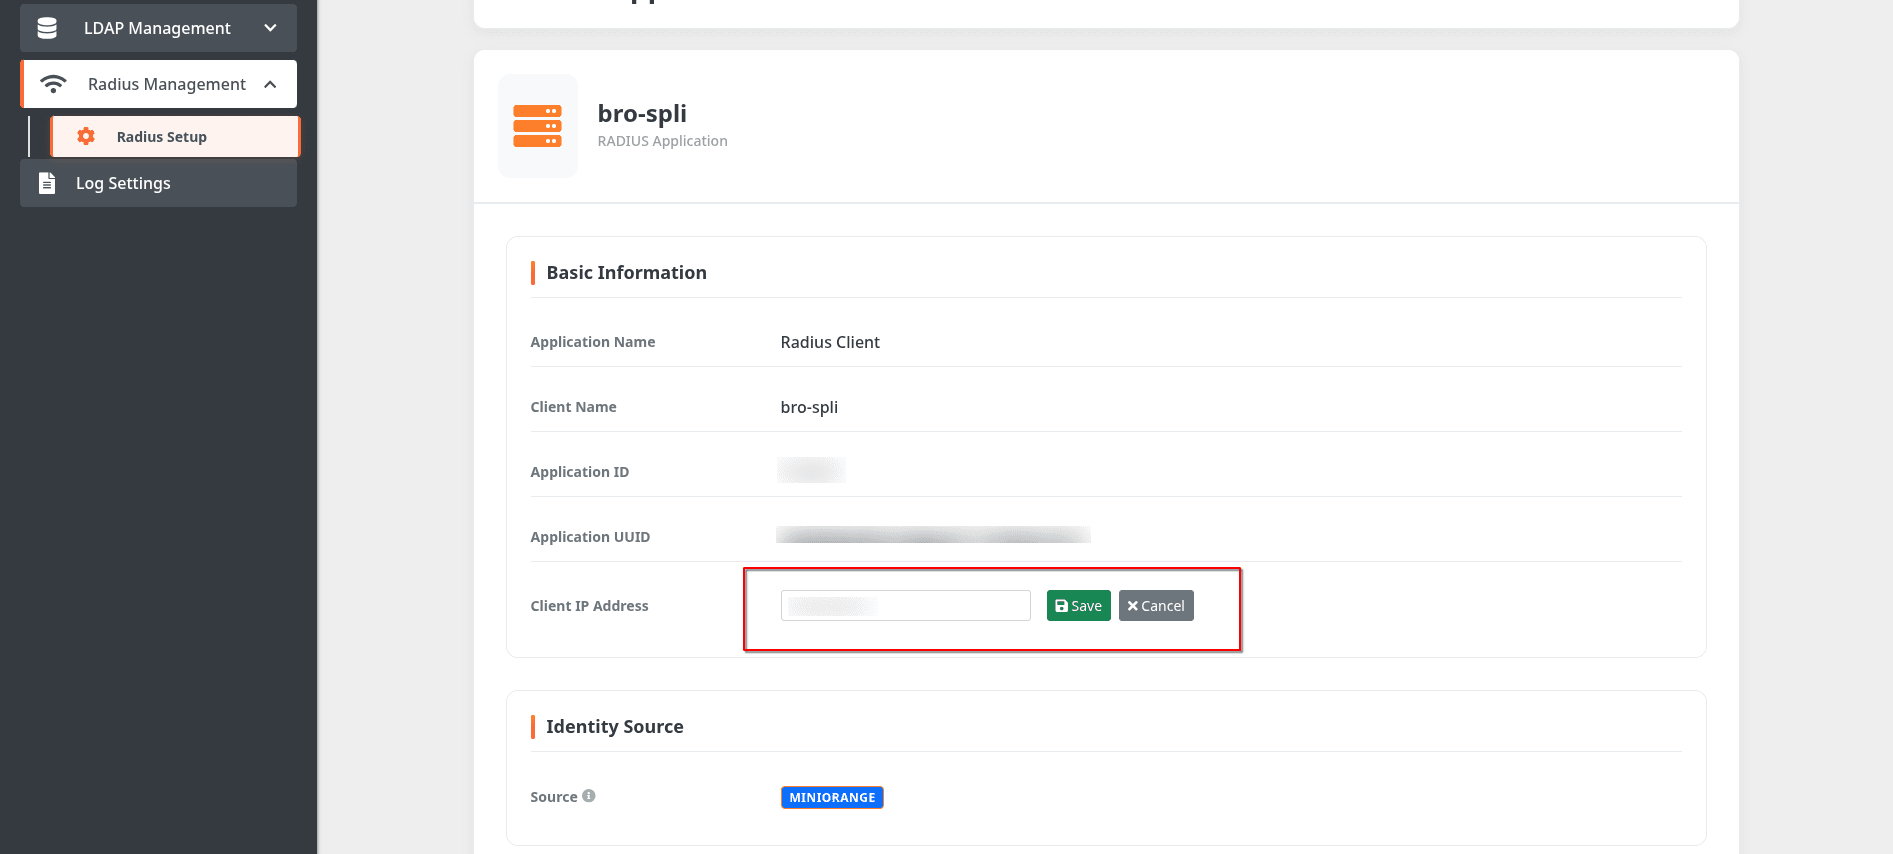
If you need to modify the configuration for a registered application:
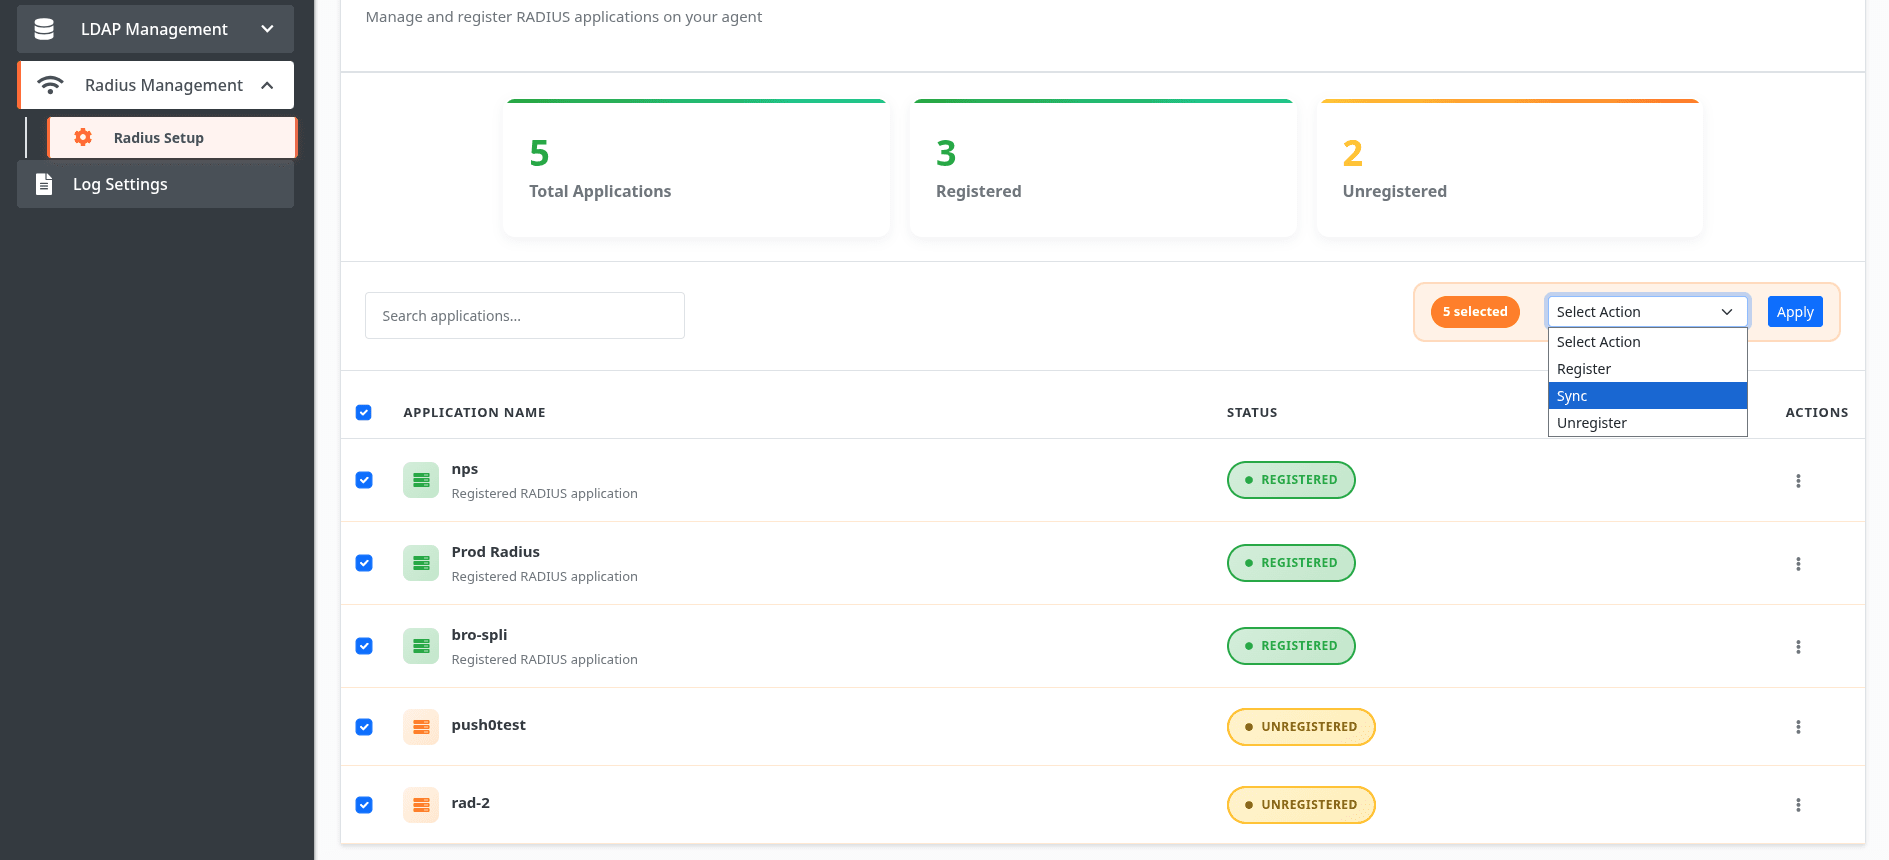
  • Log in to your miniOrange customer admin account.
  • Make the necessary configuration changes.
  • Return to the RADIUS Proxy interface.
  • Click Sync next to the specific application to apply the updated settings.
  • Configure Radius Proxy: Click Sync

8. Manage Multiple Applications

  • You can perform bulk operations on multiple applications simultaneously:
  • Bulk Register:

    • Register multiple applications at once using the bulk registration feature.

    Bulk Sync:

    • Synchronize configuration updates across multiple applications.

    Bulk Unregister:

    • Remove multiple applications from the RADIUS Proxy in one action.
    • Configure Radius Proxy: Bulk Options

Want To Schedule A Demo?

Request a Demo


Our Other Identity & Access Management Products