Hello there!
Need Help? We are right here!
Need Help? We are right here!
Search Results:
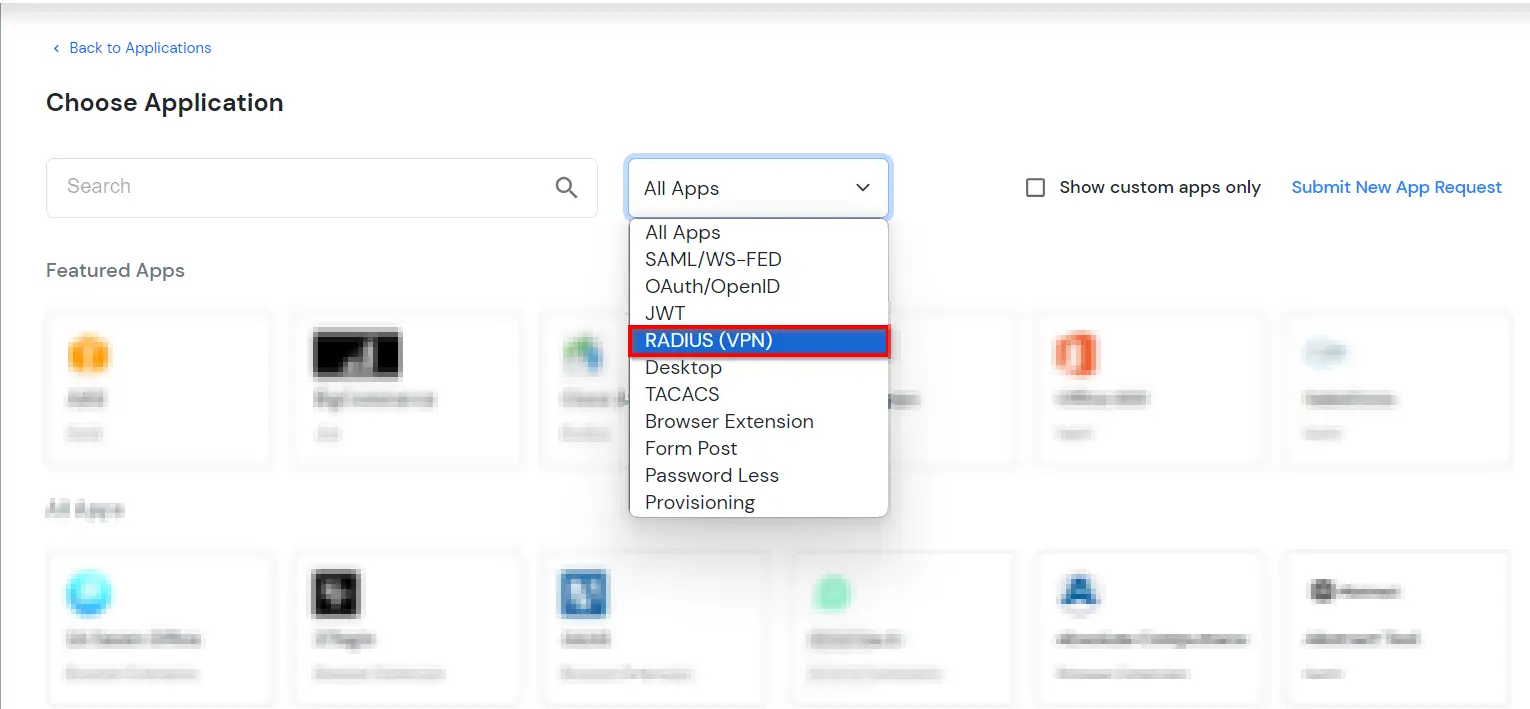
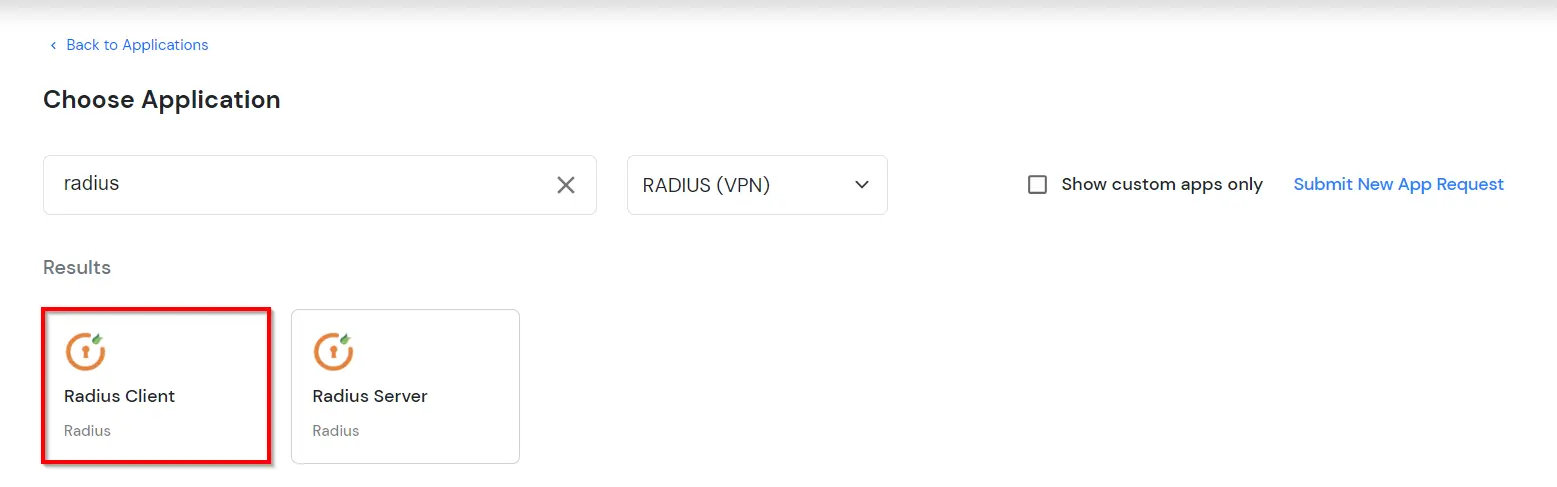
×Remote Authentication Dial-In User Service (RADIUS) is a software and client-server protocol used to centrally authenticate and authorize users attempting to access a network, acting as a central point to verify user credentials before granting network access. It performs functions like authentication, authorization, and accounting (AAA) for users trying to connect to a network, like through Wi-Fi or VPNs.
miniOrange enables several different protocols for your applications, such as SAML, WS-FED, OAuth, OIDC, JWT, RADIUS, and more. We provide MFA or adaptive authentication solutions for RADIUS apps like Fortinet VPN, SonicWall VPN, AWS Workspaces, and many more.
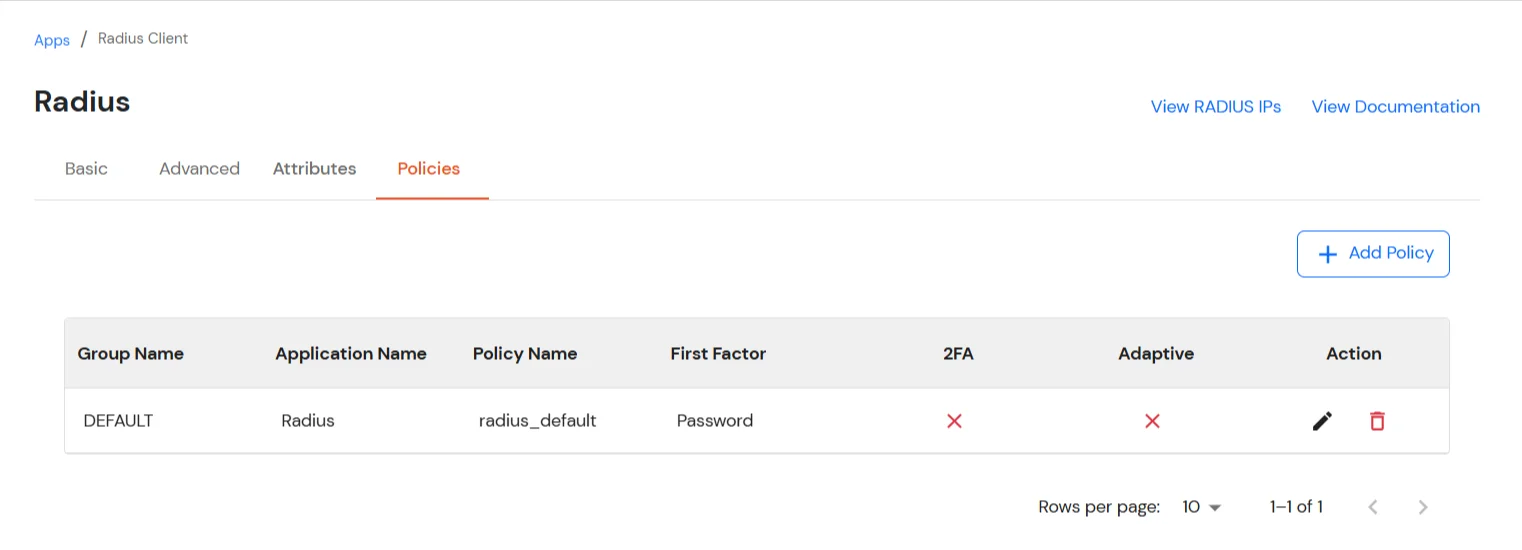
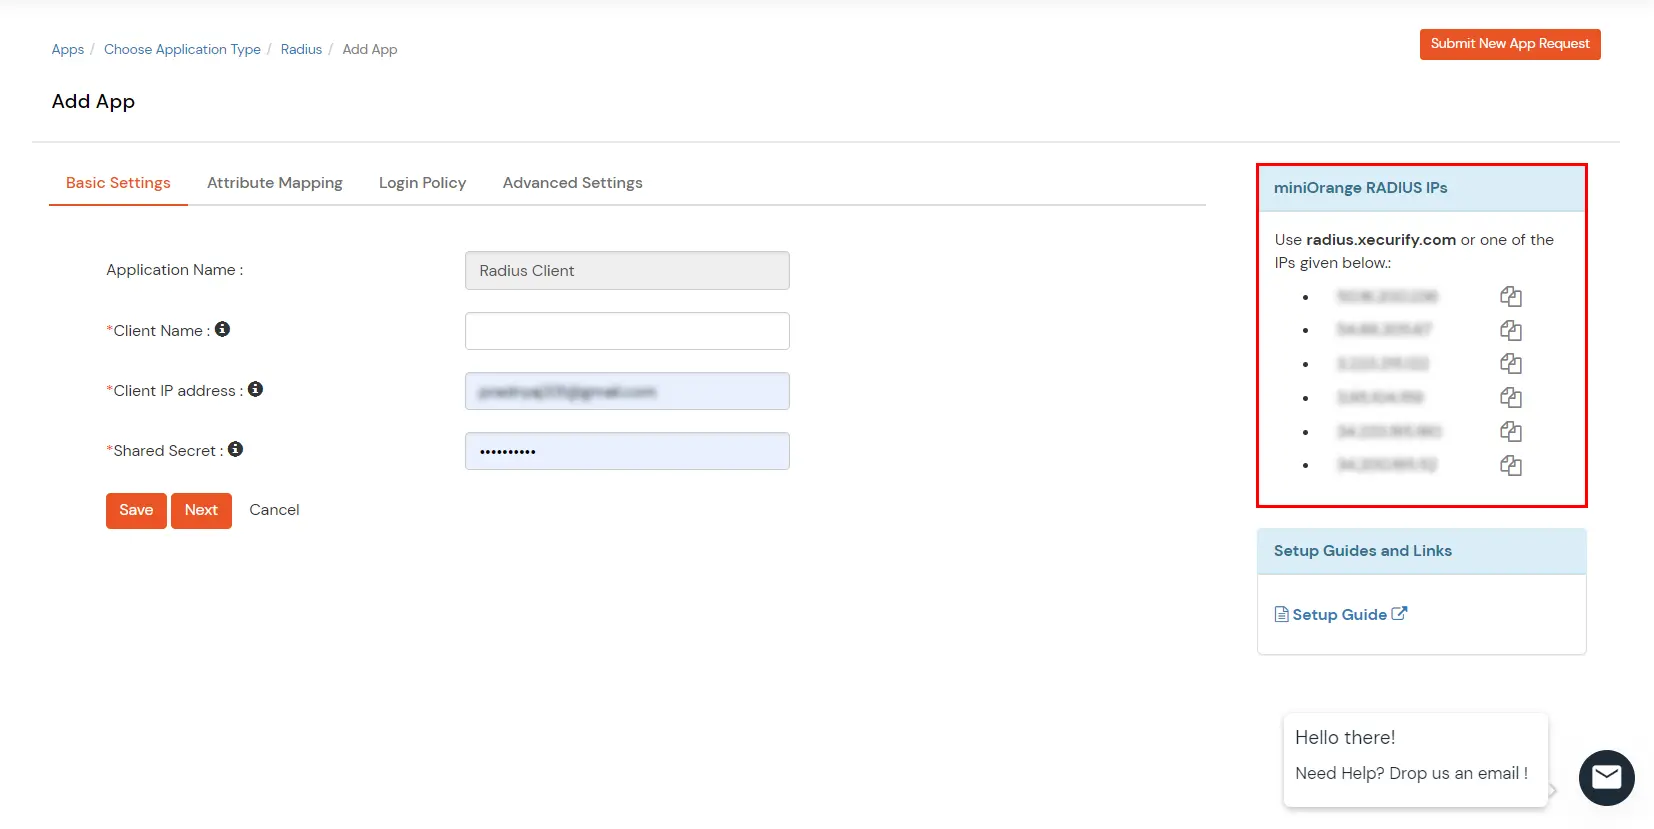
Let’s configure your application now.

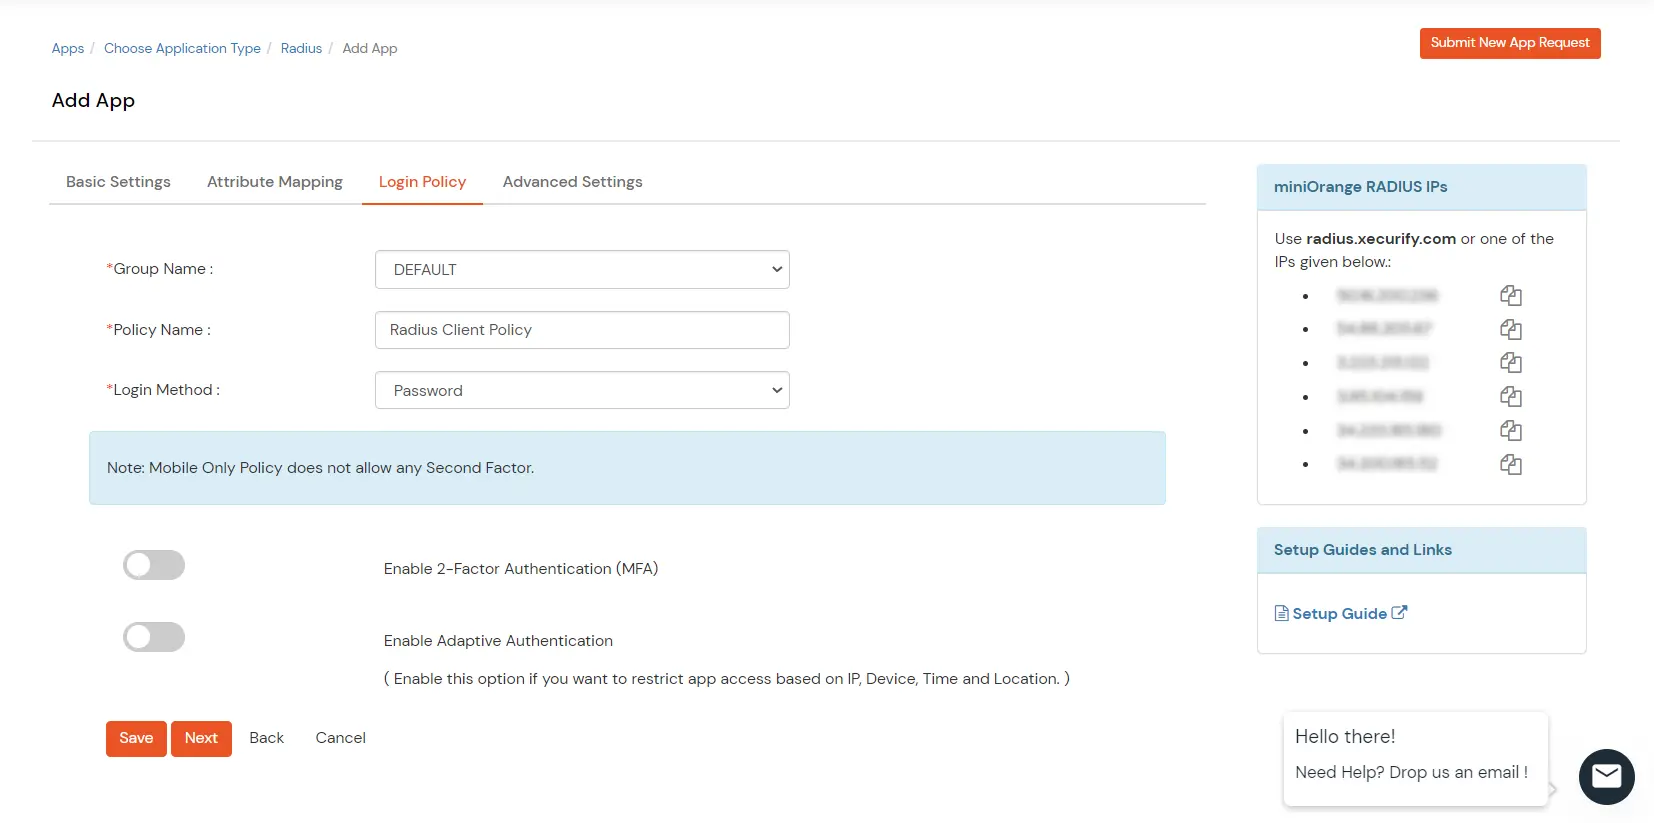
| Display Name | Any name for your reference. |
| Client IP | The IP address of the VPN server, which will send the RADIUS authentication request. |
| Shared Secret | Security key. For Eg. "shared-secret" (Keep this with you; you will need to configure the same on VPN Server) |
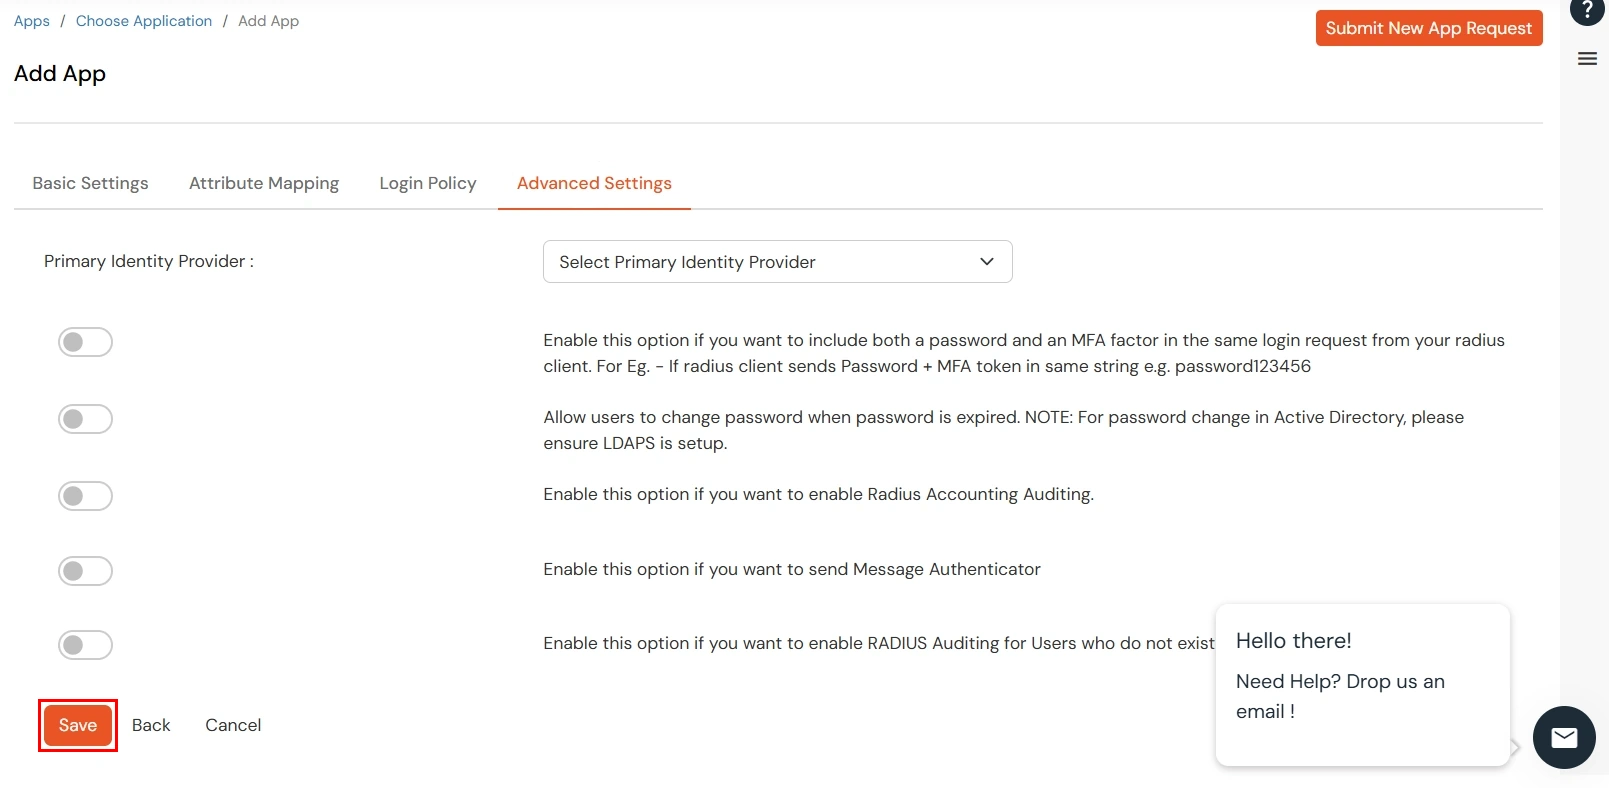
| Primary Identity Provider | Select the default ID source from the dropdown for the application. If not selected, users will see the default login screen and can choose their own IDP. [Choose miniOrange in this case.] |
| Include password and MFA factor in same login request from RADIUS Client | Check this option for clients, which takes a password and the OTP in the same request. Otherwise, keep it unchecked. |
| Allow users to change password when password is expired. | Enables a password-change flow for users whose password has expired. For Active Directory, ensure LDAPS is configured for a secure connection. |
| Log RADIUS Accounting Events | When enabled, logs RADIUS accounting events such as session start, stop, and usage details for auditing and reporting. |
| Enable RADIUS Audit for Invalid Users / Non-Existing Accounts | Logs authentication attempts from unknown or non-existent users for auditing and security analysis. |
| Send Message Authenticator | Sends the Message Authenticator attribute so RADIUS messages include an integrity check and are harder to spoof or tamper with. |
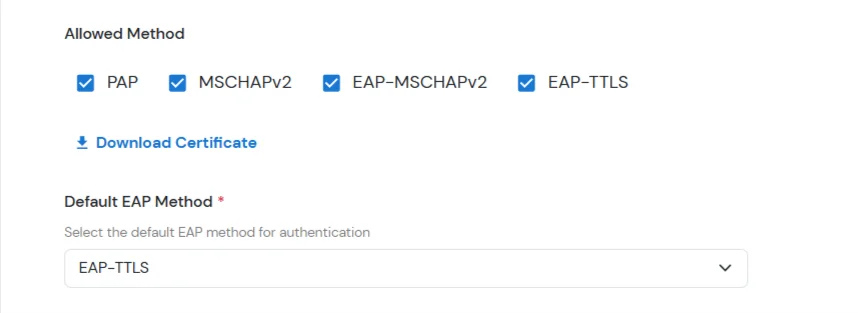
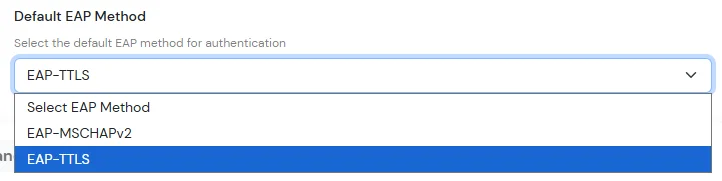
If your application supports EAP-based authentication, complete the following on the same tab:

NOTE: Follow the below steps before testing the connectivity. Open Firewall Ports.