Hello there!
Need Help? We are right here!
Need Help? We are right here!
Search Results:
×miniOrange Identity Broker service solution enables cross protocol authentication. You can configure Auth0 as an IDP for Single Sign-On (SSO) into your applications/websites. Here, Auth0 will act as an Identity Provider (IDP) and miniOrange will act as a broker.
We offer a pre-built solution for integrating with Auth0, making it easier and quick to implement. Our team can also help you set up Auth0 as SAML or OIDC IDP to login into your applications.
miniOrange offers free help through a consultation call with our System Engineers to configure SSO for different apps using Auth0 as IDP in your environment with 30-day free trial.
For this, you need to just send us an email at idpsupport@xecurify.com to book a slot and we'll help you in no time.
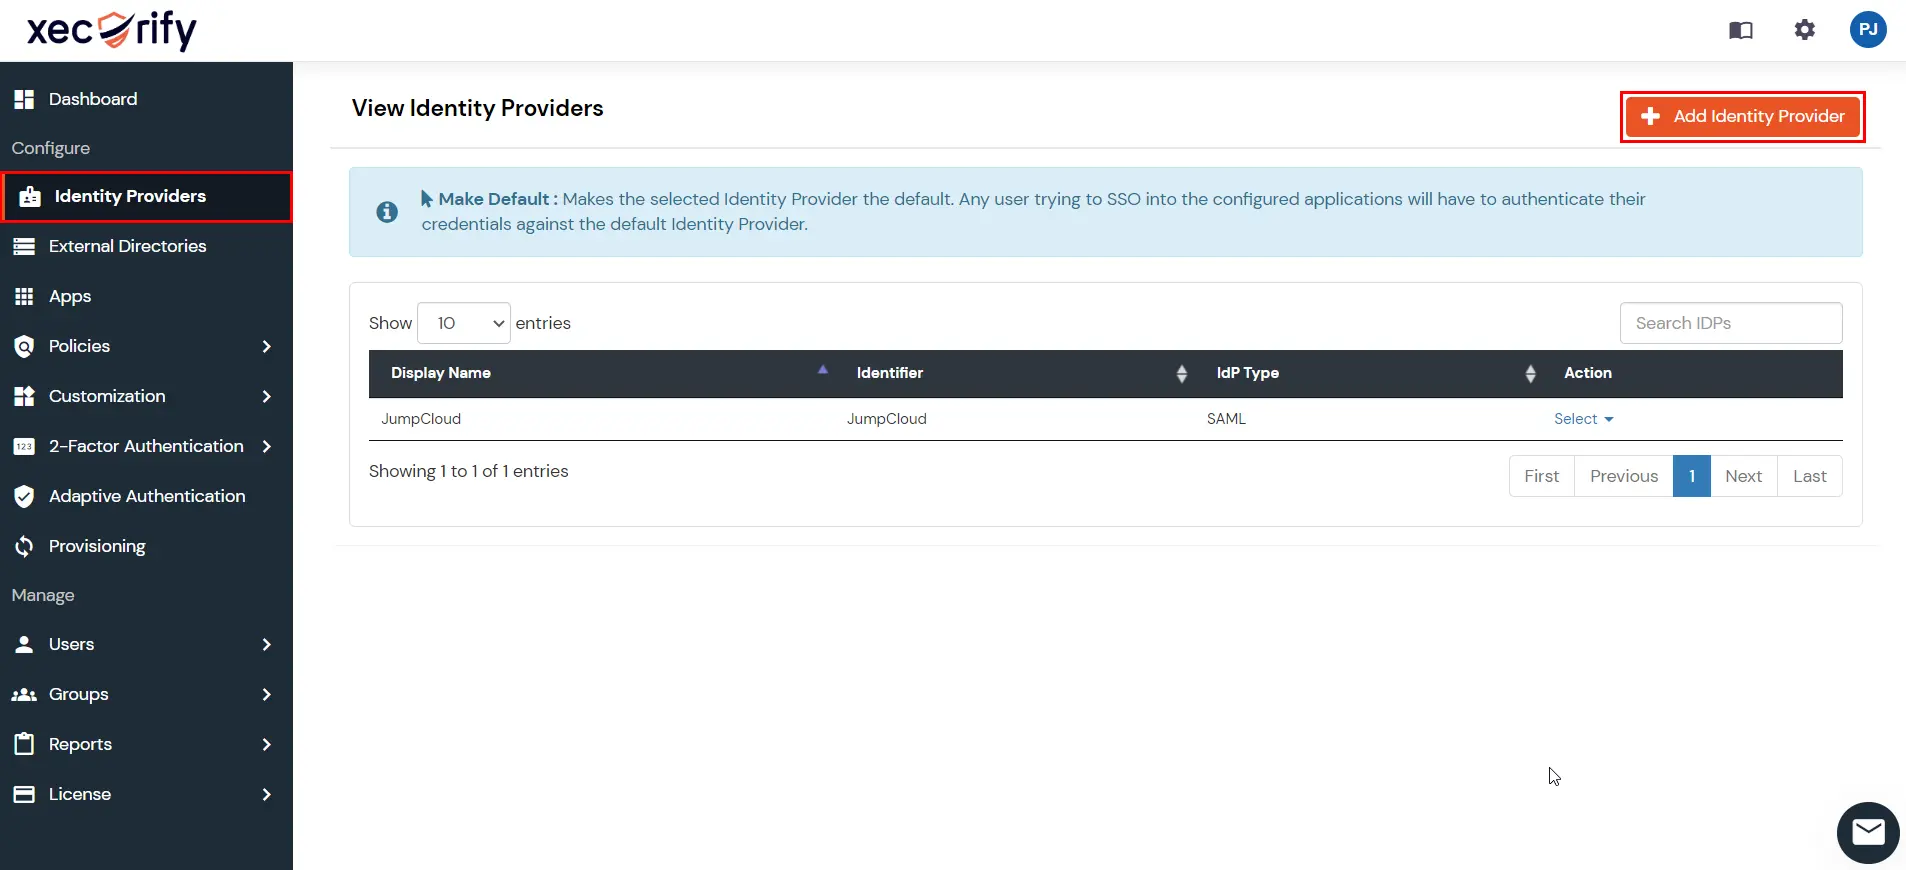
Please make sure your organisation branding is already set under Customization >> Login and Registration Branding in the left menu of the dashboard.
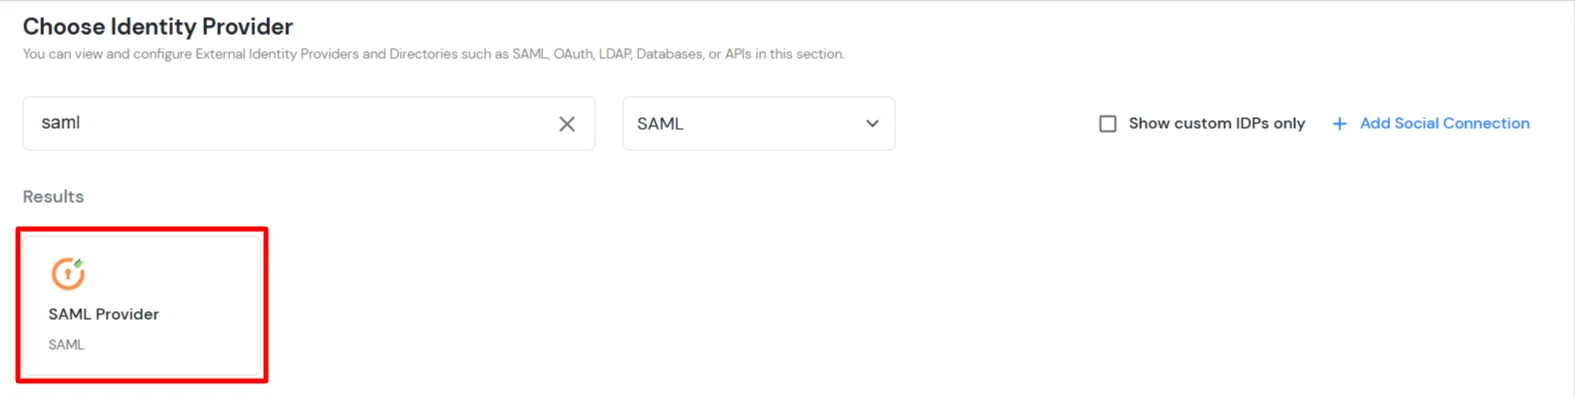
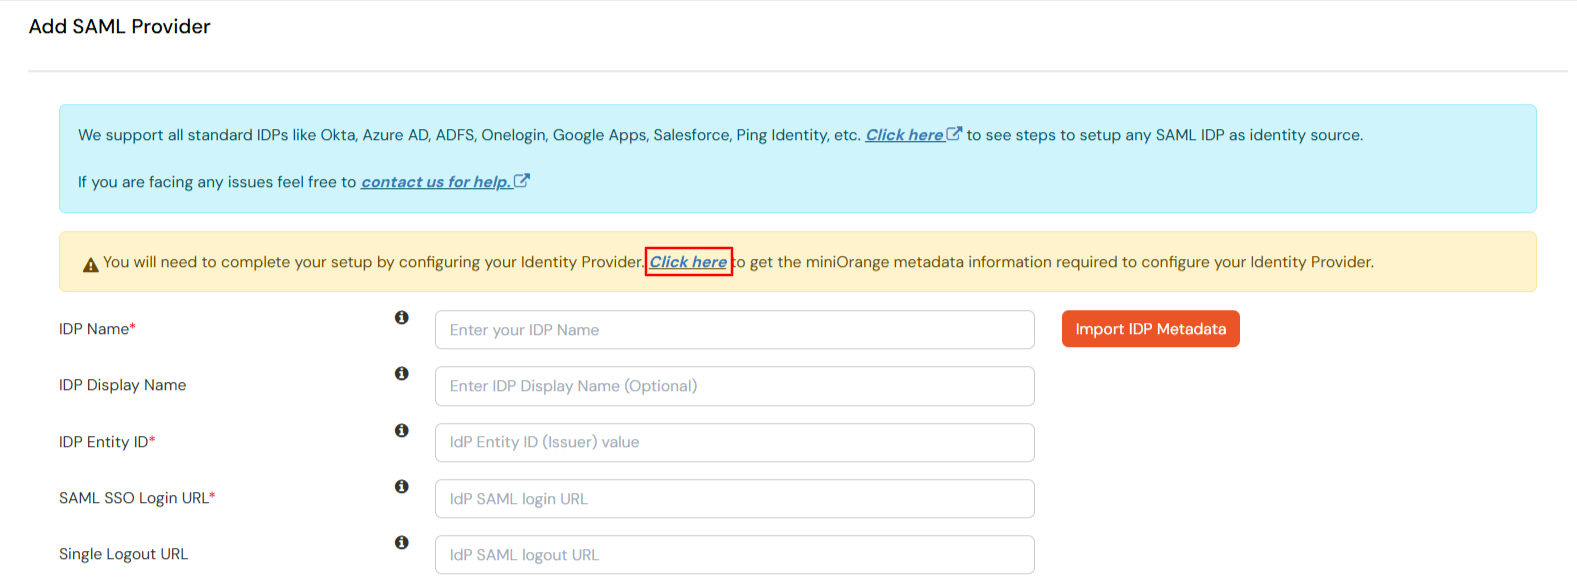
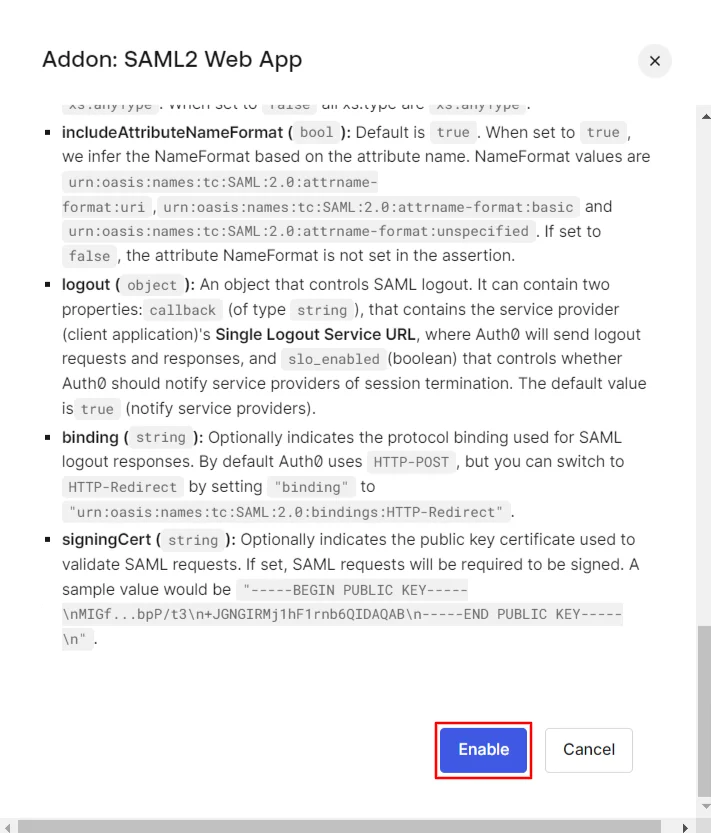
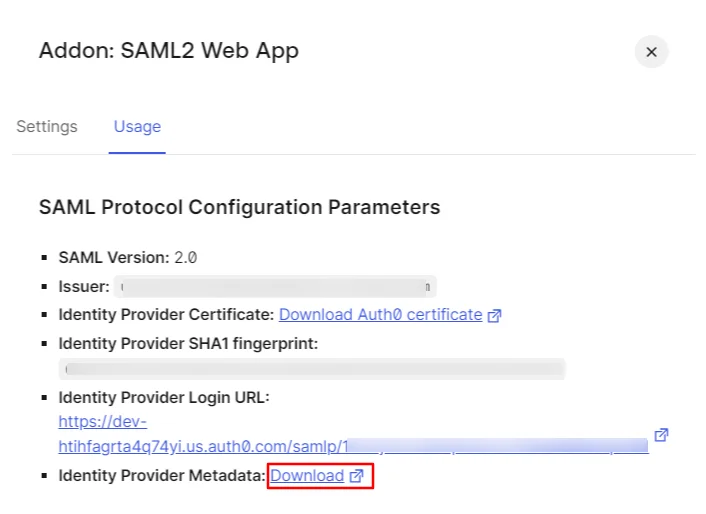
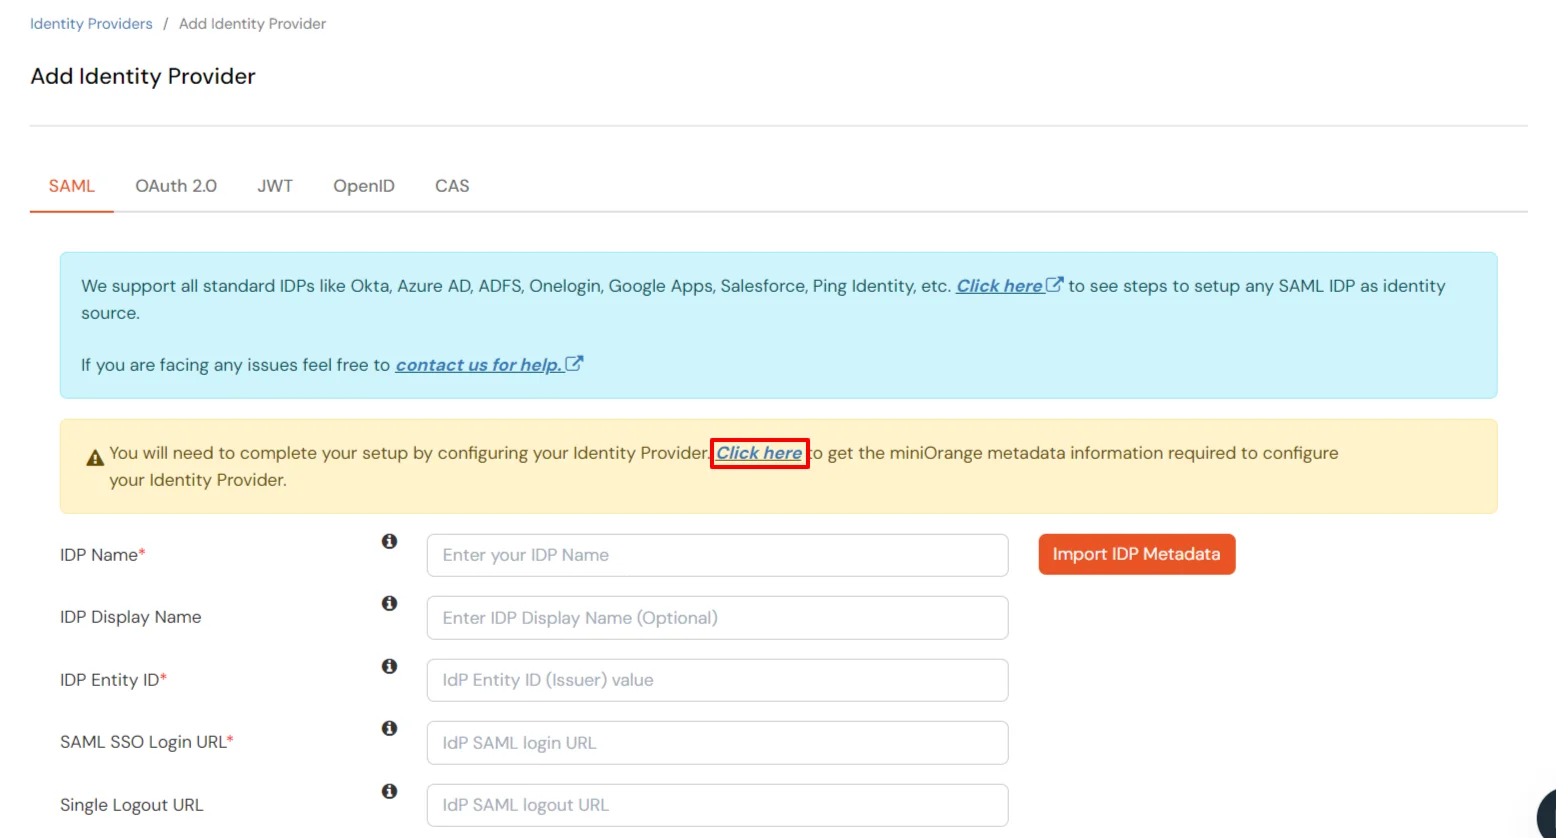
Mentioned below are steps to configure Auth0 as IDP via SAML and OAuth configuration. Follow the steps accordingly based on your requirement (SAML or OAuth).


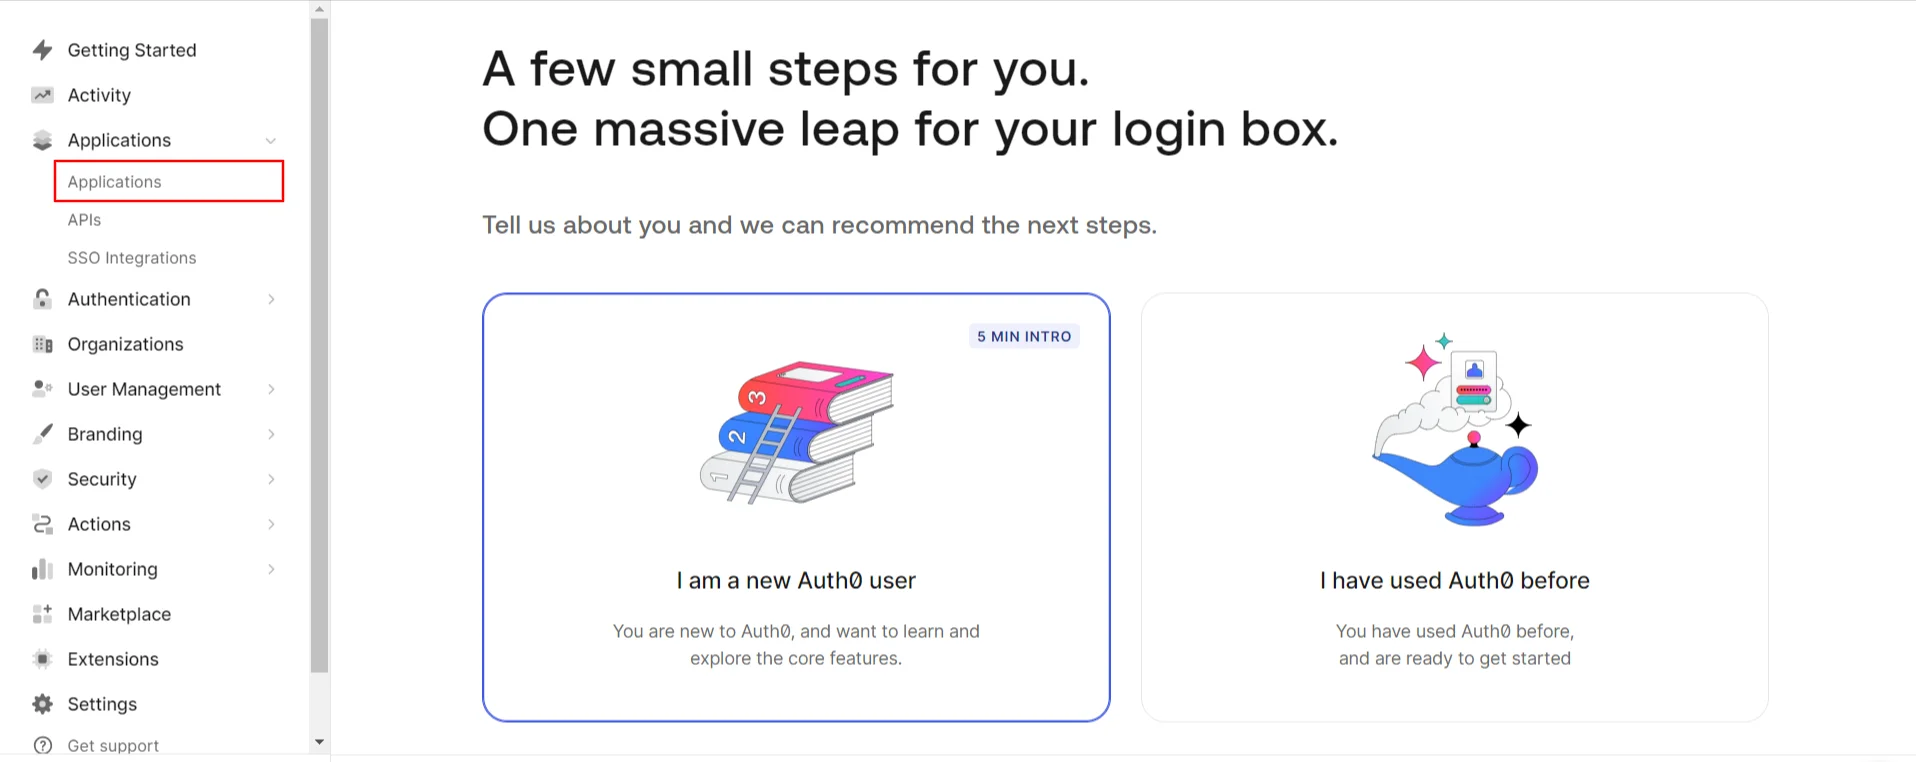
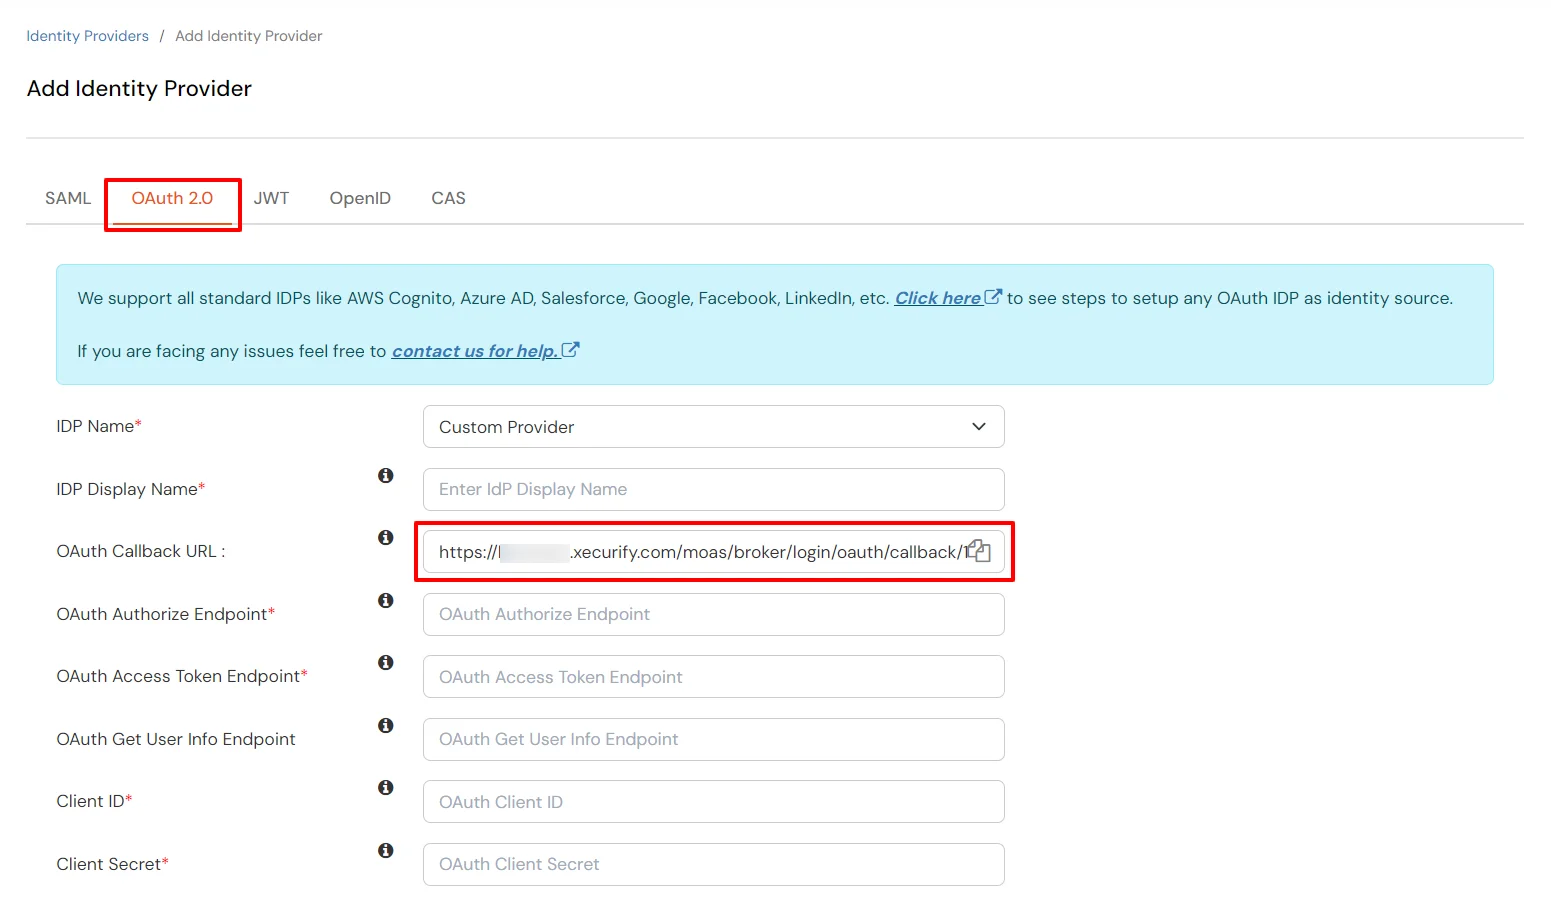
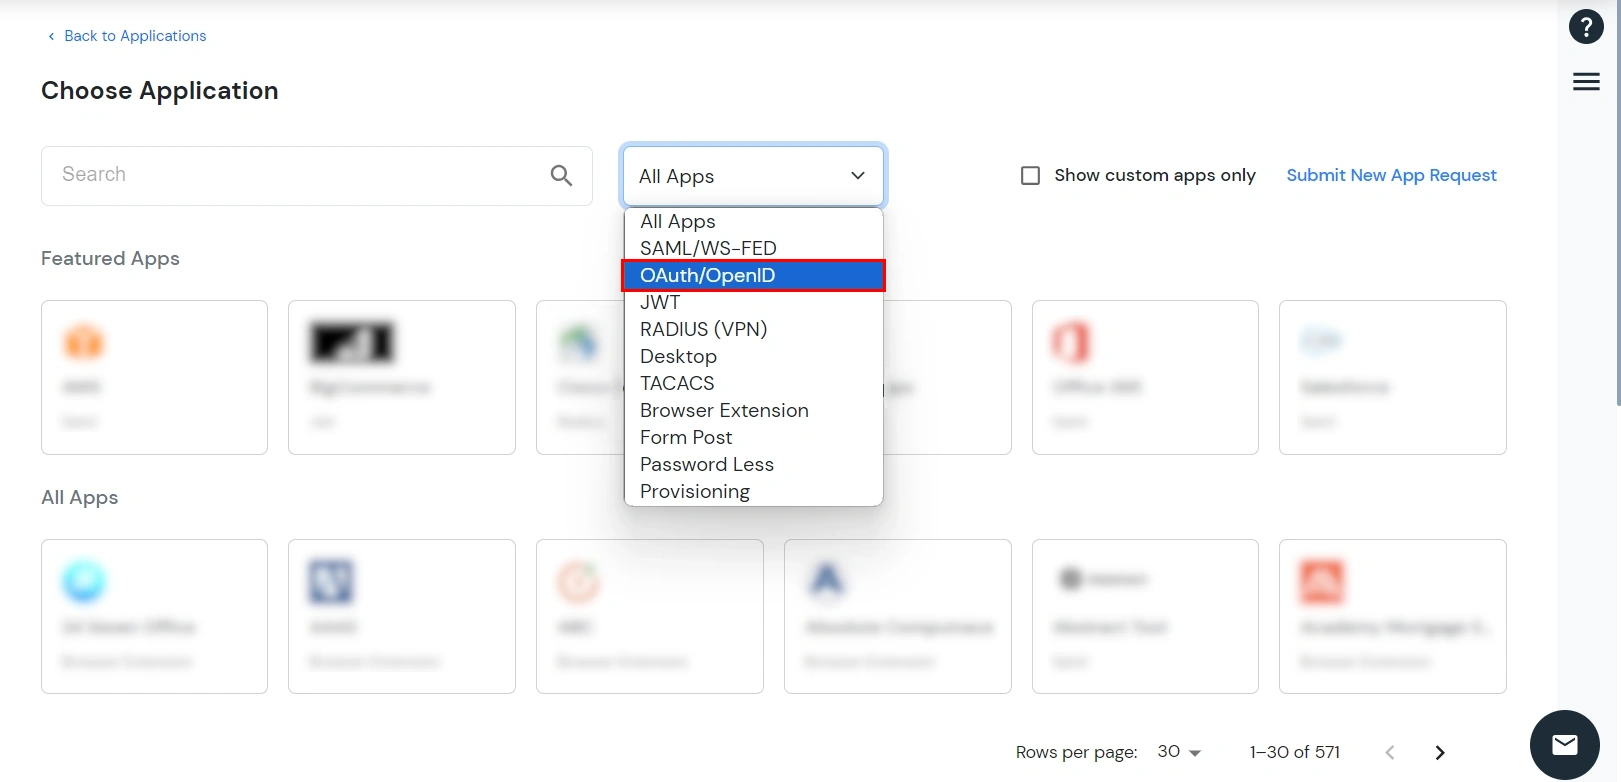
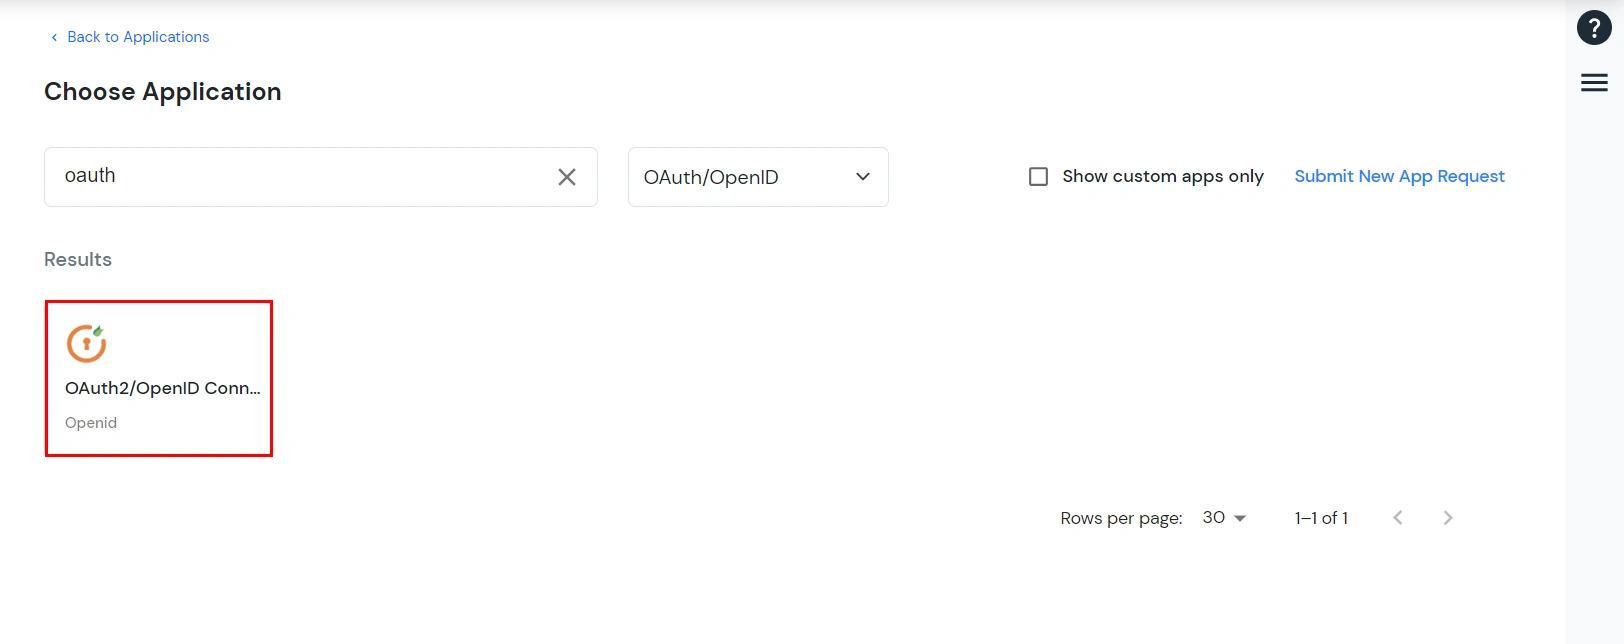
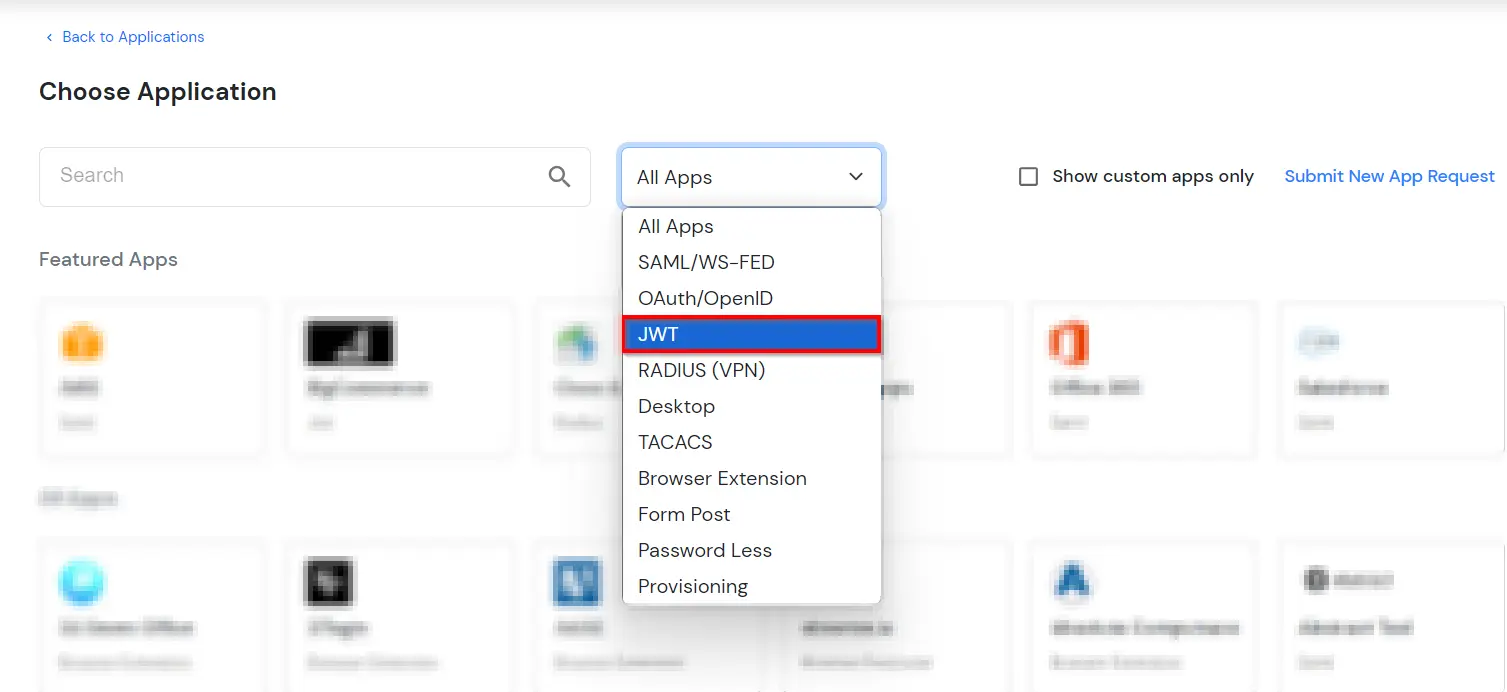
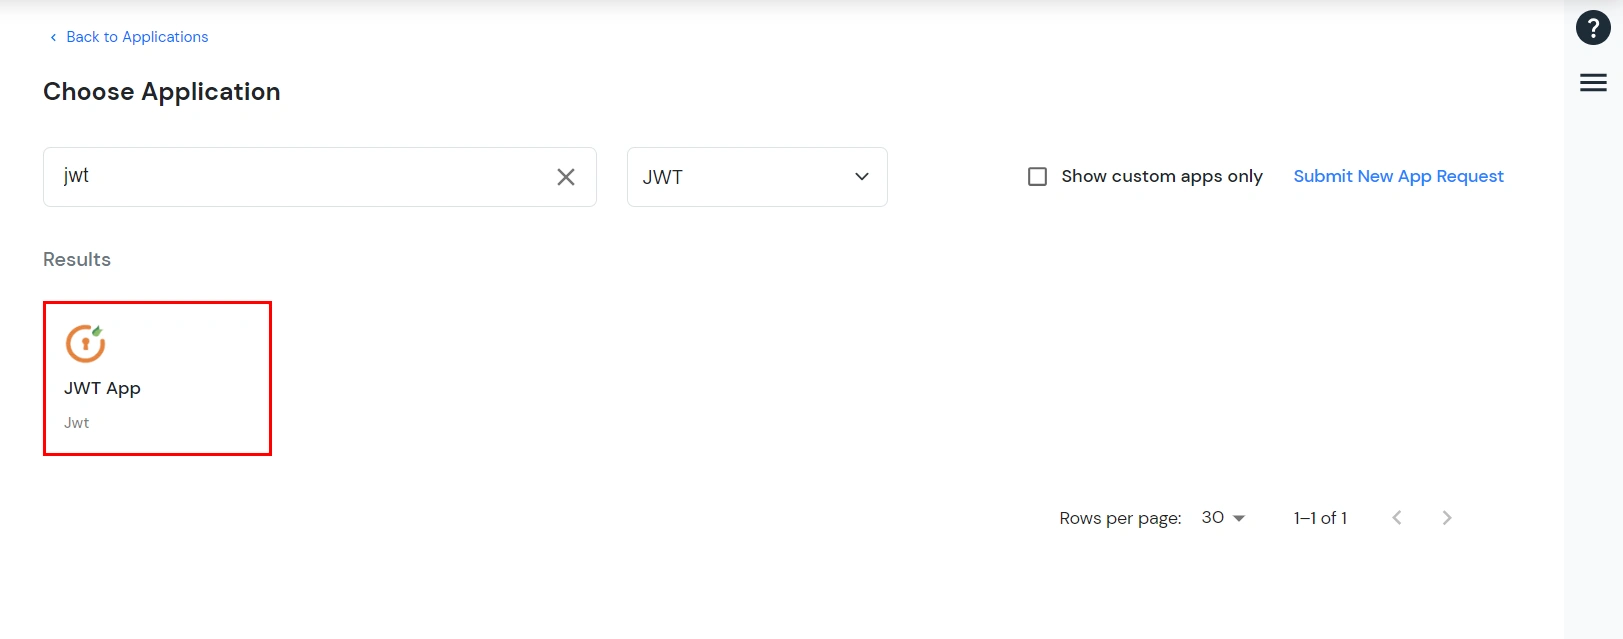
Follow the steps to configure Auth0 as IdP by OAuth configuration.
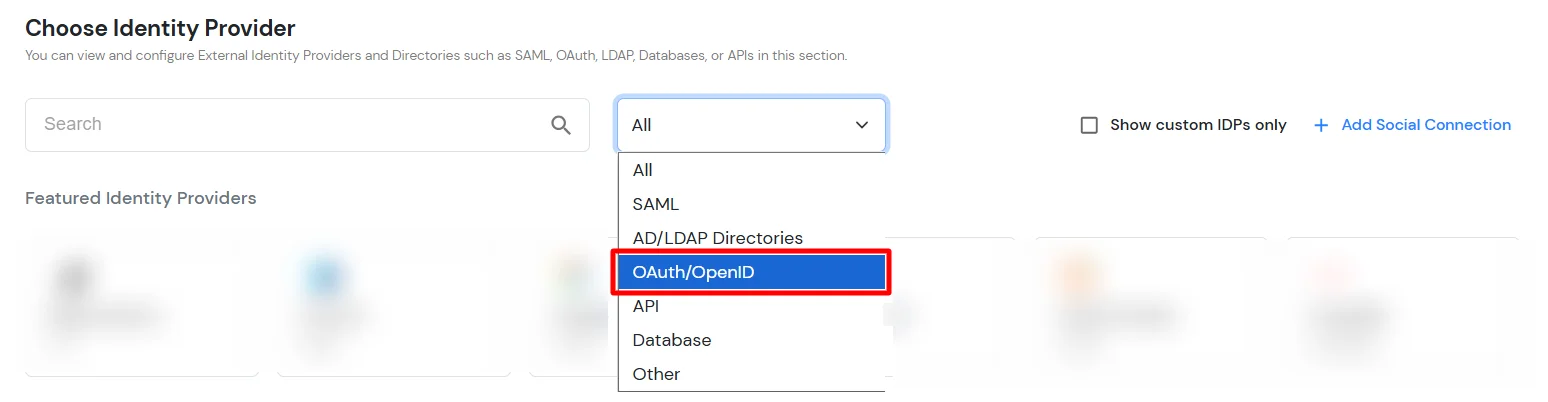
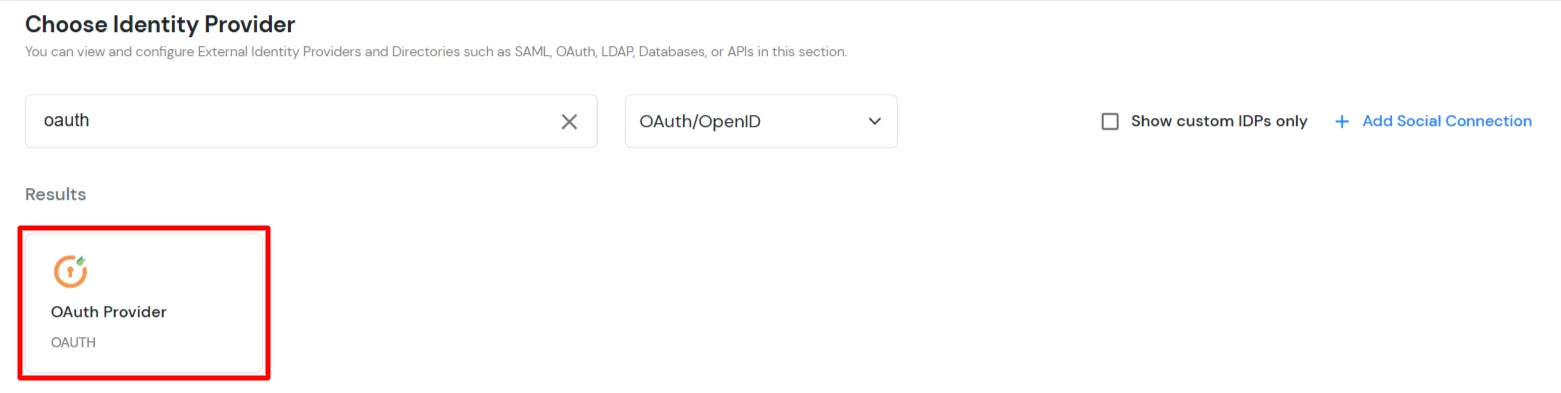
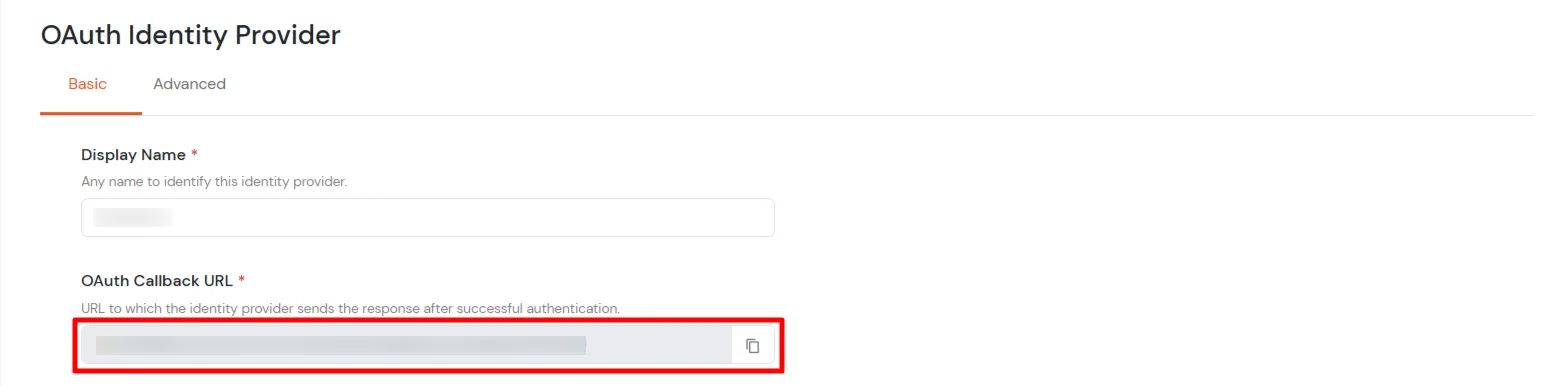
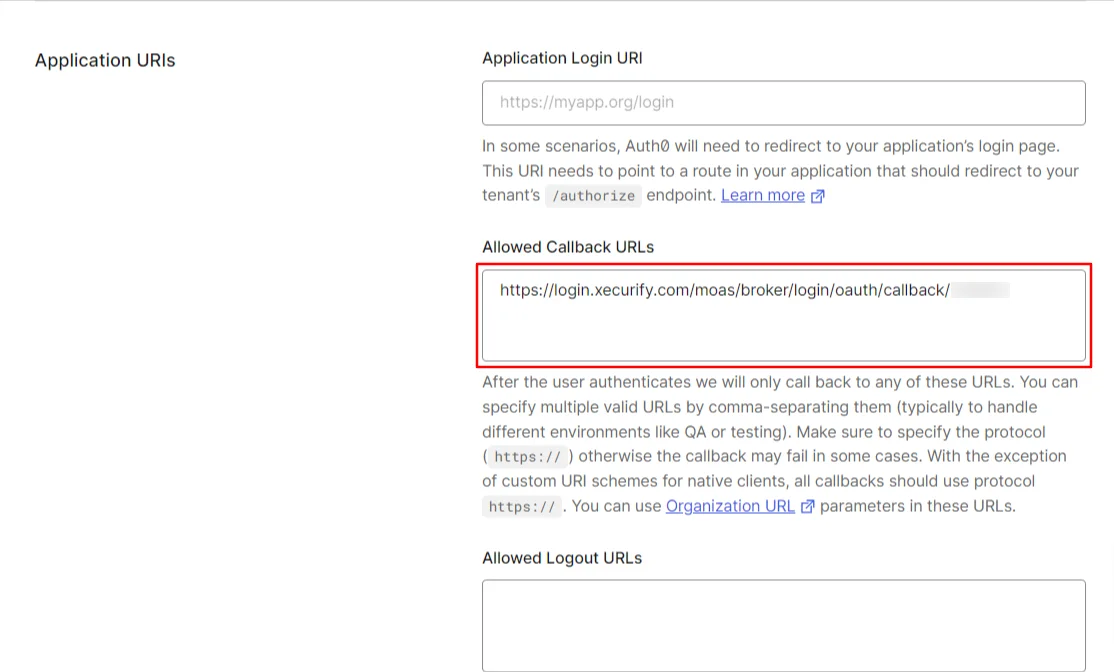
Follow the steps to configure Auth0 as IdP by OAuth configuration.
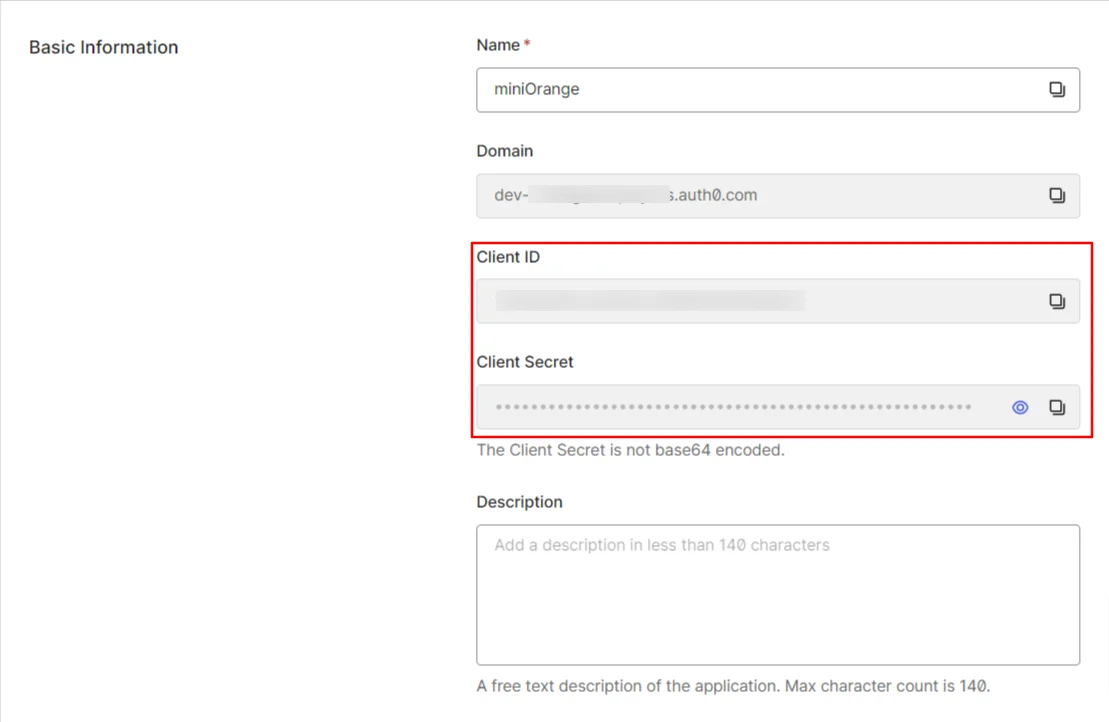
| Display Name | Choose appropriate Name |
| Client ID | From step 1 |
| Client secret | From step 1 |
| Authorization Endpoint | https://{your-base-url}/as/authorization.oauth2 | Token Endpoint | https://{your-base-url}/as/token.oauth2 | User Info Endpoint (optional) | https://{your-base-url}/idp/userinfo.oauth2 |
| Scopes | auto |
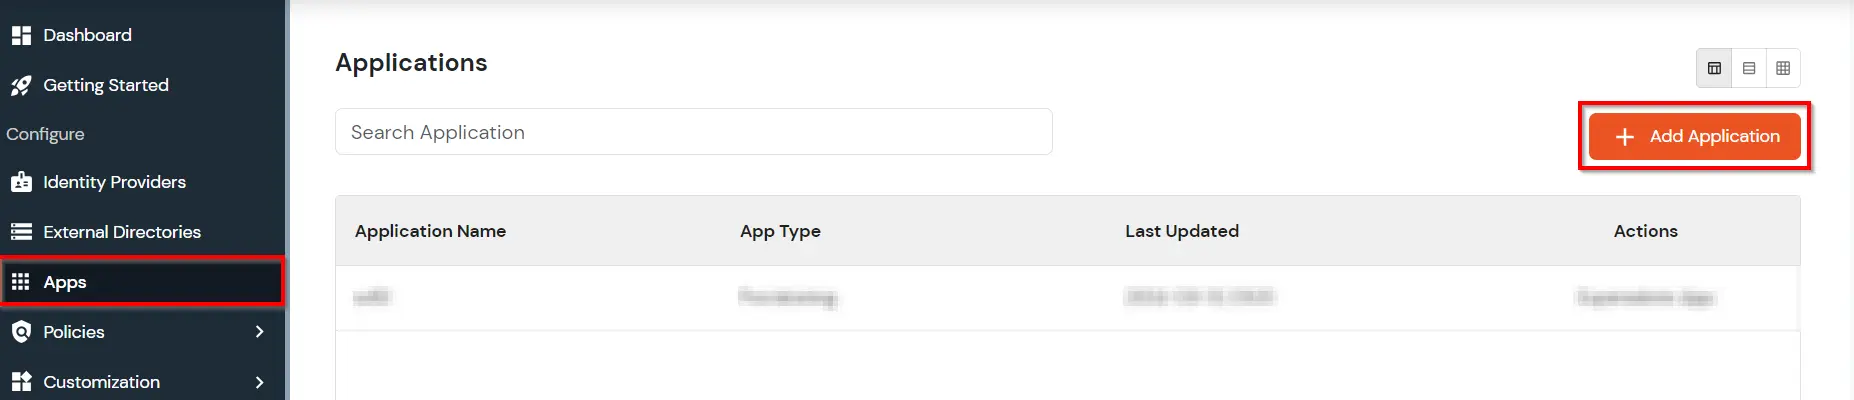
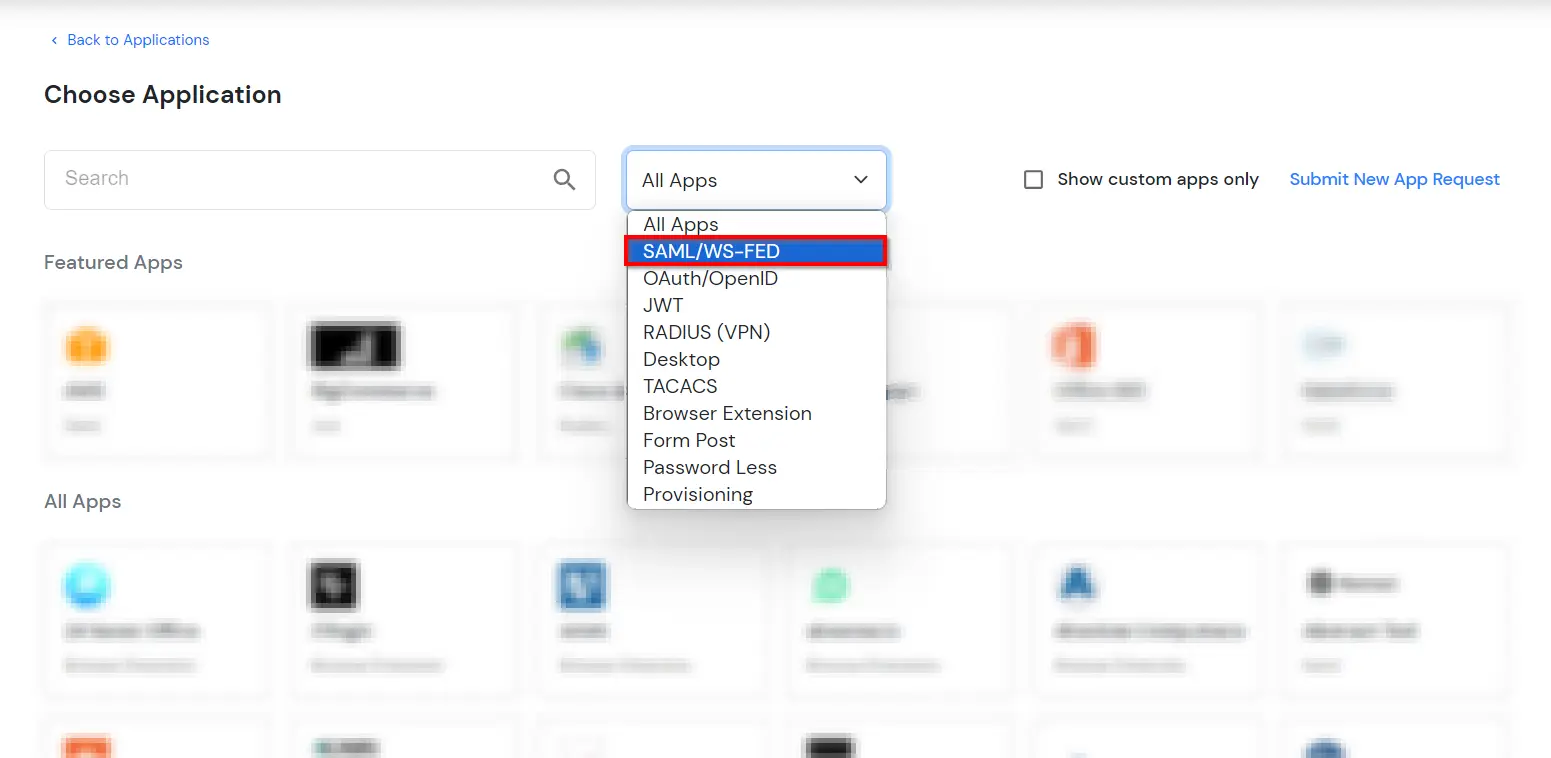
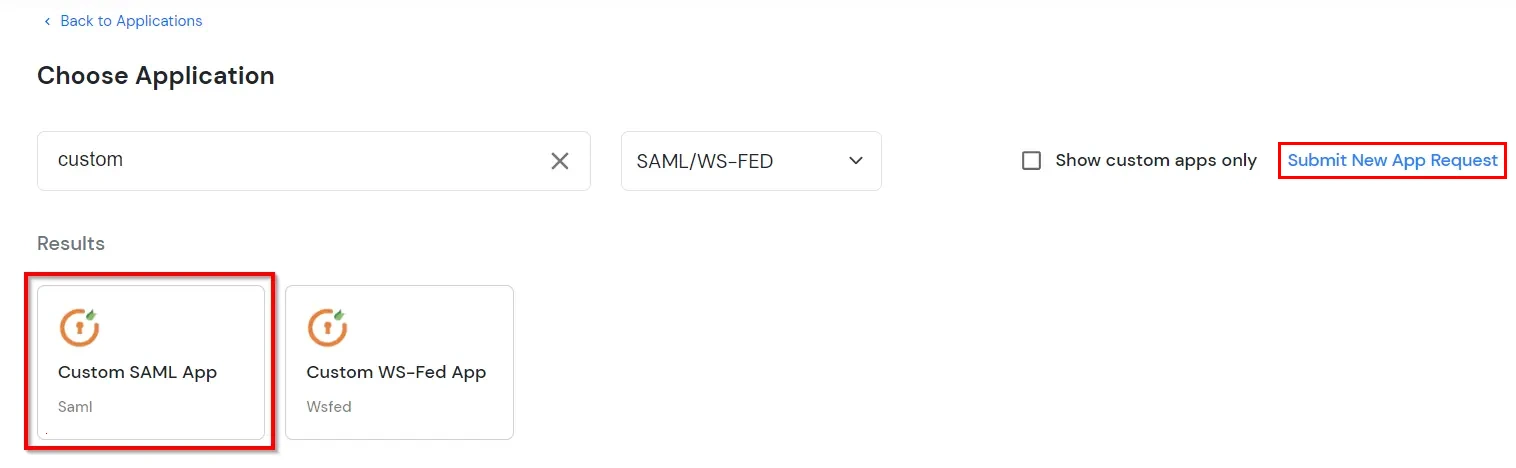
If you have already configured your application in miniOrange you can skip the following steps.
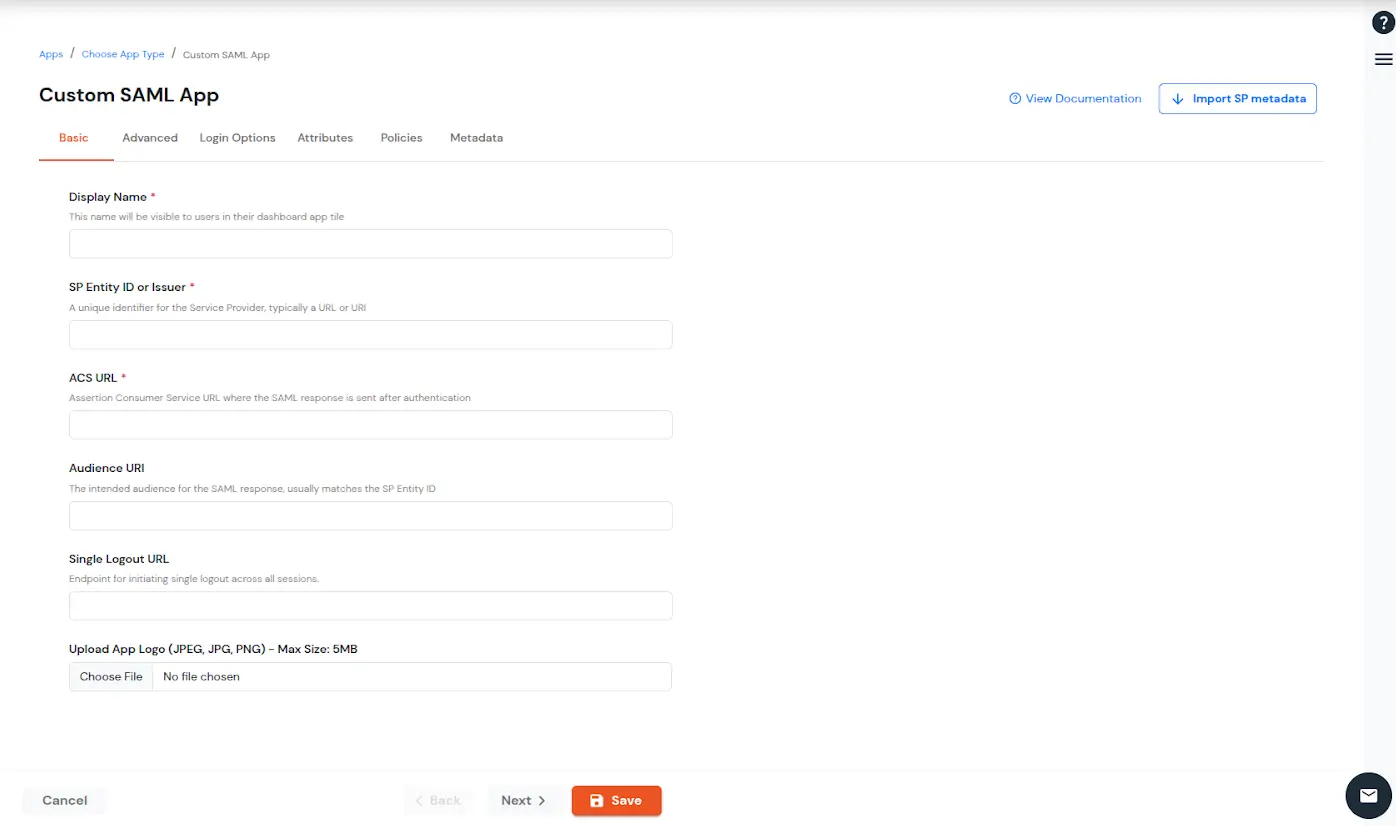
| Display Name (required) | Enter the Display name for your app as per your preference. |
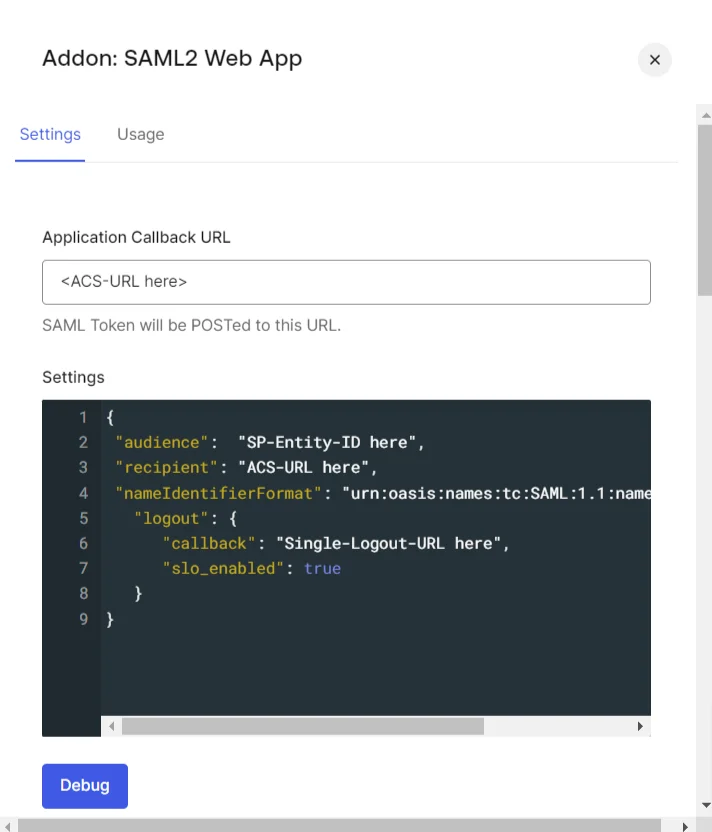
| SP Entity ID or Issuer (required) | Is used to identify your app against the SAML request received from SP. The SP Entity ID or Issuer can be in either URL or in String format. |
| ACS URL or Assertion Consumer Service URL (required) | Defines where the SAML Assertion should be sent after authentication. Make sure the ACS URL is in the format: https://www.domain-name.com/a/[domain_name]/acs |
| Audience URL | As the name suggests, specifies the valid audience for SAML Assertion. It is usually the same as SP Entity ID. If Audience URL is not specified separately by SP, leave it blank. |
| Single Logout URL | The URL where you want the logout request to be consumed and where your users should be redirected after single logout from the applications. |
| Upload App Logo | Upload a logo for your application. |
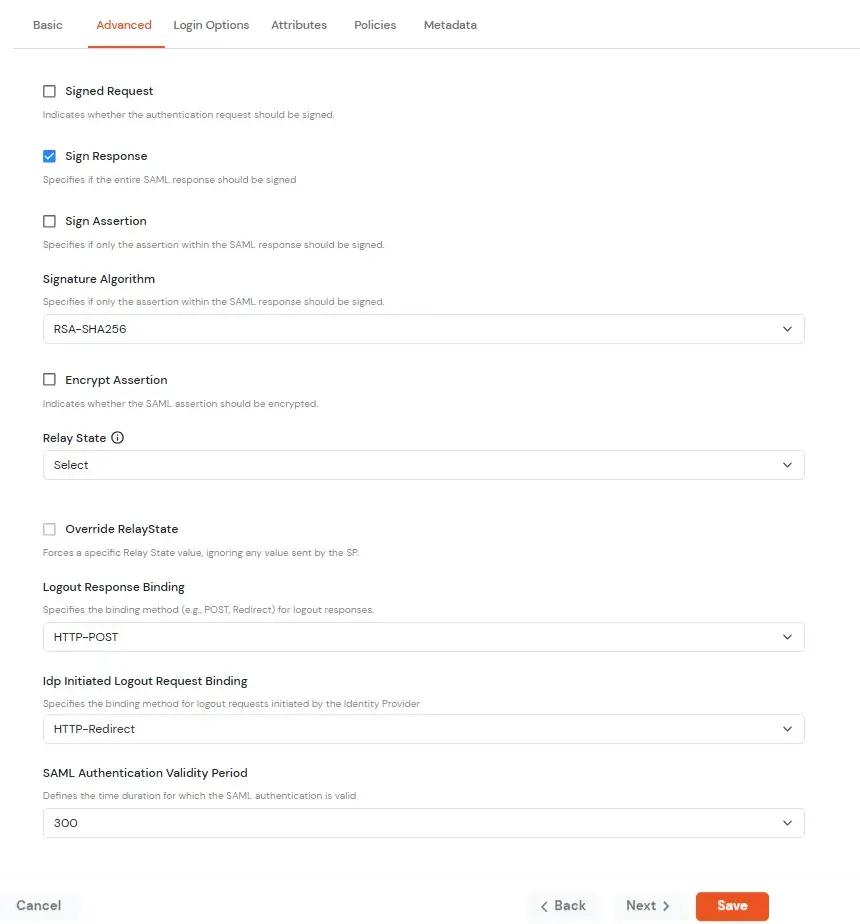
| Signed Request | Enable this to sign the saml request sent by SP. Provide the X509 certificate or upload the certificate. |
| Sign Response | Enable this if you want the entire SAML response to be signed. |
| Sign Assertion | Enable this if you want only the assertion within the SAML response should be signed. |
| Signature Algorithm | Select the algorithm that will be used to sign the SAML request/response. |
| Encrypt Assertion | Select this if you want to encrypt the assertion in SAML response and provide the algorithm and certificate for encryption. |
| Relay State | Enter the URL where you want the user to redirect after sign in to the application. |
| Override Relay state | Enable this to override the default relay state of the SP. |
| Logout Response Binding | A Logout Response is sent in reply to a Logout Request from SP. It could be sent by an Identity Provider or Service Provider. |
| IdP initiated Logout Request Binding: | A Logout Response is sent in reply to a Logout Request from the IdP dashboard. It could be sent by an Identity Provider or Service Provider.
|
| SAML Authentication Validity Period | The time for which the authentication should be considered valid and the user should be able to perform SSO. After that, the user will have to sign in again. |
| Enable Shared Identity | This feature lets you control whether a specific application can be accessed by shared user or not. |
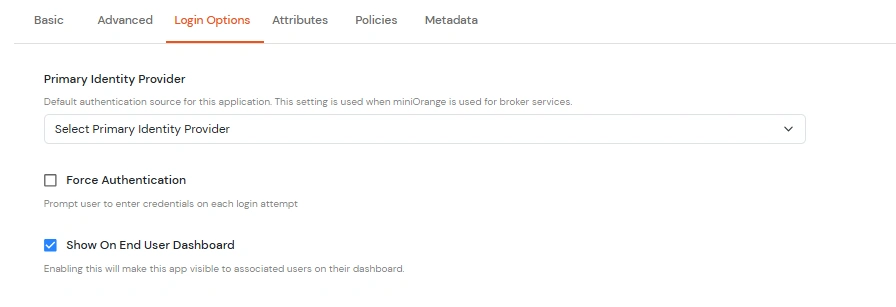
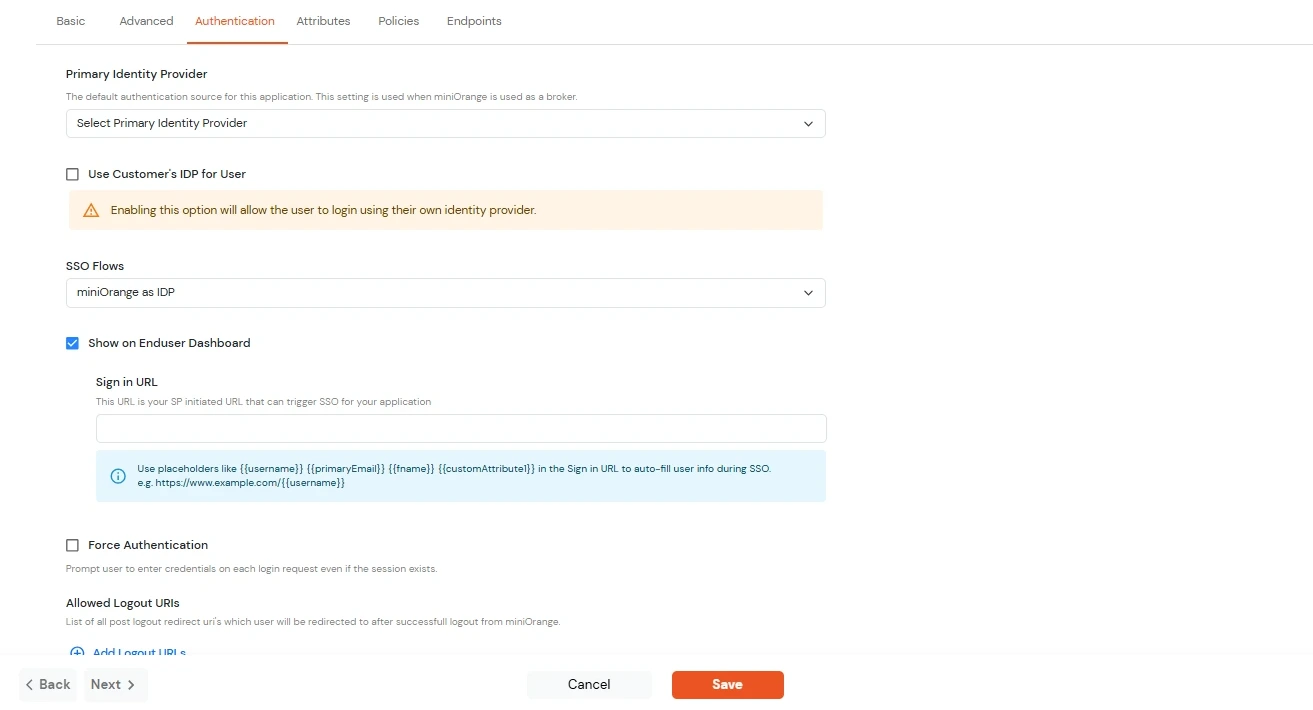
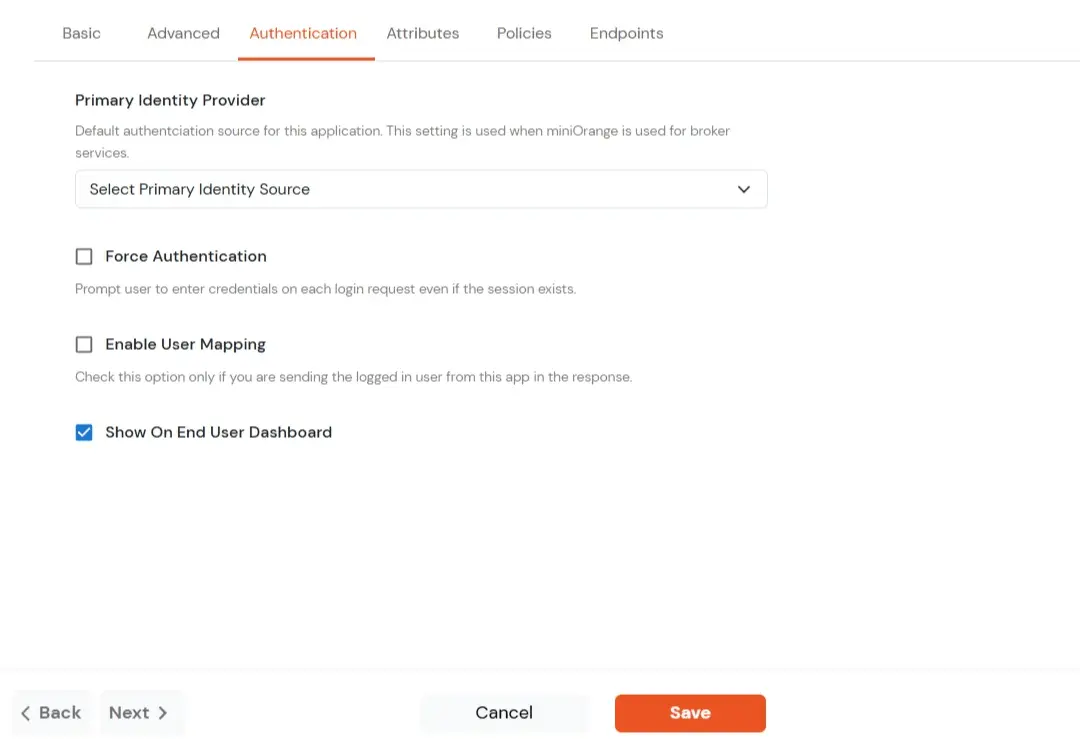
| Primary Identity Provider | Select the identity source from where you want the authentication to happen. You will see the list of all configured sources. |
| Force Authentication | Enable this to enforce authentication on each request to access the application. |
| Show On End User Dashboard | Disable this if you do not want the app to be visible for all users on end user dashboard. |
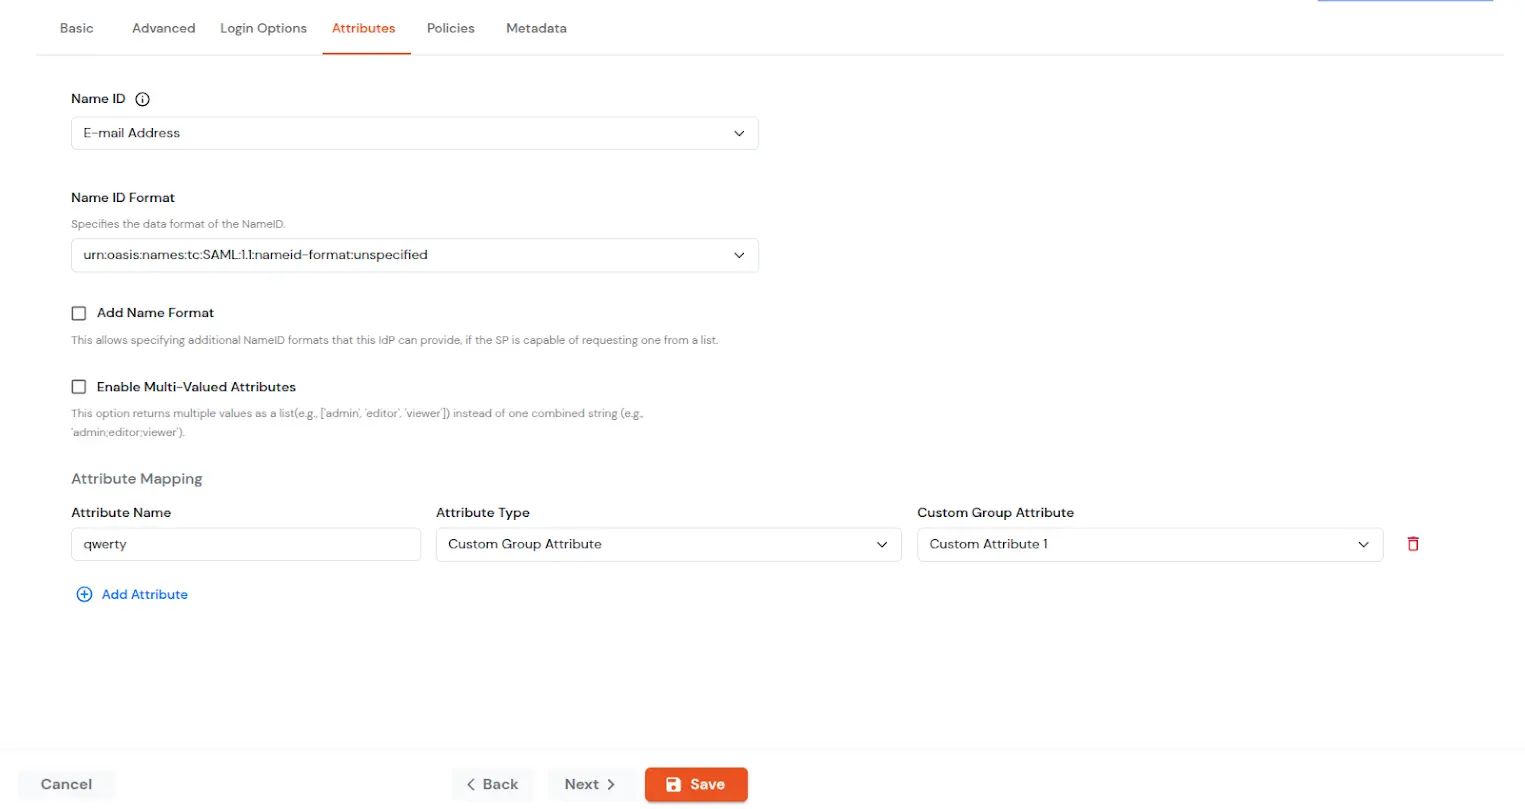
| NameID | NameID is the unique identifier for the authenticated user included in the SAML assertion. It allows the Service Provider to recognize and map the user to an account. Generally, NameID is a username or Email Address. |
| NameID Format | Defines what type of identifier is used in the NameID (e.g., email, persistent, transient) so the SP can correctly map the user. If the SP does not request a specific format, the IdP can leave it unspecified and use a default. |
| Add Name Format | Name Format defines how attribute names are represented in a SAML assertion (e.g., as simple strings or URIs). It helps the SP correctly interpret attribute naming and ensures consistency between IdP and SP. |
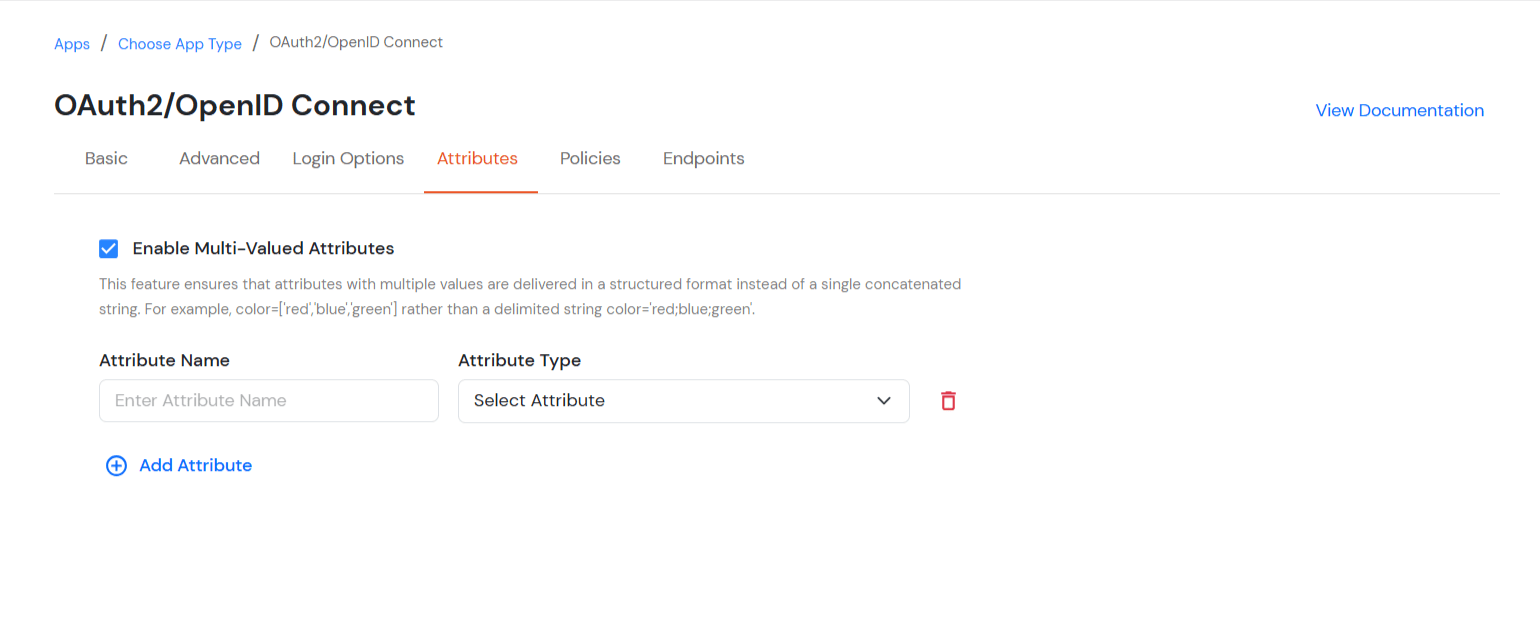
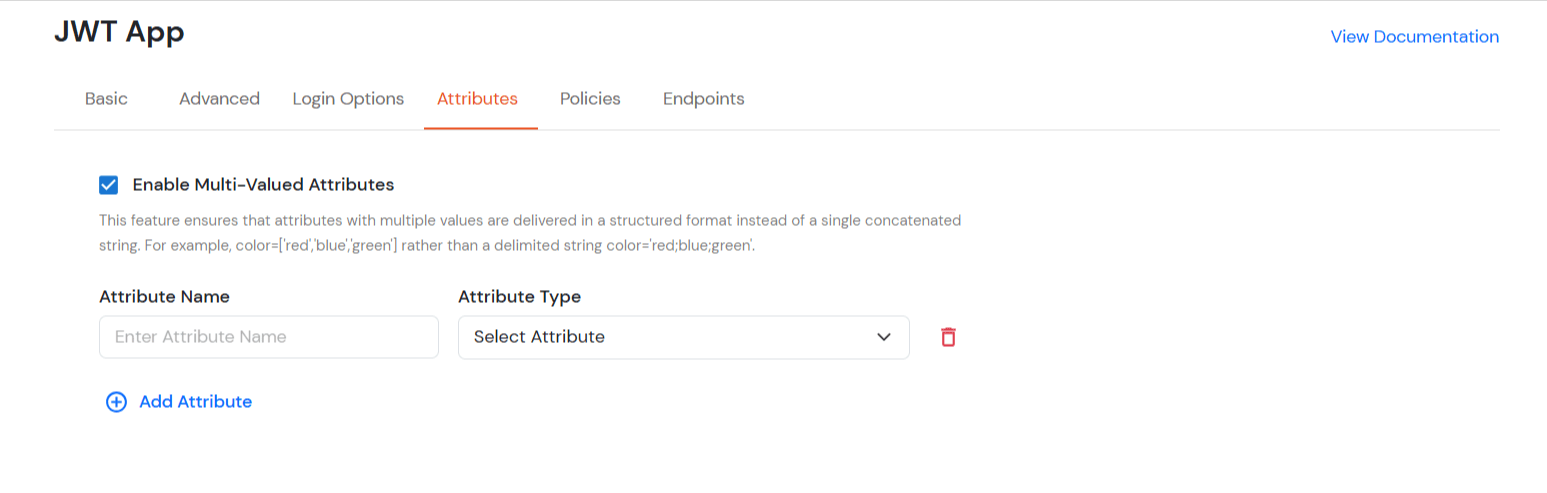
| Enable Multi-Valued Attributes | Enabled:Commas (,) and semicolons (;) are treated as separators, so the attribute is split into a clean list. Example: roles = ['admin', 'editor', 'viewer']. Disabled:Commas and semicolons are not treated as separators, so the attribute stays as one combined string. Example: roles = "admin;editor;viewer". |
| Attribute Mapping | You can Add Attributes to be sent in SAML Assertion to SP. The attributes include user’s profile attributes such as first name, last name, full name, username, email, custom profile attributes, and user groups, etc. |
| Display Name | Enter the Display Name (i.e., the name for this application). |
| Redirect URL | Enter the Redirect URL. Make sure it follows this format: https://<mycompany.domain-name.com> |
| Client ID | Auto-generated. Click the copy icon to use it in your application. |
| Client Secret | Client Secret is hidden by default. Click the eye icon to reveal it and use the clipboard icon to copy it. |
| Subject (Optional) | Select an attribute from the dropdown list. |
| Description (Optional) | Add a description if required. |
| Upload App Logo (Optional) | Upload an app logo (Optional). The app will be shown in the end-user dashboard with the logo that you configure here. |
| Primary Identity Provider | Select the default ID source from the dropdown for the application. If not selected, users will see the default login screen and can choose their own IDP. [Choose miniOrange in this case.] |
| SSO FLows | Select the desired SSO flow from the dropdown, such as miniOrange as IDP, miniOrange as Broker, or miniOrange as Broker with Discovery Flow. |
| Show on Enduser Dashboard | Enable this option if you want to show this app in the end-user dashboard. |
| Force Authentication | If you enable this option, users will have to log in every time, even if their session already exists. |
| Allowed Logout URIs | Click the Allowed Logout URIs link to add a list of post-logout redirect URIs. Users will be redirected to one of these URIs after a successful logout from miniOrange. |
| Single Logout Enabled | Enable this option to send logout requests to other applications when logging out from this app. |
| Sign in URL | You can include user attributes in the sign-in URL using placeholders like {{username}}, {{primaryEmail}}, {{customAttribute1}}, etc. These placeholders will be dynamically replaced with the actual user values during the IdP-initiated SSO flow. You can generate url using following attributes: username, primaryEmail, alternateEmail, fname, lname, primaryPhone and customAttribute1. The url could be like this https://<sso-url>>?username={{username}}
https://<sso-url>>?username={{username}}&email={{primaryEmail}}https://<sso-url>>/{{customAttribute1}}/{{customAttribute2}}/?username={{username}} |
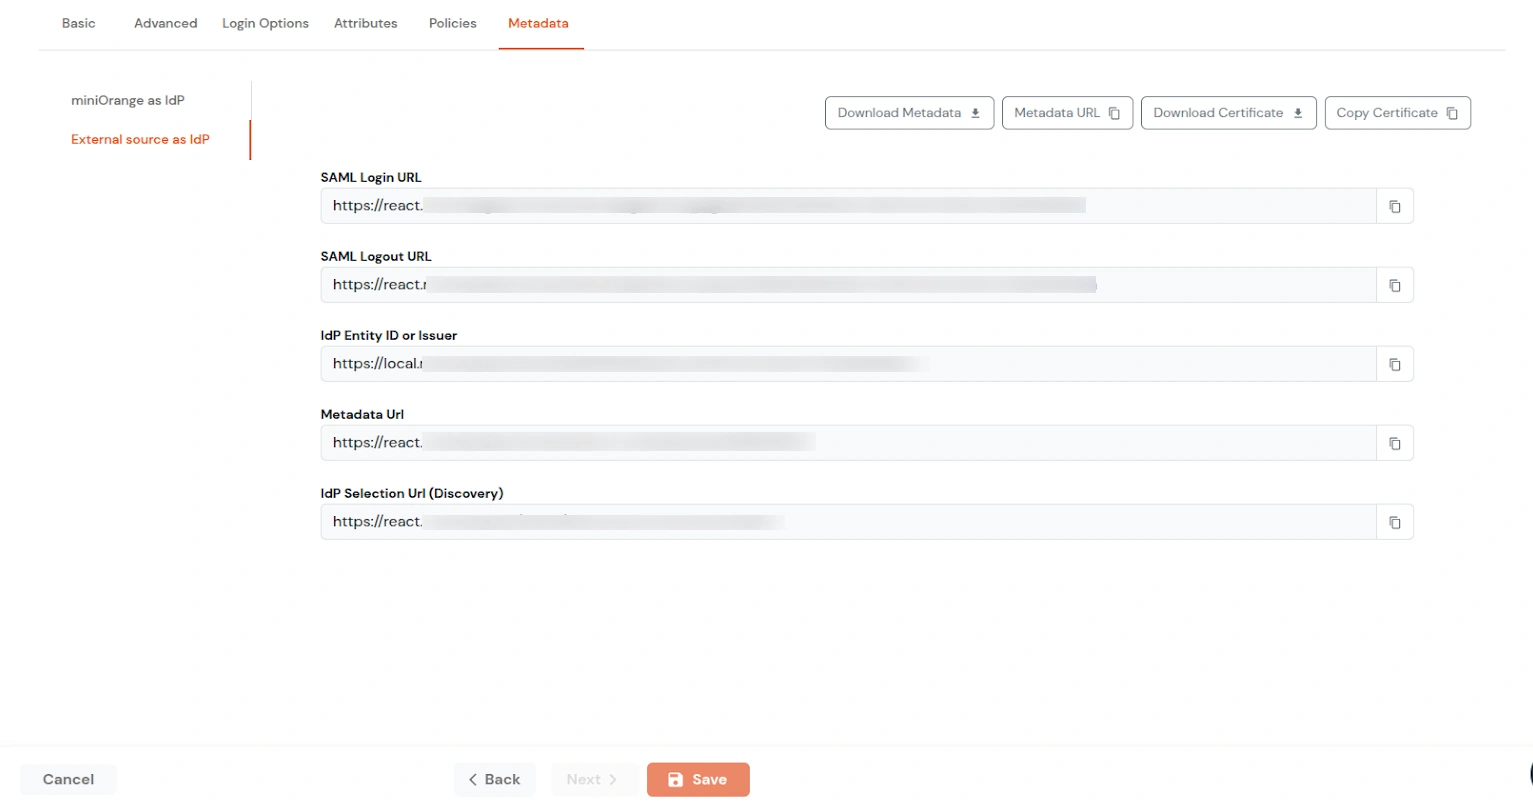
https://<your-company-name>.xecurify.com/moas/idp/openidsso ]https://<your-company-name>.xecurify.com/moas/rest/oauth/token ]| iss | https URI that indicates the issuer |
| sub | identifier of the user at the issuer |
| aud | client_id of the requesting client |
| nonce | the nonce parameter value received from the client |
| exp | expiration time of this token |
| iat | time when this token was issued |
| auth_time | time the authentication happened |
| at_hash | the first half of a hash of the access token |
https://<your-domain>.xecurify.com/moas/api/oauth/getuserinfo ] Required in case of OAuth Onlyhttps://<your-domain>.xecurify.com/moas/idp/oidc/logout?post_logout_redirect_uri ] :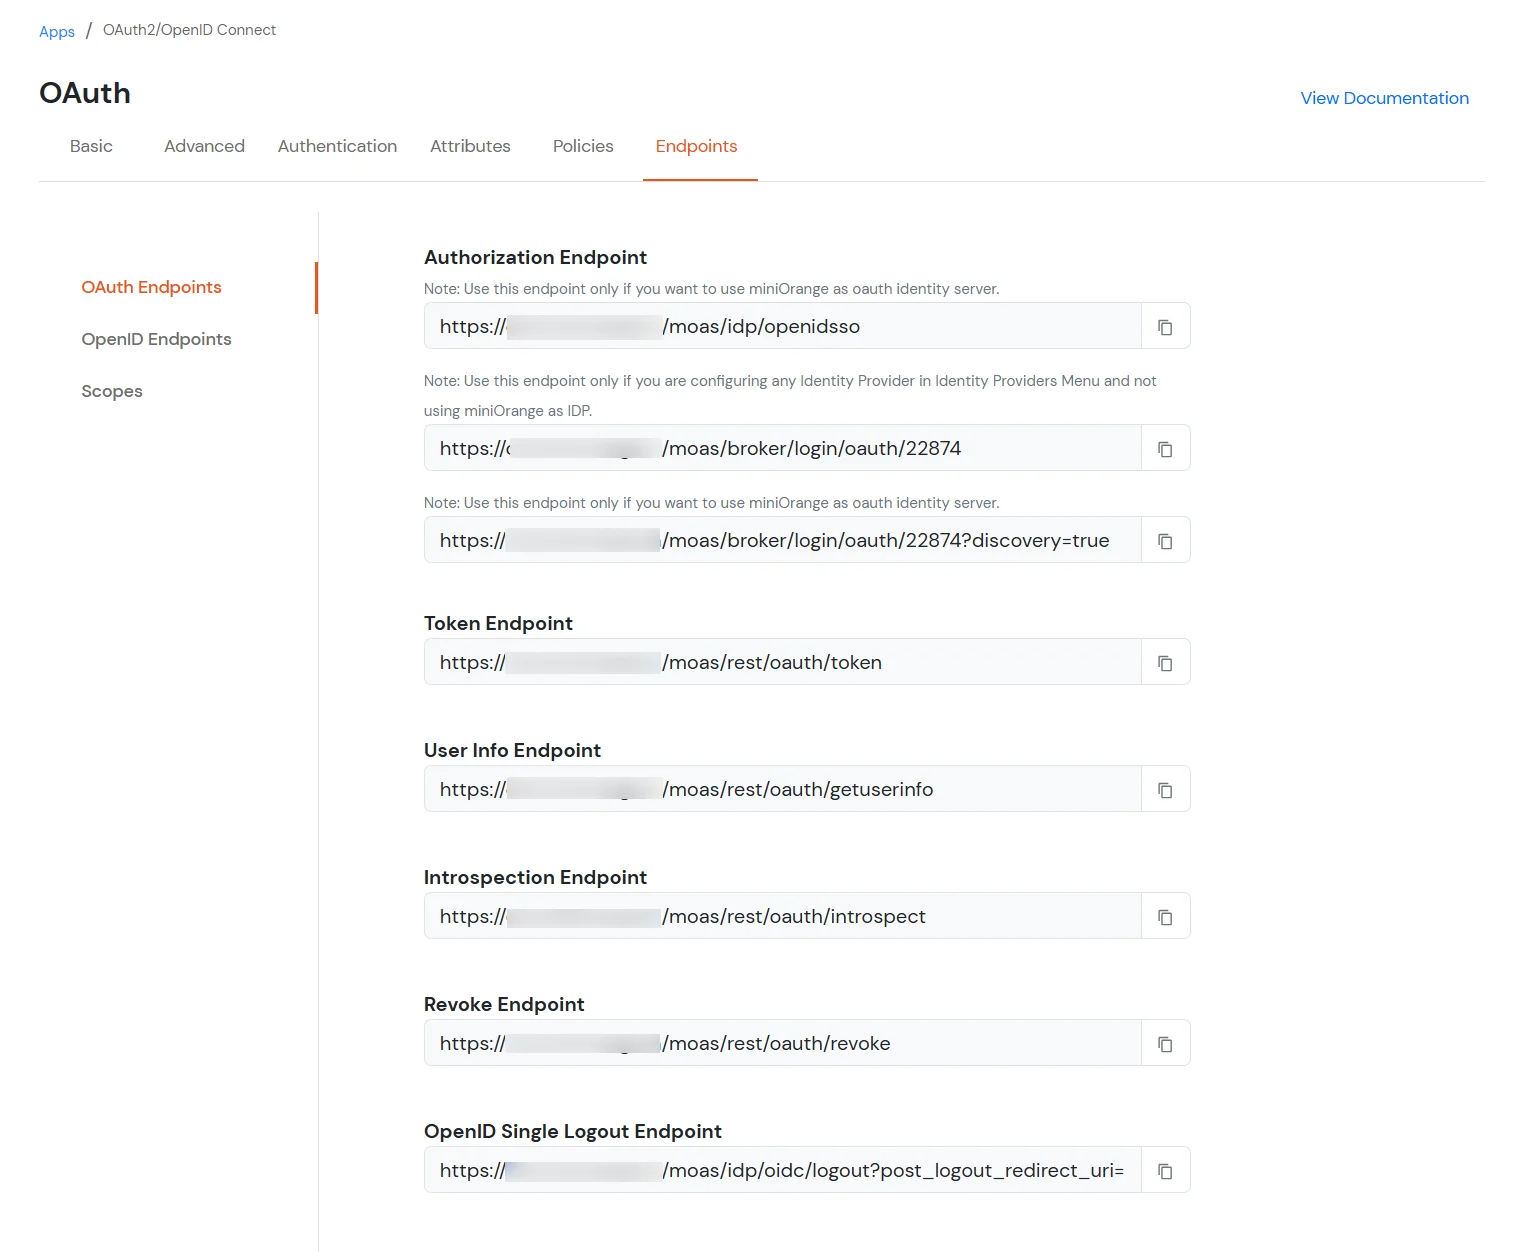
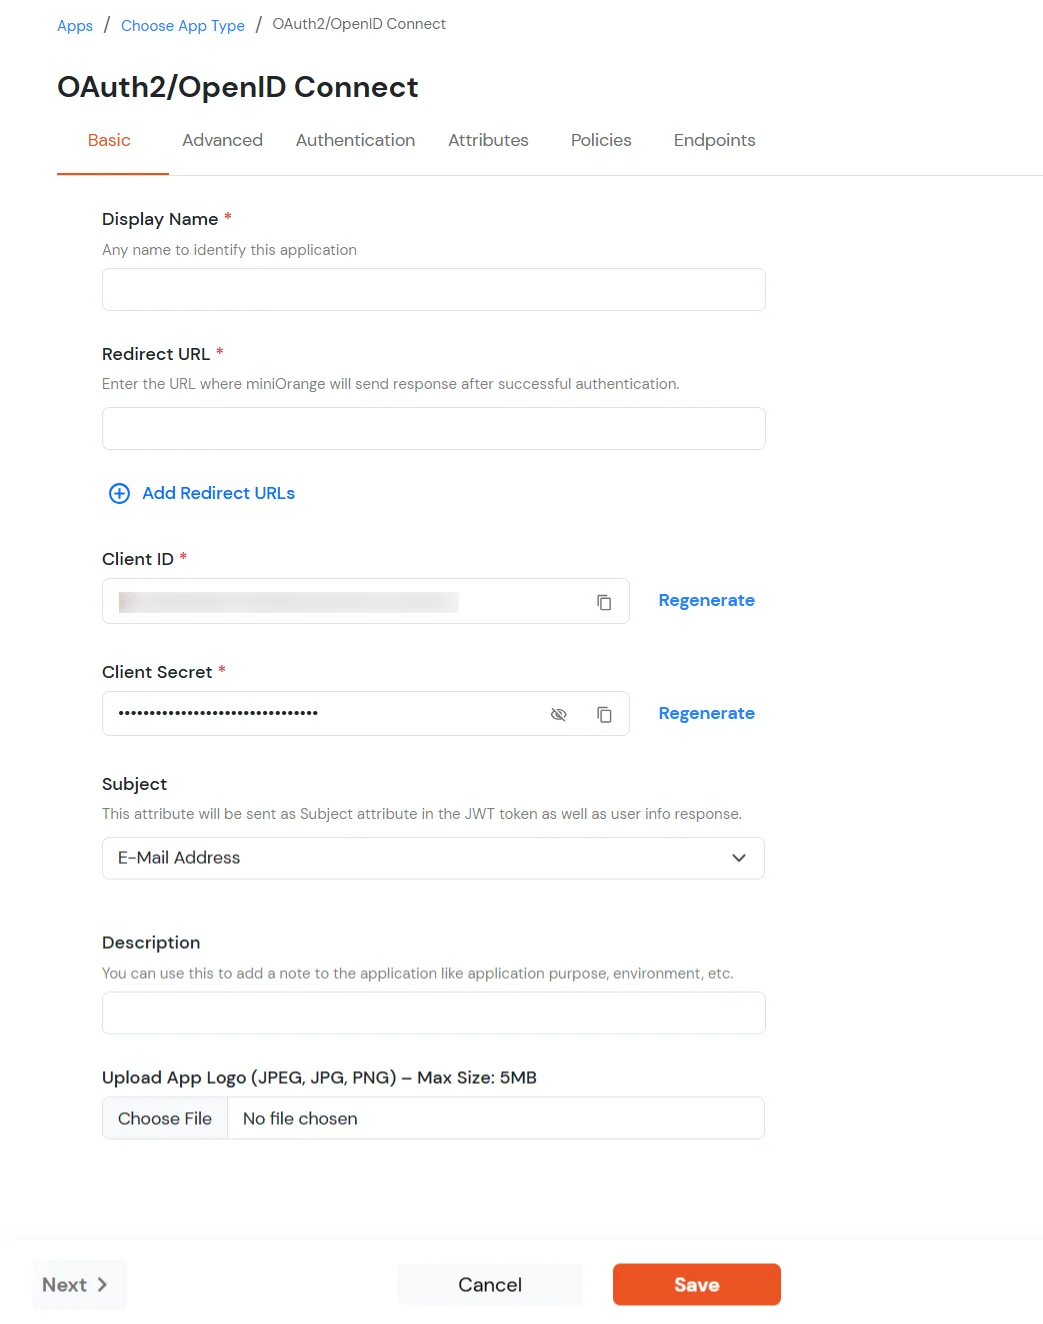
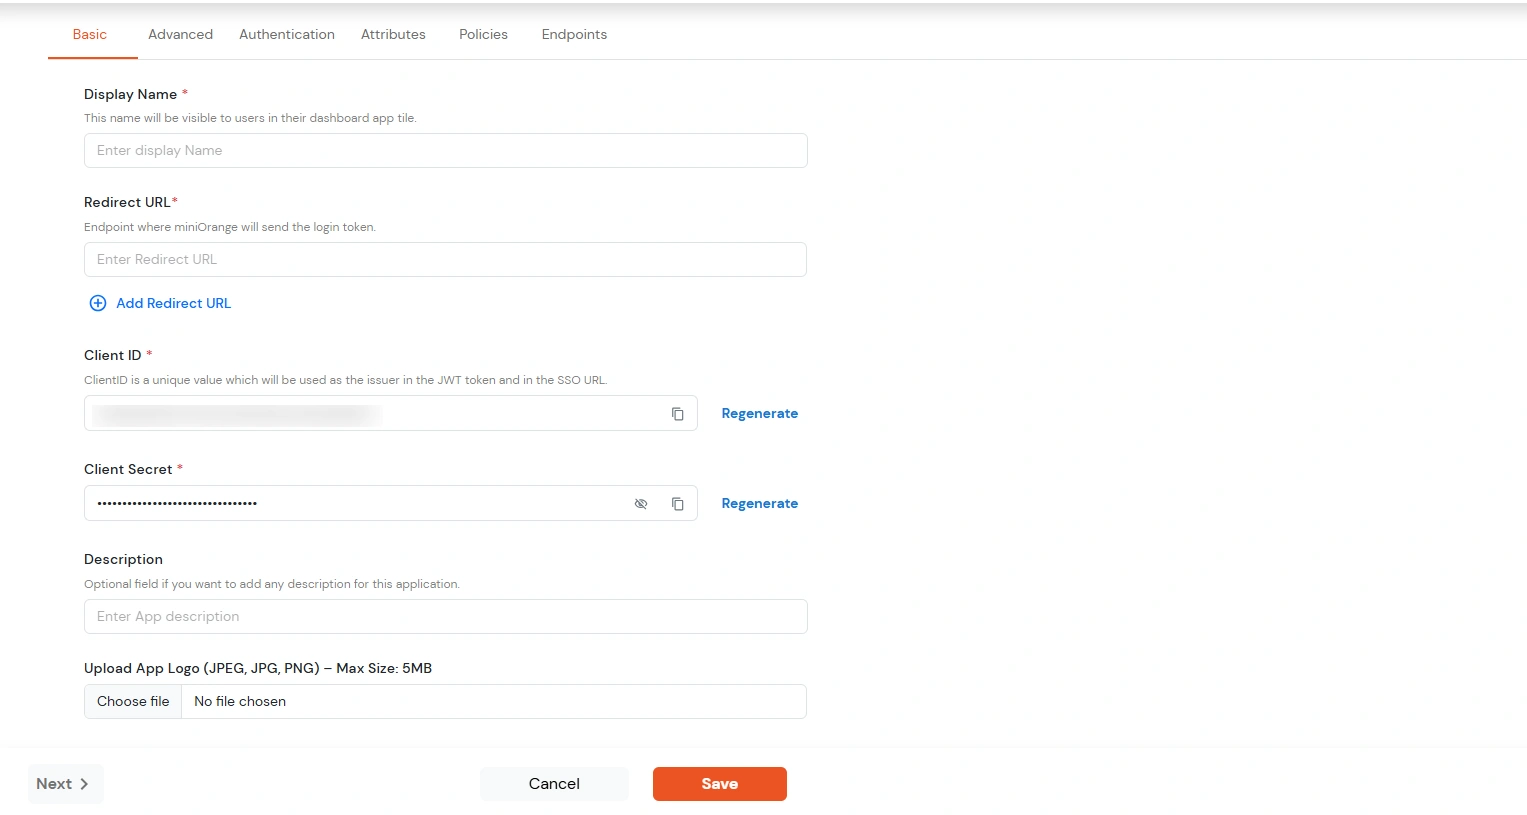
| Display Name | Enter the Display Name (i.e. the name for this application) |
| Redirect URL | Enter the Redirect URL (i.e. the endpoint where you want to send/post your JWT token). You can add multiple redirect URLs by separating them with a ‘;’.E.g. abc.com;xyz.com |
| Client ID | The Client ID is shown in the field below. Click the clipboard icon to copy it. |
| Client Secret | Client Secret is hidden by default. Click the eye icon to reveal it and use the clipboard icon to copy it. This is used in the HS256 signature algorithm for generating the signature. |
| Description (Optional) | Add a description if required. |
| Upload App Logo (Optional) | Upload an app logo (Optional). The app will be shown in the end-user dashboard with the logo that you configure here. |
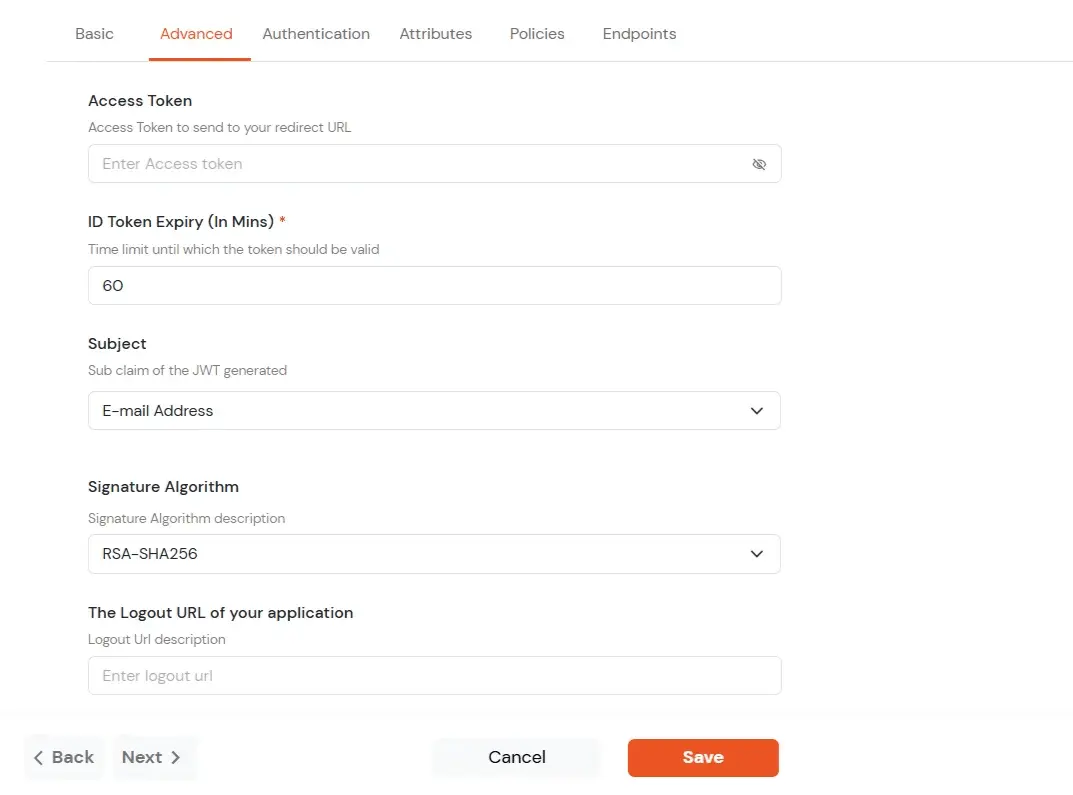
| Access Token | Enter the access token that will be sent to your redirect URL after a user logs in. This token helps your app know the user is allowed to access certain features. |
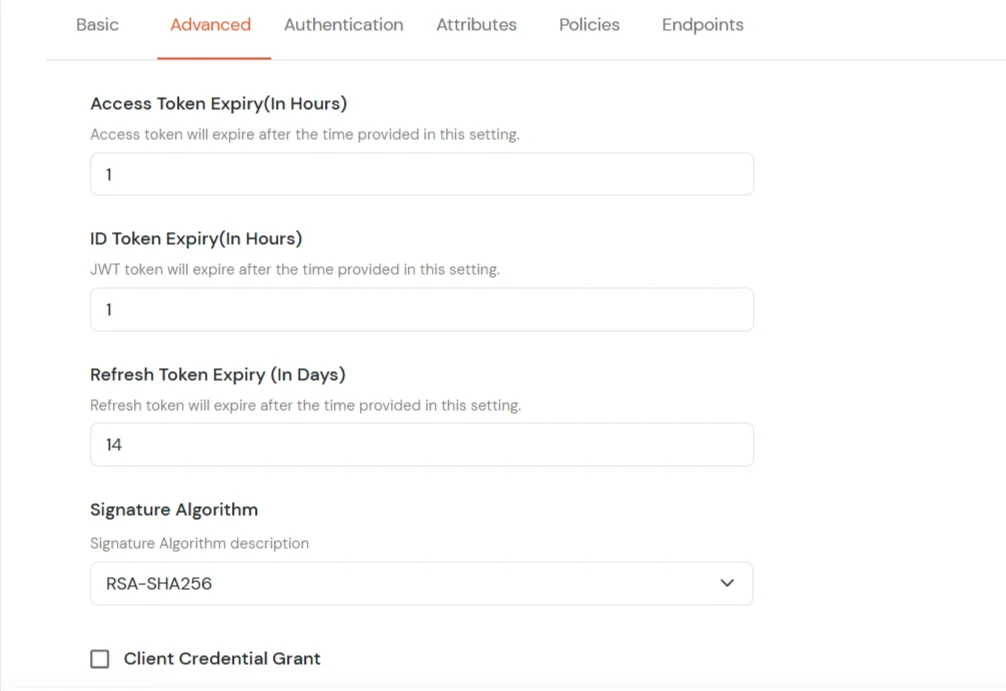
| ID Token Expiry (In Mins) | Set how long (in minutes) the ID token will be valid. After this time, the user will need to log in again to get a new token. |
| Subject | Choose what information, like the user’s email address, will be used to identify them in the token. This helps your app know which user is logged in. |
| Signature Algorithm | Select your signature algorithm from the dropdown. |
| The Logout URL of your application | Enter the web address where users should be sent after they log out. |
| Enable Shared Identity | This feature lets you control whether a specific application can be accessed by shared user or not. |
| Primary Identity Provider | Select the default ID source from the dropdown for the application. If not selected, users will see the default login screen and can choose their own IDP. [Choose miniOrange in this case.] |
| Force Authentication | If you enable this option, users will have to log in every time, even if their session already exists. |
| Enable User Mapping | Enable this option, if you want the app to show which user is signed in when it responds. |
| Show On End User Dashboard | Enable this option if you want to show this app in the end-user dashboard. |
Maps information, such as email and username, during Just-In-Time (JIT) user creation. Email and Username attributes are necessary to create the user profile.

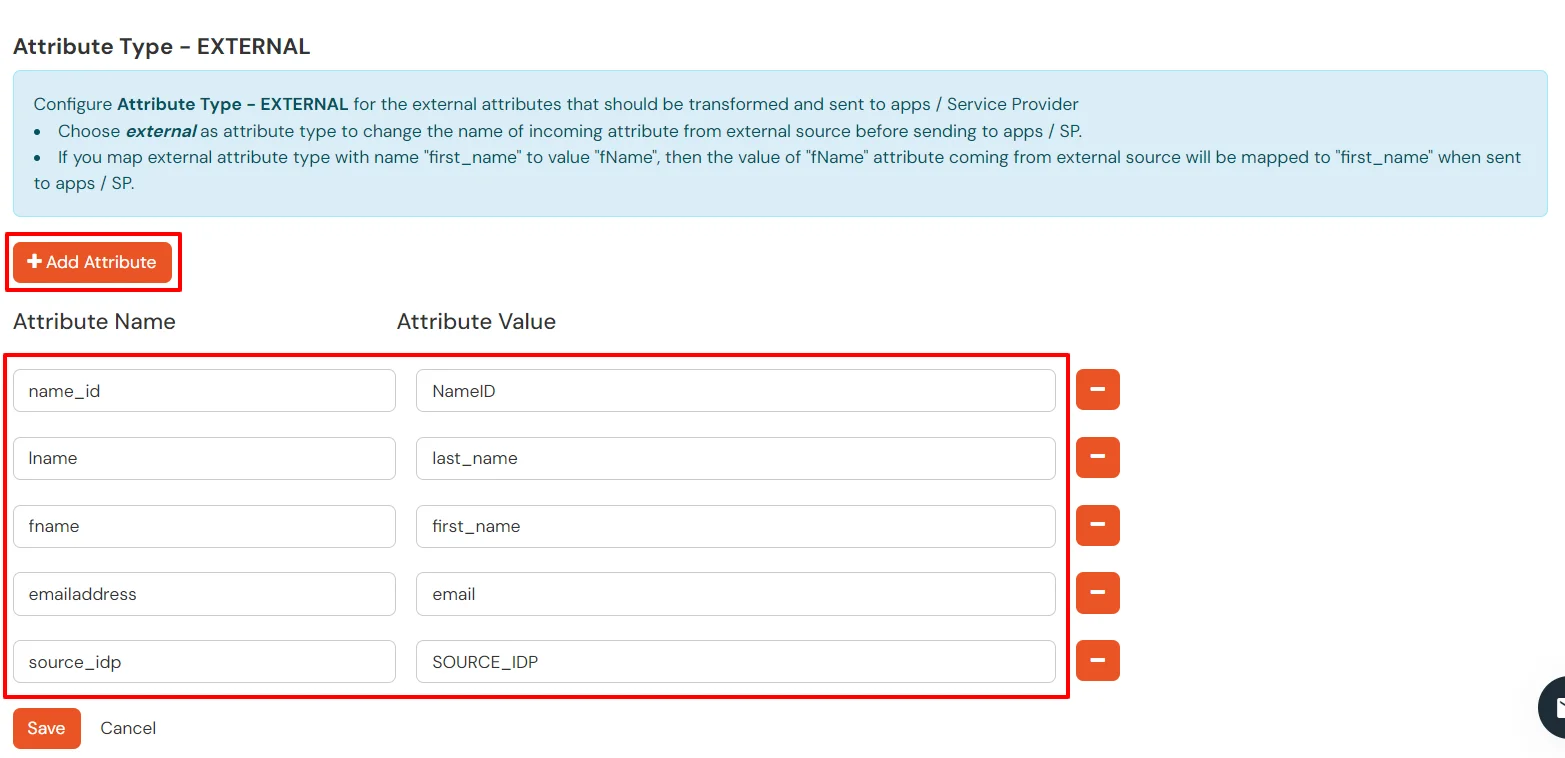
EXTERNAL mappings help alter incoming attribute names before sending them to apps, ensuring that the data is in the correct format.
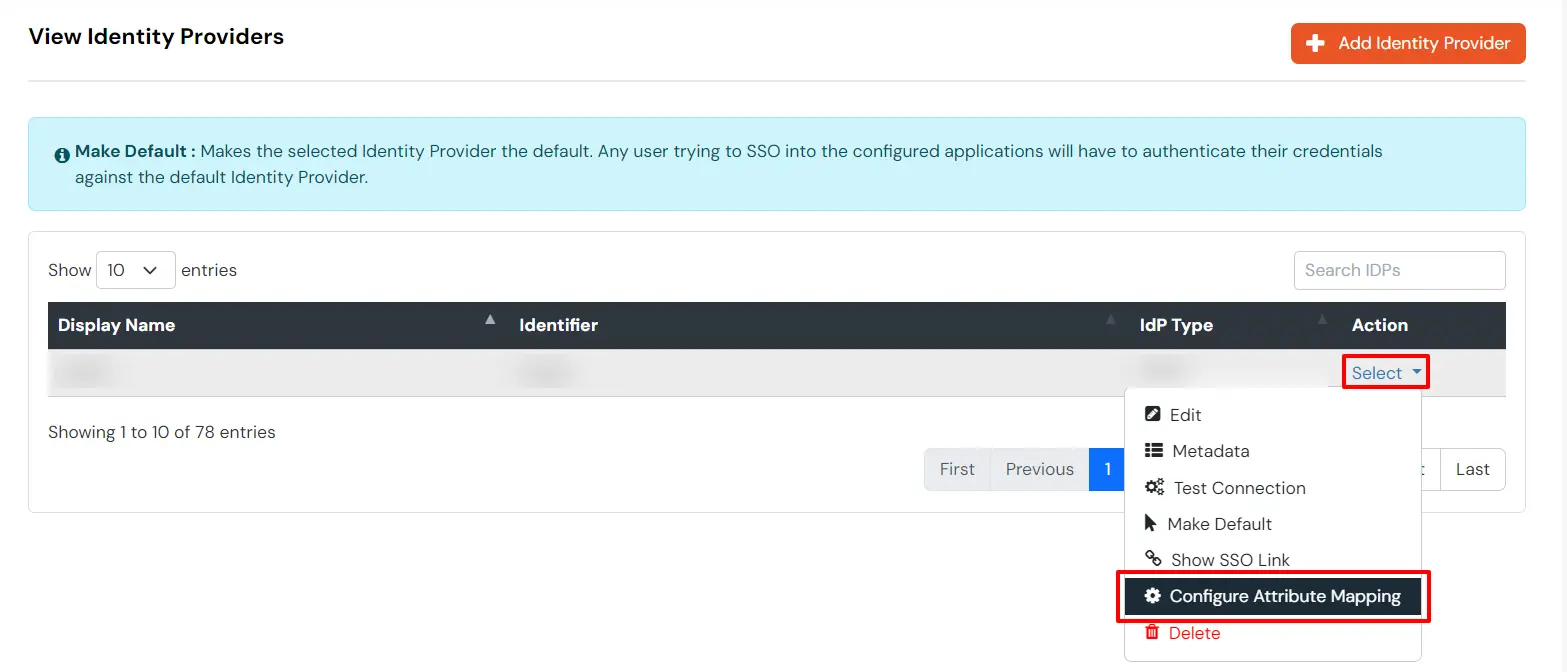
You can follow this guide, if you want to configure multiple IDPs (Identity Providers) and give users the option to select the IDP of their choice to authenticate with.
You receive these error message when you try to SSO in to an application that has been set up to use as External IdP using OAuth based Single Sign-On (SSO).
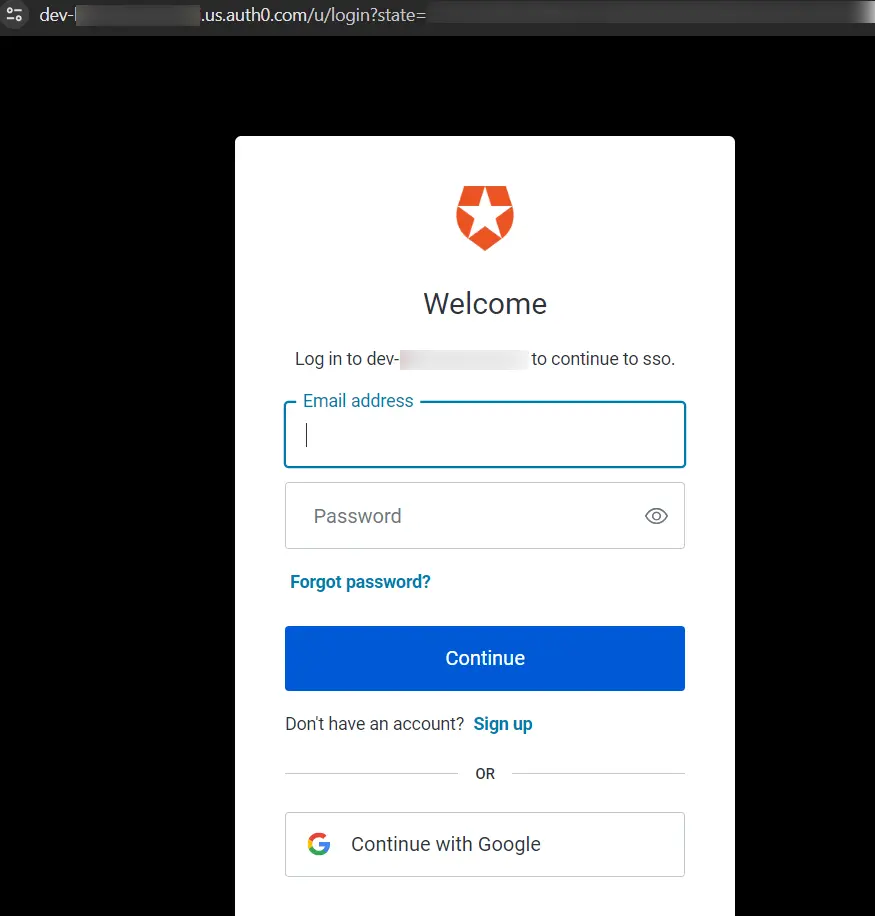
Users can’t log in through Auth0.
To fix the issue, follow these steps:
Users are sent to the wrong page after logging in.
To fix the issue, follow these steps:
Users frequently get logged out or see token expiration messages.
To fix the issue, follow these steps:
User profile data isn’t being displayed.
To fix the issue, follow these steps:
This happens when the Service Provider (SP) and Identity Provider (IdP) certificates don’t match or signature validation fails.
To fix the issue, follow these steps:
SAML assertions should have an audience that matches the SP’s entity ID.
To fix the issue, follow these steps:
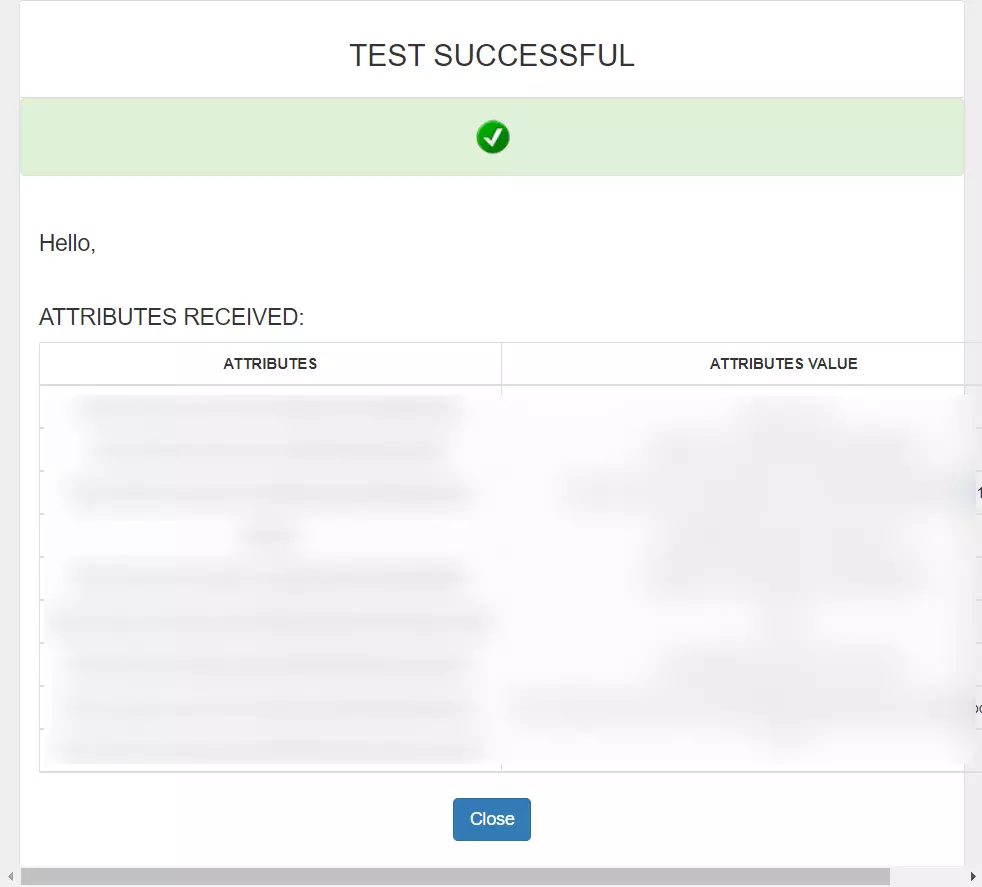
Missing attributes can cause failures.
To fix the issue, follow these steps:
The Assertion Consumer Service (ACS) URL must be correctly set in the IdP for the response to be sent to the right place.
To fix the issue, follow these steps:
