Hello there!
Need Help? We are right here!
Need Help? We are right here!
Search Results:
×Node.js JWT Single Sign-On (SSO) solution by miniOrange provides secure Single Sign-On access into Node.js application using a single set of login credentials. This is done using JSON Web Token (JWT) tokens and it can be easily integrated with Node.js built in any framework or language. You can enable social login for your users to get secure access to applications using any of their existing social providers such as Facebook, Twitter, Google, or LinkedIn.
With miniOrange Node.js SSO, you get:
miniOrange provides user authentication from various external sources, which can be Directories (like ADFS, Microsoft Active Directory, OpenLDAP, AWS etc), Identity Providers (like Microsoft Entra ID, Okta, AWS), and many more. You can configure your existing directory/user store or add users in miniOrange.
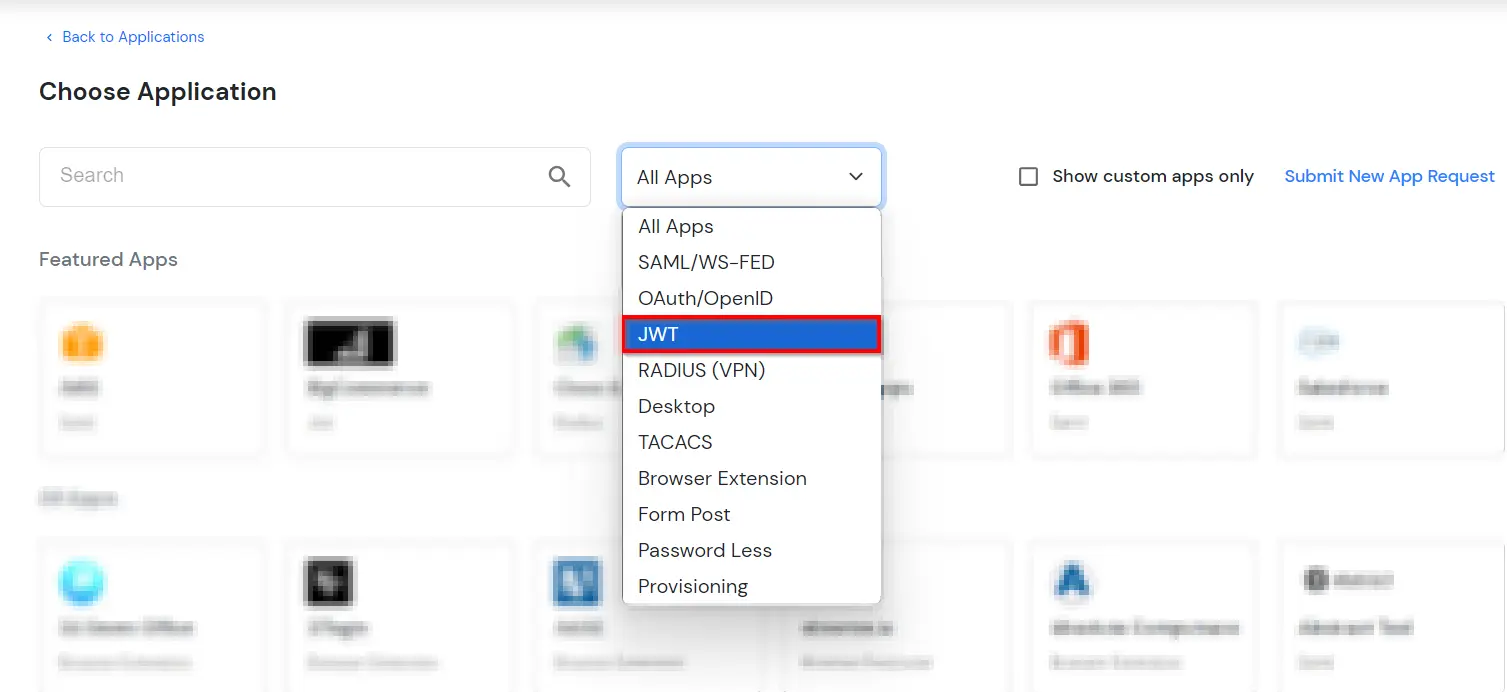
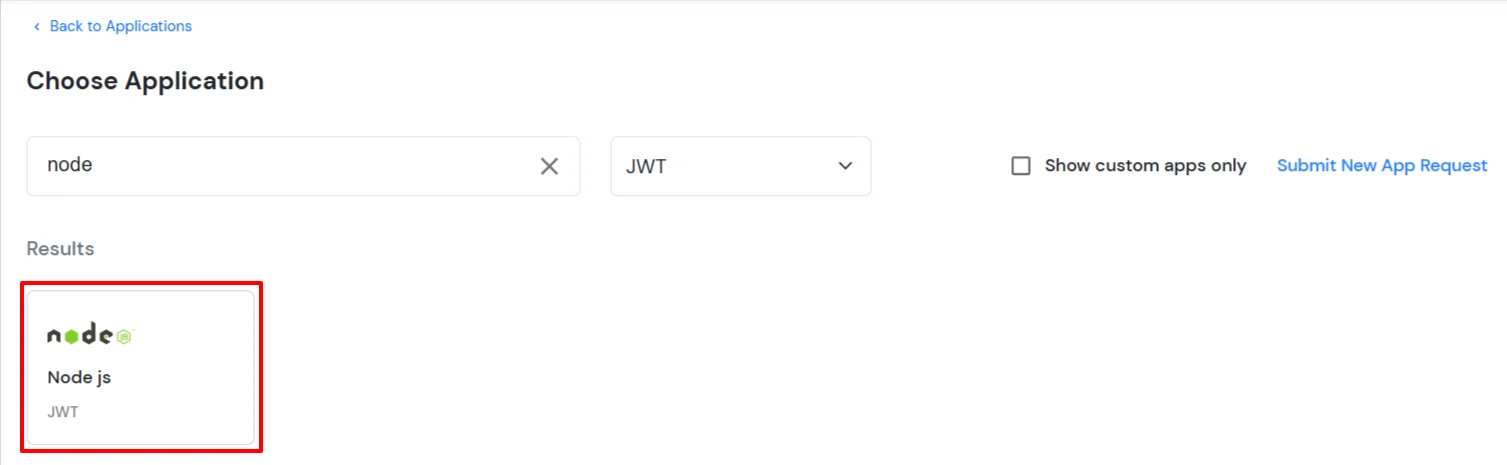
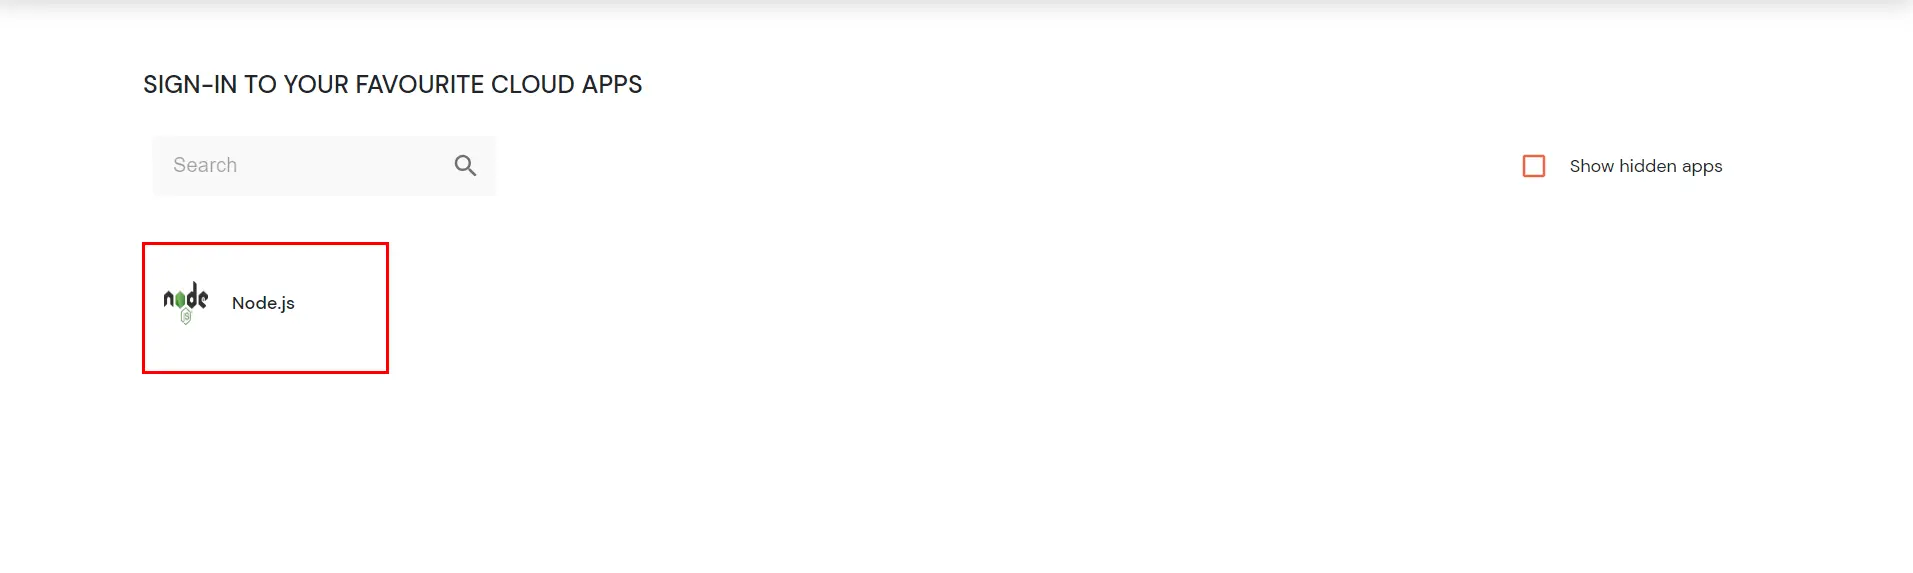
A. Add Node.js app in miniOrange:
In miniOrange dashboard, you can add JWT application with steps below:

https://<Node.js-application-base-url>/auth/callback
myapps://auth/callback
B. Add SSO link in Node.js:
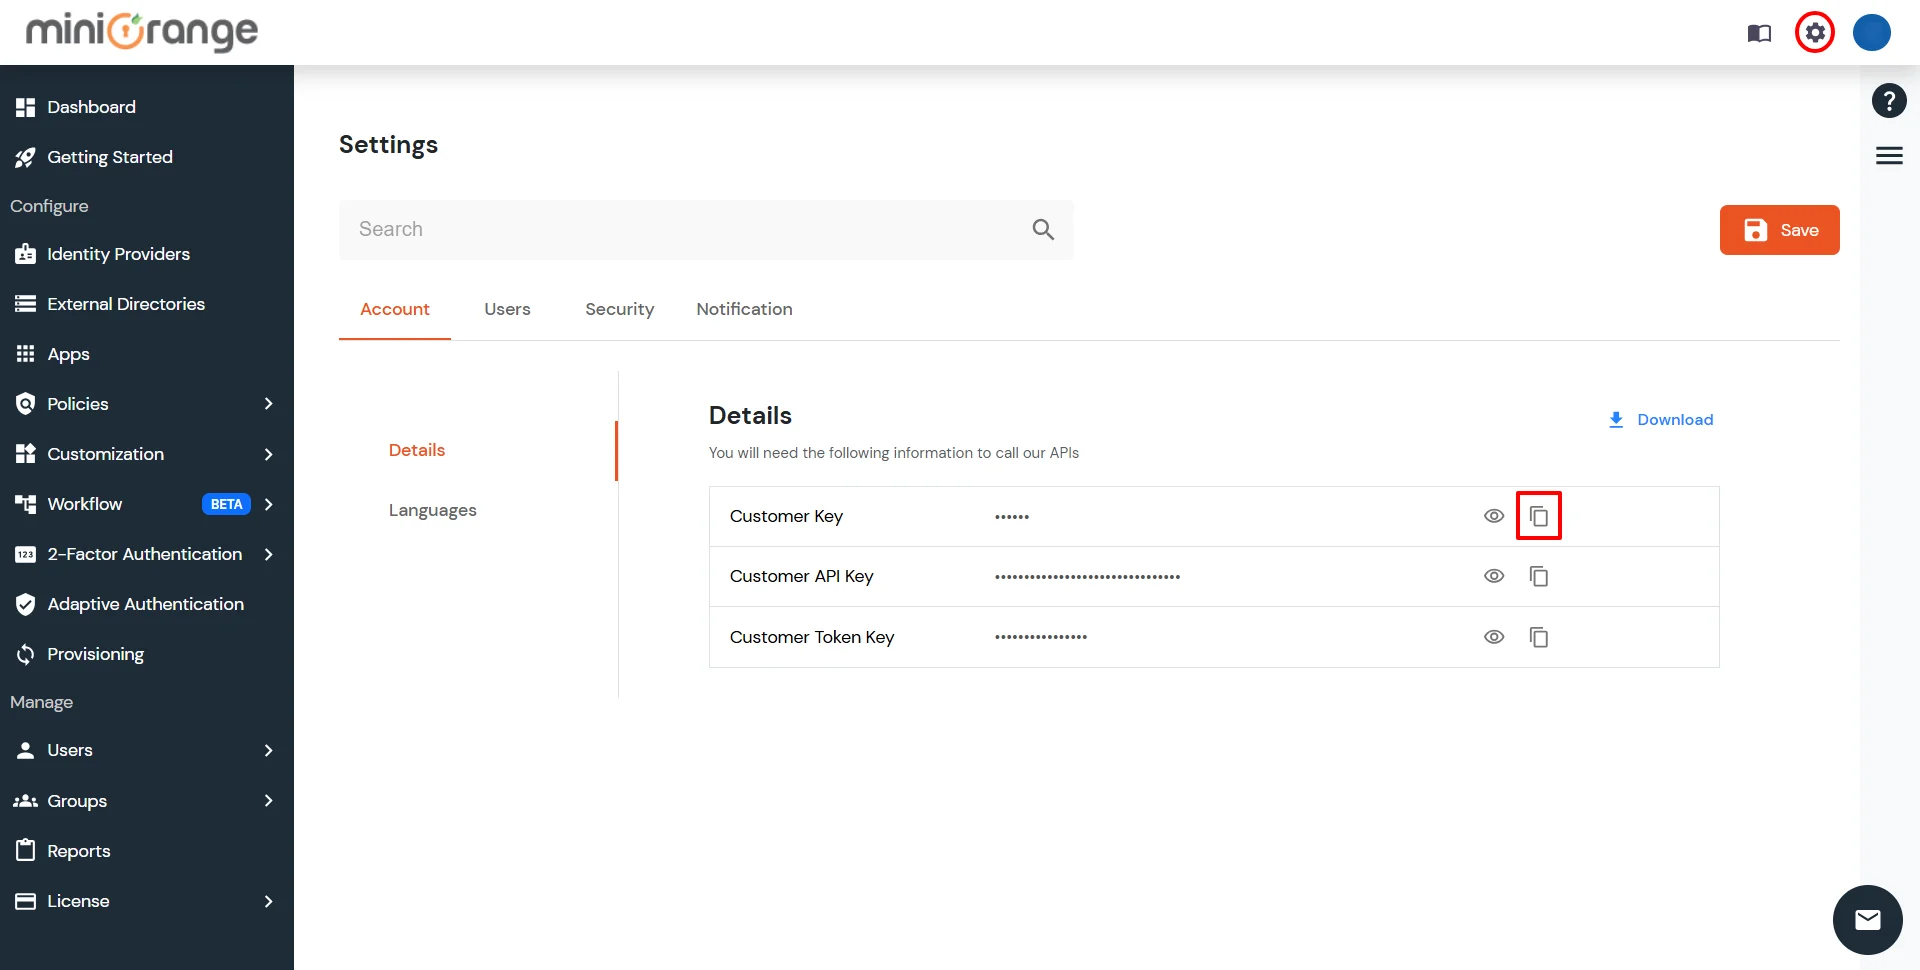
https://login.xecurify.com/moas/broker/login/jwt/<customer-id>?client_id=<client-id>&redirect_uri=<redirect-url>| customer-id | Customer ID of your miniOrange account which can be found under settings menu.Refer image below. |
| client-id | Client Id of JWT application created above(Step 3.a). |
| redirect-url | Configured Redirect URL against JWT application. |
C. Verify JWT token and parse user details for SSO:
eg. xxxx.yyyyyyyyyyyy.zzzzzz
D. Perform SSO:
Copy following Sample Code for setting up the Node.js application by clicking on the Download Connector button.
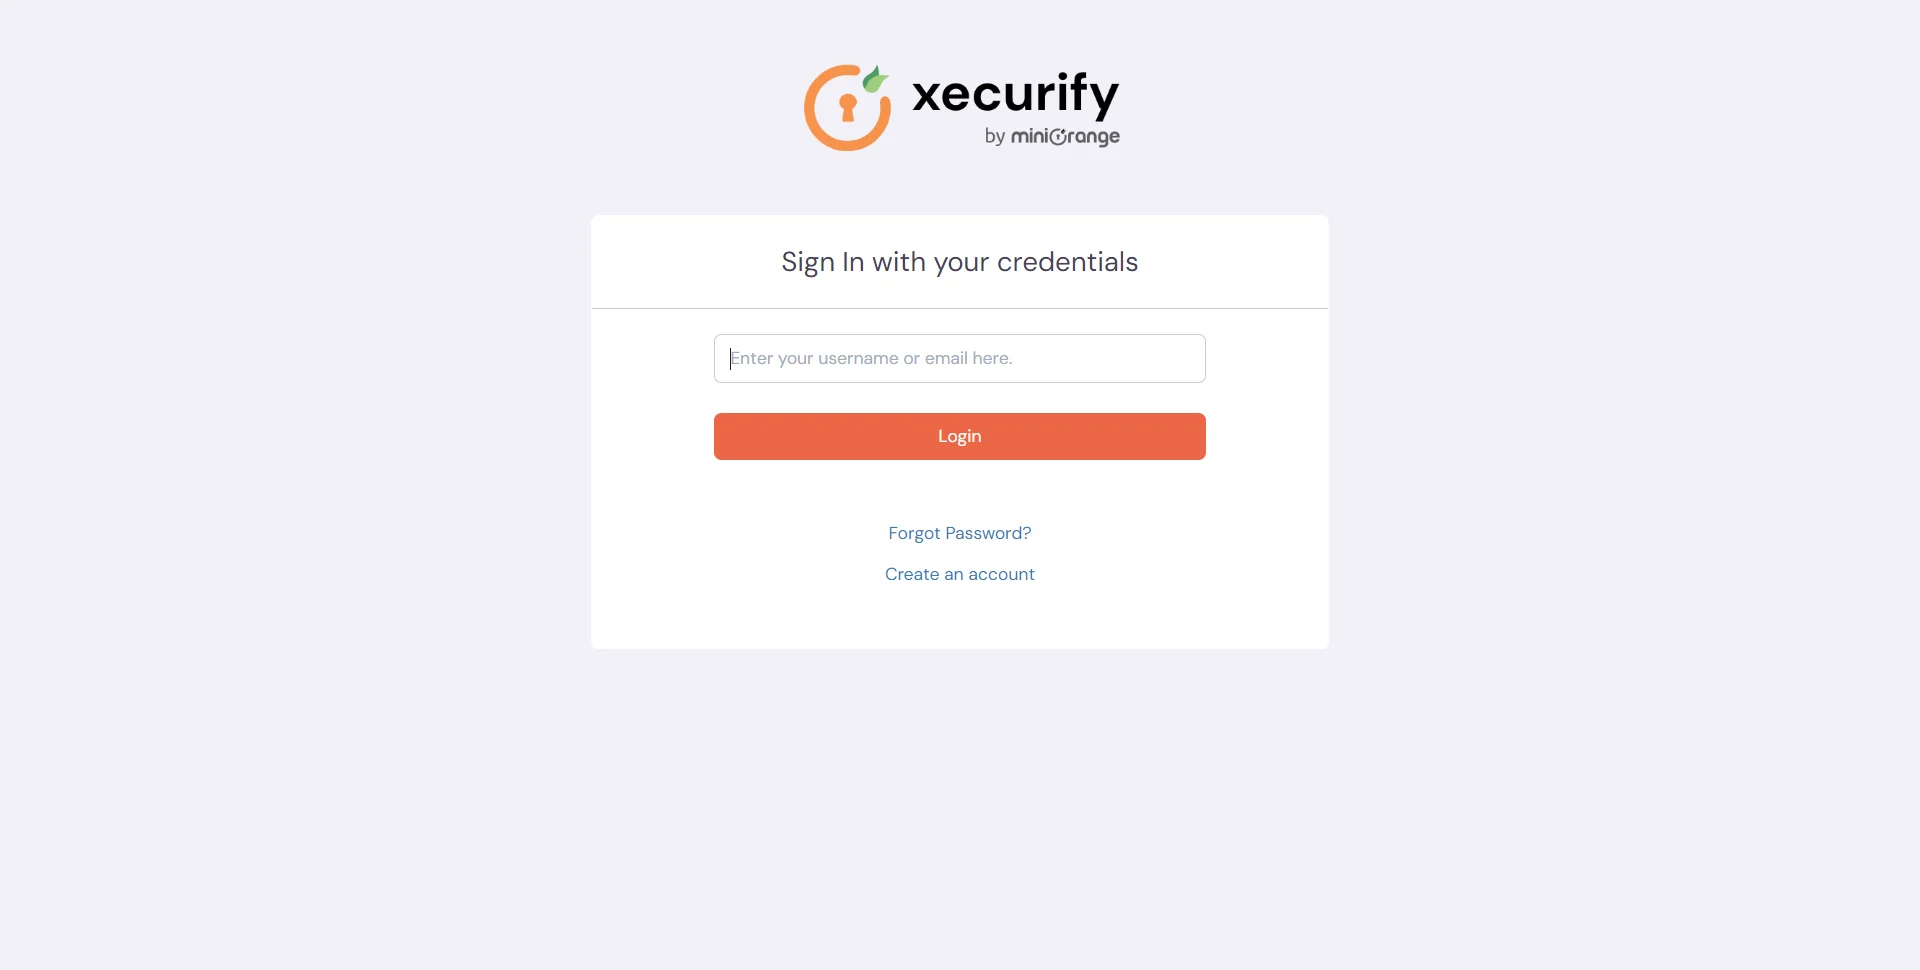
Test SSO login to your Node.js account with miniOrange IdP:
Contact us or email us at idpsupport@xecurify.com and we'll help you setting it up in no time.
x
Your download should start now. If not, please email us at idpsupport@xecurify.com or contact us.