Hello there!
Need Help? We are right here!
Need Help? We are right here!
Search Results:
×Webflow Microsoft Entra ID integration by miniOrange helps customers allow their users to access Microsoft Entra ID credentials for seamless access to Webflow using SSO. This solution ensures that you are ready to roll out secure access to Webflow using Microsoft Entra ID within minutes instead of managing users in Webflow. miniOrange also provides 30-days free trial to test out the solution on your own.
miniOrange Webflow integration is just not limited to Microsoft Entra ID but you can easily connect with any of your IDP (Okta, Ping, Microsoft, etc), Active & LDAP without migrating your users. Webflow SSO integration helps your organization's time and efforts with improved security to your data present in the cloud or on-premise.
Note: You don't need any enterprise plan or premium feature to enable SSO for Webflow.
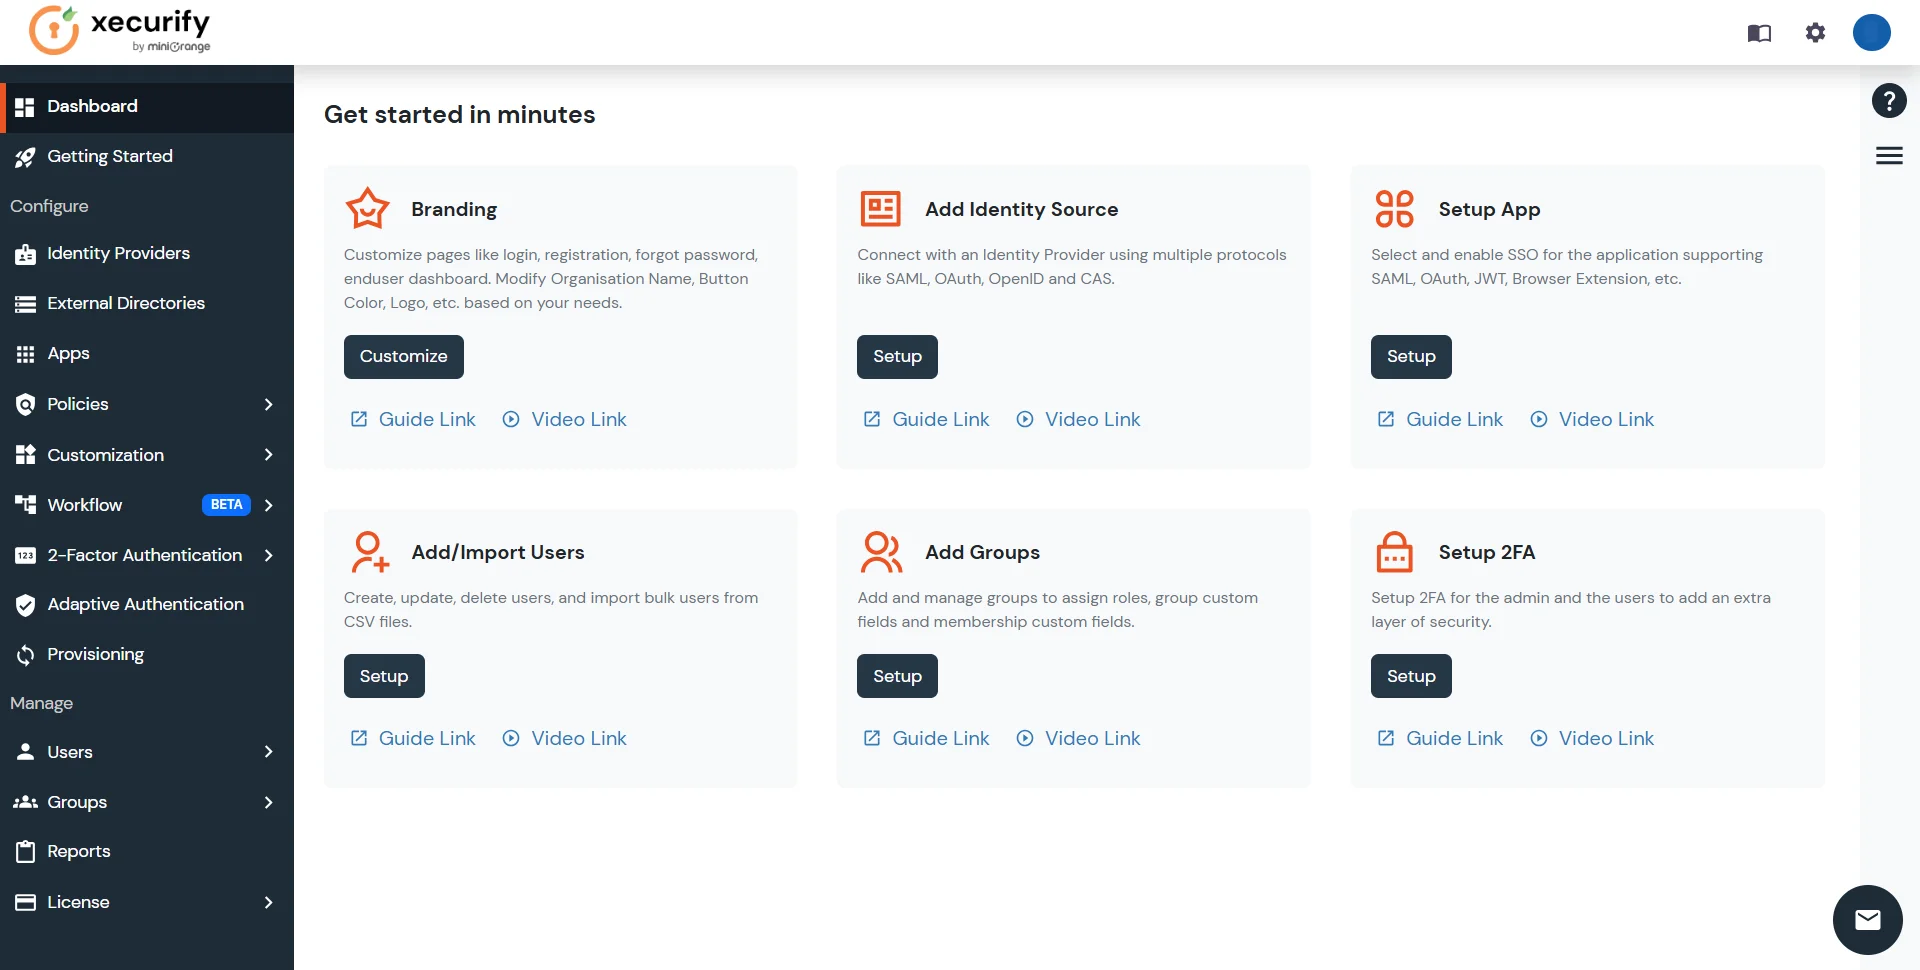
Please make sure your organisation branding is already set under Customization >> Login and Registration Branding in the left menu of the dashboard.
miniOrange provides user authentication from various external sources, which can be Directories (like ADFS, Microsoft Active Directory, OpenLDAP, AWS etc), Identity Providers (like Microsoft Entra ID, Okta, AWS), and many more. You can configure your existing directory/user store or add users in miniOrange.

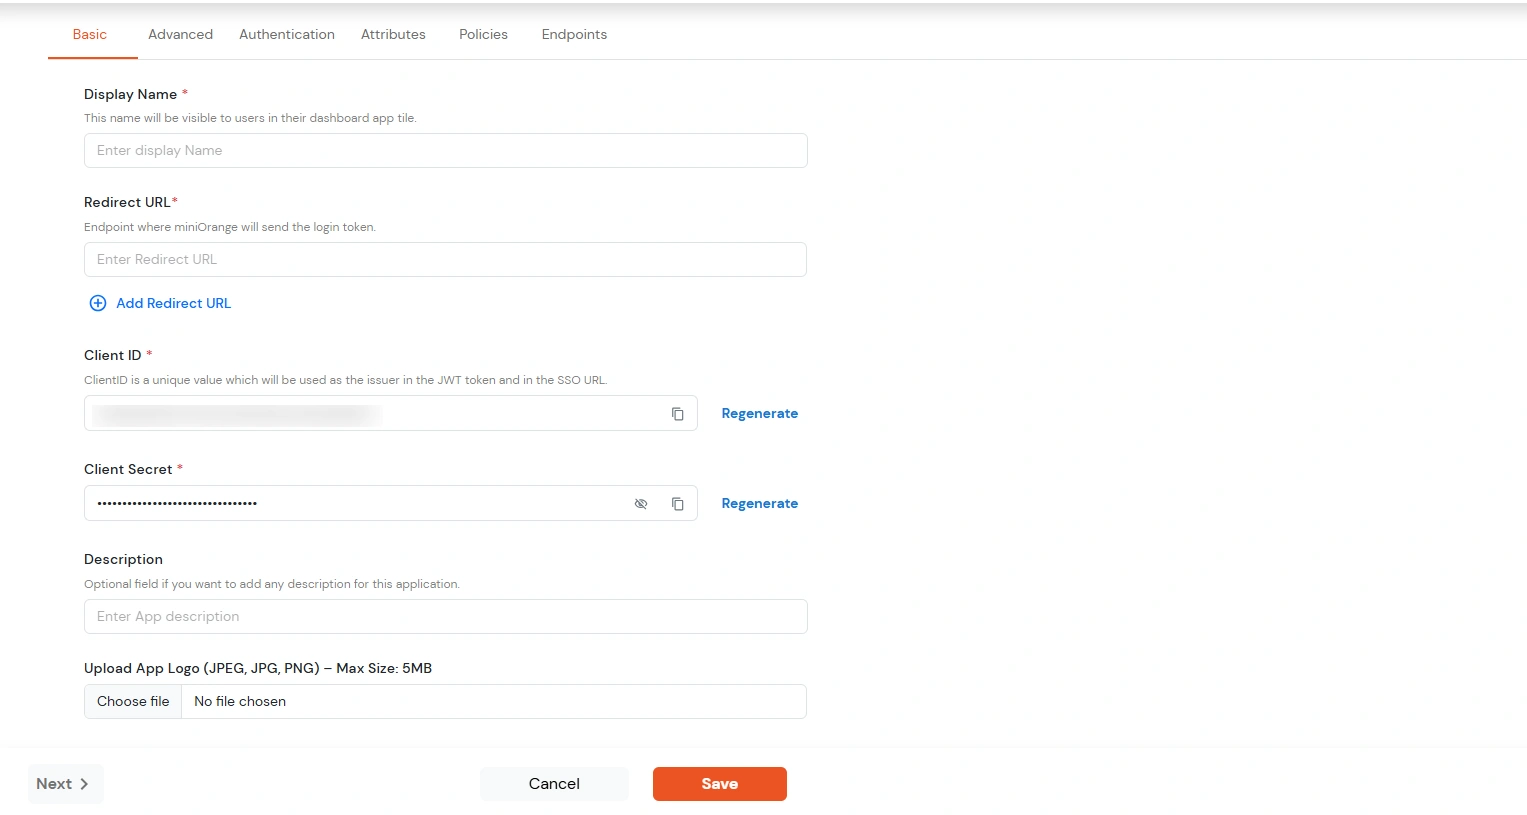
| Display Name | Enter the Display Name (i.e. the name for this application) |
| Redirect URL | Enter the Redirect URL (i.e. the endpoint where you want to send/post your JWT token). You can add multiple redirect URLs by separating them with a ‘;’.E.g. abc.com;xyz.com |
| Client ID | The Client ID is shown in the field below. Click the clipboard icon to copy it. |
| Client Secret | Client Secret is hidden by default. Click the eye icon to reveal it and use the clipboard icon to copy it. This is used in the HS256 signature algorithm for generating the signature. |
| Description (Optional) | Add a description if required. |
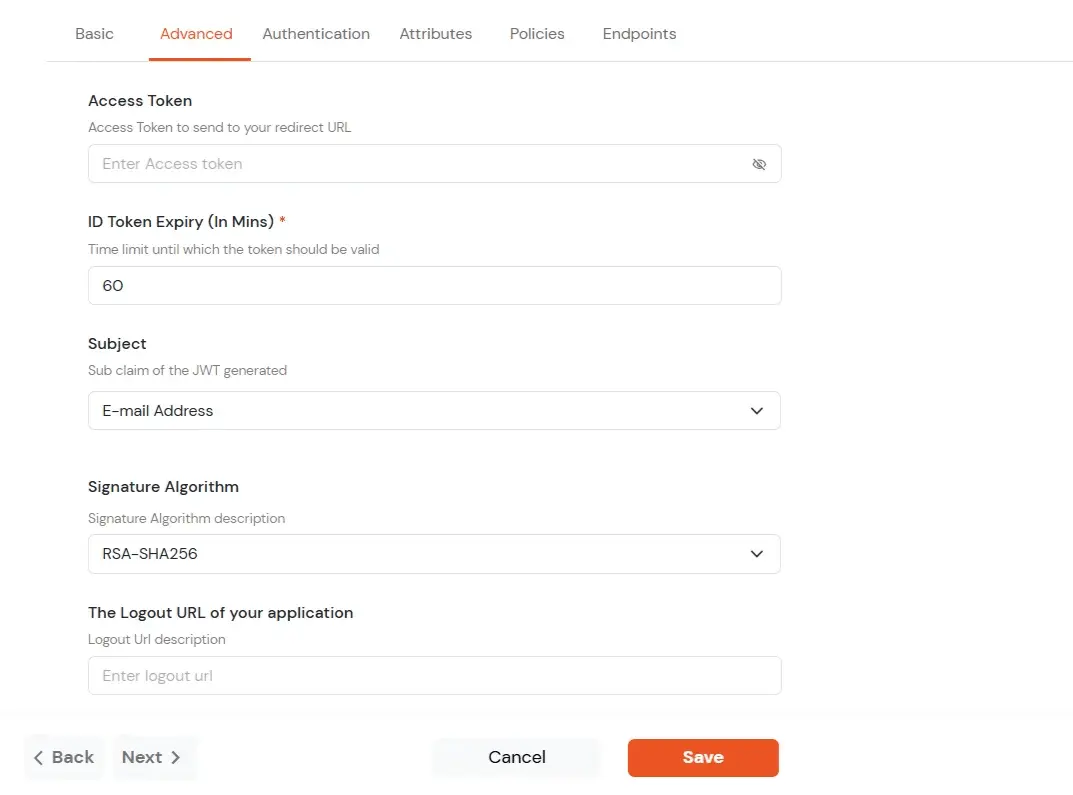
| Access Token | Enter the access token that will be sent to your redirect URL after a user logs in. This token helps your app know the user is allowed to access certain features. |
| ID Token Expiry (In Mins) | Set how long (in minutes) the ID token will be valid. After this time, the user will need to log in again to get a new token. |
| Subject | Choose what information, like the user’s email address, will be used to identify them in the token. This helps your app know which user is logged in. |
| Signature Algorithm | Select your signature algorithm from the dropdown. |
| The Logout URL of your application | Enter the web address where users should be sent after they log out. |
| Enable Shared Identity | This feature lets you control whether a specific application can be accessed by shared user or not. |
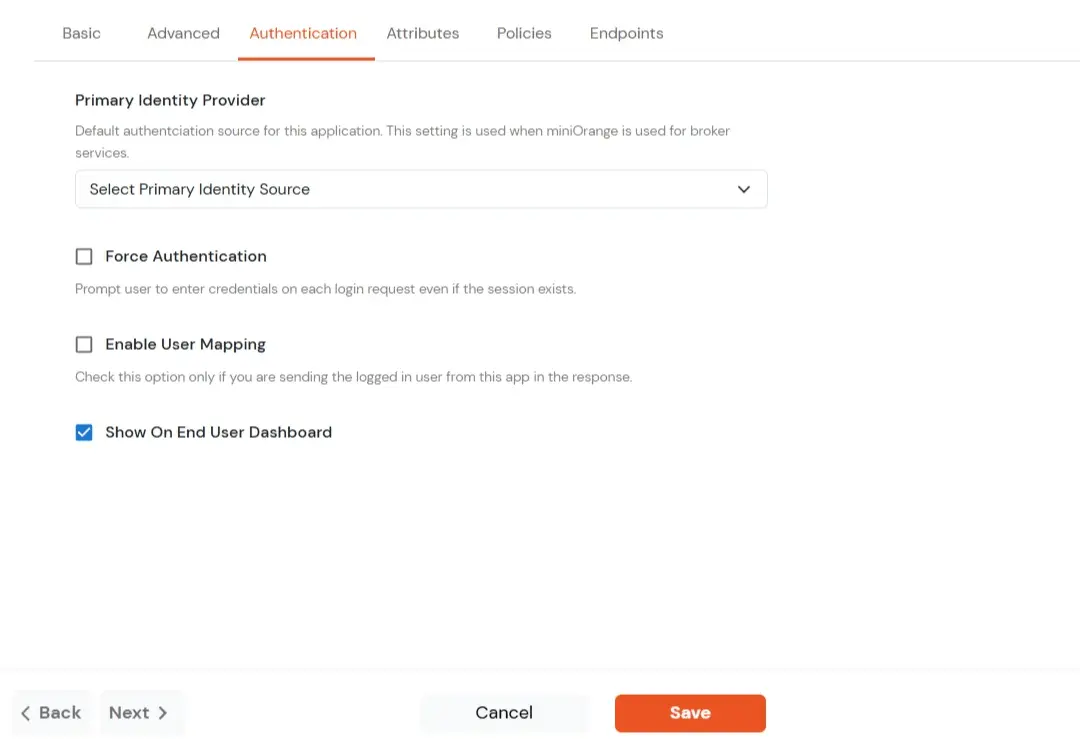
| Primary Identity Provider | Select the default ID source from the dropdown for the application. If not selected, users will see the default login screen and can choose their own IDP. [Choose miniOrange in this case.] |
| Force Authentication | If you enable this option, users will have to log in every time, even if their session already exists. |
| Enable User Mapping | Enable this option, if you want the app to show which user is signed in when it responds. |
| Show On End User Dashboard | Enable this option if you want to show this app in the end-user dashboard. |
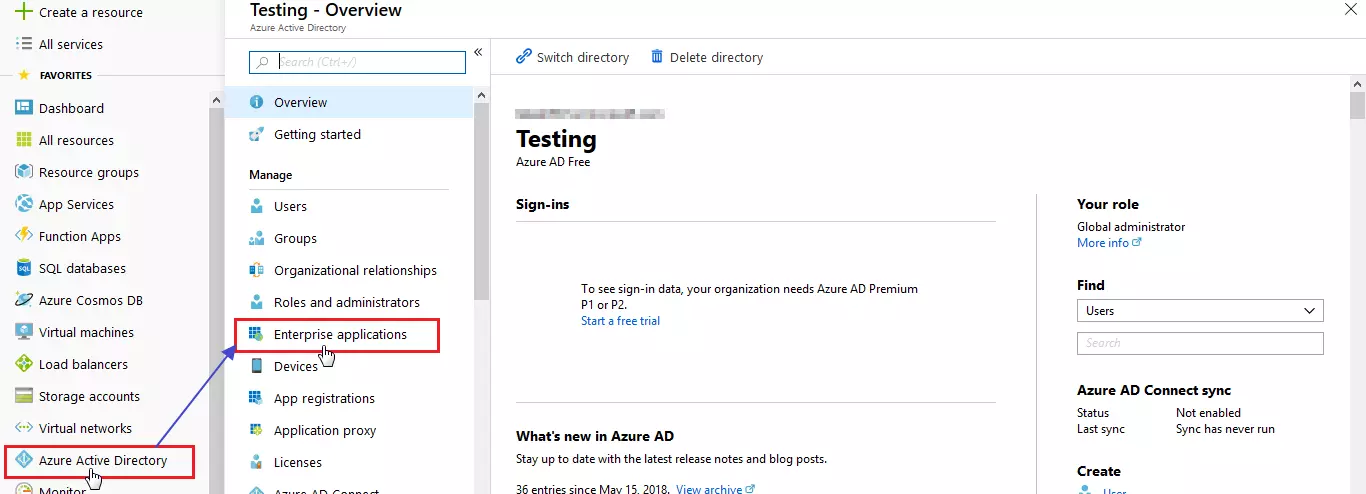
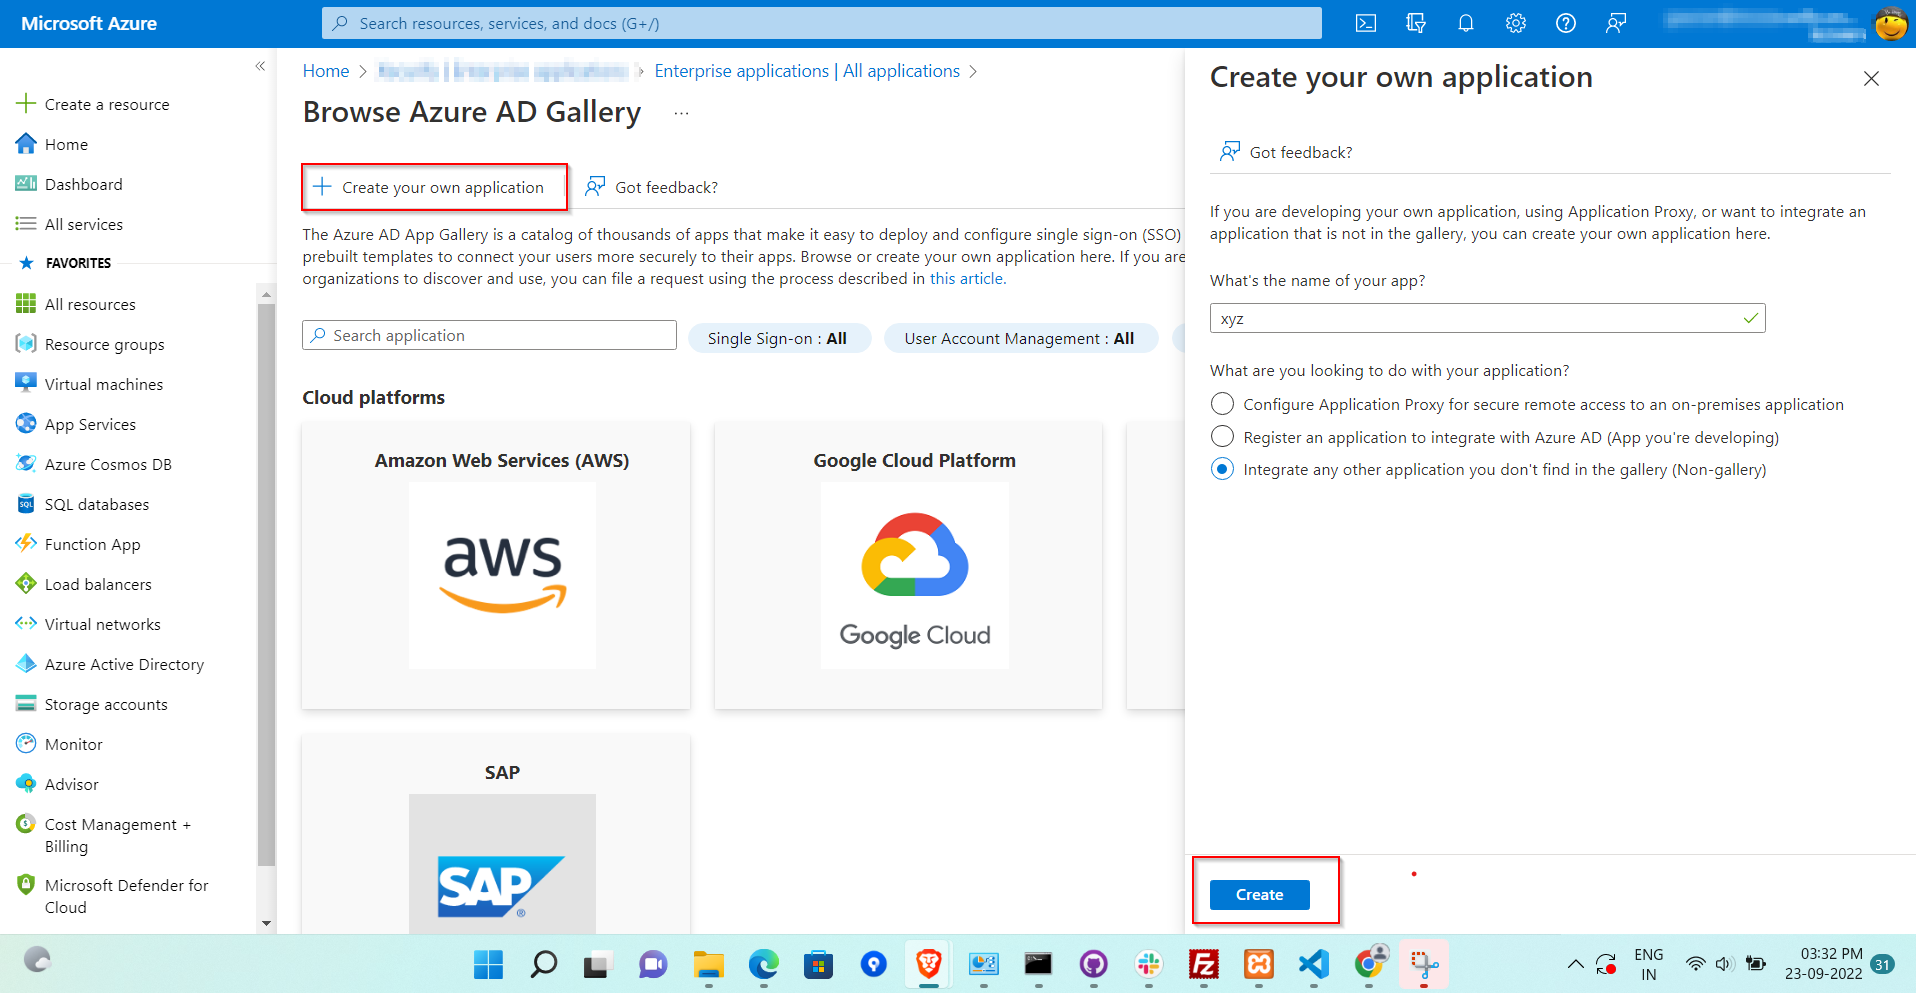
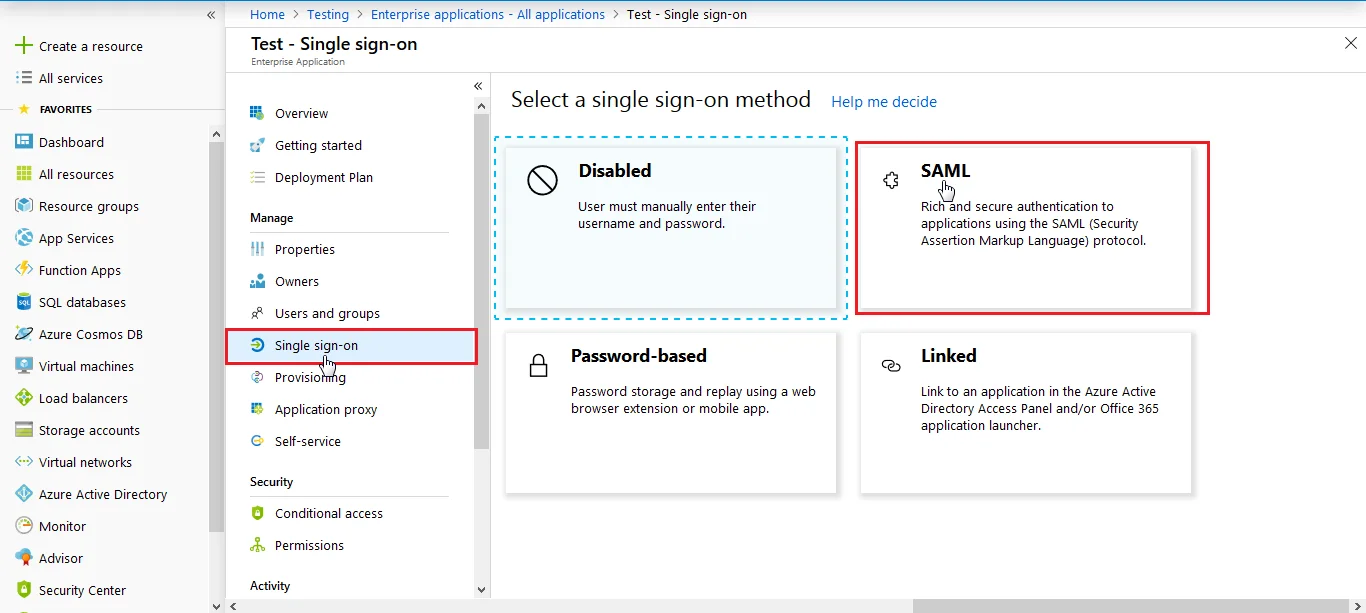
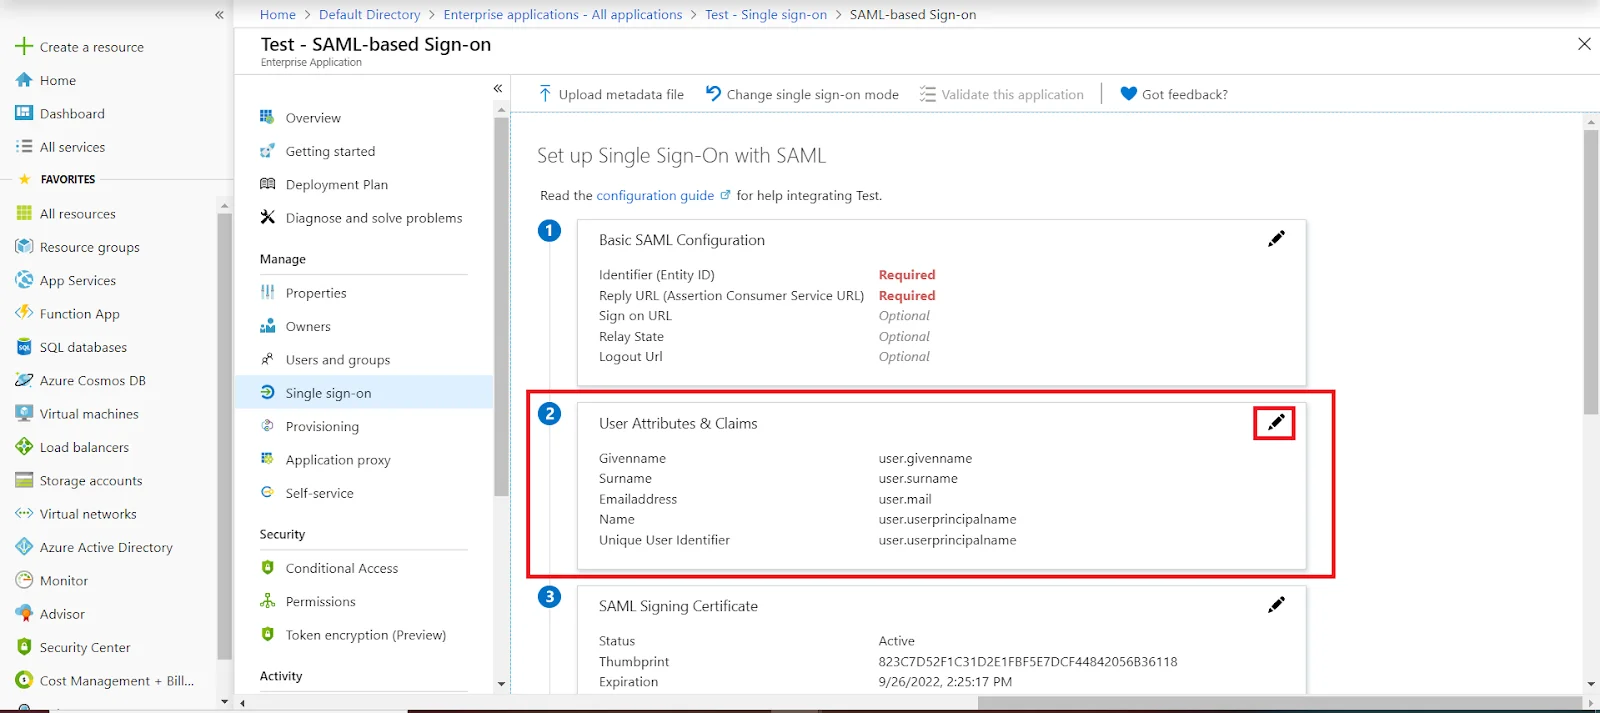
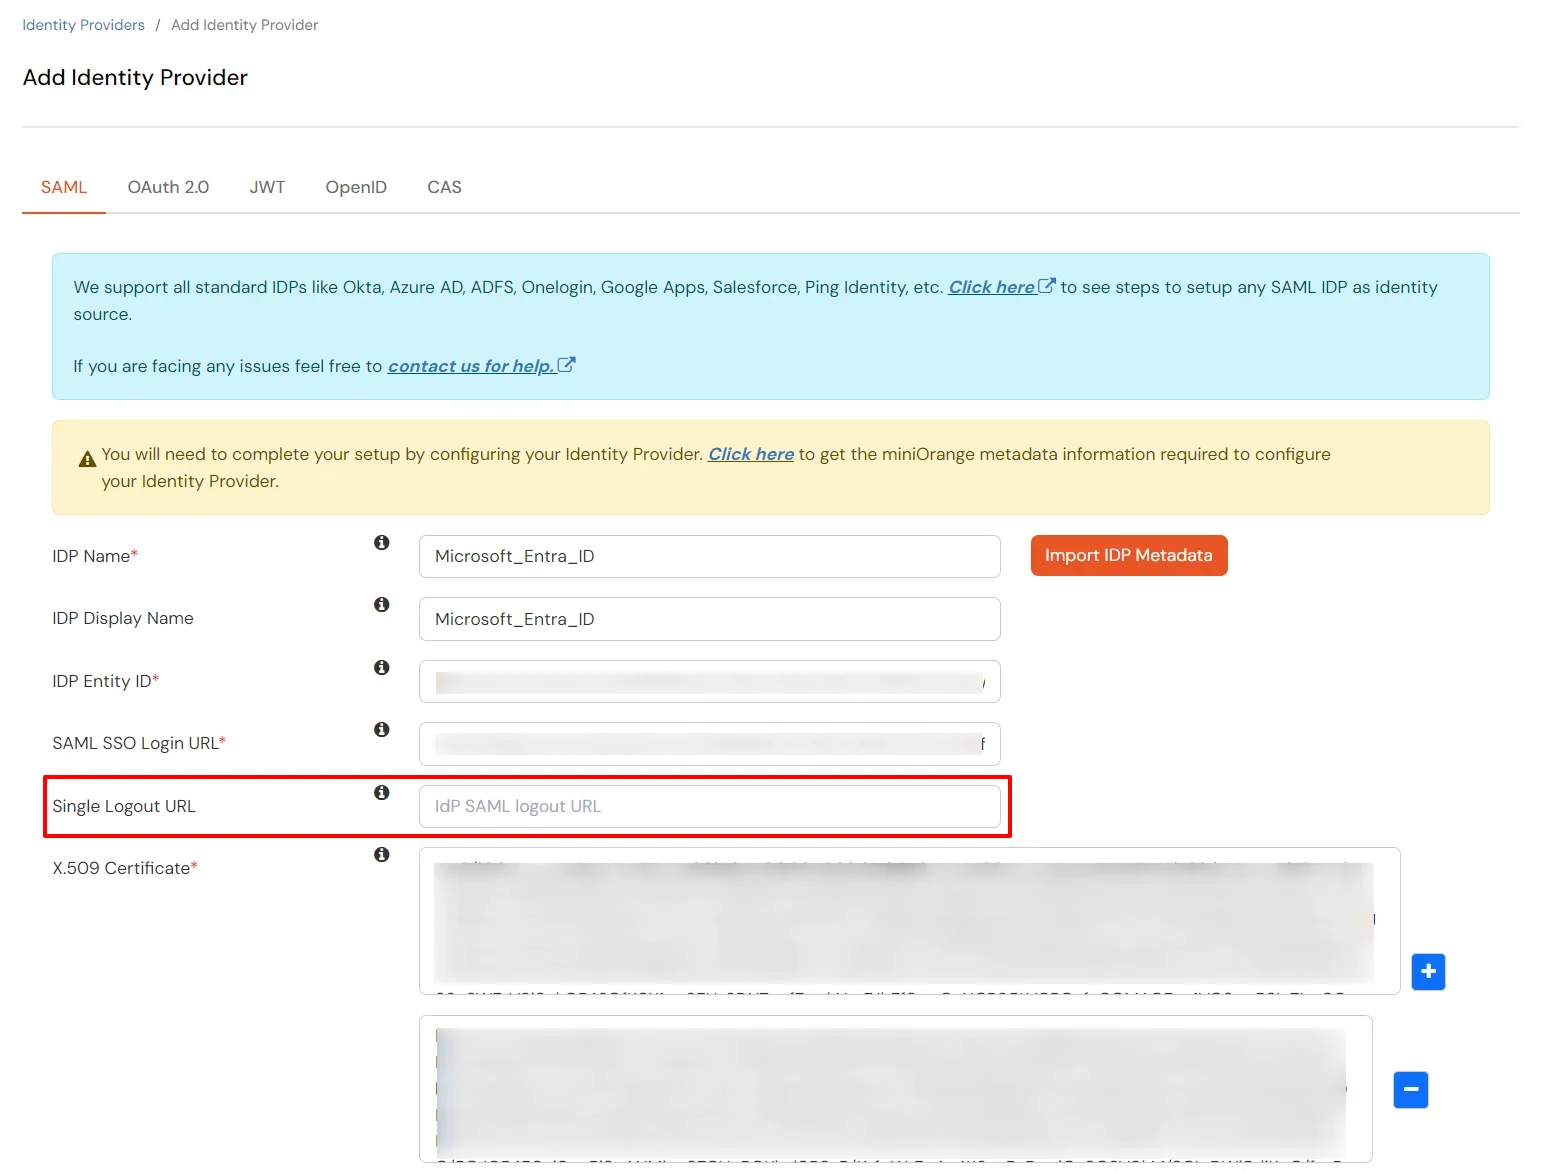
3.a. Configuring miniOrange as Service Provider (SP) in Microsoft Entra ID


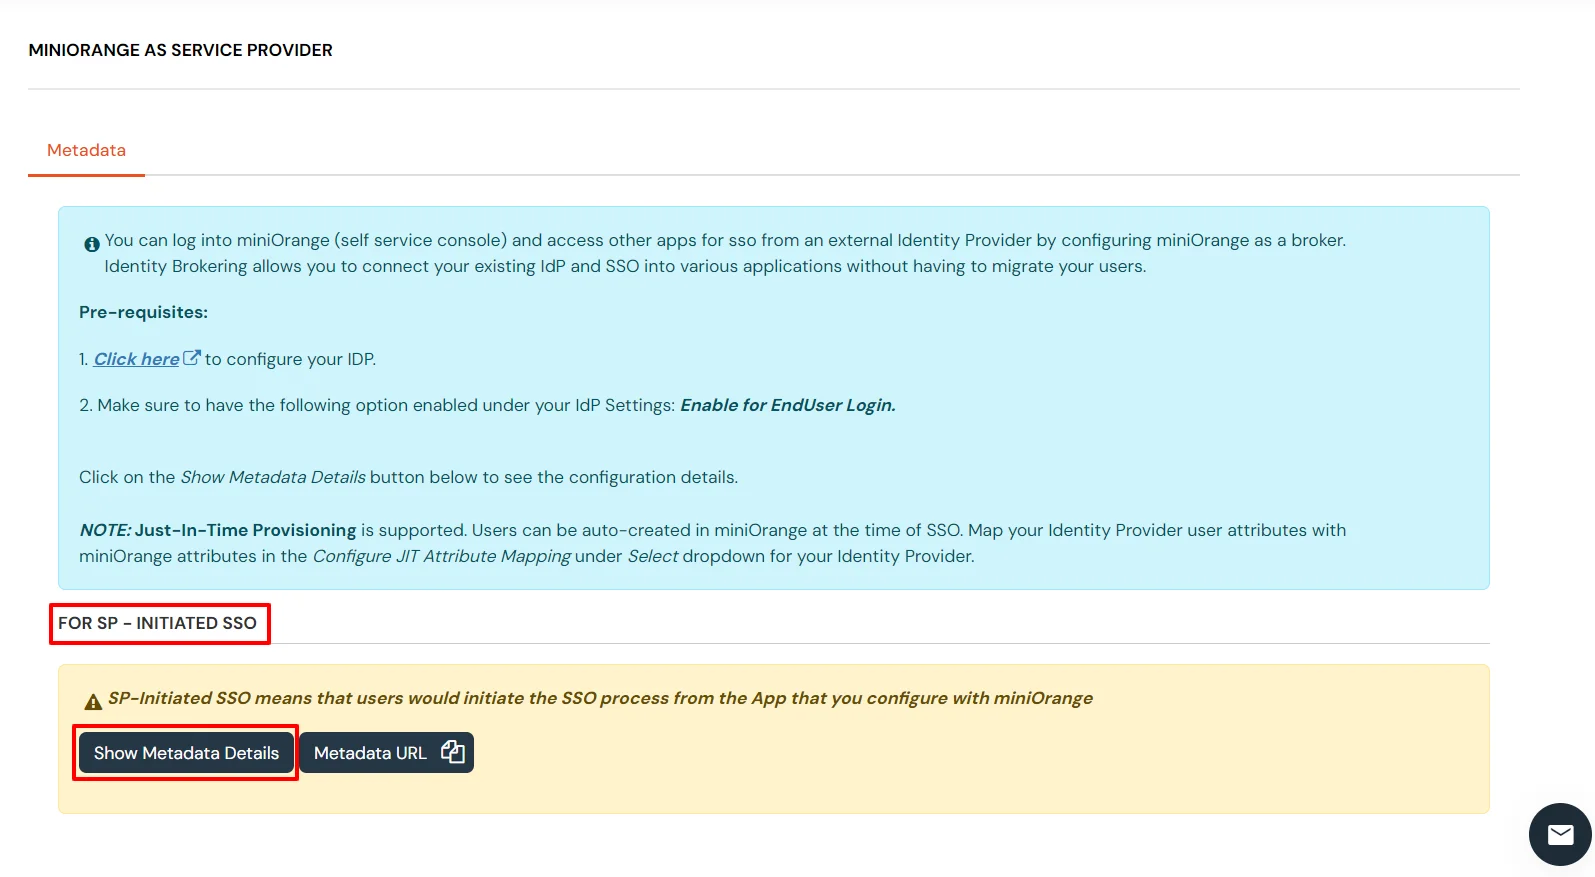
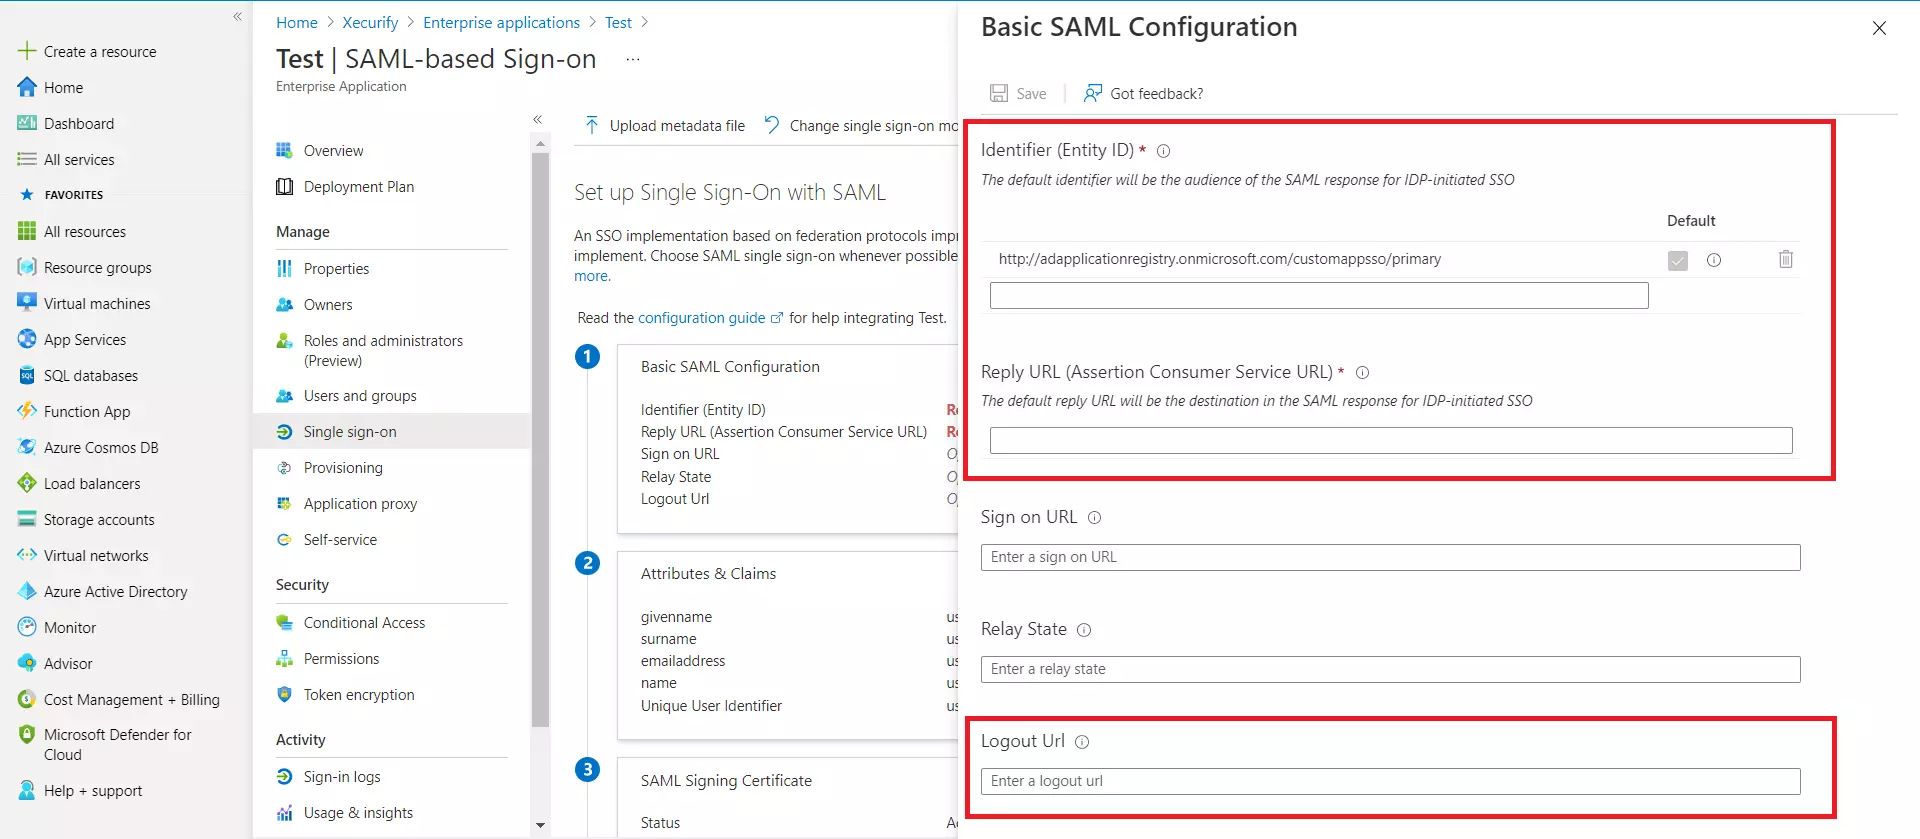
| Identifier (Entity ID) | Entity ID or Issuer copied from the miniOrange metadata section mentioned in the previous step. |
| Reply URL (Assertion Consumer Service URL) | ACS URL copied from the miniOrange metadata section mentioned in the previous step. |
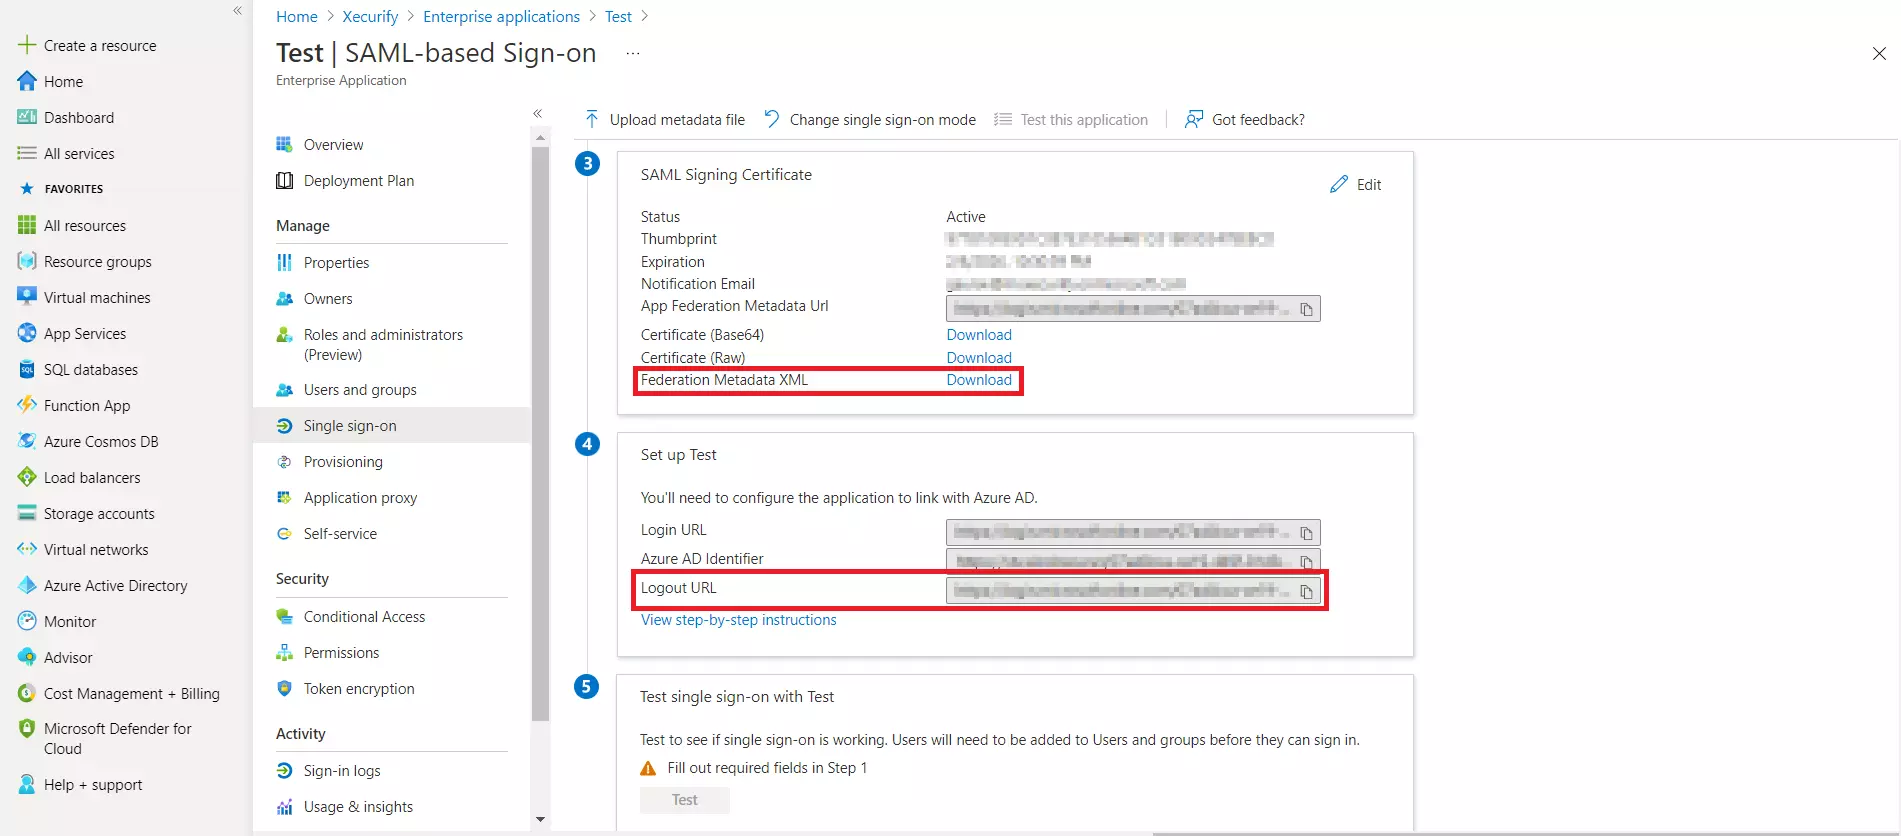
| Logout URL | Single Logout URL copied from the miniOrange metadata section mentioned in the previous step. |
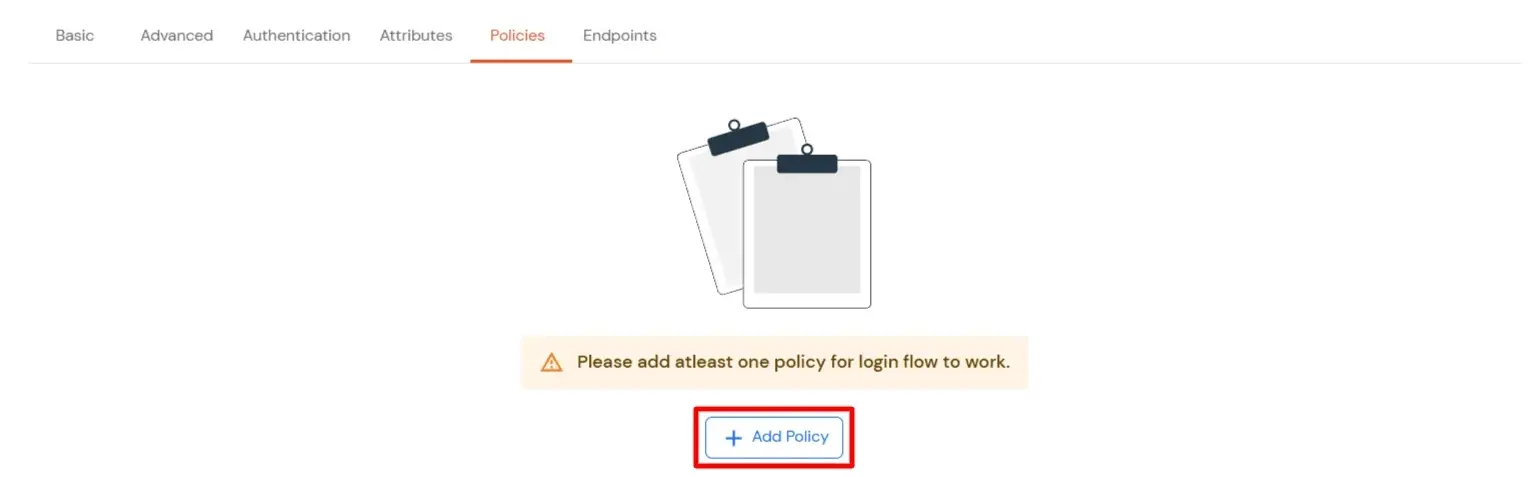
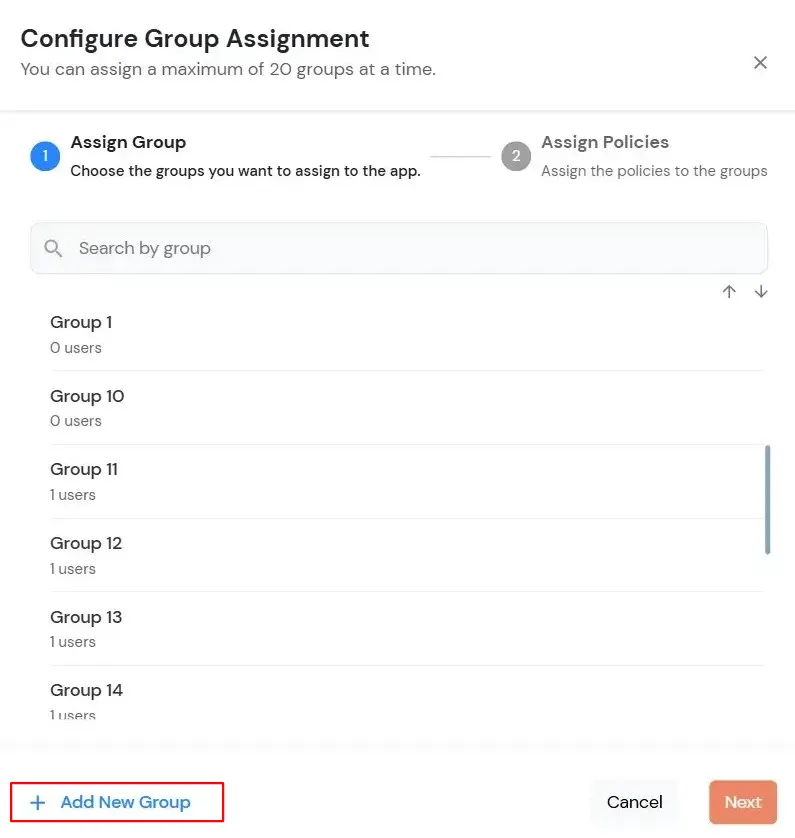
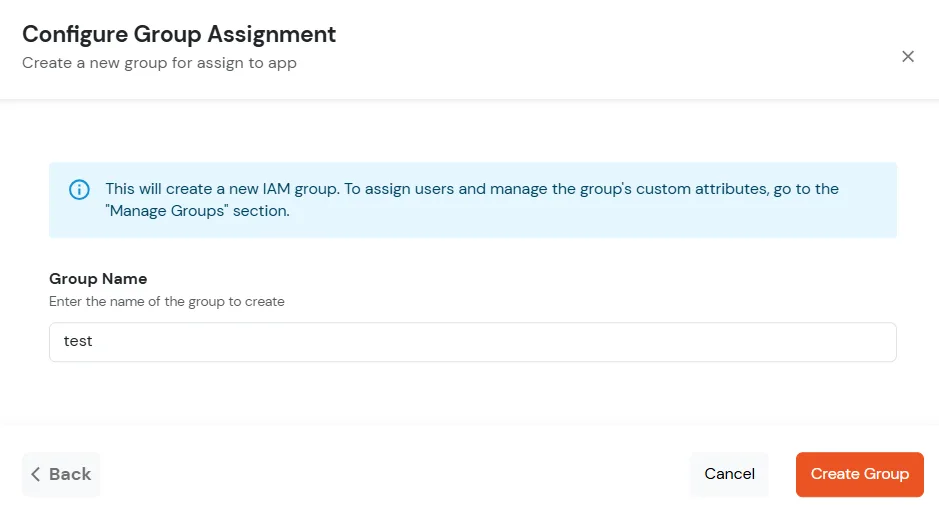
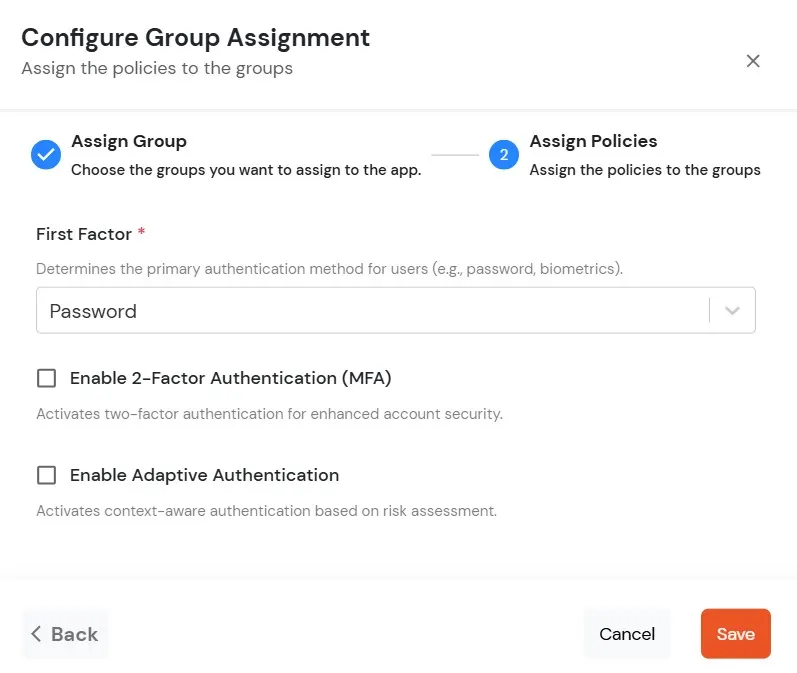
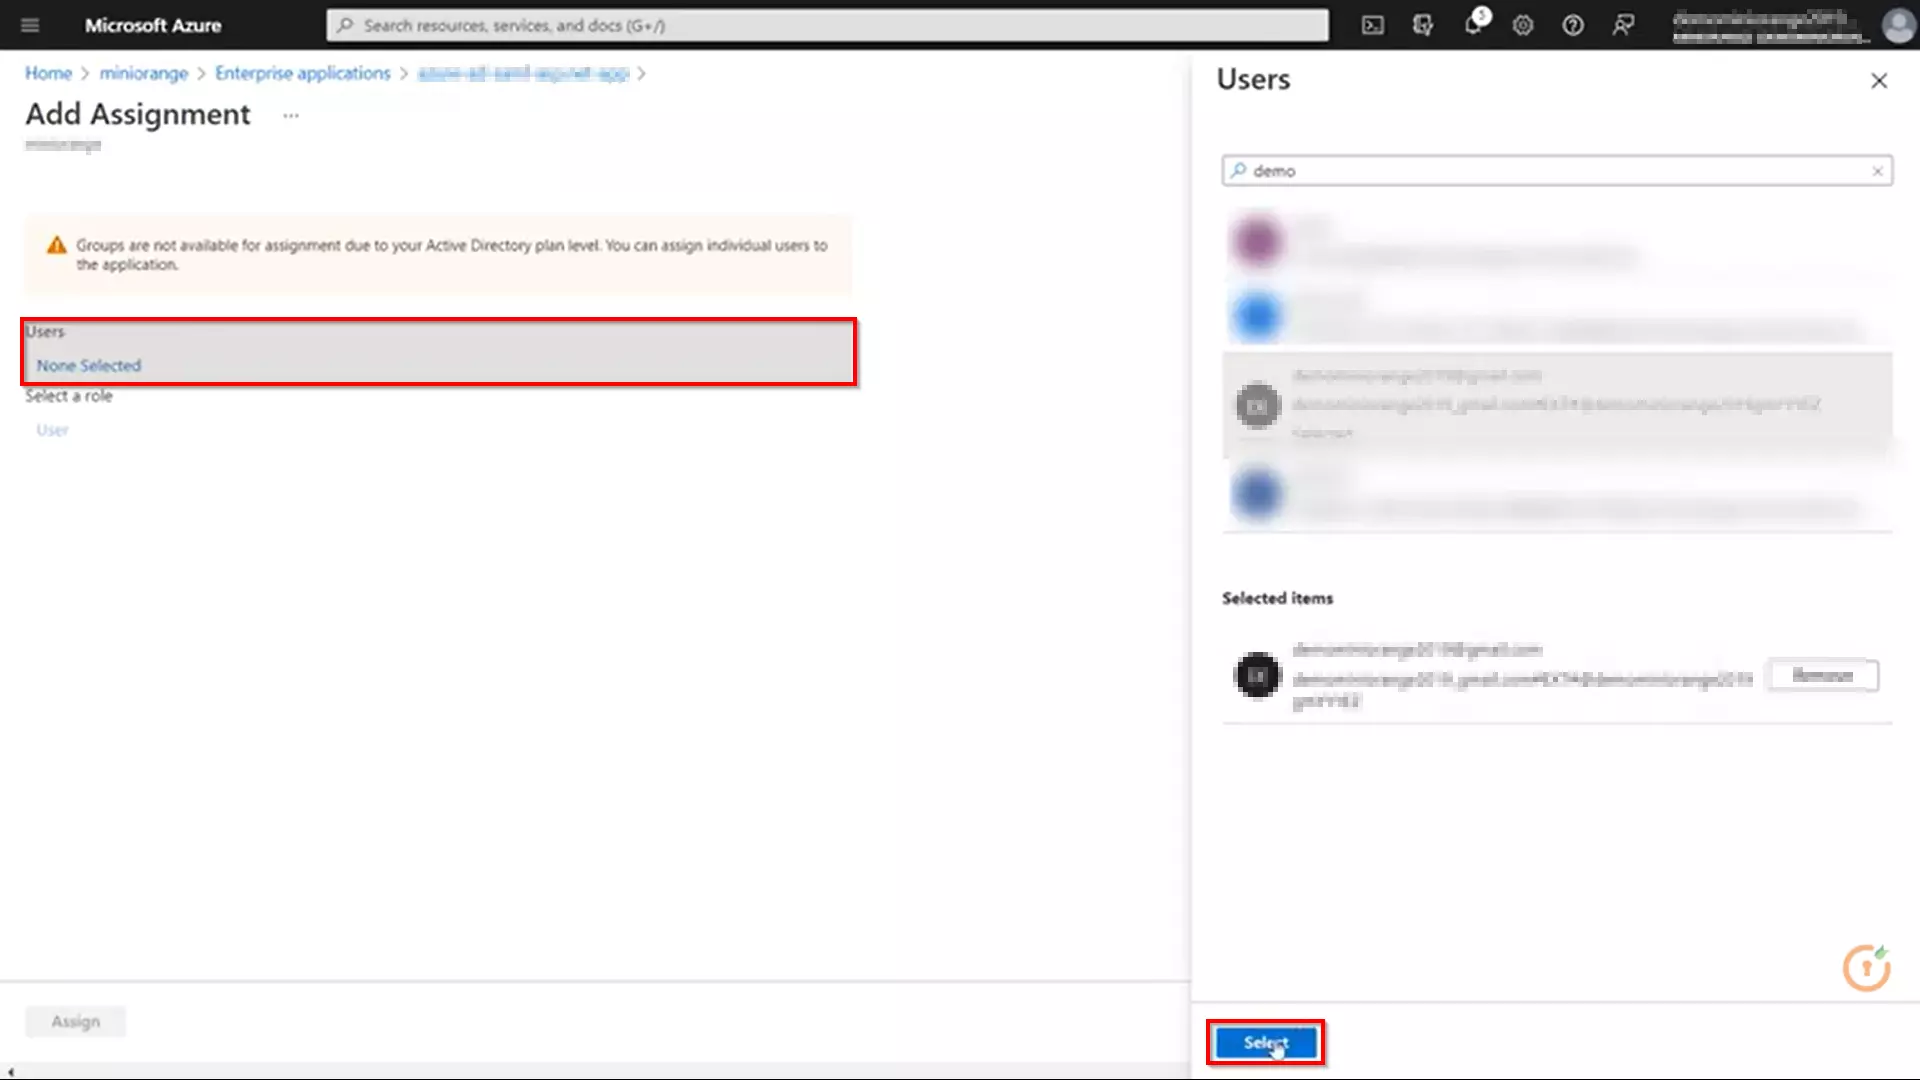
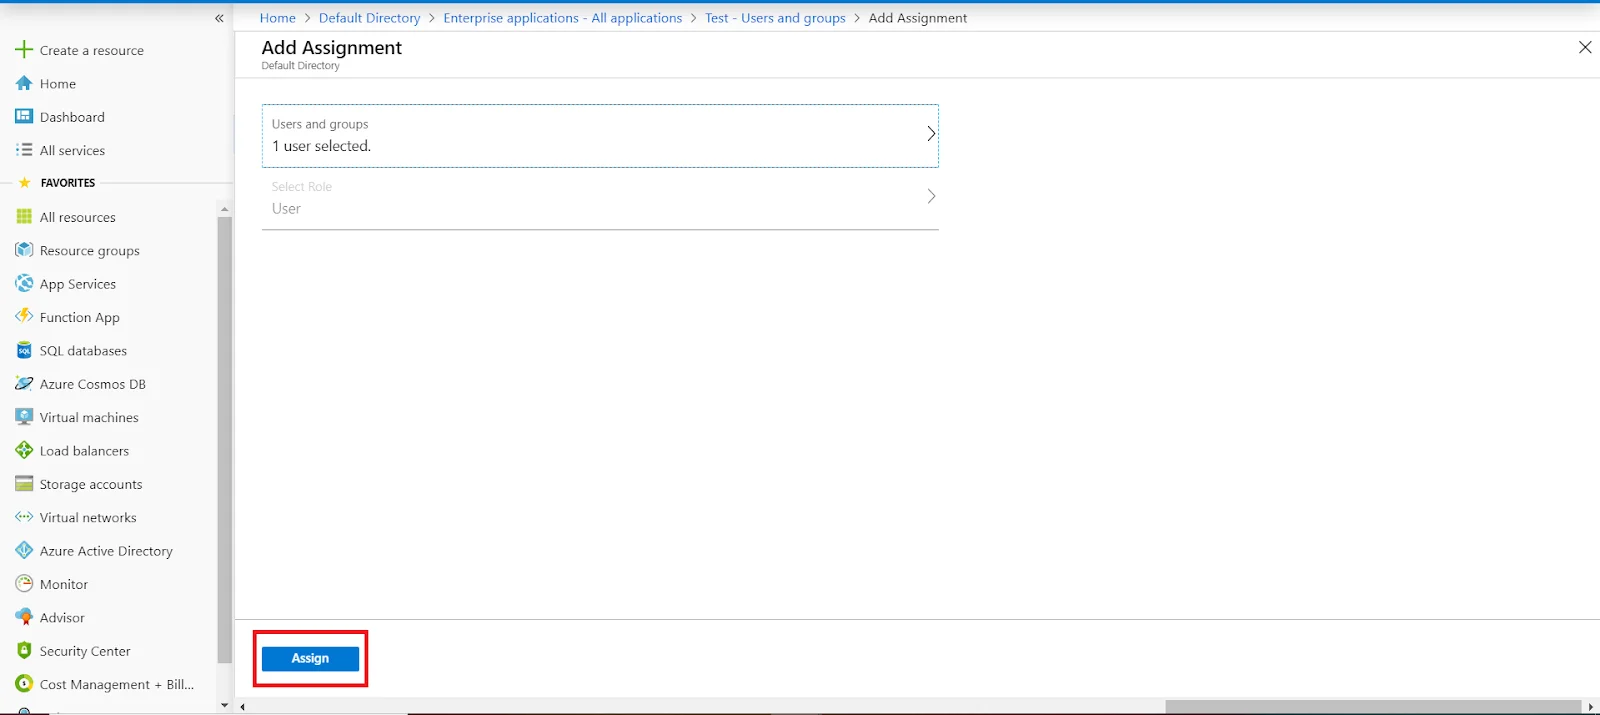
3.b. User/Group Assignment

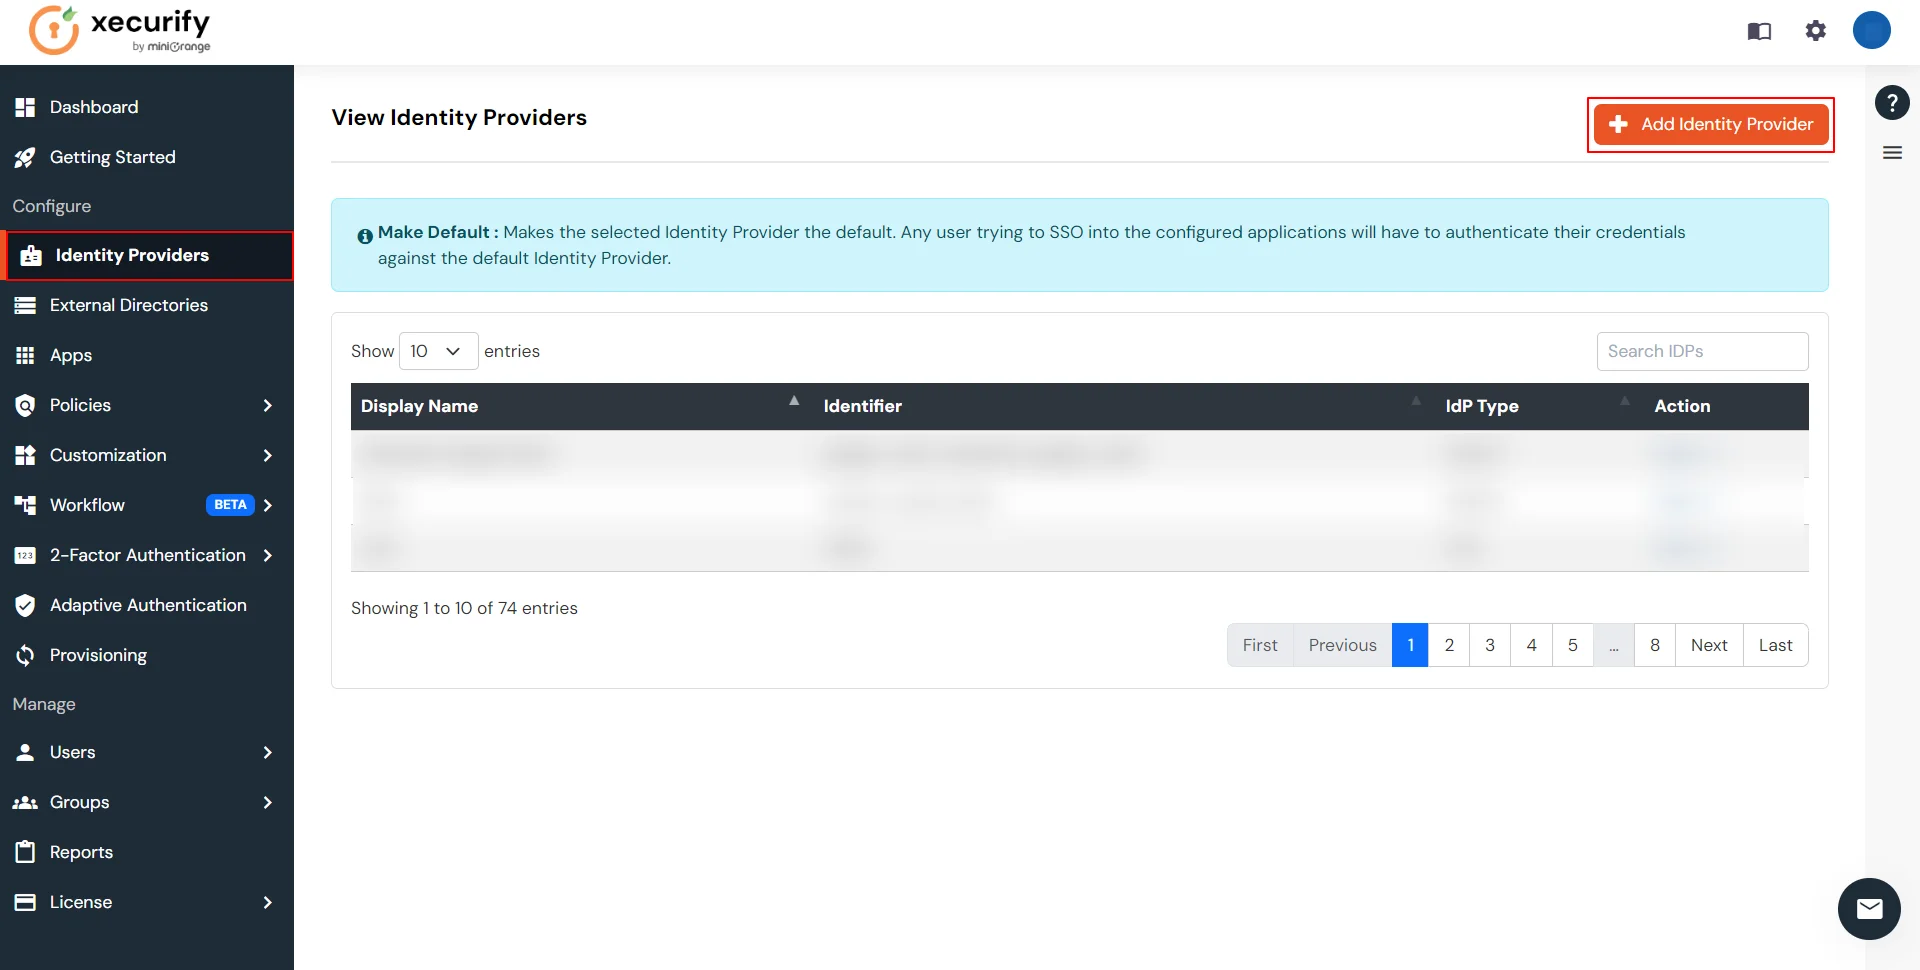
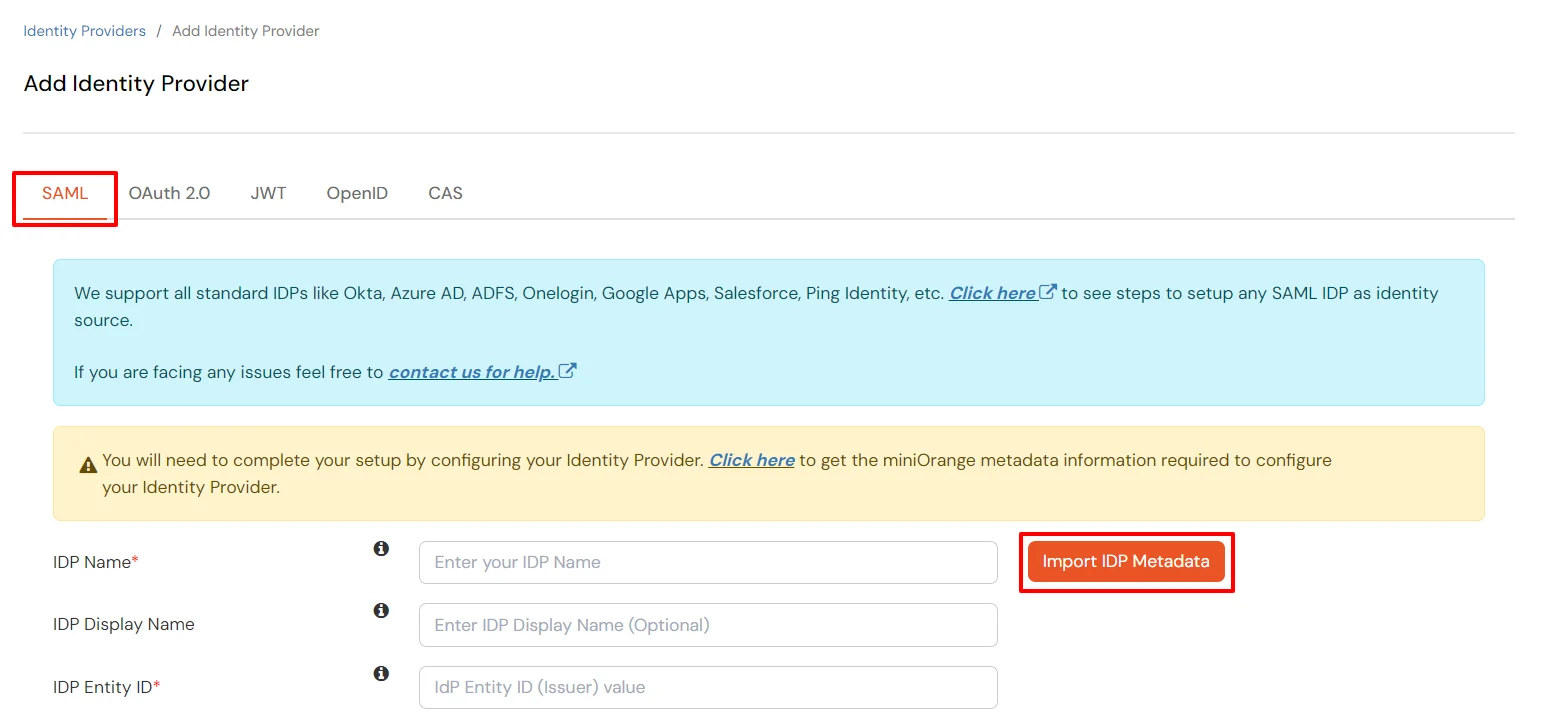
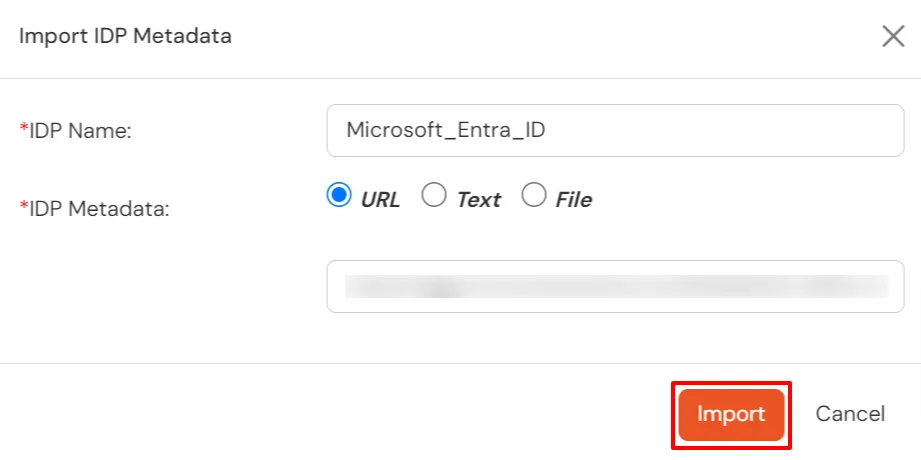
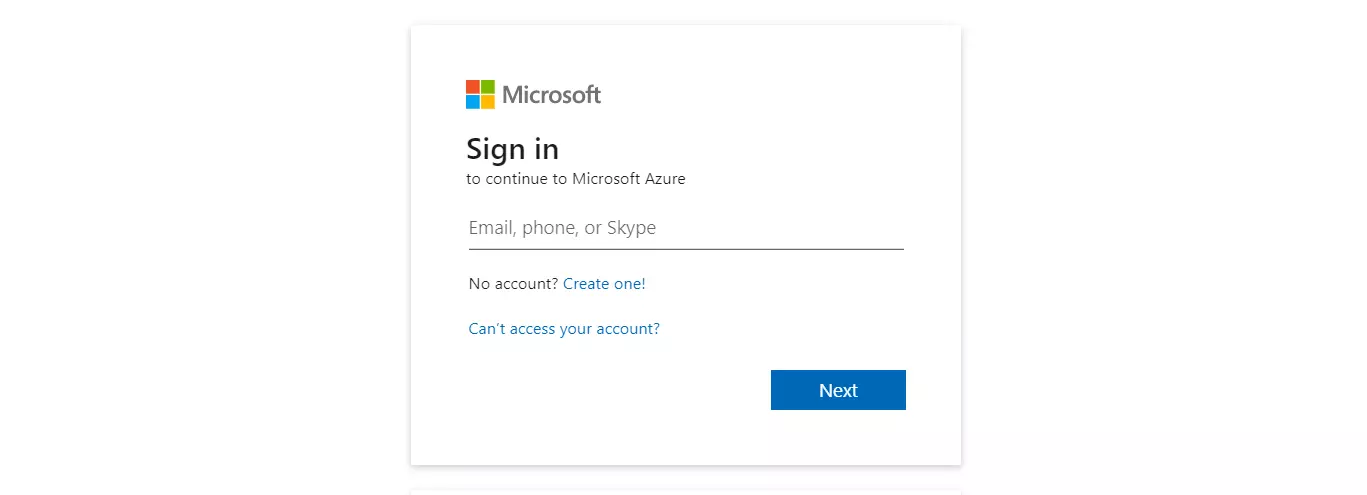
3.c. Configure Microsoft Entra ID as Identity Provider (IDP) in miniOrange
| Domain Mapping | Enable to redirect domain specific user to a specific IDP |
| Show IdP to Users | Enable this option if you wish to show this IDP as a button on the login page. Eg : Login with Microsoft Entra ID. |
| Send Configured Attributes | Enable this option if you wish to send user attributes from the IDP to WebFlow while SSO. |
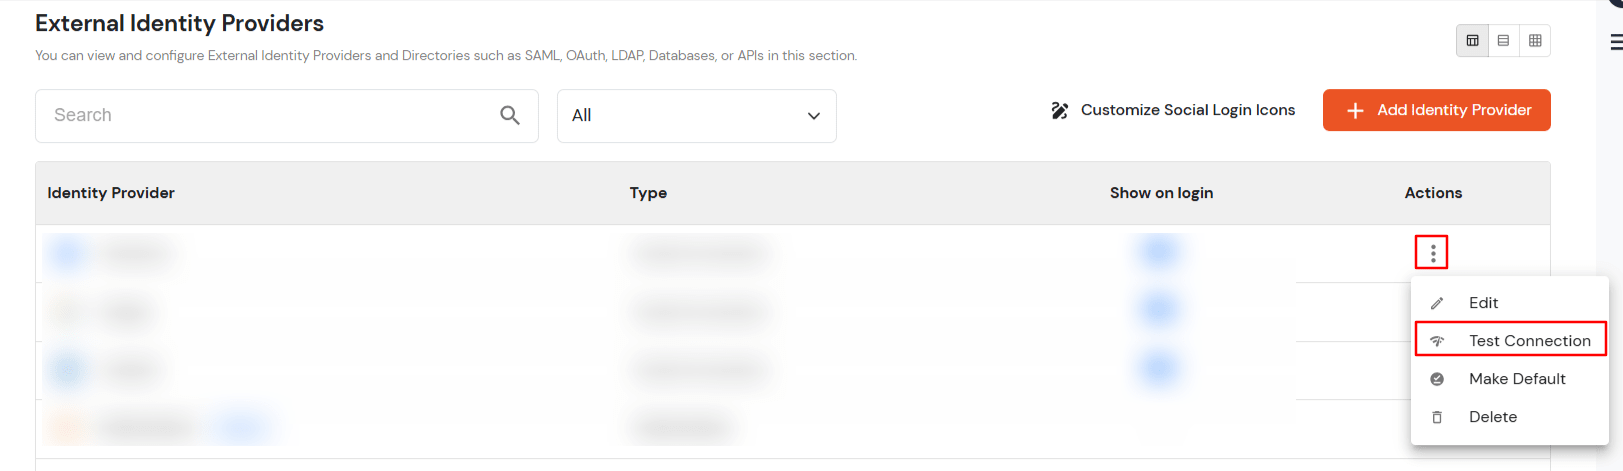
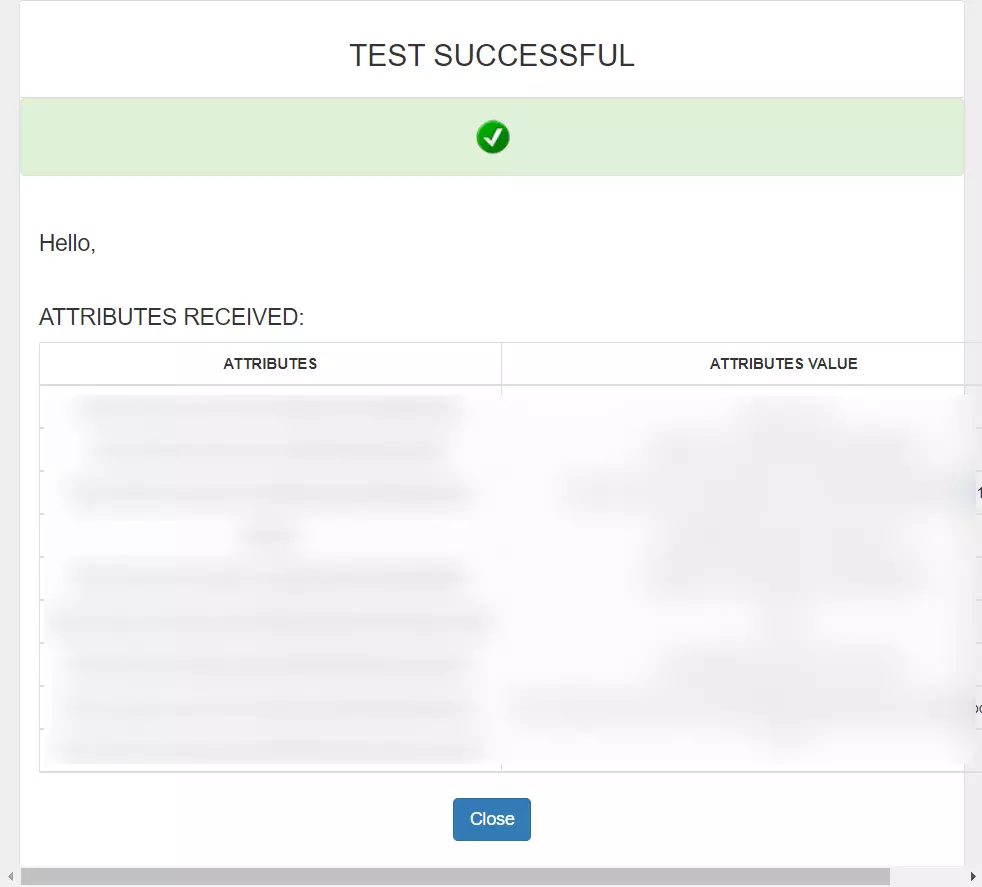
3.d. Test IDP Connection

Yes, our scripts are completely customizable and you can restrict page access based on memberships, groups, company . domain or any other custom attribute of your choice.
We handle this by adding the no script tags in our script file, this enables redirection of your users to a customizable page with instructions to enable javascript.
