BigCommerce B2B Social Login allows business buyers to create an account or log in to your BigCommerce B2B store using their existing social or enterprise identity credentials, such as Google, Microsoft, Apple, Facebook, or other supported Identity Providers (IdPs). This simplifies the authentication process for B2B buyers by eliminating the need to remember separate BigCommerce login credentials.
With BigCommerce B2B Social Login, you can:
Enable B2B buyers to securely log in to your BigCommerce B2B storefront using their existing social or Identity Provider credentials.
Simplify access for business buyers while maintaining their B2B company and user-role associations.
Improve the B2B buying experience by providing faster, passwordless-style access to the storefront and reducing login friction.
Enhance security by integrating Multi-Factor Authentication (MFA/2FA) with the authentication flow.
miniOrange offers free help through a consultation call with our System Engineers to Install or Setup BigCommerce SSO solution in your environment with 30-day free trial.
For this, you need to just send us an email at idpsupport@xecurify.com to book a slot and we'll help you in no time.
miniOrange provides user authentication from various external sources, which can be Directories (like ADFS, Microsoft Active Directory, OpenLDAP, AWS etc), Identity Providers (like Microsoft Entra ID, Okta, AWS), and many more. You can configure your existing directory/user store or add users in miniOrange.
Prerequisites
Please make sure your organisation branding is already set under Customization >> Login and Registration Branding in the left menu of the dashboard.
Follow the Step-by-Step Guide given below for BigCommerce Single Sign-On (SSO)
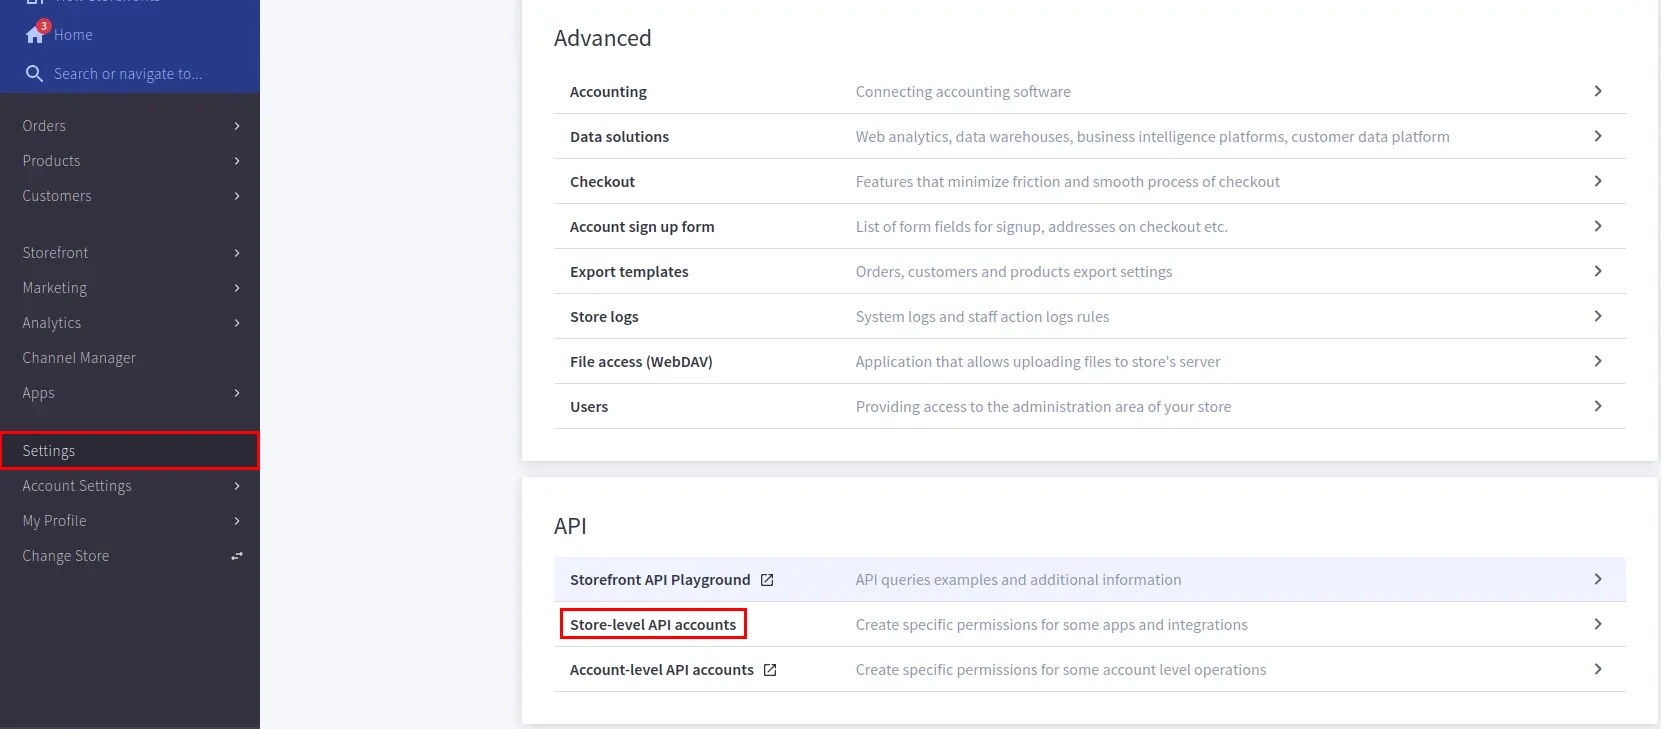
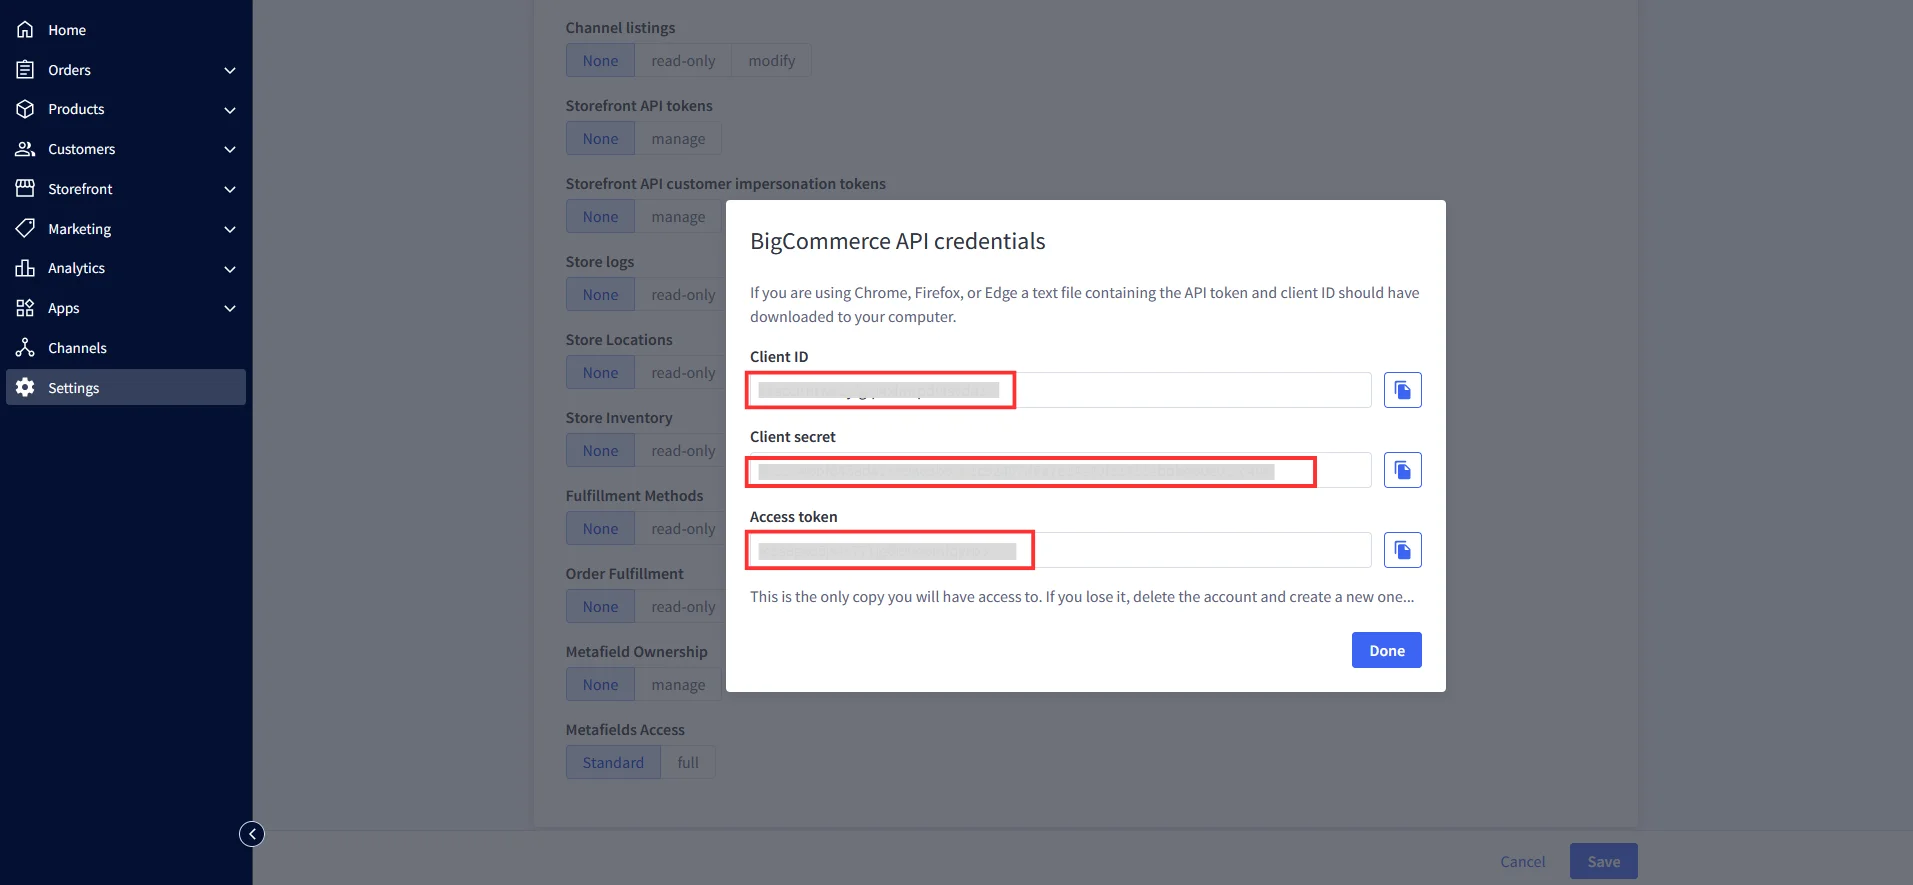
Go to the Settings from the sidebar, scroll down to API and then click on Store-level API accounts.
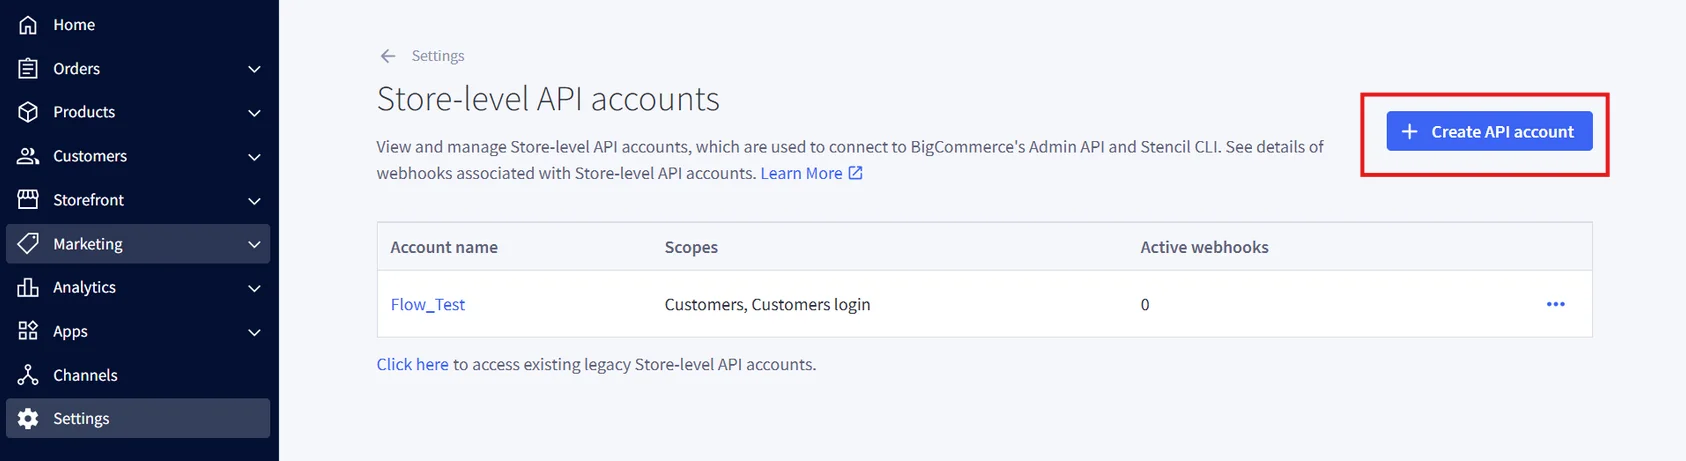
Click on Create API Account and choose the token type as V2/V3 API Token option from the menu shown.
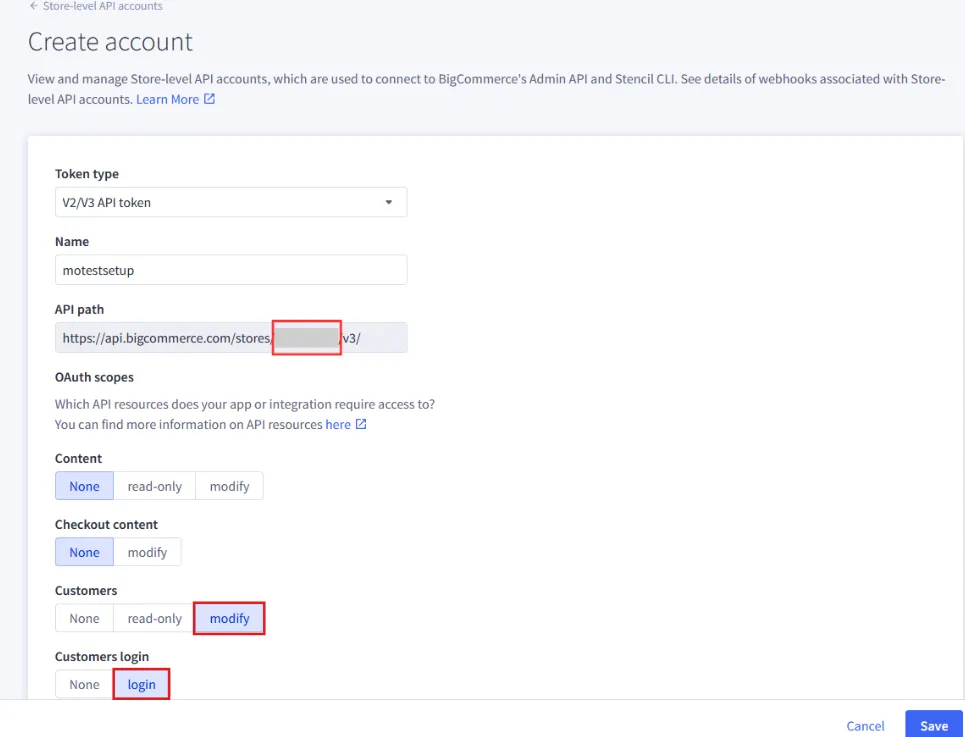
Add a suitable name for your API account.
Note: In BigCommerce, the API Path is the base URL that your application or integration uses to connect to your store’s data through BigCommerce APIs. The Store Hash is a unique identifier automatically generated by BigCommerce for each store. It appears in the API Path.
Copy the highlighted Store Hash from the API Path.
Note: This Store Hash will be required while configuring BigCommerce in miniOrange.
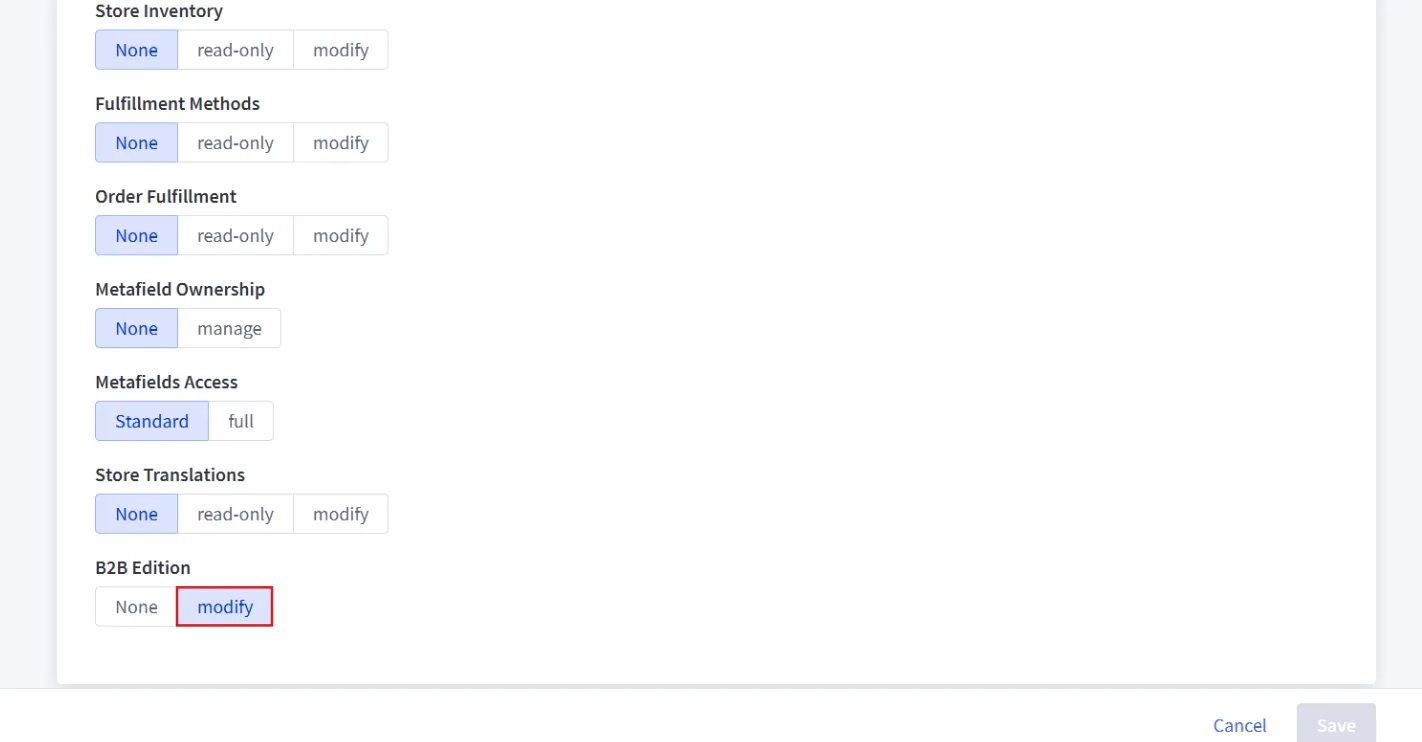
Enable the Customers option as Modify, set Customers Login to Login, and enable B2B Edition as Modify. Keep all other settings unchanged.
Click on Save.
Download the API credentials file. It contains the API token, Client ID and Client Secret.
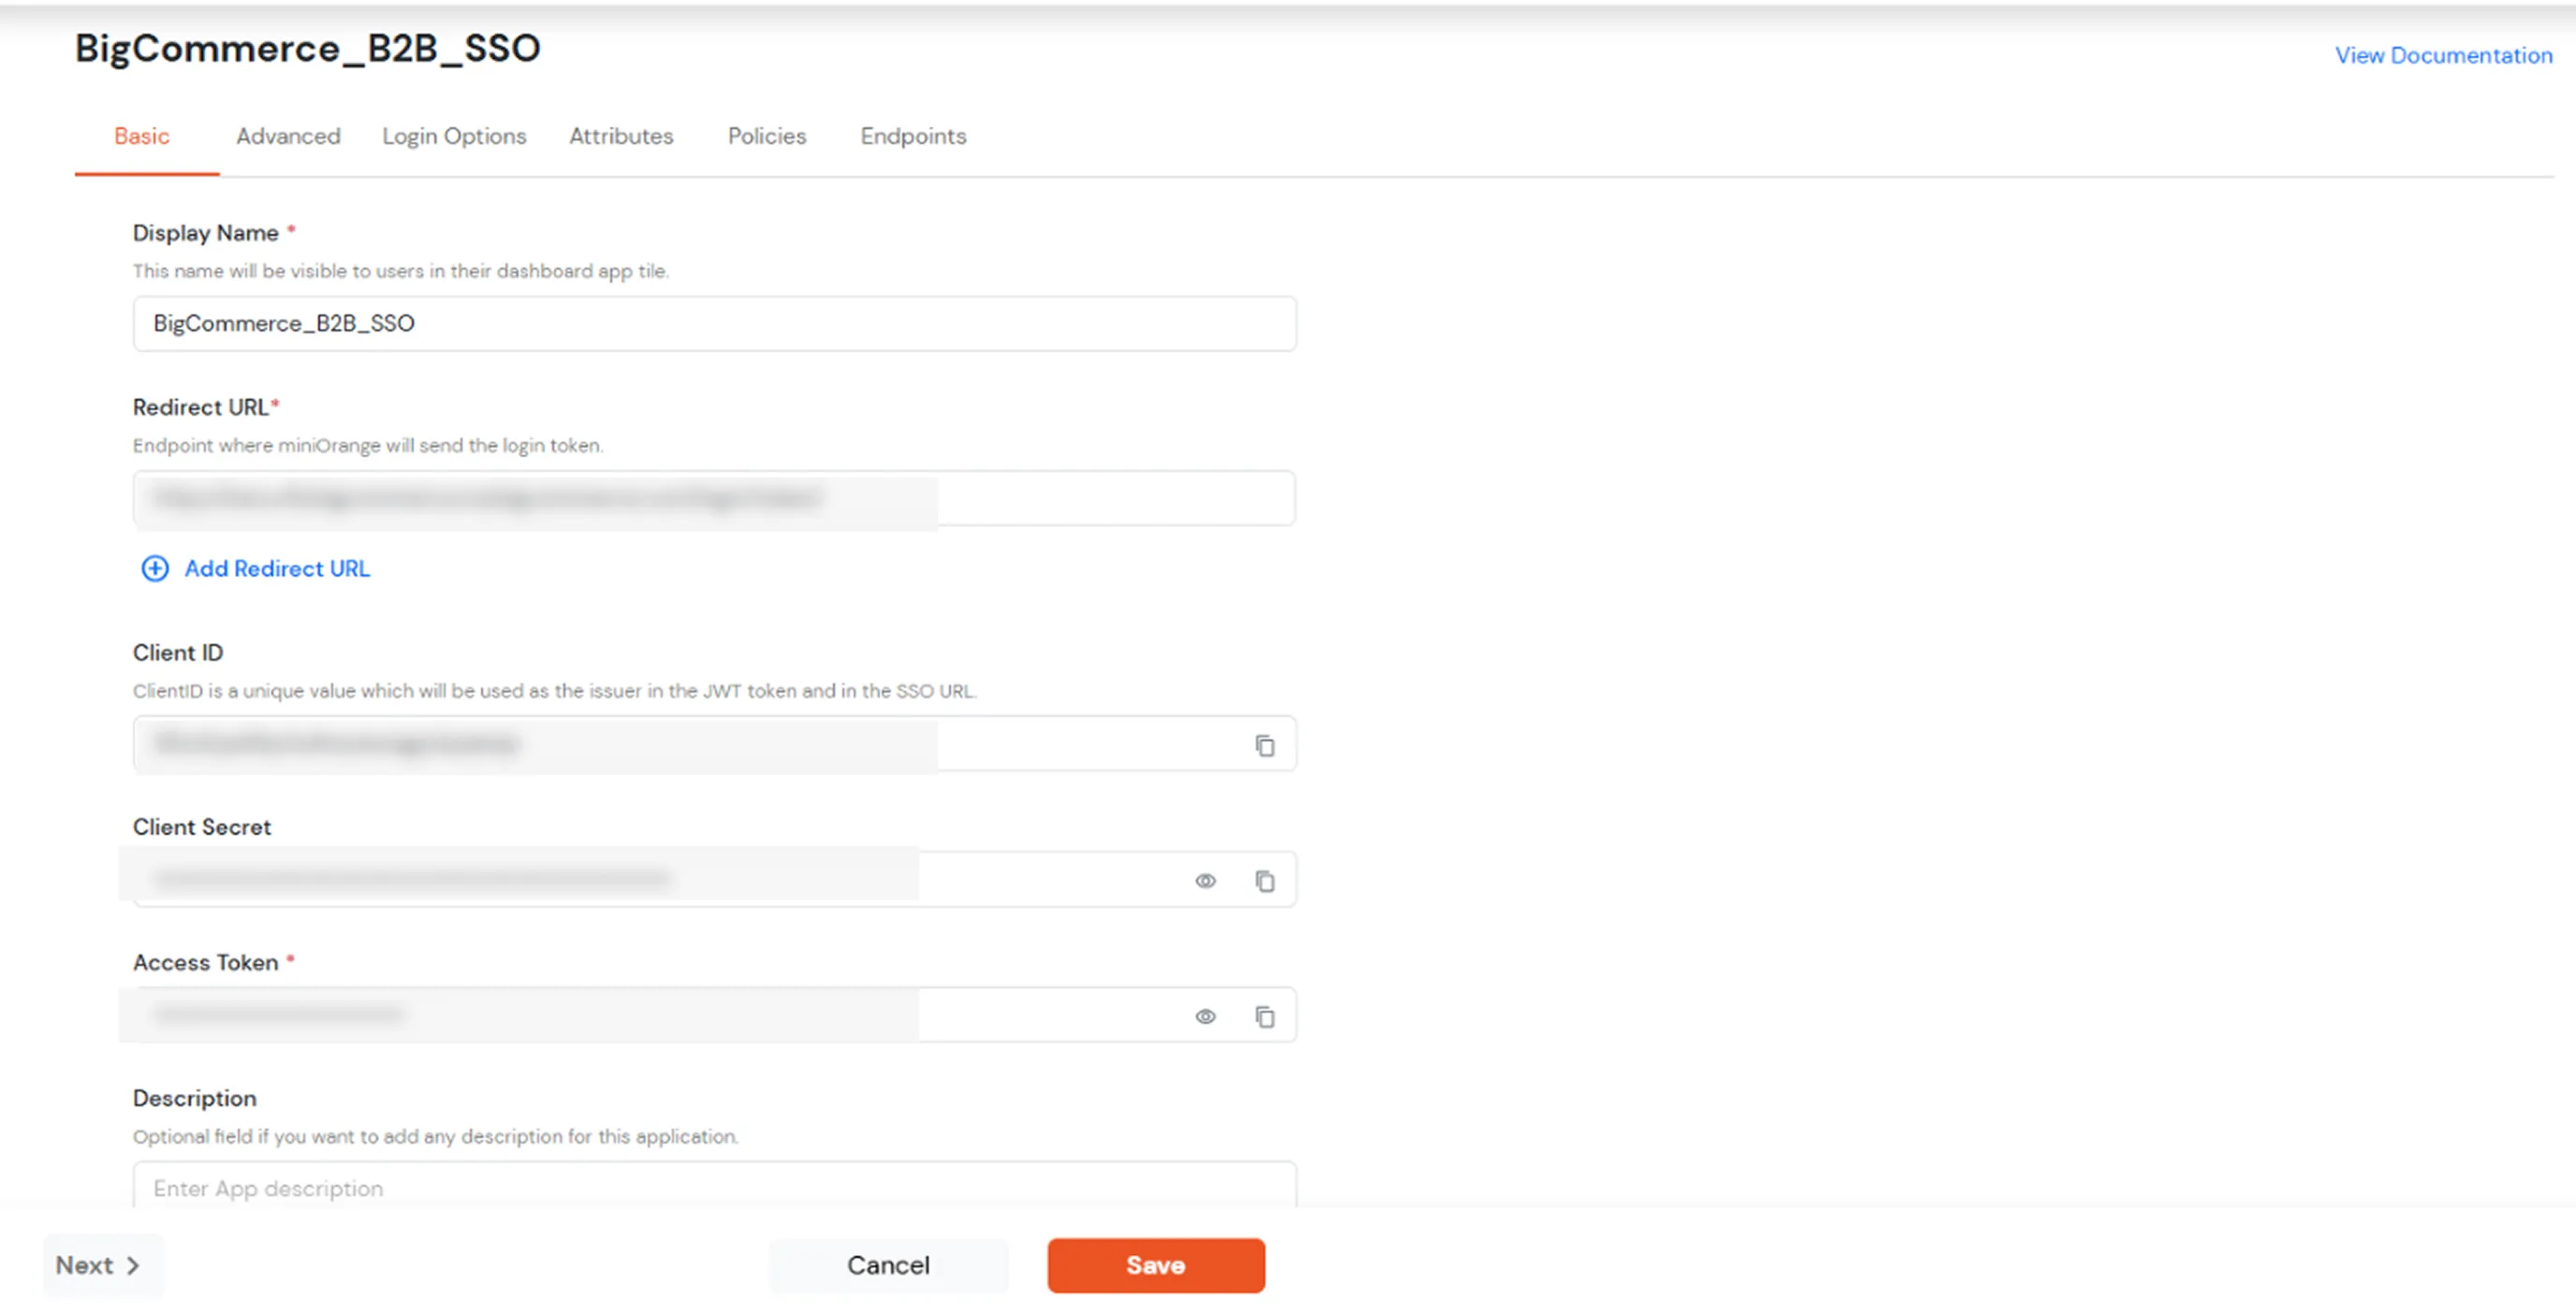
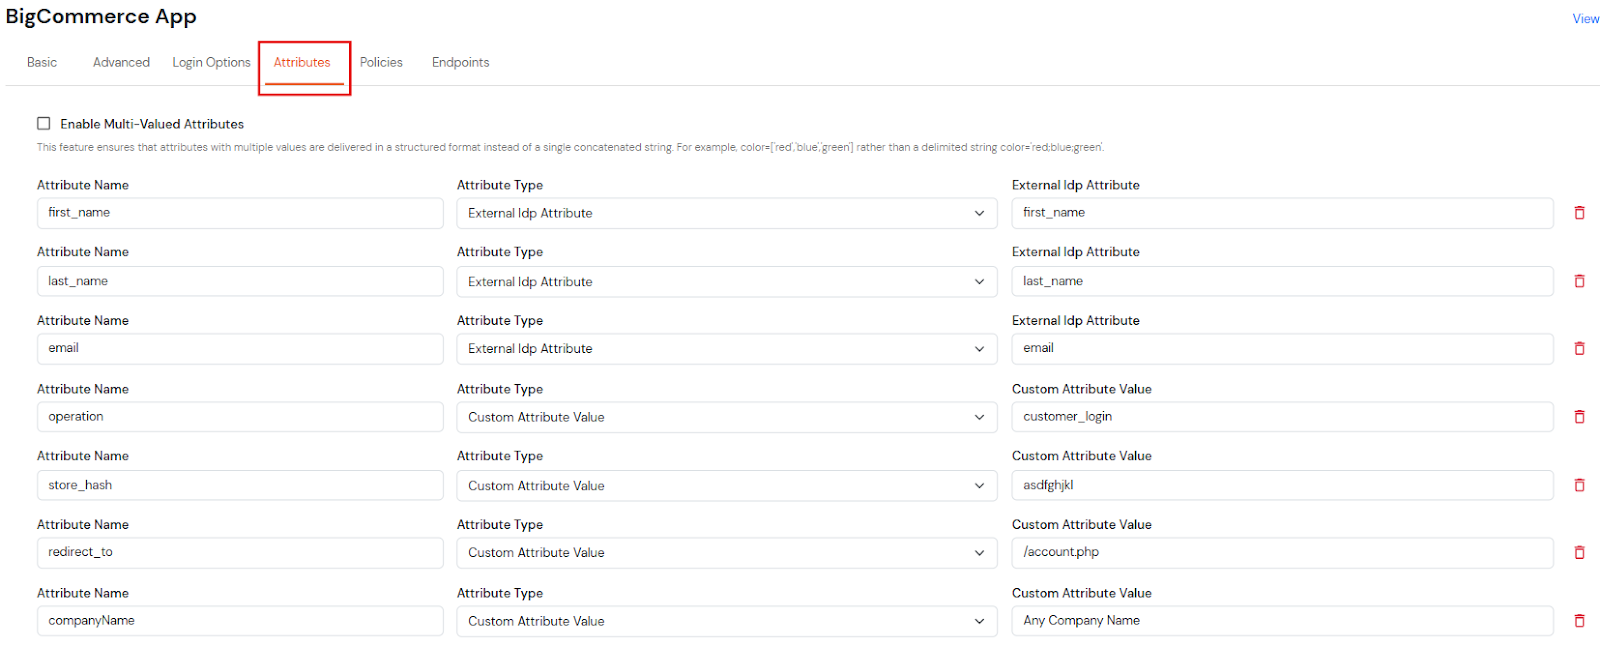
Endpoint where you wish to redirect the user to after sso. [Homepage or account page e.g. /account.php]
operation
Custom Profile Attribute
customer_login
first_name
External Idp Attribute
first_name
last_name
External Idp Attribute
last_name
email
External Idp Attribute
email
companyName
Map to company field or static value
[Company name for B2B account] TestCompany
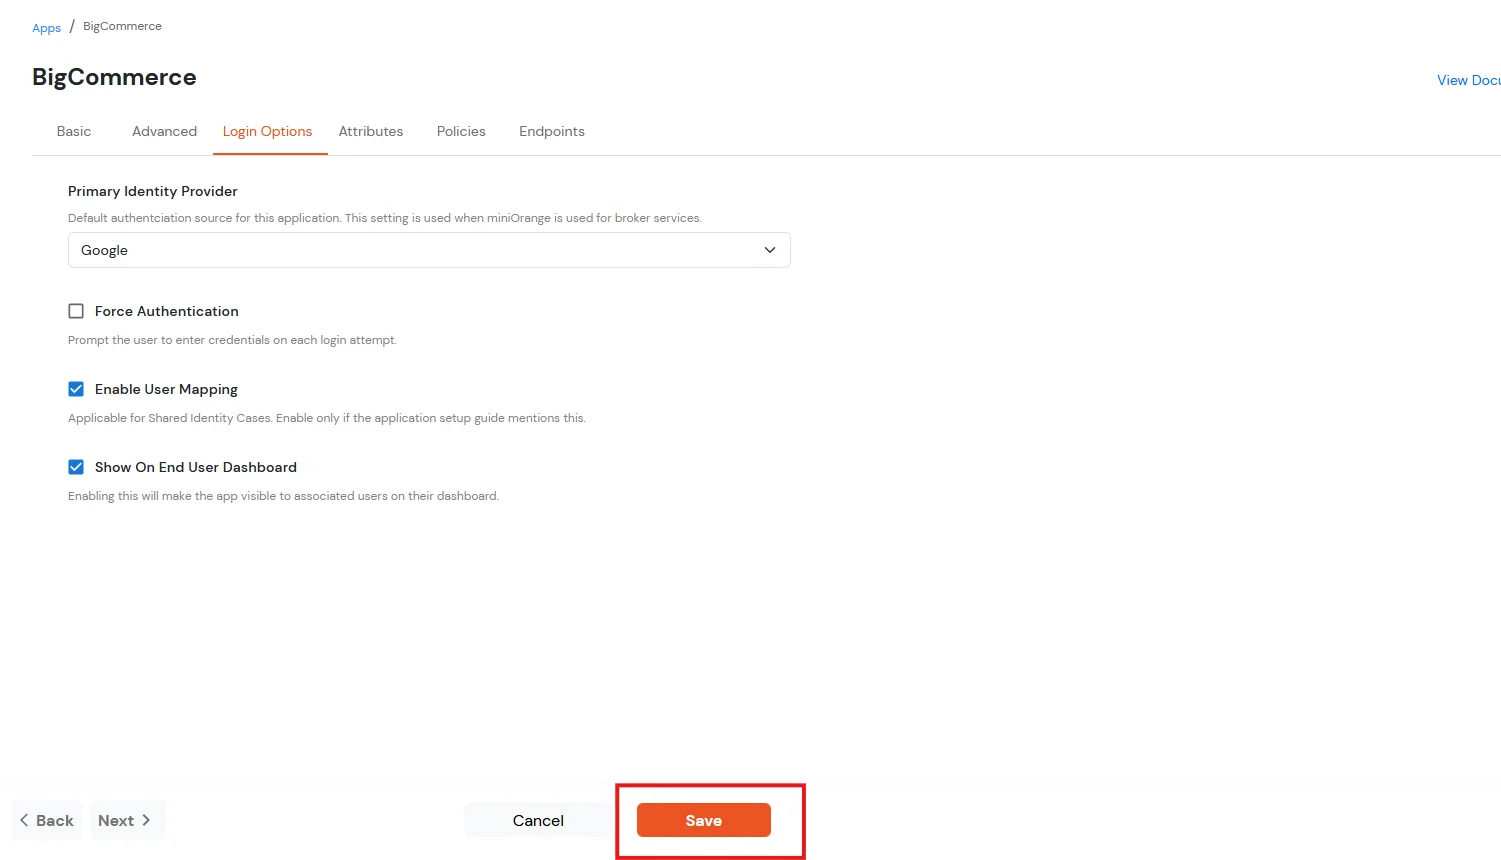
Click on the Save button.
Configure Optional Attributes
Beyond the required attributes, you can configure additional optional attributes to customize user provisioning and company setup.
Available Optional Attributes
Attribute
Description
Accepted Values
Default Value
role
User's role within the B2B company
admin, senior_buyer, junior_buyer
junior_buyer
phone
Company contact phone number
Valid phone number string
1234567890
country
Company's primary business location
Full country name or two-letter country code (e.g., 'United States', 'US', 'Canada', 'CA')
United States
How to Add Optional Attributes
In the Attribute tab, click Add Attribute Mapping.
Enter the attribute name exactly as shown above (case-sensitive).
Map it to the corresponding field from your identity provider, or enter a static value.
Click on Save.
Important Notes About Optional Attributes
First User Exception: The first user created for any company will automatically receive the admin role, regardless of the role attribute mapping. This ensures each company has at least one administrator.
Phone Format: Any phone number format is accepted.
Country Names: Use full country names as they appear in BigCommerce (e.g., "United States" not "US" or "USA").
Defaults Applied: If optional attributes are not configured, the system will use the default values listed above. The integration will function normally without them.
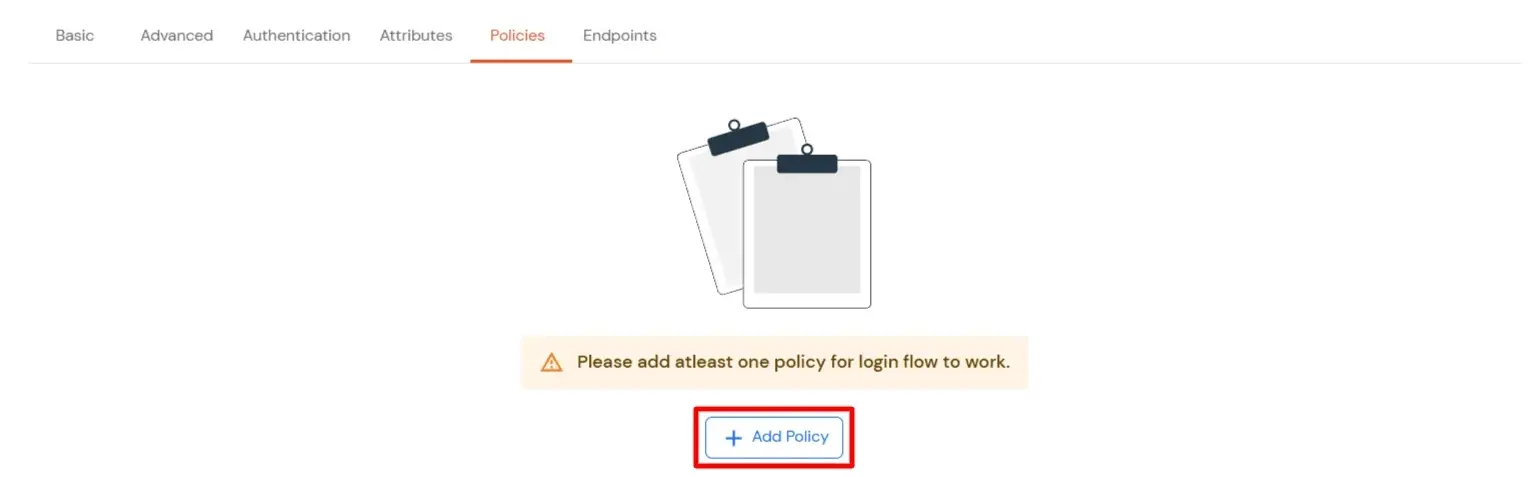
Navigate to Policies tab.
Click on Assign Group button.
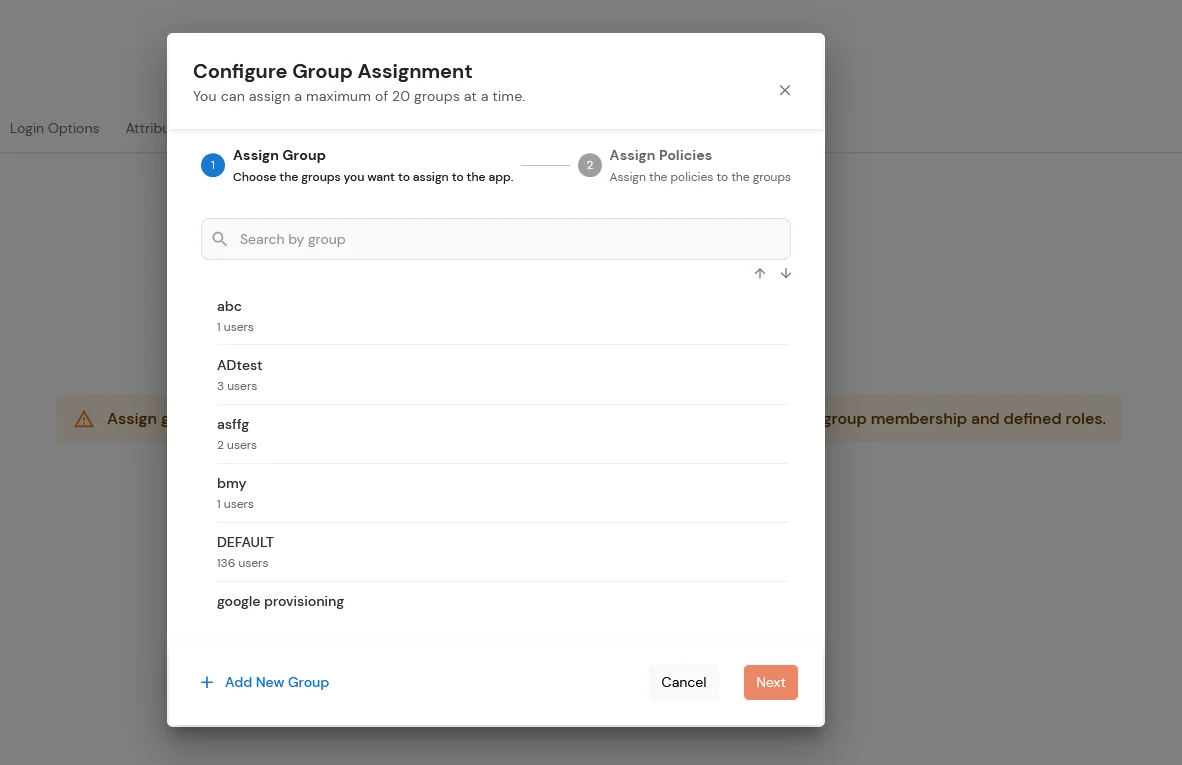
Choose the DEFAULT group.
Click on the Next button.
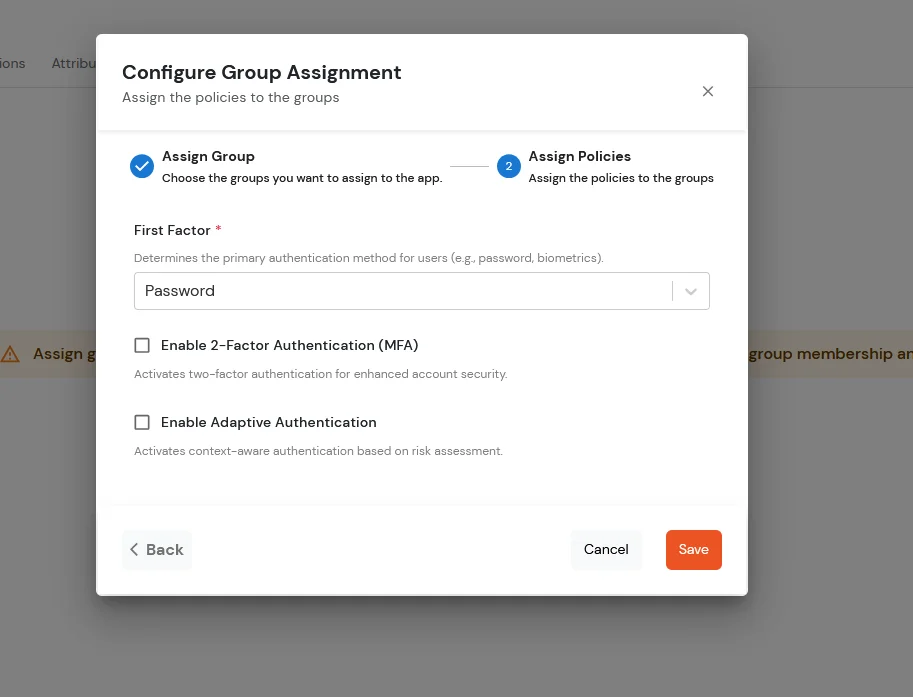
Assign the policies to the group. Here, you can choose the primary authentication method for users. From the dropdown under First Factor, select Password.
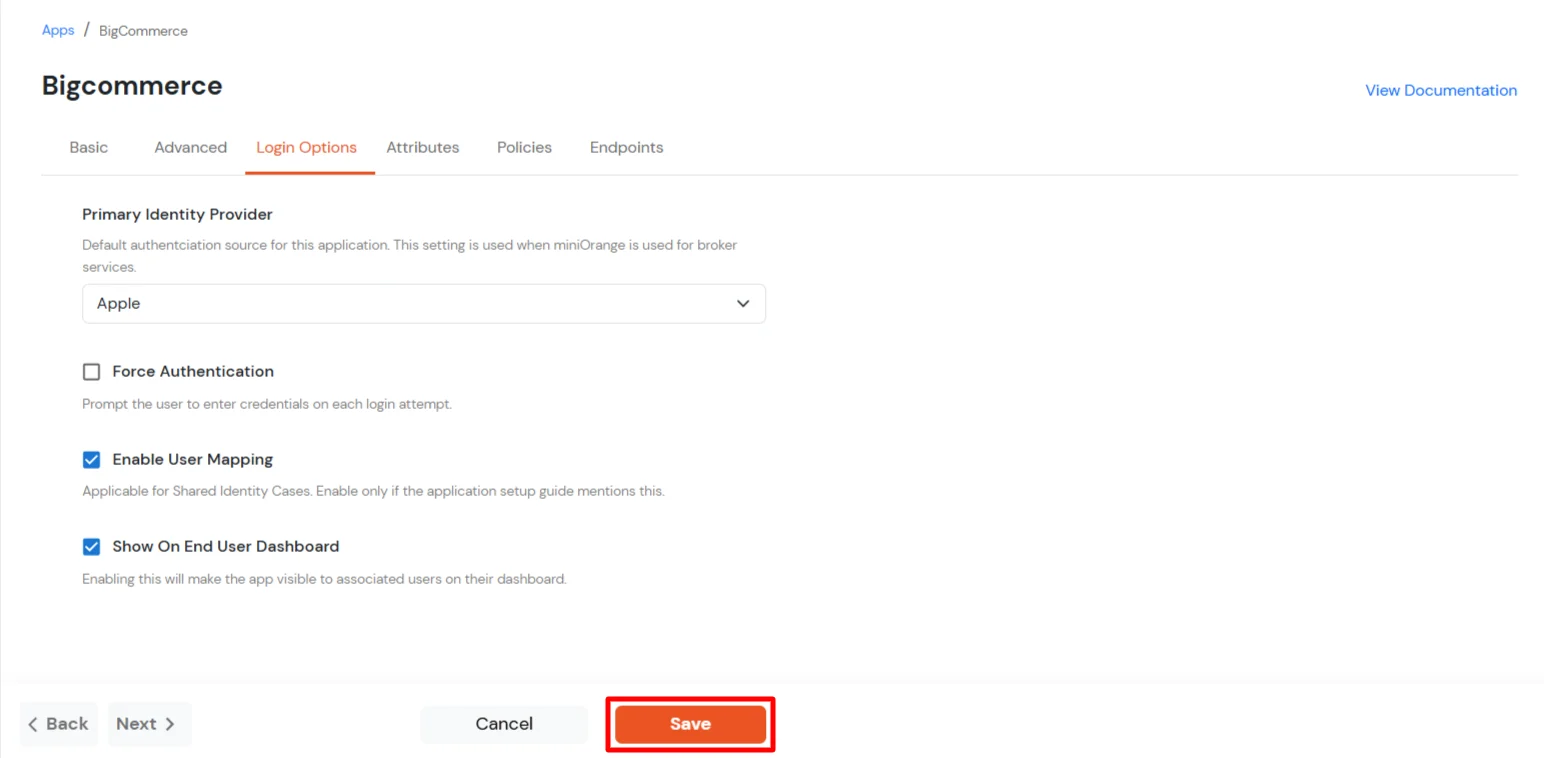
Click on the Save button.
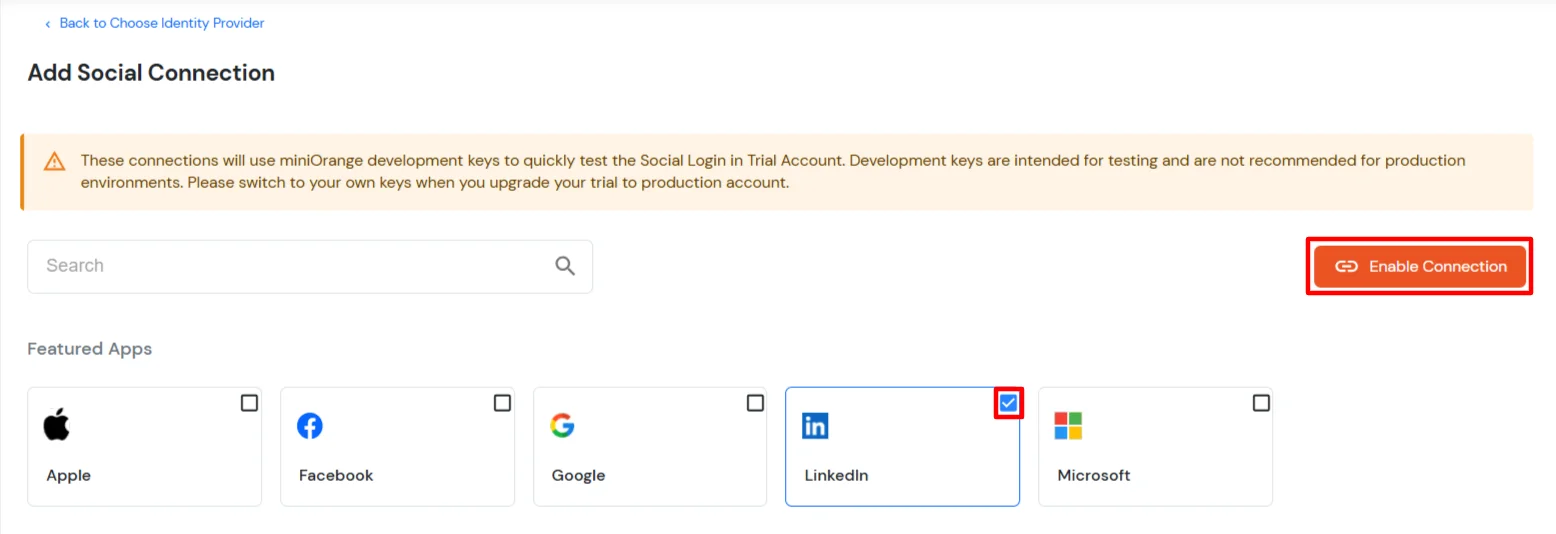
3. Configure Social Login Providers
miniOrange provides user authentication from various external sources, which can be Directories (like ADFS, Microsoft Entra ID, OpenLDAP, Google, AWS Cognito etc), Identity Providers (like Okta, Shibboleth, Ping, OneLogin, KeyCloak), Databases (like MySQL, Maria DB, PostgreSQL) and many more. You can configure your existing directory/user store or add users in miniOrange.
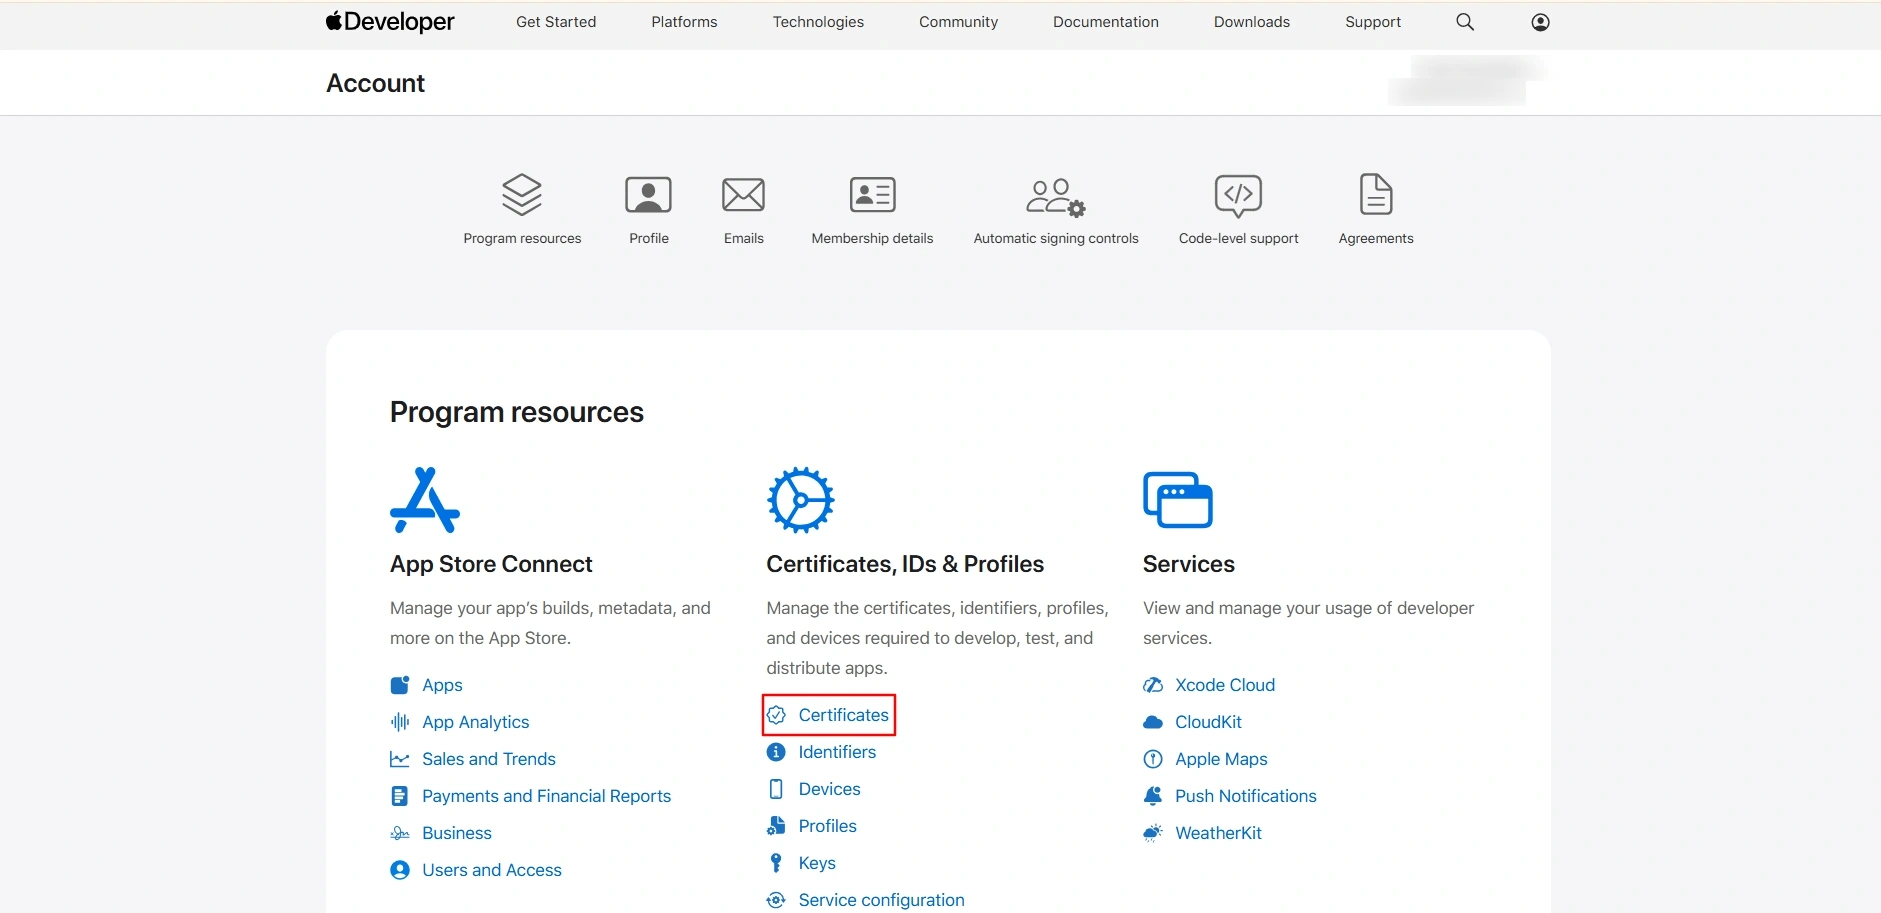
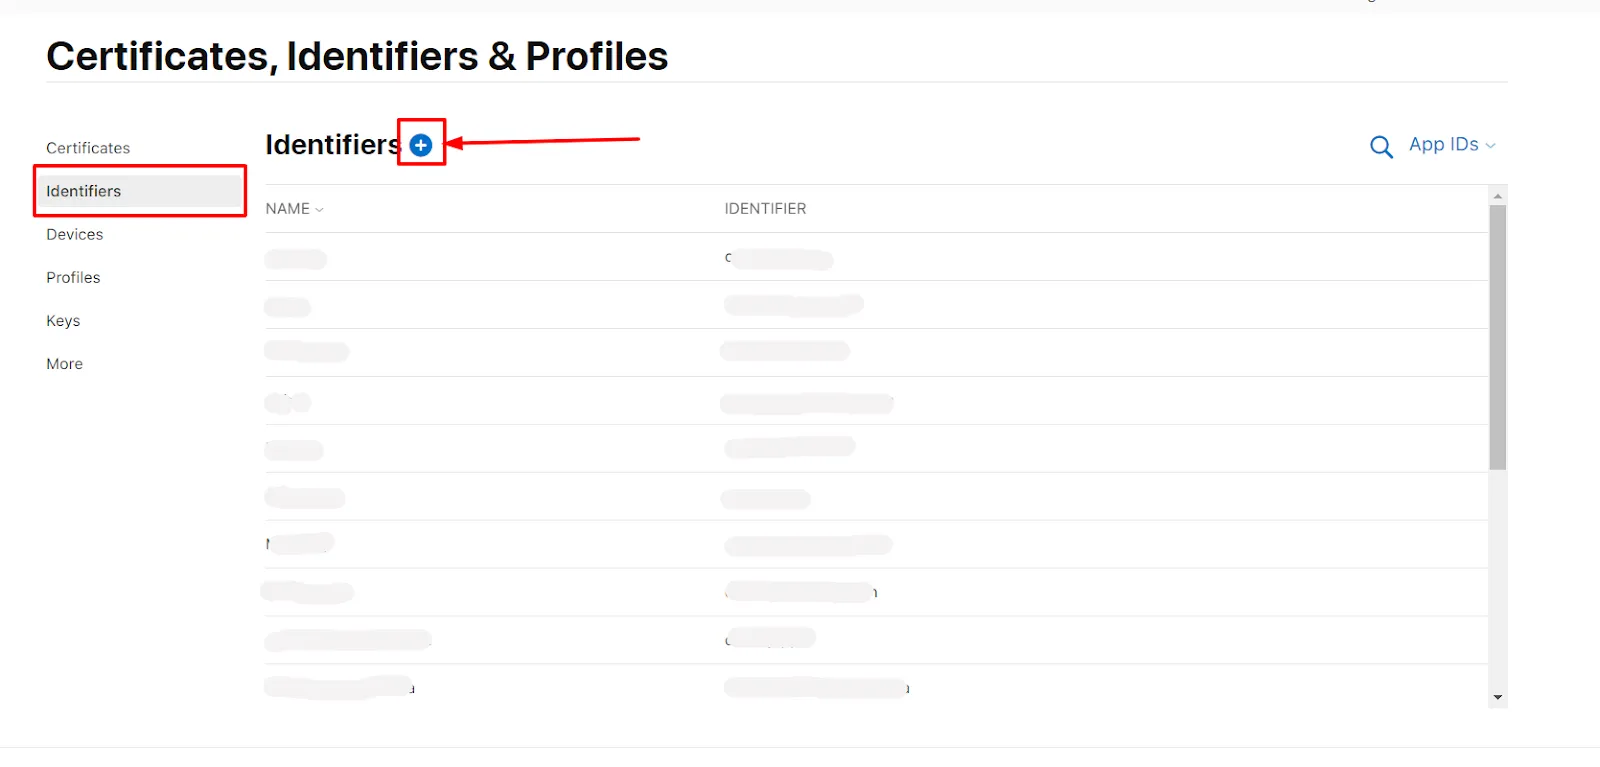
Click Identifiers in the left menu, then click the blue plus (+) icon to add a new identifier.
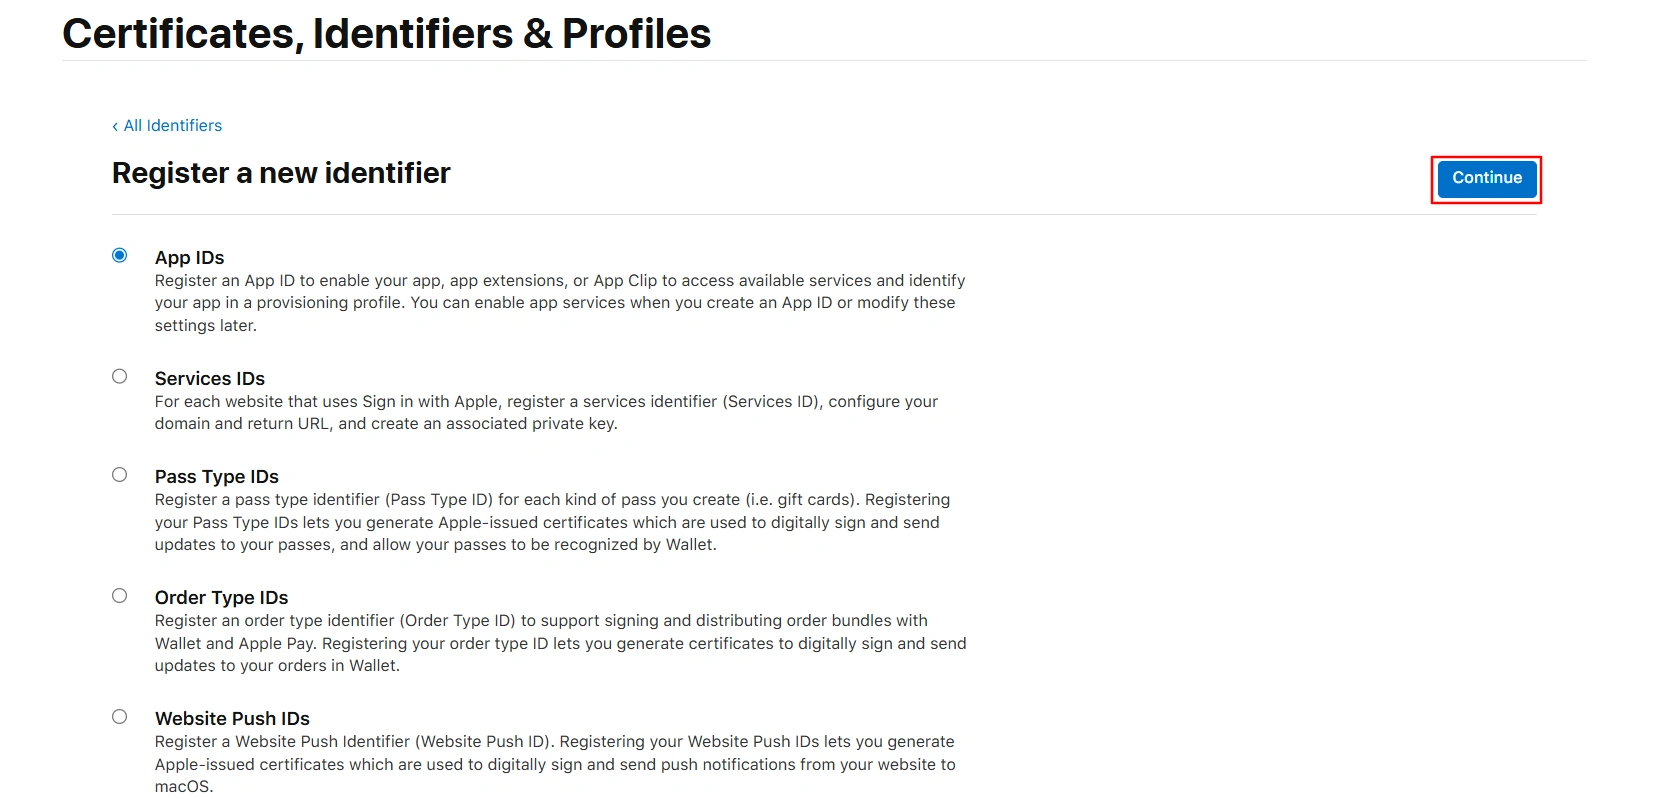
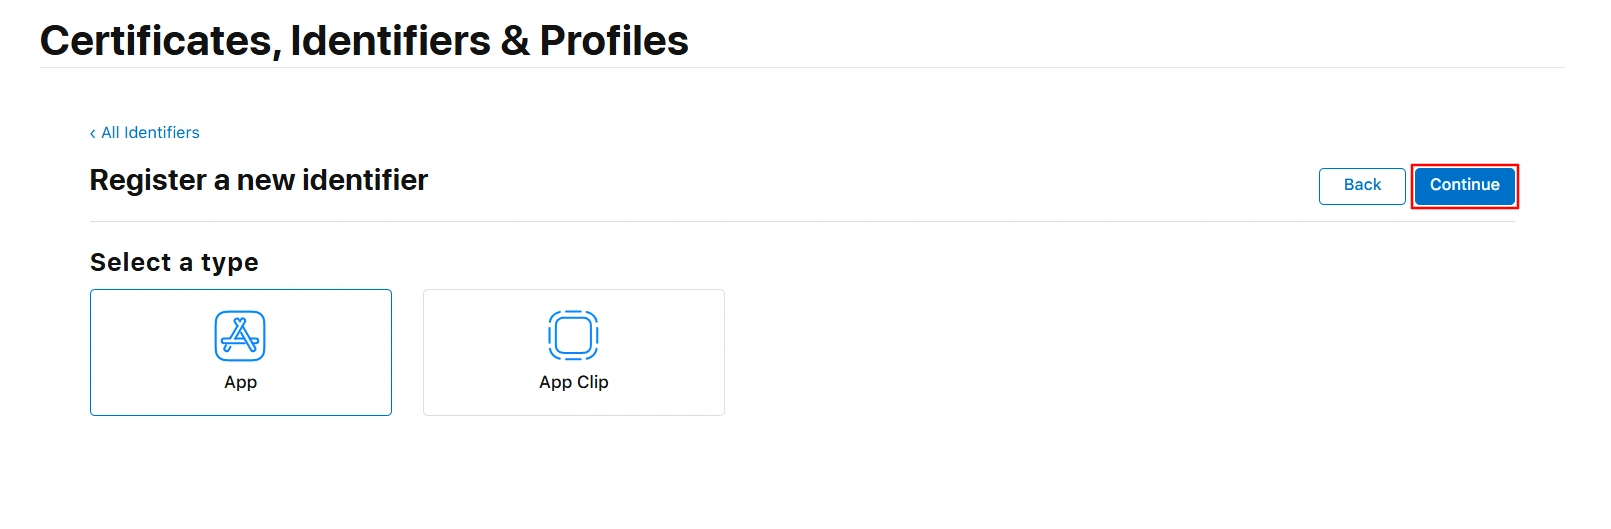
On the Certificates, Identifiers & Profiles page, click Continue.
On the next screen (Register a new identifier >> Select a type), ensure that App is selected. Click the Continue button again to proceed to the next step.
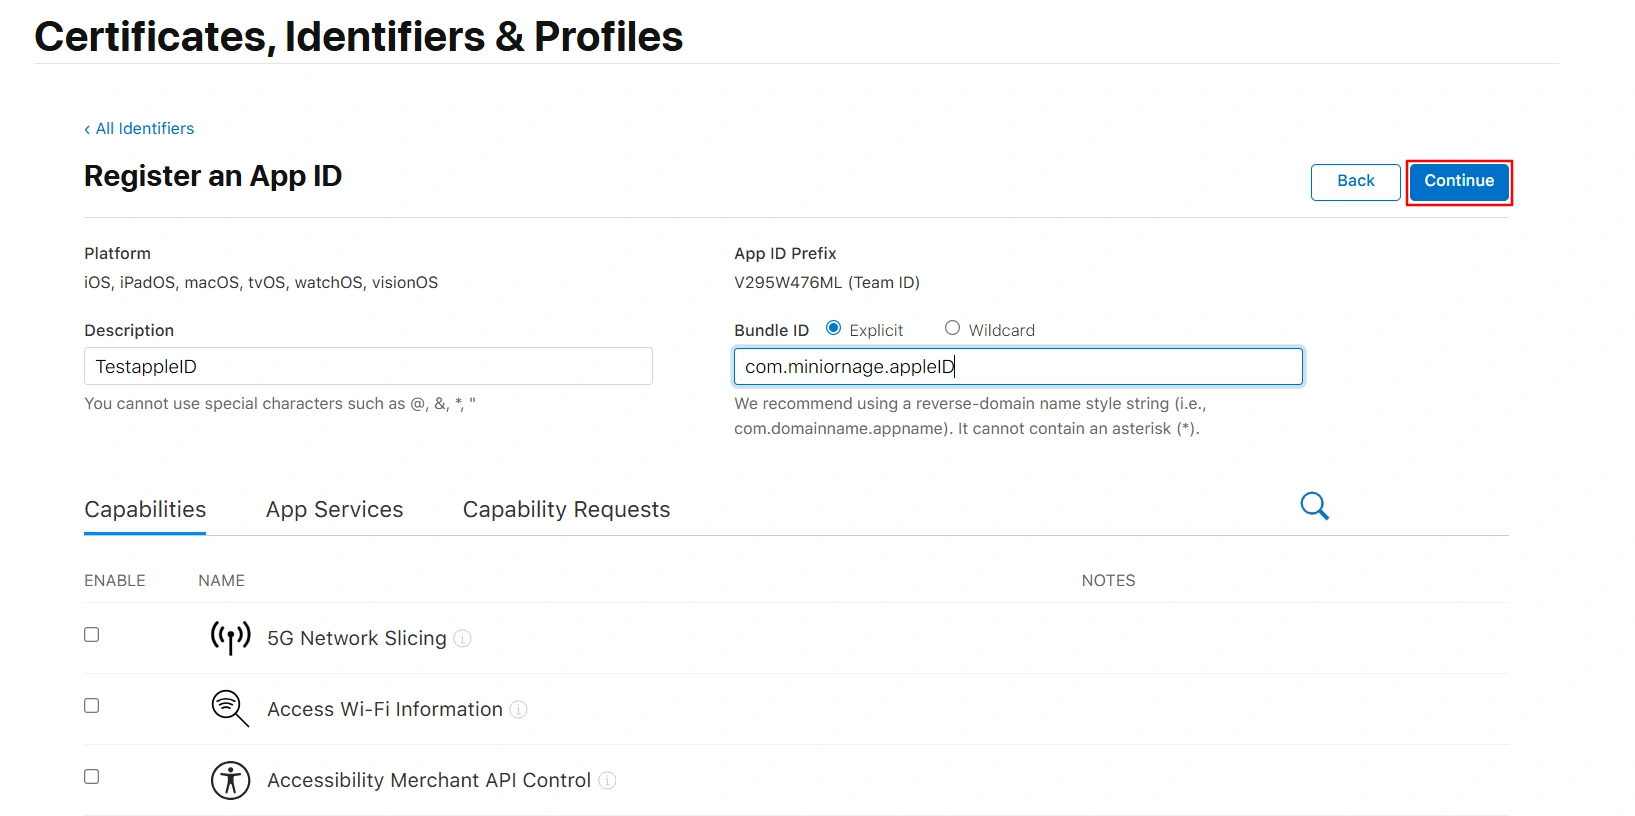
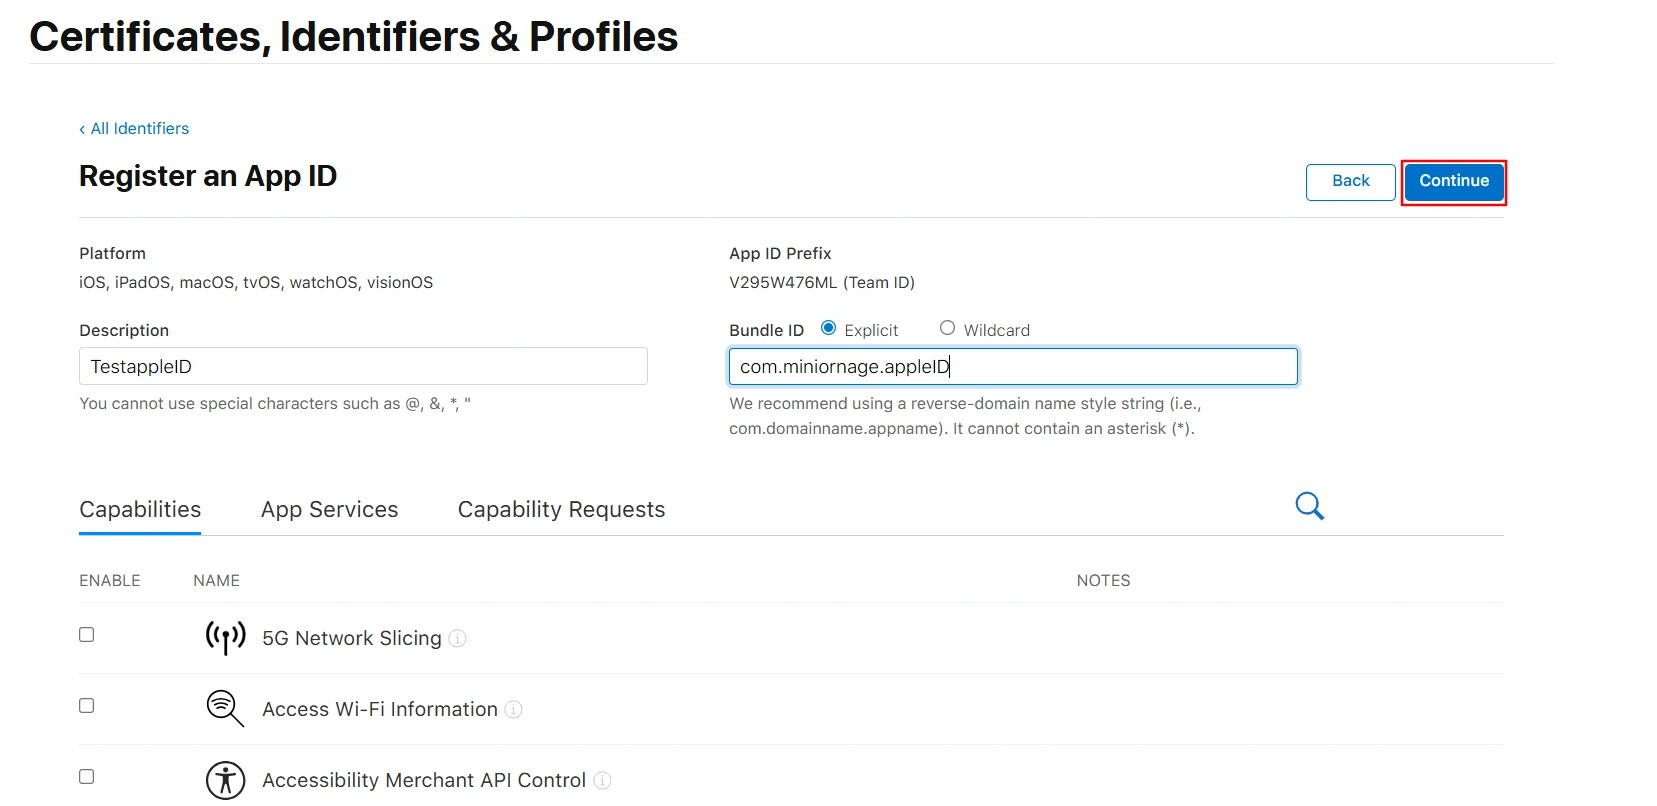
Enter a Description and Bundle ID for the App ID.
For example:Description: MiniorangeSPApp, Bundle ID: com.miniorange.spapp
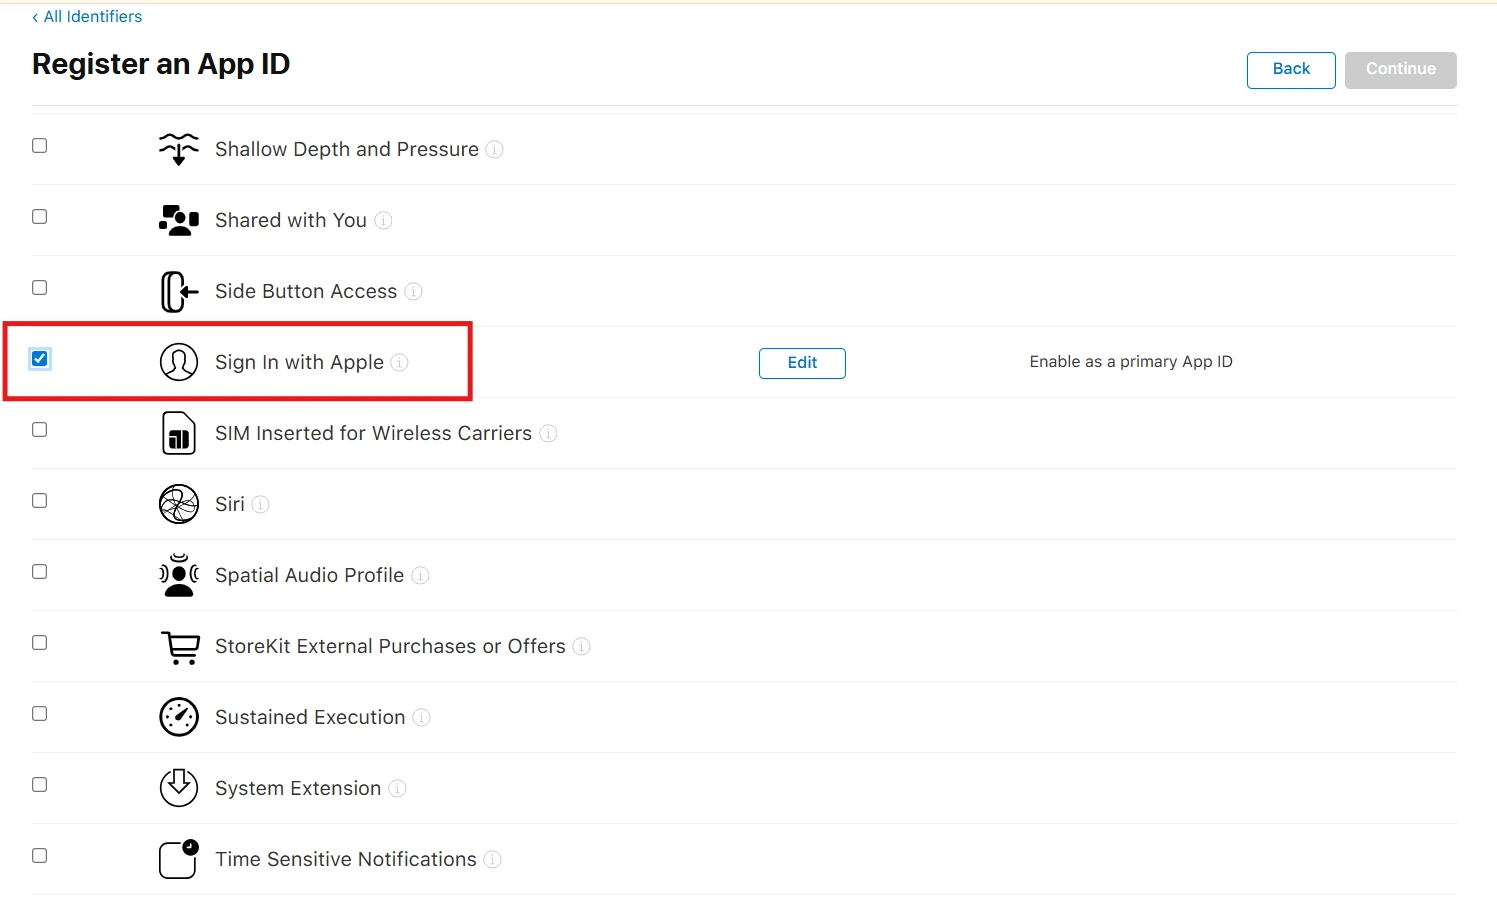
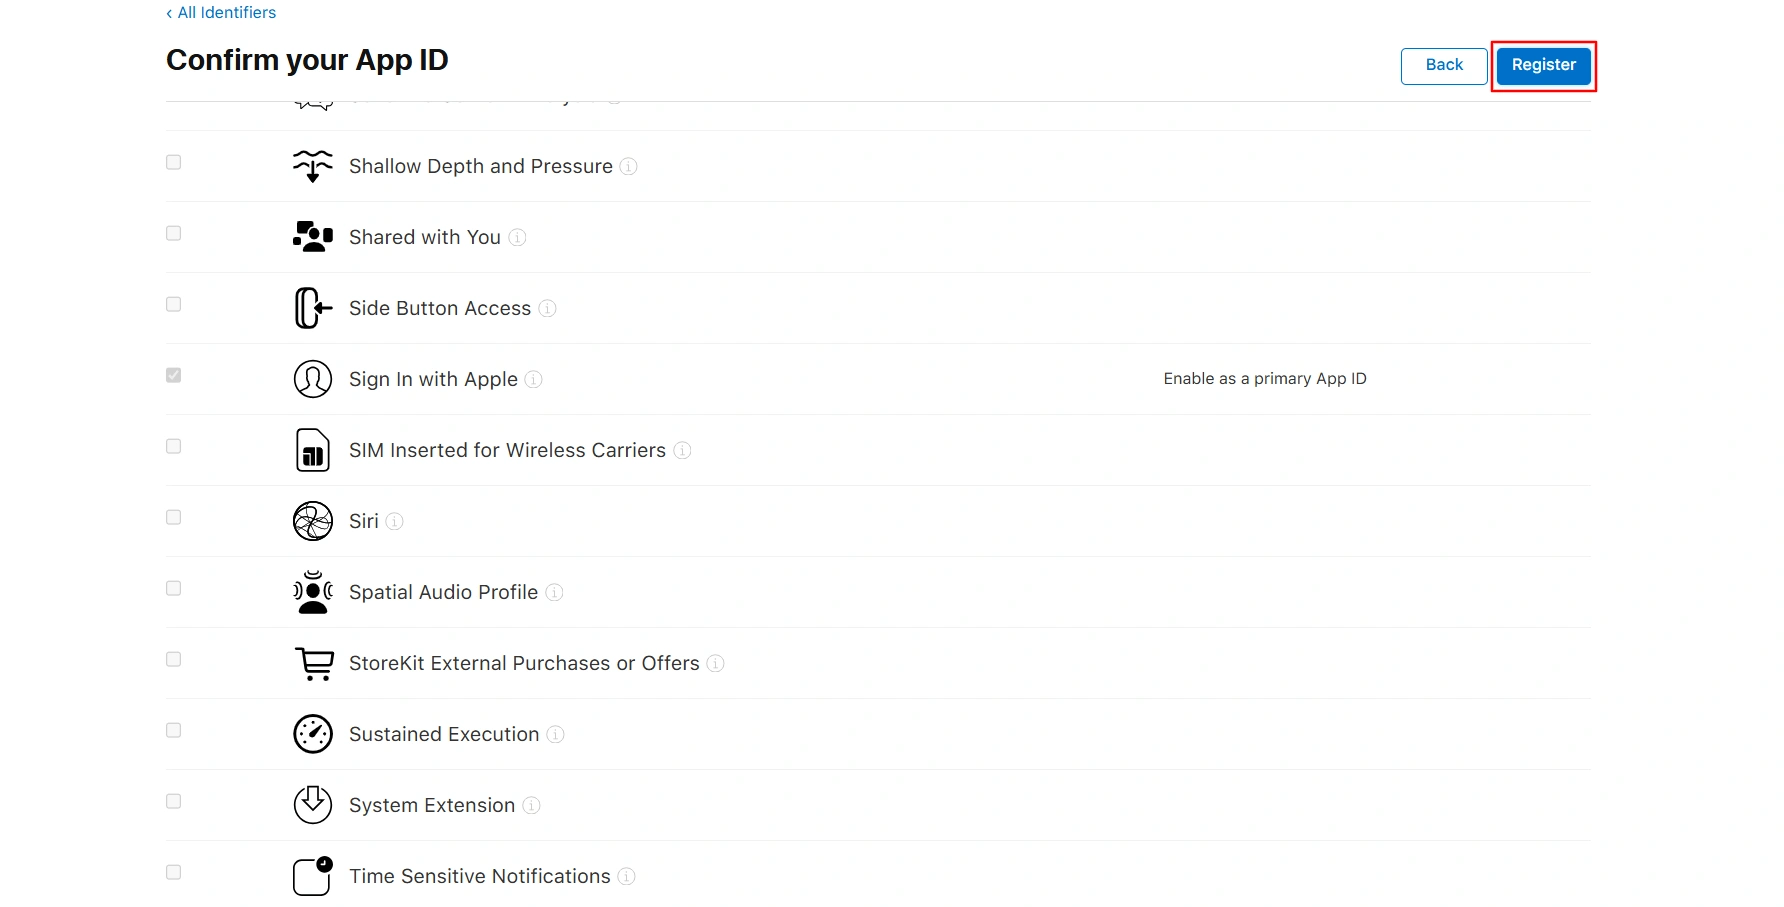
In the Capabilities section, scroll down and select Sign in with Apple.
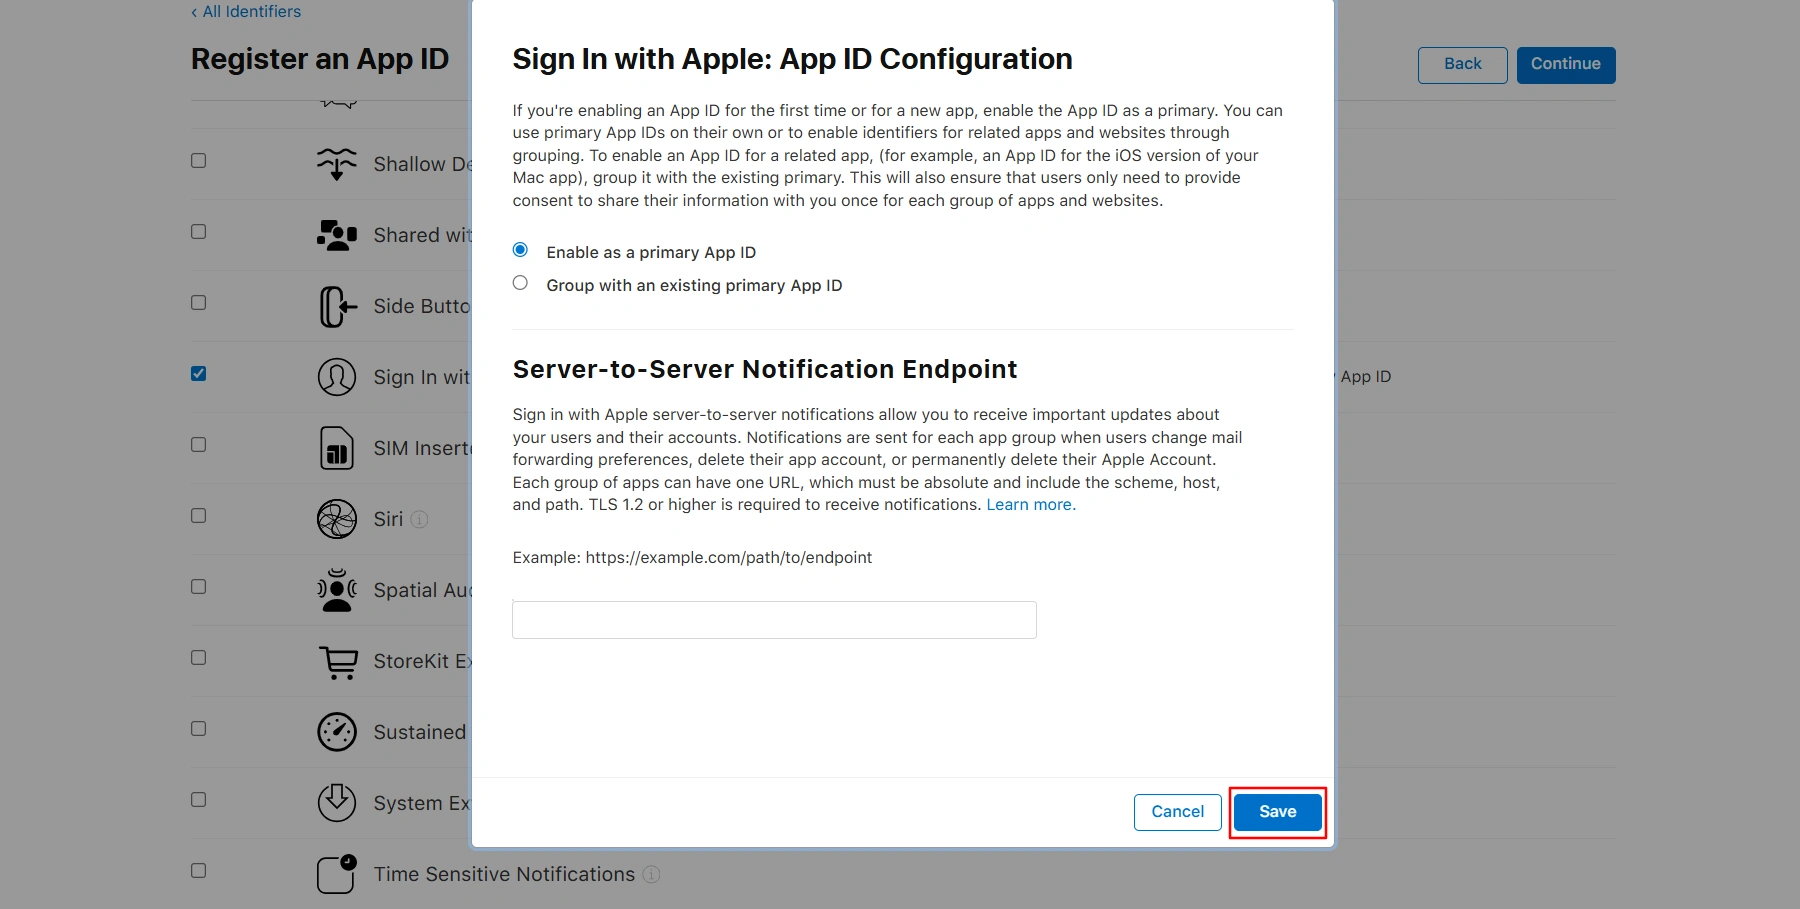
Click Edit, choose Enable as a primary App ID, then click Save.
Click Continue in the top-right corner.
Click on the Register.
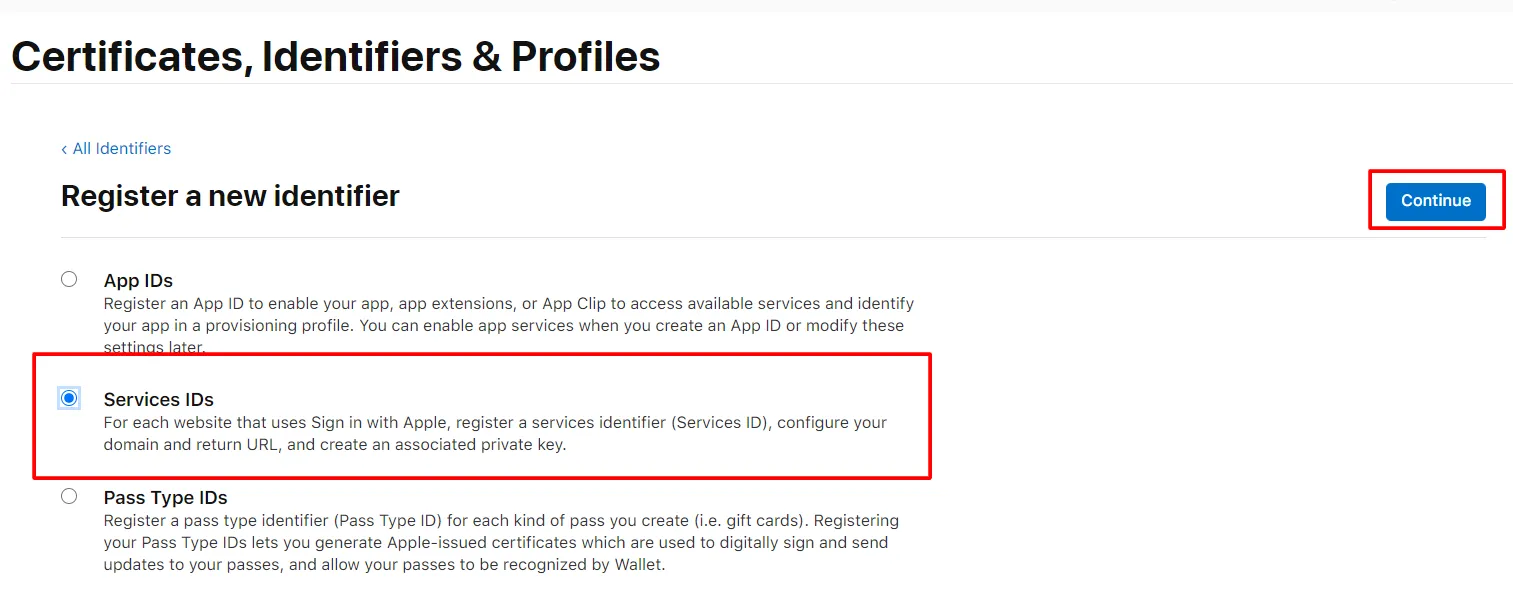
Click Identifiers in the left menu, then click the blue plus (+) icon.
Select Services IDs, then click Continue.
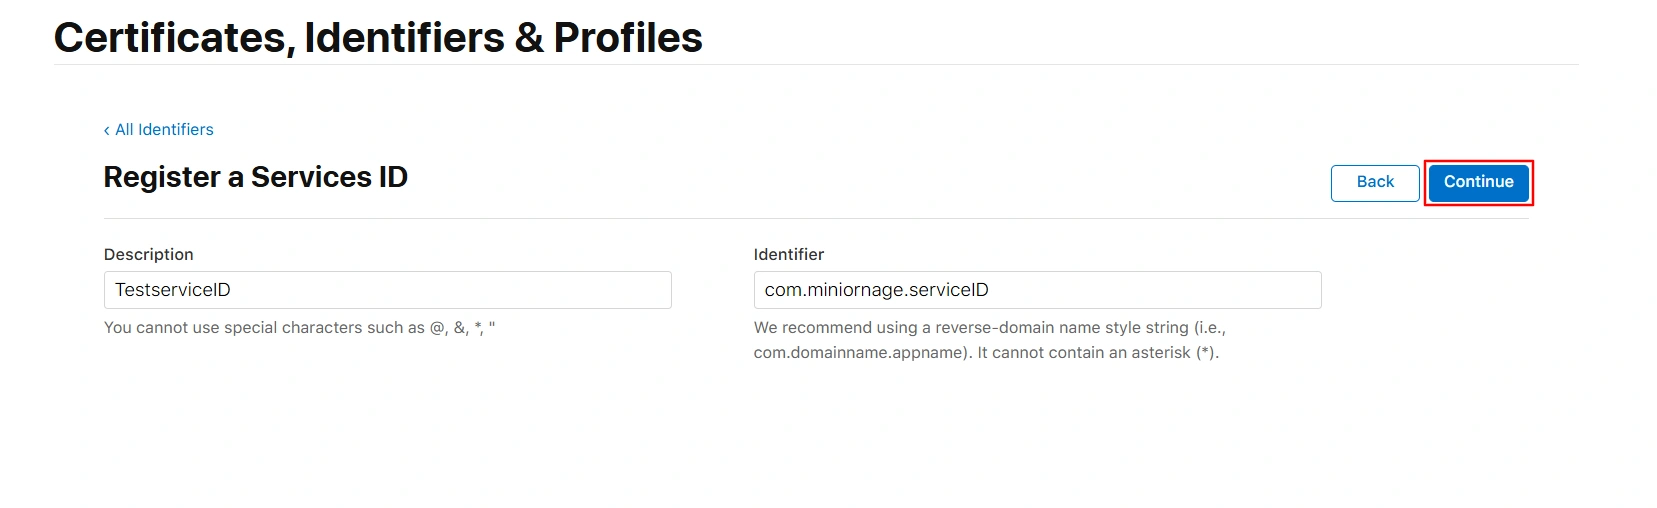
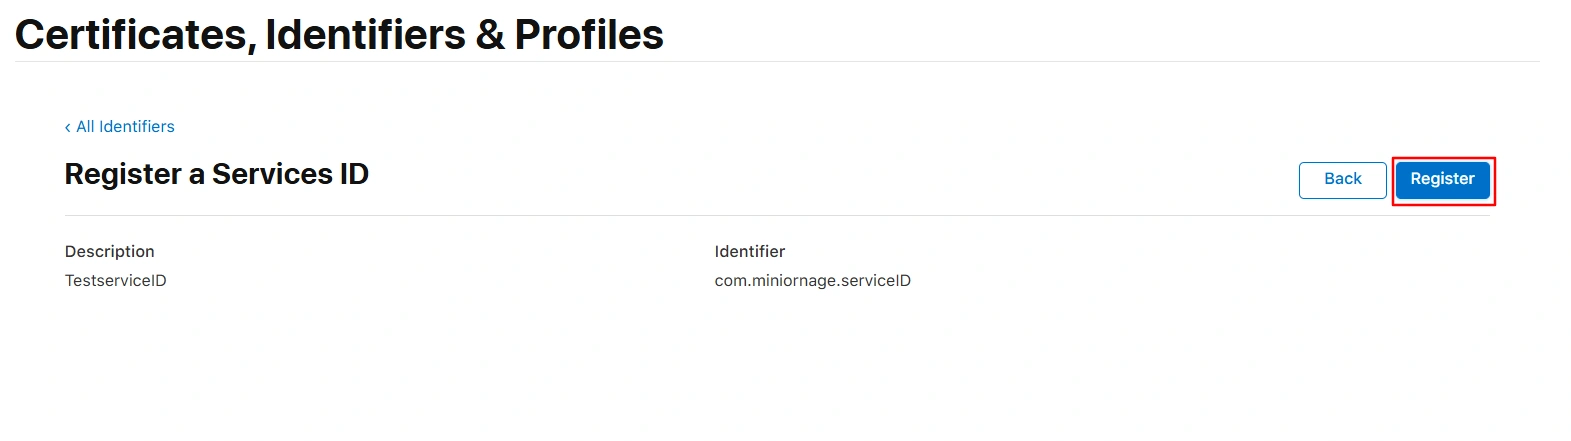
Enter the Description and Identifier (the Identifier will serve as your Client ID - copy this value, as it will be required in later steps).
Click Continue, then Register.
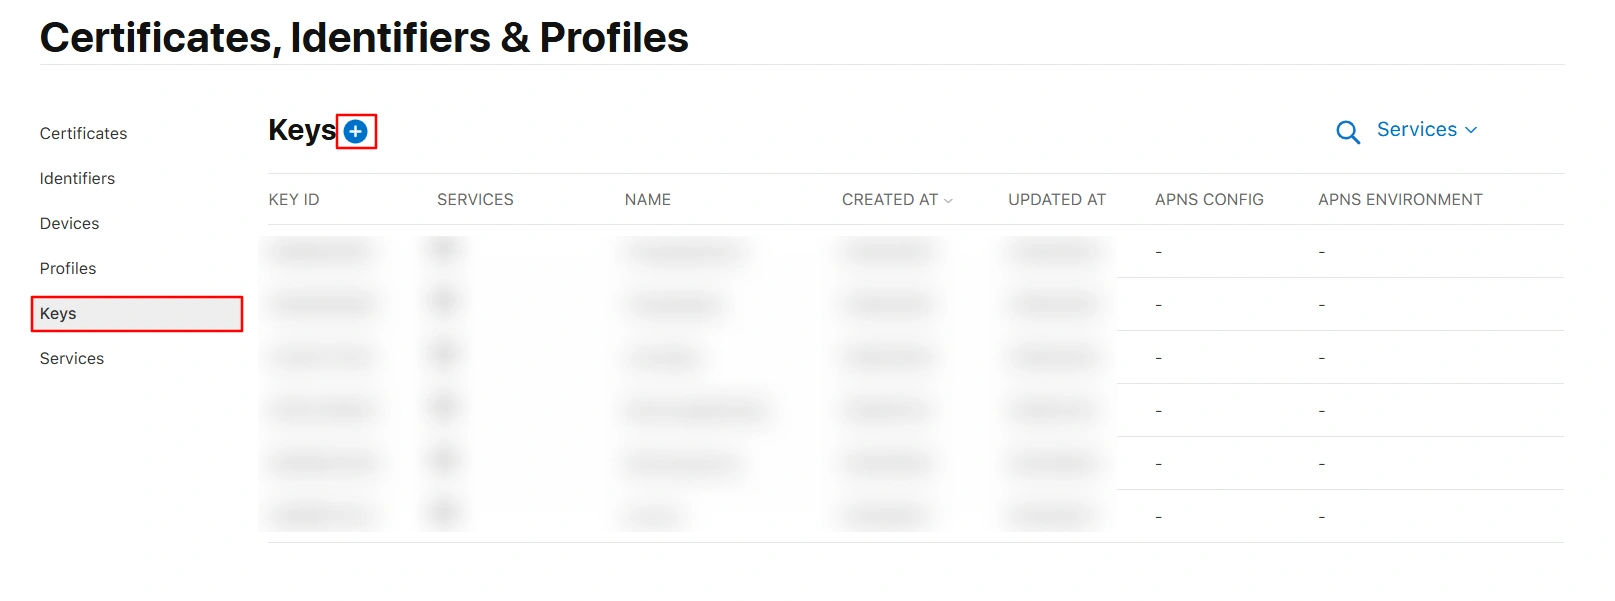
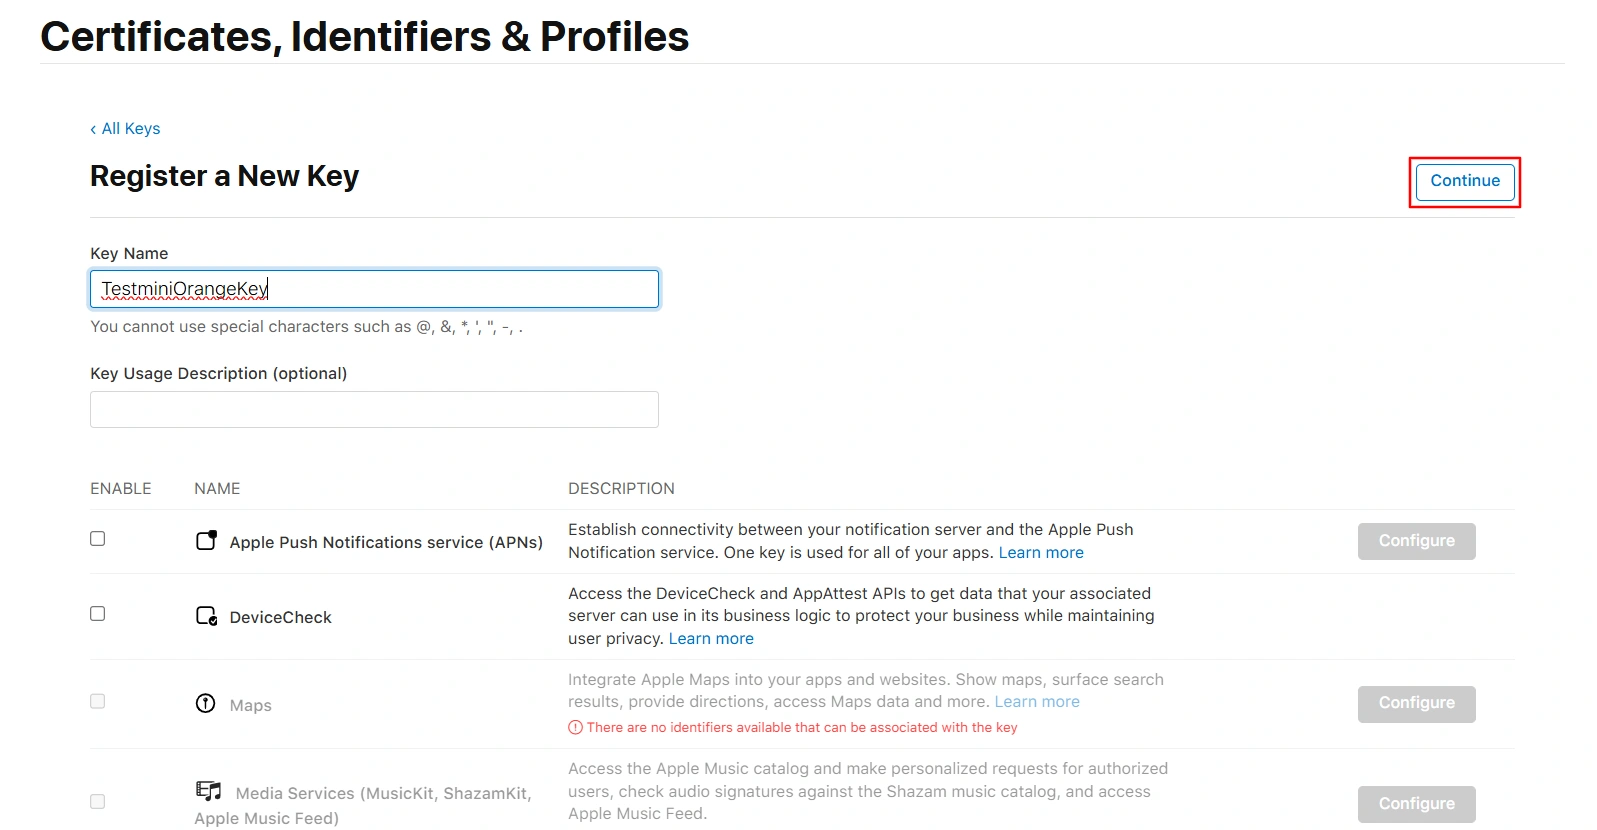
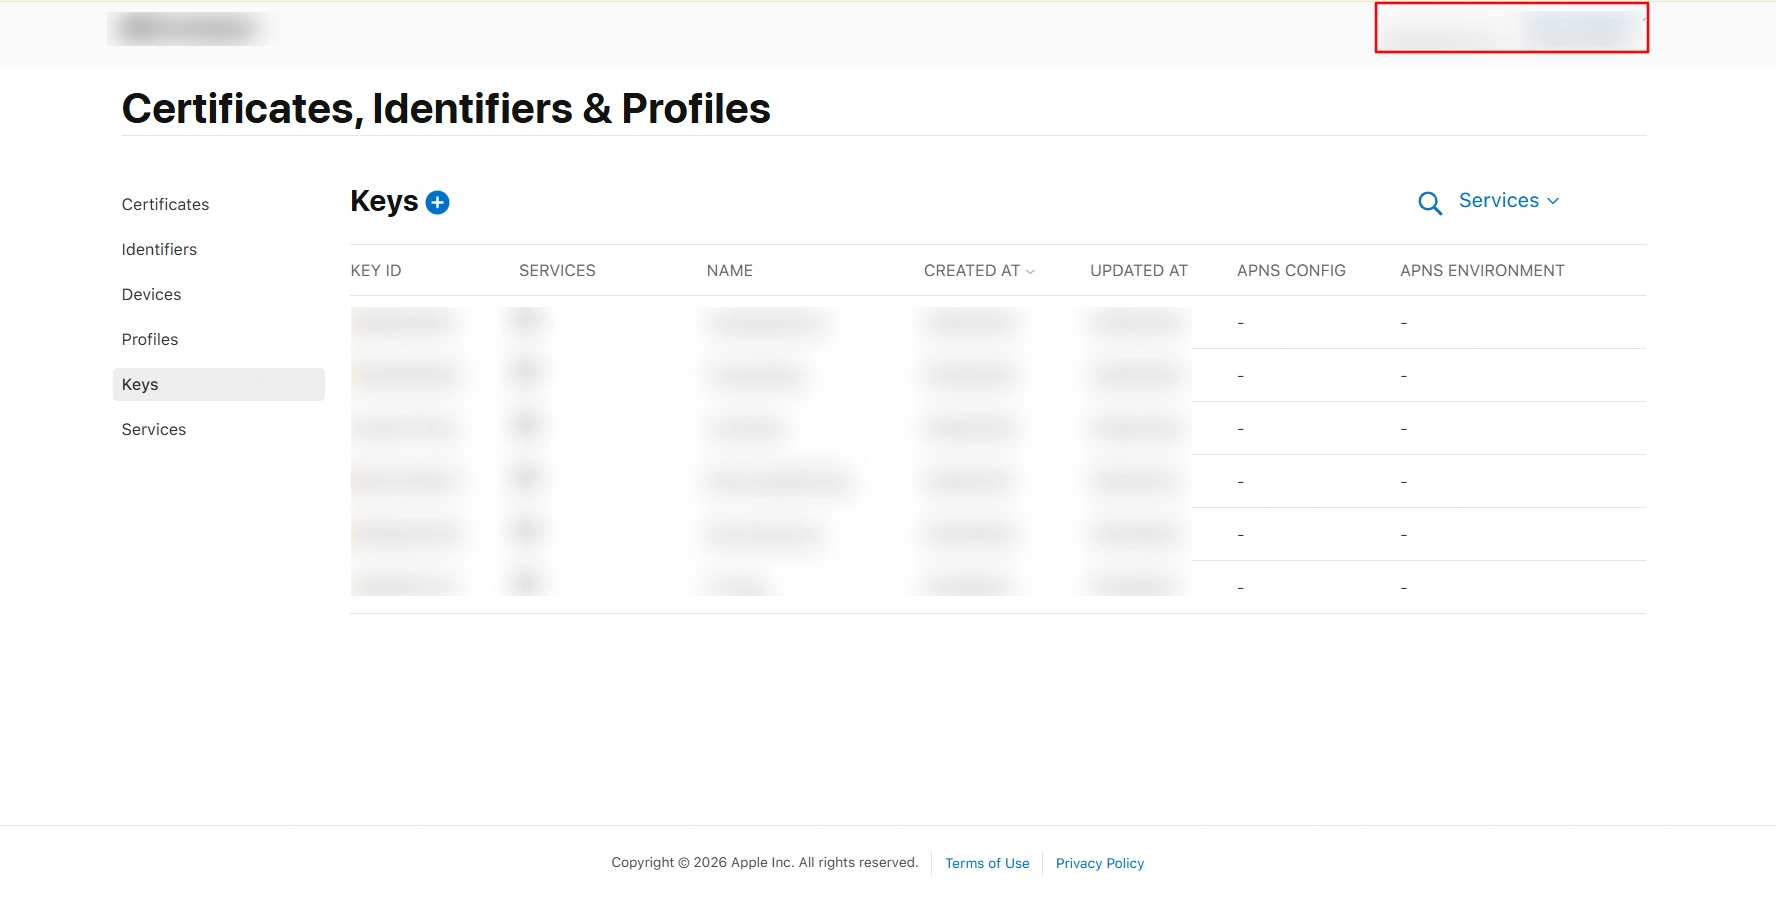
In the left sidebar, click Keys, then click the plus (+) icon to create a new key.
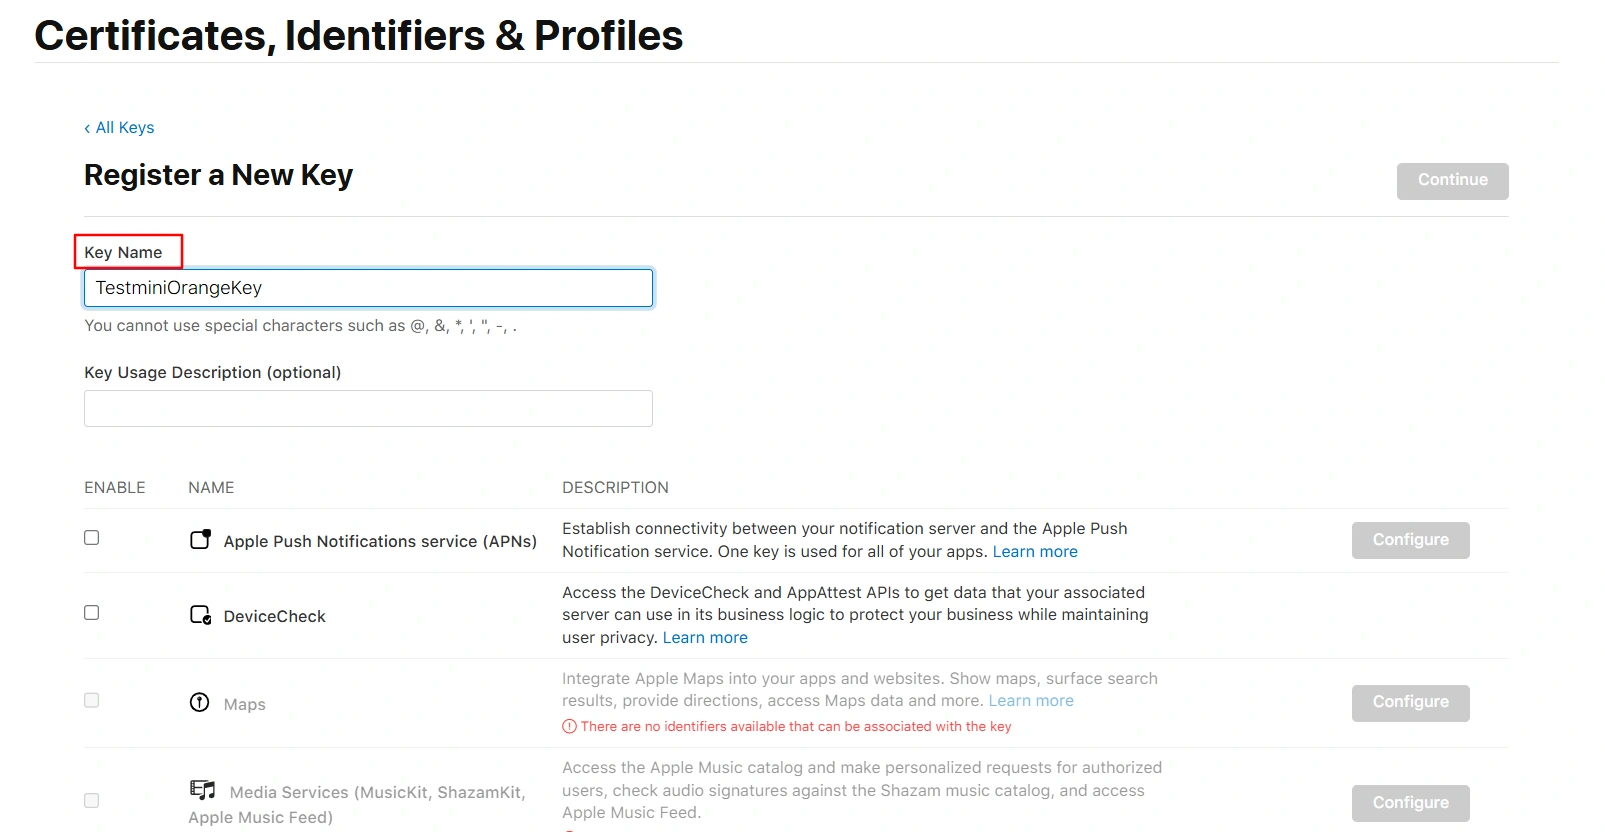
Enter a Key Name.
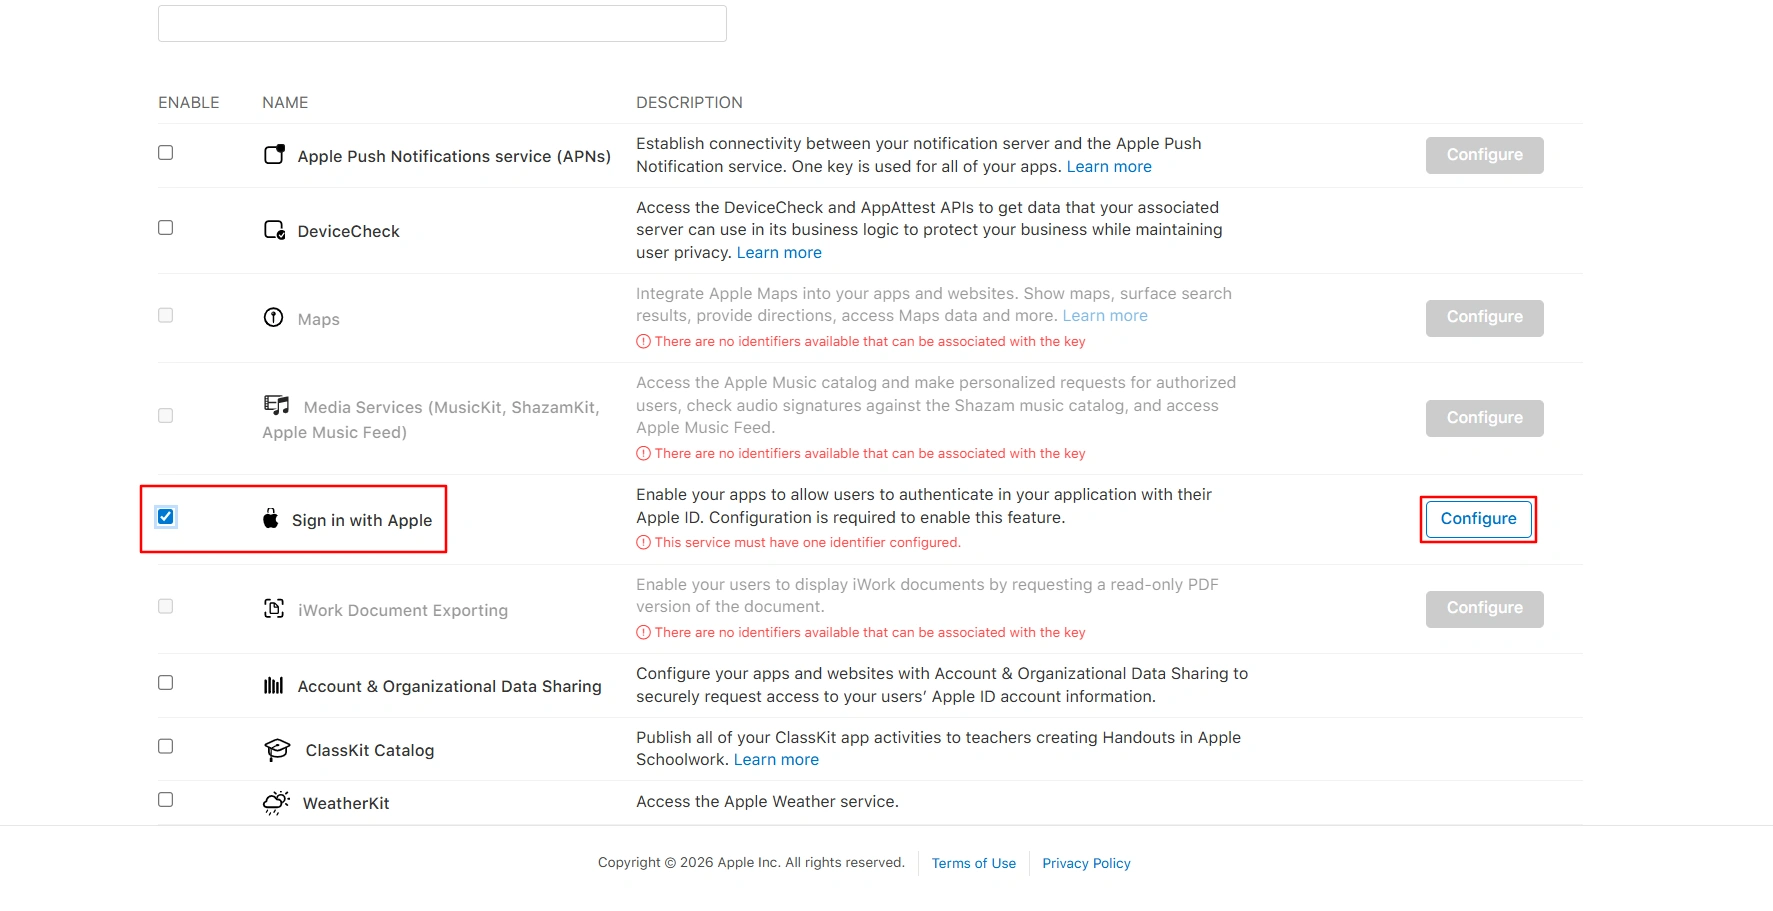
Enable Sign In with Apple, then click Configure.
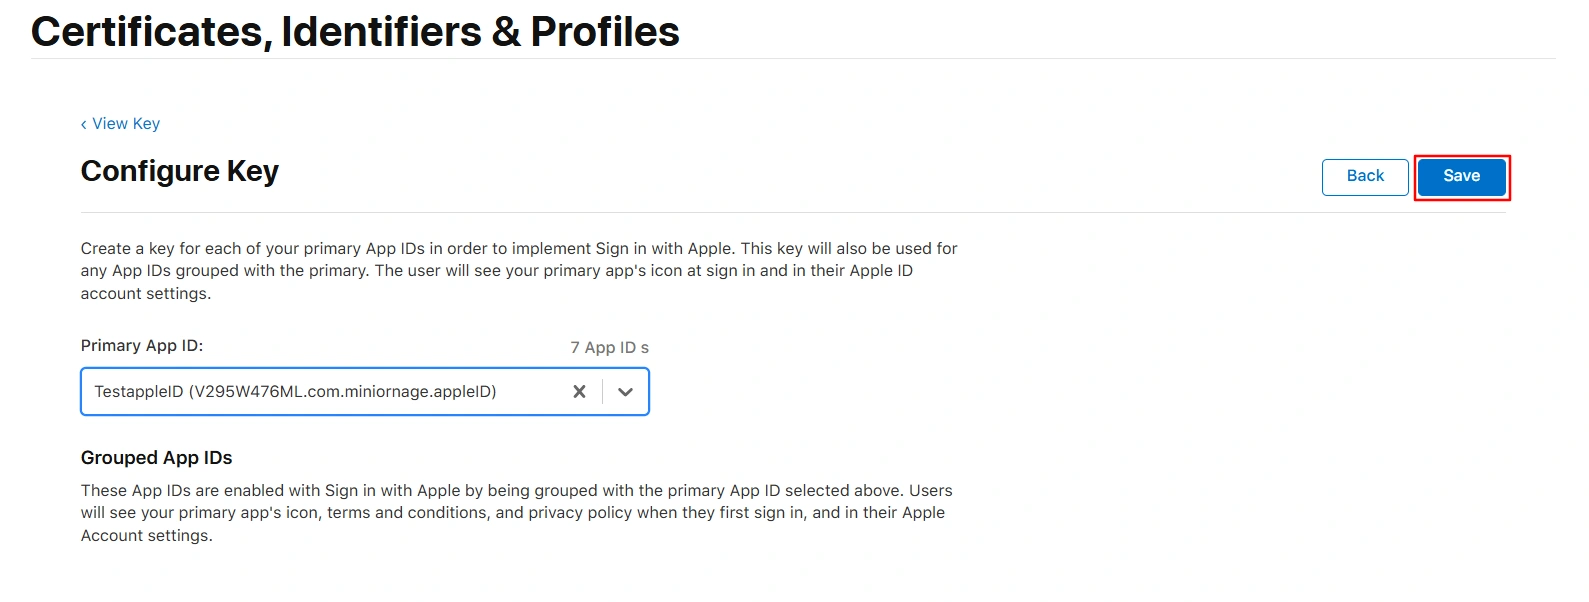
Select the Primary App ID that you configured previously, then click Save.
In the top-right corner, click Continue.
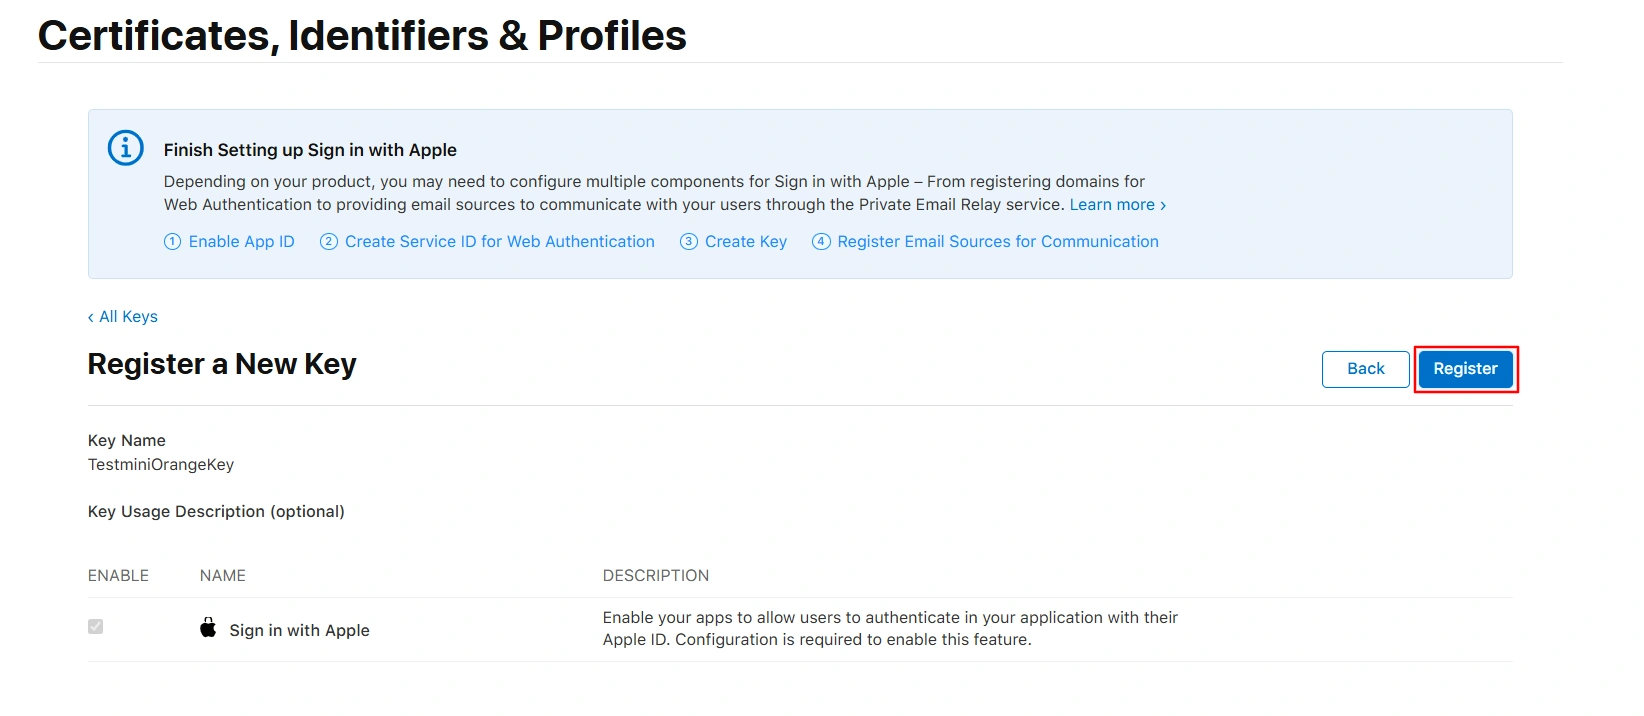
Click on the Register button.
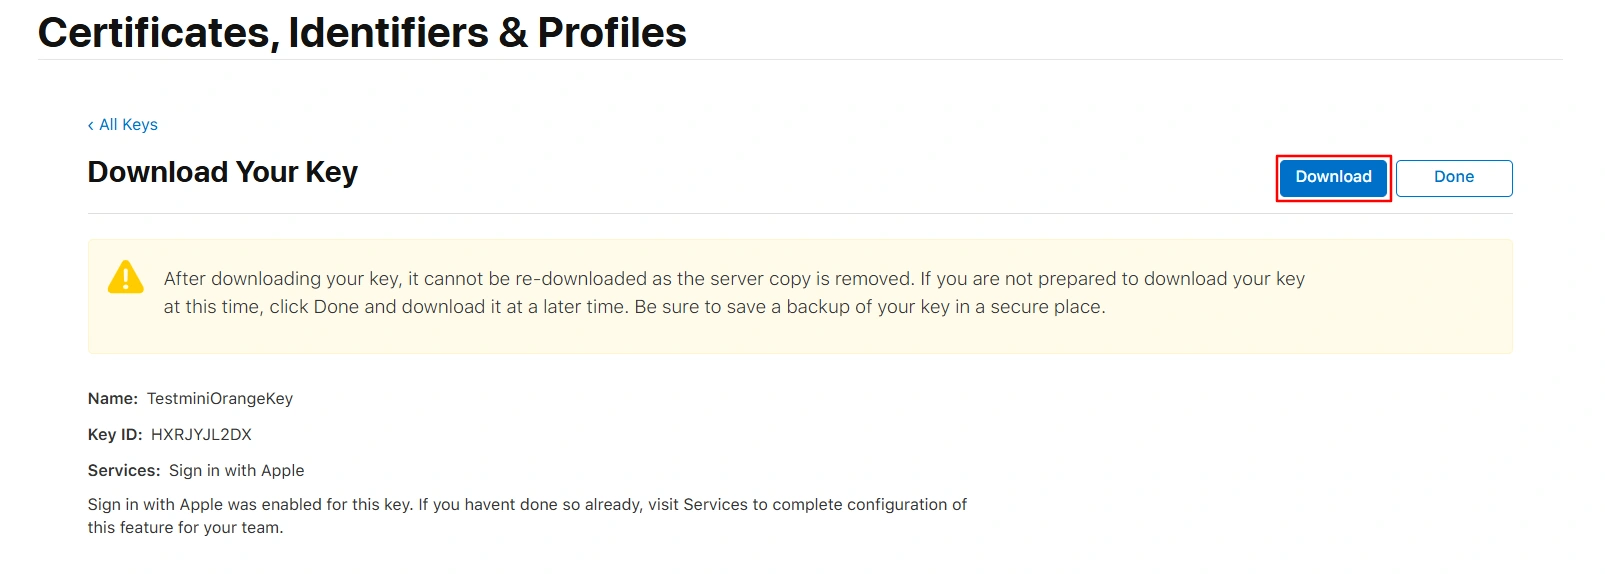
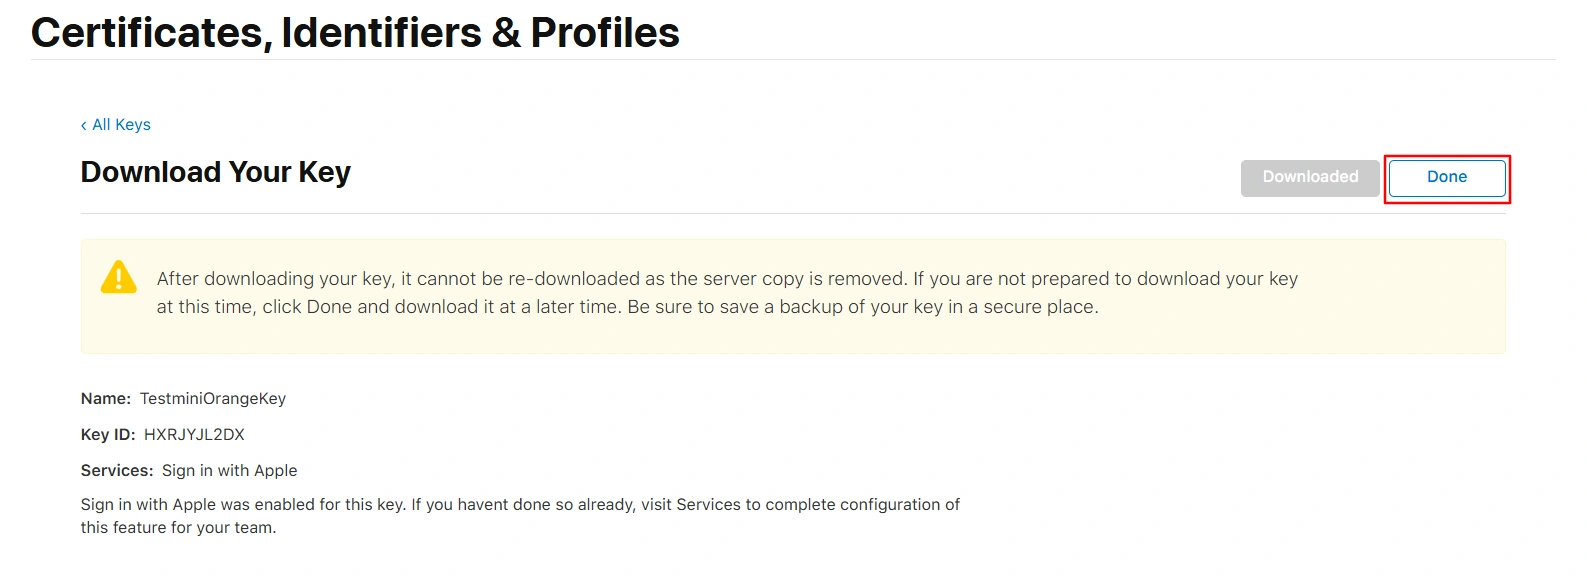
Click the Download button to download the key (the file will have a .p8 extension).
After the key has downloaded, click Done.
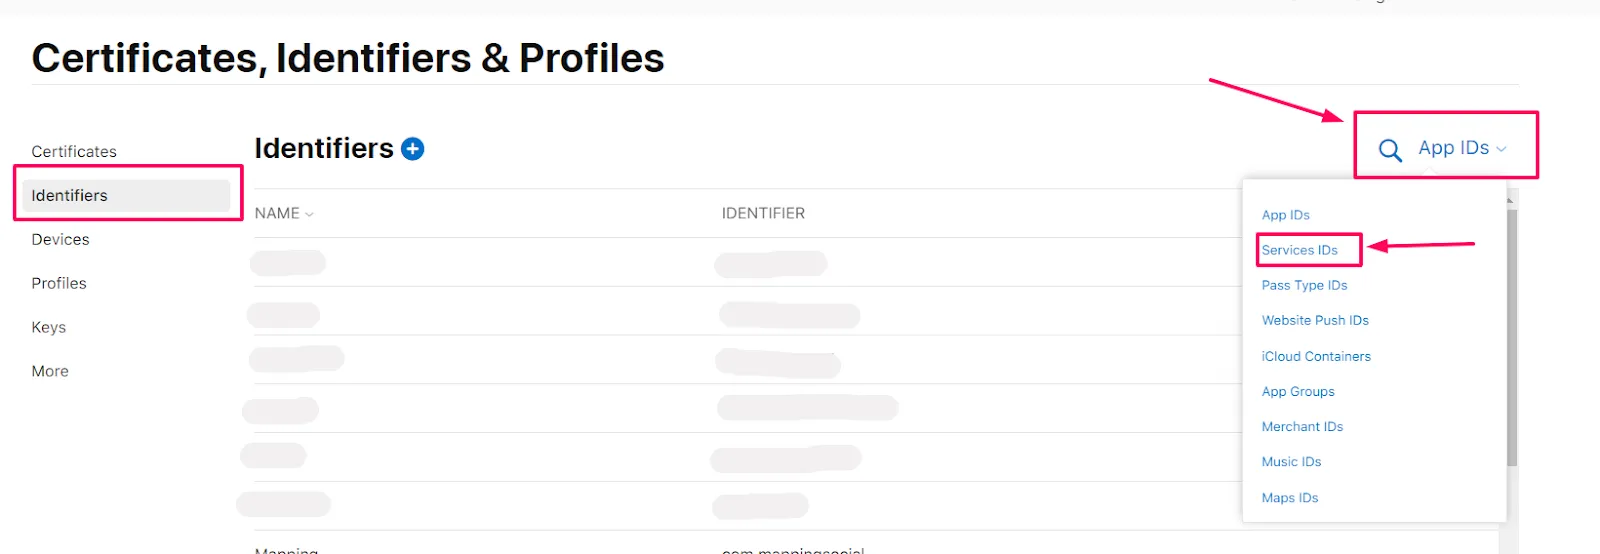
Click Identifiers from the left menu, then click App IDs at the top right and select Service IDs from the drop-down menu.
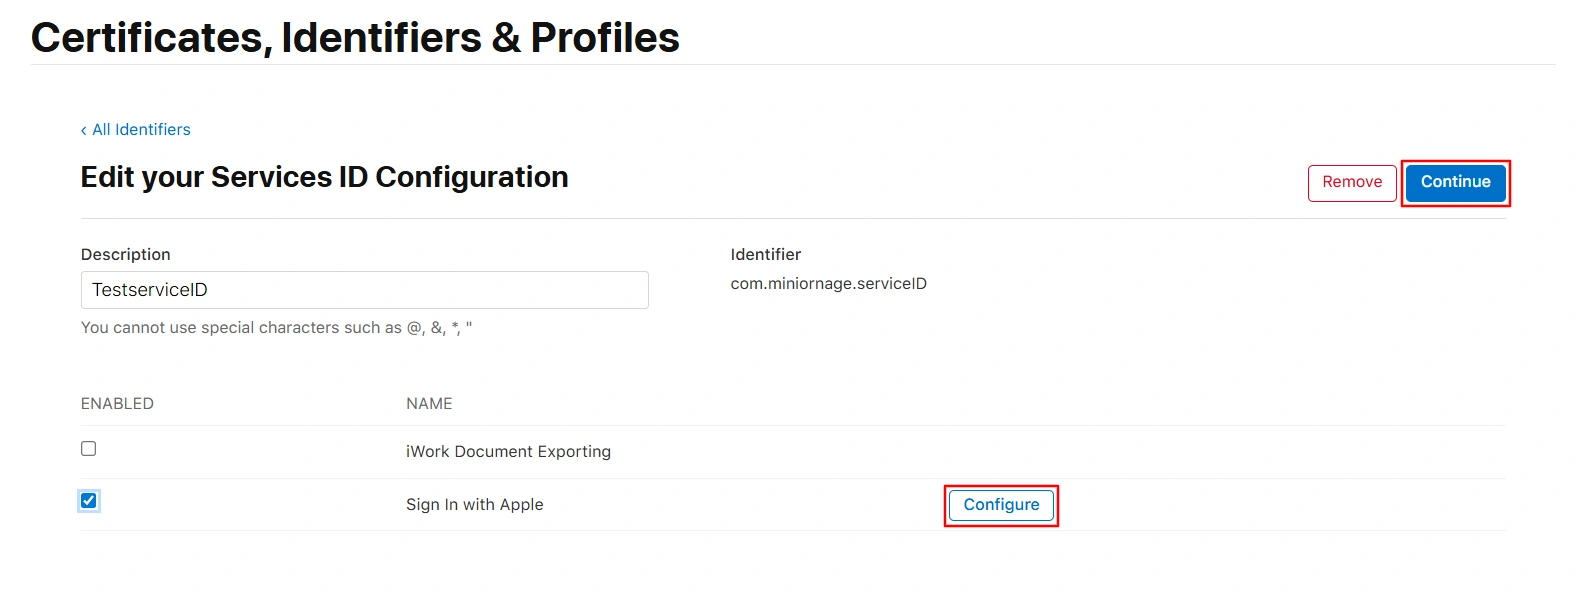
Select the previously configured Identifier, then select Sign In with Apple and click the Configure button.
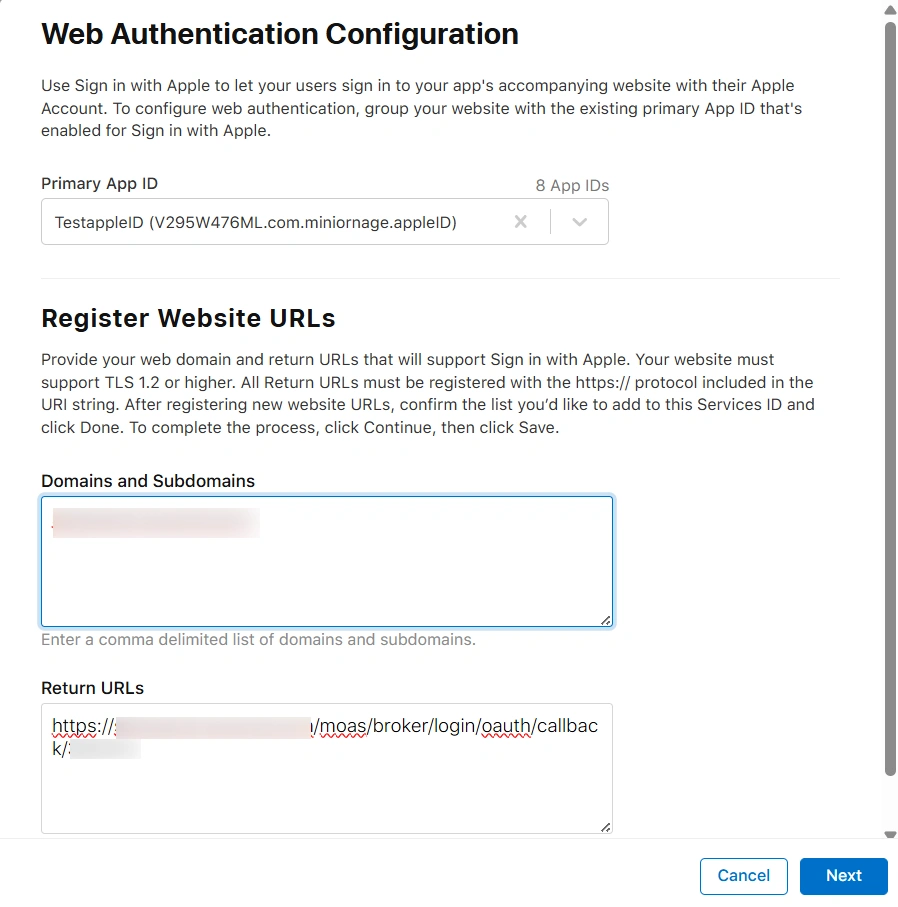
Select your Primary App ID from the drop-down.
Enter the Domain in the Domains and Subdomains section.
Enter the OAuth Callback URL from step 4.2 in the Return URLs section.
Click on the Next button.
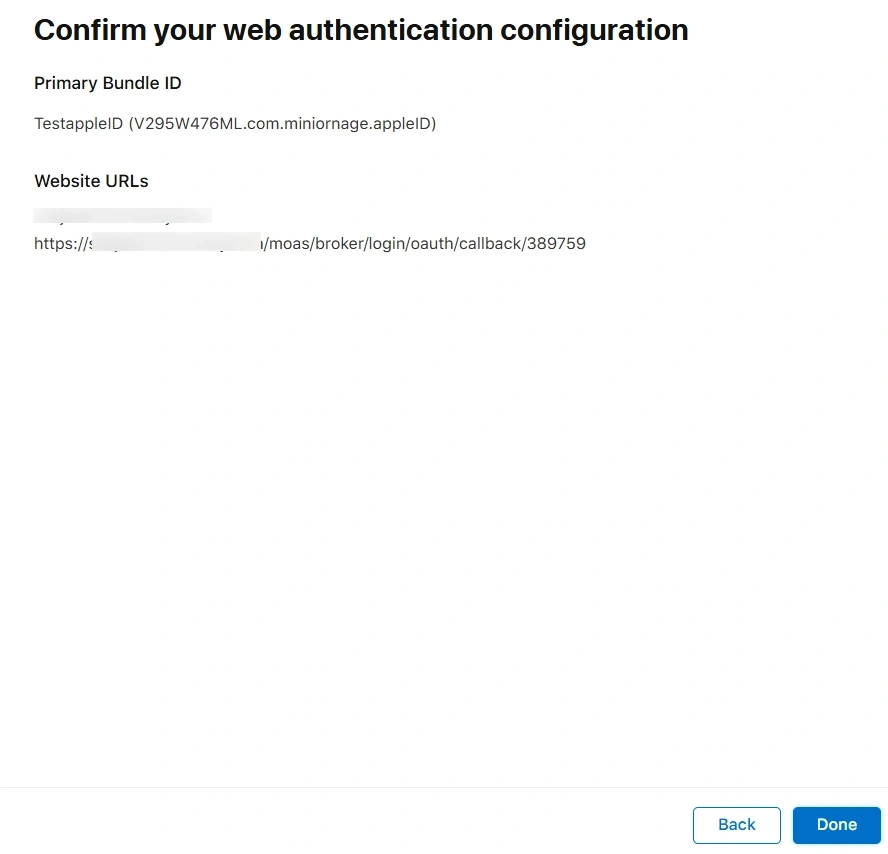
Verify the details and click on the Done button.
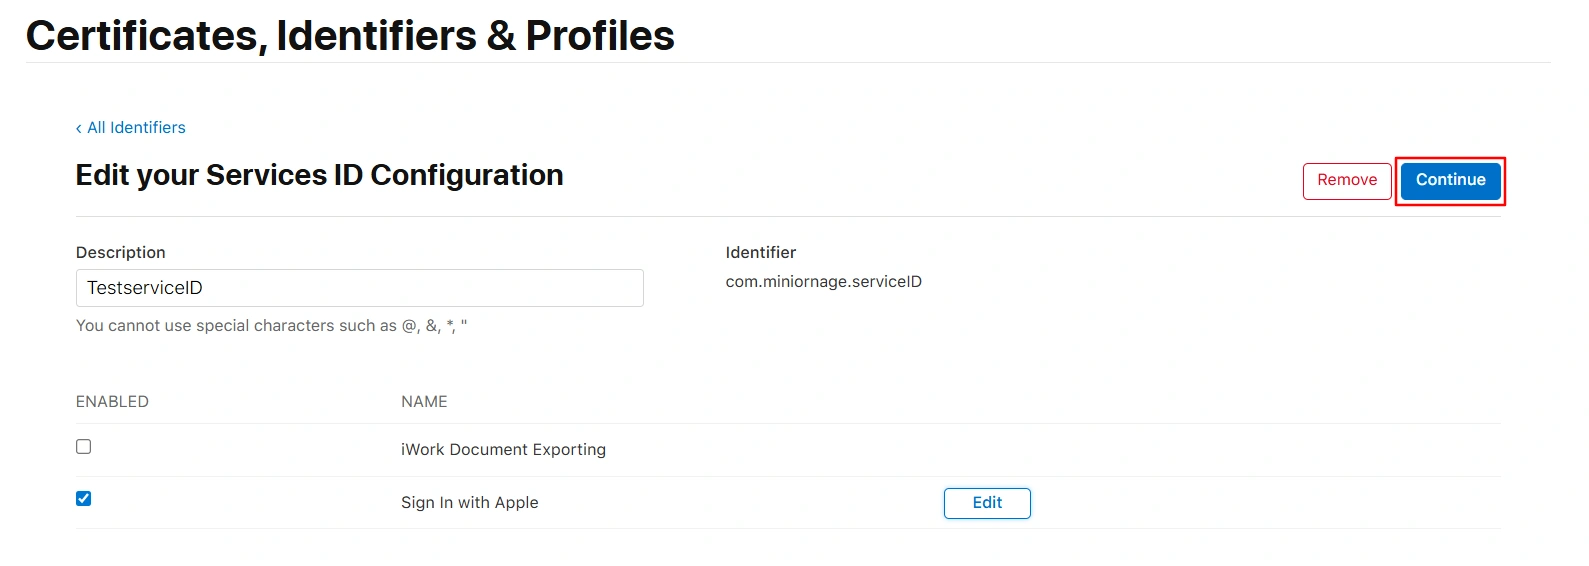
At the right corner, click on the Continue button.
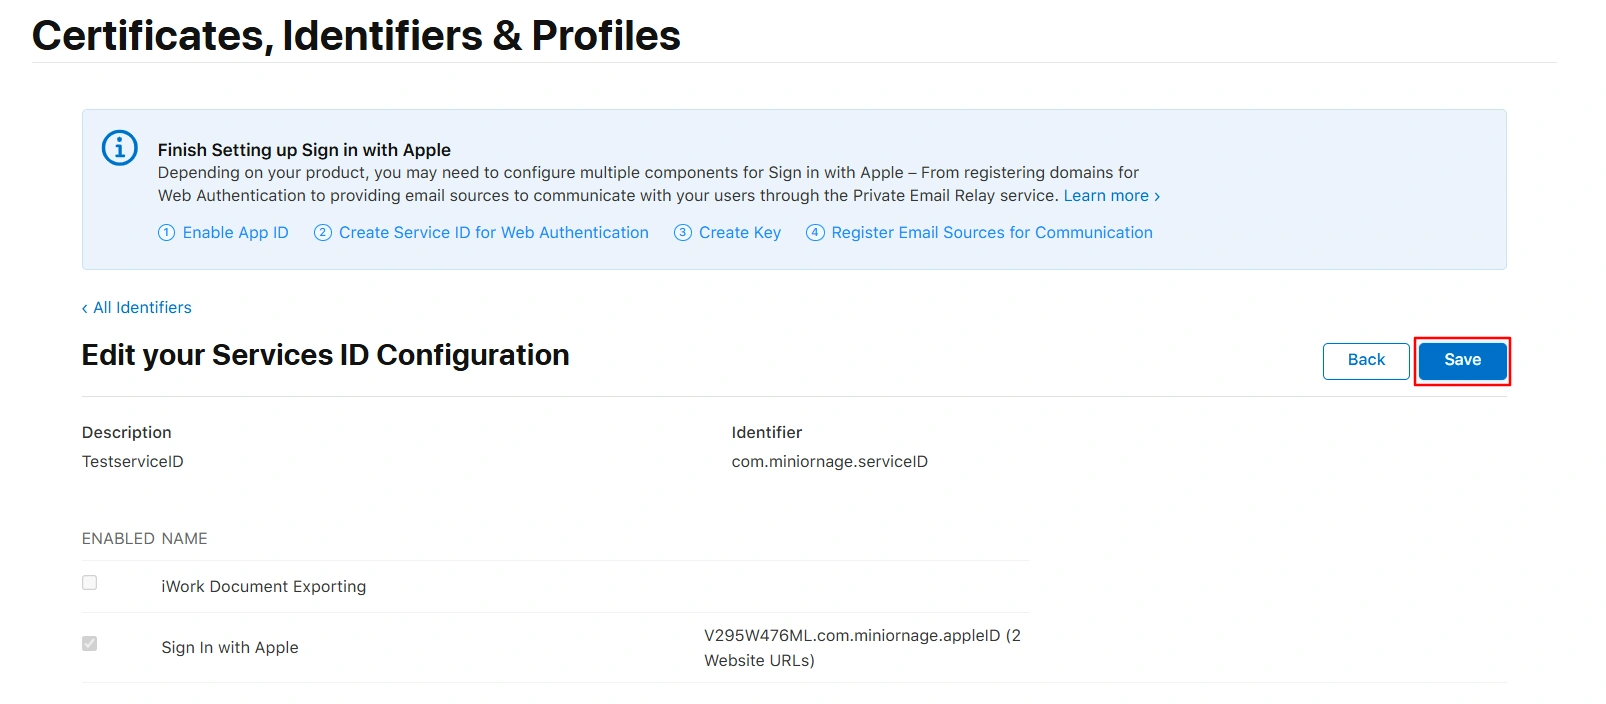
Click on the Save button at the top right corner.
Now follow below steps to generate the client secret key:
Generate the client secret (JWT) using Node.js:
Download and install Node.js from the following link.
Copy the code below into a file and save it with a .js extension. Make sure to keep this .js file and the downloaded .p8 key file in the same folder.
     const fs = require('fs');
      const jwt = require('jsonwebtoken');

// ===== CONFIGURATION =====
const TEAM_ID = 'enter_your_TEAM_ID'; // Apple Team ID (iss)
const CLIENT_ID = 'enter_your_CLIENT_ID '; // Service ID (sub)
const KEY_ID = 'enter_your_KEY_ID'; // Key ID (kid)
const PRIVATE_KEY_PATH = 'enter_your_PRIVATE_KEY_PATH'; // Make sure filename matches

// ===== READ PRIVATE KEY =====
const privateKey = fs.readFileSync(PRIVATE_KEY_PATH, 'utf8');

// ===== TIME SETTINGS =====
const now = Math.floor(Date.now() / 1000);
const payload = {
  iss: TEAM_ID,
  iat: now,
  exp: now + (60 * 60 * 24 * 180), // 180 days (max allowed)
  aud: 'https://appleid.apple.com',
  sub: CLIENT_ID
};

// ===== GENERATE JWT =====
const clientSecret = jwt.sign(payload, privateKey, {
  algorithm: 'ES256',
  keyid: KEY_ID // important: use keyid instead of custom header object
});

console.log('\n=== Apple Client Secret ===\n');
console.log(clientSecret);
Now replace below values in the code as given below:
key_file: AuthKey_(enter_your_AUTHKEY) , give it the name of the downloaded .p8 file.
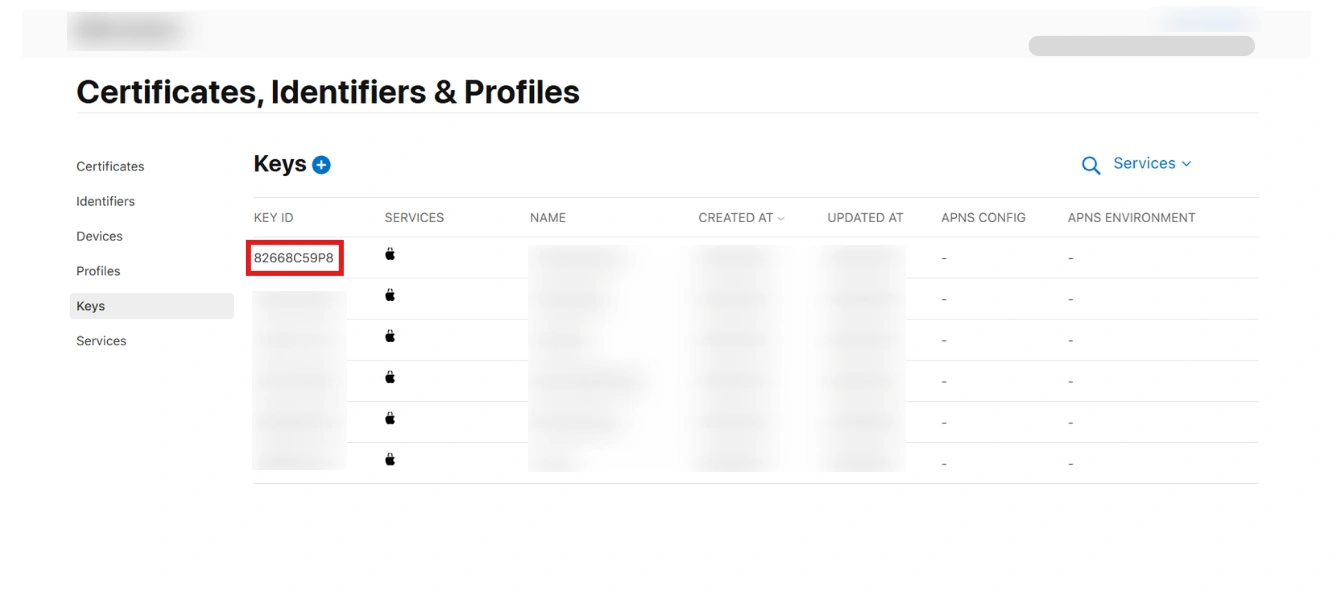
Key_id: It will be the Key ID you will get from your configured Key.
Client_id: It is the identifier.
Team_id: You will get this from top right corner as shown below.
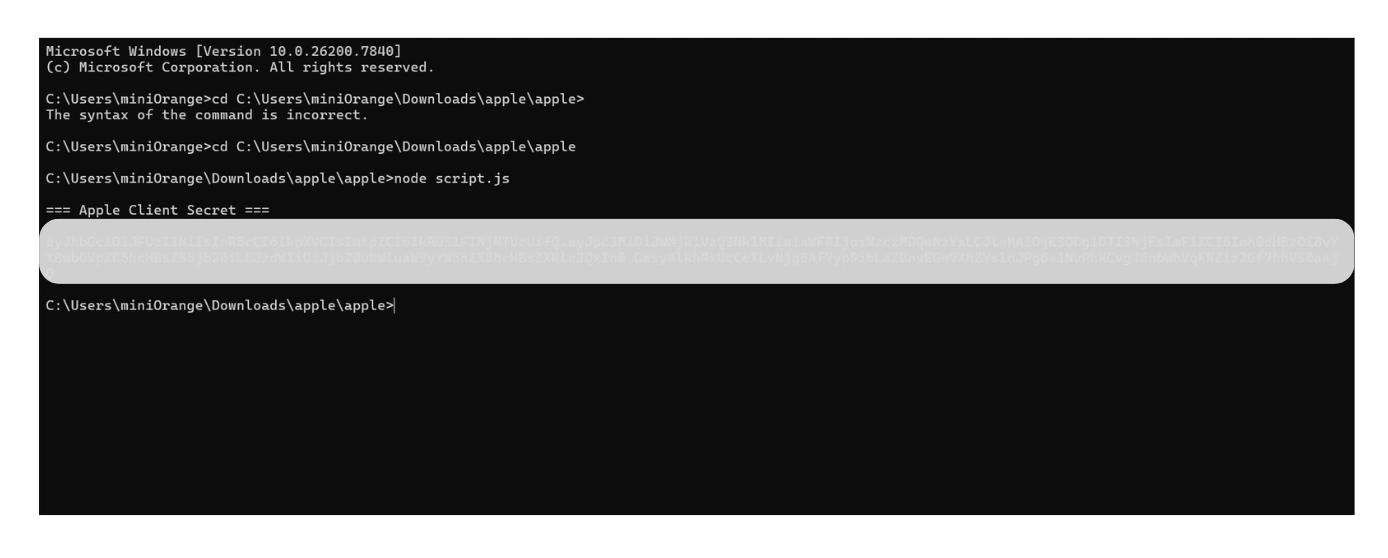
Go to the folder location in the command prompt which consists of the rb and p8 file. Now run the above code using the following command: node yourfilename.js
You will receive a Client Secret Key. copy and securely store this key, as it will be required while configuring Apple ID in the miniOrange Dashboard.
Step 3.2: Configure Apple ID as OAuth 2.0 Provider (IDP) in miniOrange
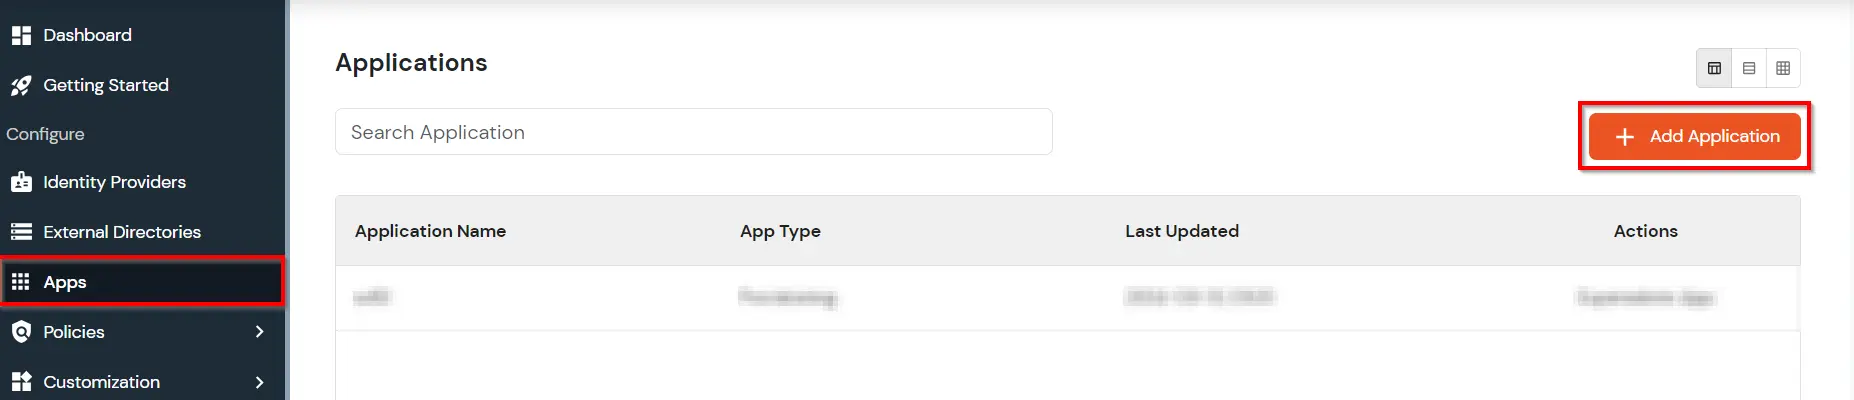
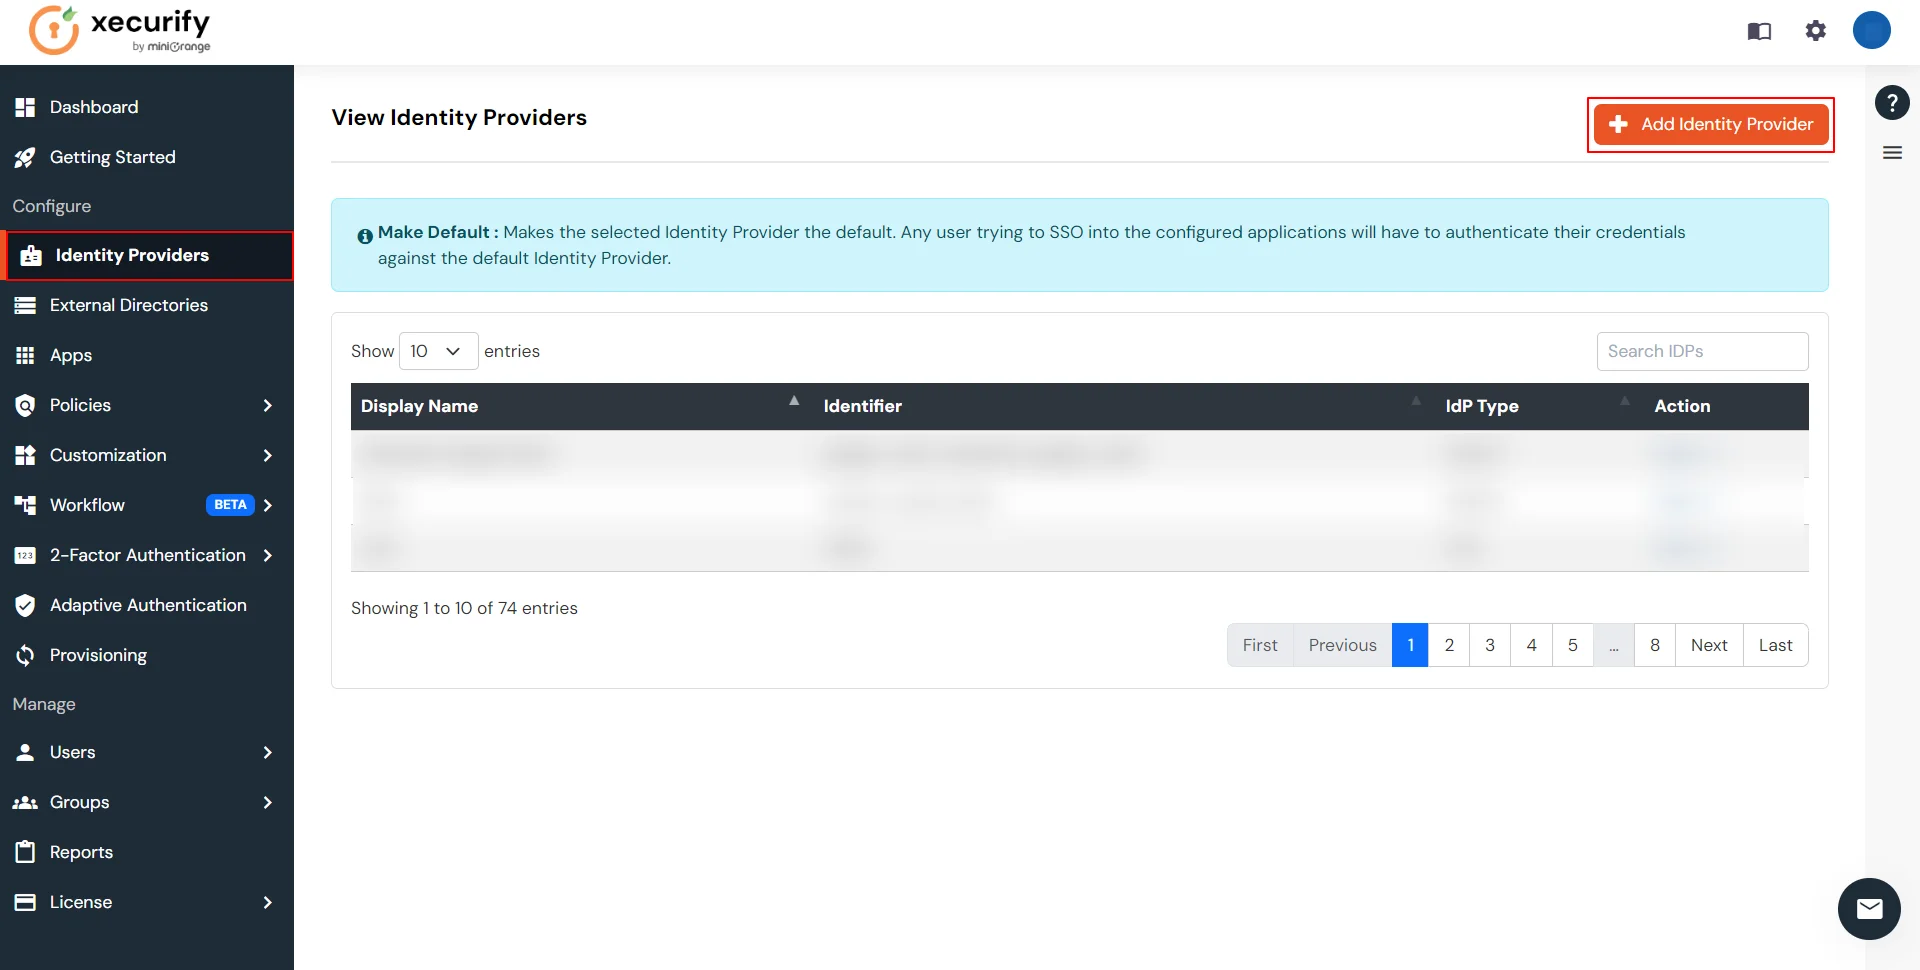
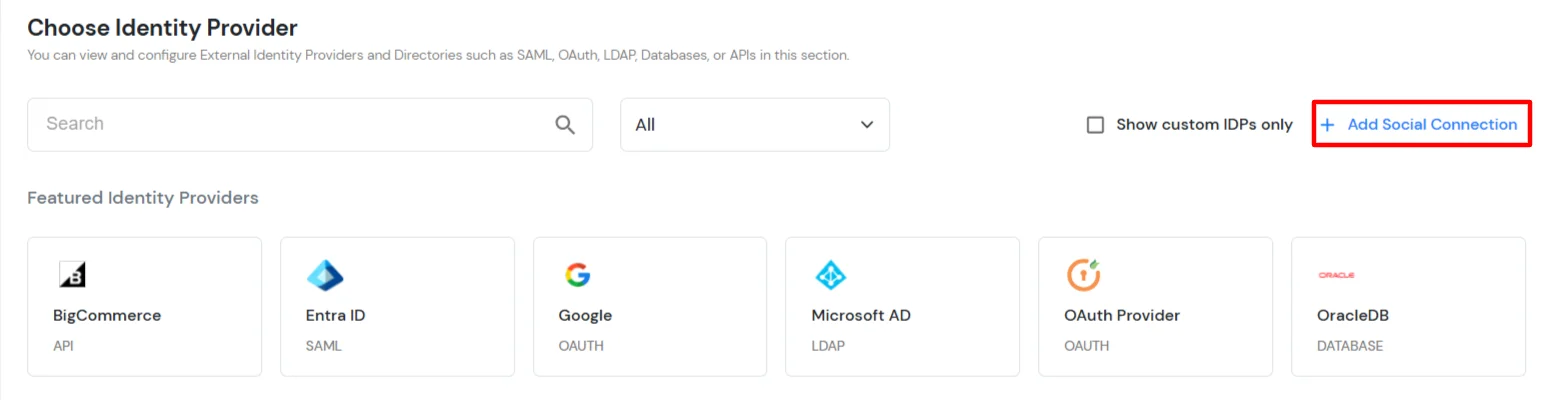
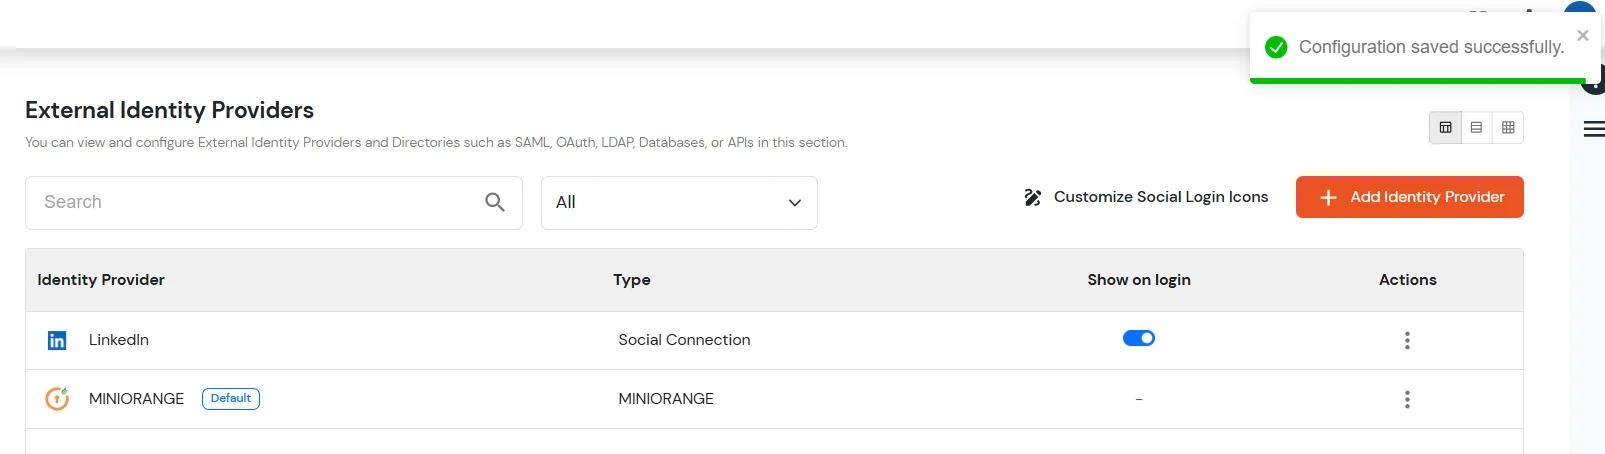
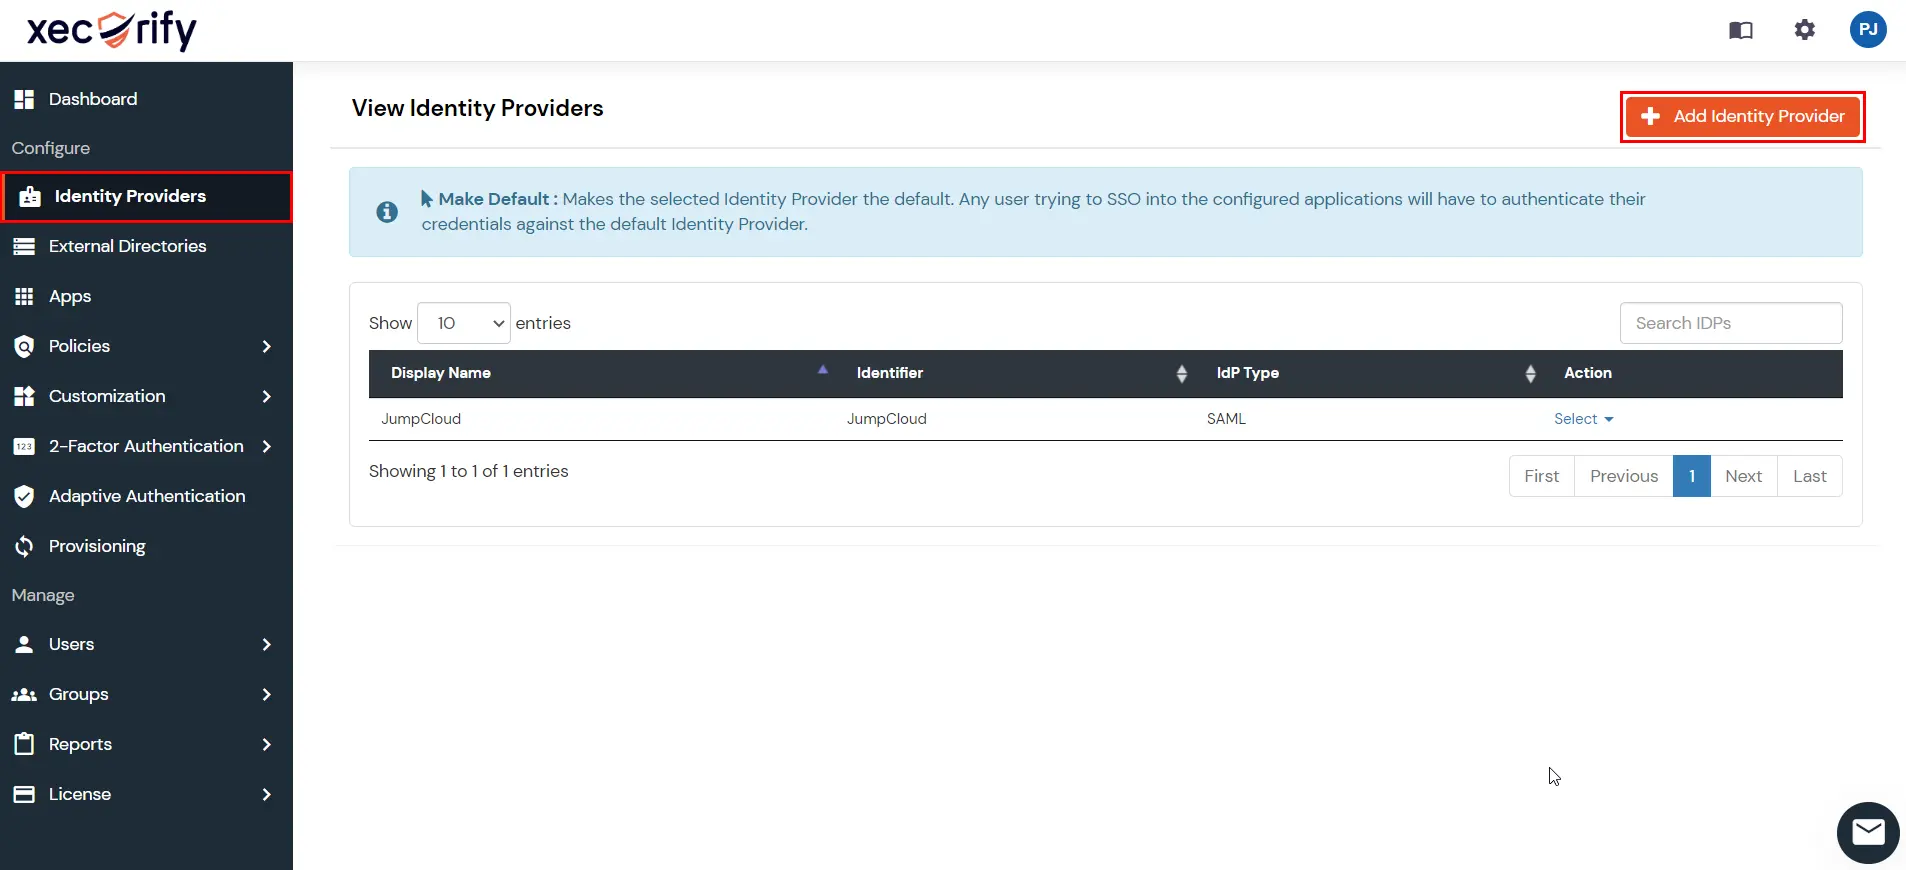
Go to Identity Providers and click Add Identity Provider.
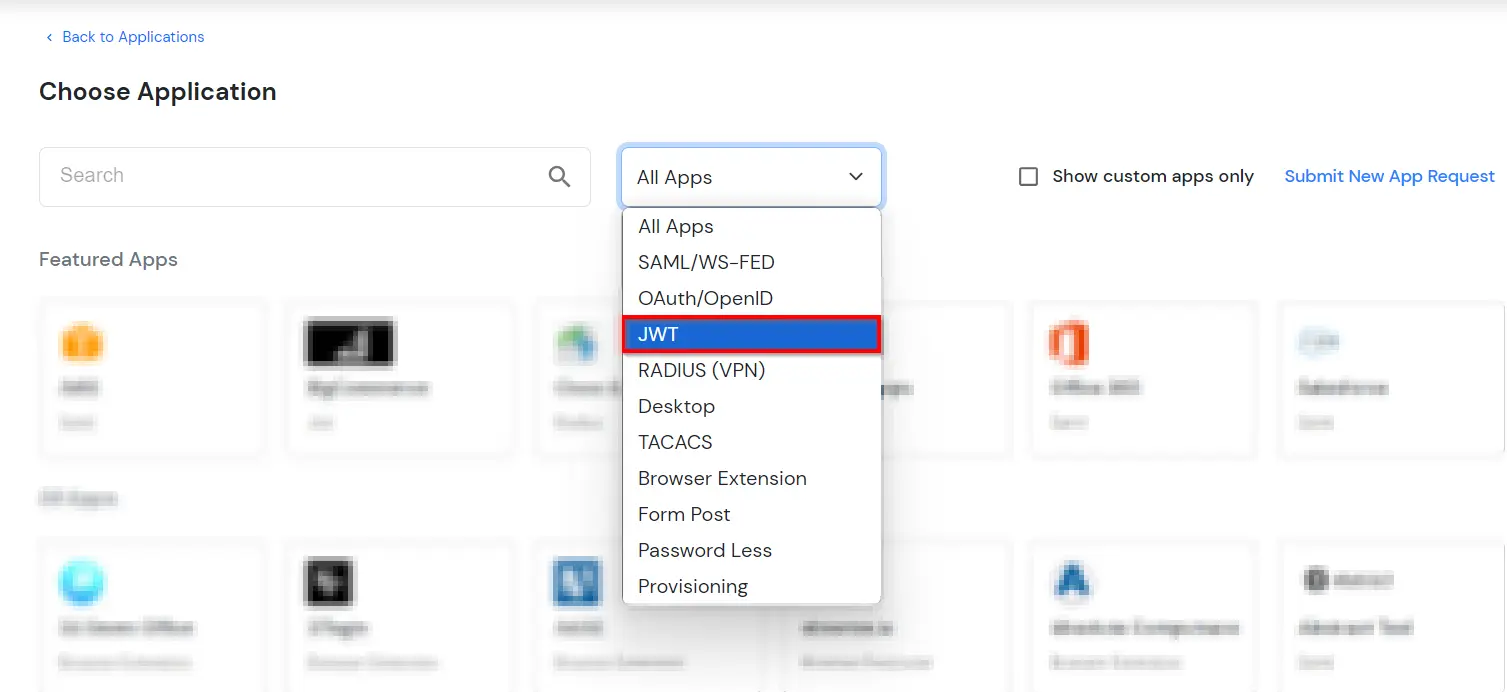
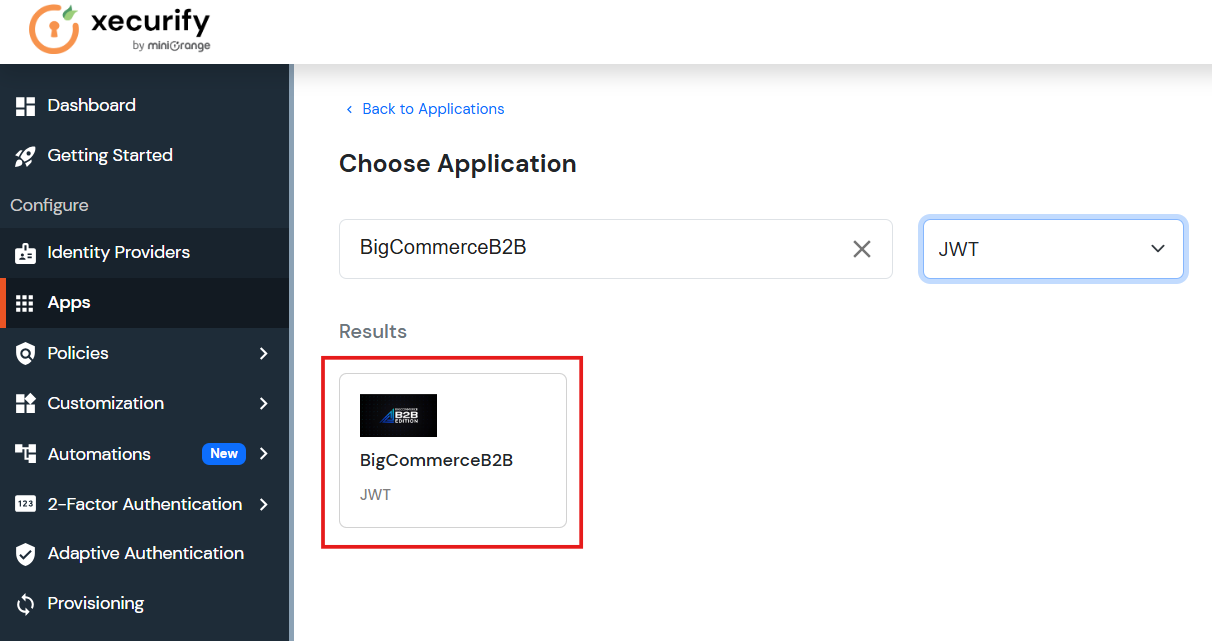
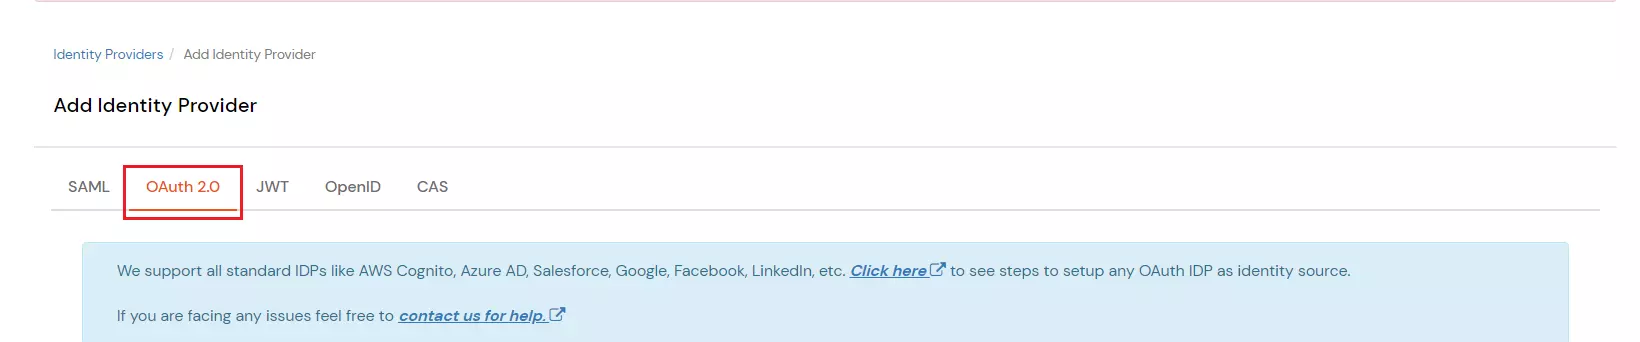
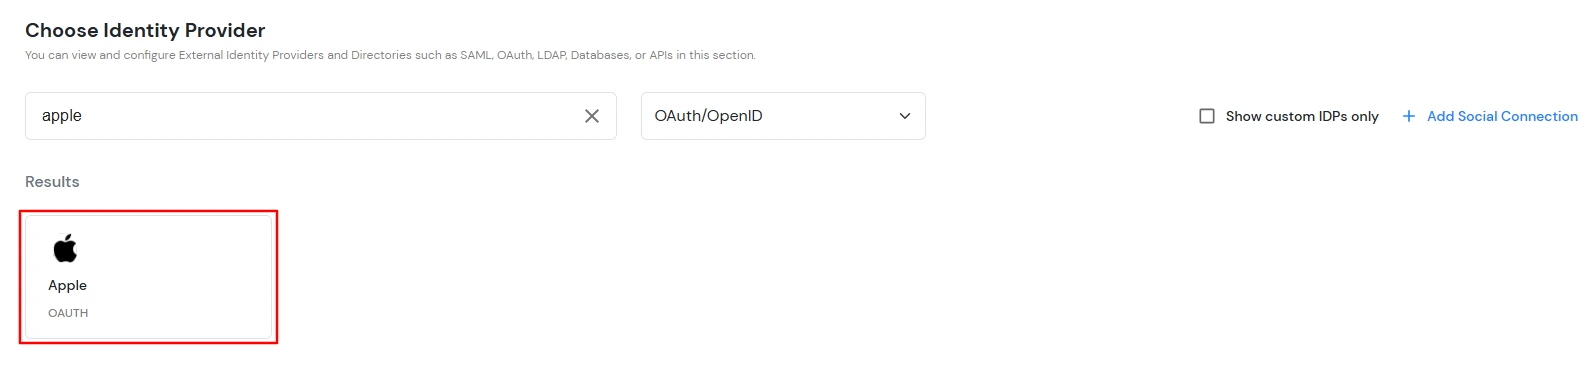
Select OAuth/OpenID as the Identity Provider type.
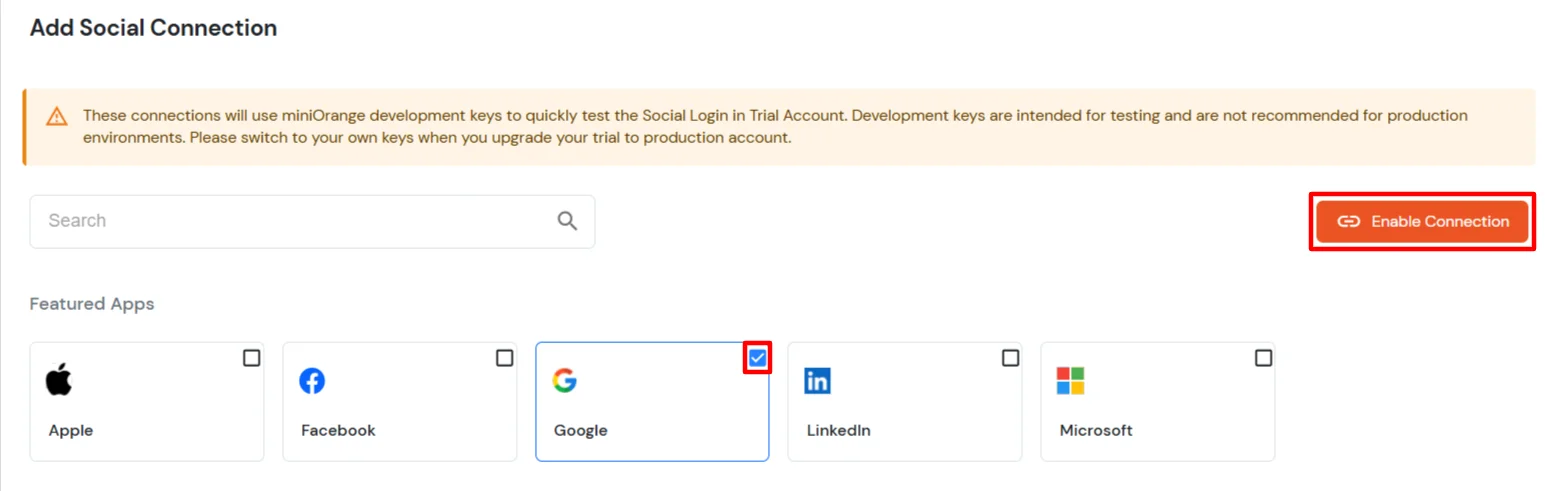
Click the Apple logo to choose Apple as the Identity Provider.
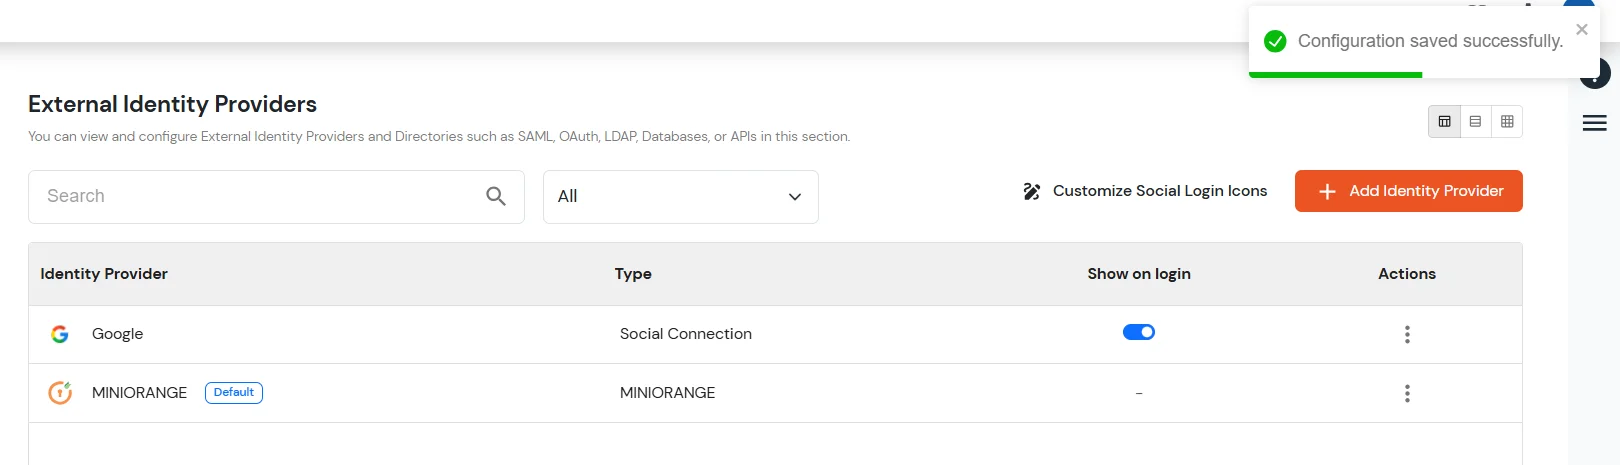
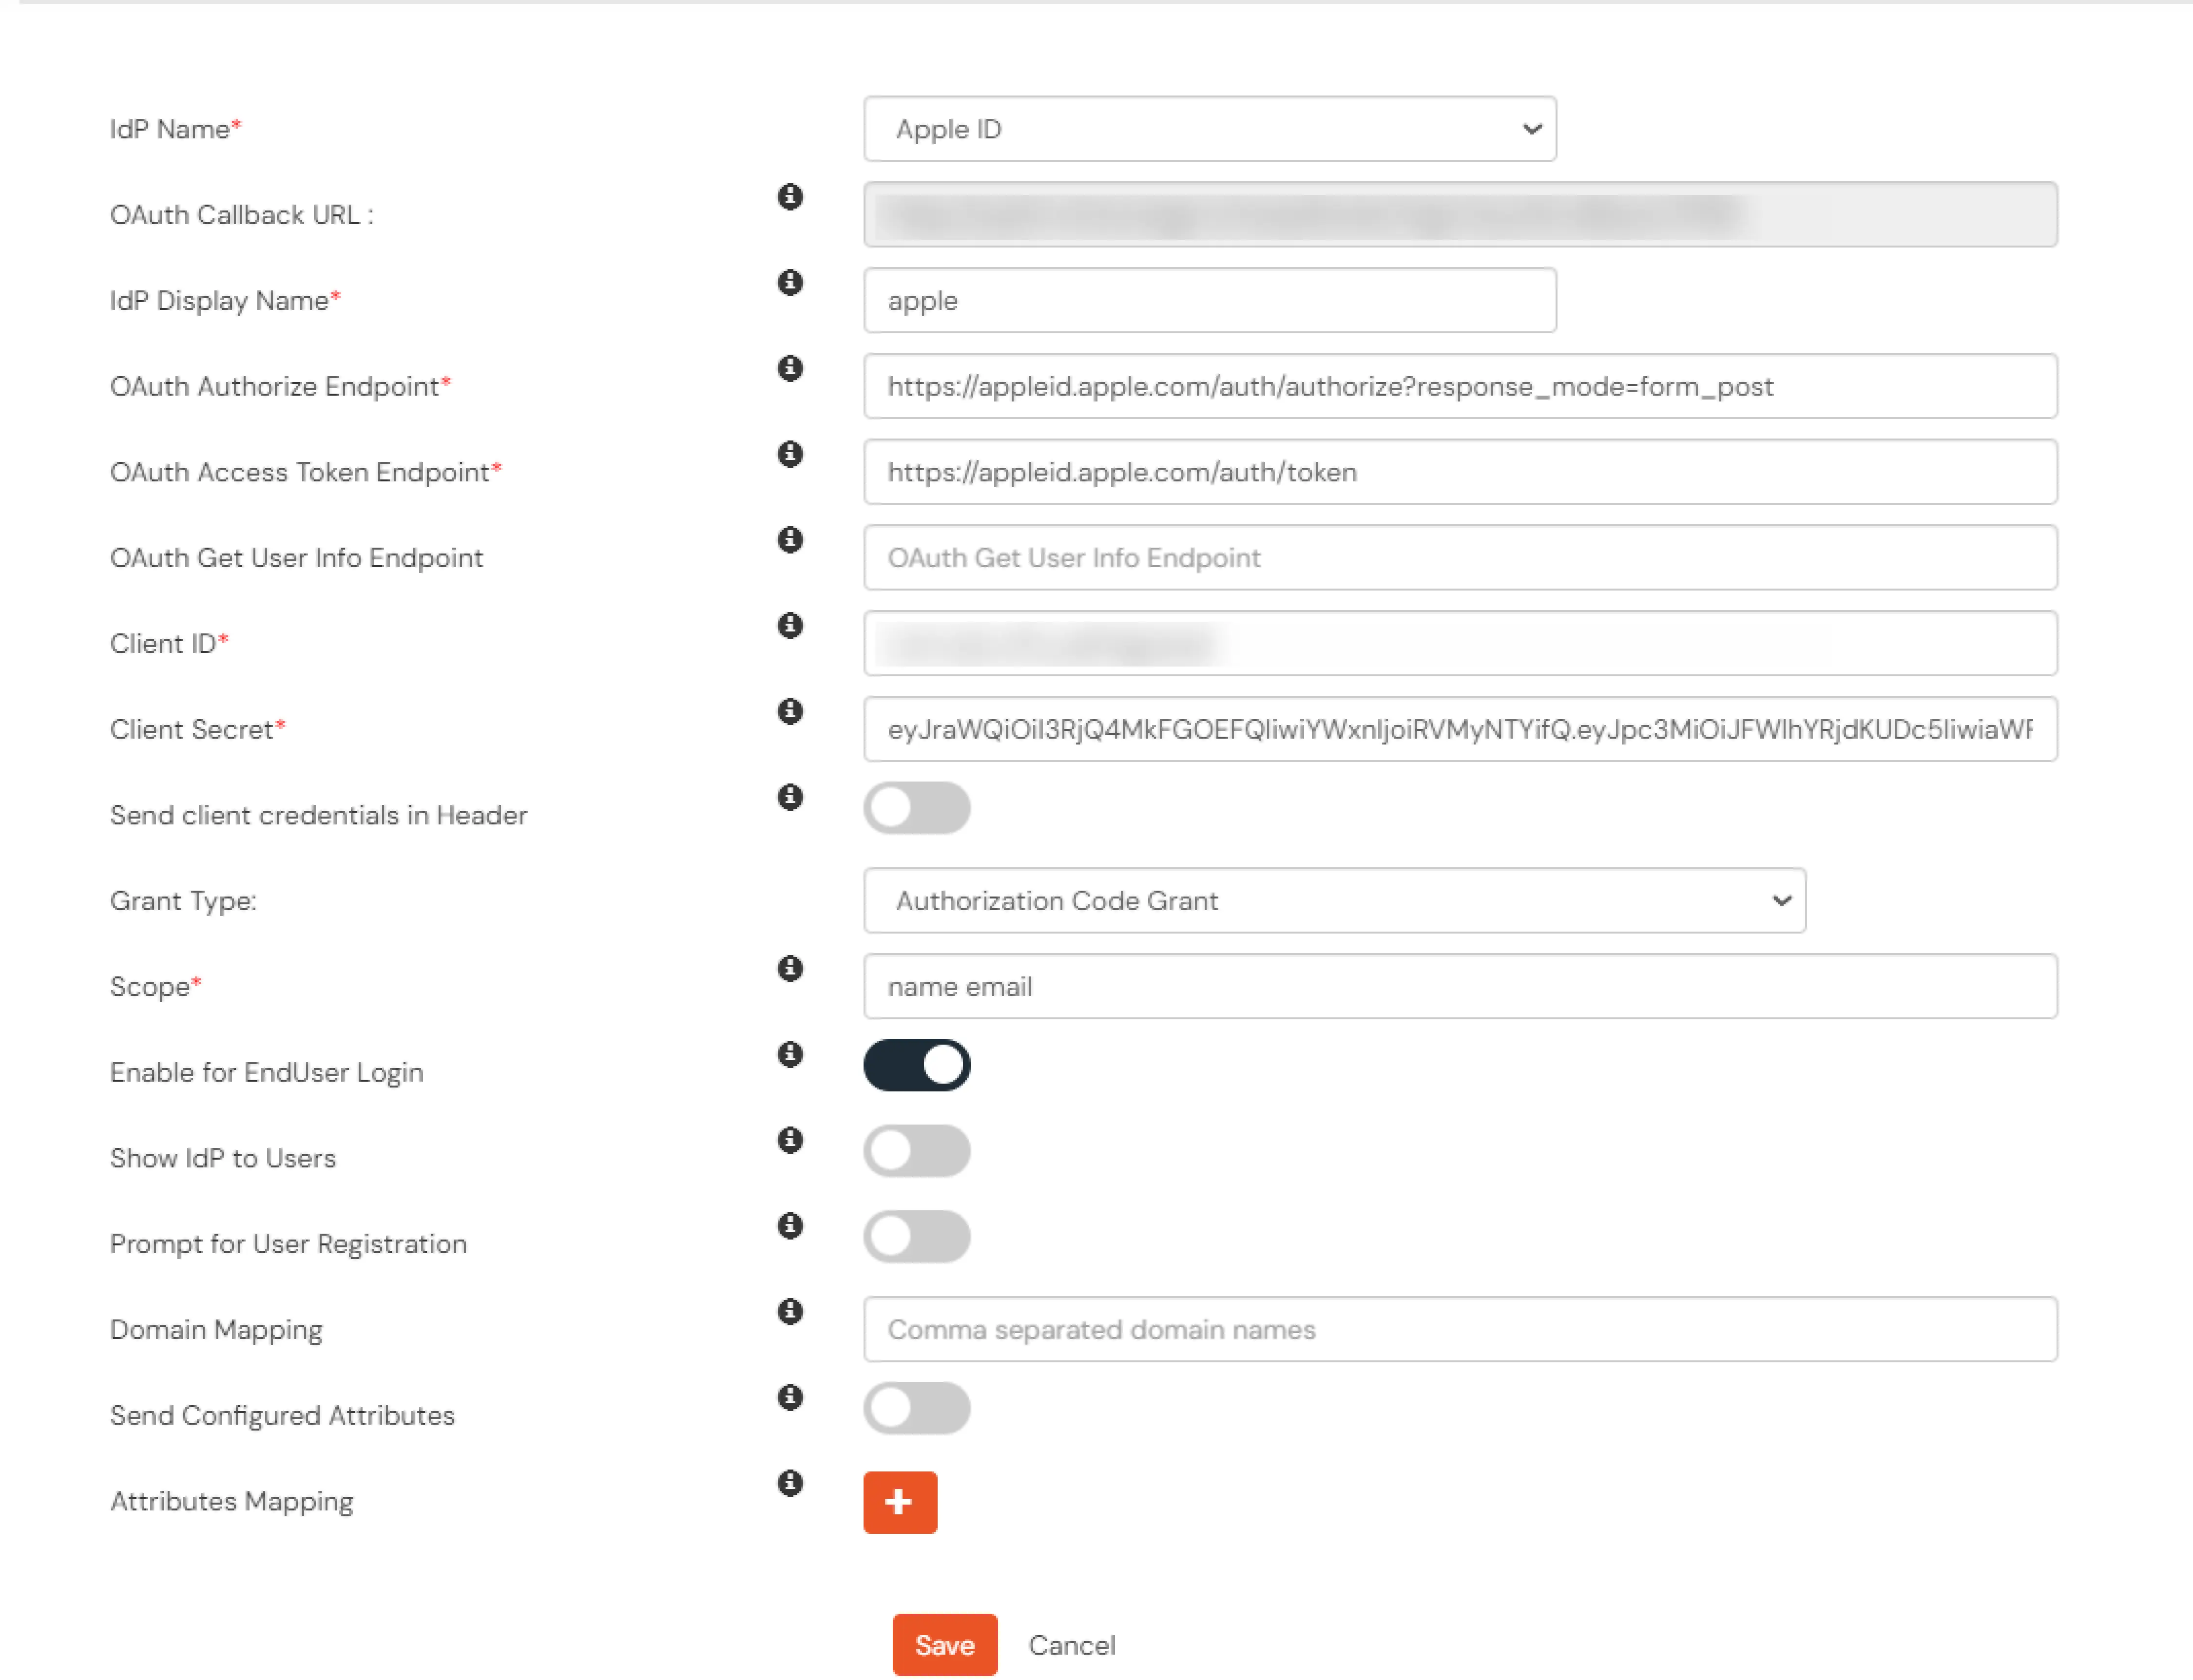
Enter the Client ID and Client Secret that you generated in the above steps, and then click on the Save button.
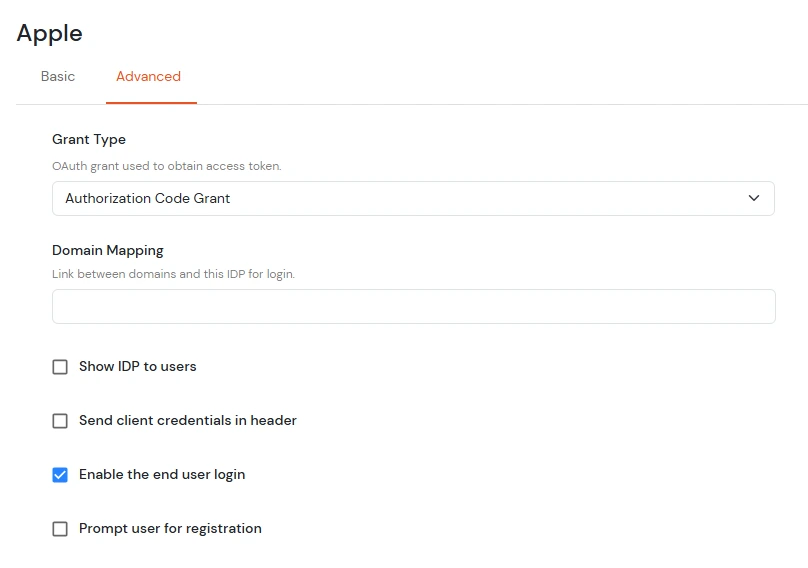
Go to the Advanced tab and enable the checkbox for Enable the End User Login, as this is required for JIT mapping later.
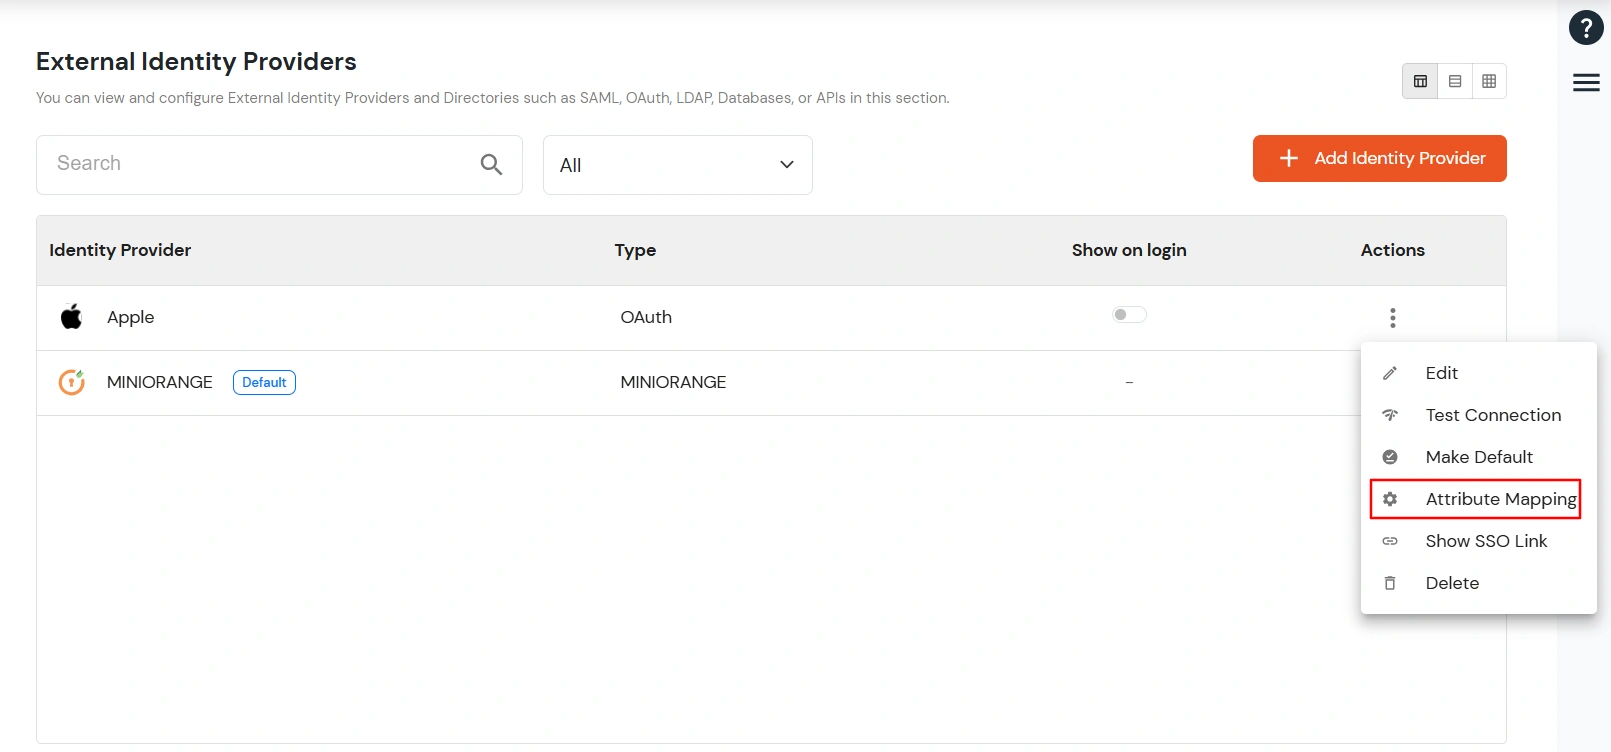
Now select the Identity Provider you configured. In the Action column, click on the three dots, and then select Attribute Mapping.
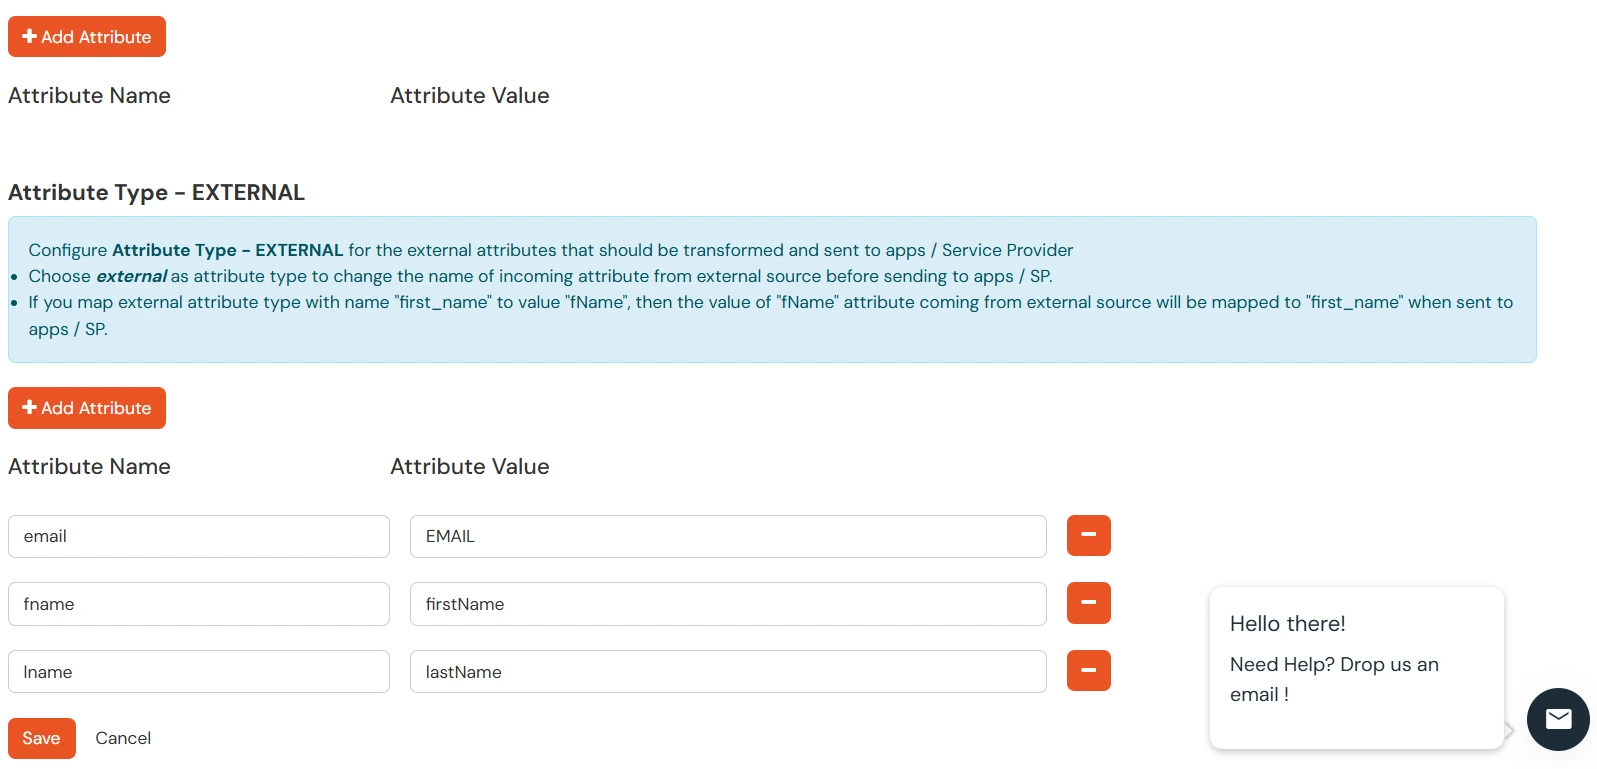
In the Attribute Type section, select External, and configure the attributes such as First Name, Last Name, and Email as shown in the image below and click on the save button.
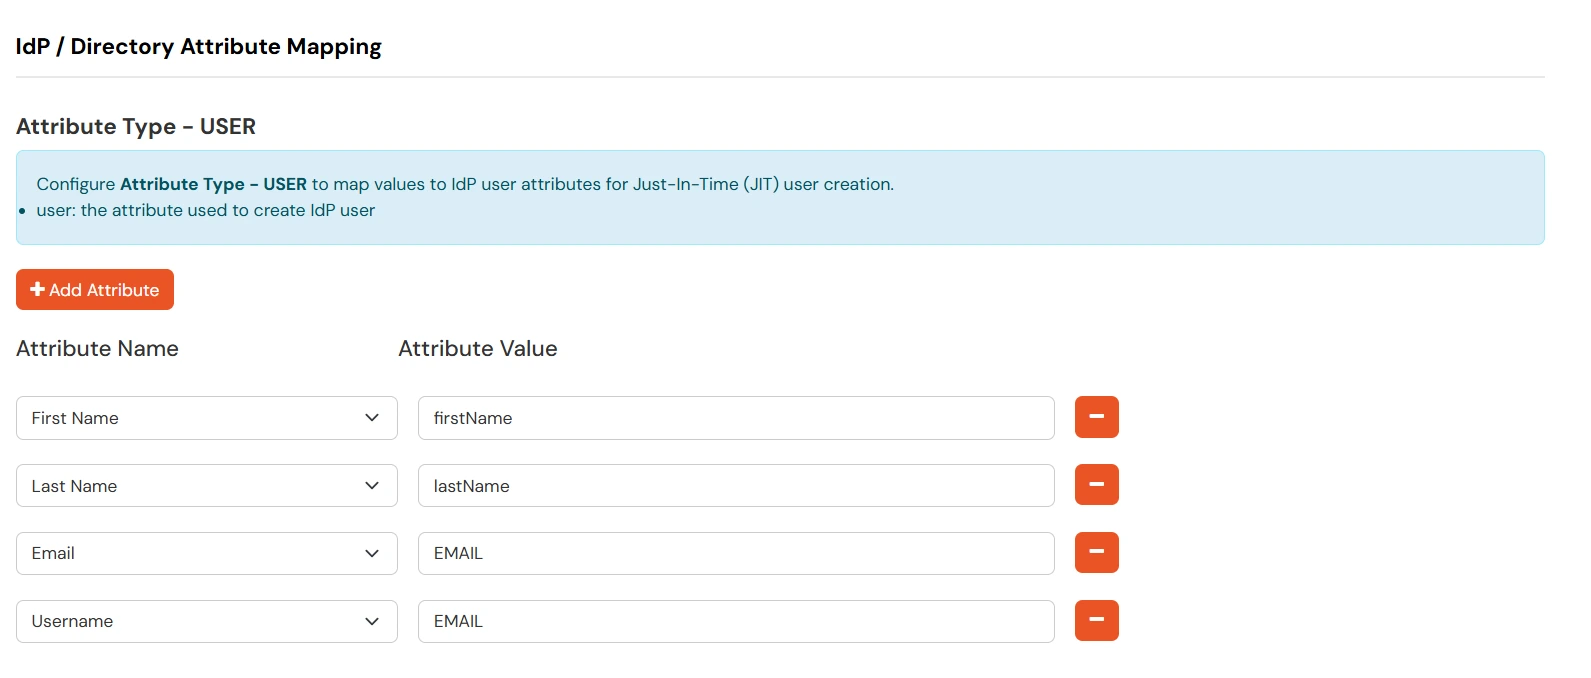
Additionally, you also need to configure the Attribute Type as User. This is required because Apple provides the First Name and Last Name only during the first SSO login. From the second SSO onwards, Apple does not send these attributes again.
However, BigCommerce requires the attributesfirst_name, last_name, and emailduring every login/SSO request, and these attributes are mandatory. To handle this situation, we need to store the user's First Name and Last Name in miniOrange during the first SSO login.
This can be achieved using JIT (Just-In-Time) attribute mapping. During the first login, the attributes received from Apple will be stored in miniOrange. From the second login onwards, miniOrange will retrieve these stored attributes and pass them during SSO, ensuring that the required attributes are always available.
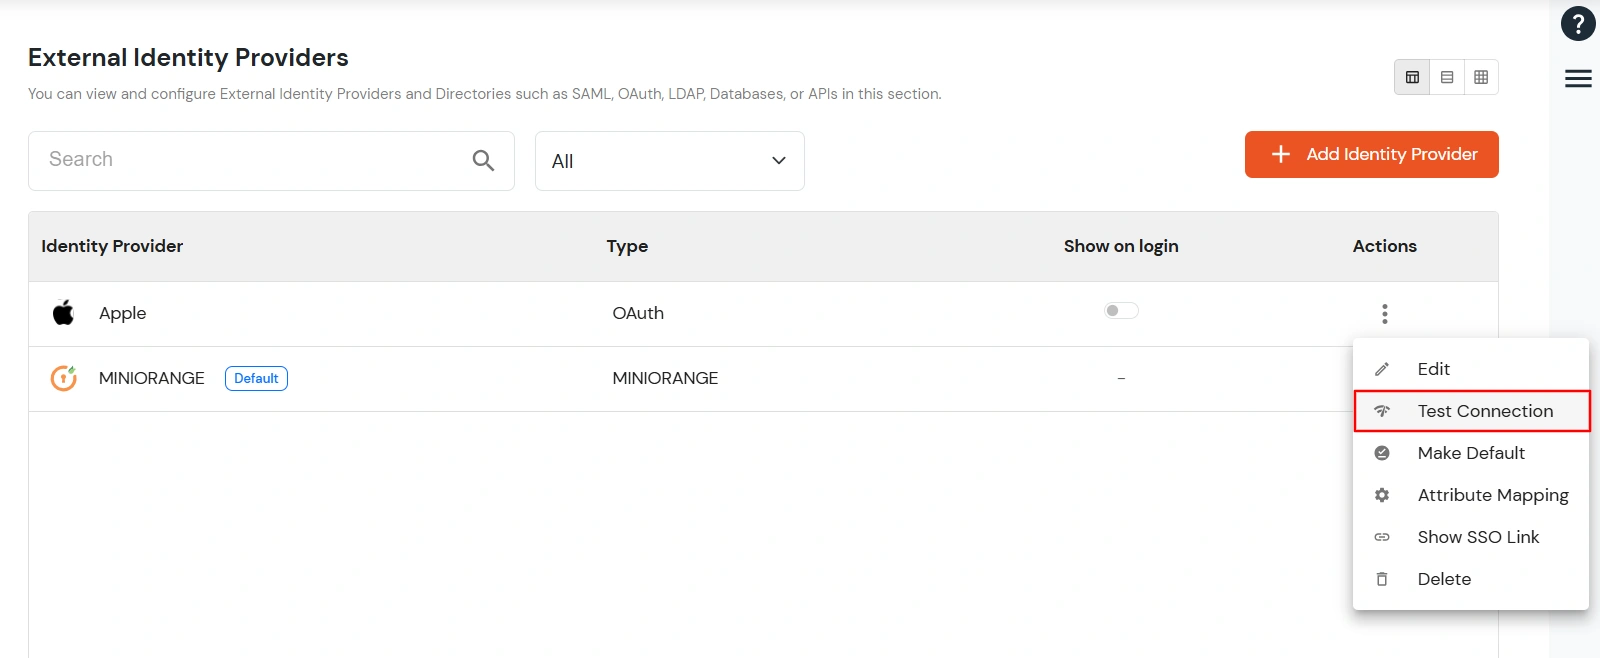
Now select the Identity Provider you configured. In the Action column, click on the three dots, and then select Test Connection.
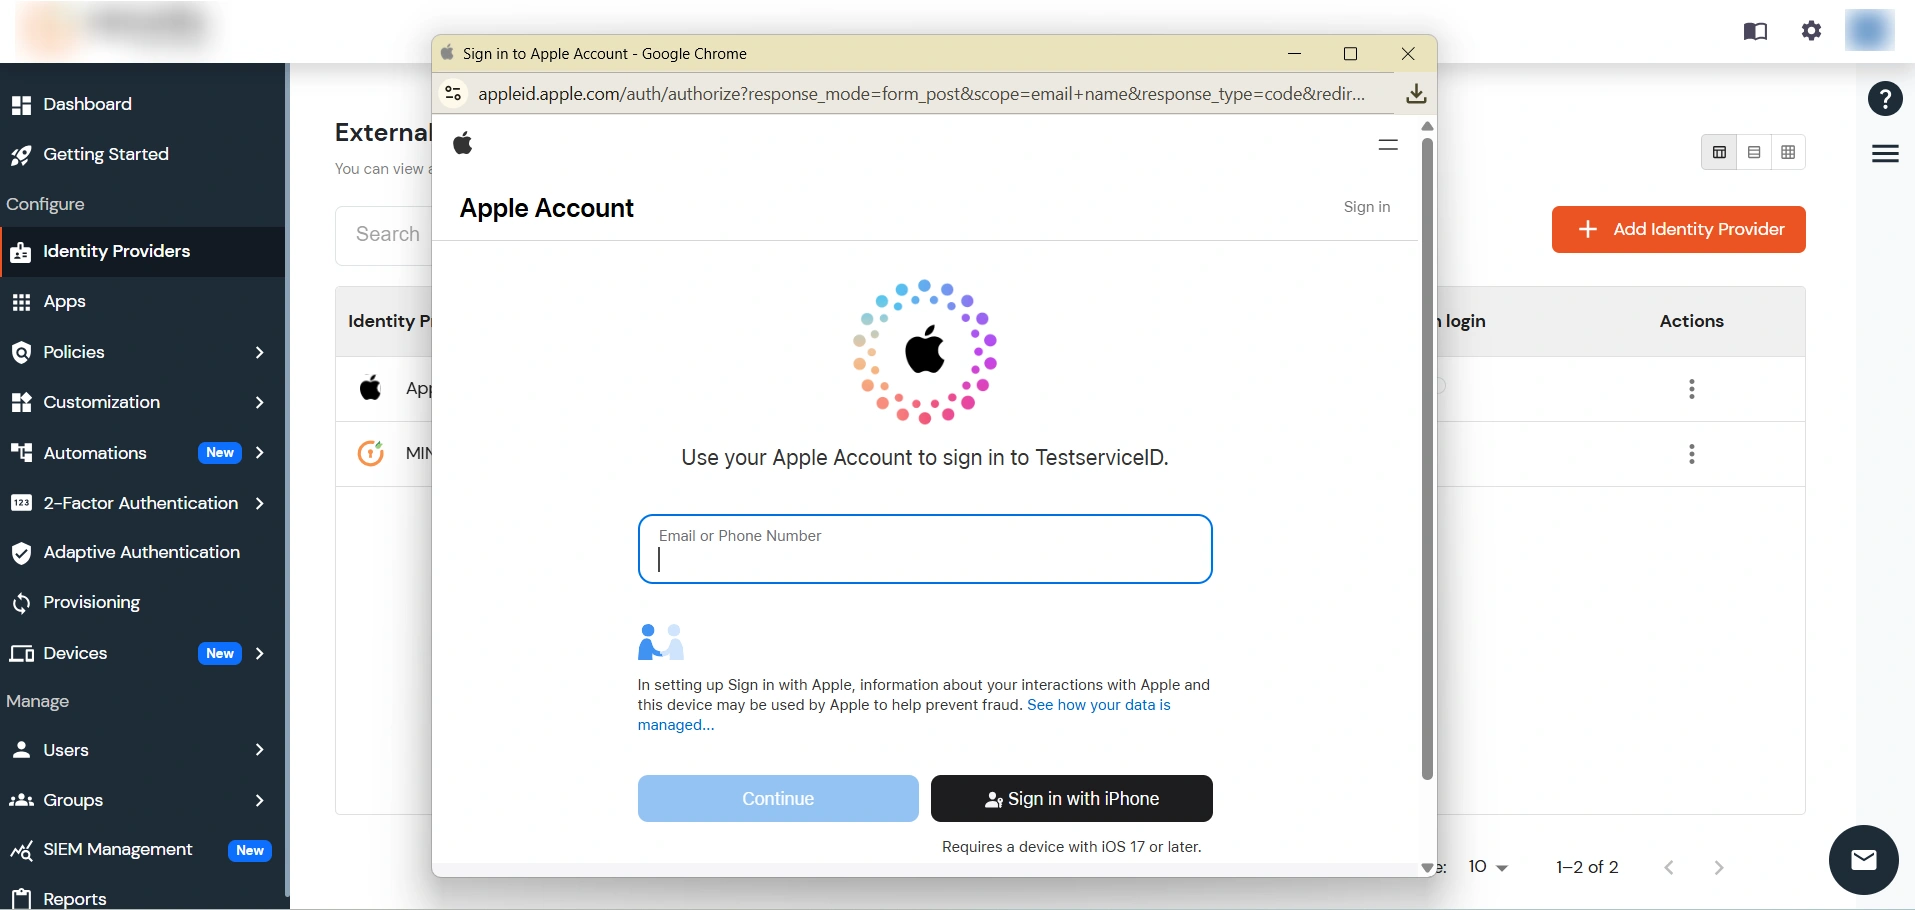
You will be directed to enter your Apple Id.
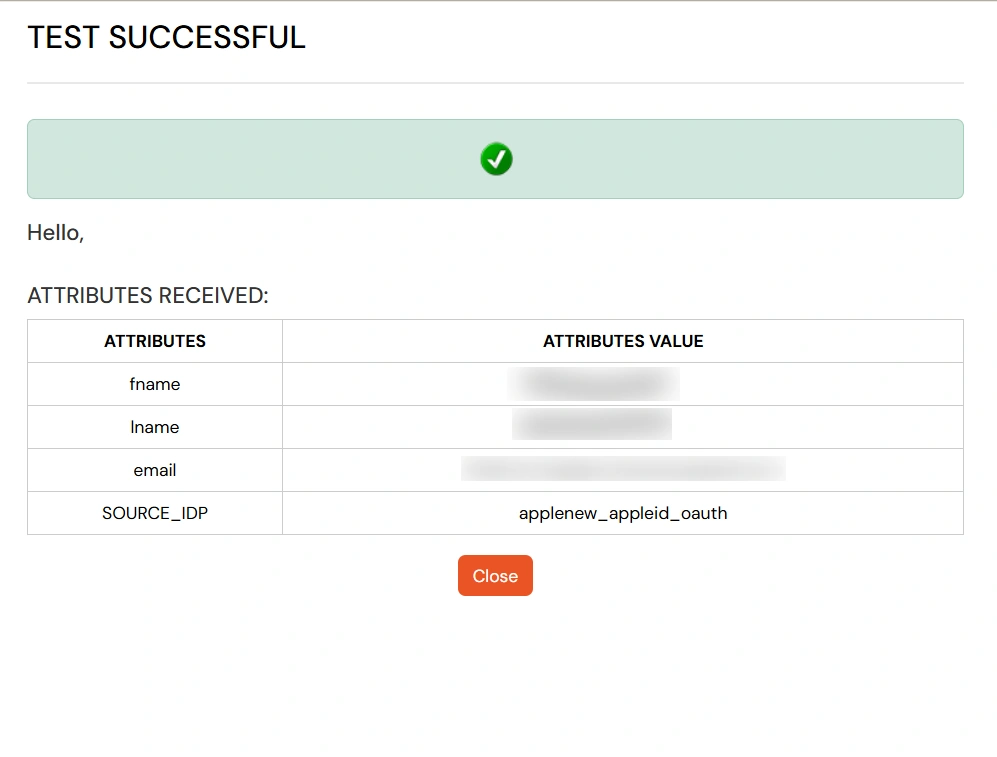
On entering valid Apple credentials you will see a pop-up window which is shown in the below screen.
Hence your configuration of Apple as IDP in miniOrange is successfully completed.
4. Embed your social login urls to perform SP Initiated Social Login
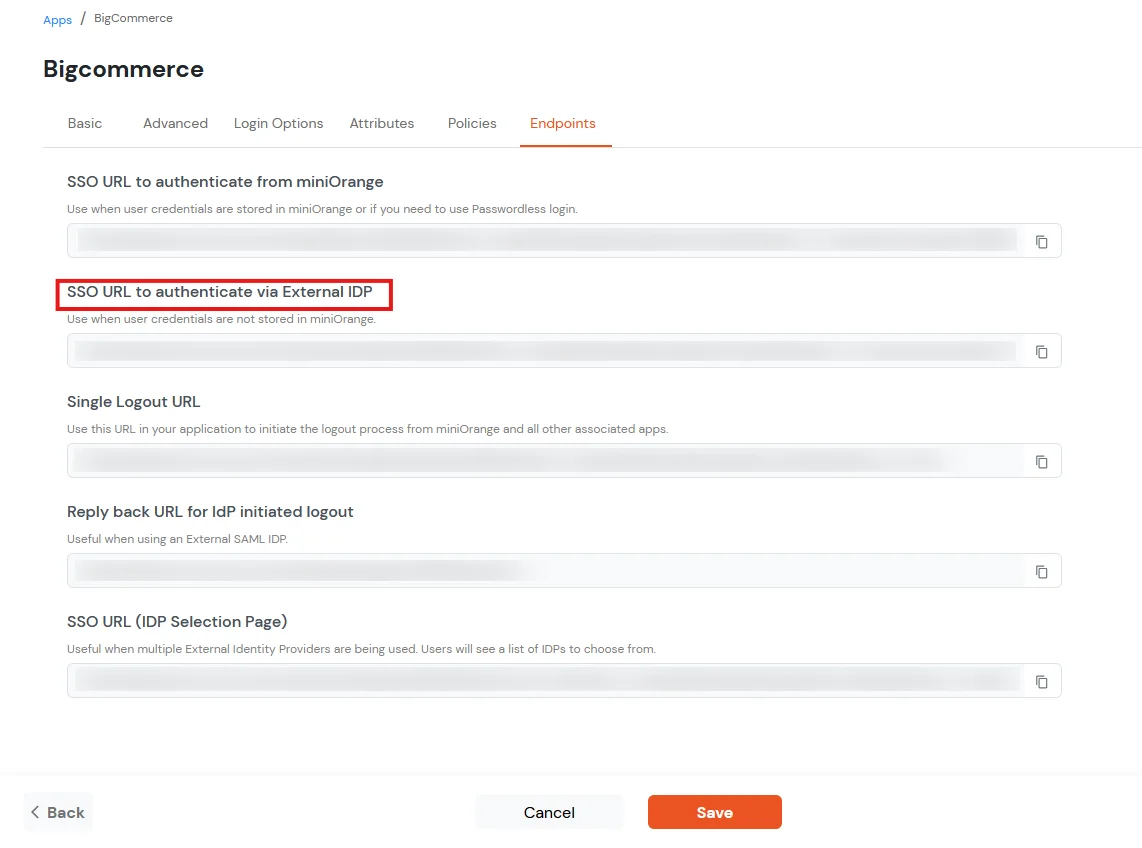
Copy the Single Sign-On (SSO) url from the BigCommerce App that you have configured in miniOrange.
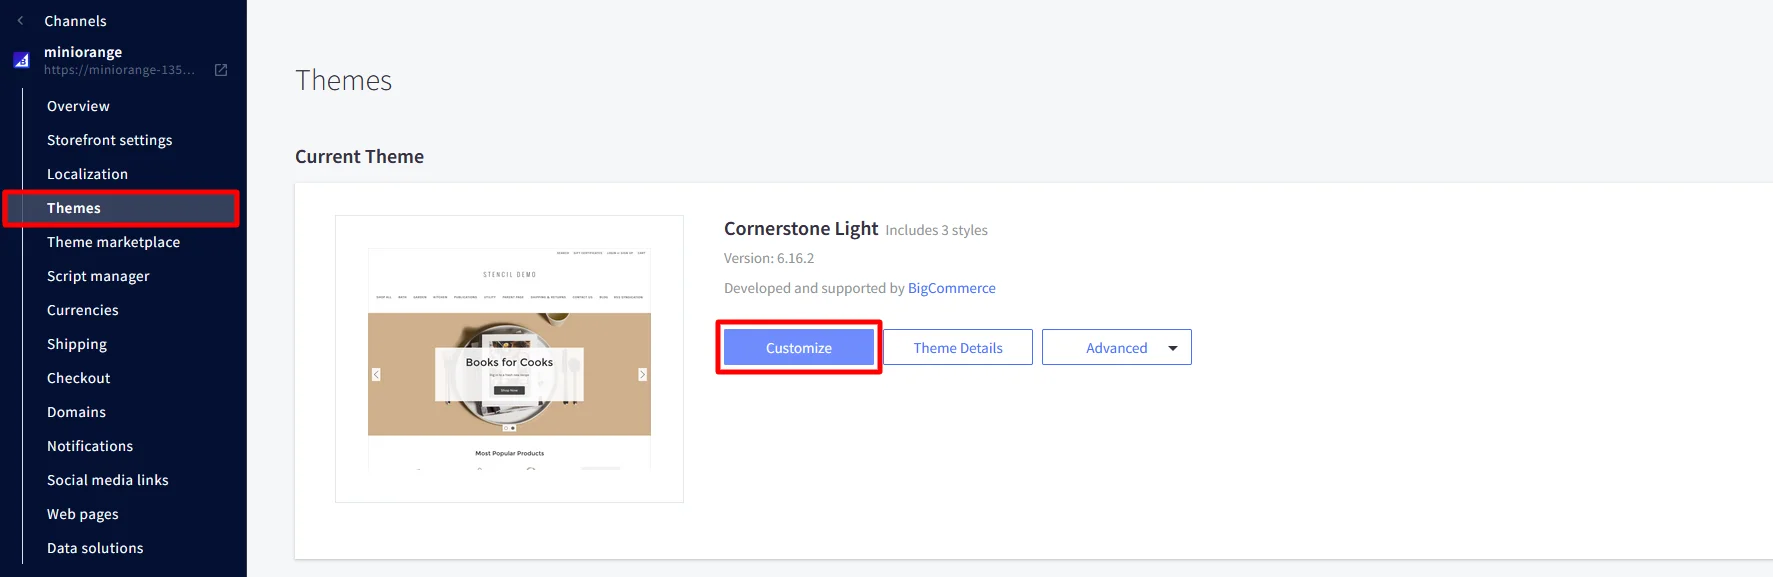
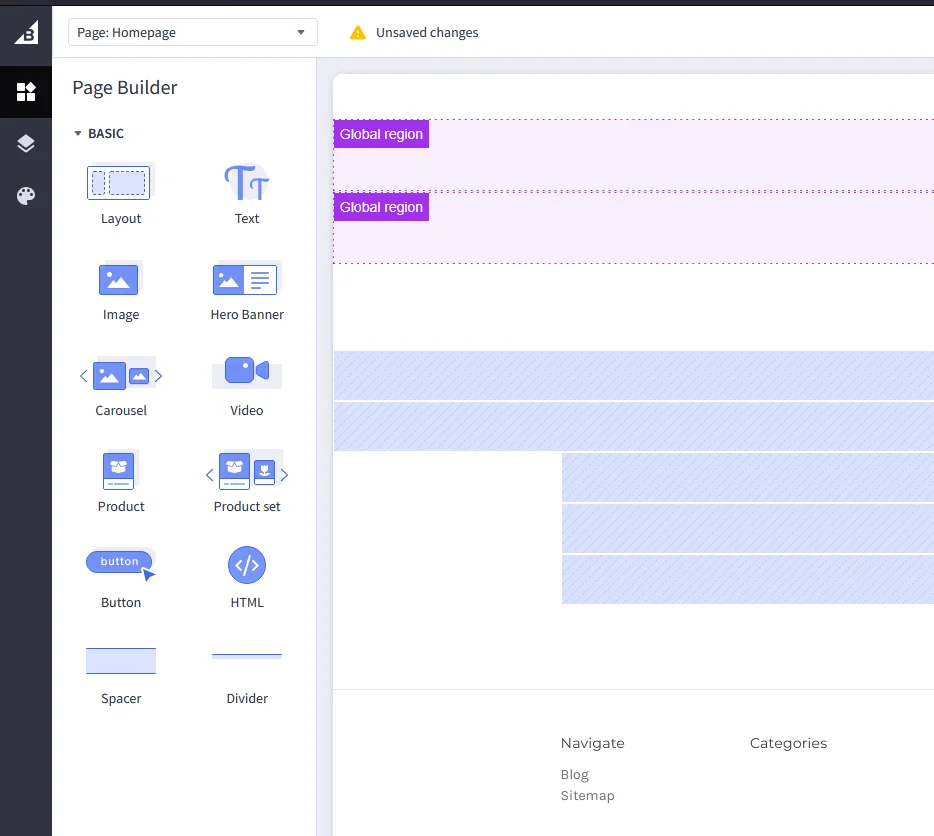
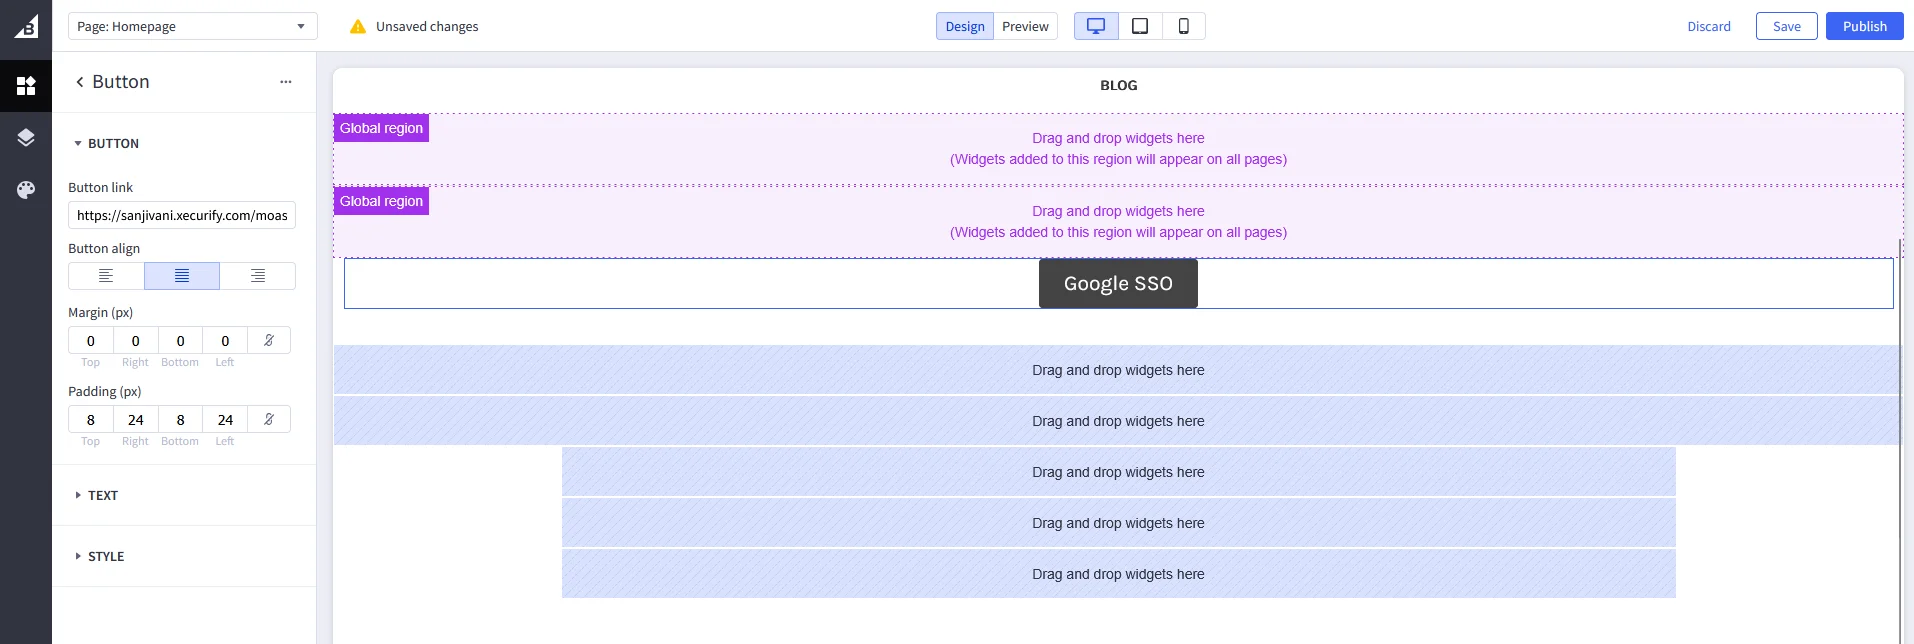
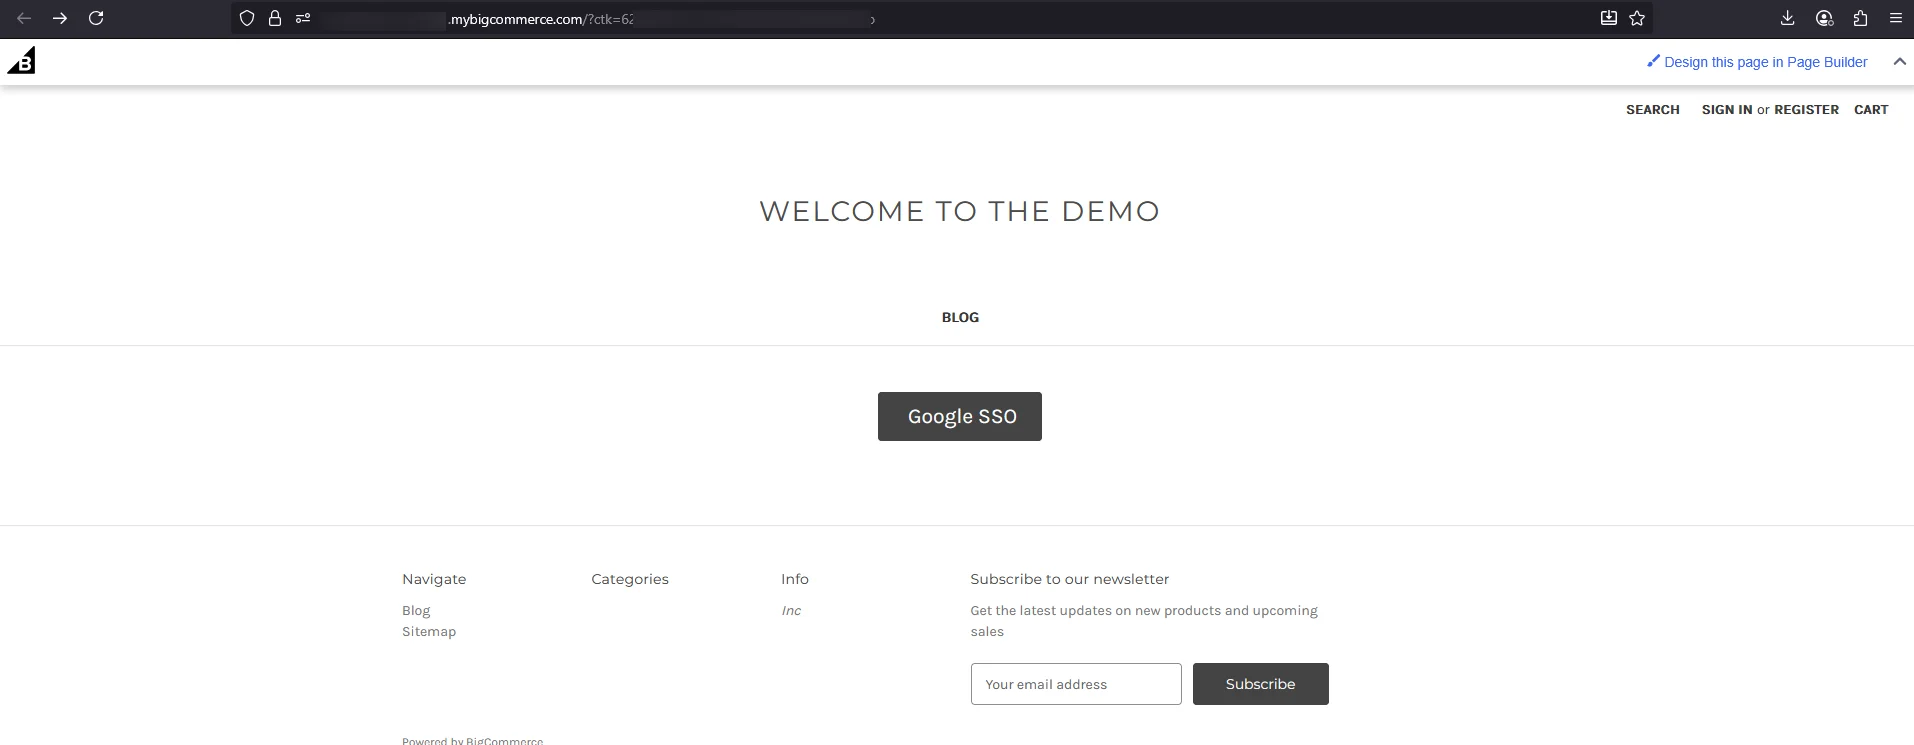
Just add an identifier such as google_oauth, facebook_oauth, linkedin_oauth, appleid_oauth after your customerId in SSO Url for respective Social login url as given below.
Is miniOrange's social login SSO supported on all BigCommerce plans?
miniOrange BigCommerce Social Login SSO solution is available for all BigCommerce plans, including the free ones. We also offer support for a wide range of social login providers, including Google, Facebook, Twitter, and more. With our solution, customers can easily log in to their BigCommerce accounts using their preferred social media credentials, while website owners can benefit from increased engagement & streamlined login processes.