- Home
- DLP
- How to Install miniOrange DLP Agent Using GPO
How to Install miniOrange DLP Agent Using GPO Push
Deploying the miniOrange DLP Agent across multiple devices can be simplified using Group Policy Objects (GPO), a native feature in Windows Active Directory environments. By pushing the DLP Agent via GPO, administrators can automate the installation process across hundreds of endpoints, ensuring consistent protection and policy enforcement. This guide outlines a step-by-step process to help IT teams silently install the miniOrange DLP Agent using a GPO push method.
Prerequisites
There are a couple of things you need to check before you start with the setup:
- You need Administrator privileges to log in to the miniOrange DLP Admin Dashboard.
Step 1: Download the miniOrange DLP Agent Installer
- Log in to your DLP Admin dashboard.
- navigate to Getting Started tab, and under Windows tab, and click the Download Module button to download the DLP Agent Installer.
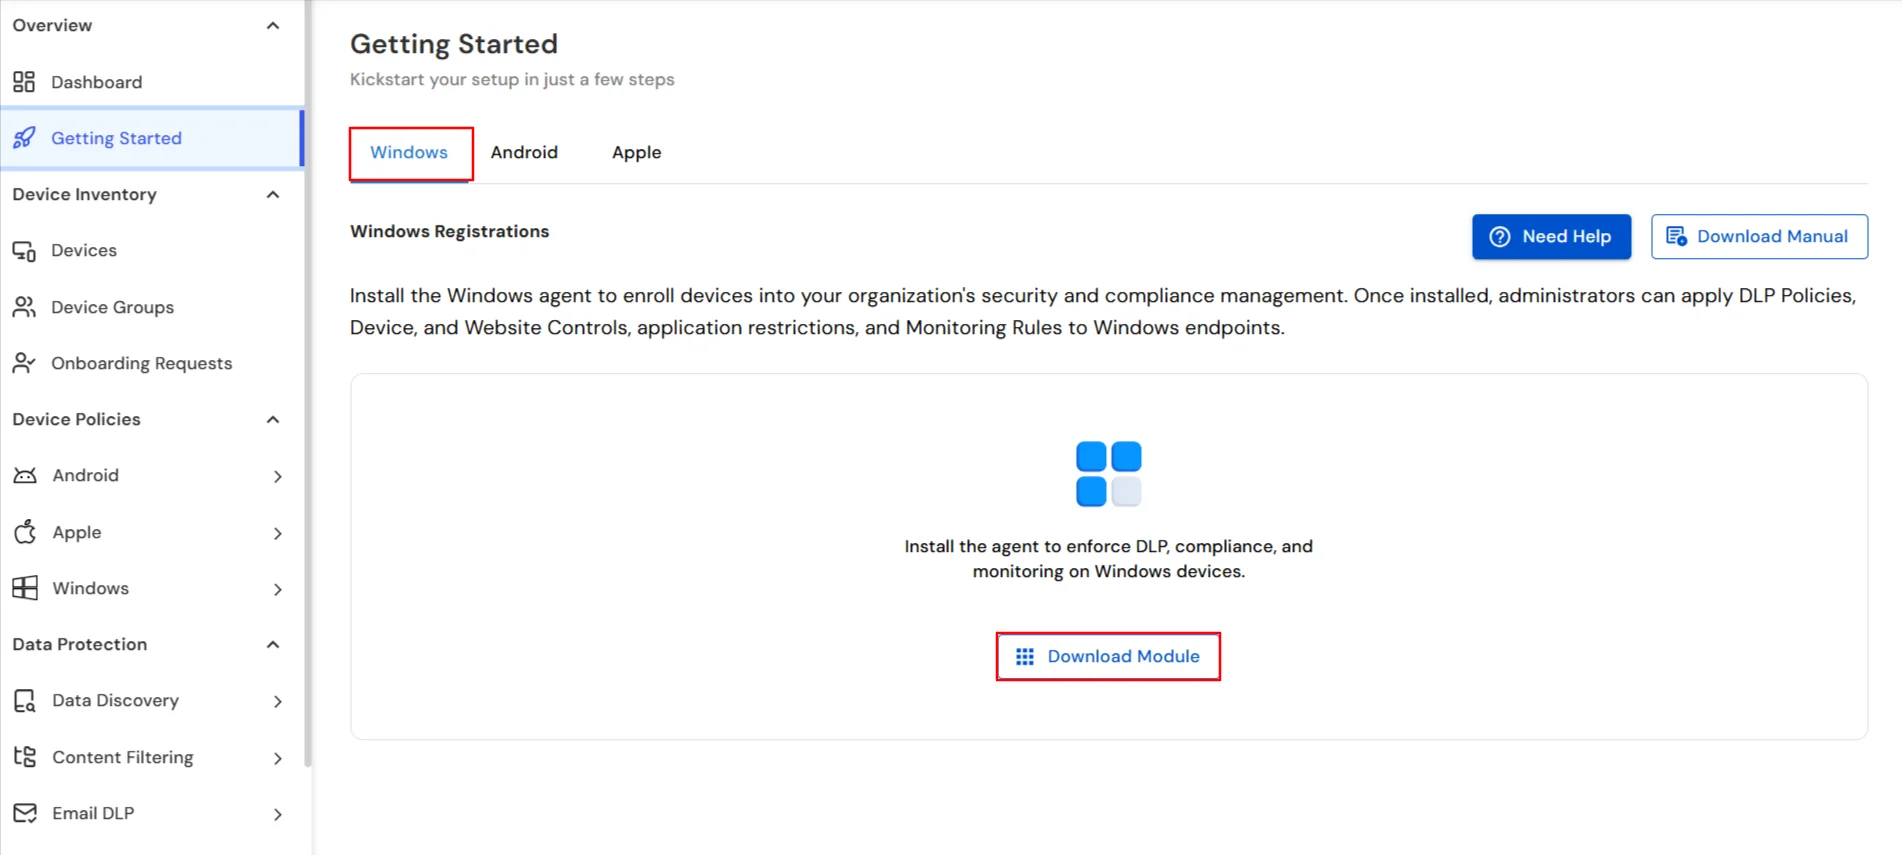
- The Windows Installer (.msi) will be downloaded.
Step 2: Prepare the Shared Network Folder
- Place the downloaded .msi file in a shared folder (e.g., \\YourServer\SharedFolder\miniOrangeAgent.msi).
- Make sure that all target computers and the domain controller have read access to this shared location
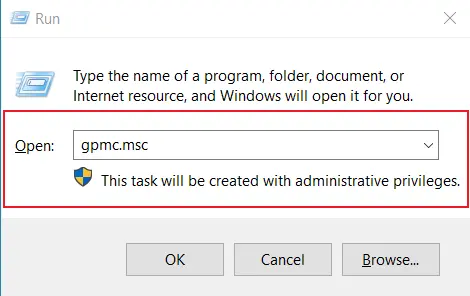
Step 3: Group Policy Management Console
- On your Domain Controller, press Win + R, type gpmc.msc, and press Enter. This will open your Group Policy Object settings.
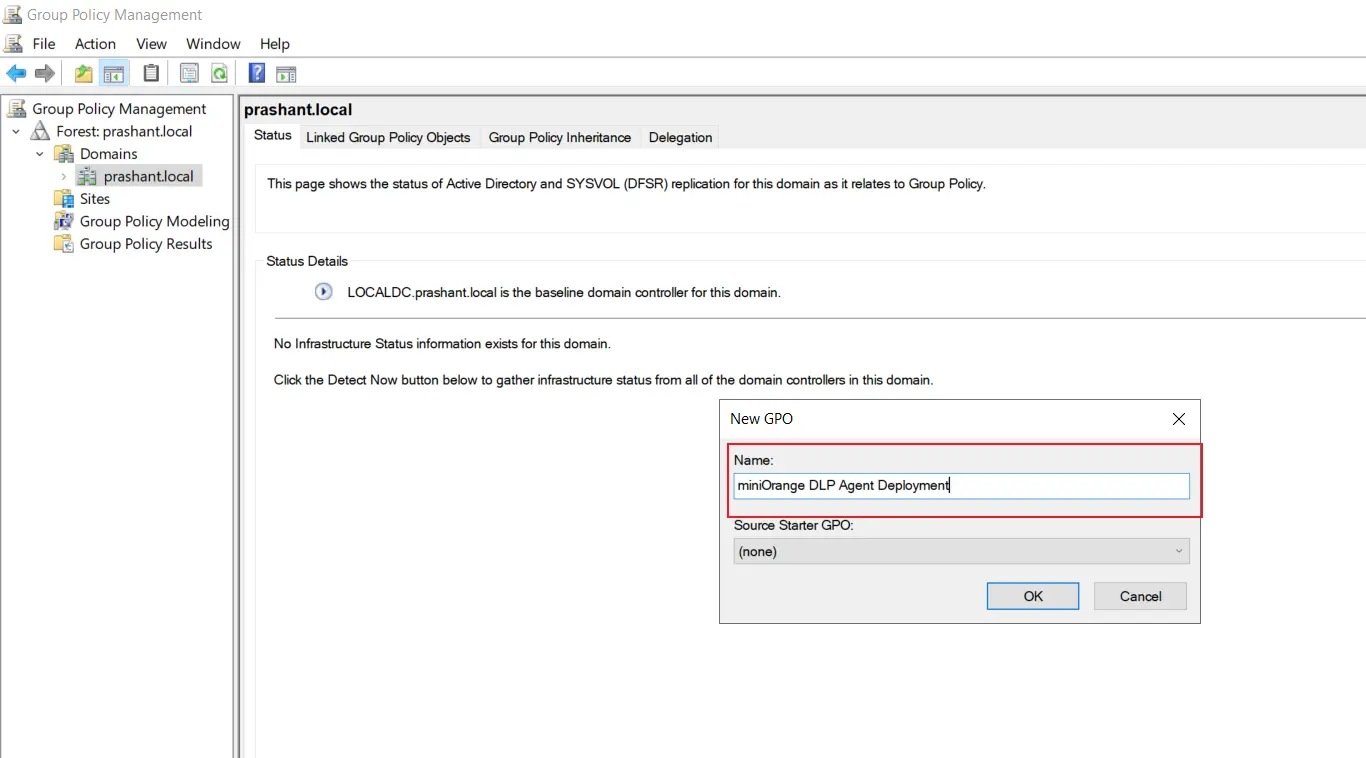
- Right-click on the Organizational Unit (OU) where your target devices reside and click Create a GPO in this domain, and link it here.
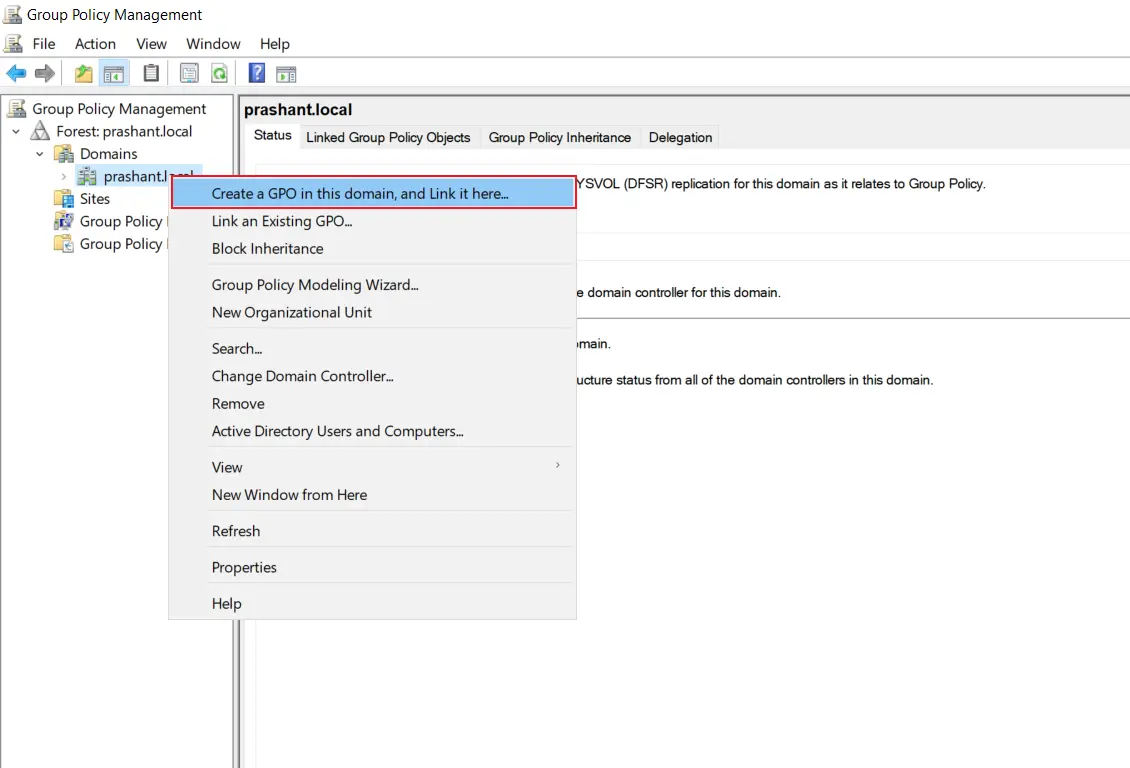
- Name the GPO (e.g., miniOrange DLP Agent Deployment).
Step 4: Configure the GPO for Software Installation
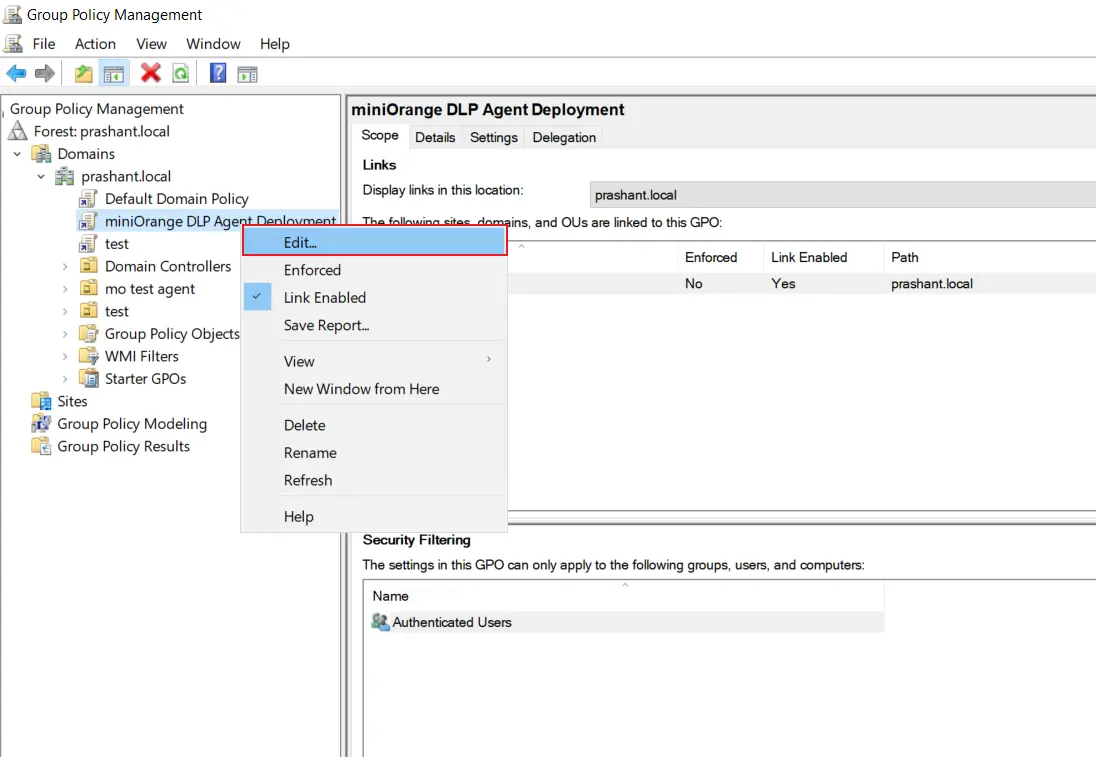
- Right-click the newly created GPO and select Edit.
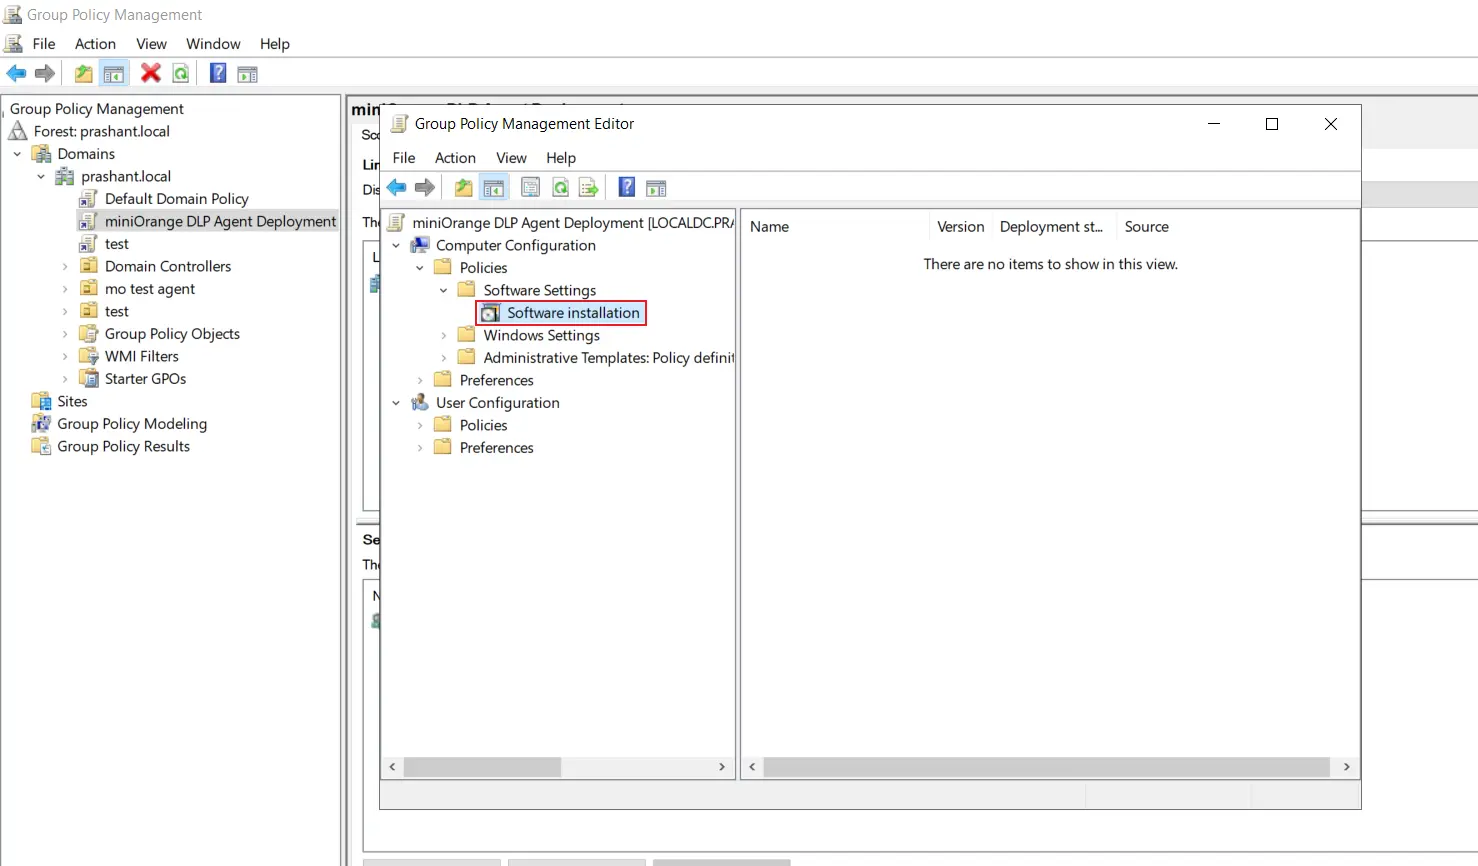
- Navigate to: Computer Configuration → Policies → Software Settings → Software Installation.
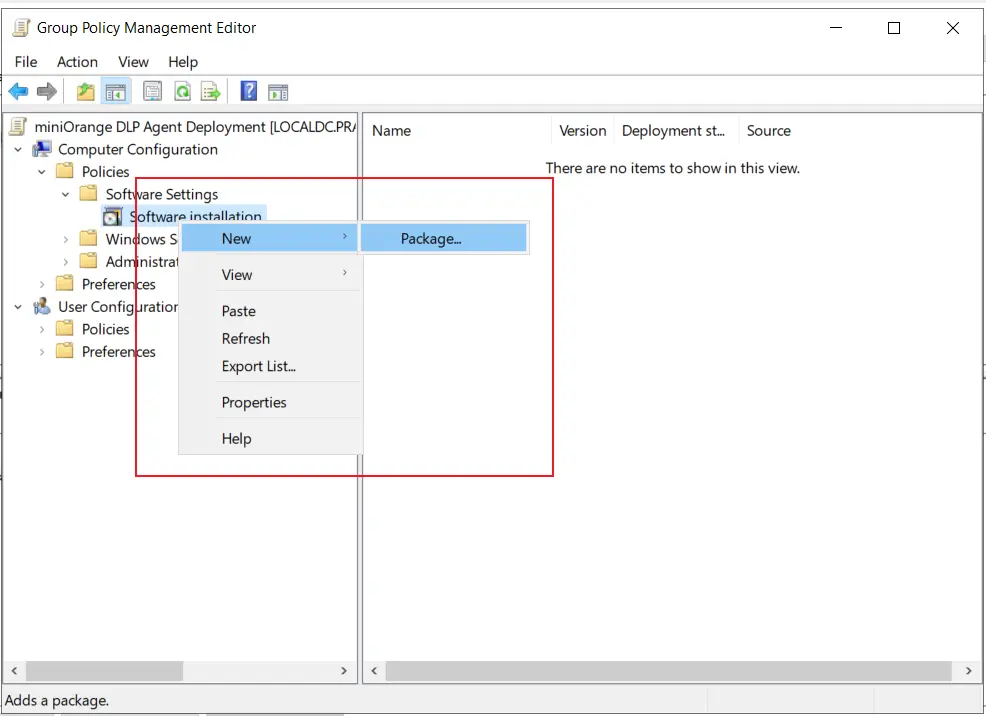
- Right-click on Software Installation and select New → Package.
Step 5: Add the DLP Agent Installer
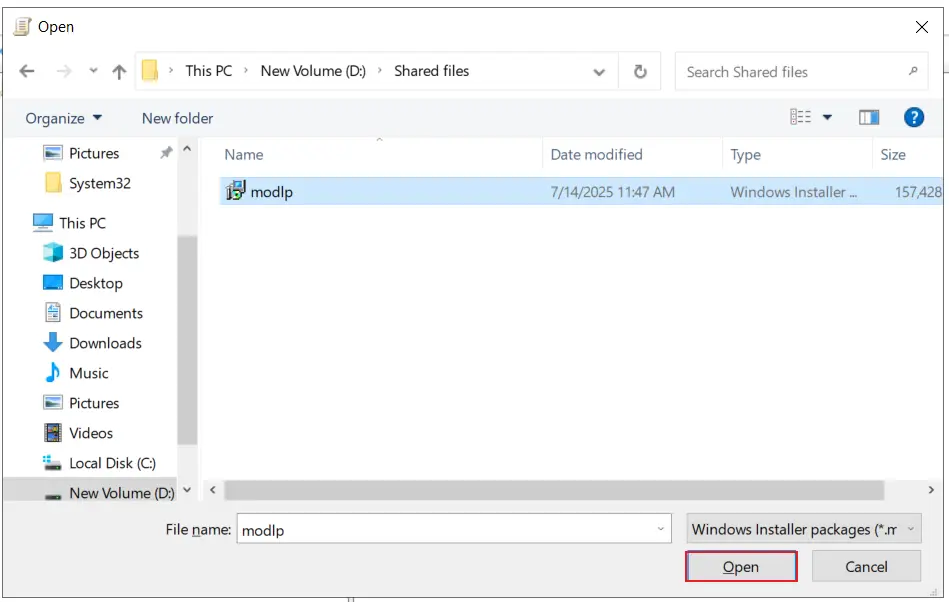
- In the dialog box, enter the path of the .msi installer (e.g., \\YourServer\SharedFolder\miniOrangeAgent.msi).
- Choose the file and click on Open.
Step 5: Policy Update
- Close the Group Policy Management Editor.
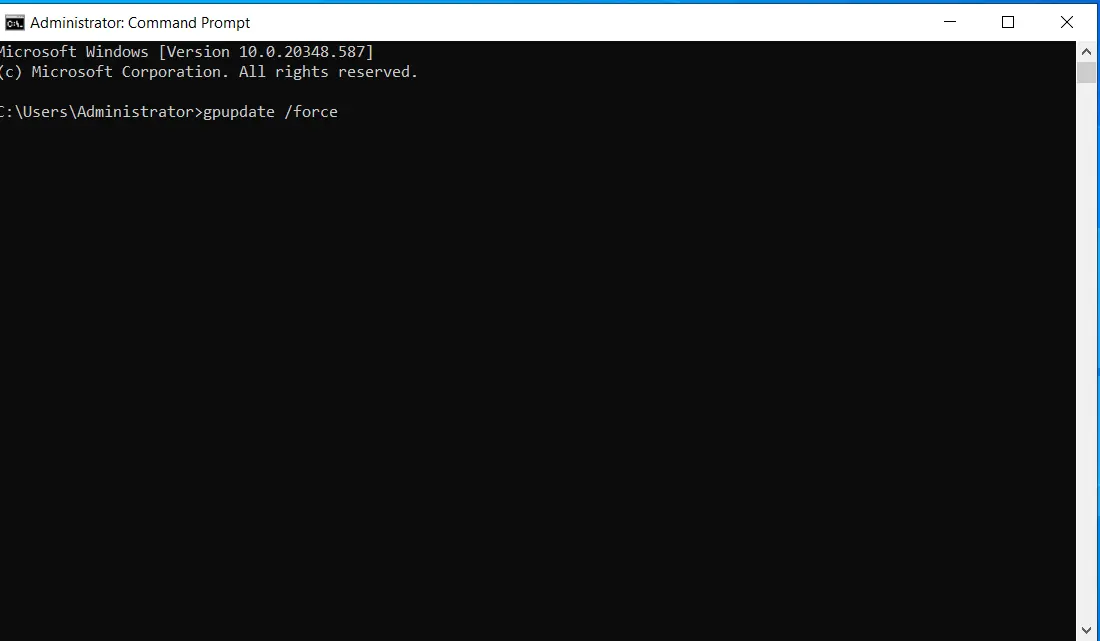
- On the target computers, open Command Prompt and run: gpupdate /force
- Restart the machines to initiate the agent installation.
Step 7: Post-Installation Validation
- After reboot, the miniOrange DLP Agent will be installed silently on the target systems.
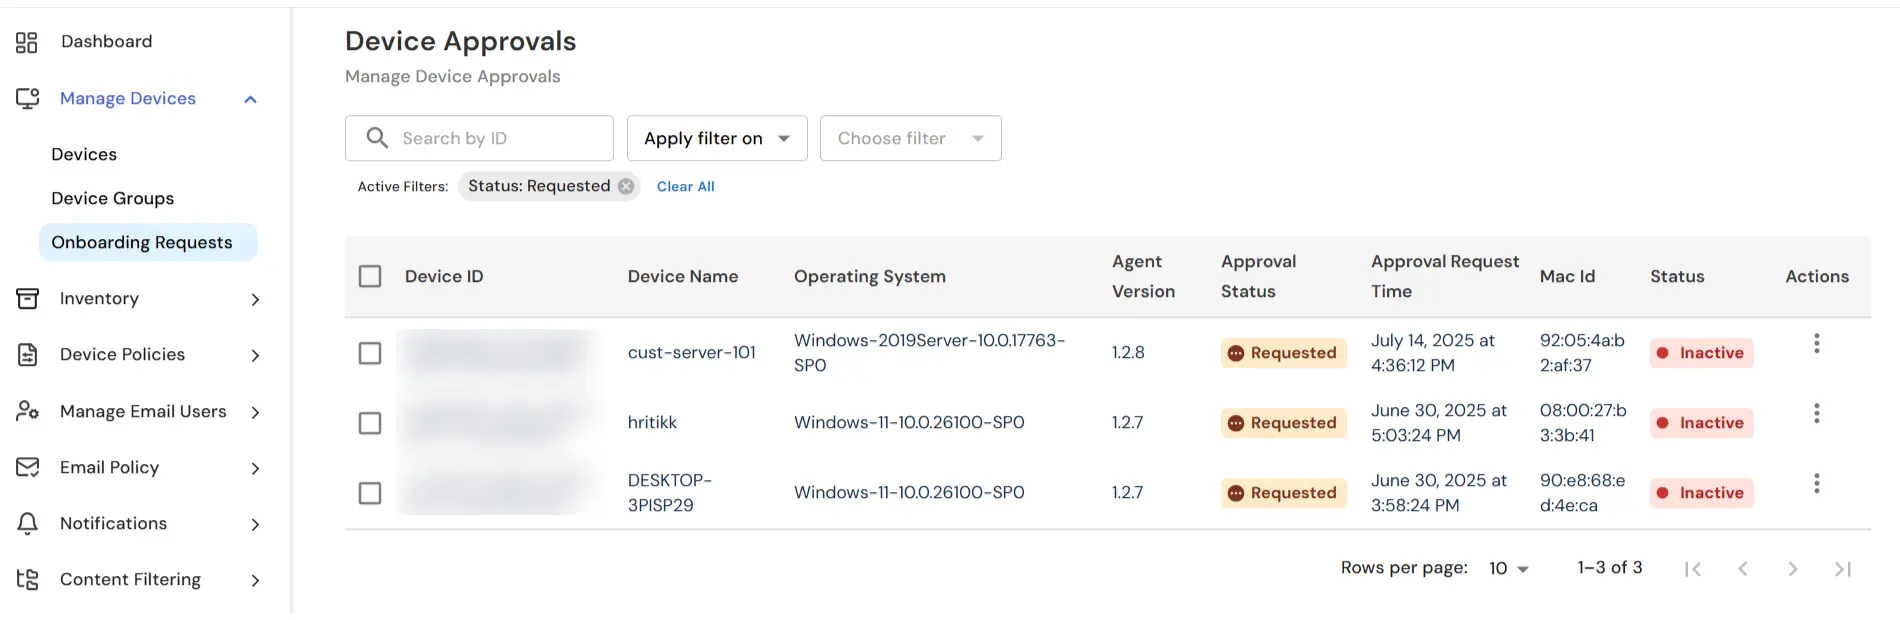
- To verify go to Manage Devices → Onboarding Requests in the DLP Admin Console.
- You will see the Requested Status for the Devices where the Agent has been installed.
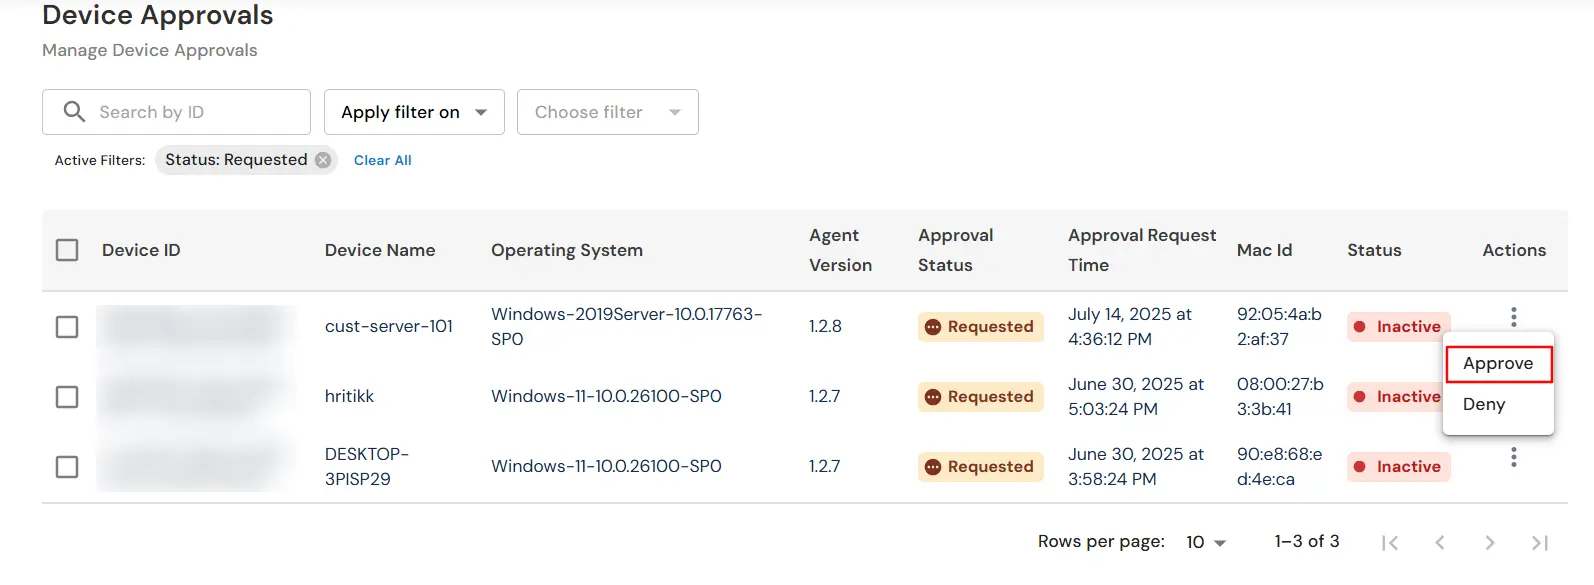
- Under the Actions column, click on the Approve button to activate the agent on that device. You can also select the devices in bulk and then approve the approval request.
Step 8: Troubleshooting Tips
- Ensure the .msi file is placed in a shared location with correct permissions.
- Verify that the GPO is linked to the correct OU.
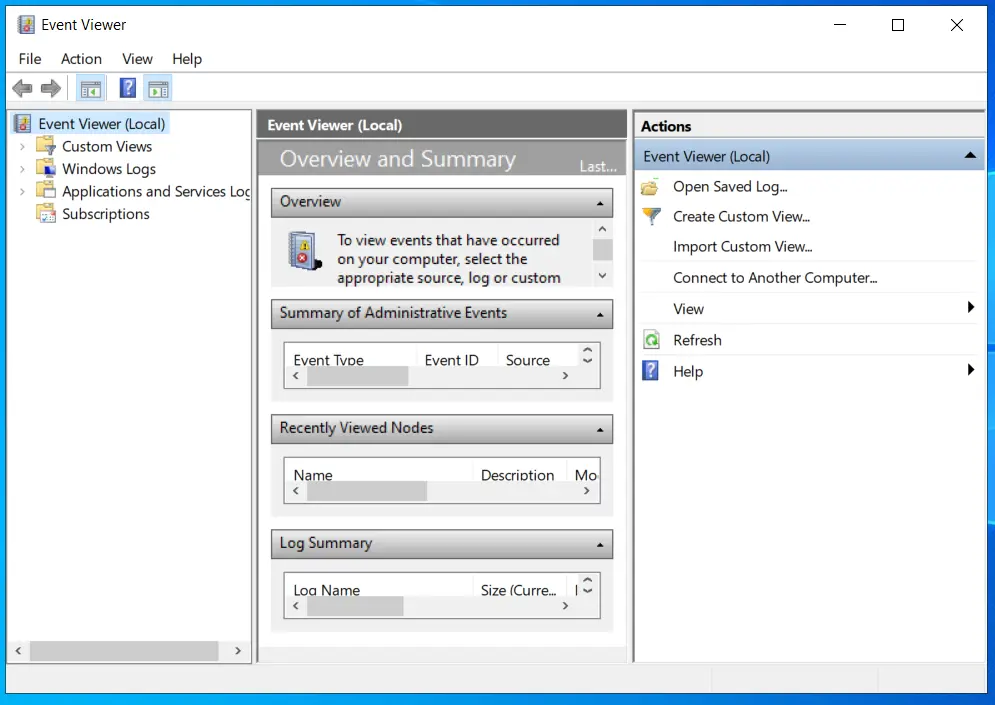
- Use eventvwr.msc (Event Viewer) on the client machines to diagnose GPO or MSI-related errors.
- If installation doesn't happen, confirm the client machine is receiving GPOs using gpresult /r.
In this way you have succesfully configured the GPO settings to Install the DLP Agent in your target computers. Also if you are facing any issues that you are not able to resolve please feel to reach out us uemsupport@xecurify.com
