Hello there!
Need Help? We are right here!
Need Help? We are right here!
Search Results:
×Integrating miniOrange with Microsoft Azure Active Directory (AD) allows organizations to enhance security by enabling Microsoft Authenticator Push Notifications as a Multi-Factor Authentication (MFA) method. This integration provides users with an additional layer of security during authentication processes.
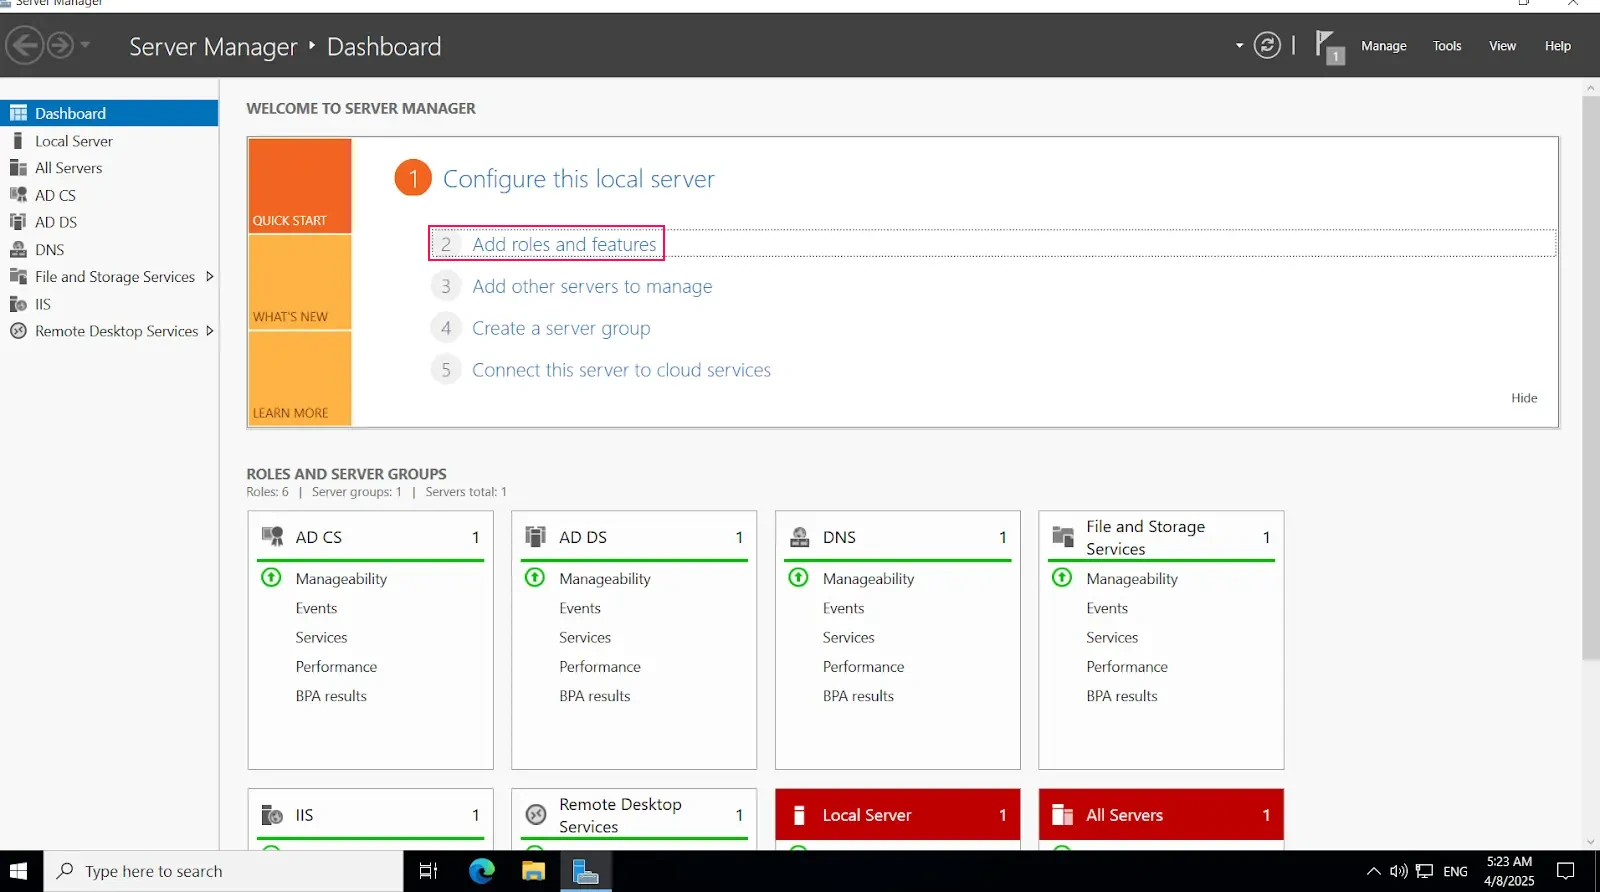
Explore the areas that can be enhanced with the Windows 2FA login solution:
miniOrange offers free help through a consultation call with our System Engineers to Install or Setup Two-Factor Authentication (2FA) for Windows Logon and RDP solution in your environment with 30 days trial.
For this, you need to just send us an email at idpsupport@xecurify.com to book a slot and we'll help you setting it up in no time.
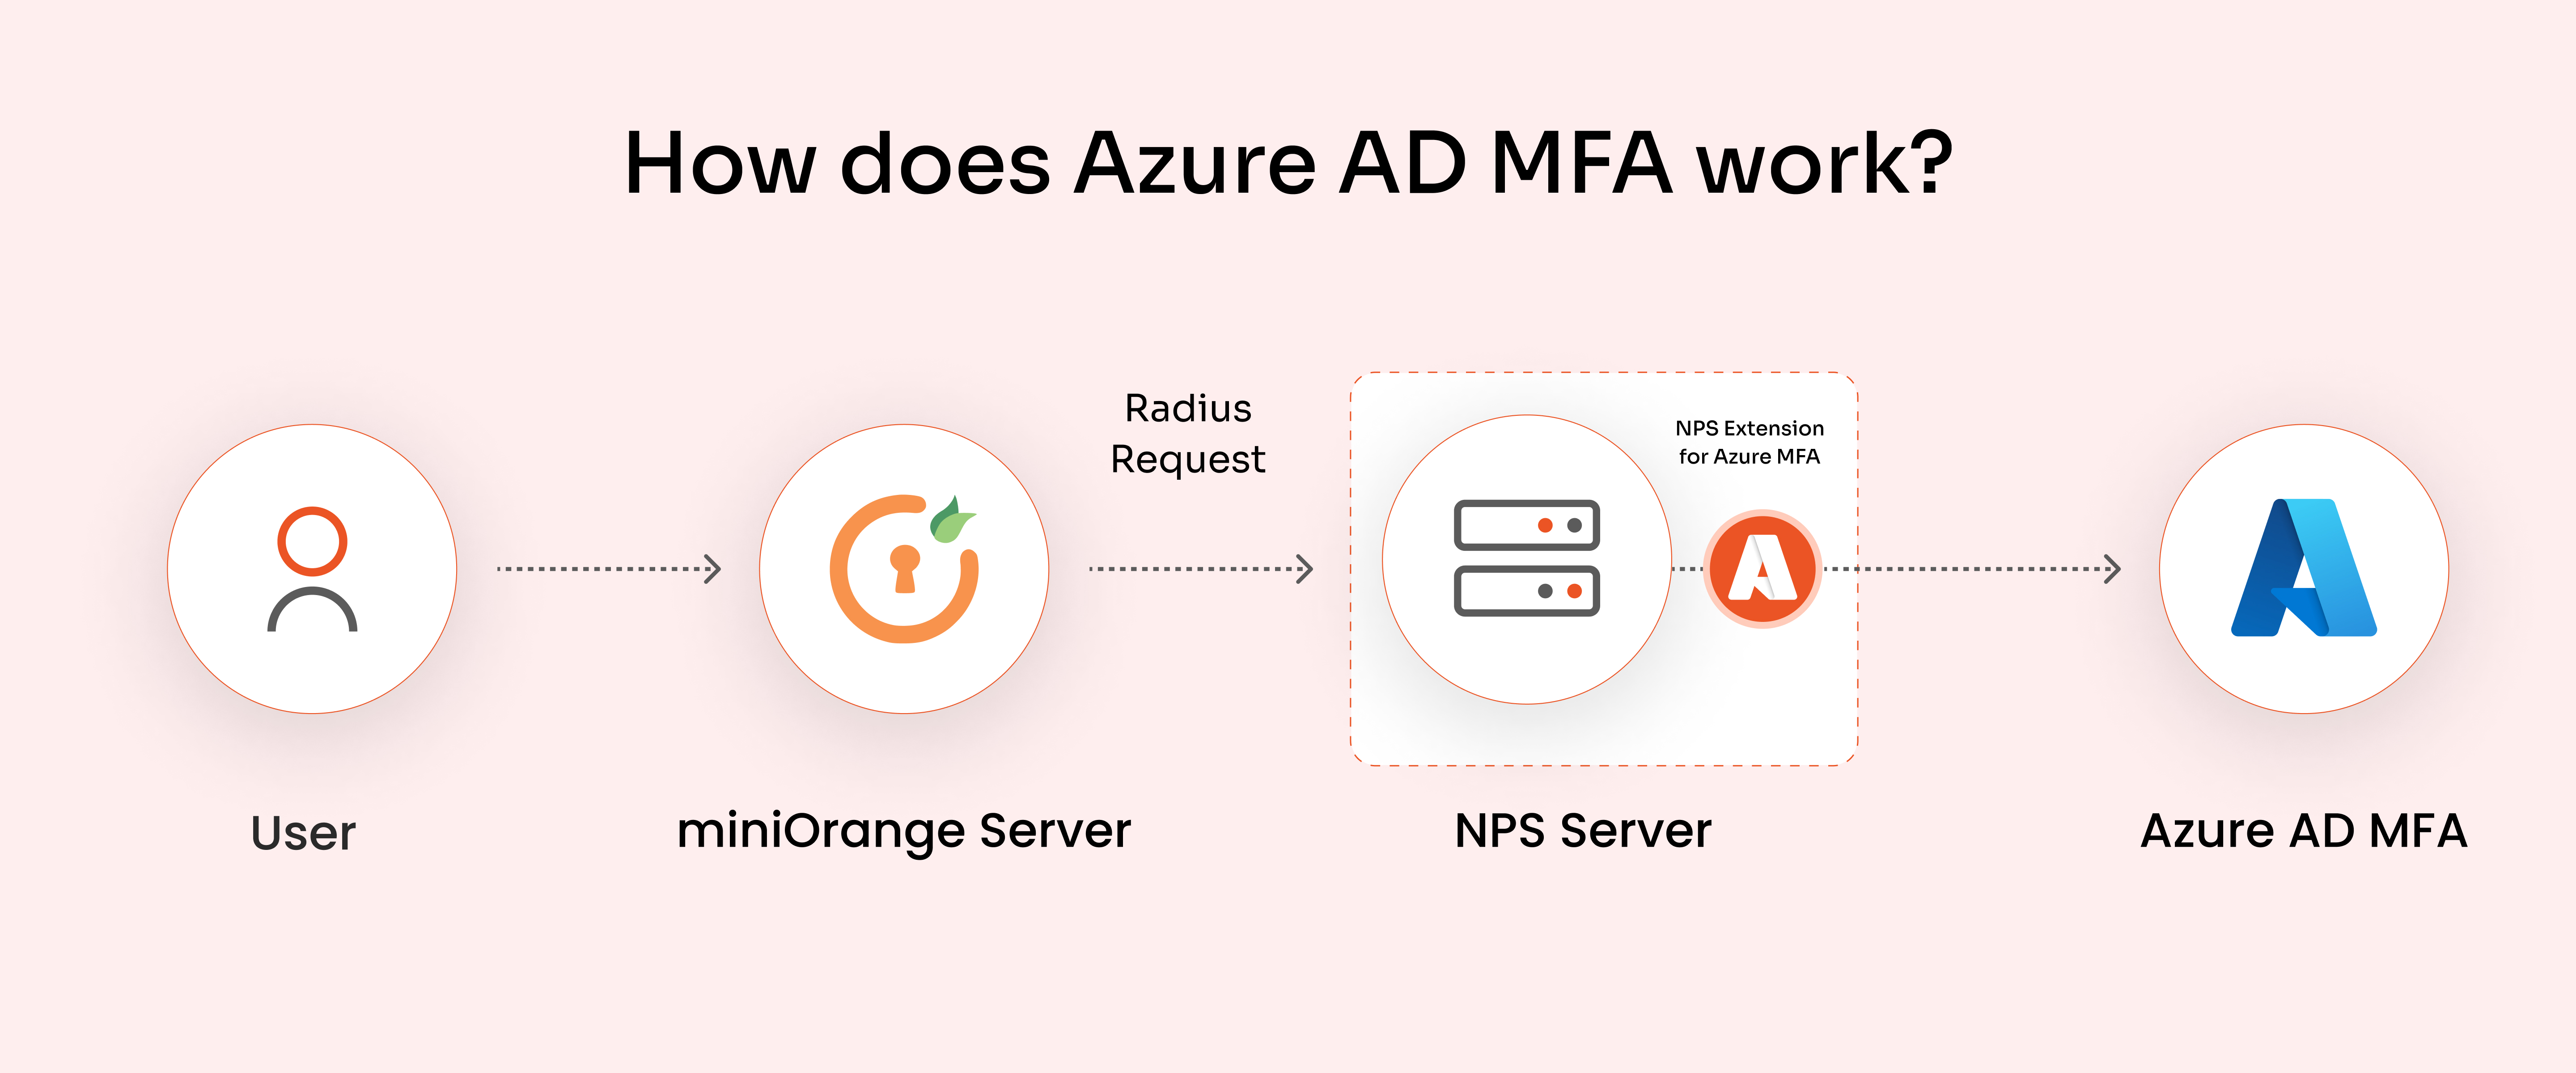

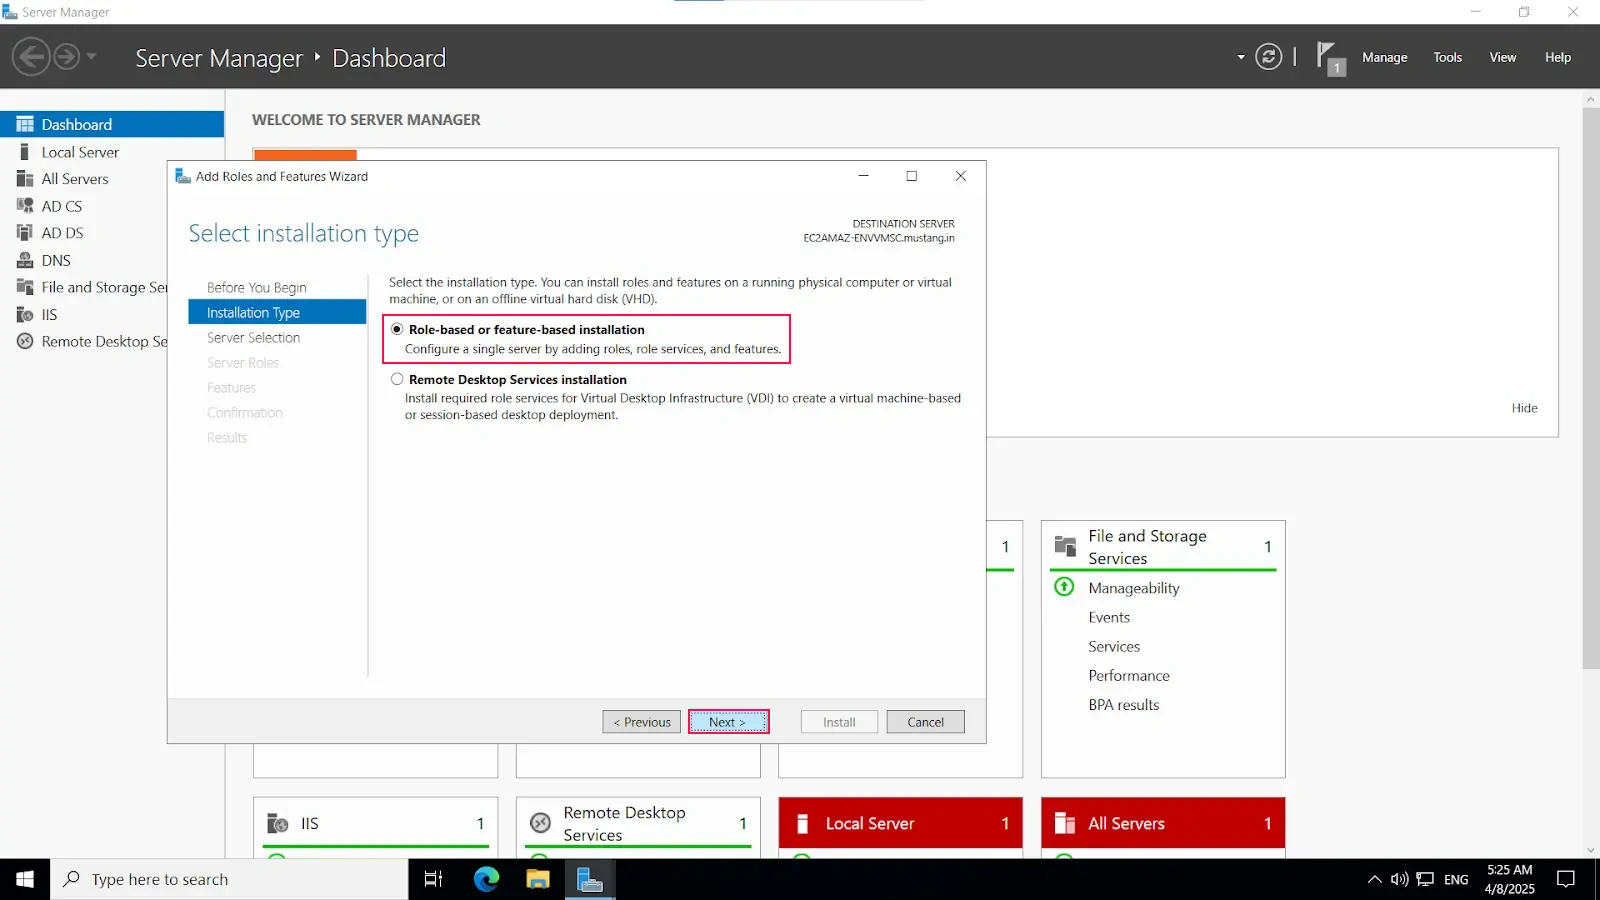
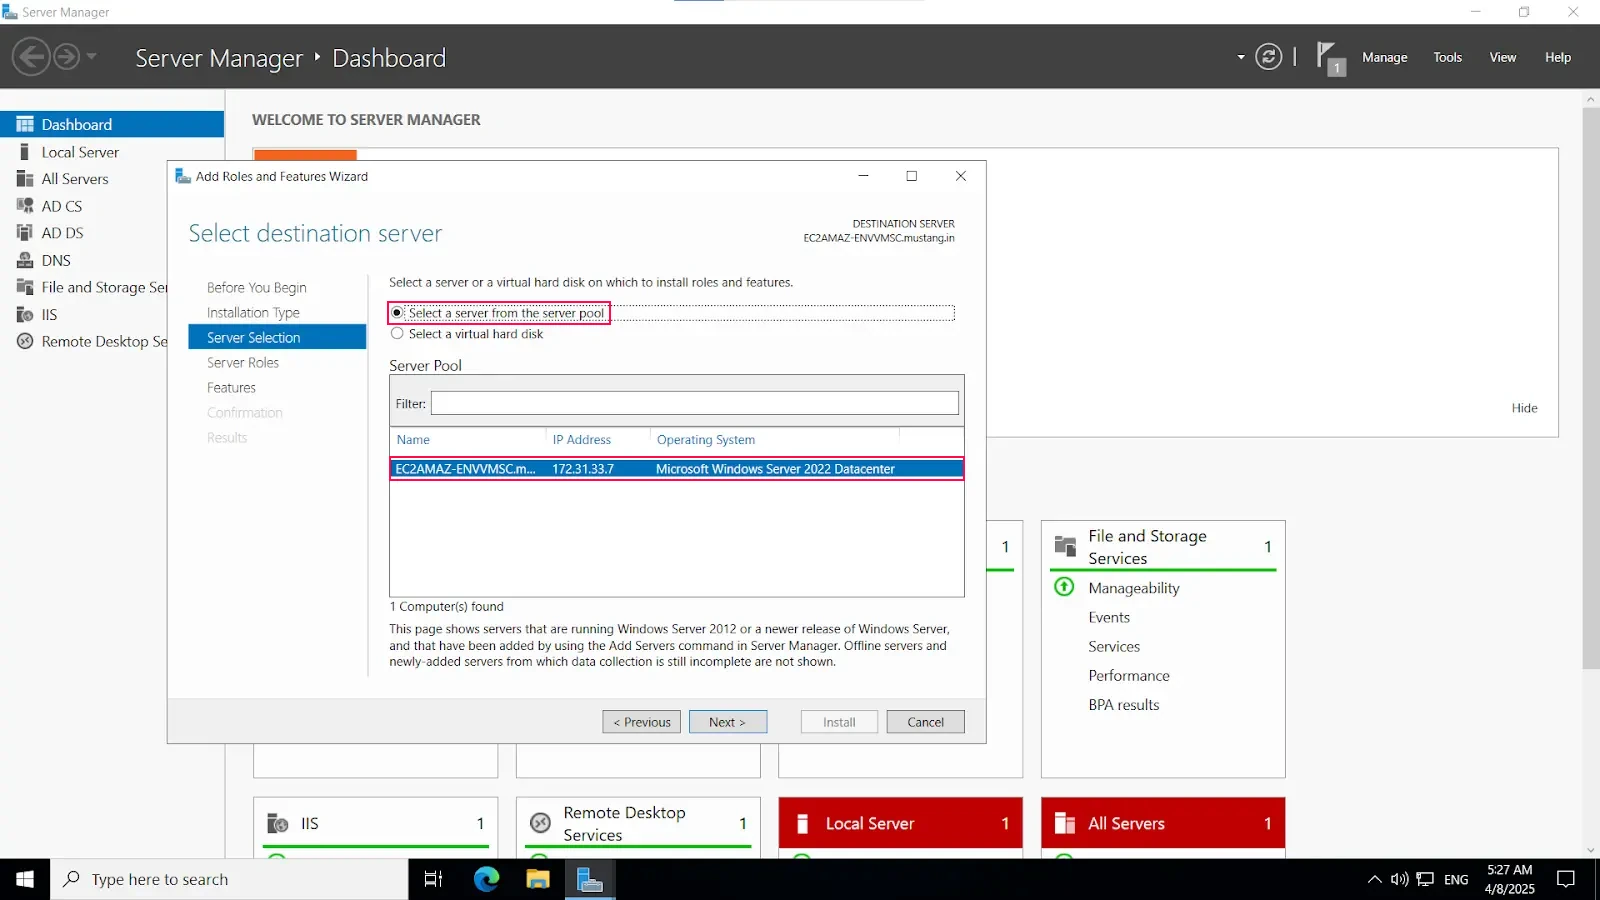
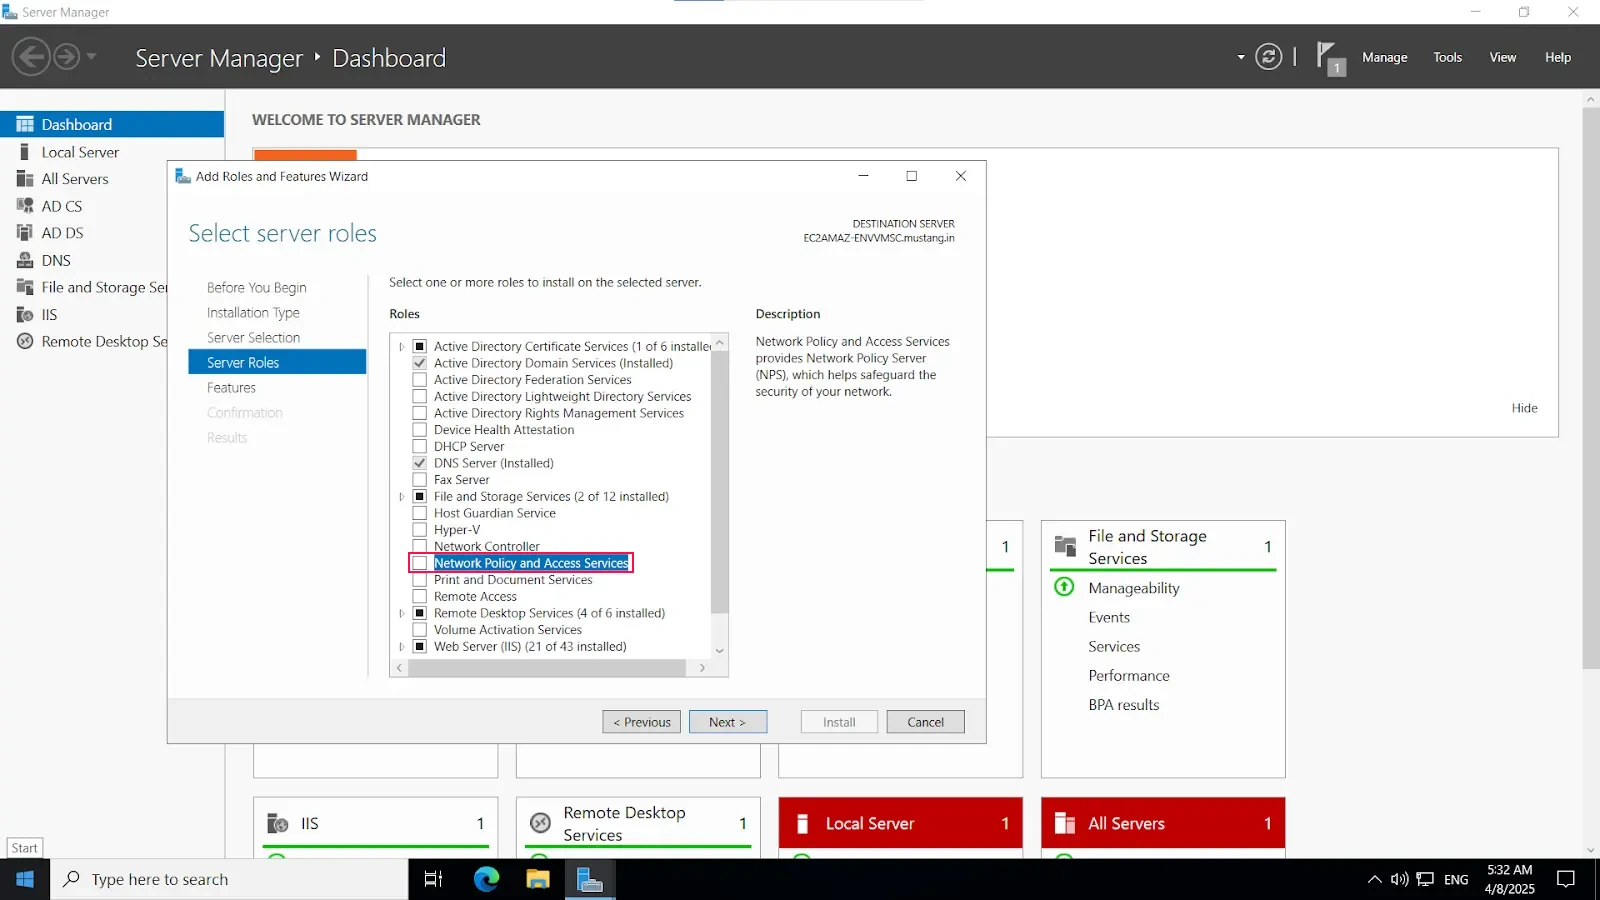
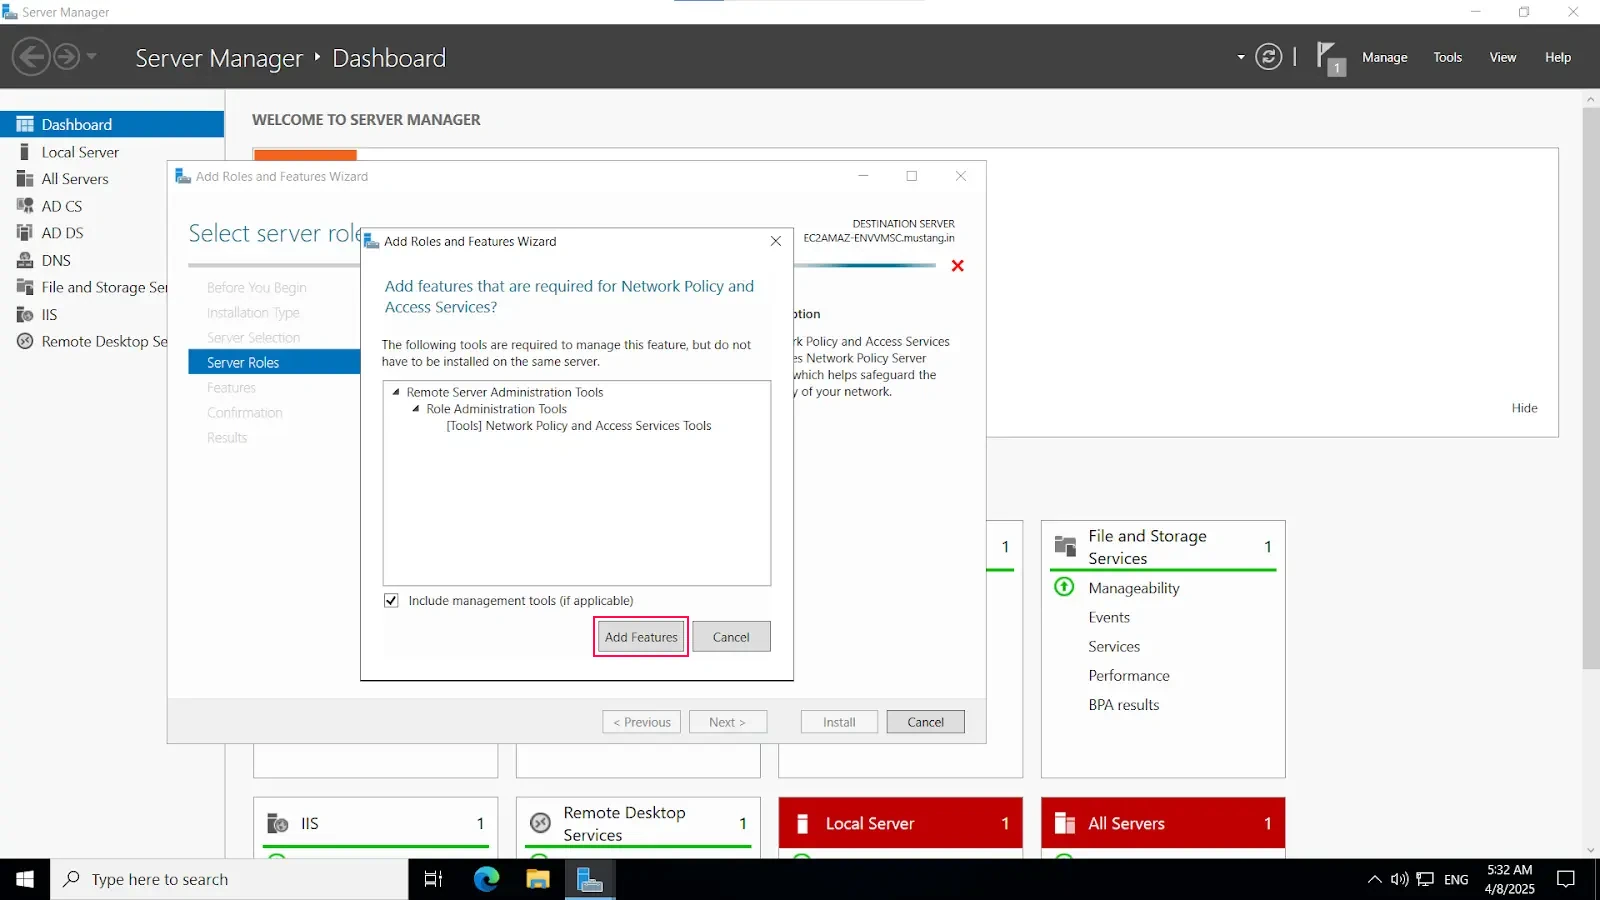
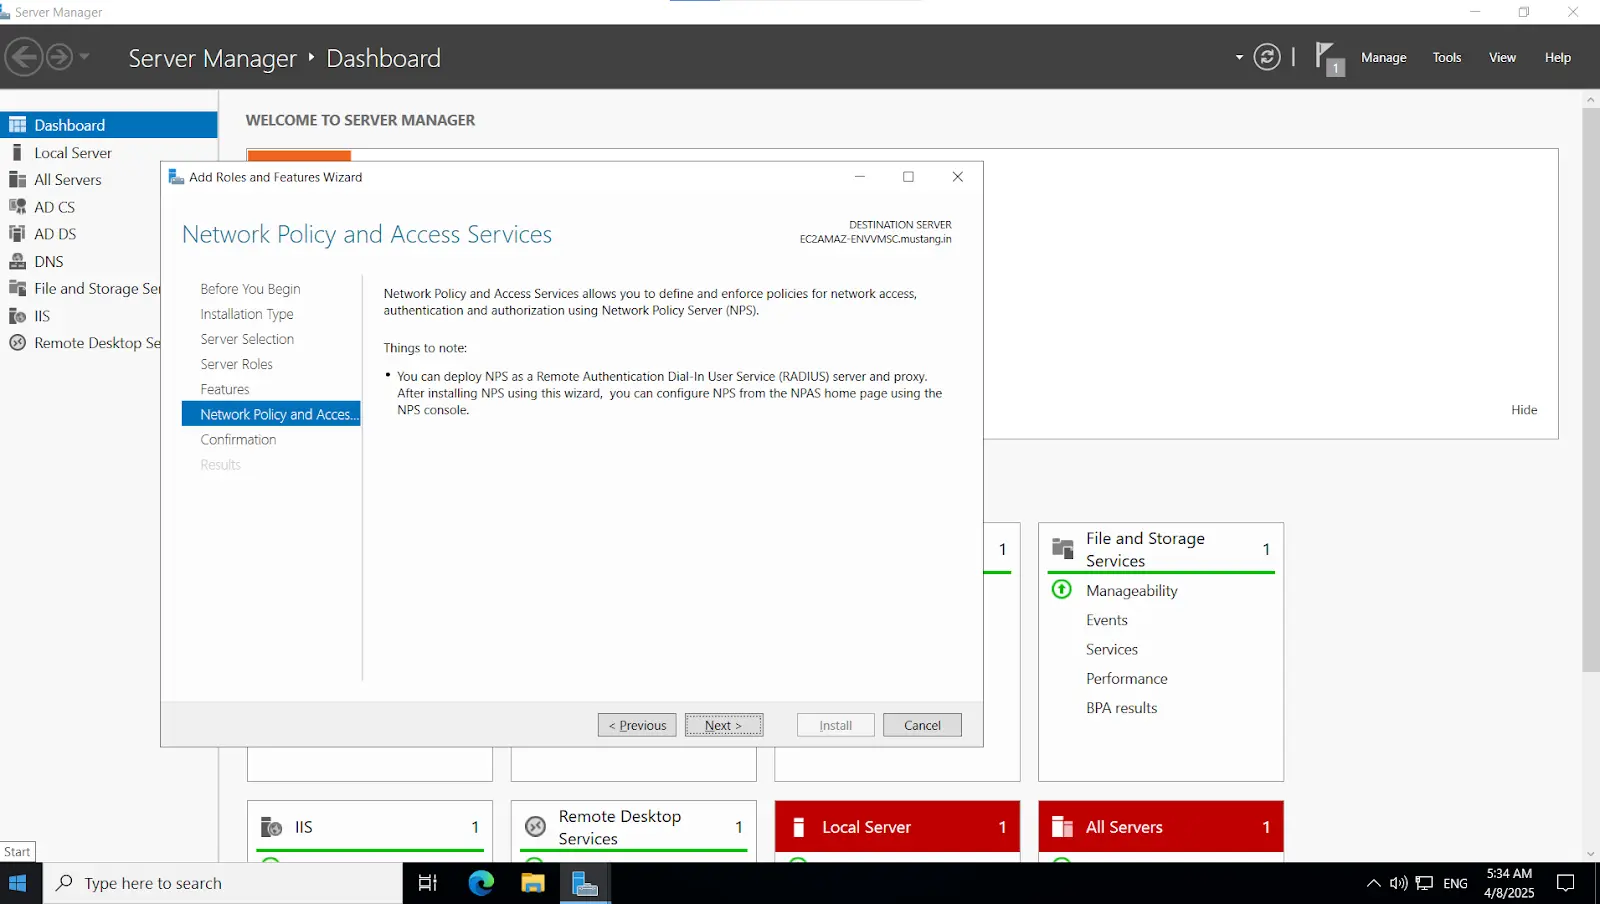
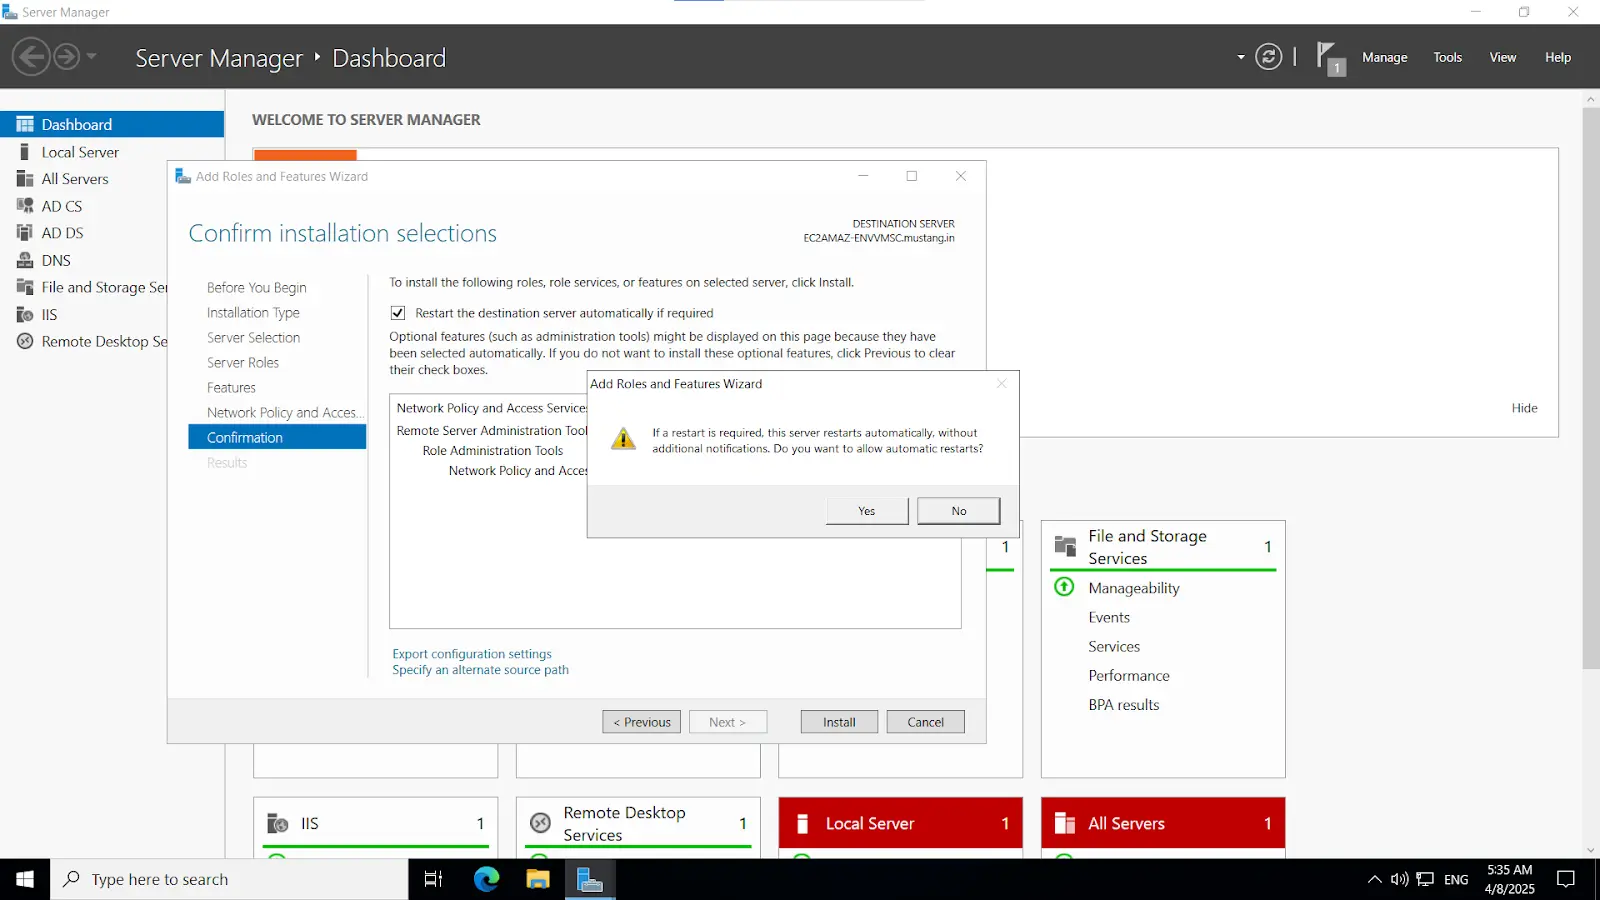

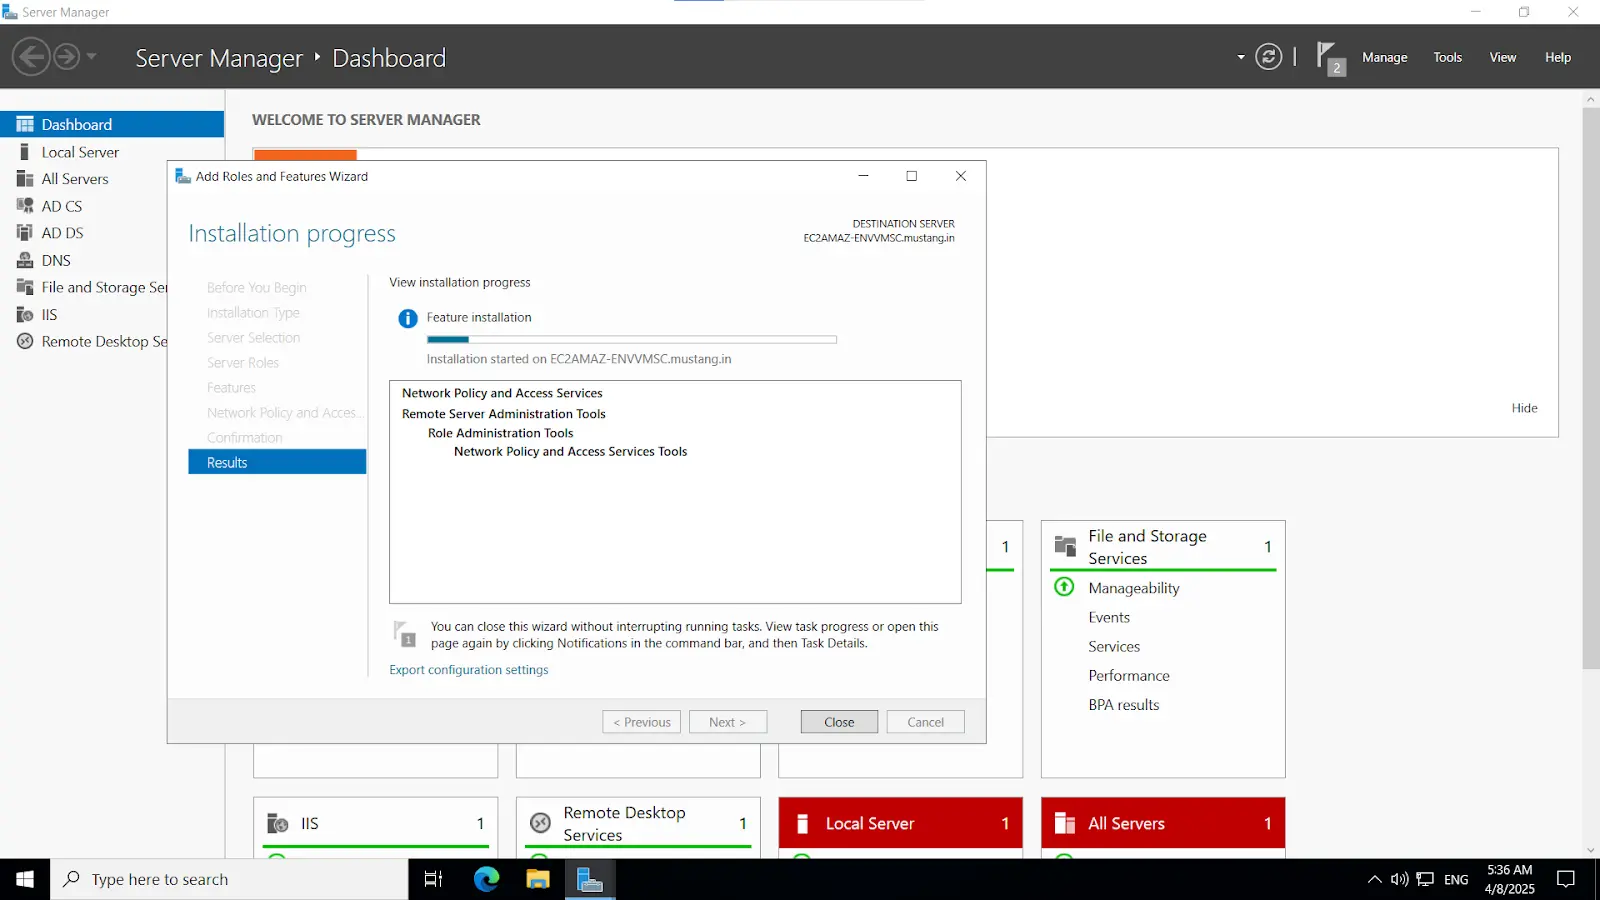
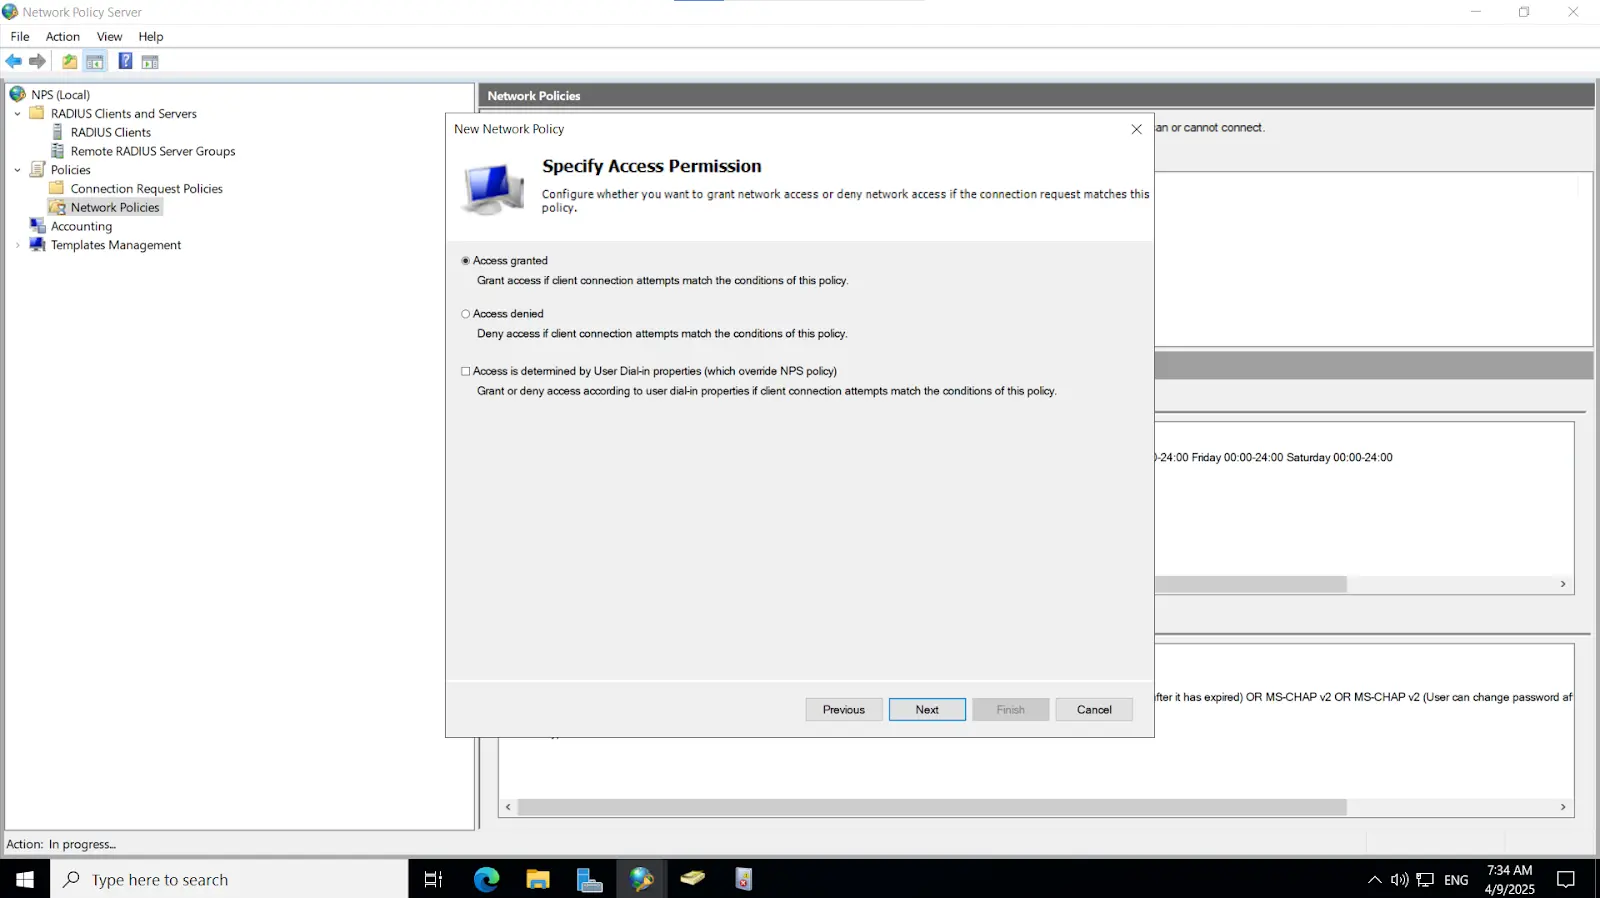
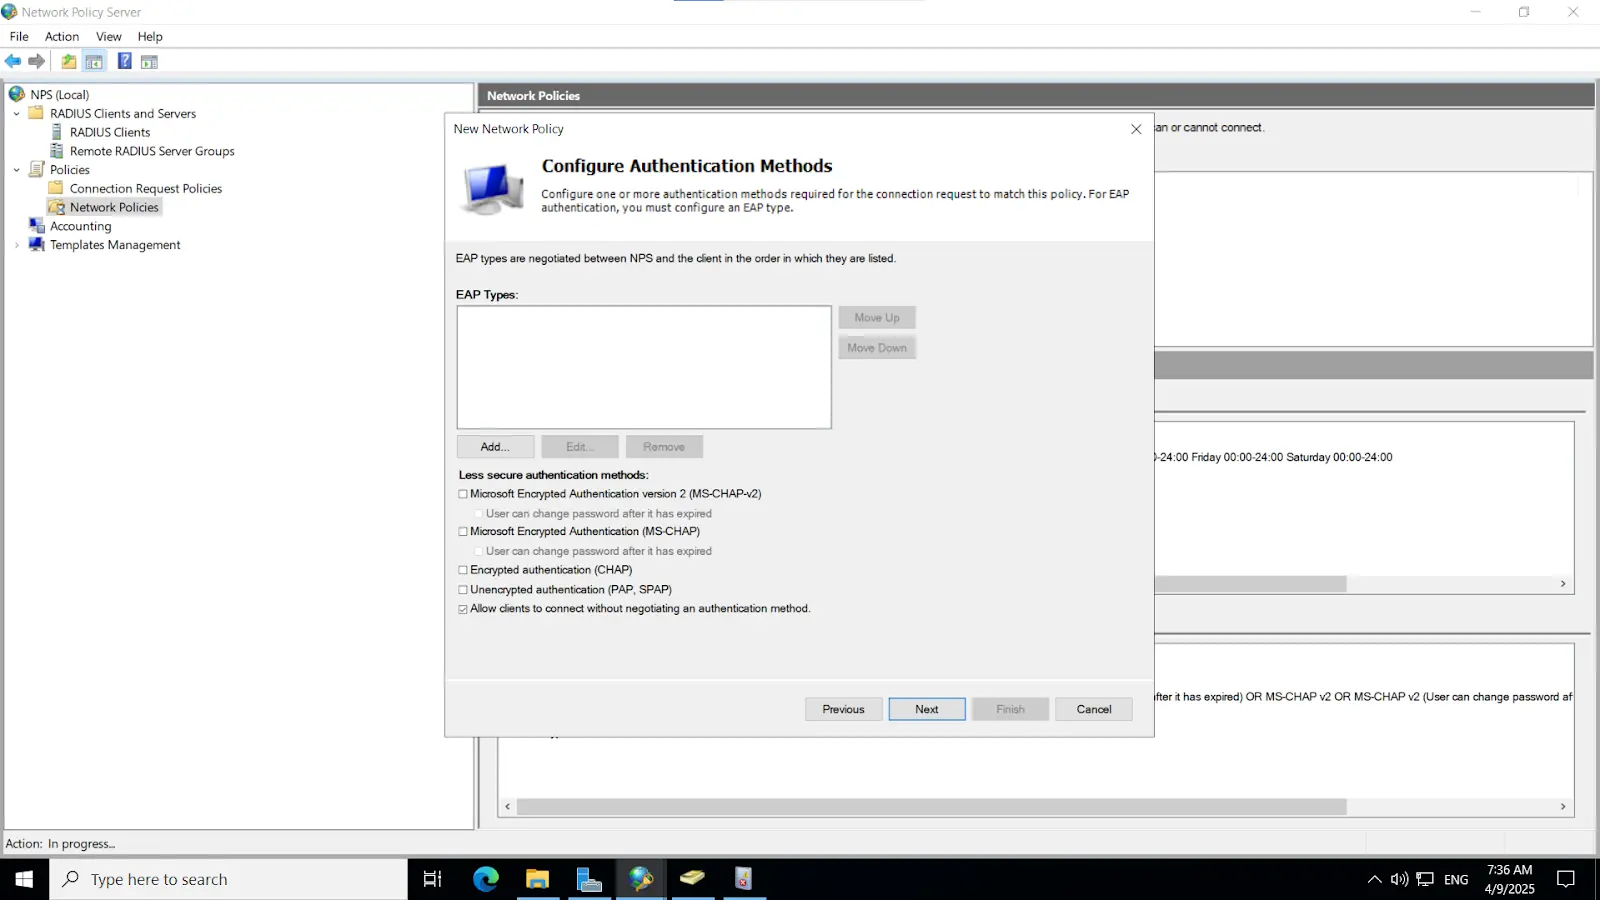
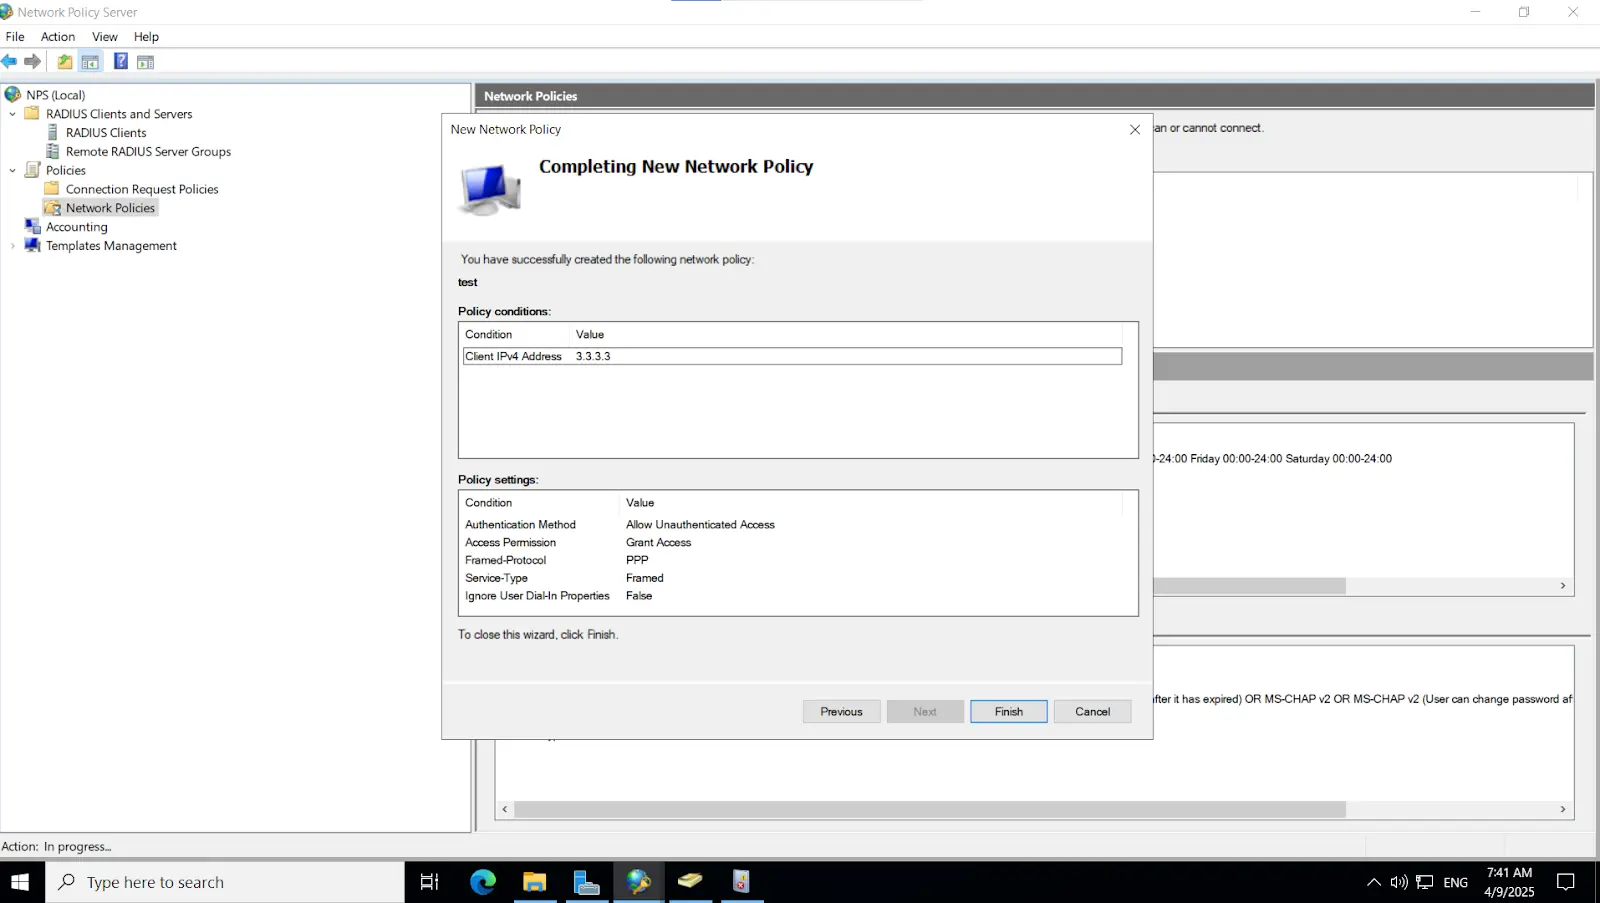
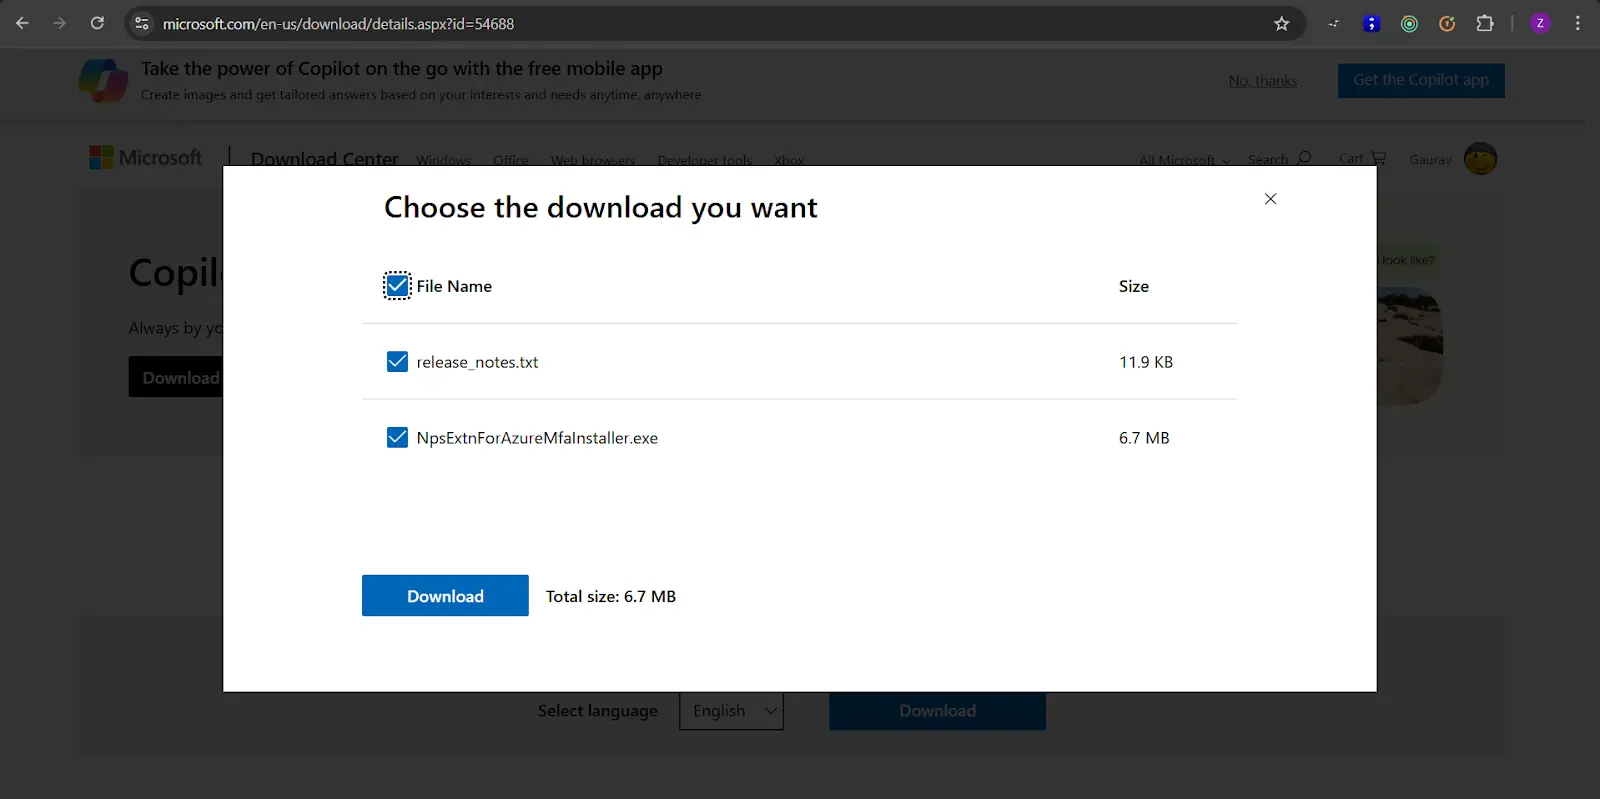
Install-WindowsFeature NPAS -IncludeManagementToolsImportant Note: The NPS server connects to Microsoft Entra ID and authenticates the MFA requests. Choose one server for this role. We recommend choosing a server that doesn't handle requests from other services, because the NPS extension throws errors for any requests that aren't RADIUS. The NPS server must be set up as the primary and secondary authentication server for your environment. It can't proxy RADIUS requests to another server.
cd "C:\Program Files\Microsoft\AzureMfa\Config"ls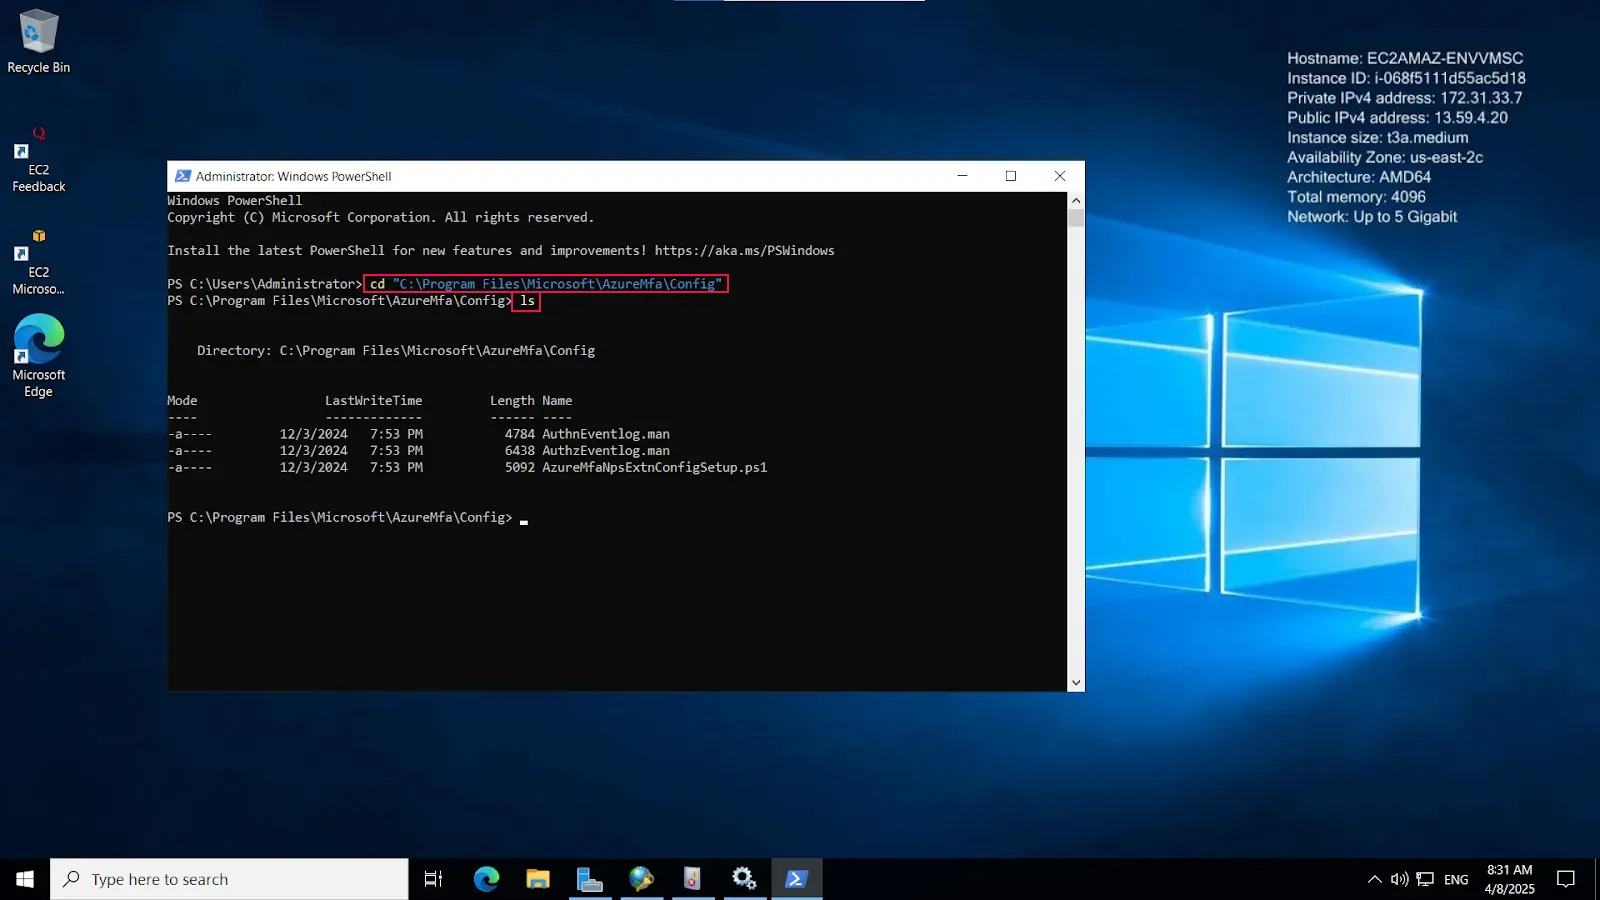
.\AzureMfaNpsExtnConfigSetup.ps1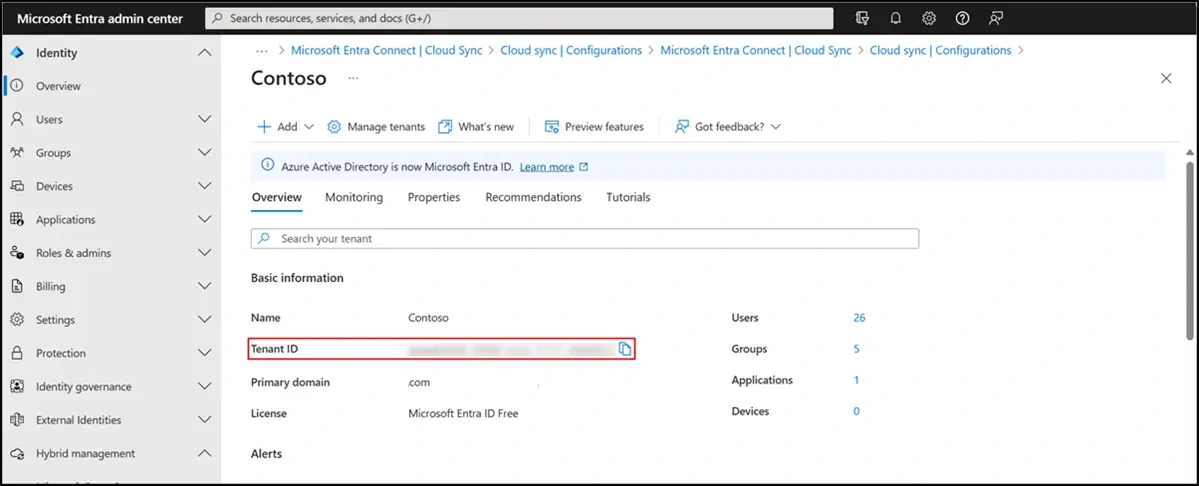
3.1. Initial Configuration
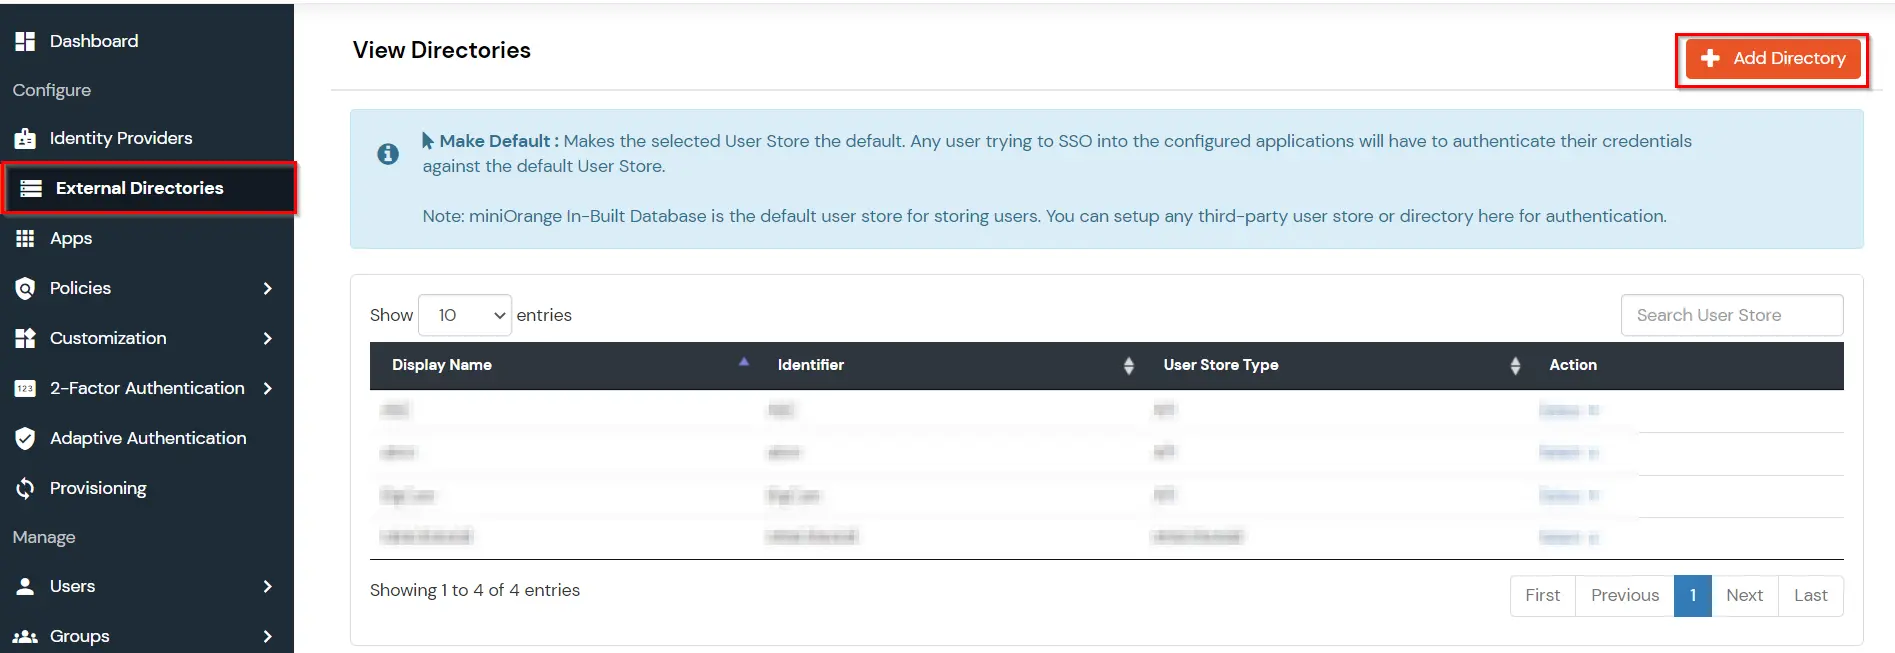
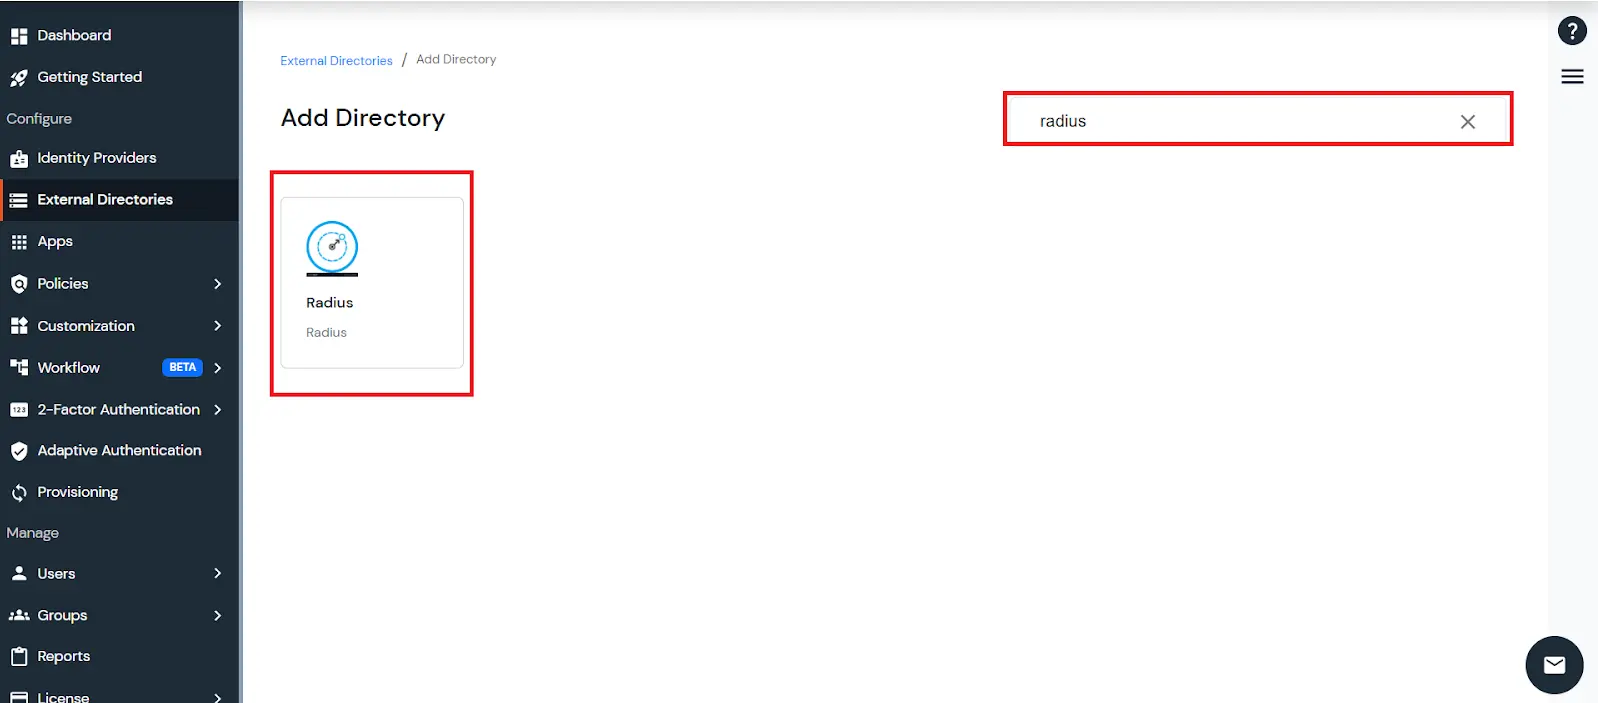
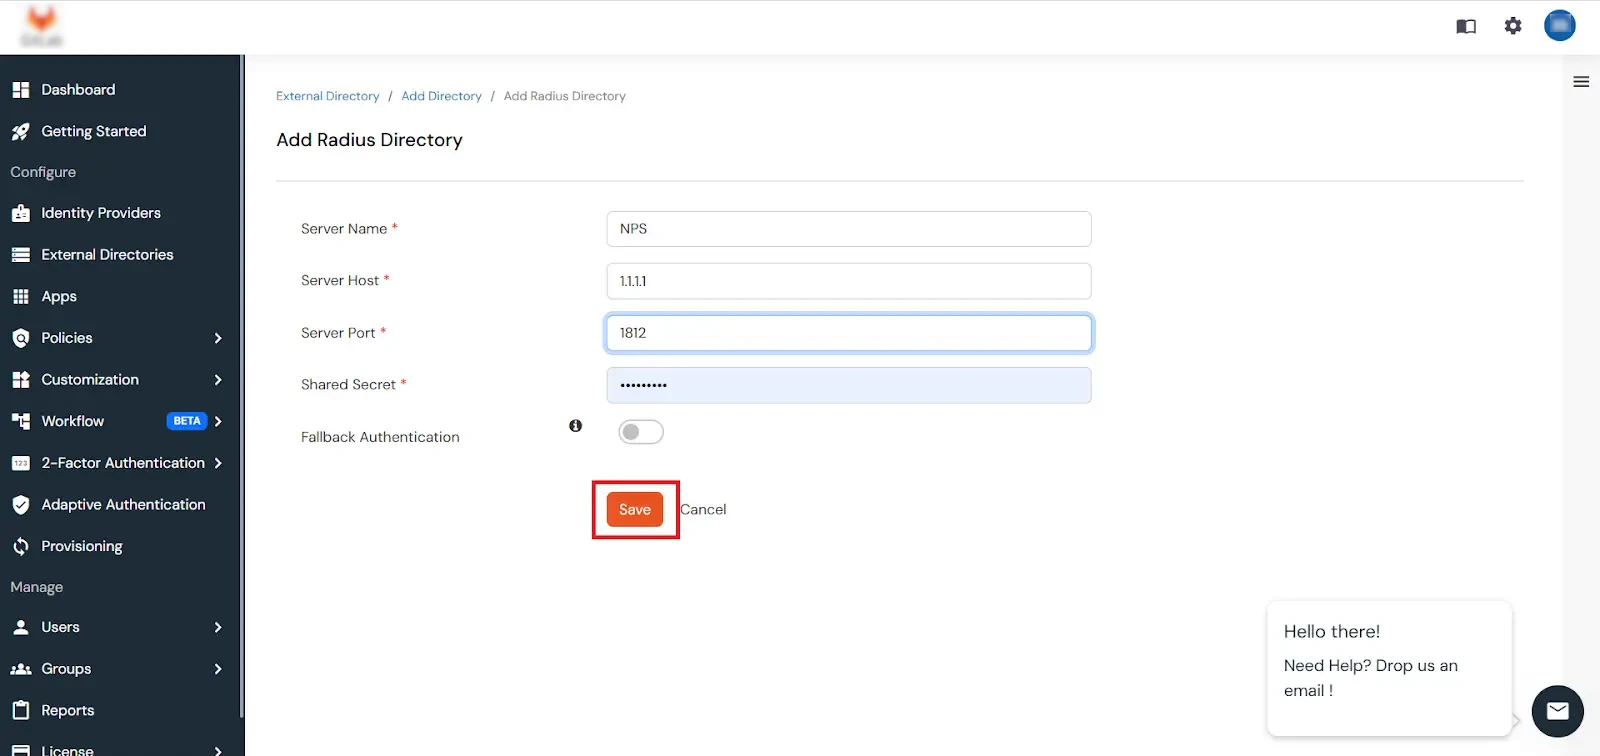
3.2. Configure Radius directory
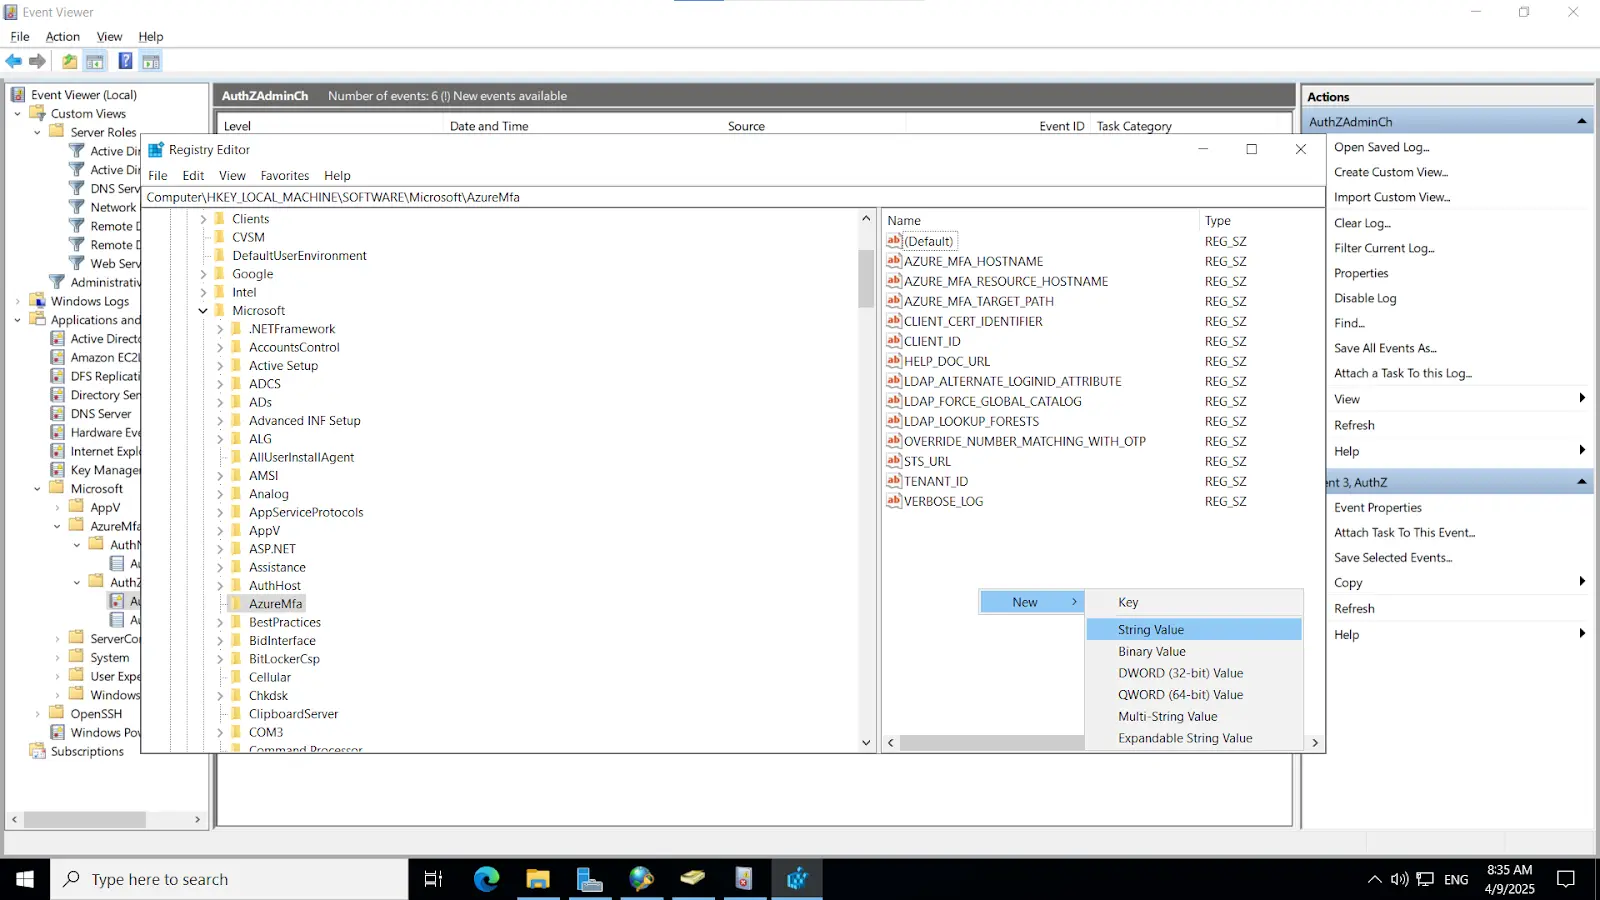
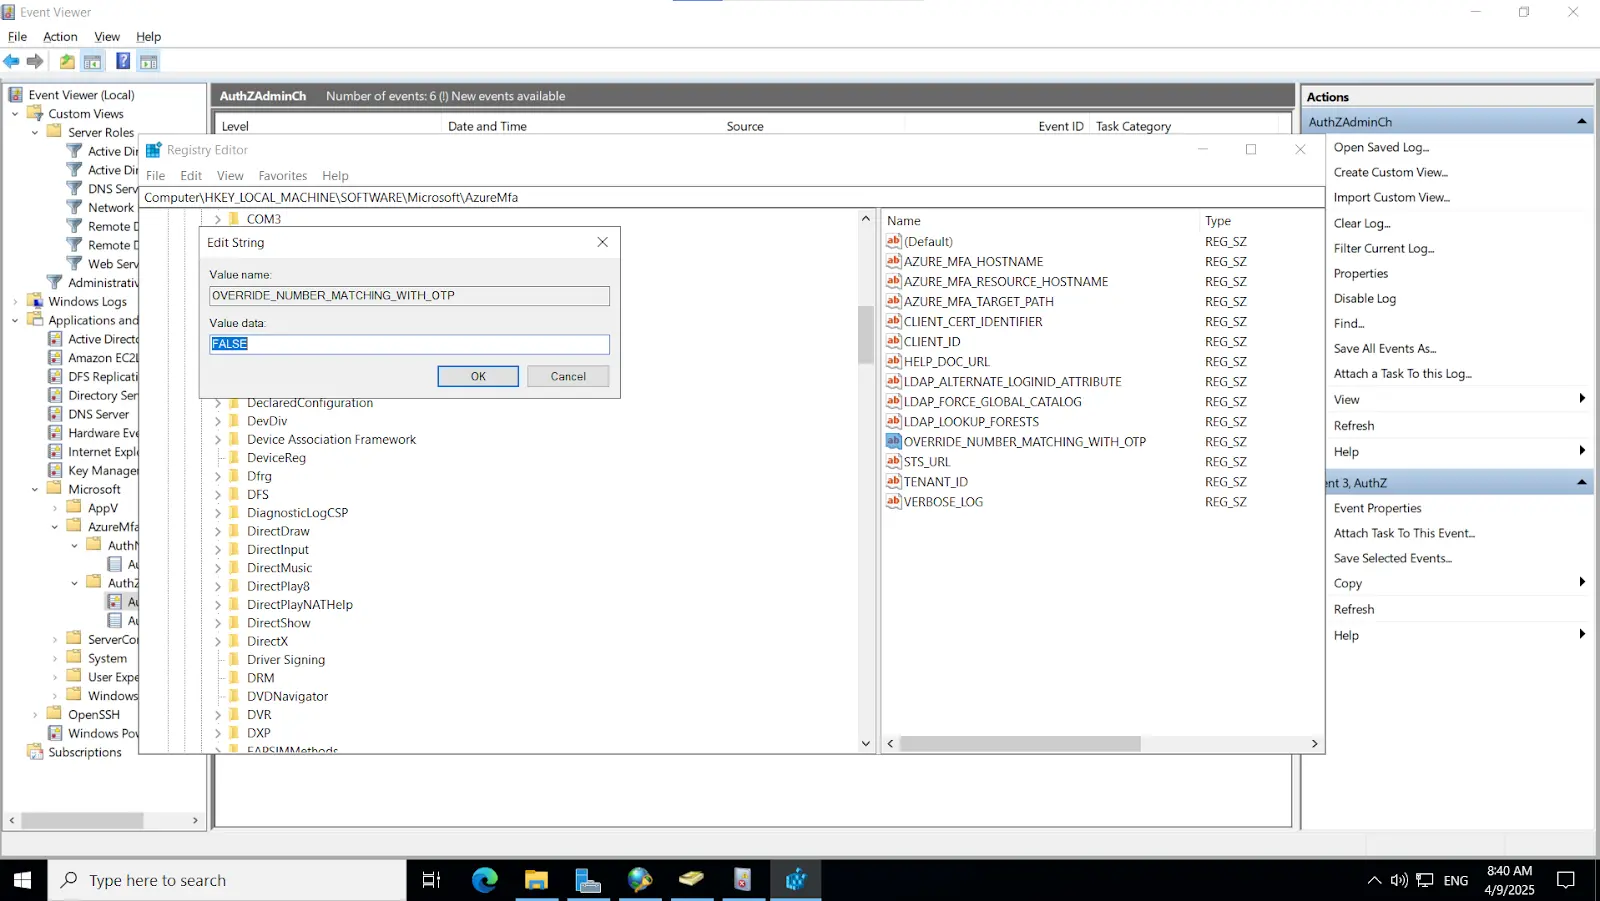
Note: This key must also be configured on the NPS server, as outlined in the subsequent steps.
Or Alternatively

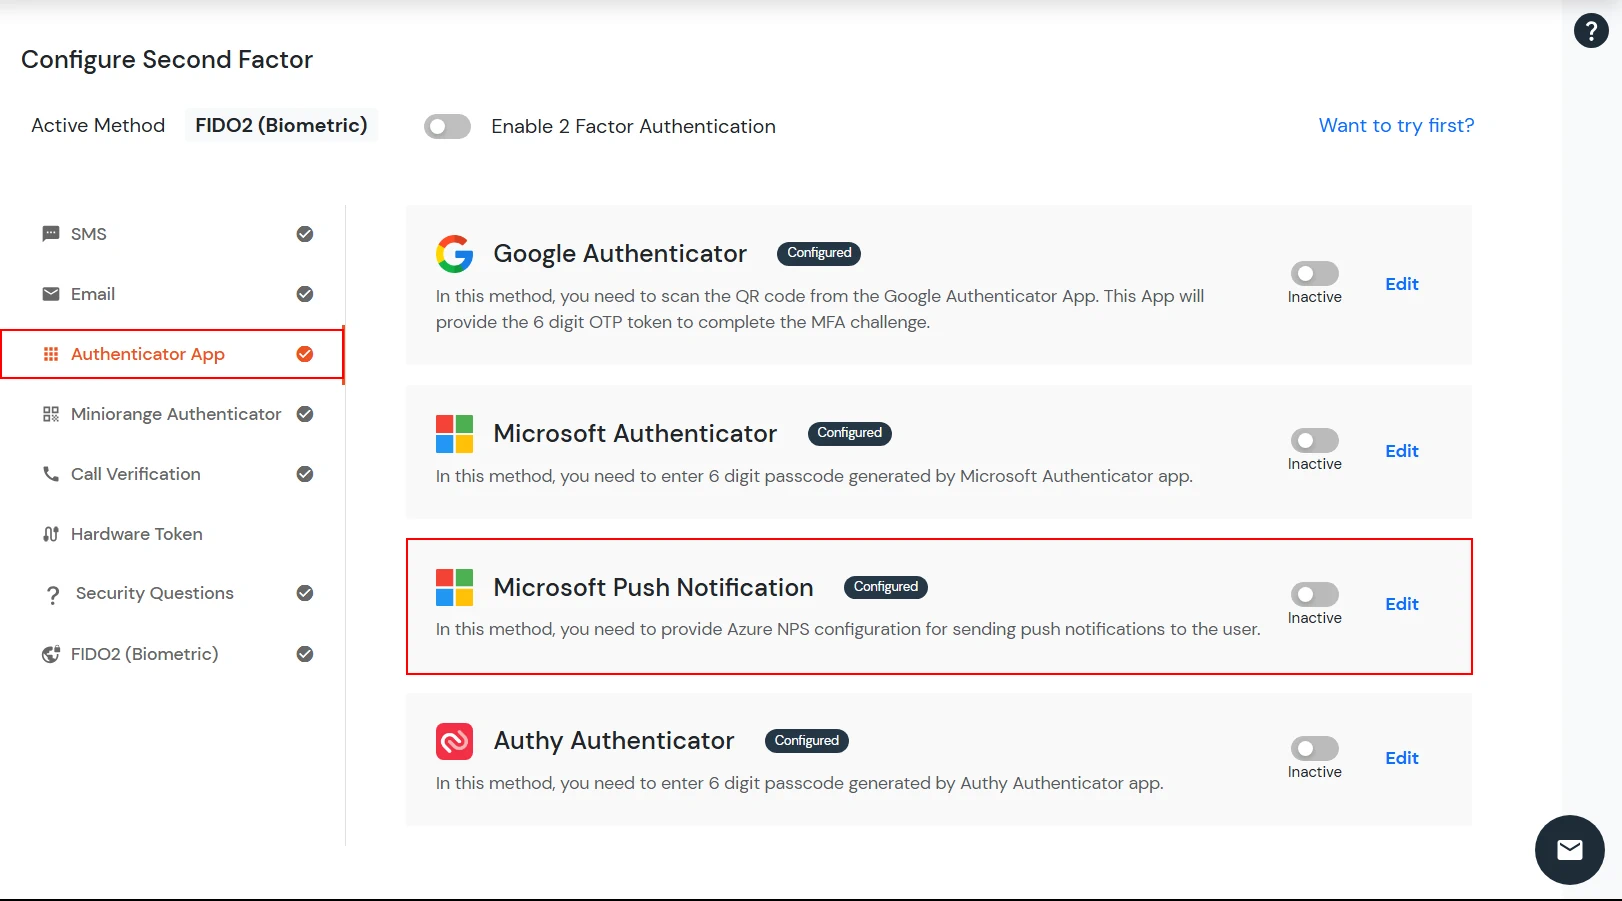
[Note: Before enabling Microsoft Push Notifications for users, the administrator must configure a RADIUS directory.]
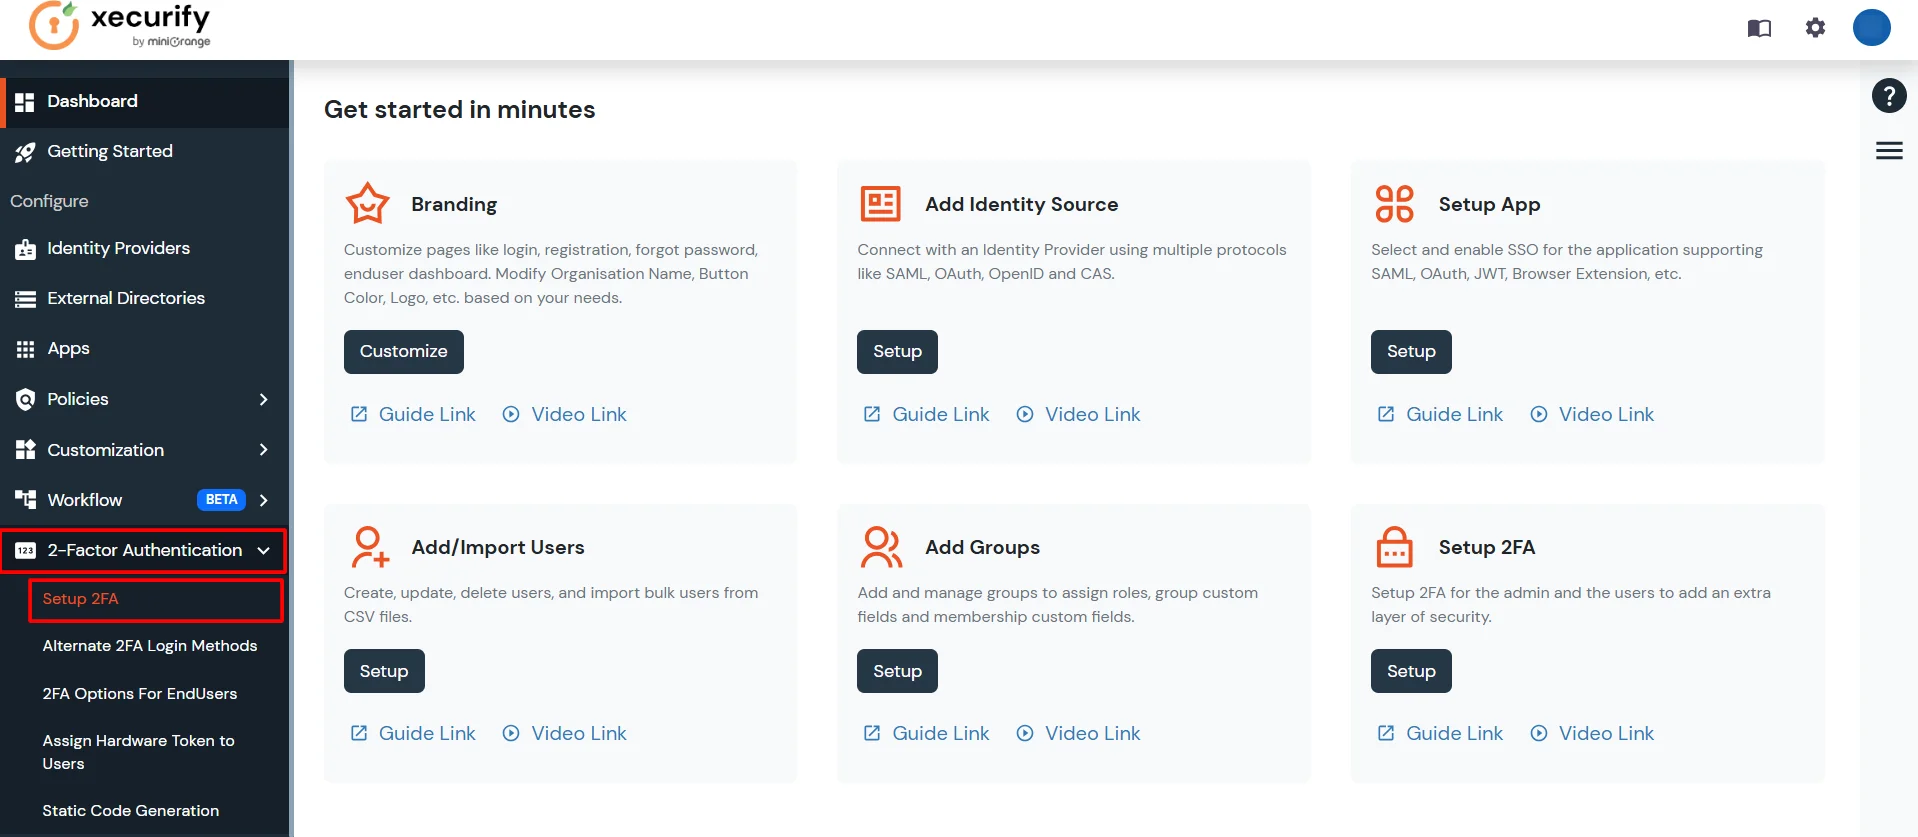
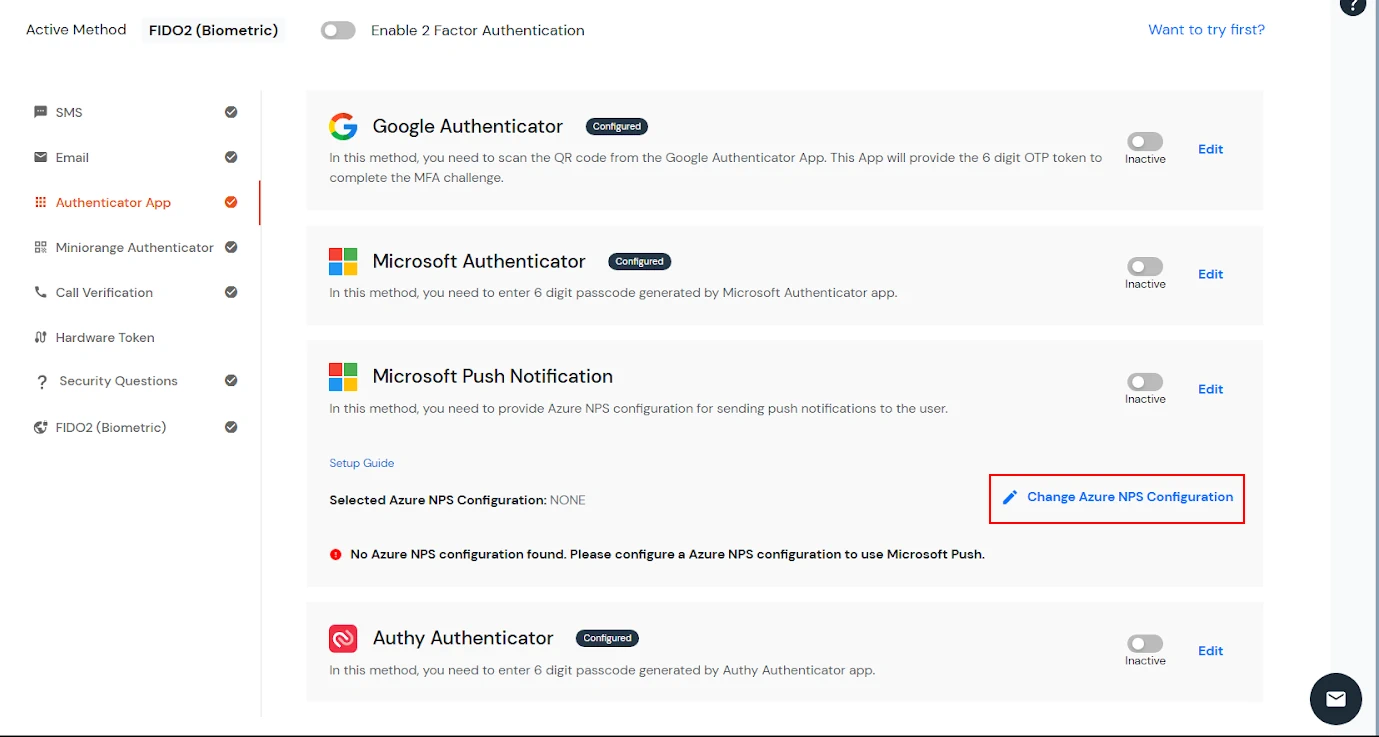
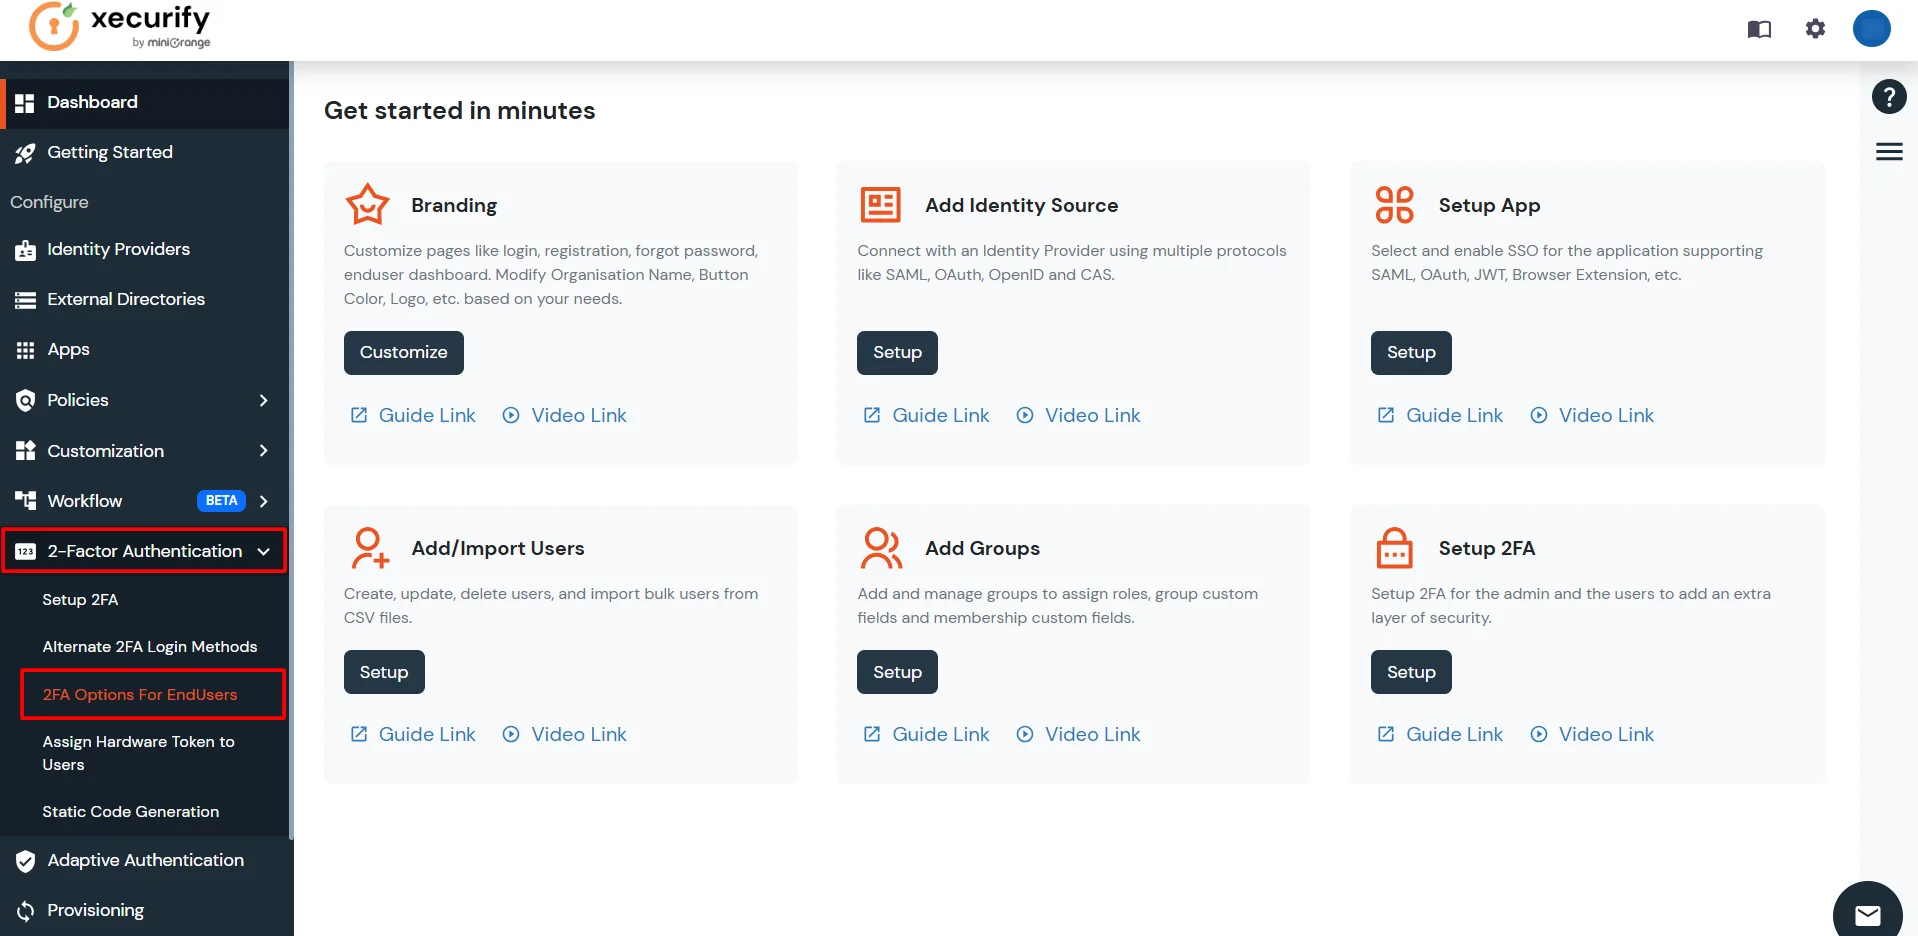
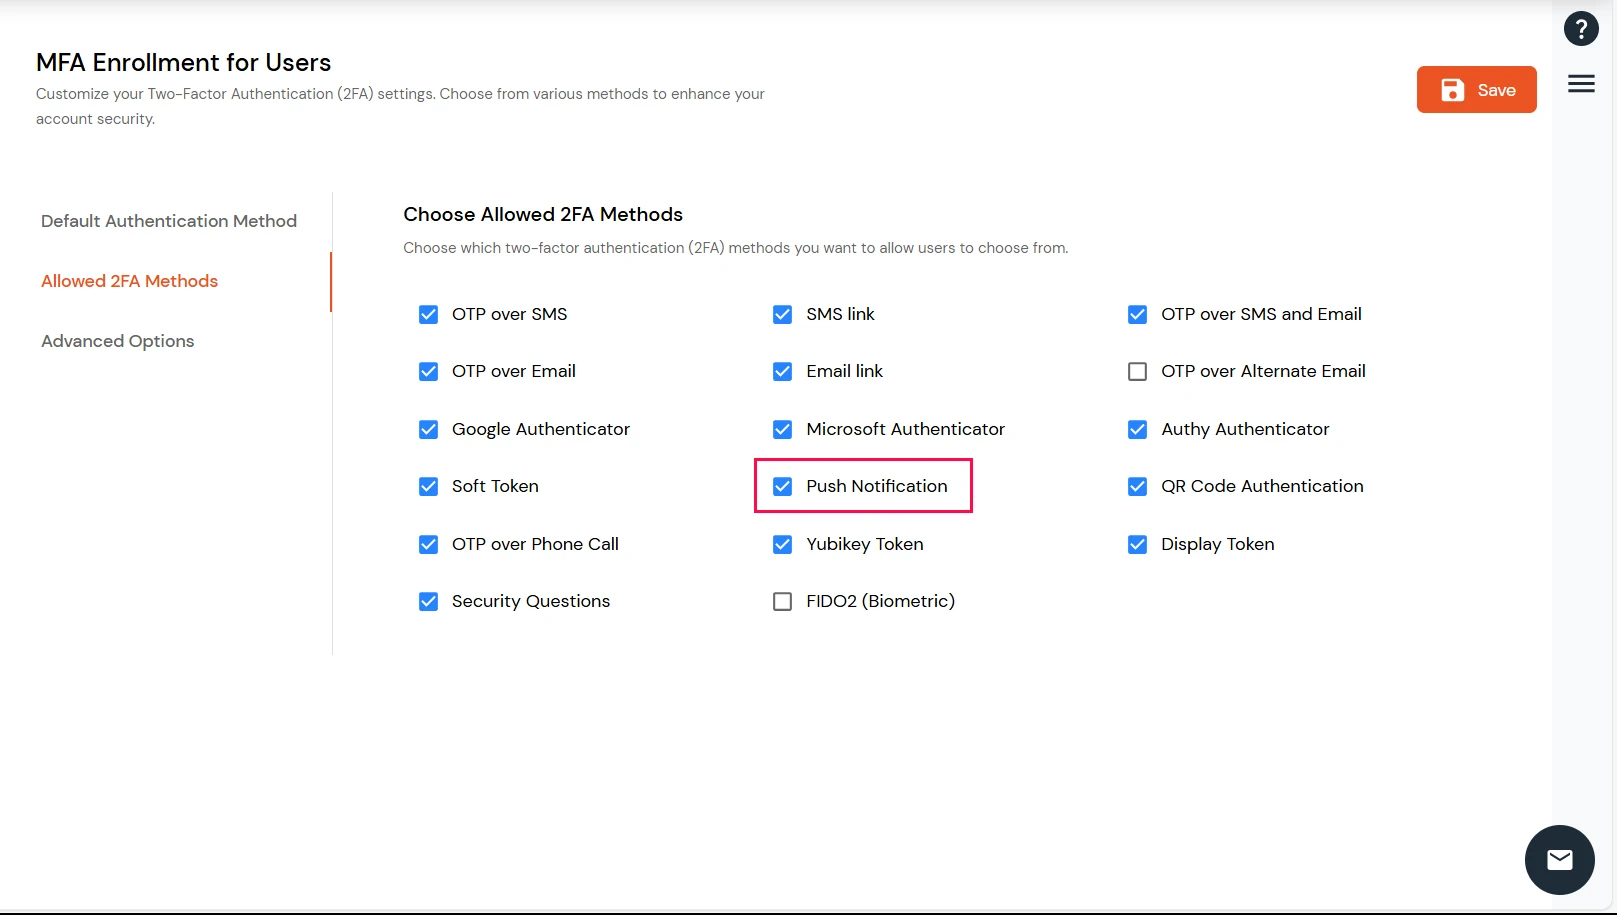
3.3. Configure Push Notification for endusers
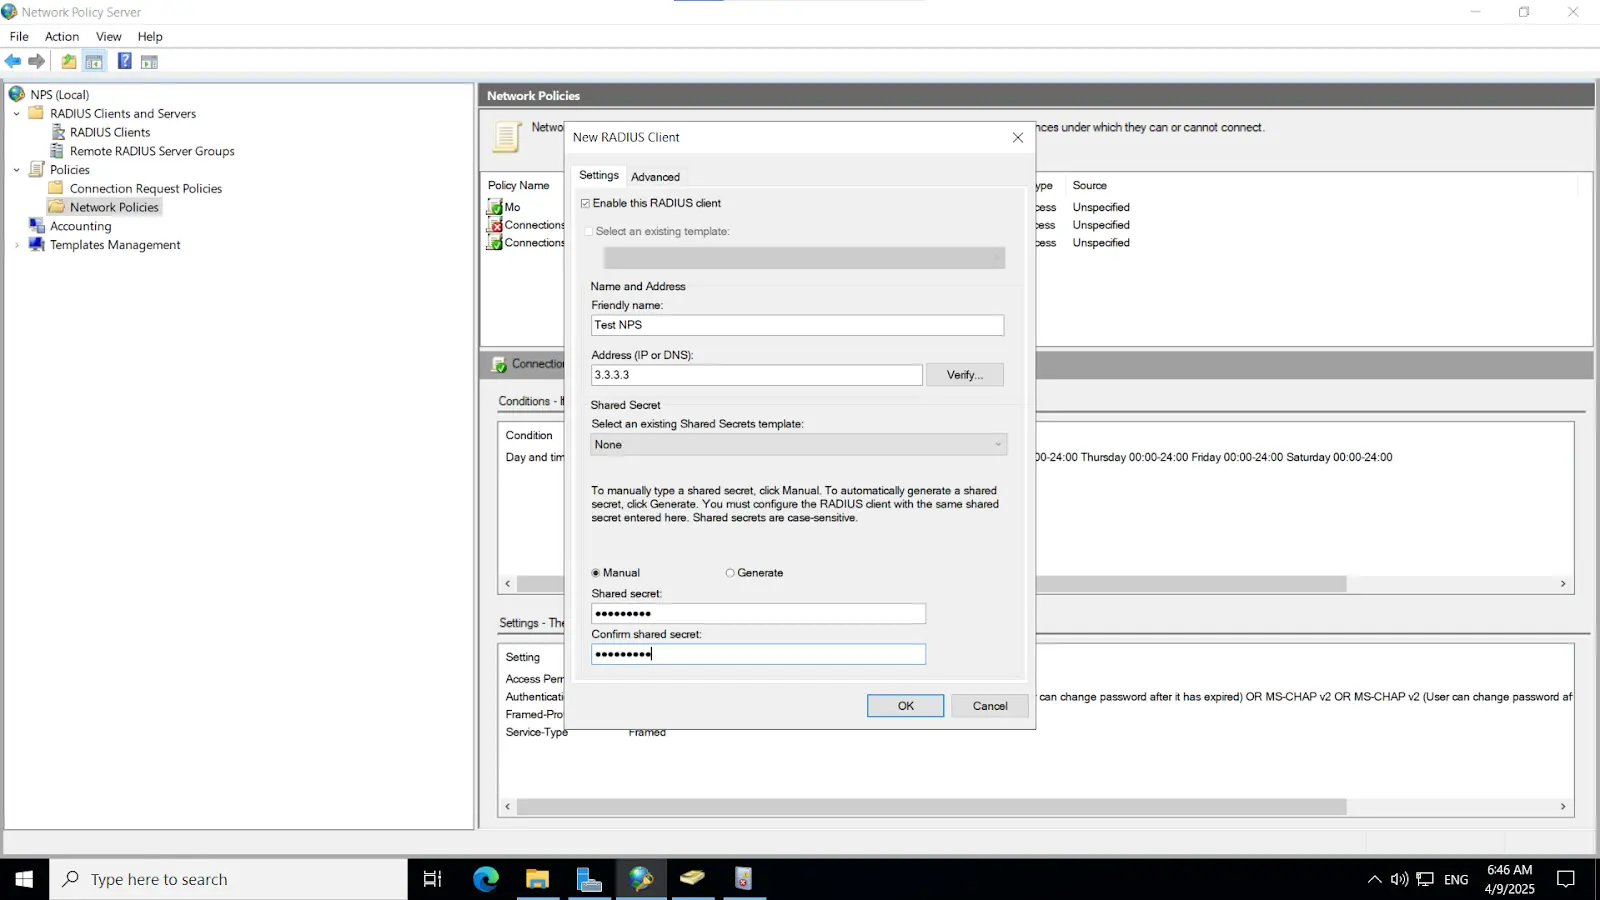
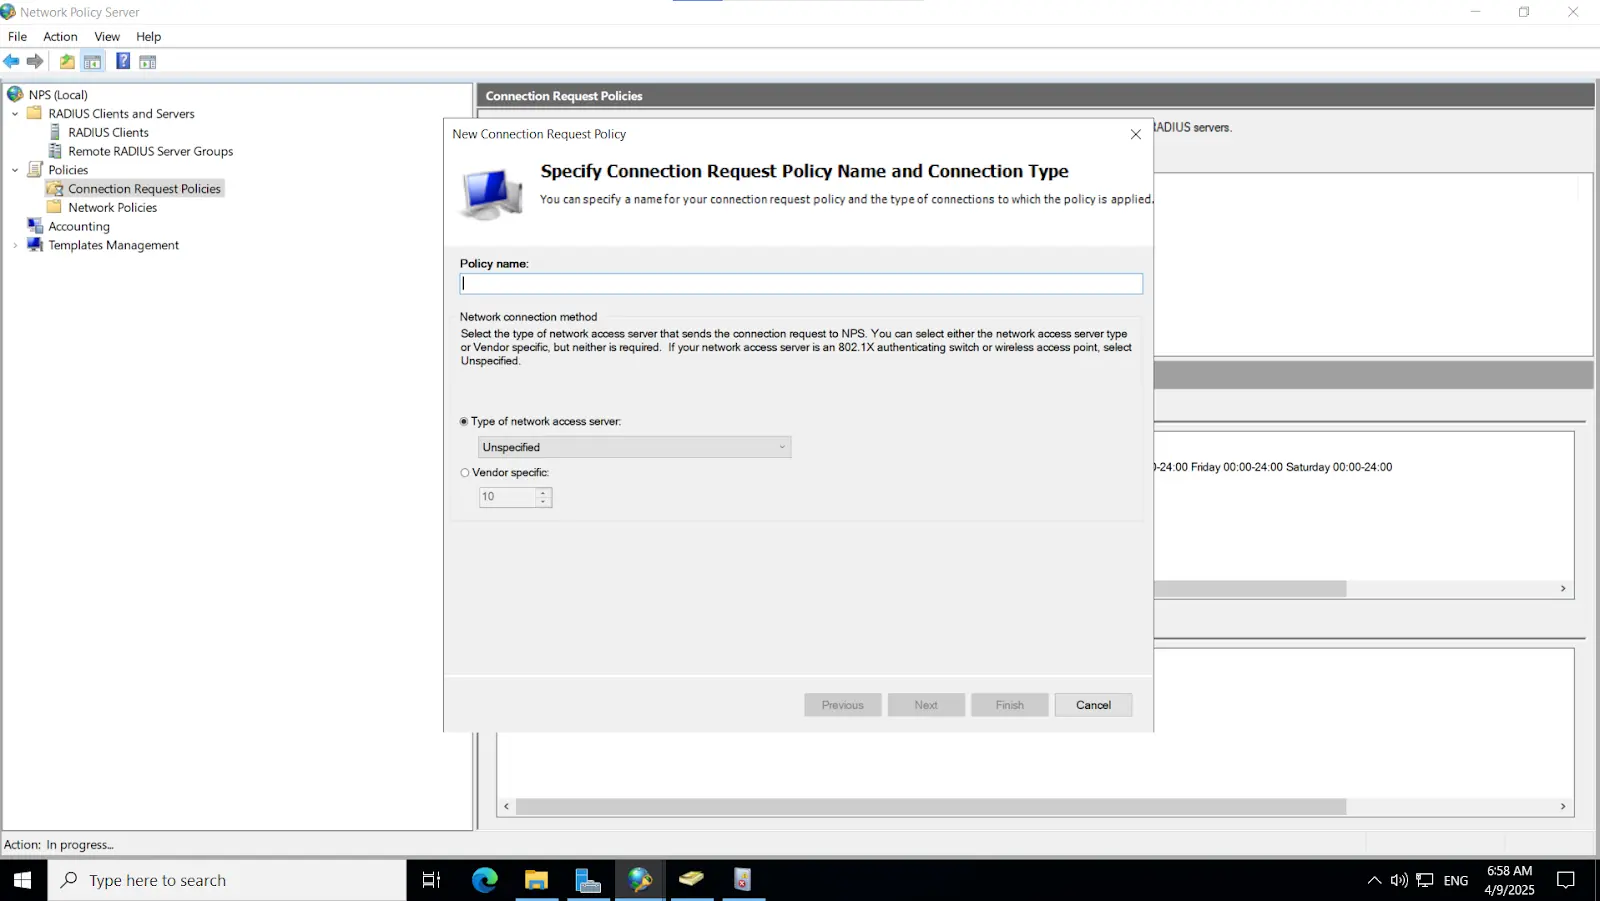
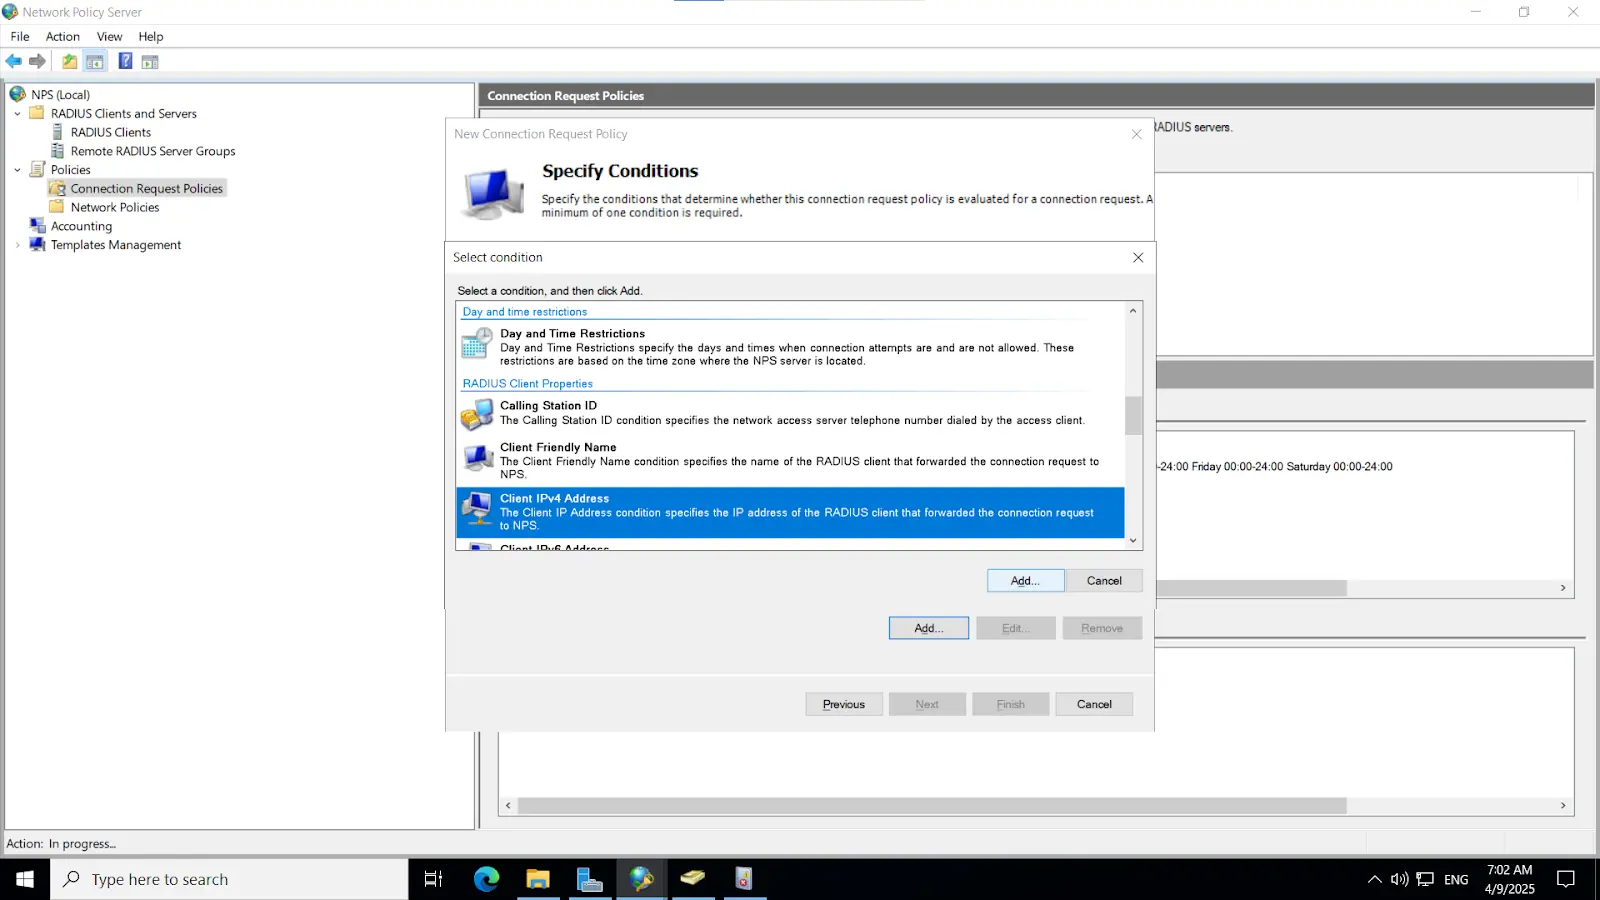
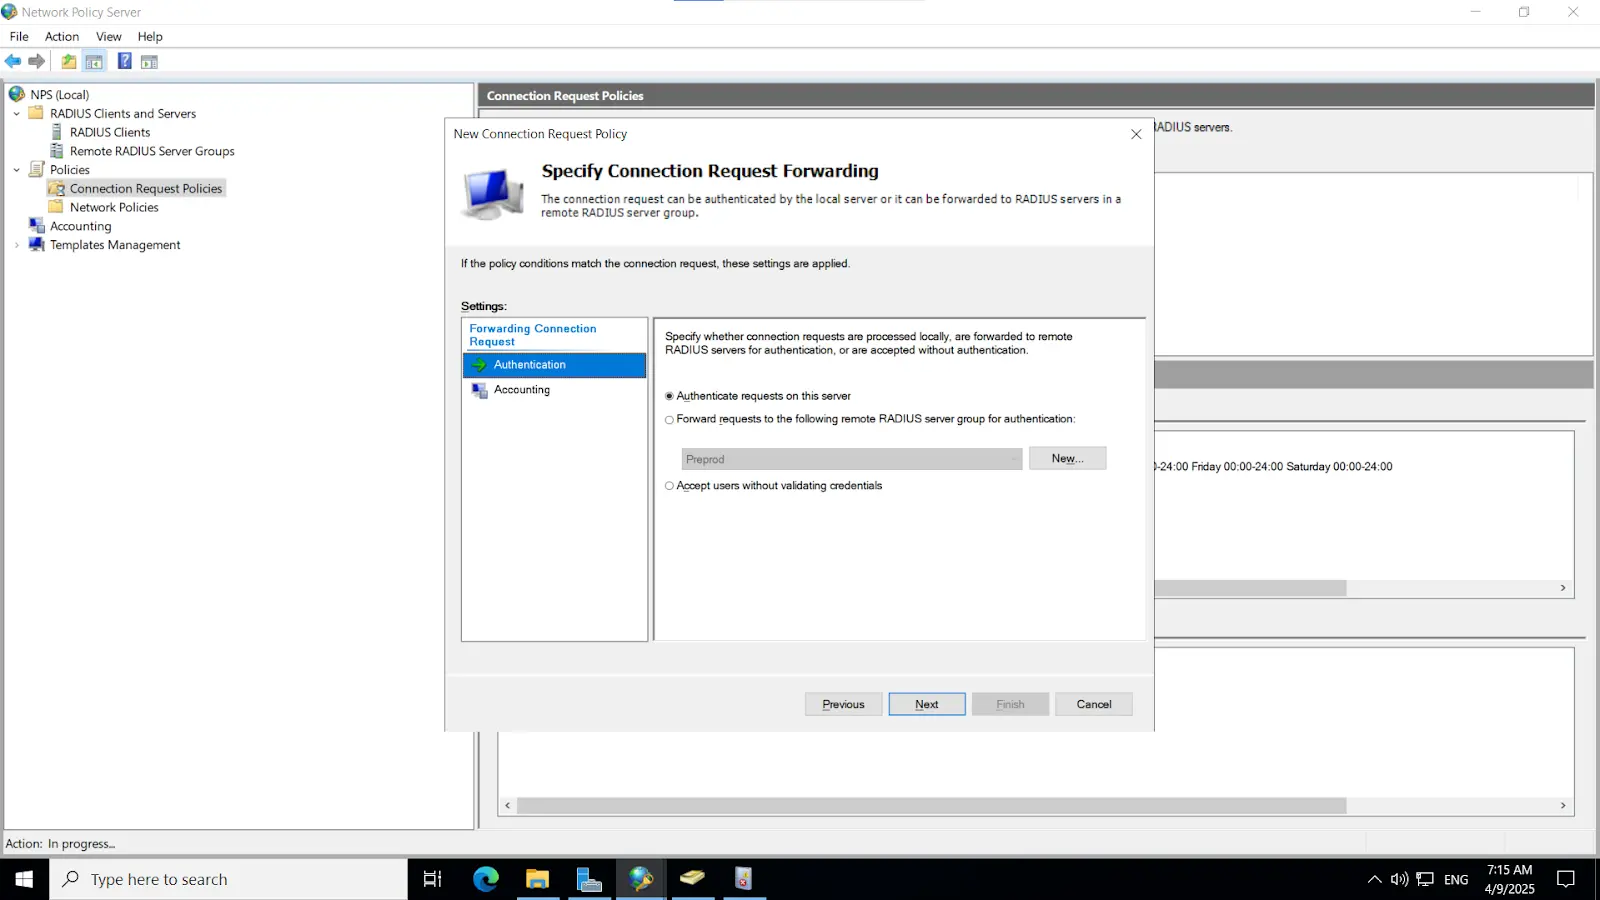
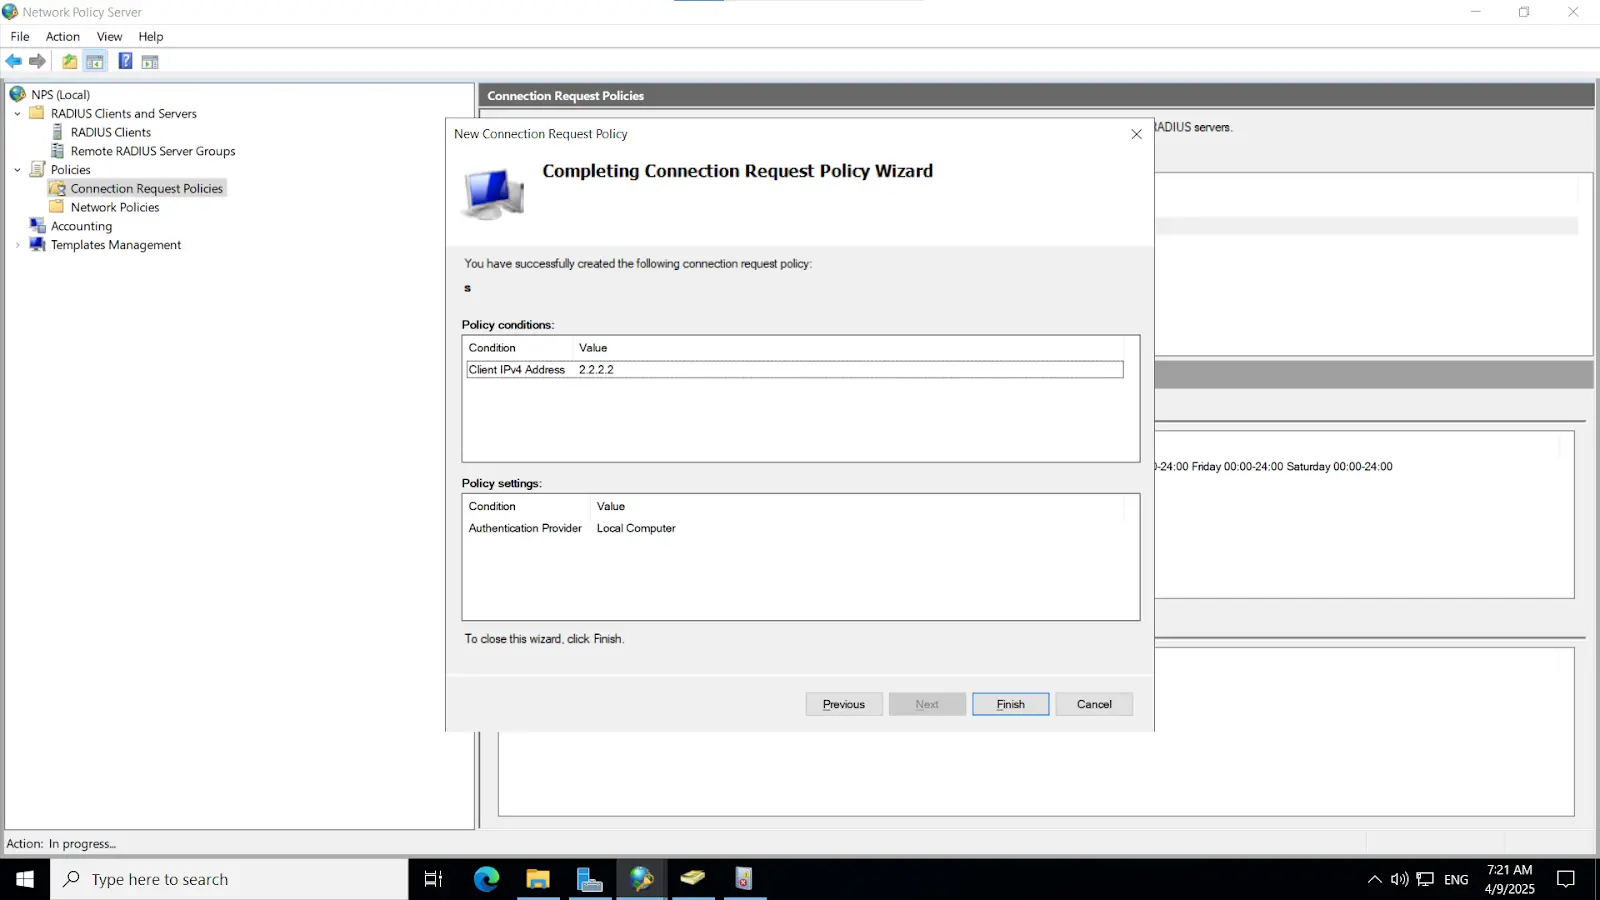
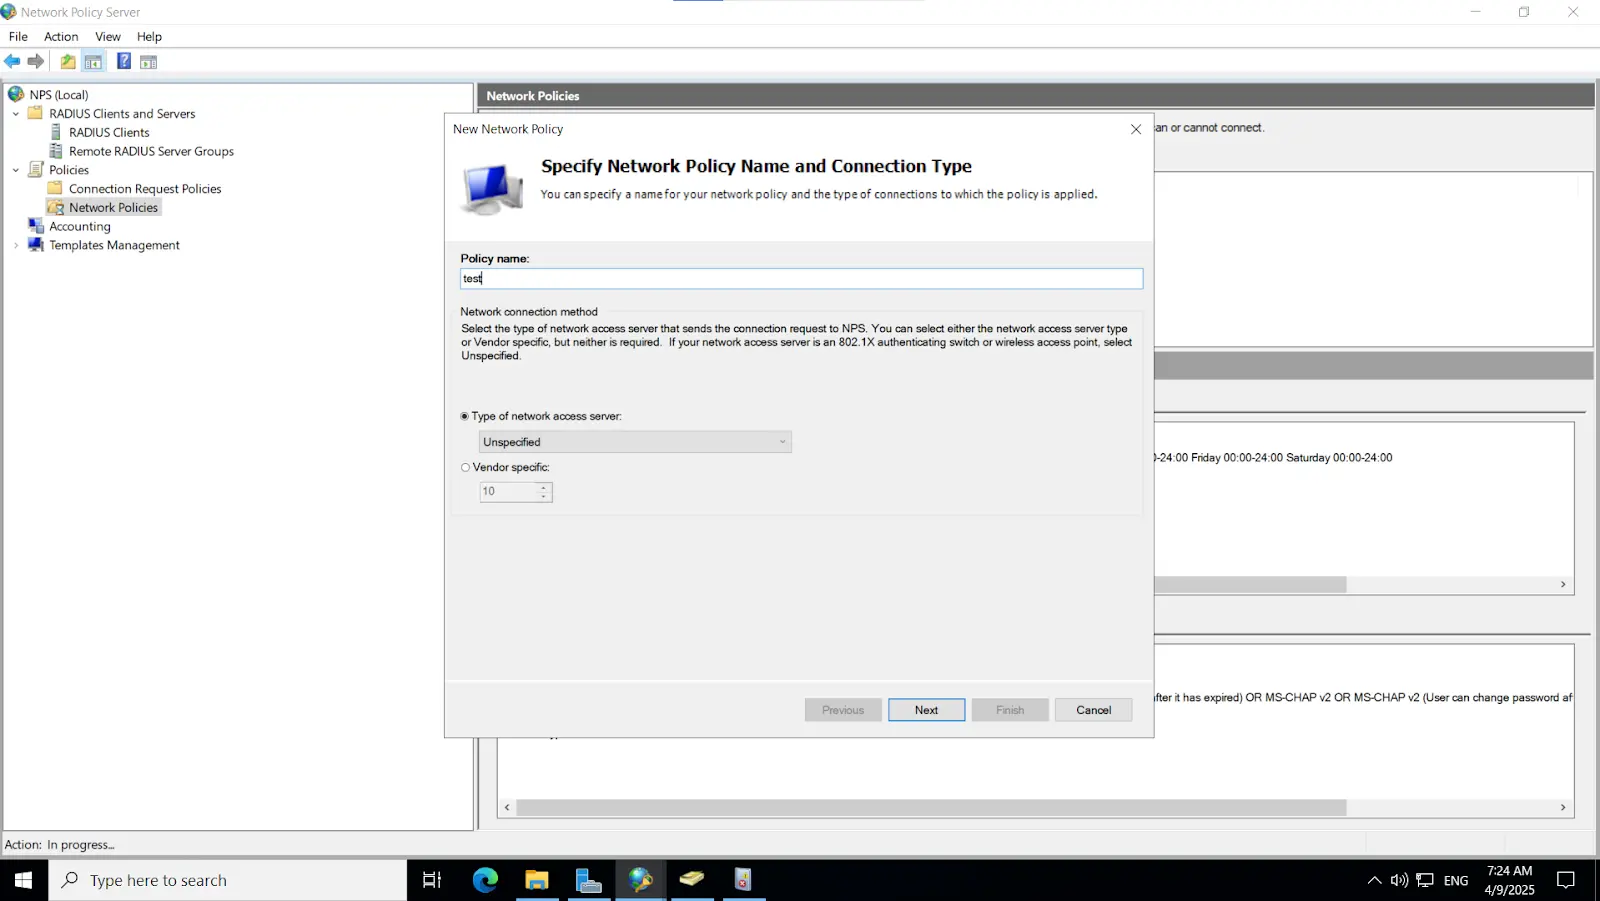
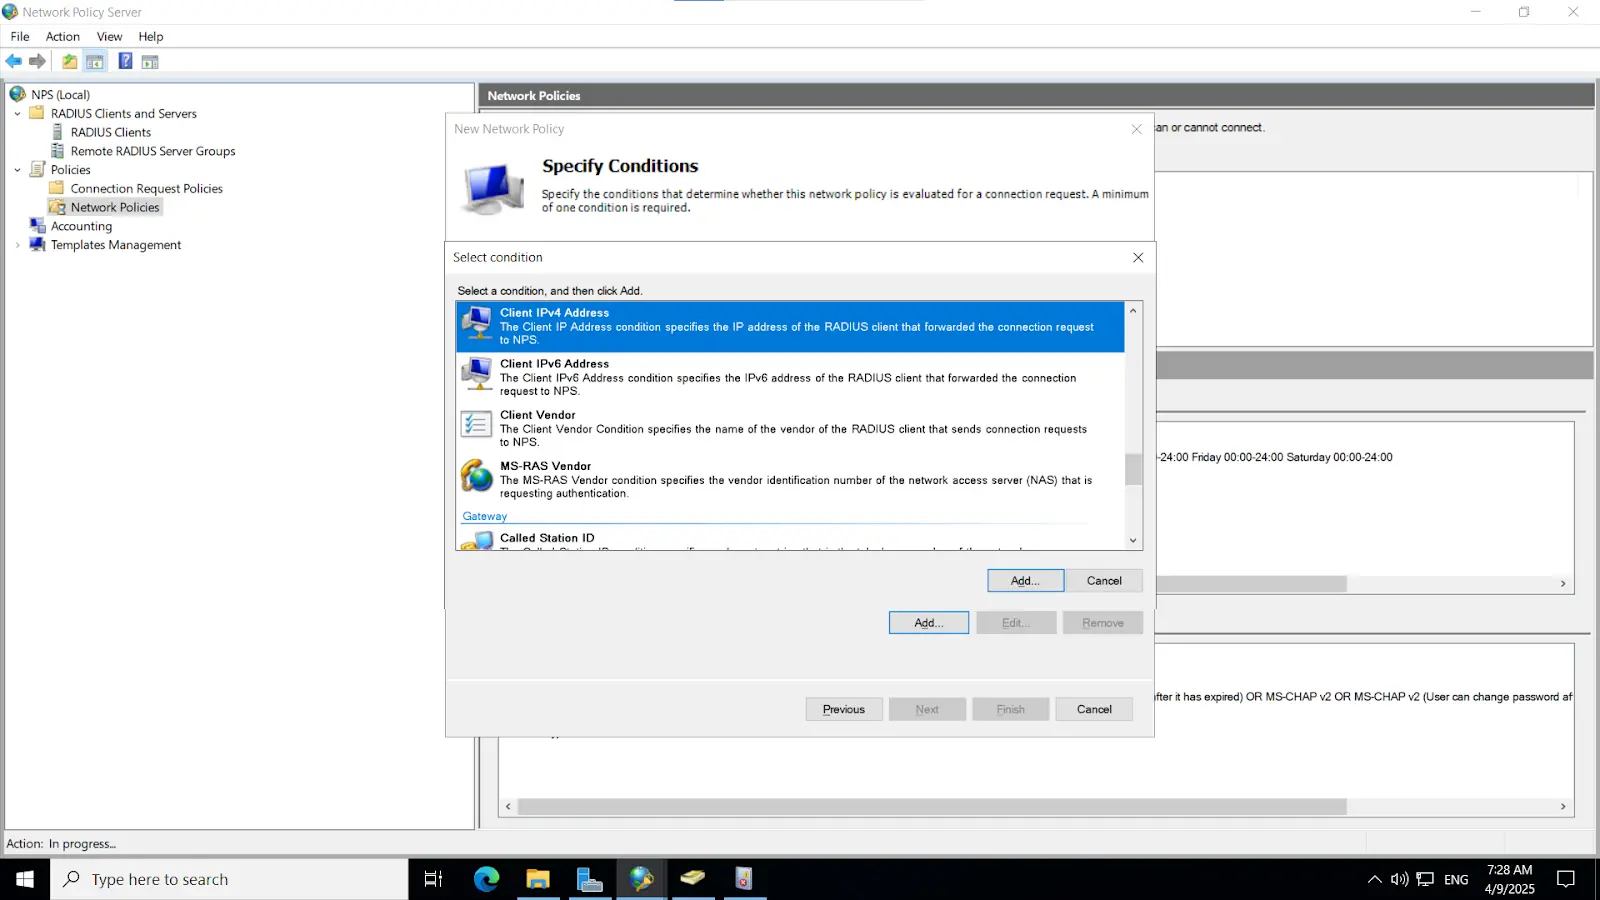
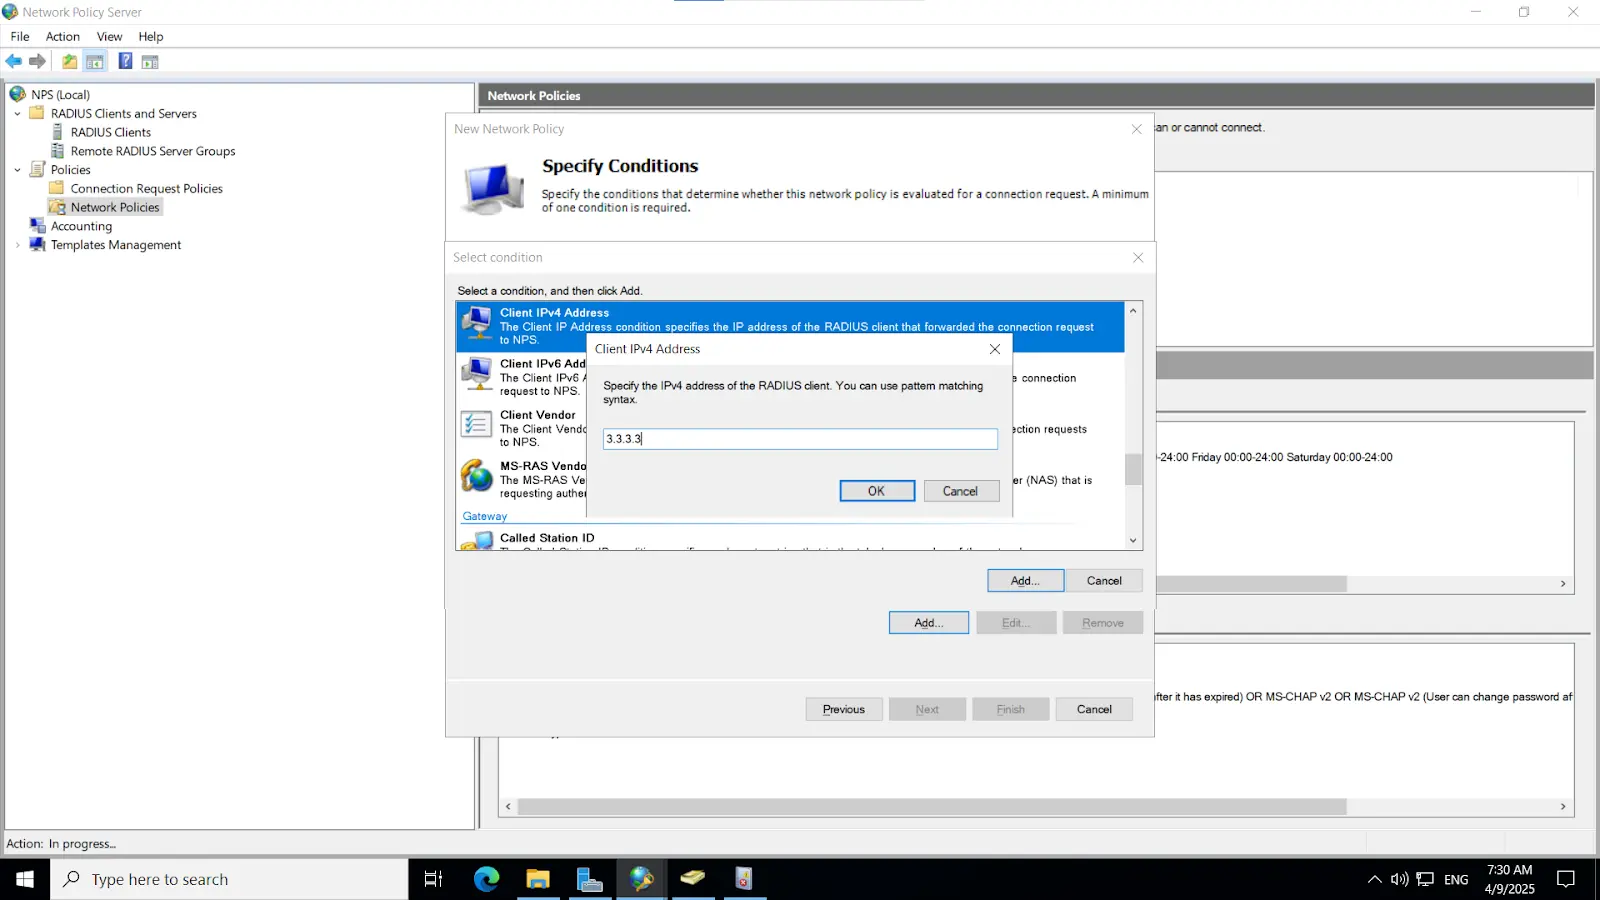
3.4. Integrating miniOrange IDP server with NPS
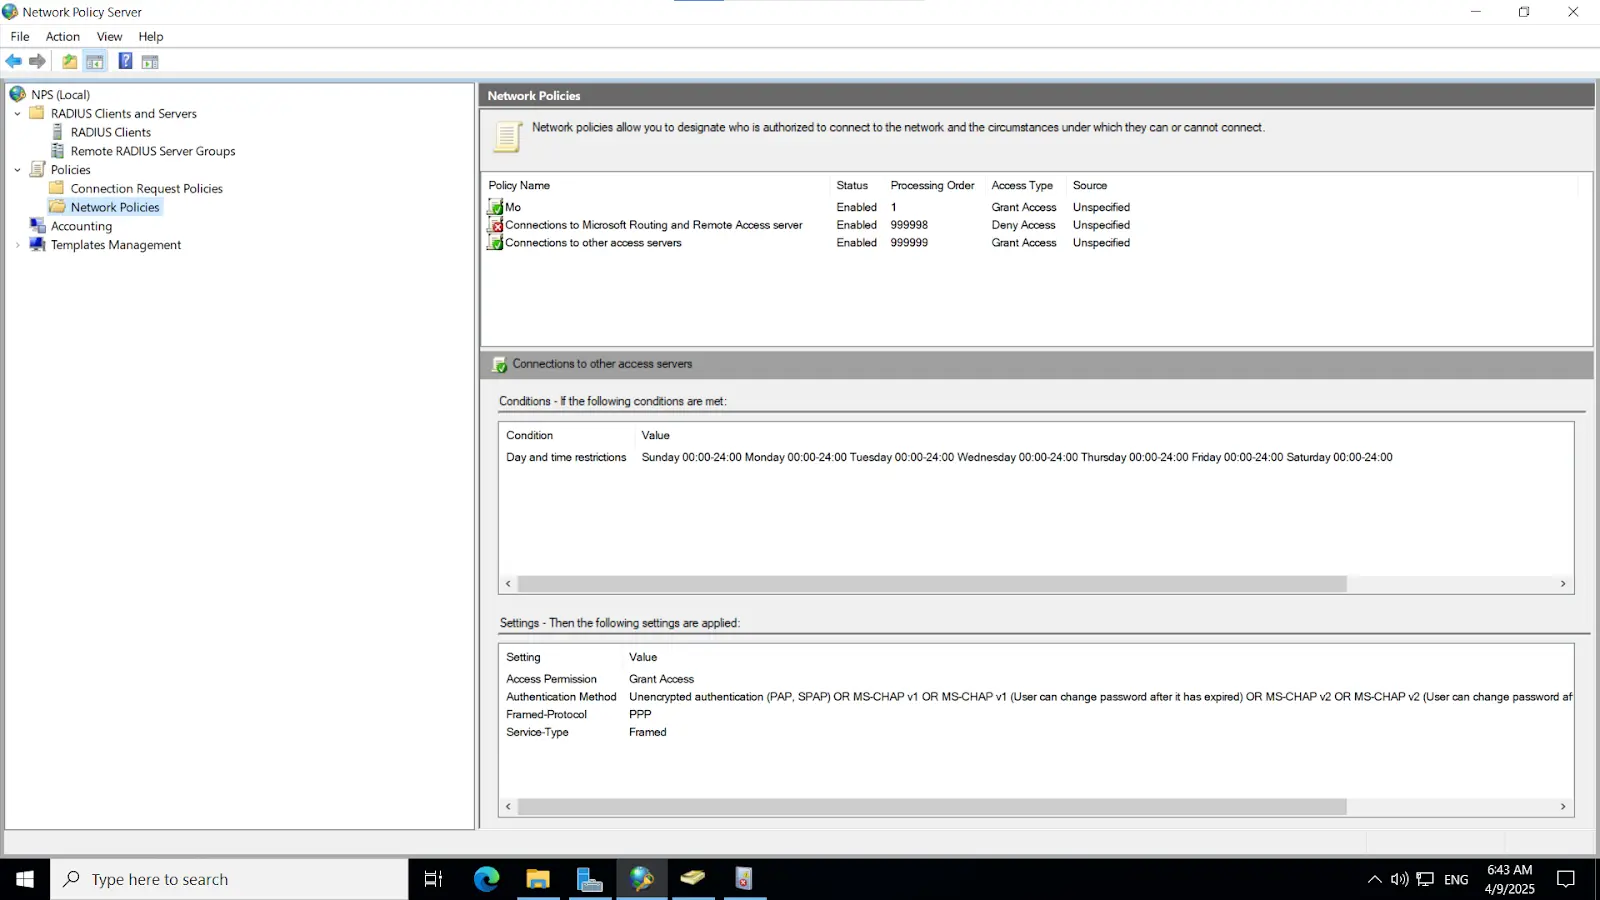
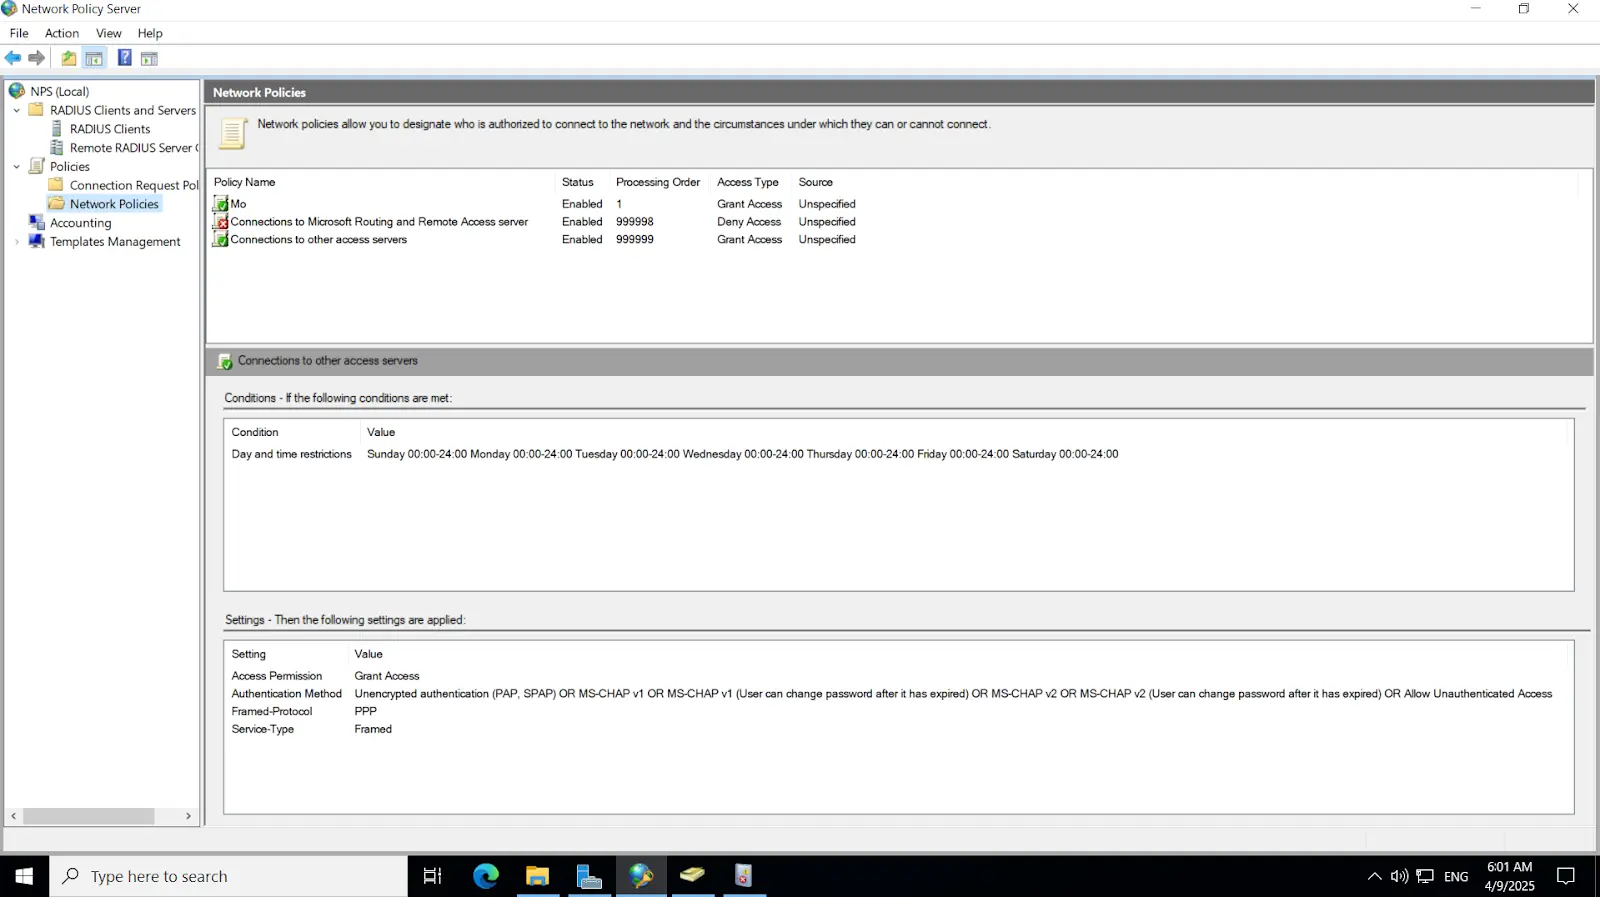
Note: Ensure that the "Enable this RADIUS client" checkbox is selected to activate the client configuration.