Hello there!

Need Help? We are right here!

Support Icon
miniOrange Email Support
success

Thanks for your Enquiry. Our team will soon reach out to you.

If you don't hear from us within 24 hours, please feel free to send a follow-up email to info@xecurify.com

Search Results:

×

Configure ISAM as SAML IDP for SSO


miniOrange Identity Broker service solution enables cross protocol authentication. You can configure ISAM as an IDP for Single Sign-On (SSO) into your applications/websites. Here, ISAM will act as an Identity Provider (IDP) and miniOrange will act as a broker.

We offer a pre-built solution for integrating with ISAM, making it easier and quick to implement. Our team can also help you set up ISAM as SAML IDP to login into your applications.

Get Free Installation Help


miniOrange offers free help through a consultation call with our System Engineers to configure SSO for different apps using ISAM as IDP in your environment with 30-day free trial.

For this, you need to just send us an email at idpsupport@xecurify.com to book a slot and we'll help you in no time.


Prerequisites

Please make sure your organisation branding is already set under Customization >> Login and Registration Branding in the left menu of the dashboard.

Follow the Step-by-Step Guide given below for ISAM Single Sign-On (SSO)

1. Configuring miniOrange as Service Provider (SP) in ISAM

  • Login to ISAM as admin.
  • Go to Secure Federation > Manage > Federations.
  • Click on Add button to add new federation.
  • ISAM SSO

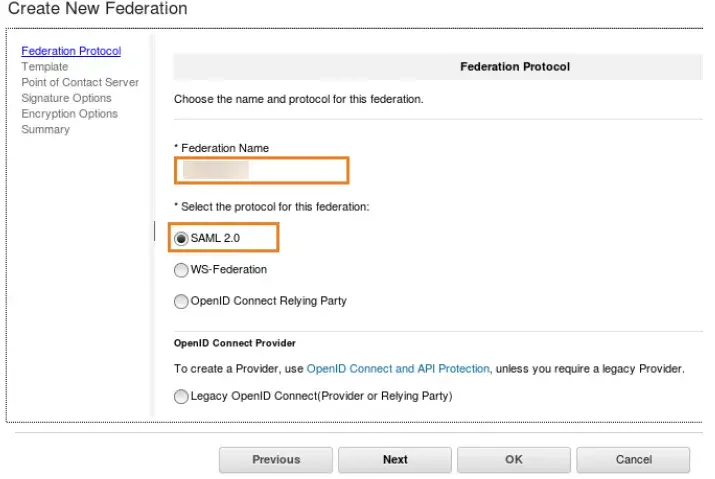
  • Enter the name of your federation and select SAML 2.0. Then click Next.
  • ISAM SSO

  • On the Template section click on your Quick Connect.
  • ISAM SSO

  • For Point of Contact, type https://<reverse proxy hostname>/isam.
  • Follow these steps to configure or get your proxy hostname.

    • Go to Secure Web Settings > Manage > Reverse Proxy.
    • Select your reverse proxy hostname and select Manage > Configuration > Edit Configuration File .
    • Use your browser find tool (Ctrl+f) to find and edit the following:
    • [server] web-host-name = <your-hostname> [step-up] verify-step-up-user = no [session] user-session-ids = yes inactive-timeout = 1800 create-unauth-session = yes
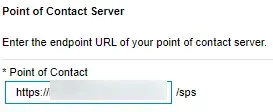
    • If you are setting up a new proxy instance then save and restart your instance.
    • ISAM SSO

  • Select your Certificates and Key value in the Signature and Encryption Option sections. You can find or configure / import your certificates from Manage Systems Settings > Secure Settings > SSL Certificates.
  • Review the summary and click the OK button.
  • Select the newly created Federation name and click on Export. The browser shows a message window that prompts you to save the file containing the exported data.
  • ISAM SSO

  • Click OK. The browser download window prompts for a location to save the file.
  • Choose the directory and save the metadata file, keep the metadata file handy as it will be needed to configure step 2.
  • Click Save.
  • Now, go to your Federation and click Partners.
  • ISAM SSO

  • Click on Add to add new partner
  • ISAM SSO

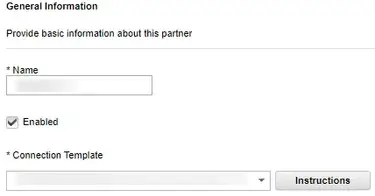
  • Fill in General Information like Name of your application and Enabled the checkbox.
  • ISAM SSO

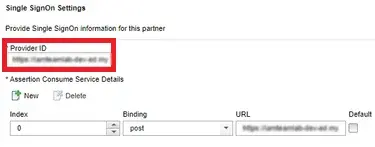
  • In the Single SignOn Settings enter the Provider ID: <Your application domain>.
  • ISAM SSO

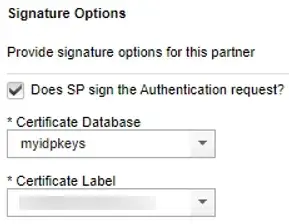
  • From the SSL Certificates, enter the Certificate Database and Certificate Label, and also enable the checkbox labeled Does SP sign authentication requests? under Signature Options.
  • ISAM SSO

  • In the Encryption Options, Mapping Rules Options, and Attribute Mapping Options sections , keep the default settings.
  • Click on Next.
  • Review the Summary and click OK, verify that partner is added successfully.

2. Configure ISAM as Identity Provider (IDP) in miniOrange

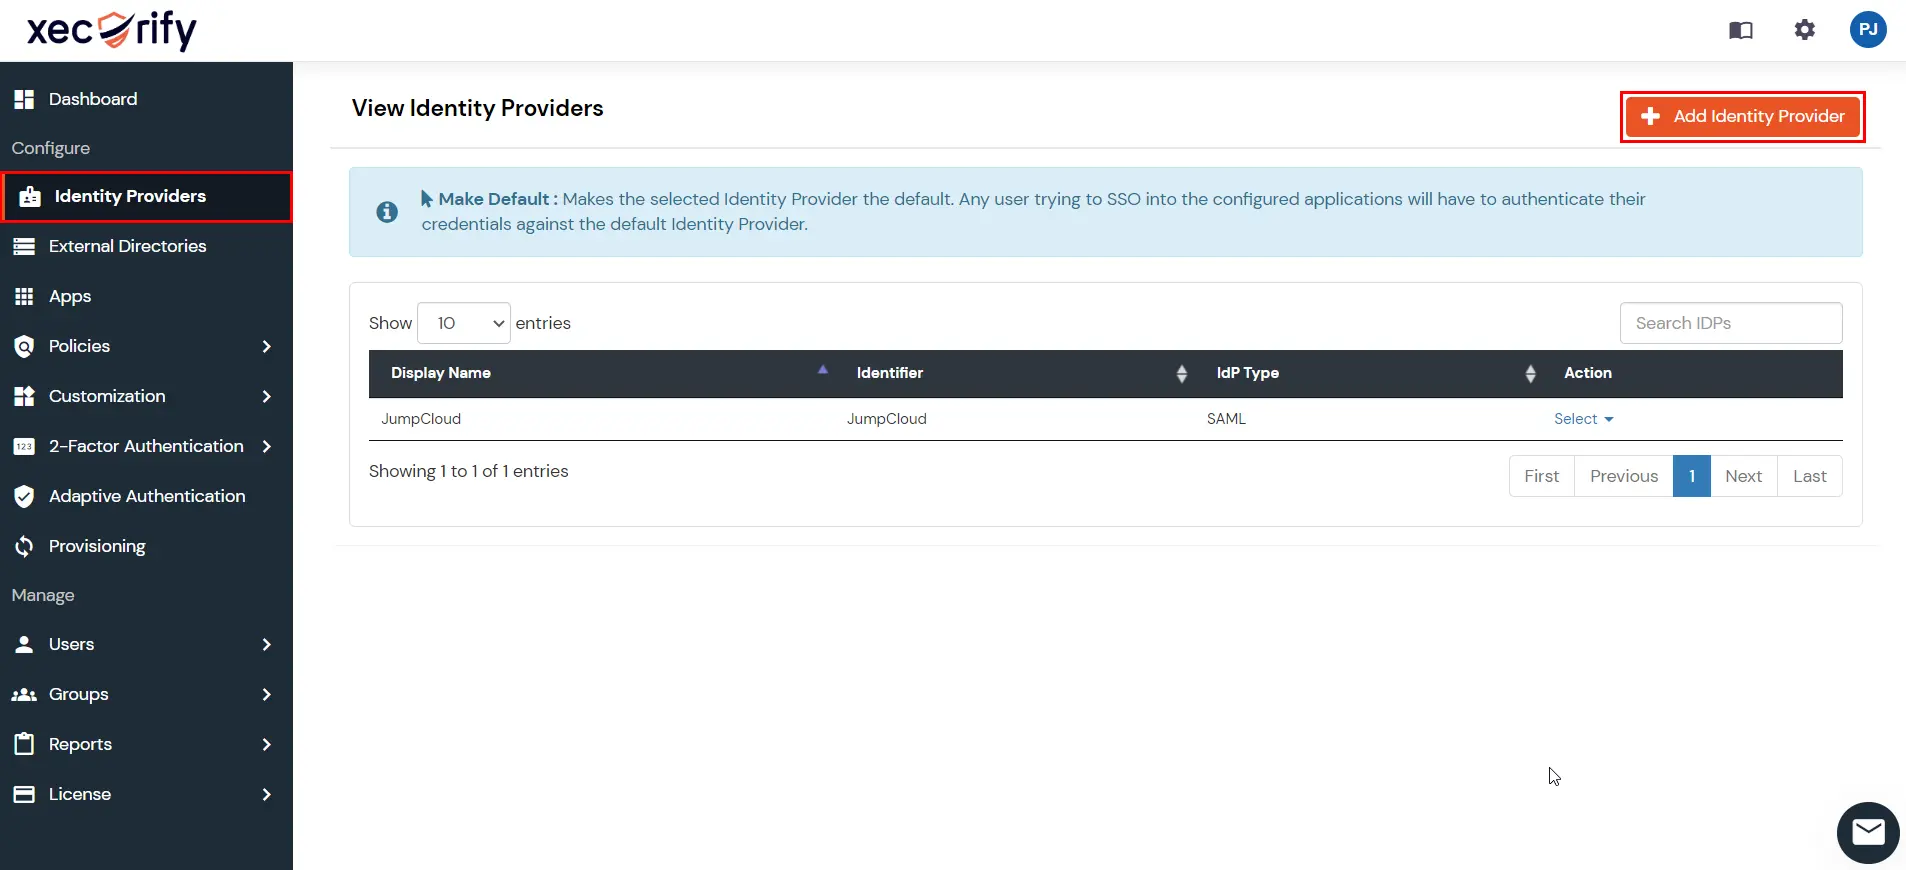
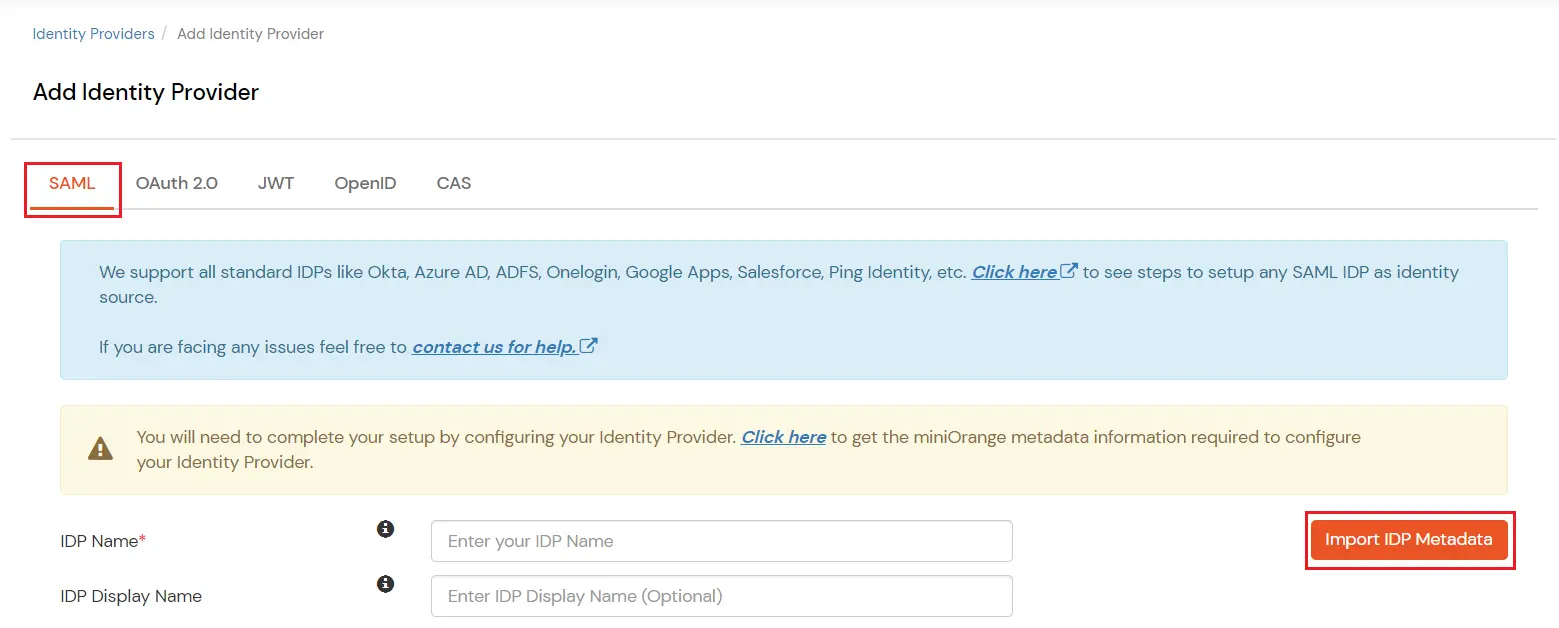
  • Go to miniOrange Admin console and navigate to Identity Providers in the left navigation menu. Then, click on Add Identity Provider button.
  • ISAM as IDP :  Add Identity Provider

  • In Choose Identity Provider, select SAML from the dropdown.
  • ISAM as IDP :  Select SAML from dropdown

  • Search for SAML Provider.
  • ISAM as IDP :  Search SAML

  • Click on Import IDP metadata.
  • OneLogin as IDP: Select SAML and Import IDP Metadata

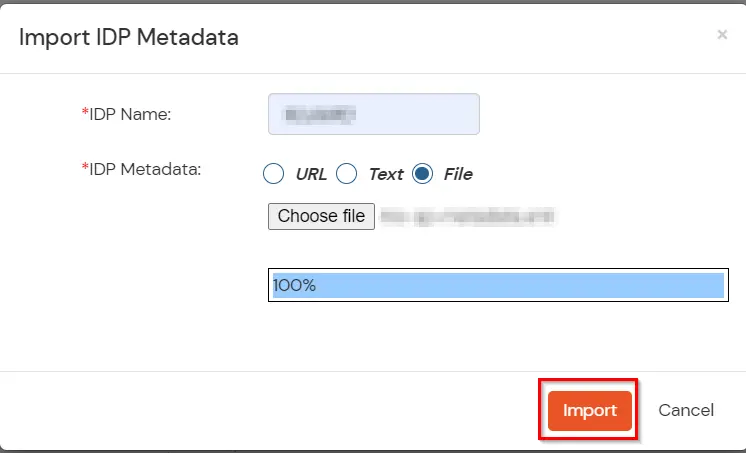
  • Choose an appropriate IDP name. Browse for the file downloaded from ISAM.
  • Click on Import.
  • ISAM SSO

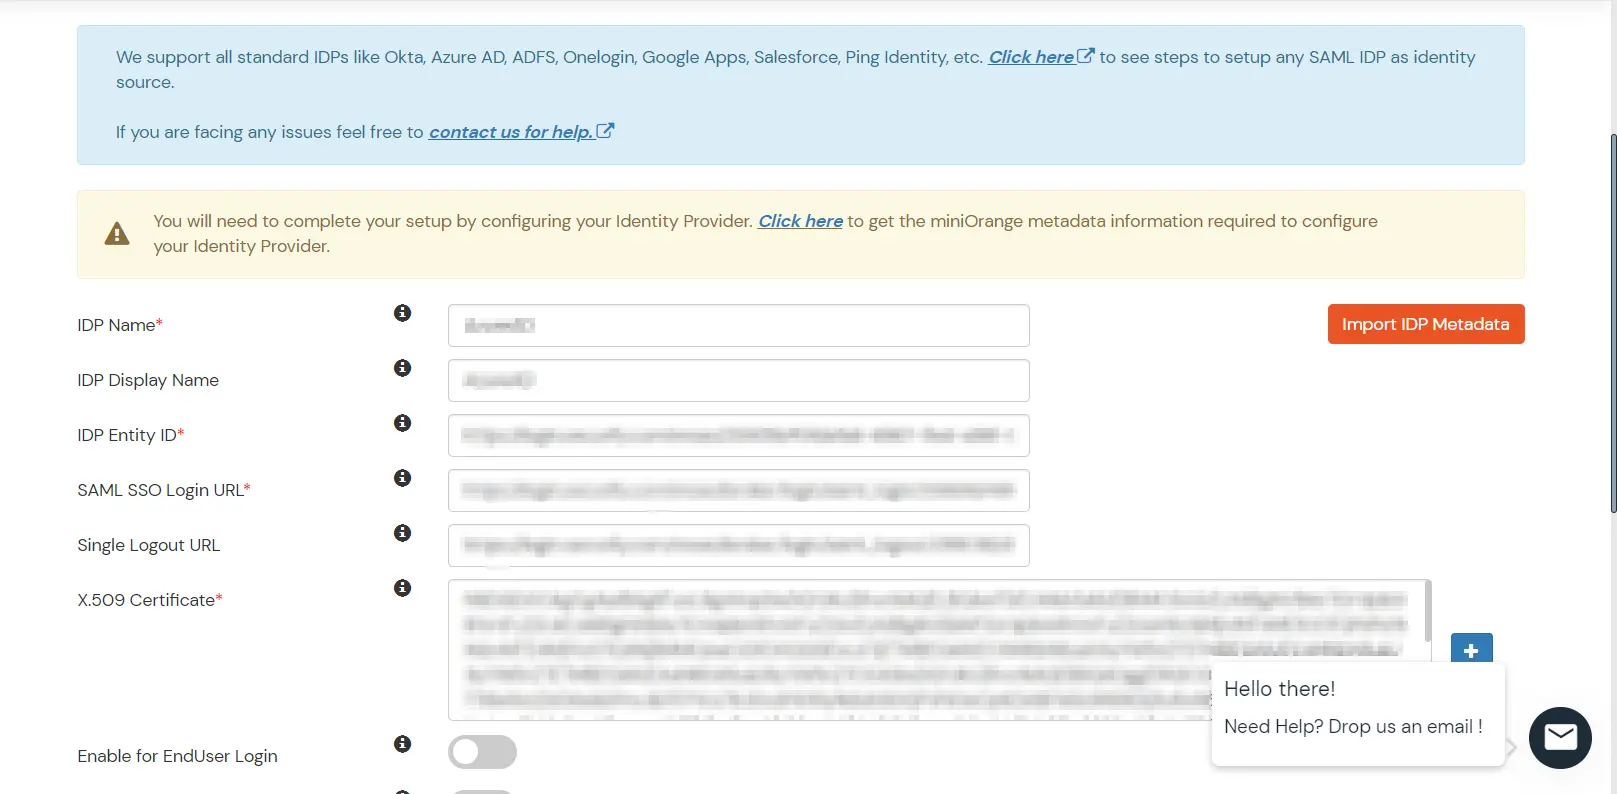
  • As shown in the below screen the IDP Entity ID, SAML SSO Login URL and x.509 Certificate will be filled from the Metadata file we just imported.
  • ISAM SSO

  • Click Save.

3. Test Connection

  • Visit your Login Page URL.
  • Go to Identity Providers tab.
  • Search for your app, click the three dots in the Actions menu, and select Test Connection against the Identity Provider (IDP) you configured.
  • ISAM-IDP-TestConnection

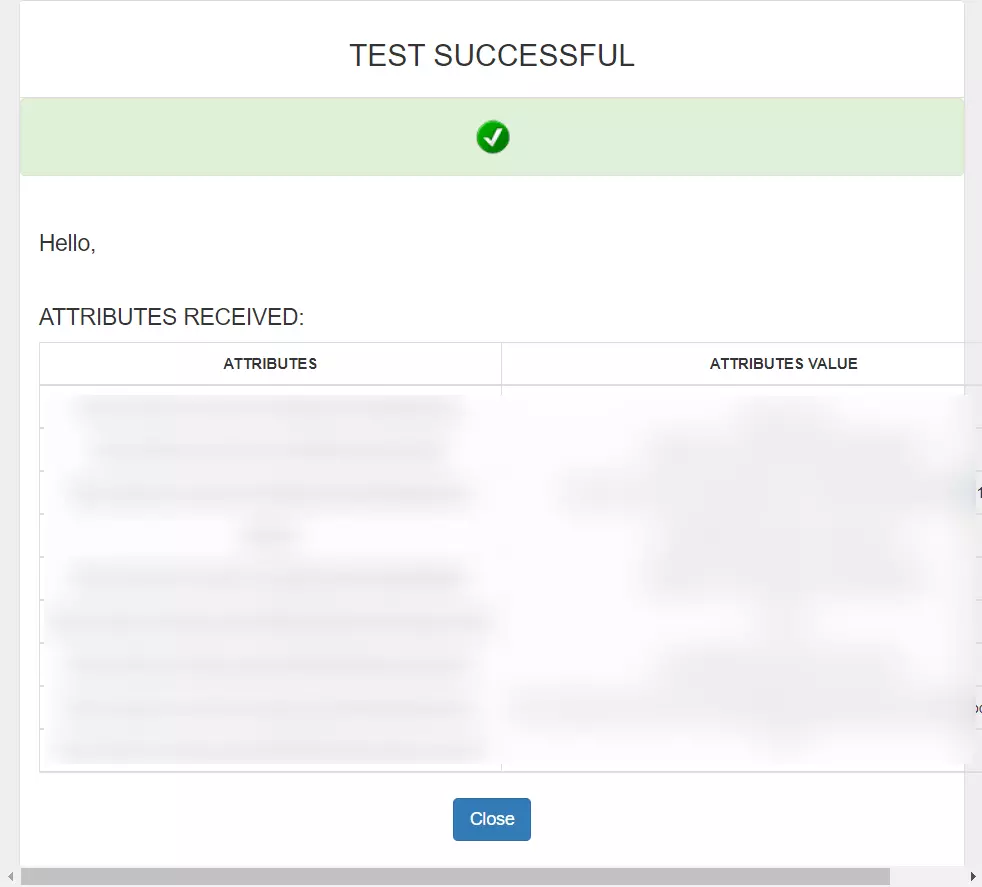
  • On entering valid ISAM credentials (credentials of user assigned to app created in ISAM), you will see a pop-up window which is shown in the below screen.
  • SucessTestConn-ISAM-IDP

  • Hence your configuration of ISAM as IDP in miniOrange is successfully completed.

Note:

You can follow this guide, if you want to configure SAML/WS-FED, OAuth/OIDC, JWT, Radius etc
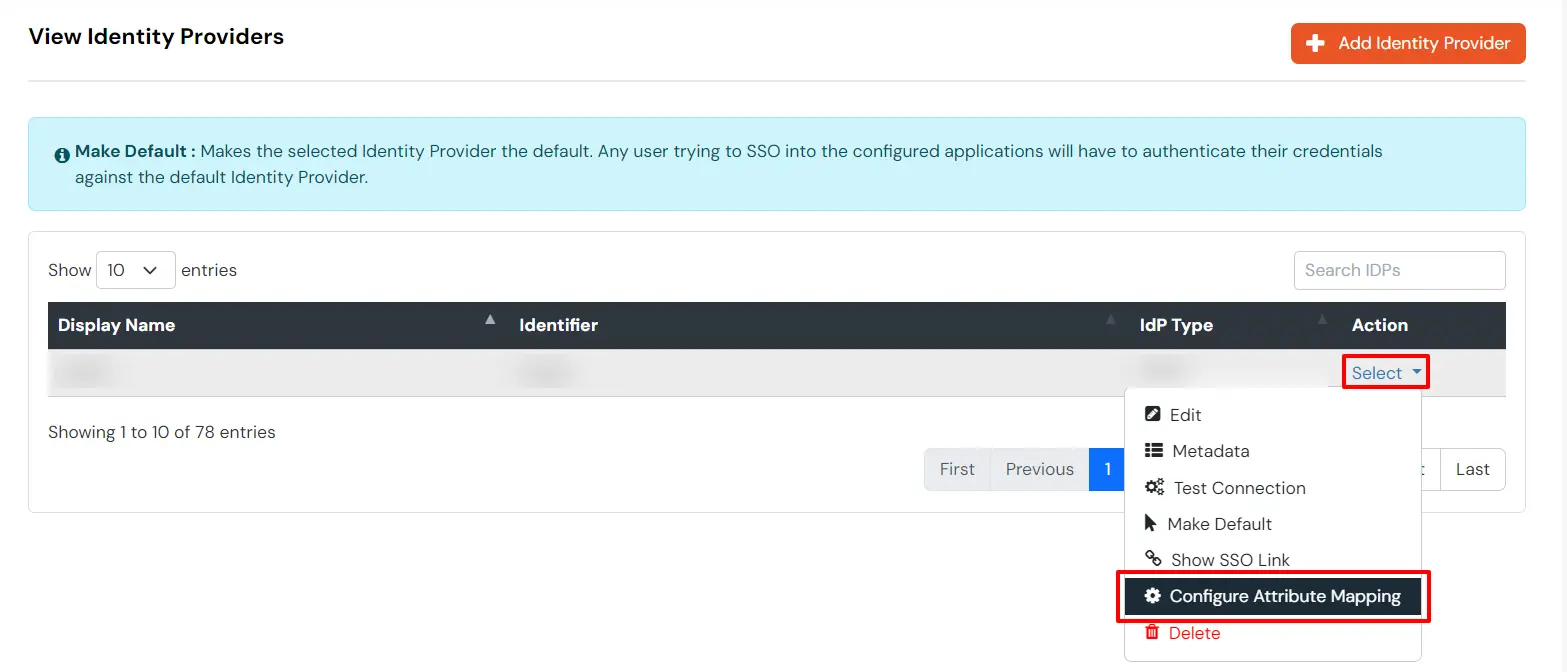


Configure Attribute Mapping

  • Go to Identity Providers go to the Three dot (⋮) icon >> Attribute Mapping ISAM as IdP.
  • ISAM Single Sign-On SSO Select and Configure Attribute Mapping


Maps information, such as email and username, during Just-In-Time (JIT) user creation. Email and Username attributes are necessary to create the user profile.
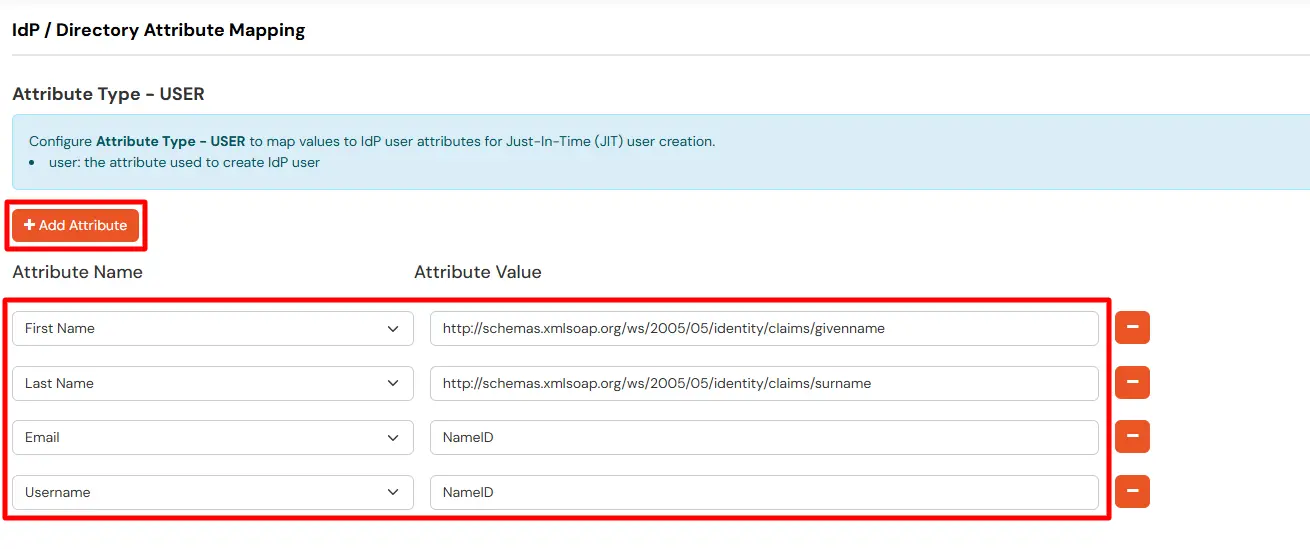
  • Click on the + Add Attribute button to add the attribute fields.
  • ISAM Single Sign-On SSO Map USER Attribute

  • Check the attributes in the Test Connection window from the previous step. Choose any attribute names you want to send to your application under Attribute Name sent to SP.
  • Enter the values of the attributes coming from IdP into the Attribute Name from IdP field on the Xecurify side.

EXTERNAL mappings help alter incoming attribute names before sending them to apps, ensuring that the data is in the correct format.
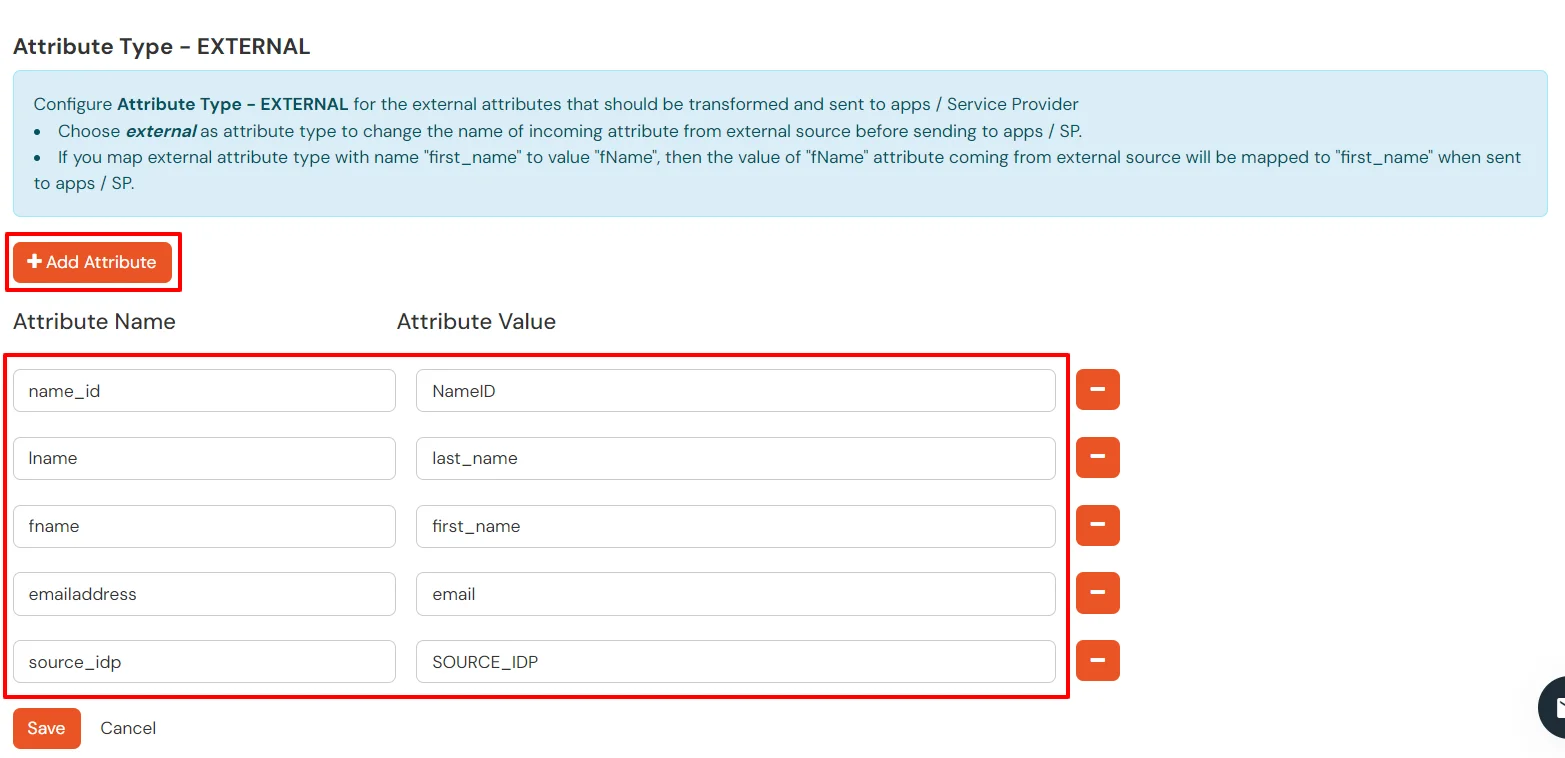
  • Click on the + Add Attribute button to add the attribute fields.
  • ISAM Single Sign-On SSO Map EXTERNAL Attribute

  • Check attributes in test connection window from last step. Enter the attribute names (any name) that you want to send to your application under Attribute Name sent to SP.
  • Enter the value of attributes that are coming from IdP into the Attribute Name from IdP field on the Xecurify side.

Configure Multiple IDPs:

You can follow this guide, if you want to configure multiple IDPs (Identity Providers) and give users the option to select the IDP of their choice to authenticate with.


External References

Want To Schedule A Demo?

Request a Demo


Our Other Identity & Access Management Products