Hello there!

Need Help? We are right here!

Support Icon
miniOrange Email Support
success

Thanks for your Enquiry. Our team will soon reach out to you.

If you don't hear from us within 24 hours, please feel free to send a follow-up email to info@xecurify.com

Search Results:

×

SSO for Apps Using JWT as IDP


miniOrange supports Single Sign-On for secure login for users and admins. miniOrange supports several different protocols for your applications, such as SAML, WS-FED, OAuth, OIDC, JWT, RADIUS, etc. Using Single Sign-on, users can use one set of credentials to login to multiple applications. This improves security, as it reduces avenues for phishing attacks, and also improves access to your application.

miniOrange provides Single Sign-on for Mobile applications and JavaScript framework based applications through JSON Web Token [so, JWT apps]. This solution allows you to setup Single Sign-On(SSO) into your applications which do not support SAML 2.0 standard. You can allow your users to Single Sign-On into your application by verifying Identity with your existing SAML 2.0 compliant Identity Provider. This is done using JSON Web Token (JWT) tokens and it can be easily integrated with your application built in any framework or language. You can add JWT app to enable SSO in any mobile/client-side apps which do not support any standard protocols and built on platforms like React.js, Firebase, Cordova, Angular.js, etc. You can also add Password-Less app links to user portal from here.


Get Free Installation Help


miniOrange offers free help through a consultation call with our System Engineers to Install or Setup JWT SSO solution in your environment with 30-day free trial.

For this, you need to just send us an email at idpsupport@xecurify.com to book a slot and we'll help you in no time.
Steps to configure JWT as IDP:

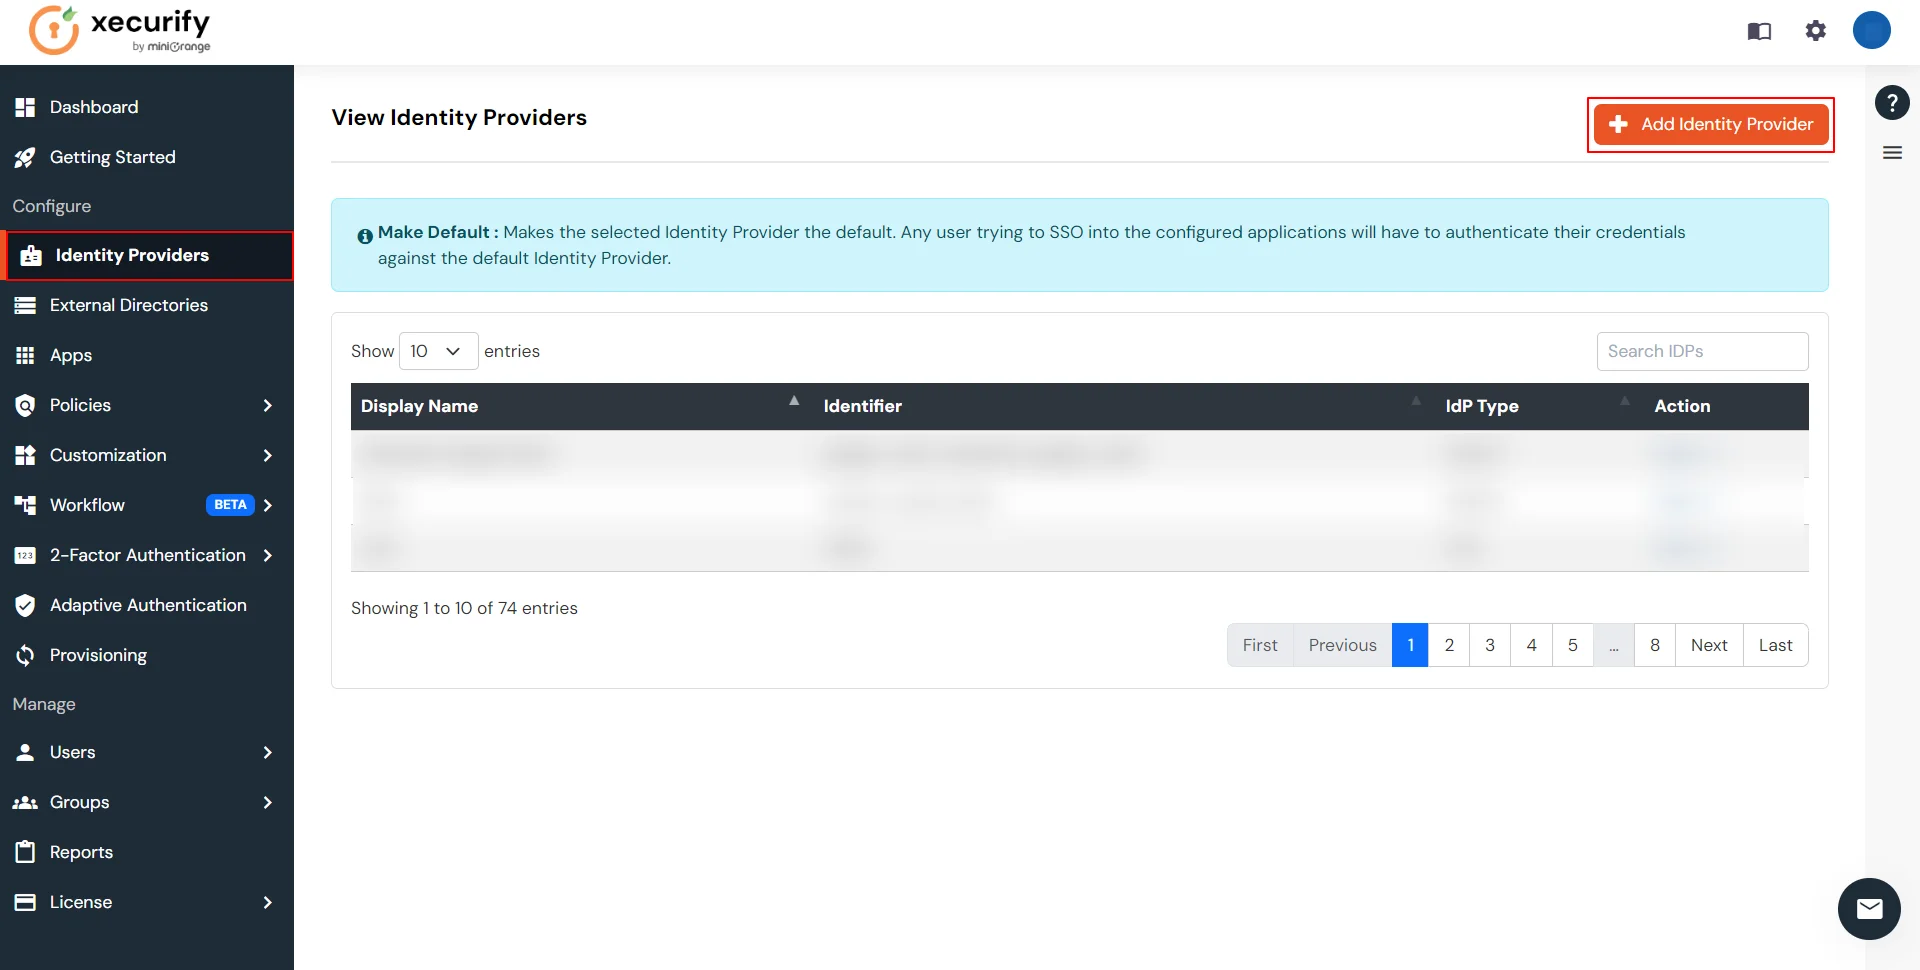
  • Login to miniOrange admin console.
  • From the left navigation bar select Identity Provider >> Add Identity Provider.
  • JWT IDP SSO: Add identity Provider

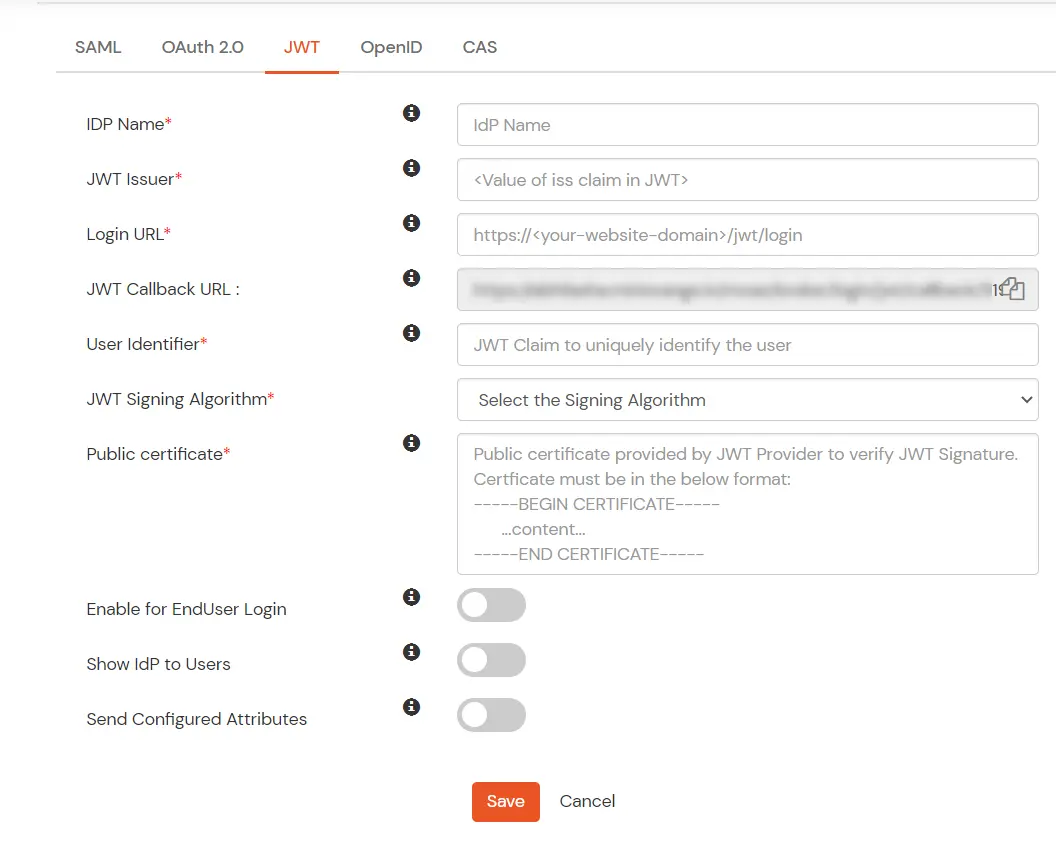
  • Click on JWT.
  • JWT IDP SSO: Public certificate

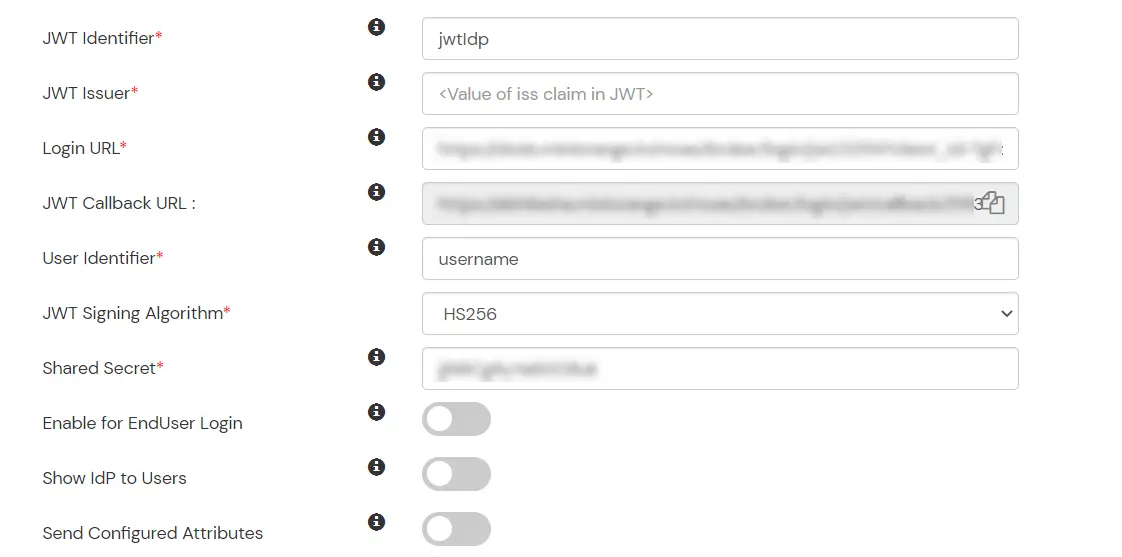
  • Enter the JWT Issuer of your JWT Provider. This should be the value of iss claim sent in JWT token by your Identity Provider.
  • Enter the SSO Login URL into the Login URL option in the JWT IDP configuration. This is the exact URL that can be used to start the SSO from your JWT provider. This could be different for each provider.
  • Copy the JWT Callback URL provided and use it as Callback/Redirect URL in your JWT Provider. This is the URL on which the JWT provider sends the token after successful authentication. (Make sure the token is sent as id_token or jwt_token parameter).
  • For User Identifier, enter the claim from your JWT token which can be used to uniquely identify each user. (For e.g. Username, Email, Subject, etc.)
  • If you are using RS256 to sign the JWT token, enter the public certificate used to sign in the Public Certificate value. Keep Signing Algorithm as RS256.
  • If you are using HS256 to sign the JWT token, enter the secret key used as the Shared Secret value. Keep Signing Algorithm as HS256.
  • JWT IDP SSO: Shared secret

  • Click on Save to save the configuration.

Test Connection

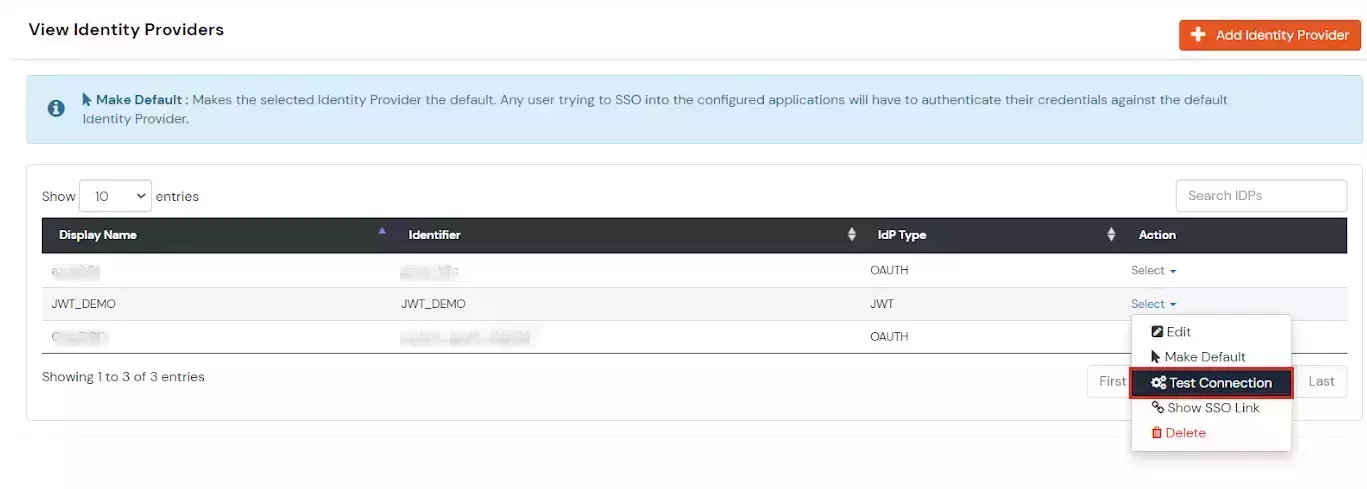
  • Go to Identity Providers tab.
  • Click on Select >> Test Connection option against the Identity Provider you configured.
  • JWT IDP SSO: Test Connection

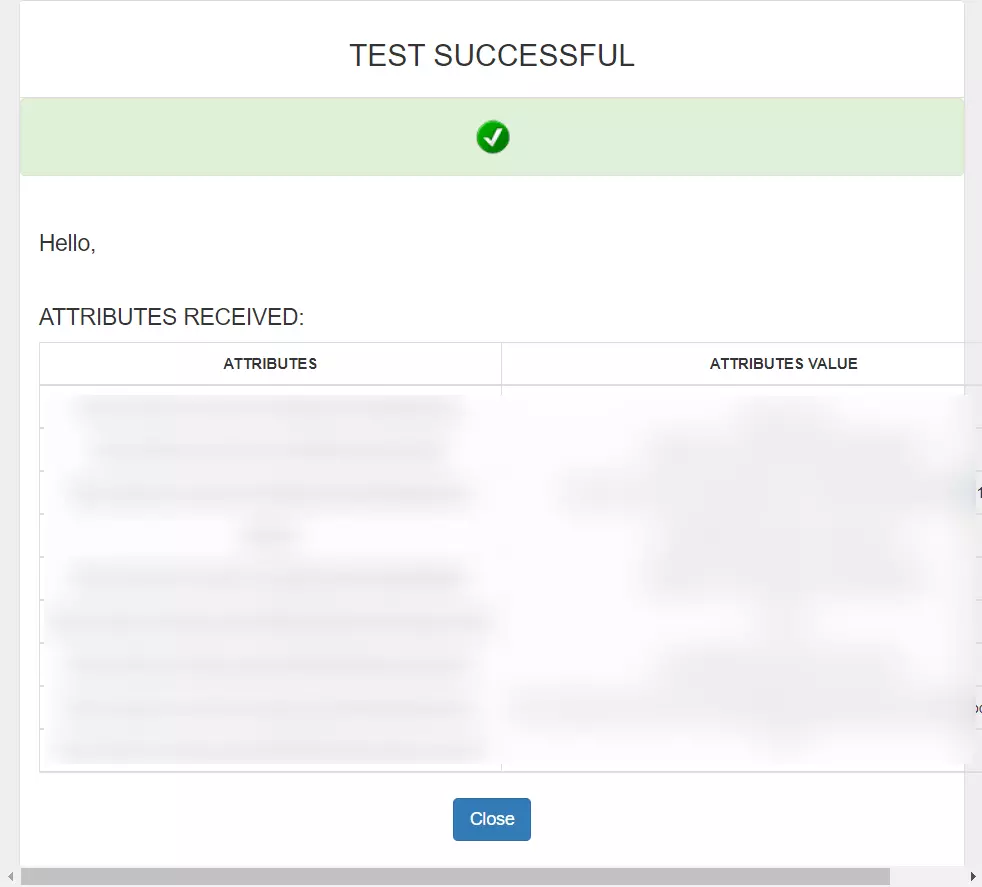
  • On entering valid external IDP credentials you will see a pop-up window as shown below.
  • JWT IDP SSO: Test Successful

External References

Want To Schedule A Demo?

Request a Demo