Hello there!
Need Help? We are right here!
Need Help? We are right here!
Search Results:
×[Latest Version: 1.5.0] [Releases & feature updates]
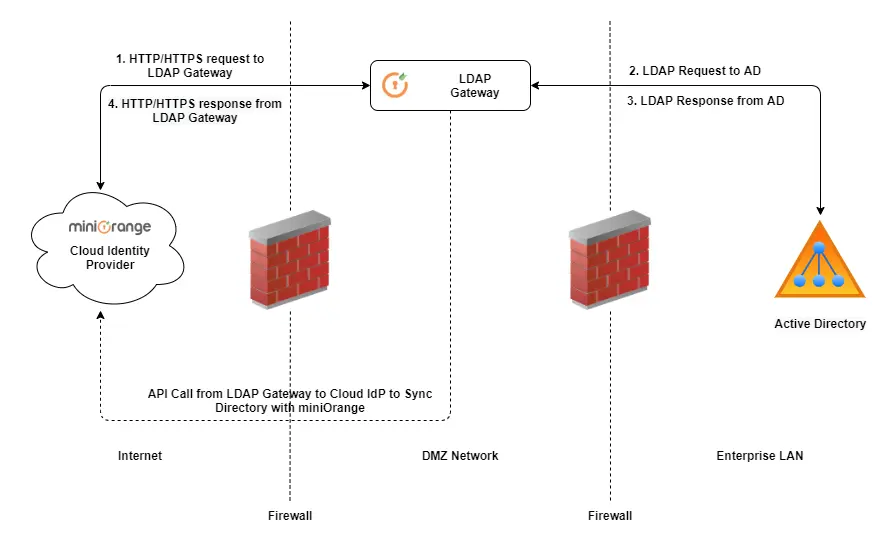
miniOrange LDAP Gateway allows login to miniOrange and several other applications using credentials stored in Active Directory, OpenLDAP and other LDAP servers where the LDAP Server is not publicly accessible. The LDAP Gateway is installed in the intranet's DMZ zone. This module also functions as a sync agent, keeping your identity provider in sync with the LDAP Server objects. Furthermore, the Gateway module allows you to configure numerous LDAP Servers, allowing you to specify each unique LDAP Server required for authentication.
Checkout miniOrange LDAP Gateway releases & feature updates.
| Specifications | miniOrange Gateway Server (minimum requirements) |
|---|---|
| CPU Core | 2 core |
| RAM | 4 GB |
| HDD | 30 GB |
| OS | Windows Server 2008+ or Linux Server |
| Java Environment | Java SE Development Kit v17 |
You can check the below table to download miniOrange Gateway on your operating system:
| Distribution | Download Link | Latest Version | Checksum(SHA256) |
|---|---|---|---|
| Zip | Download | 1.5.0 |
|
| Windows Installer | Download | 1.5.0 |
|
x
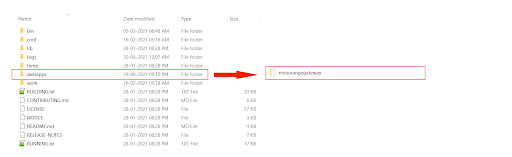
Access the gateway from your browser using the url "<hostname:port>/miniorangegateway". Replace "<hostname>" with your hostname or server IP .
NOTE: This step is mandatory for Chrome Browser. Chrome will not run the Web-Application on HTTP. For all the other browsers this is optional.
    <Connector
      port="443"
      protocol="org.apache.coyote.http11.Http11NioProtocol"
      SSLEnabled="true"
      maxThreads="150"
      scheme="https"
      secure="true">

      <SSLHostConfig hostName="_default_">
        <Protocols>
          TLSv1.2,TLSv1.3
        </Protocols>

        <Certificate
          certificateKeystoreFile="/opt/PKI/<PATH_TO_KEYSTORE>.jks"
          certificateKeystorePassword="KEYSTORE_PASSWORD"
          certificateKeyAlias="<CERTIFICATE_ALIAS>"
          type="RSA"
        />
      </SSLHostConfig>
    </Connector>

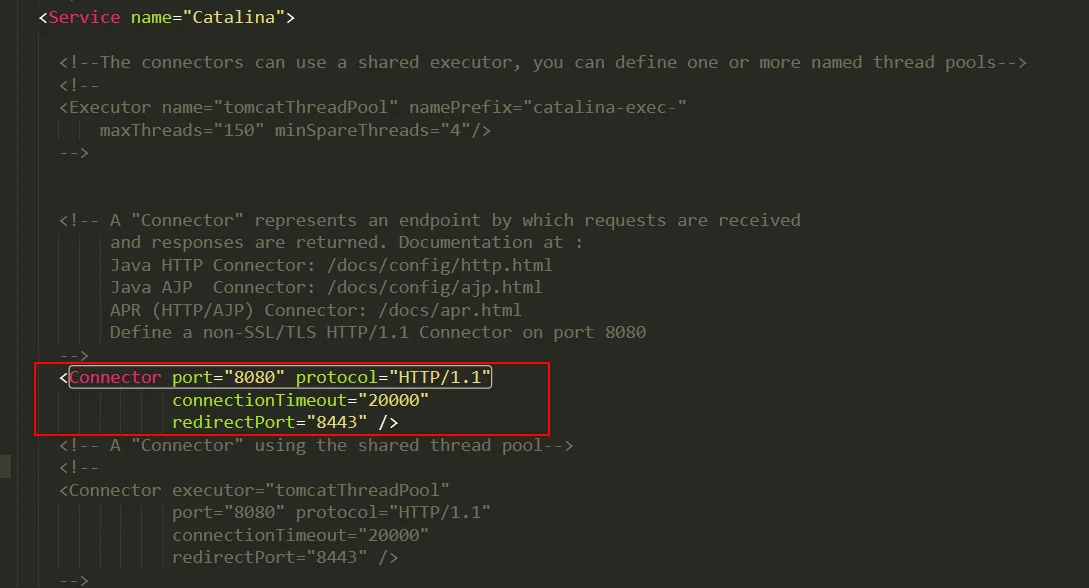
Access the gateway from your browser using the url "<hostname:port>/miniorangegateway". Replace "<hostname>" with your hostname or server IP .
eg:localhost:8080/miniorangegateway.
NOTE: If you have configured another port in Step-2, you can use that custom port instead of 8080. Eg. If you configured Tomcat to run on 8081 then the url will be eg:localhost:8081/miniorangegateway.

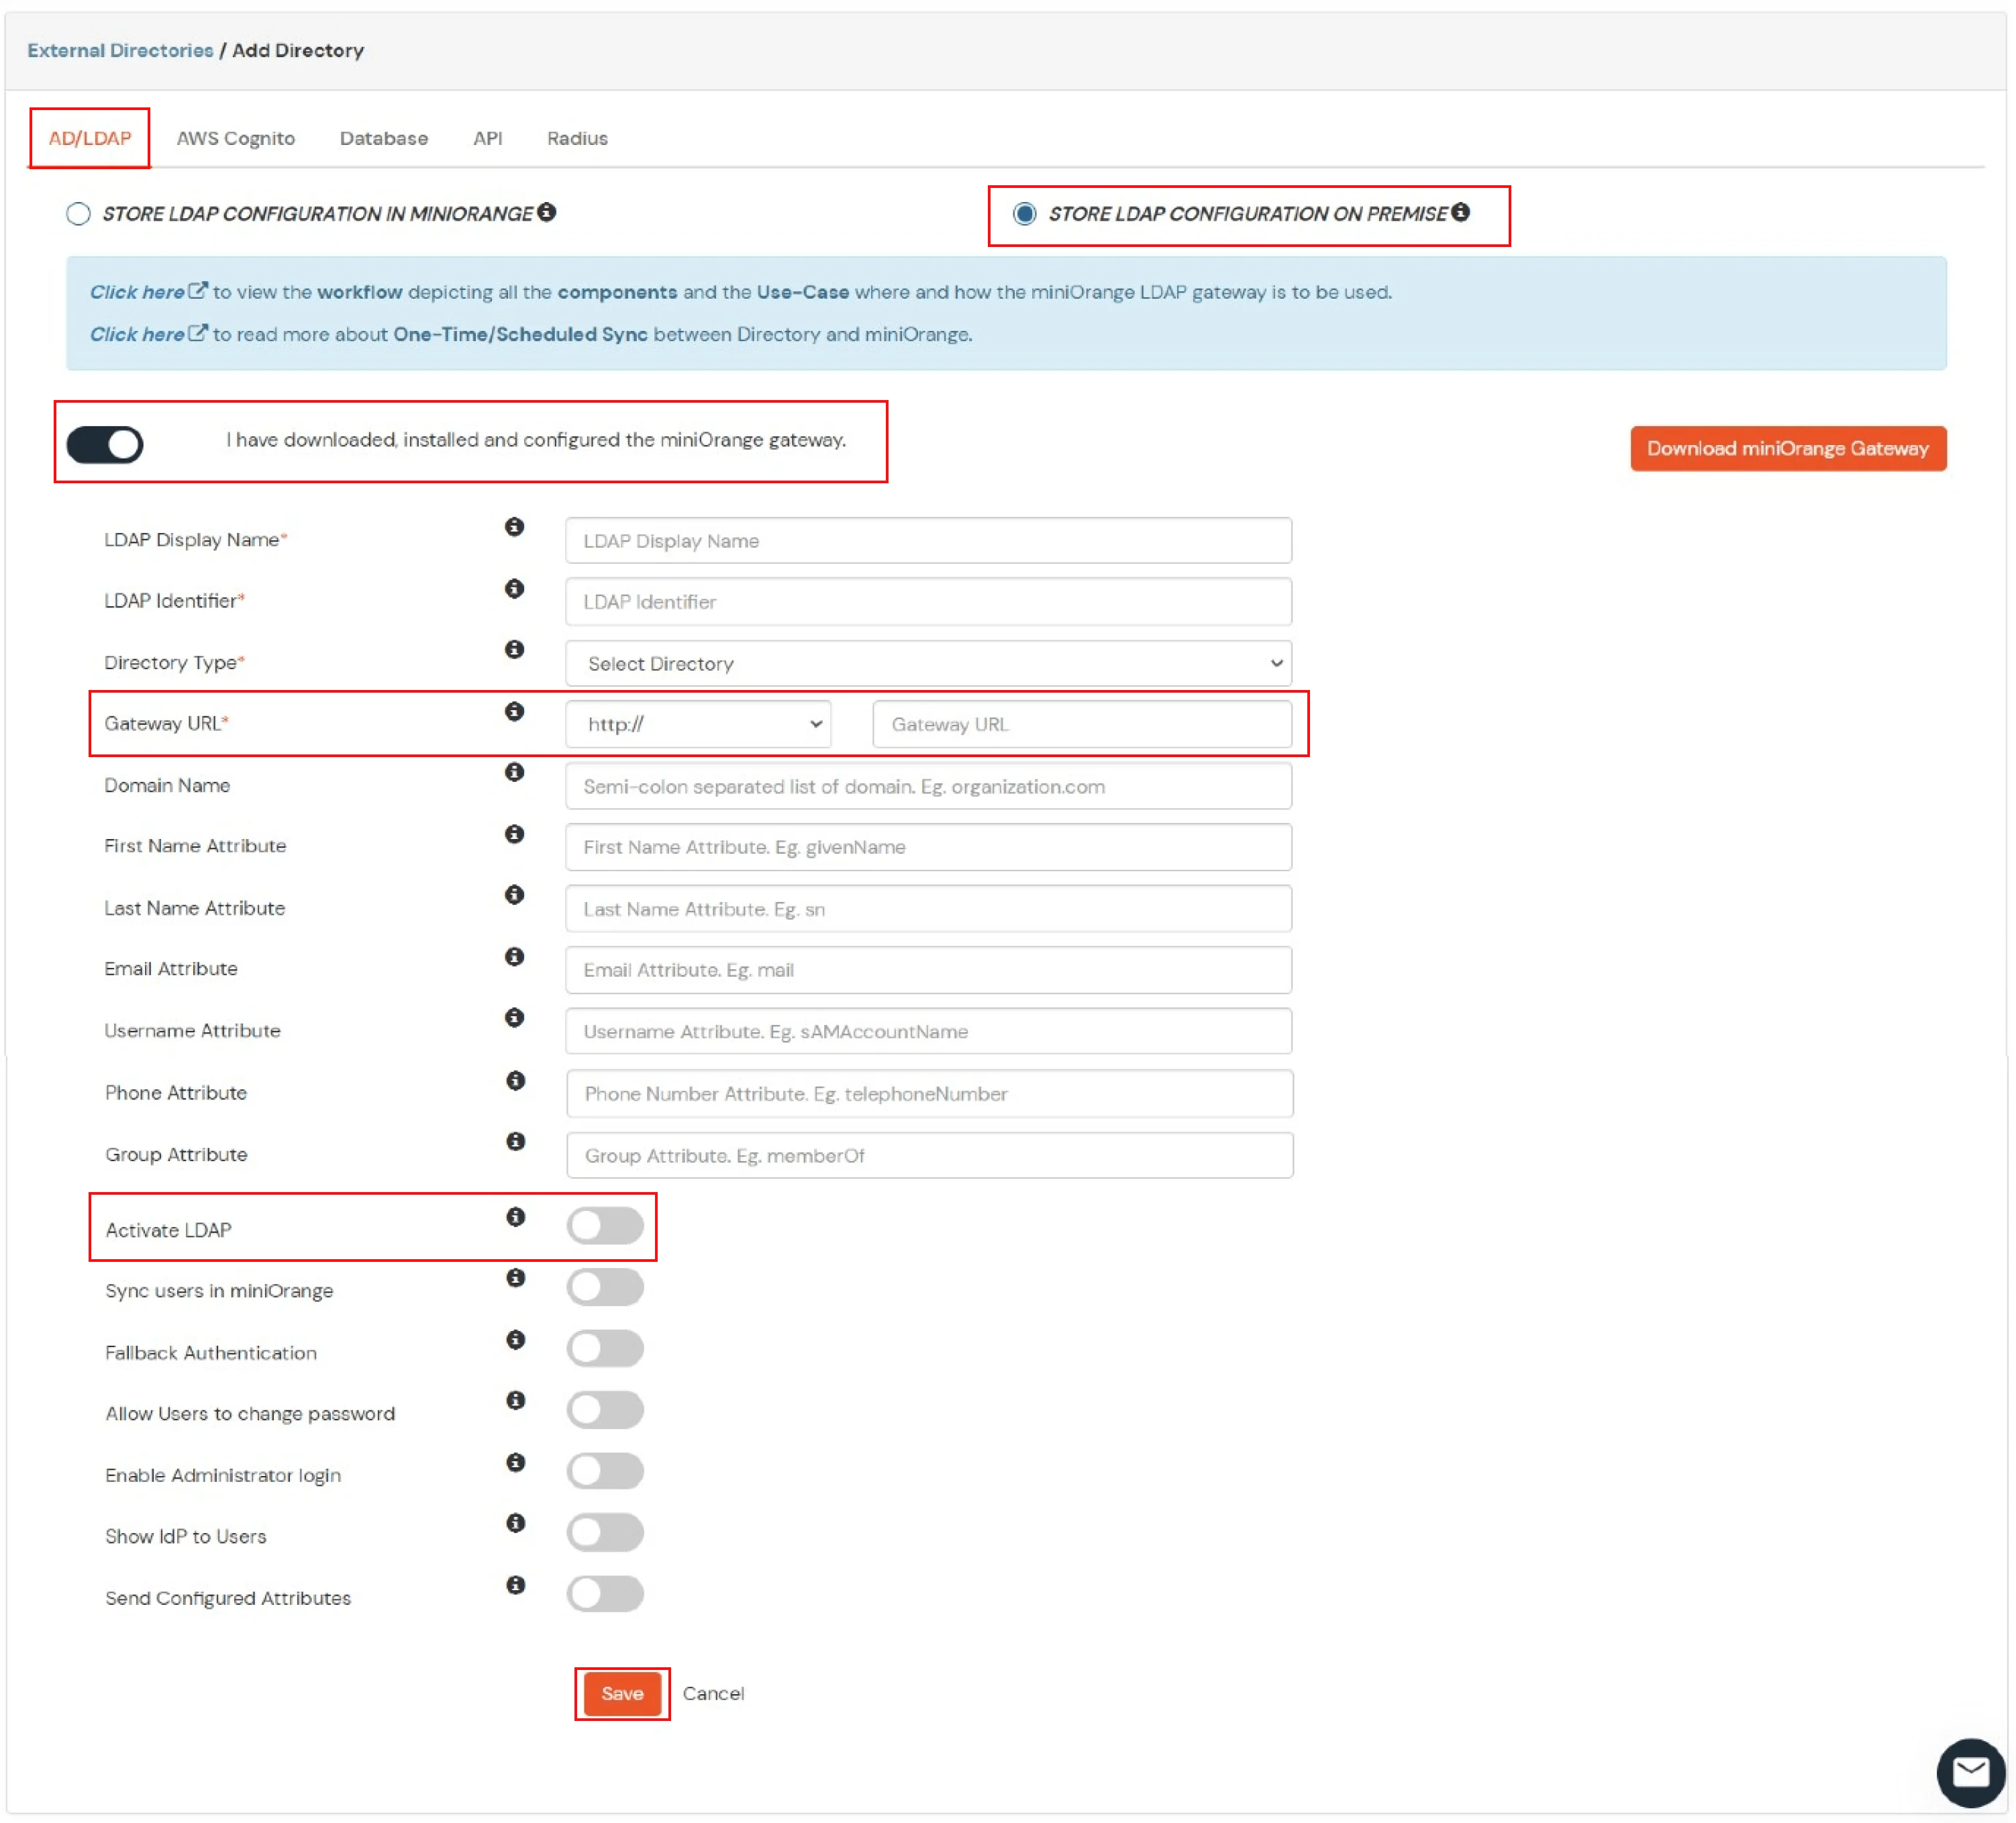
| Field | Description. |
|---|---|
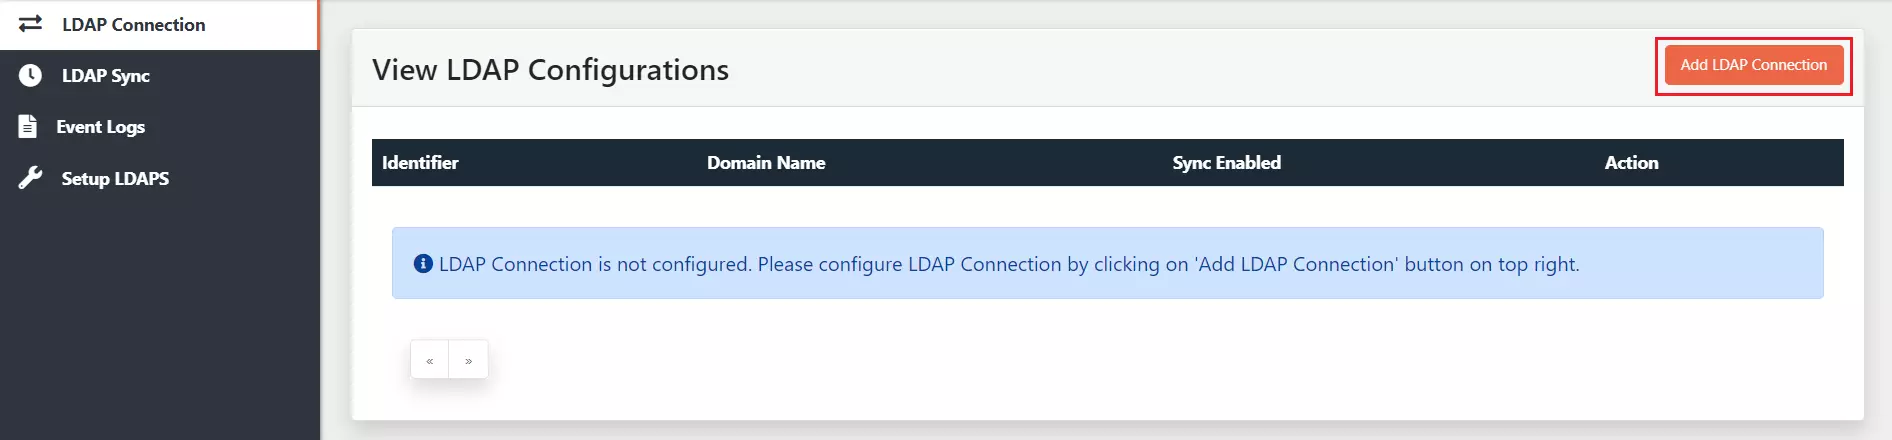
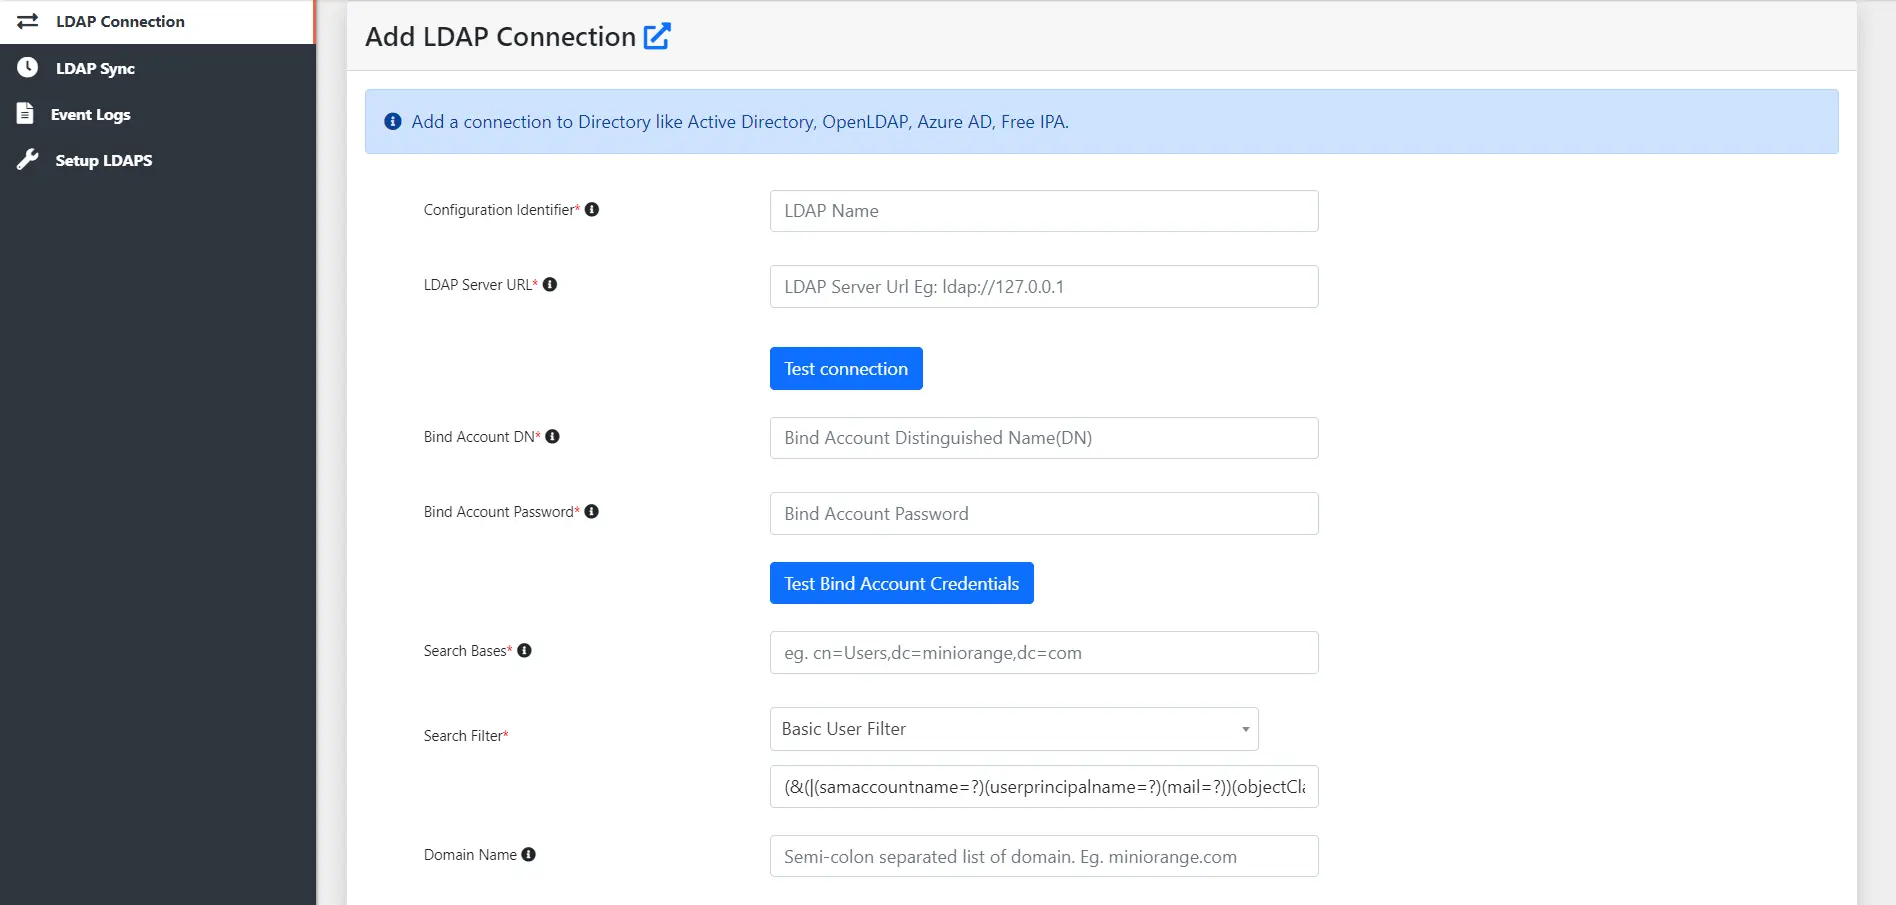
| Configuration Identifier | Any name that will specify this set of configuration. |
| LDAP Server URL | Specify the host name for the LDAP server eg: ldap://myldapserver.domain:389 |
| Bind Account DN | This will be used to establish the connection with LDAP Server. Specify it in the following ways: Username@domainname or Distinguished Name(DN) format |
| Bind Account Password | Password for the Bind Account in the LDAP Server |
| Search Bases | Provide distinguished name of the Search Base object eg:cn=User,dc=domain,dc=com |
| Search Filter | Search filters enable you to define search criteria and provide more efficient and effective searches. If you use User in Single Group Filter or User in Multiple Group Filter, replace the <group-dn> in the search filter with the distinguished name of the group in which your users are present. |
| Domain Name | Semi-colon separated list of domain. eg: miniorange.com |
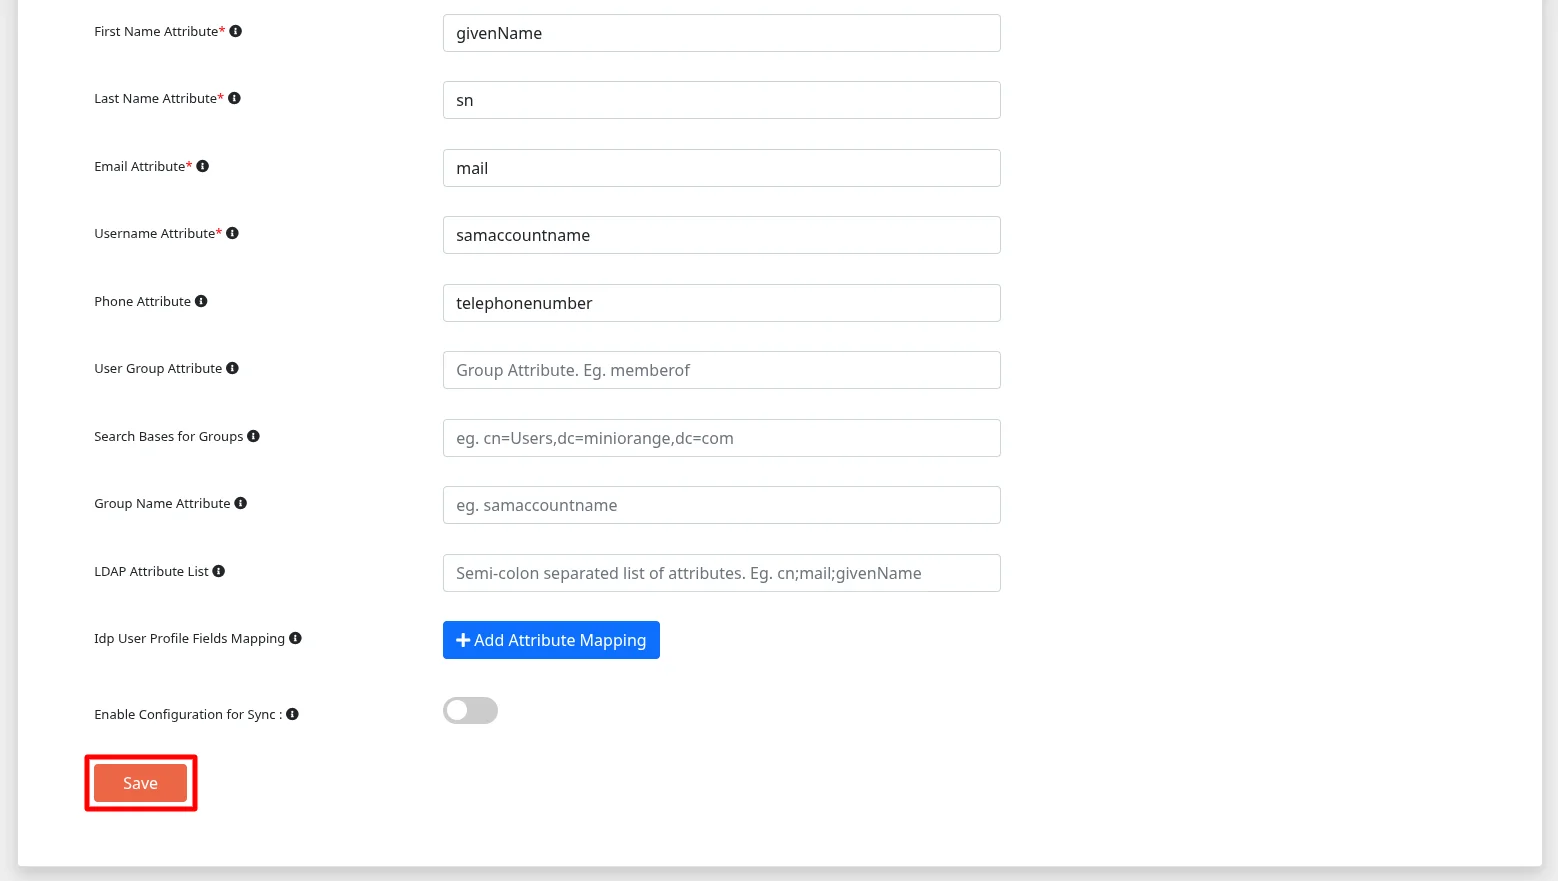
| First Name Attribute | LDAP attribute for the First Name. eg: givenName |
| Last Name Attribute | LDAP attribute for the Last Name. eg: sn |
| Email Attribute | LDAP attribute for the First Name. eg: mail |
| Username Attribute | LDAP attribute for the First Name. eg: sAMAccountName |
| Phone Attribute | LDAP attribute for the First Name. eg: telephoneNumber |
| User Group Attribute | LDAP attribute for the Group Name. eg: memberof |
| Search Bases for Groups | Provide distinguished name of the Search bases objects for your groups eg:cn=User,dc=domain,dc=com |
| Group Name Attribute | Attribute of a security group to create groups in miniOrange eg: samaccountname |
| LDAP Attribute List | Semi-colon separated list of attributes. eg: cn;mail;givenName |
| IdP User Profile Fields Mapping | Idp User Profile Fields which will be used during sync |
| Enable Configuration for Sync | This option Enables/Disables the enrollment of the current connection is Scheduler |
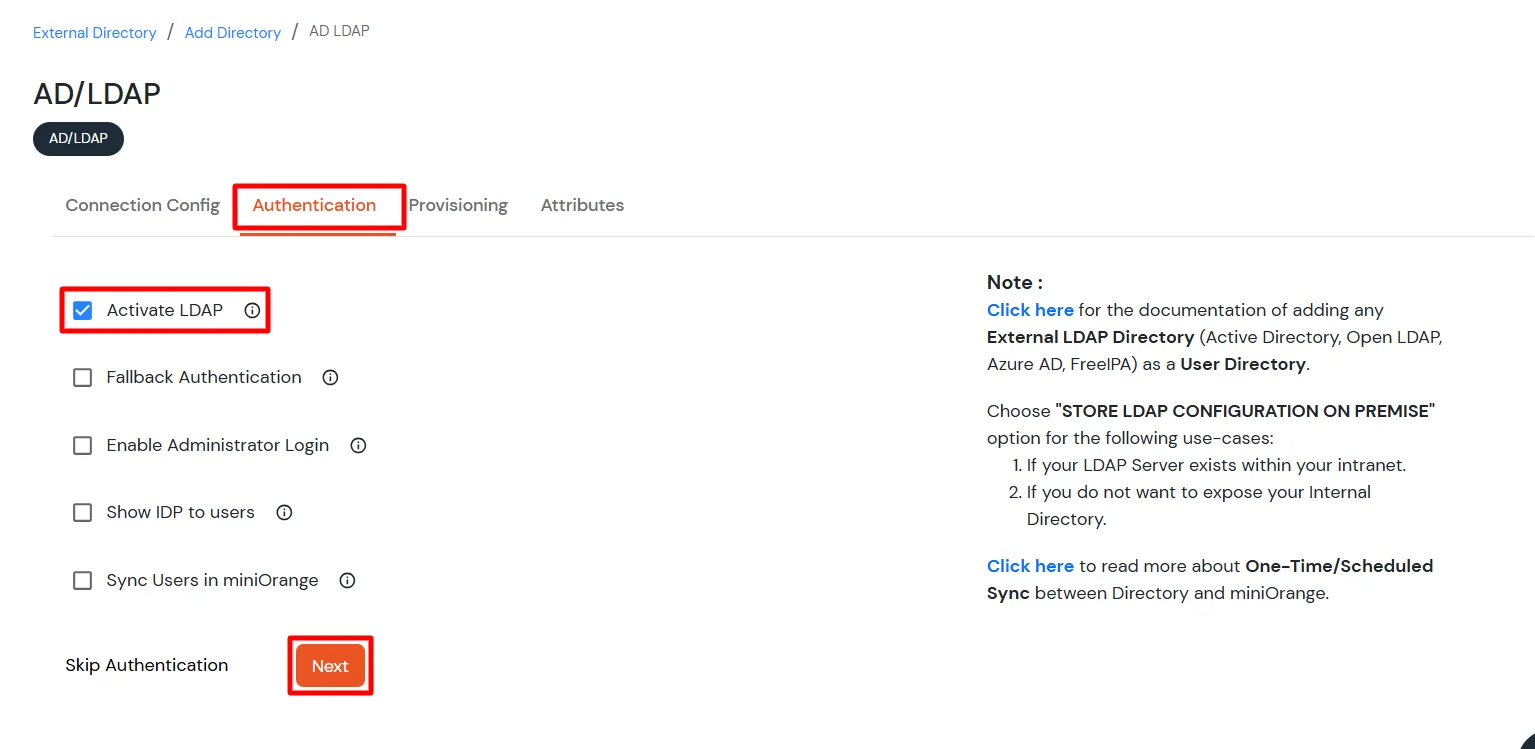
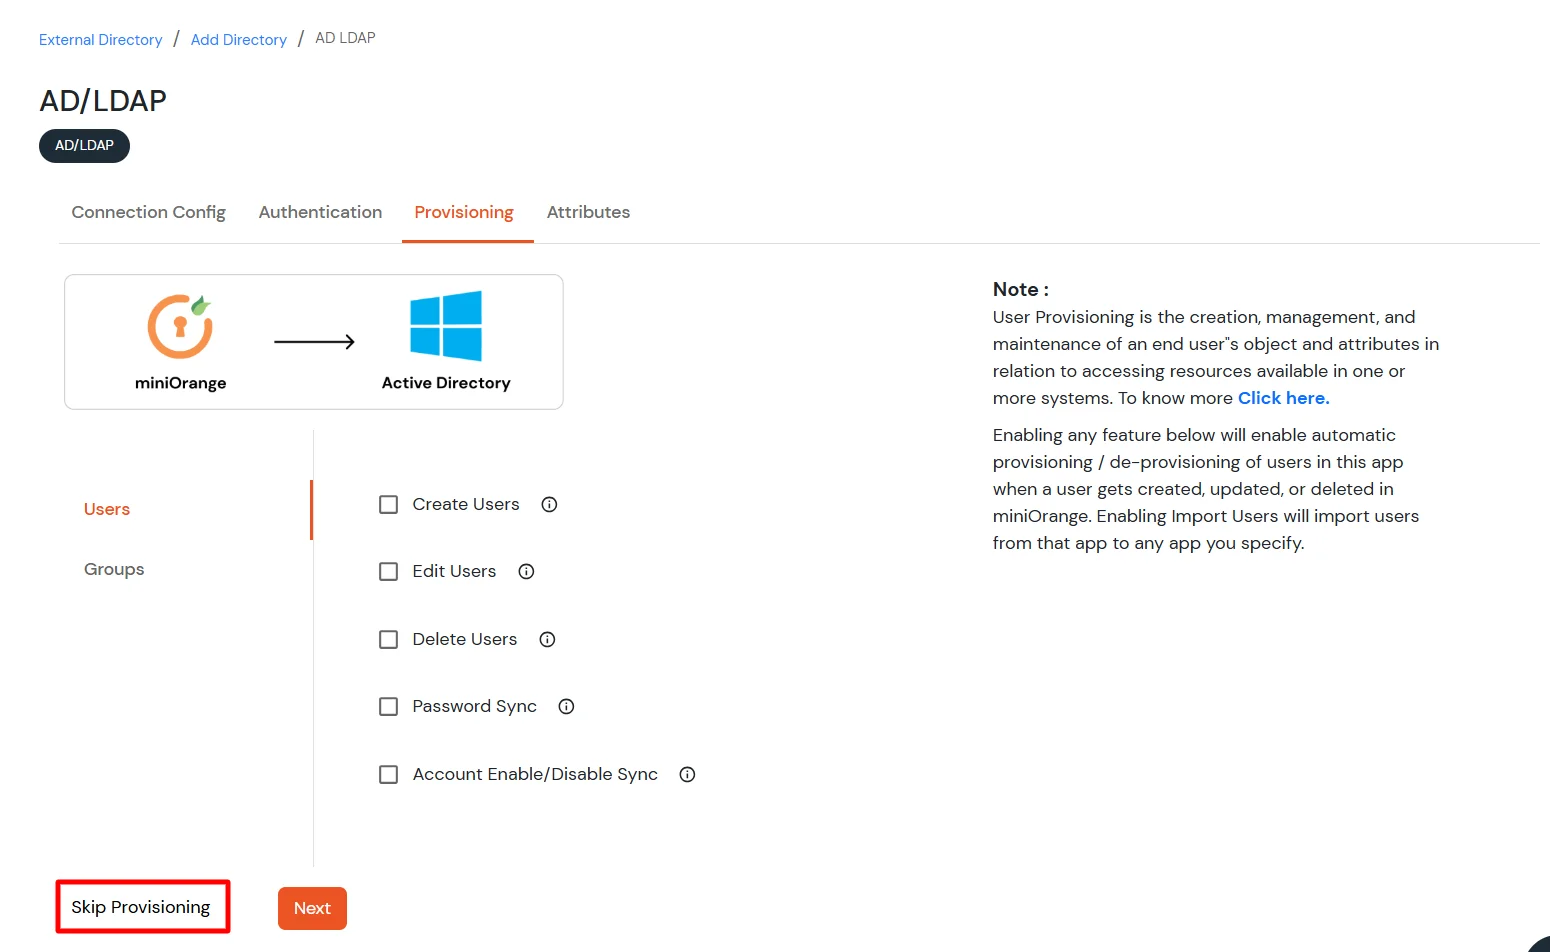
Here's the list of the attributes and what it does when we enable it. You can enable/disable accordingly.
| Attribute | Description |
|---|---|
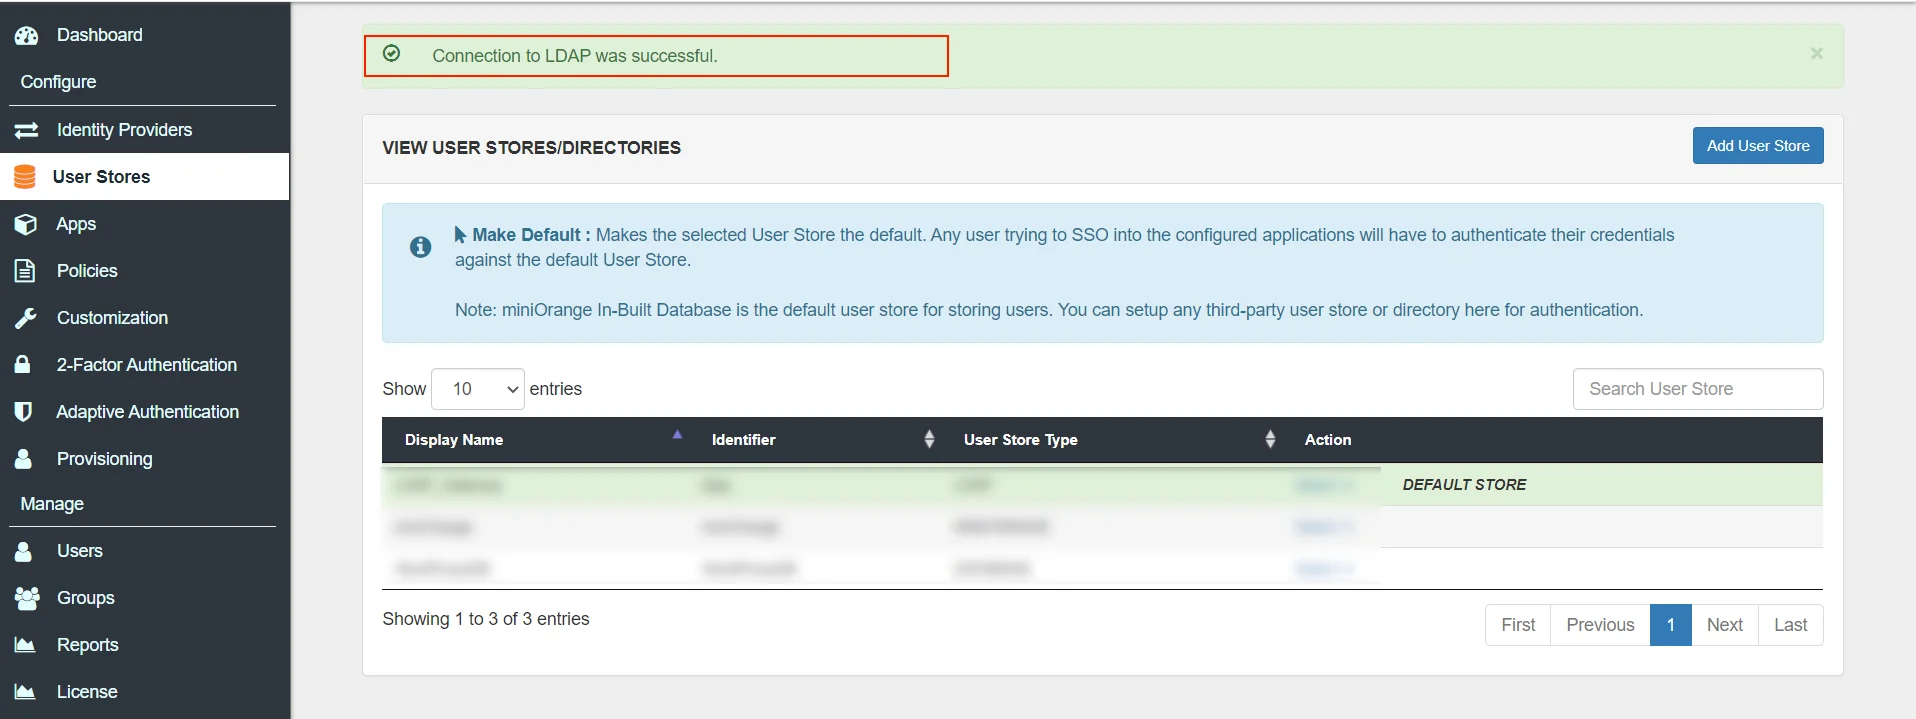
| Activate LDAP | All user authentications will be done with LDAP credentials if you Activate it |
| Fallback Authentication | If LDAP credentials fail then user will be authenticated through miniOrange |
| Enable administrator login | On enabling this, your miniOrange Administrator login authenticates using your LDAP server |
| Show IdP to users | If you enable this option, this IdP will be visible to users |
| Sync users in miniOrange | Users will be created in miniOrange after authentication with LDAP |
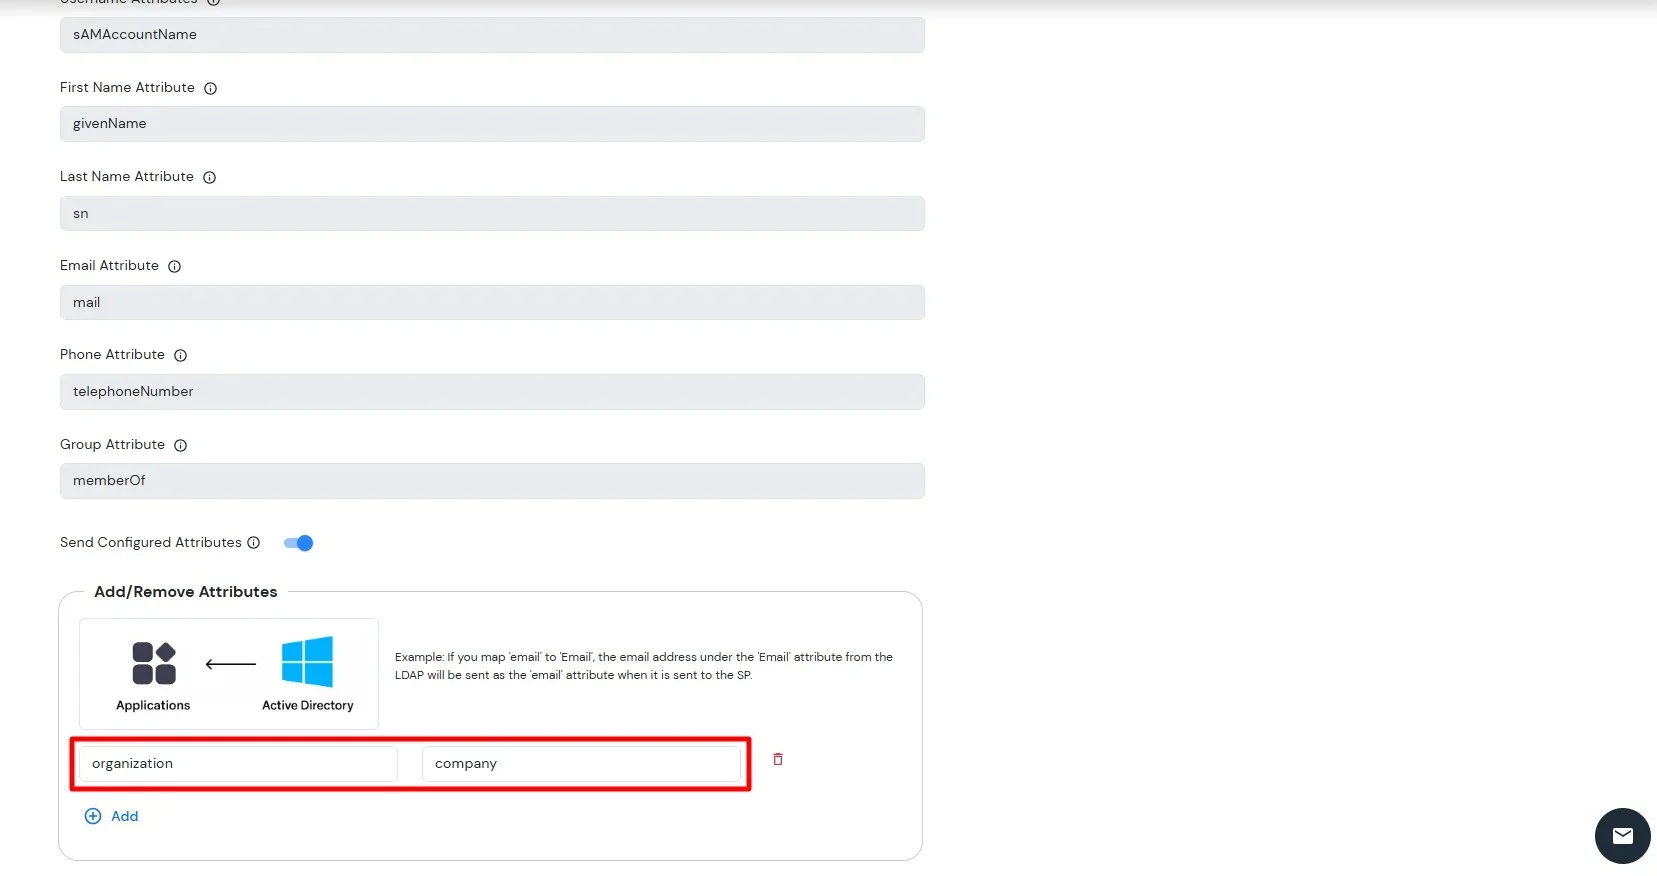
Attribute Name sent to SP = organization
Attribute Name from IDP = company
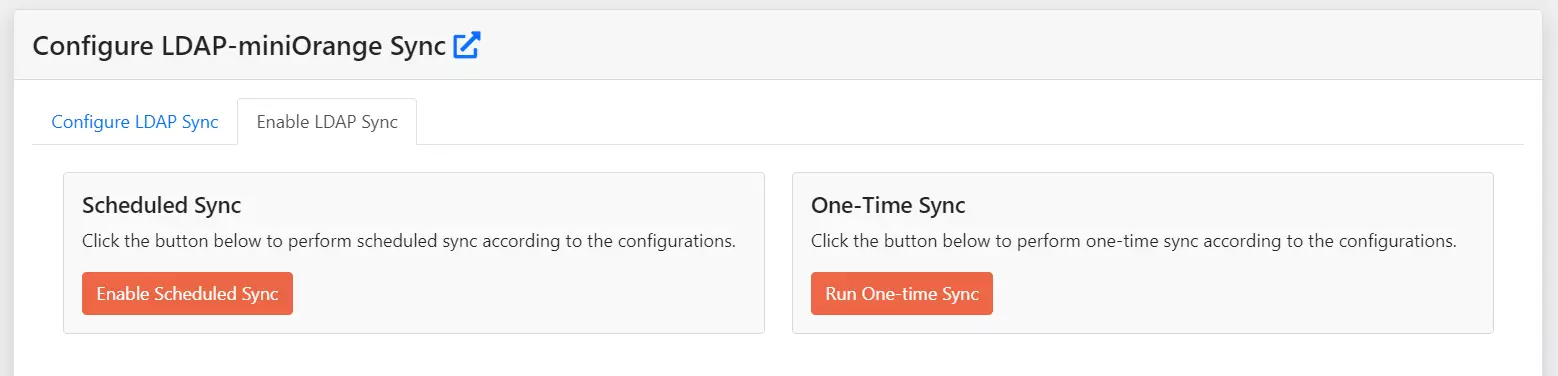
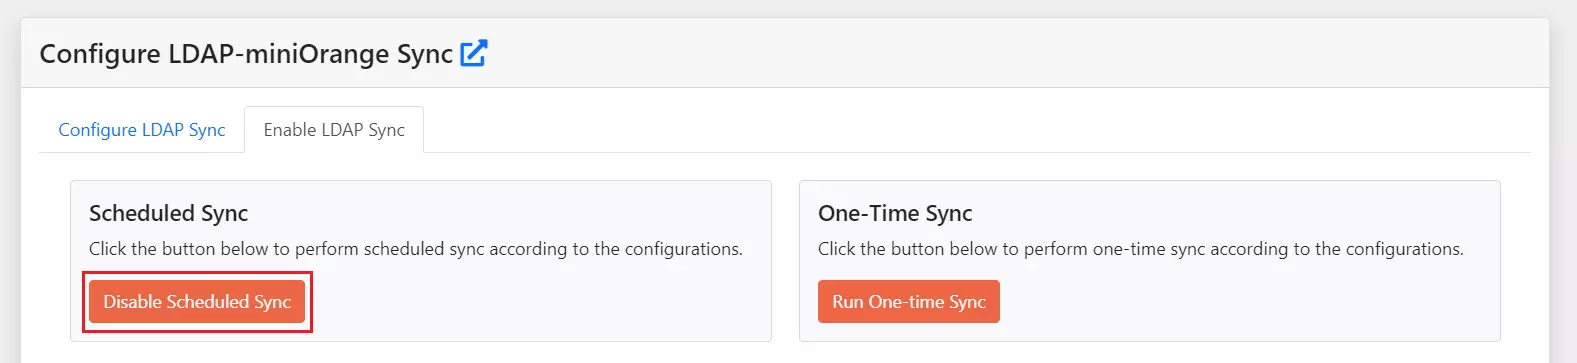
NOTE: This step is optional. Follow the below steps if you want to setup user sync between your Directory and the miniOrange Cloud service via LDAP Gateway. We support both, scheduled sync as well as One Time Sync.
Eg. If the server time is 13:00 then anytime before 13:00 should initiate immediate sync.
| Field | Description. |
|---|---|
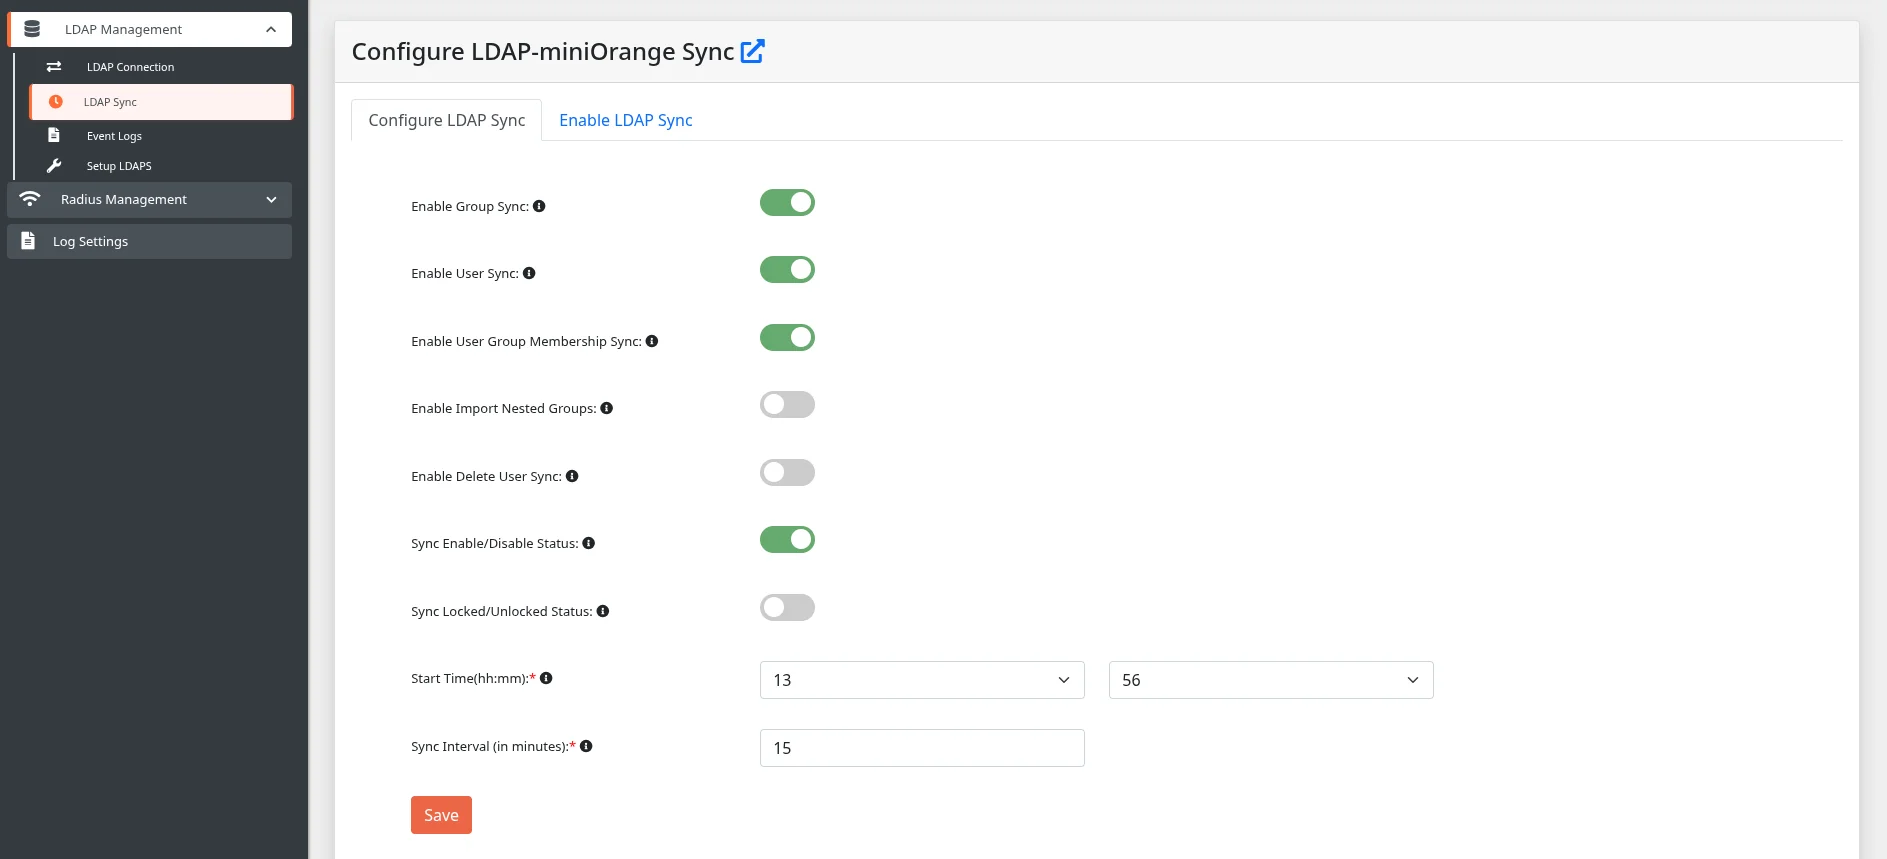
| Enable Group Sync | Enable/Disable group sync. |
| Enable User Sync | Enable/Disable user sync |
| Enable User Group Membership Sync | Enable/Disable user group membership sync |
| Enable Delete User Sync | Enable/Disable to delete user sync. |
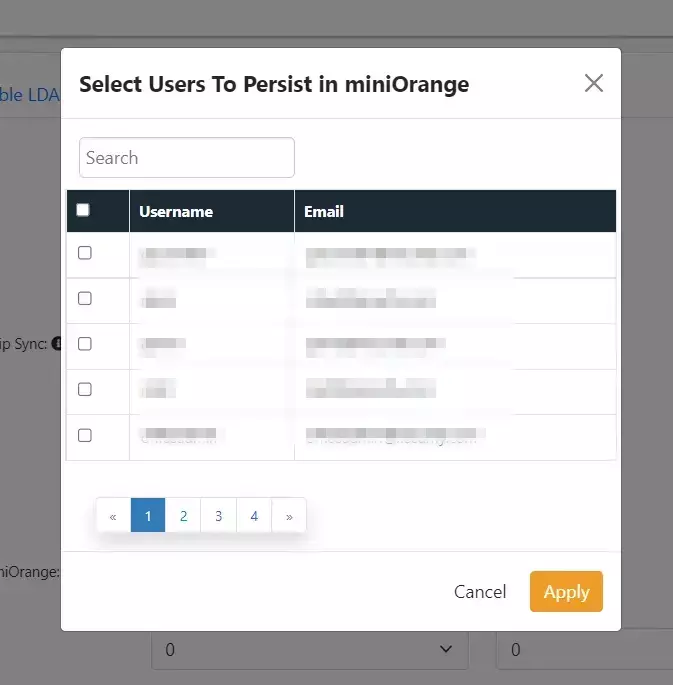
| Configure Exclusion List | Click on Select Users to select Users who are excluded from being deleted. |
| Mark User as Registered in miniOrange | Enable/Disable marking user as registered in miniOrange. |
| Start Time(hh:mm) | Start time for the schedule sync eg: 01 in hours and 01 in minutes. |
| Sync Interval (in hrs) | Time Interval between periodic sync. |
NOTE: Make sure that the Tomcat is running with the Admin Privileges.
changeit (Password of your Java TrustStore).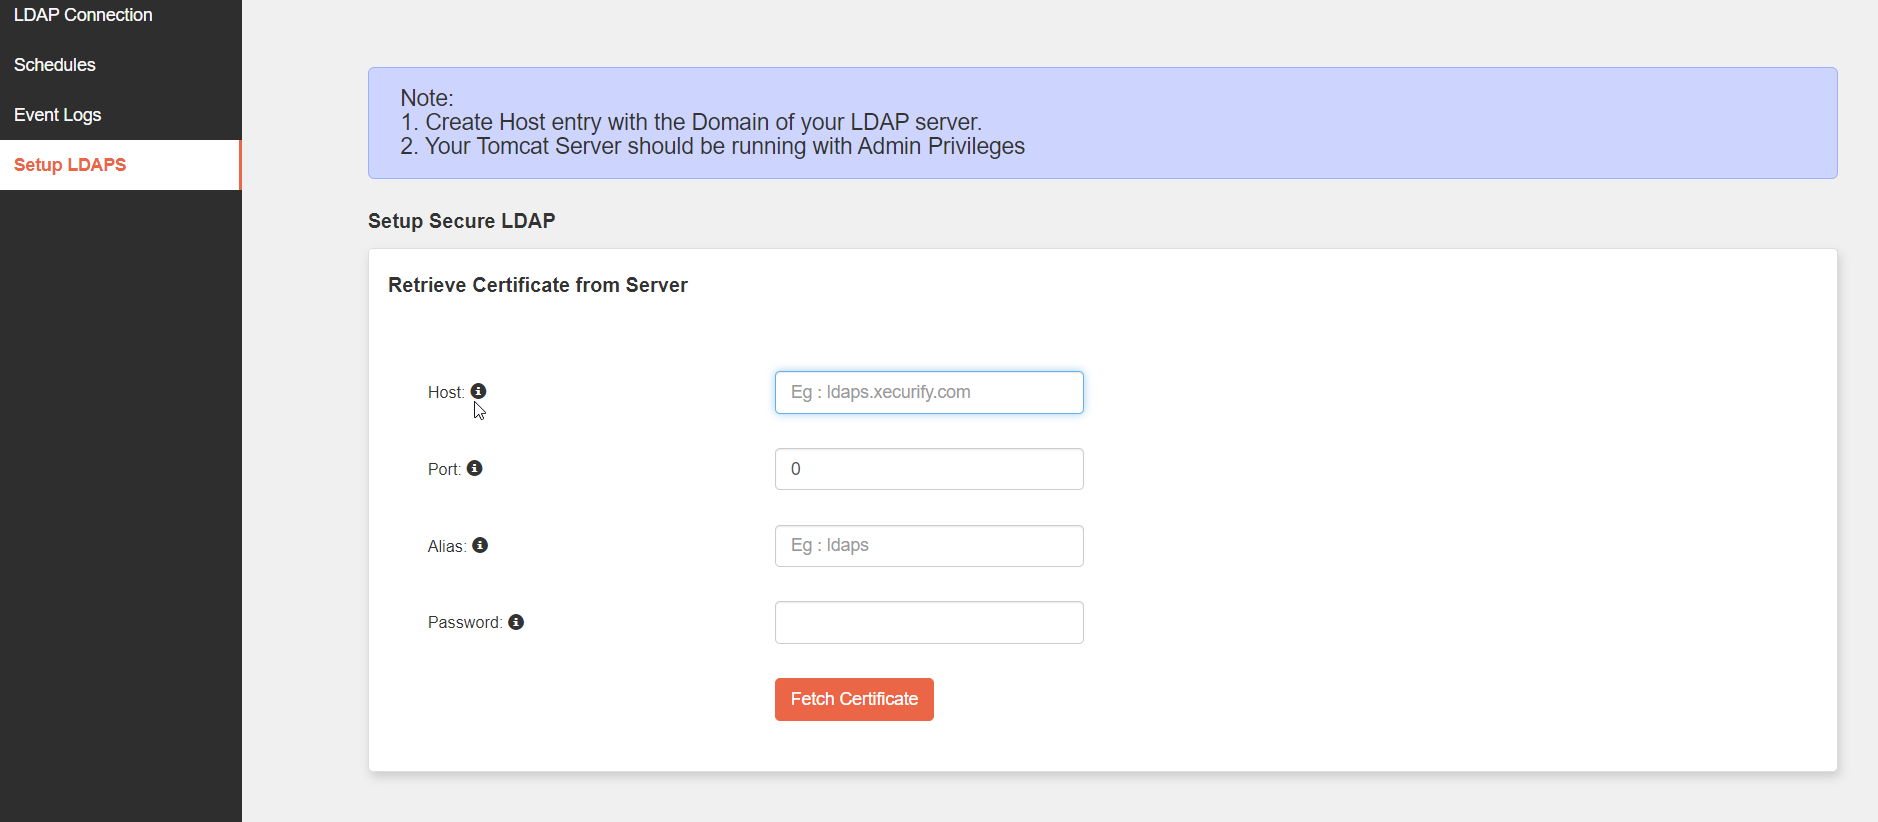
sudo vi /etc/systemd/system/tomcat.service
# Systemd unit file for tomcat
    [Unit]
    Description=Apache Tomcat Web Application Container
    After=syslog.target network.target

    [Service]
    Type=forking

    Environment=JAVA_HOME= <Location of your JRE> eg: /usr/lib/jvm/jre
    Environment=CATALINA_PID=<Location of your PID file> eg:/opt/miniorangegateway-1.x.x/temp/tomcat.pid
    Environment=CATALINA_HOME=<Location of your miniOrange Tomcat Directory> eg: /opt/miniorangegateway-1.x.x
    Environment=CATALINA_BASE=<Location of your miniOrange Tomcat Directory> eg: /opt/miniorangegateway-1.x.x
    Environment='CATALINA_OPTS=-Xms512M -Xmx1024M -server -XX:+UseParallelGC'
    Environment='JAVA_OPTS=-Djava.awt.headless=true -Djava.security.egd=file:/dev/./urandom'

    ExecStart=/opt/tomcat/bin/startup.sh
    ExecStop=/bin/kill -15 $MAINPID

    User=tomcat
    Group=tomcat
    UMask=0007
    RestartSec=10
    Restart=always

    [Install]
    WantedBy=multi-user.target
sudo systemctl daemon-reloadsudo systemctl start tomcatsudo systemctl status tomcatsudo systemctl enable tomcat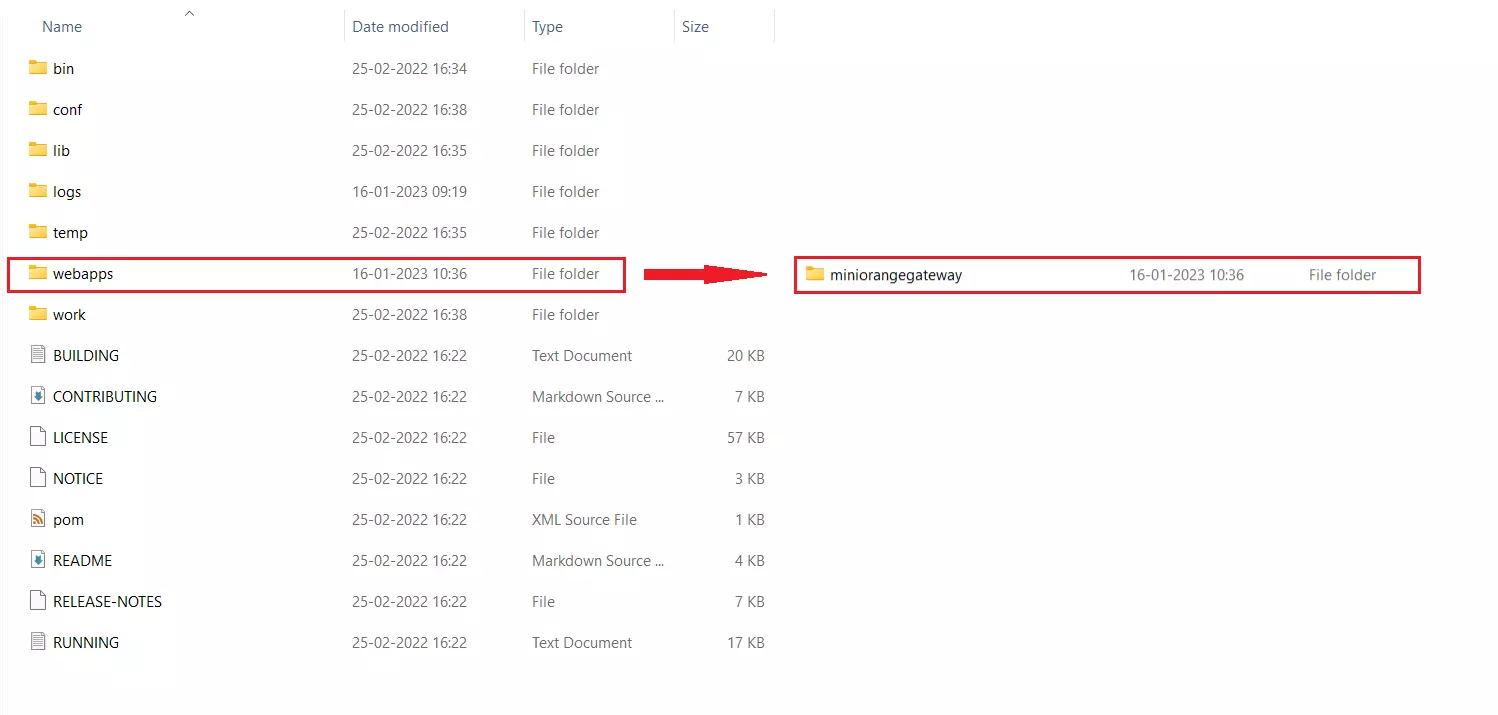
Yes. The application requires Java 17 or any version higher than Java 17. Earlier versions are not supported.
Yes. The application strictly requires Tomcat 11 or above for proper deployment and functionality.
If the DELETE SYNC process is taking more time, update the following property in the application.properties file:
Path:/apache-tomcat-11/webapps/miniorangegateway/WEB-INF/classes/application.properties
Property to update:wait.after.delete.req=180
Increase the value from 180 seconds to 240 or 300 seconds, depending on your requirement.
By default, the Gateway sends user updates to miniOrange only when an AD attribute configured in the Gateway changes.
If you want to force a full update (send all users to miniOrange even if they haven't been updated), modify this property in application.properties:
Default:send.force.updates=false
To force-update all users, change it to:send.force.updates=true
If Enable Group Sync is disabled, but Enable User Sync and Enable User Group Membership Sync are enabled, the Gateway will remove (de-assign) all groups assigned to the user in miniOrange.
If you do not want any user groups in miniOrange to be updated, then you must turn off "Enable User Group Membership Sync" as well.