Hello there!
Need Help? We are right here!
Need Help? We are right here!
Search Results:
×Login to BigCommerce Store or any other cloud apps using SSO Login with BigCommerce existing credentials. This means your BigCommerce account can be used as an Identity Provider (IdP) for your existing stores or any other external applications. This eliminated the need to log in separately for each app or store.
A One in all solution for - Centralized Management & Storage of customer data, Store to Store sync, Order status notification, Social login —> for your BigCommerce Store.
Verified Technology Partner of BigCommerce
SSO + MFA Support for any BigCommerce Plan (Standard, Plus, Pro, Enterprise)
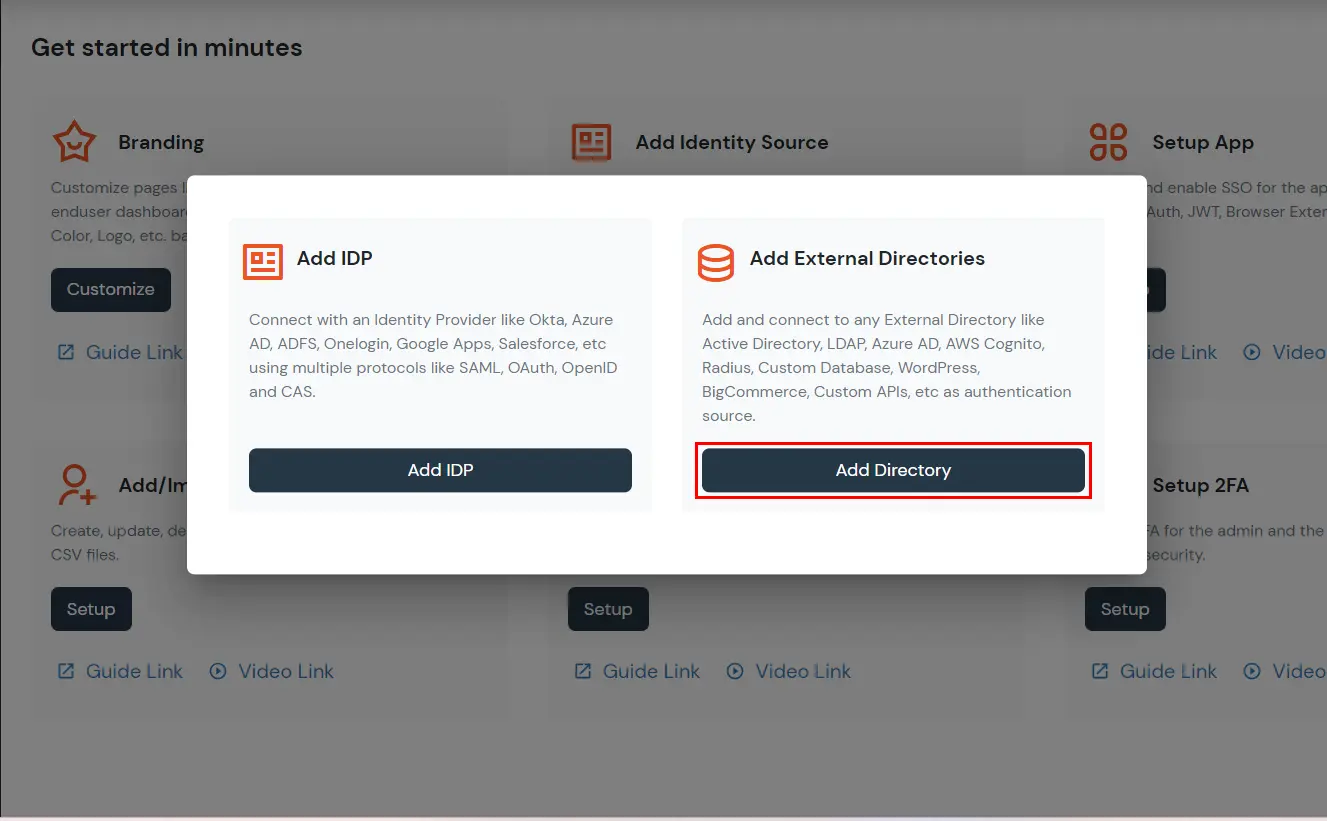
miniOrange provides user authentication from various external sources, which can be Directories (like ADFS, Microsoft Active Directory, OpenLDAP, AWS etc), Identity Providers (like Microsoft Entra ID, Okta, AWS), and many more. You can configure your existing directory/user store or add users in miniOrange.
Please make sure your organisation branding is already set under Customization >> Login and Registration Branding in the left menu of the dashboard.
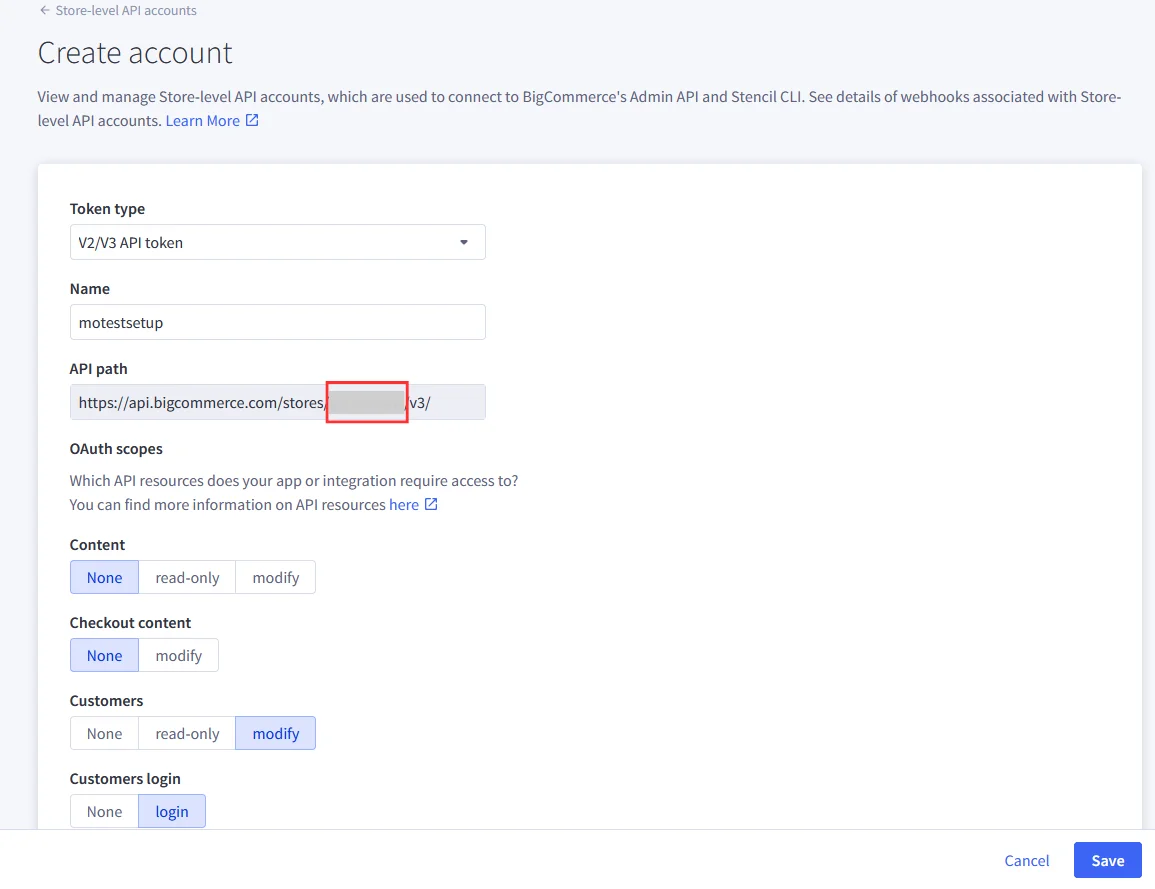

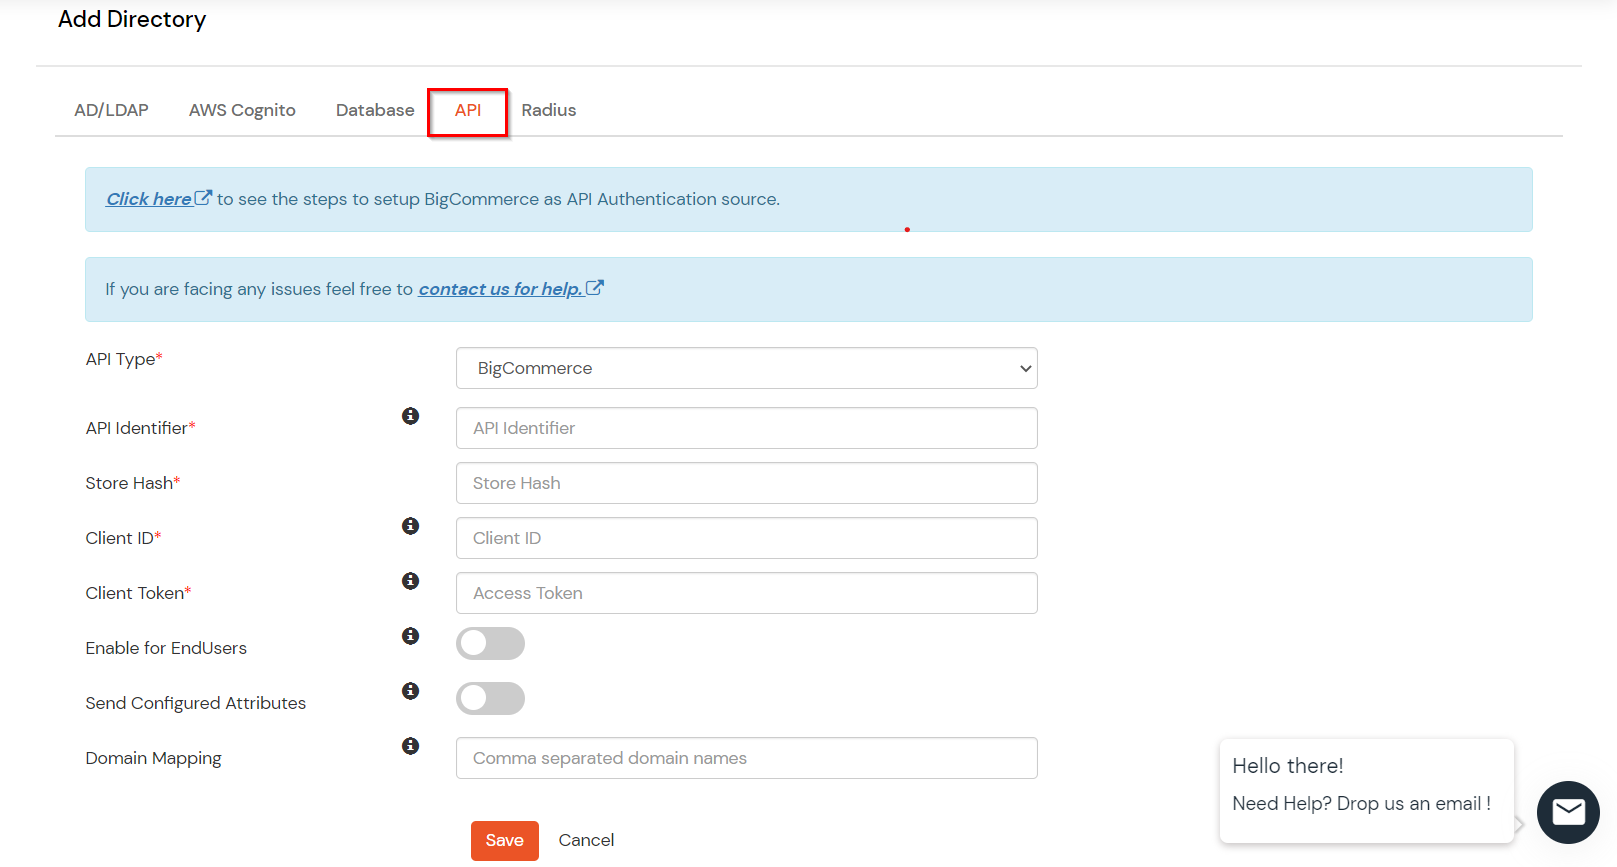
| API Identifier | Any custom name e.g. BigCommerceIDP |
| Store Hash | Store hash value found in Create API Account step |
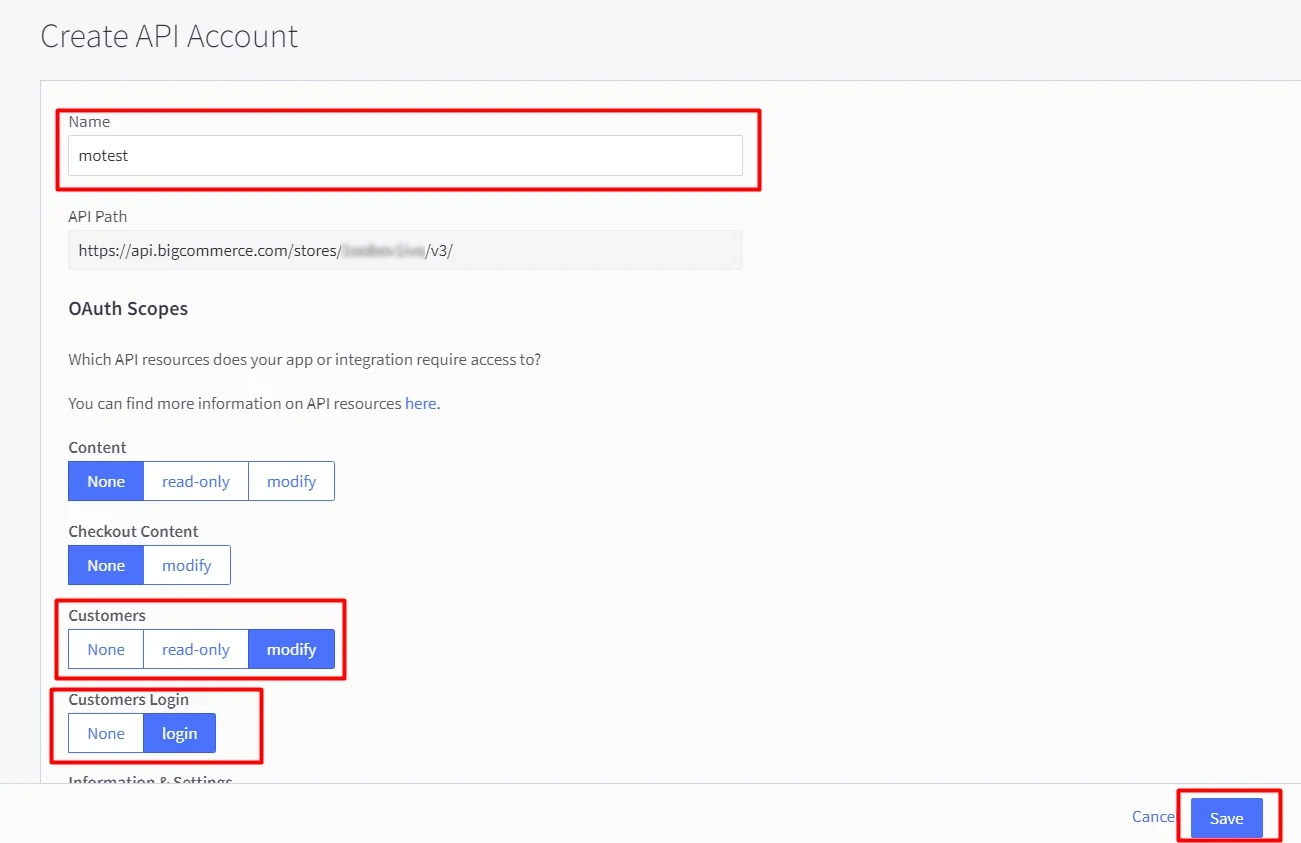
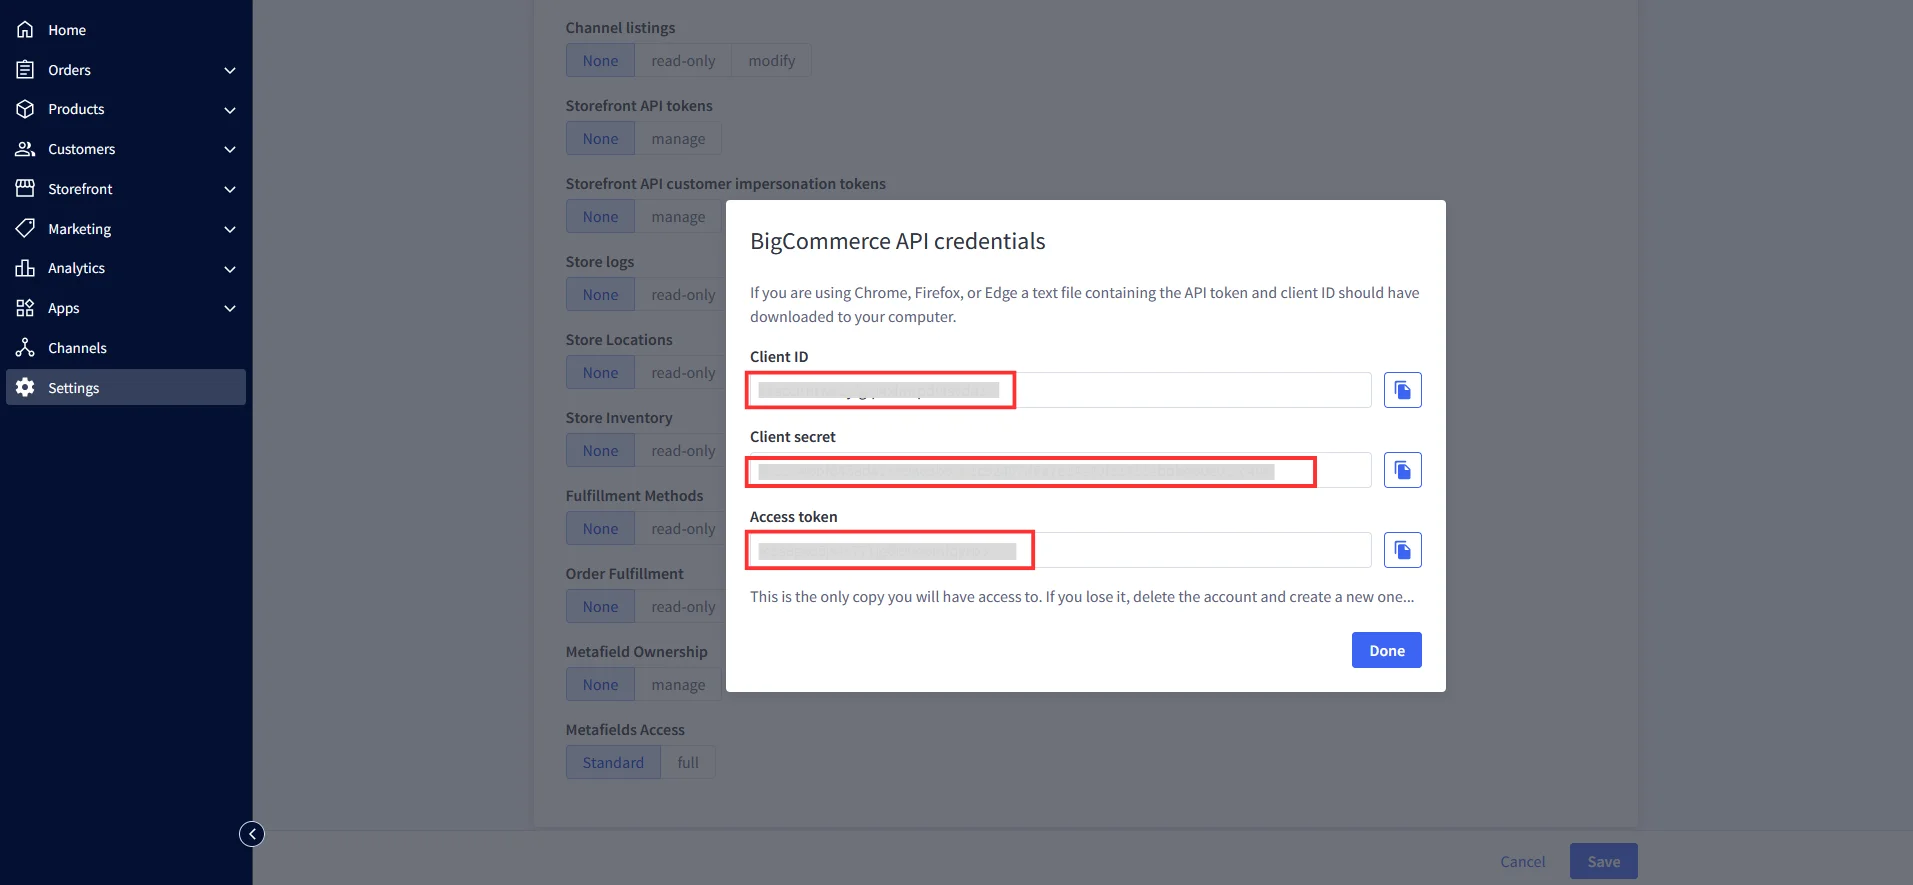
| Client ID | Client ID value found in Create API Account step |
| Access Token | Access token found in Create API Account Step |
| Enable for End USer Login | Enable this option only if you want users to log in to miniOrange dashboard using their BigCommerce credentials. This can be helpful in changing 2fa configurations, etc. |
| Migrate User's Password in miniOrange | Enable this option if you want to migrate user credentials from BigCommerce to miniOrange gradually |
| Send Configured Attributes | Enable this if you want to send any attributes from BigCommerce as SSO response to any third party application |
| Domain Mapping | Enable this option If you want users with a specific email domain to be able to authenticate against BigCommerce |
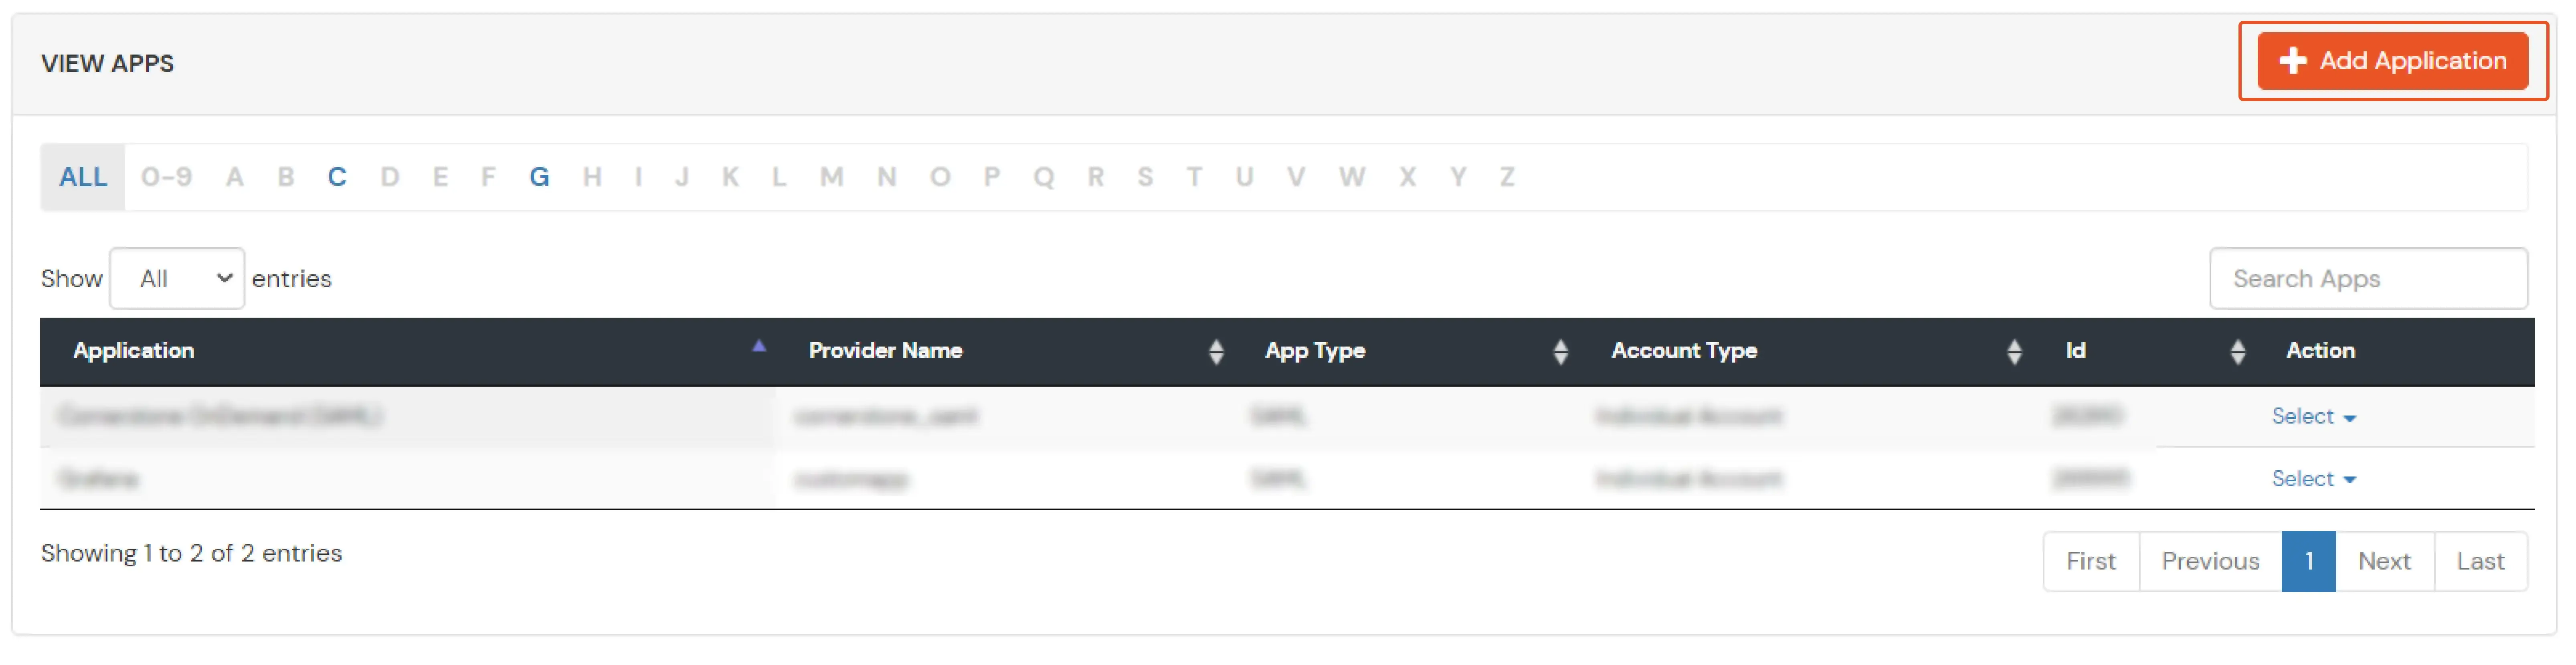
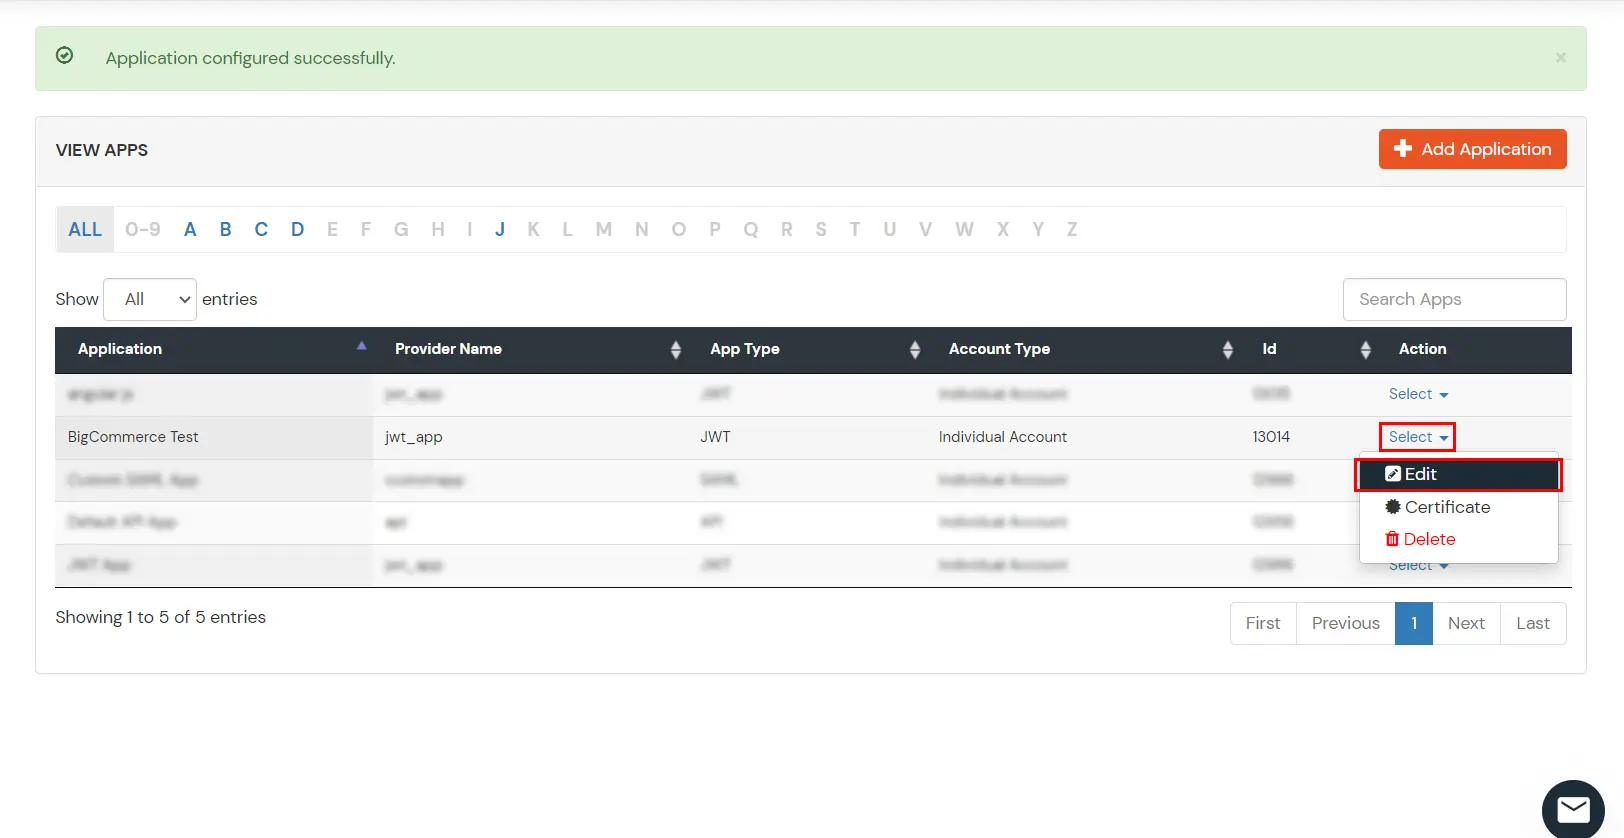
If you have already configured your application in miniOrange you can skip the following steps.
BigCommerce (According to your choice)According to your choice Storefront URL, e.g. https://{{my-store}}.mybigcommerce.com/login/token/ https://{{my-store}}.mybigcommerce.com Enable if you want user to authenticate even if the user has a session The identity source against which user will be authenticated Enable if you are sending the logged-in user from this app in the response 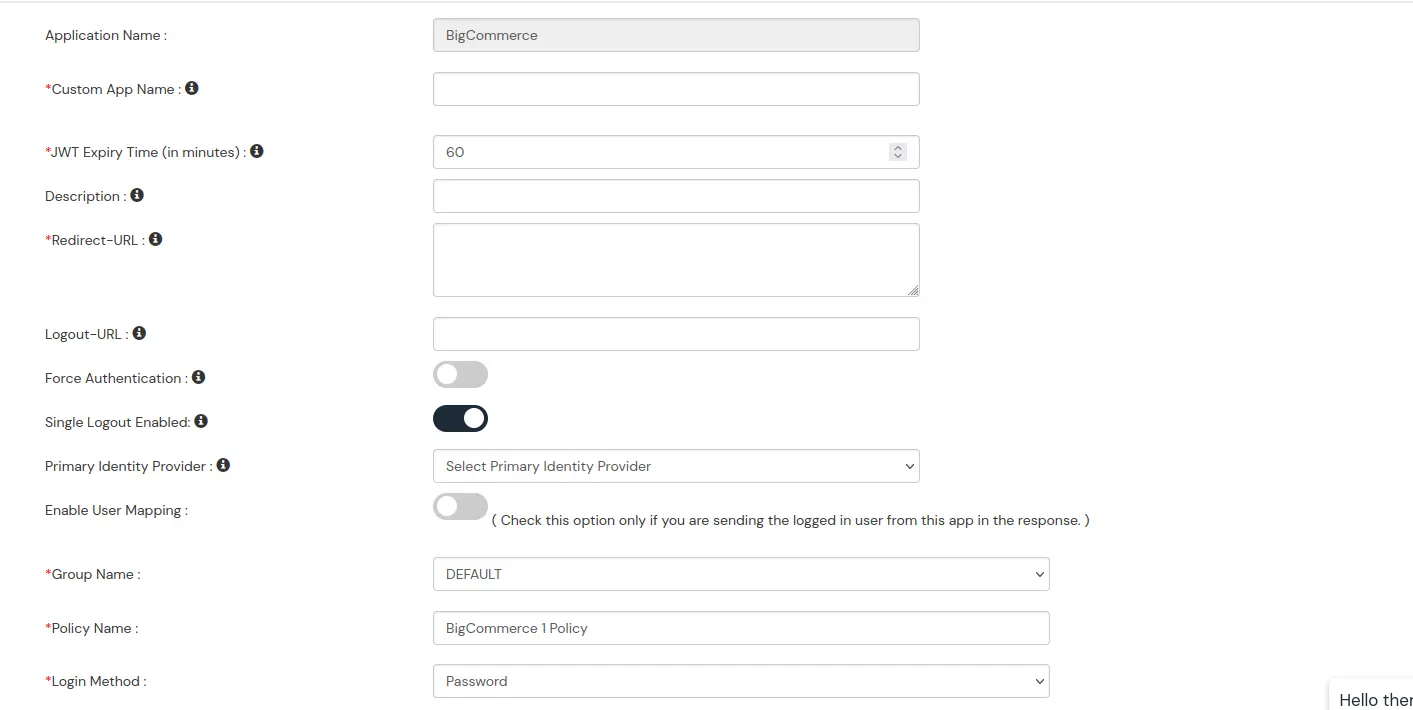
DefaultAdd policy name according to your Preference Password 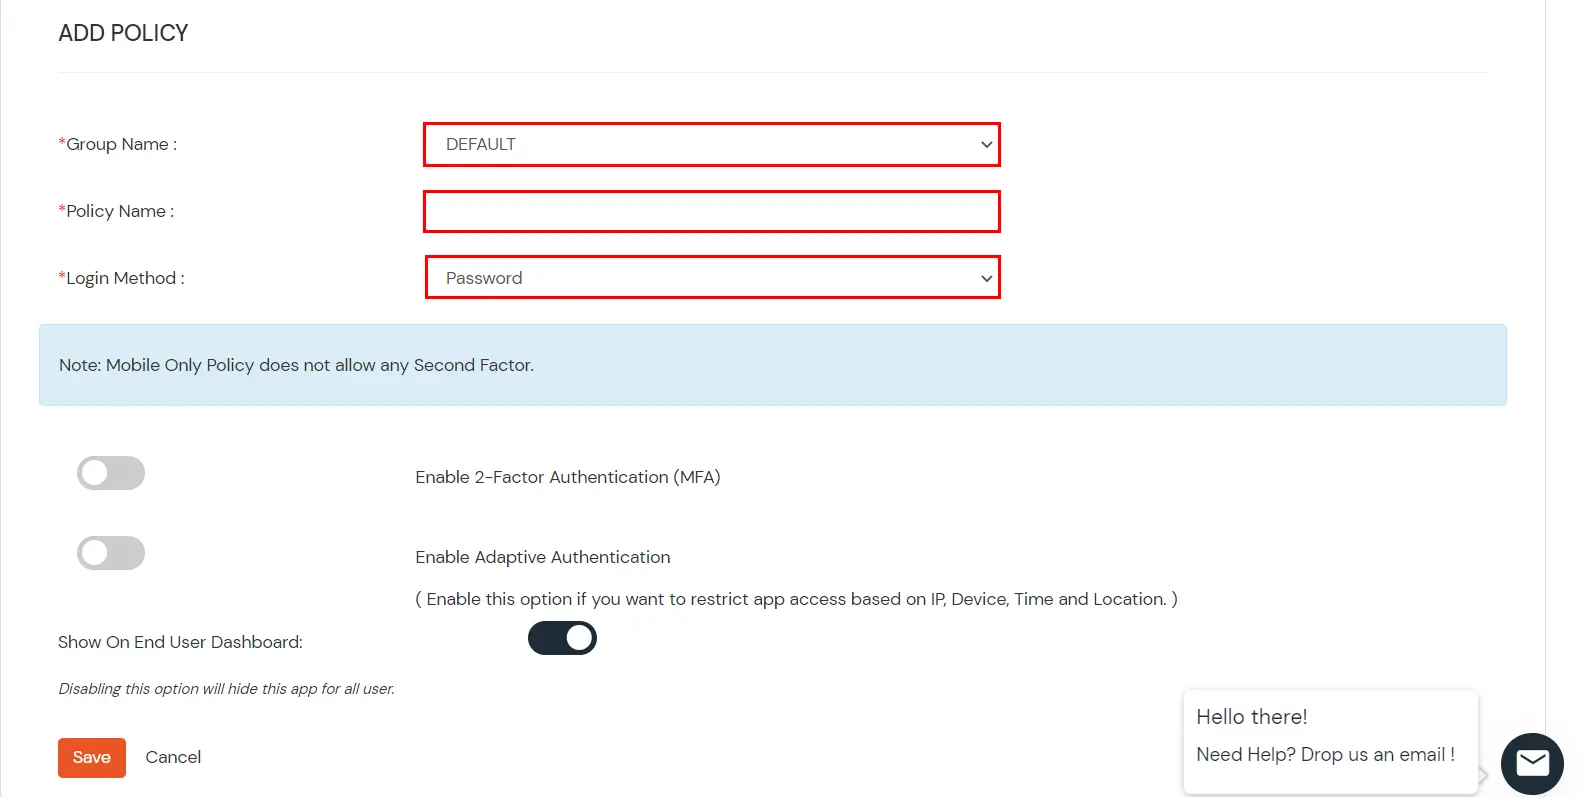
| Attribute Name | Attribute Value |
|---|---|
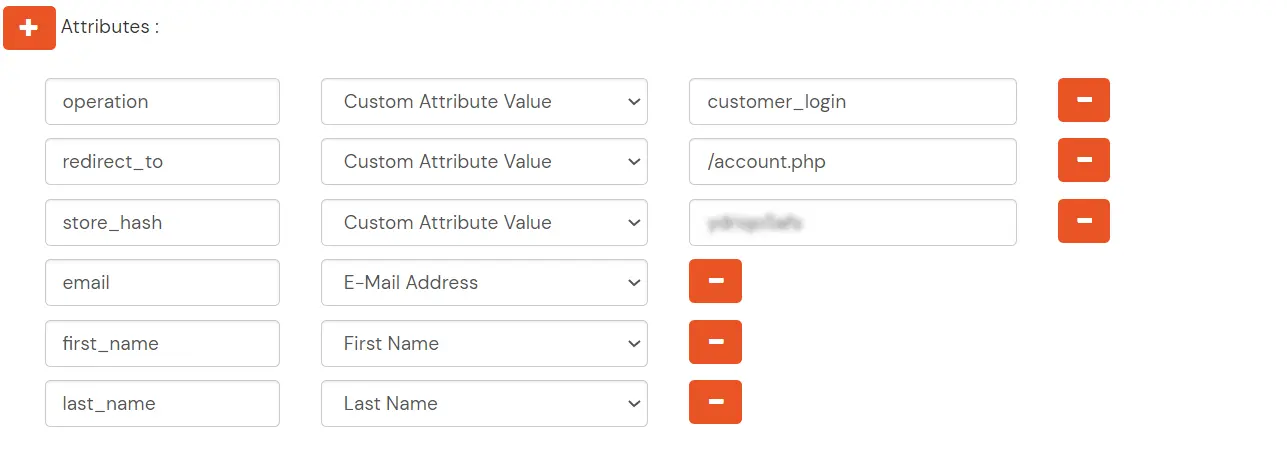
| store_hash | You got in this step. |
| redirect_to | Endpoint where you wish to redirect the user to after sso. [Homepage or account page e.g. /account.php] |
| operation | customer_login |

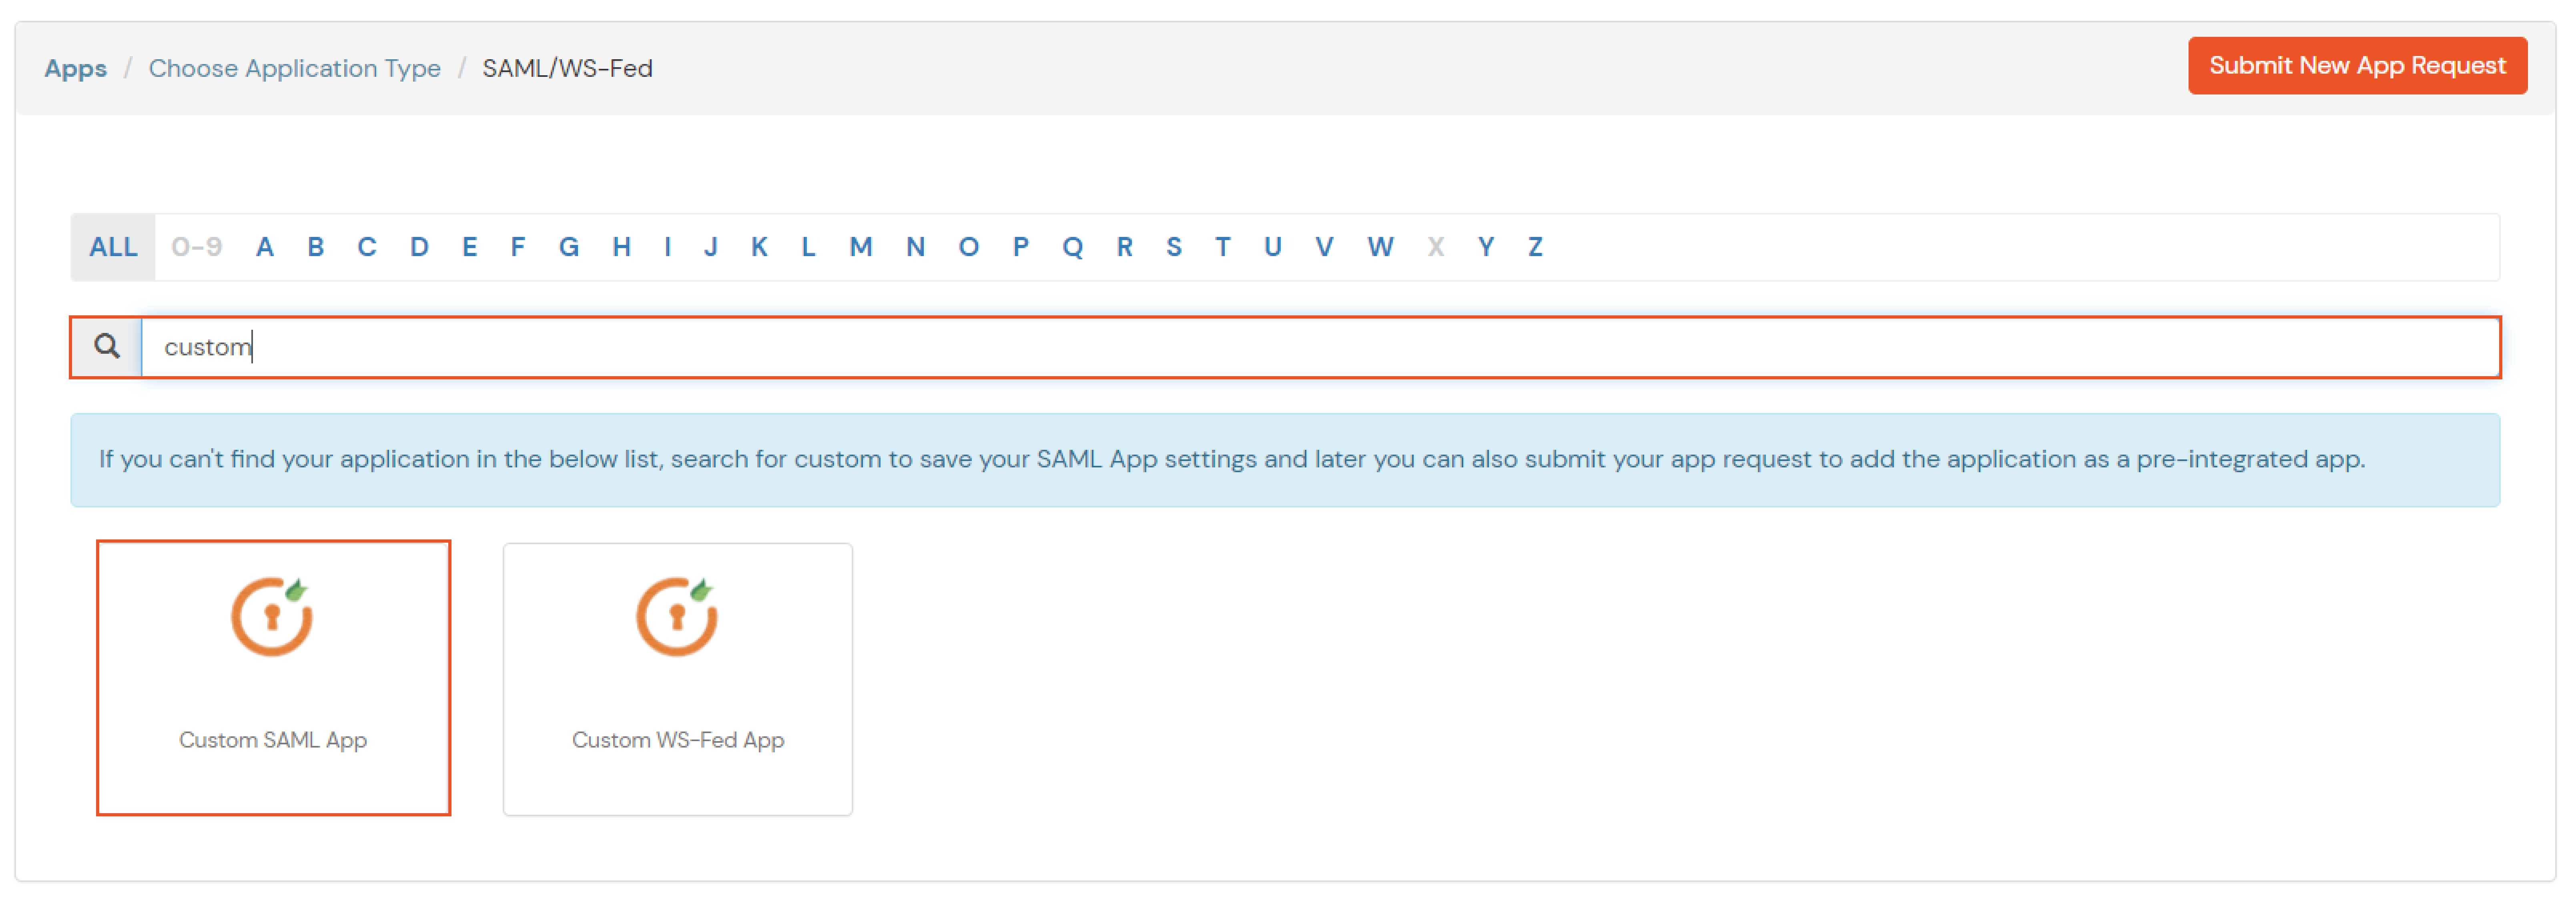
| Service Provider Name | Choose appropriate name according to your choice |
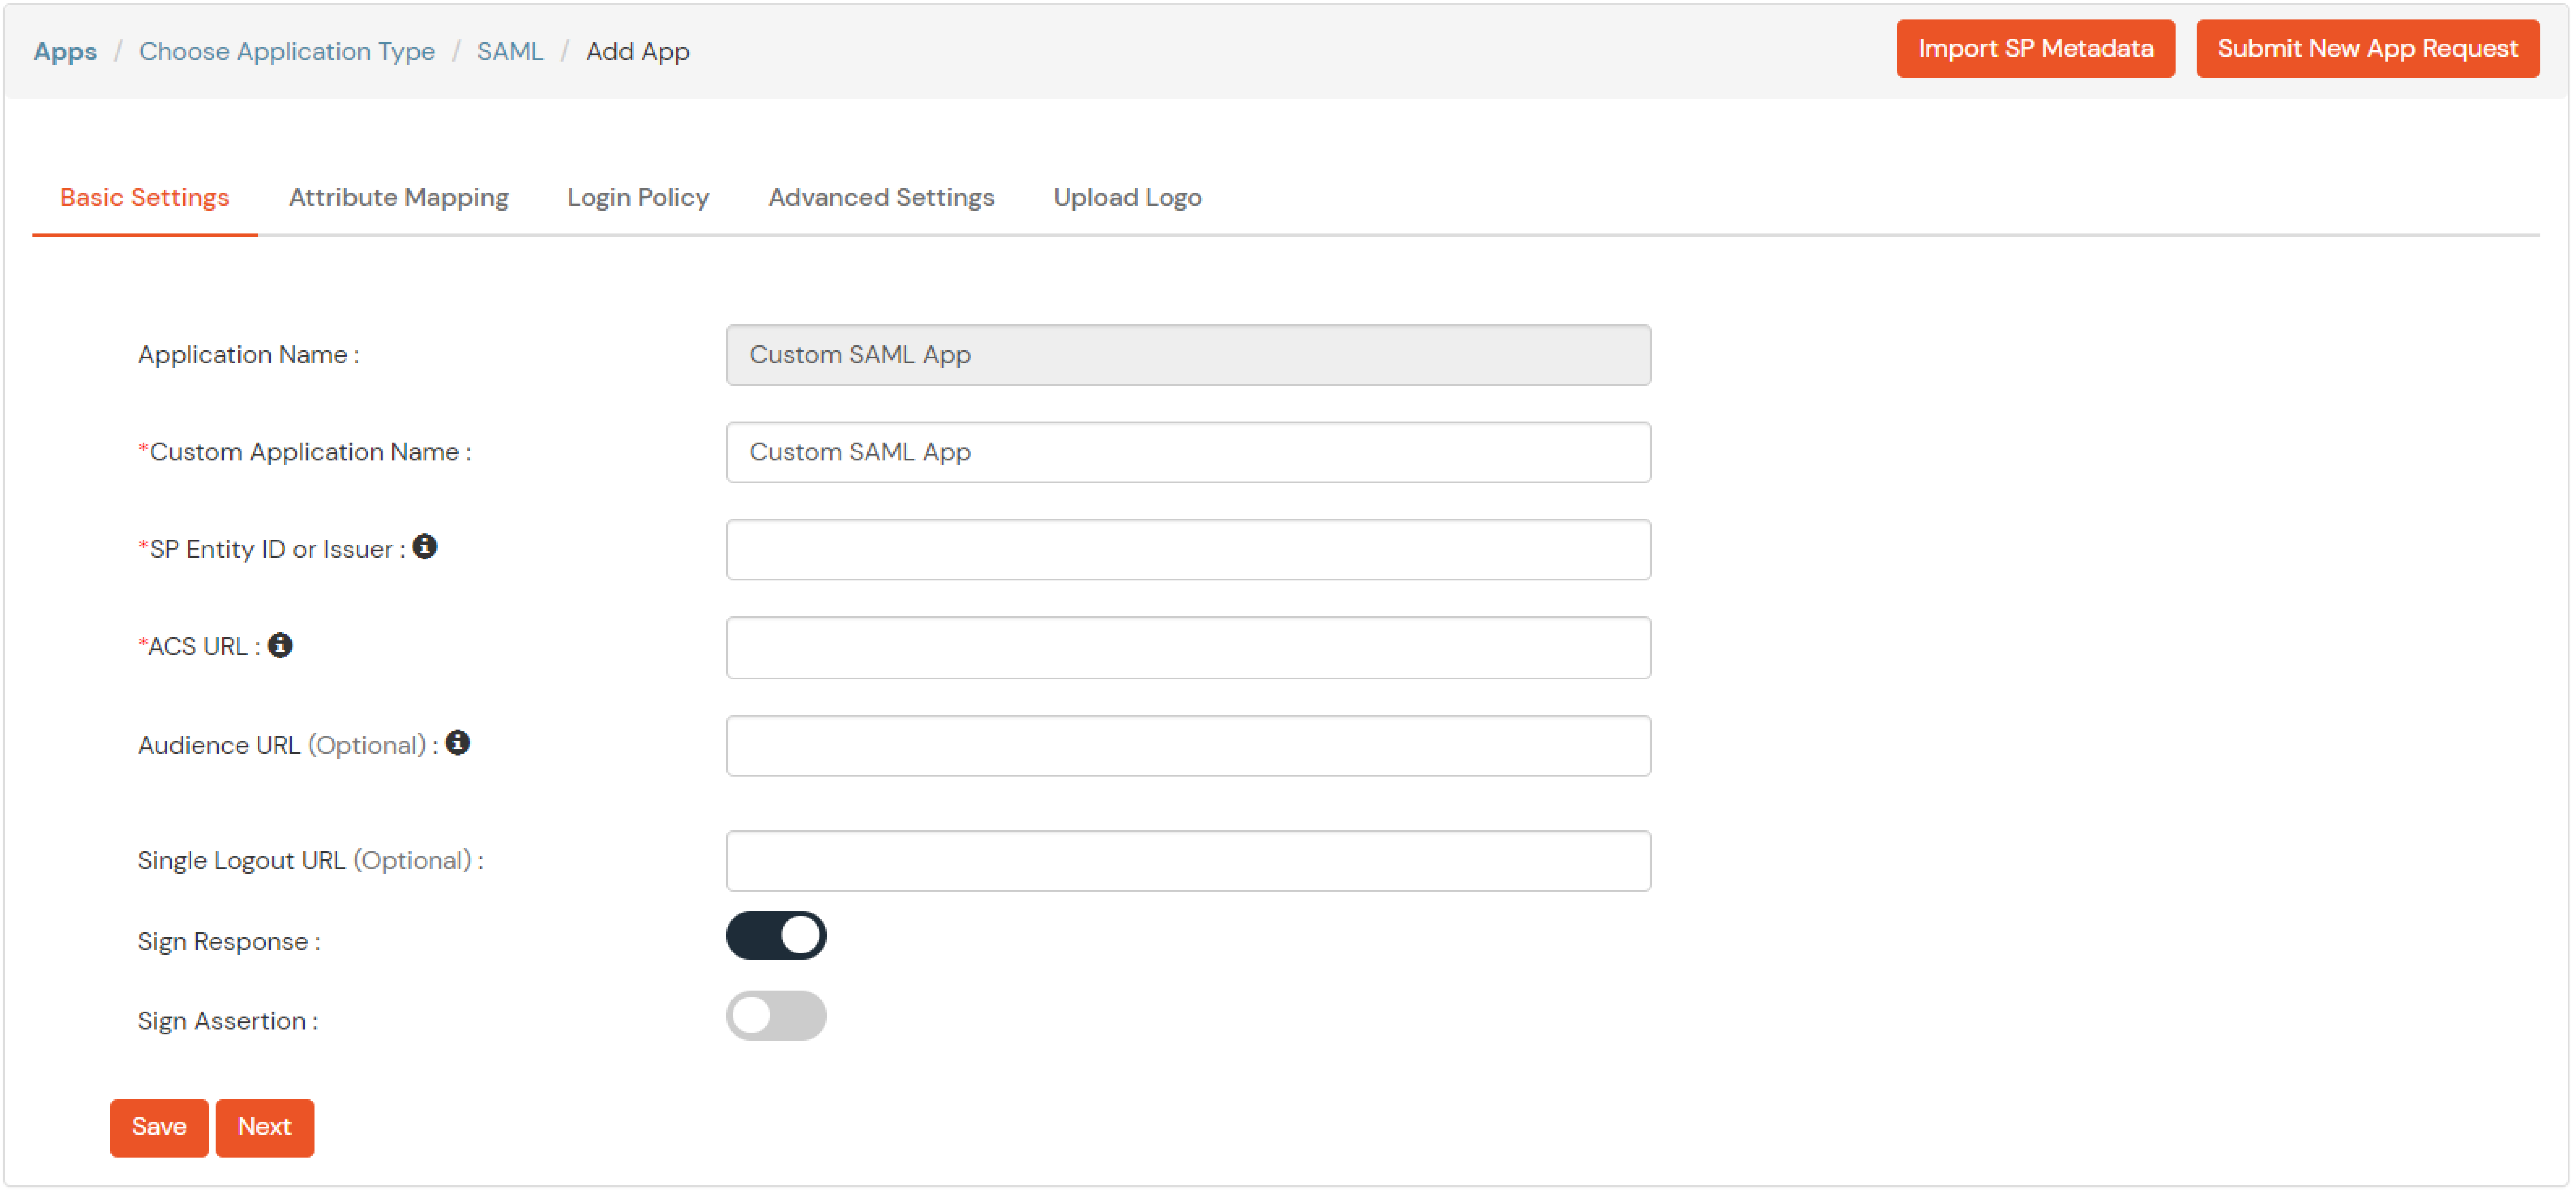
| SP Entity ID or Issuer | Your Application Entity ID |
| ACS URL X.509 Certificate (optional) | Your Application Assertion Consumer Service URL |
| NameID format | Select urn:oasis:names:tc:SAML:1.1:nameid-format:emailAddress |
| Response Signed | Unchecked |
| Assertion Signed | Checked |
| Encrypted Assertion | Unchecked |
| Group policy | Default |
| Login Method | Password |

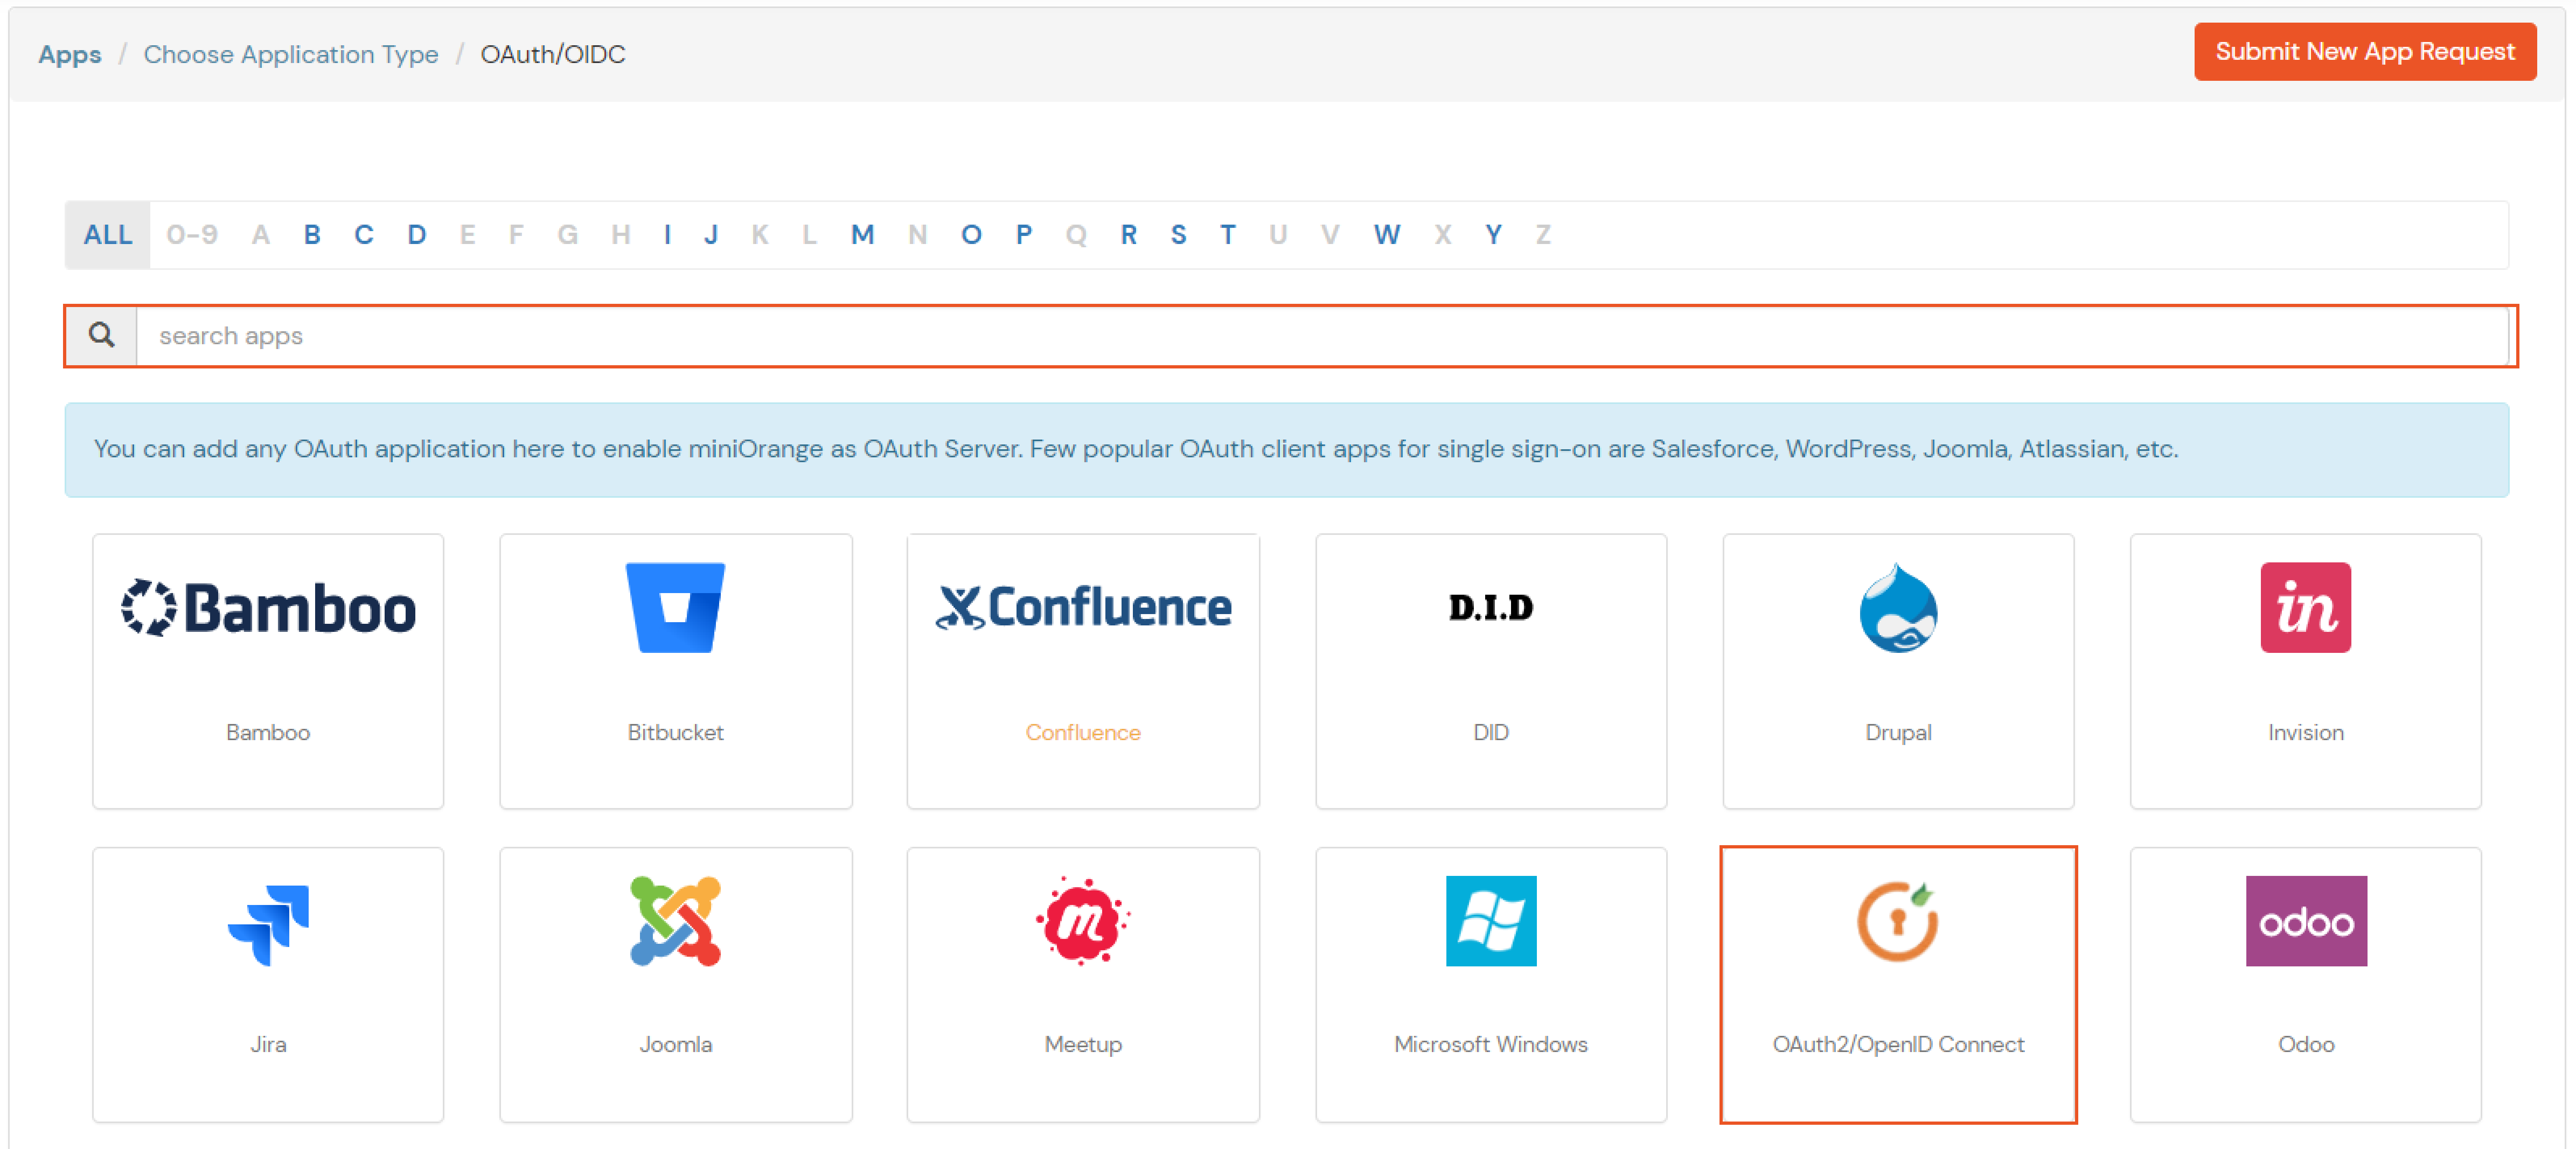
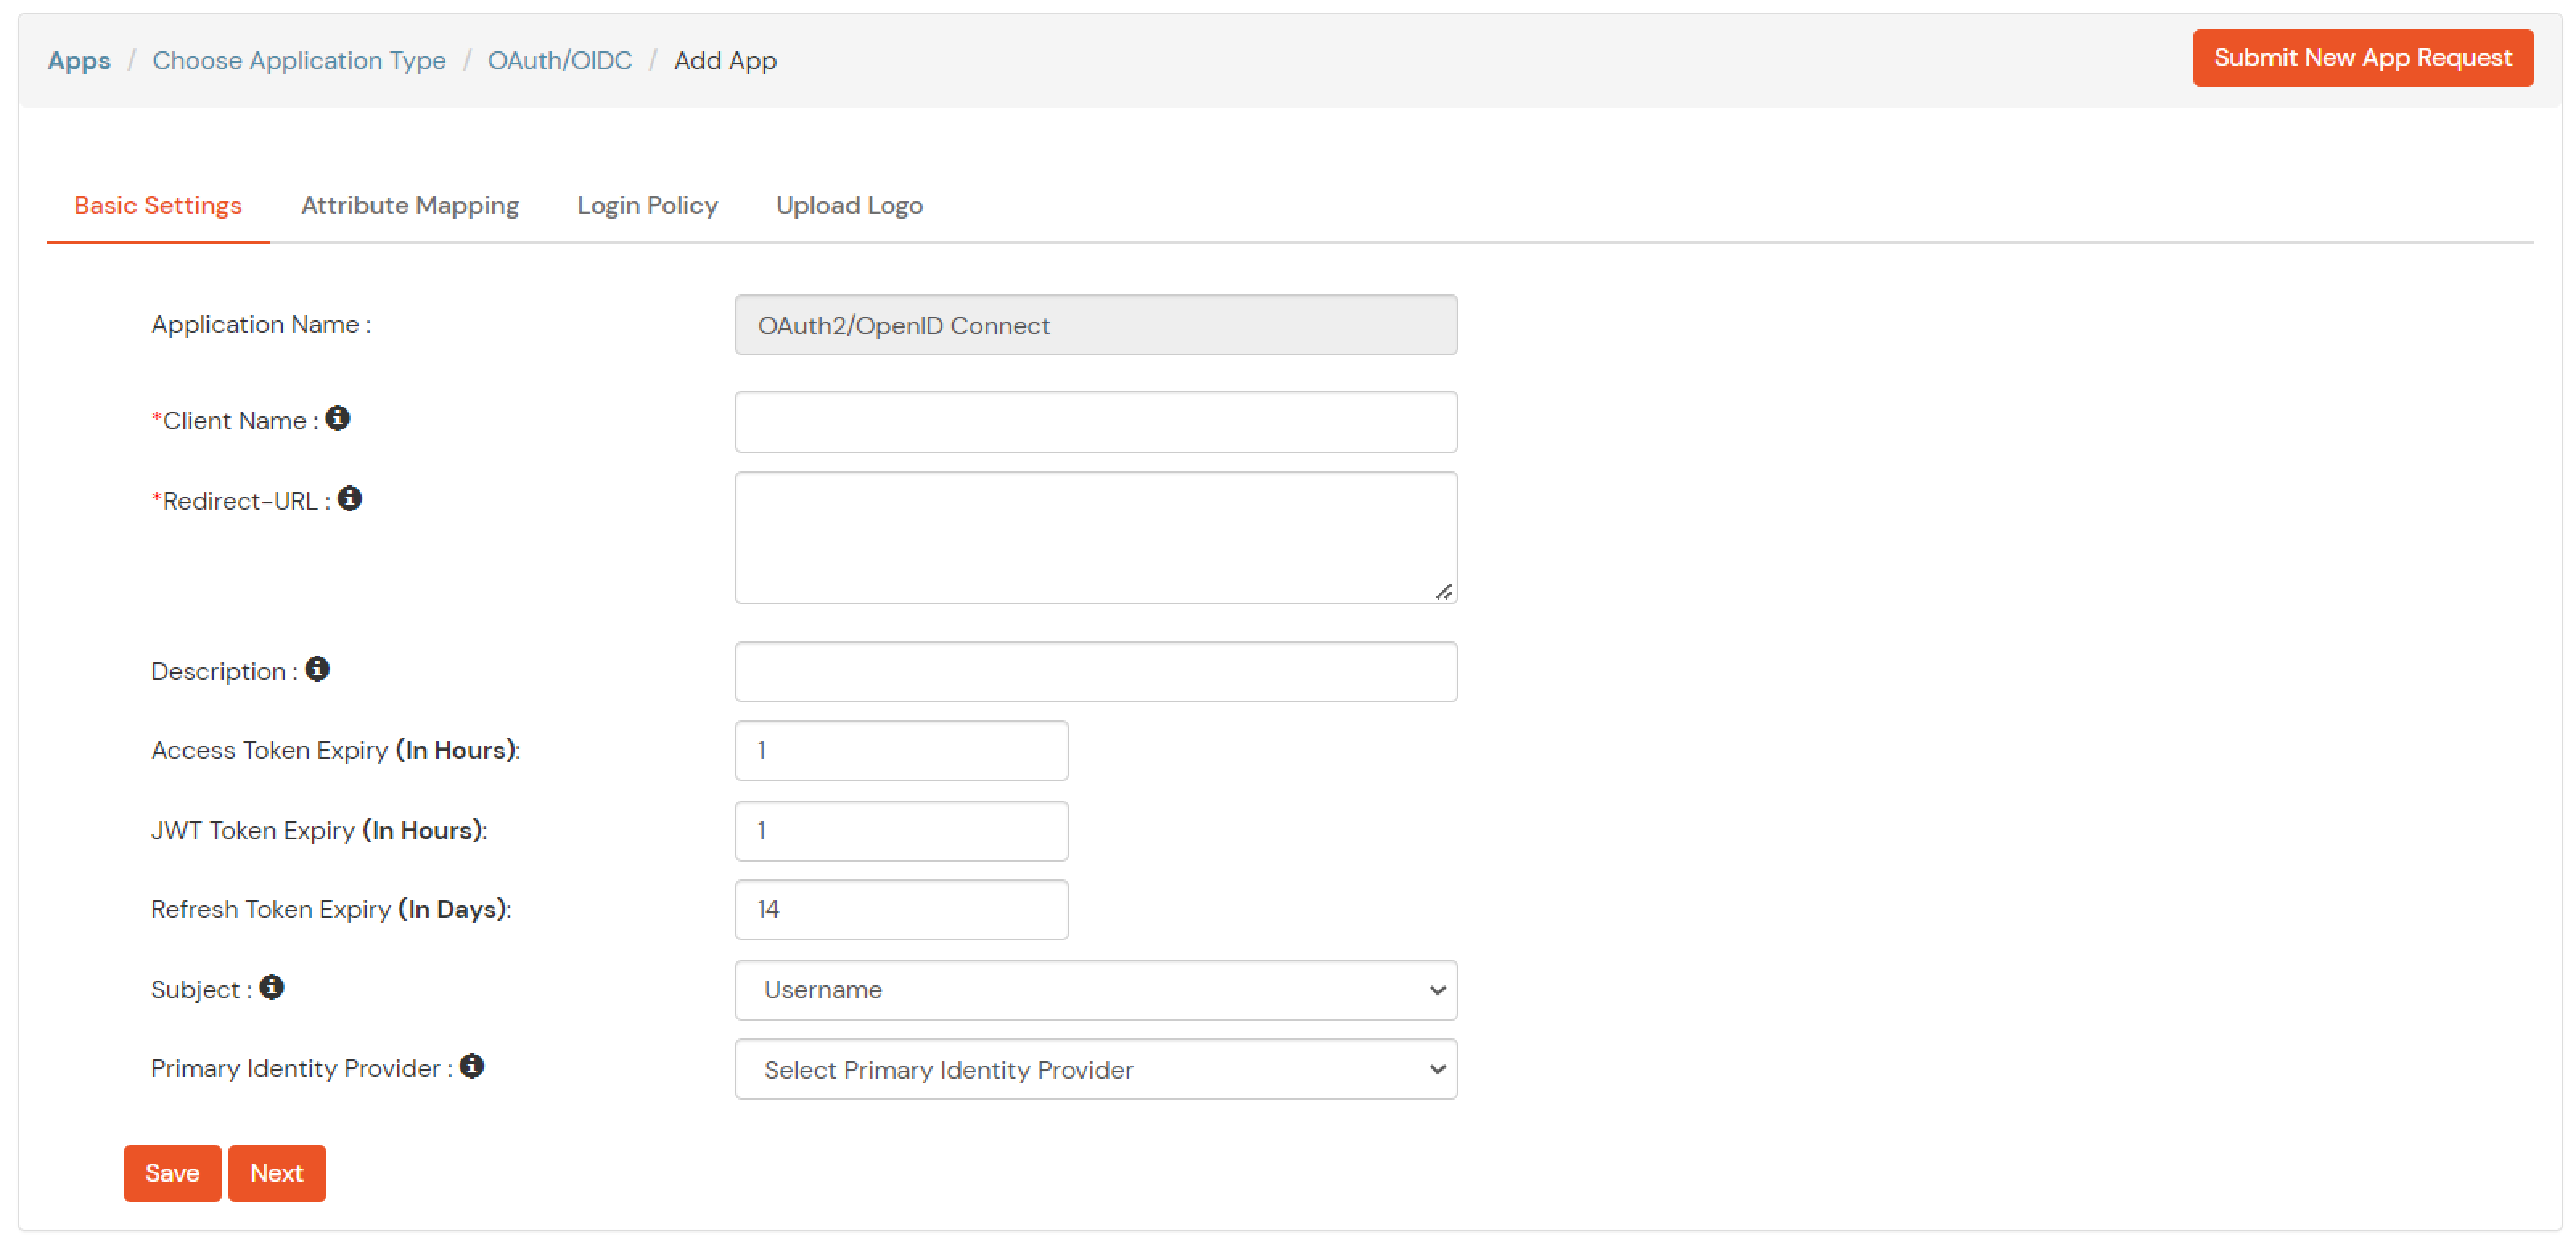
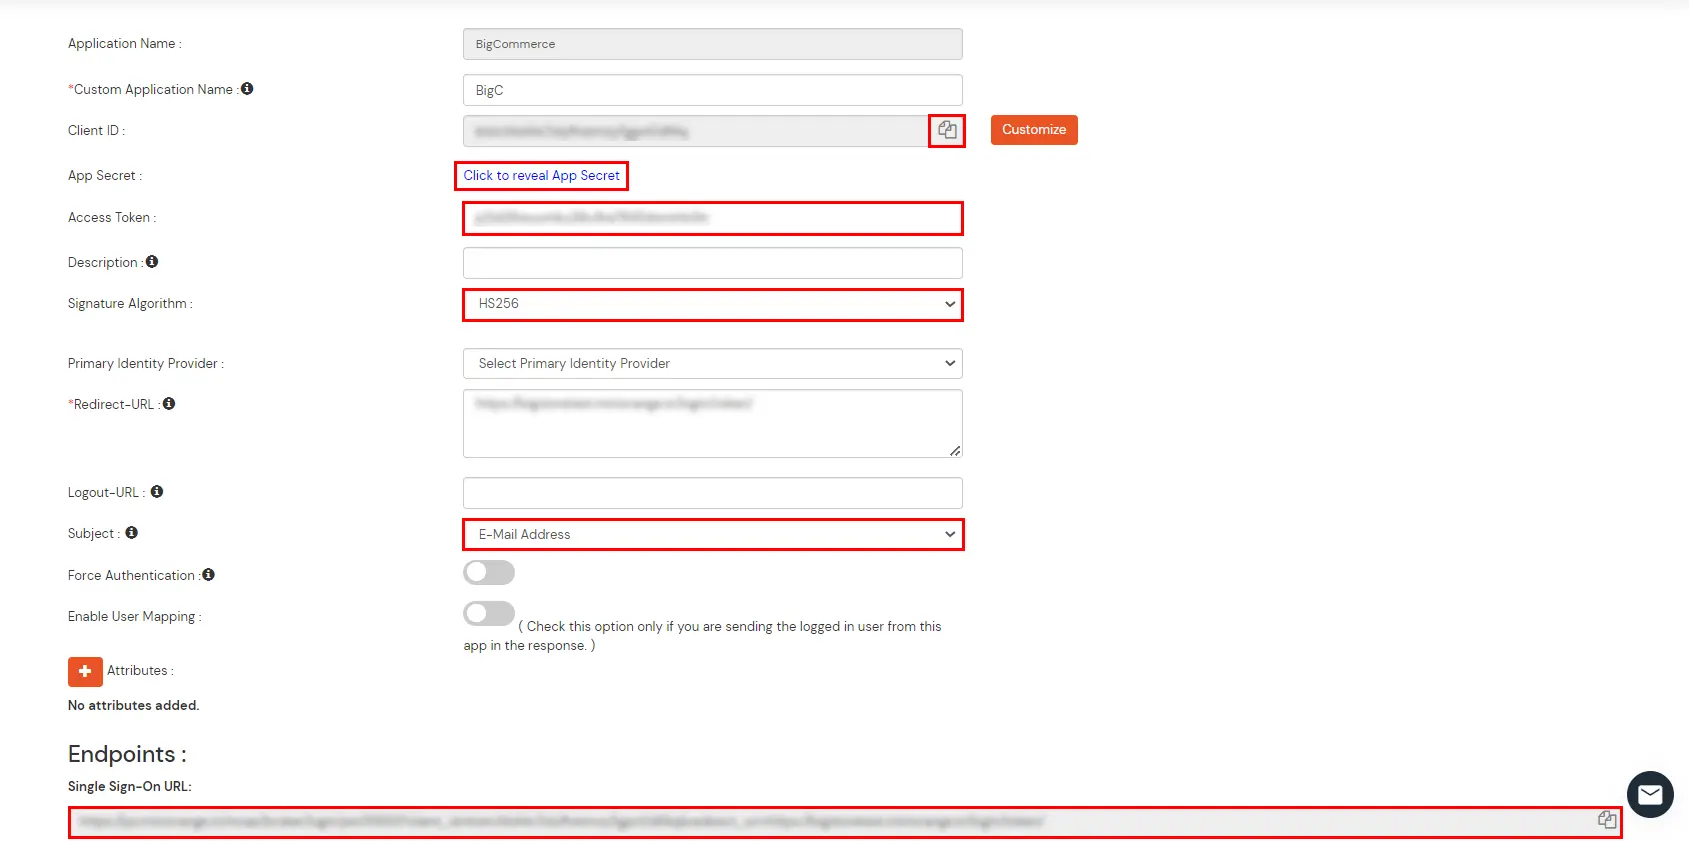
| Client Name | Add appropriate Name |
| Redirect URL | Get the Redirect-URL from your OAuth Client |
| Description | Add if required |
| Group Name | Default |
| Policy Name | As per your Choice |
| Login Method | Password |
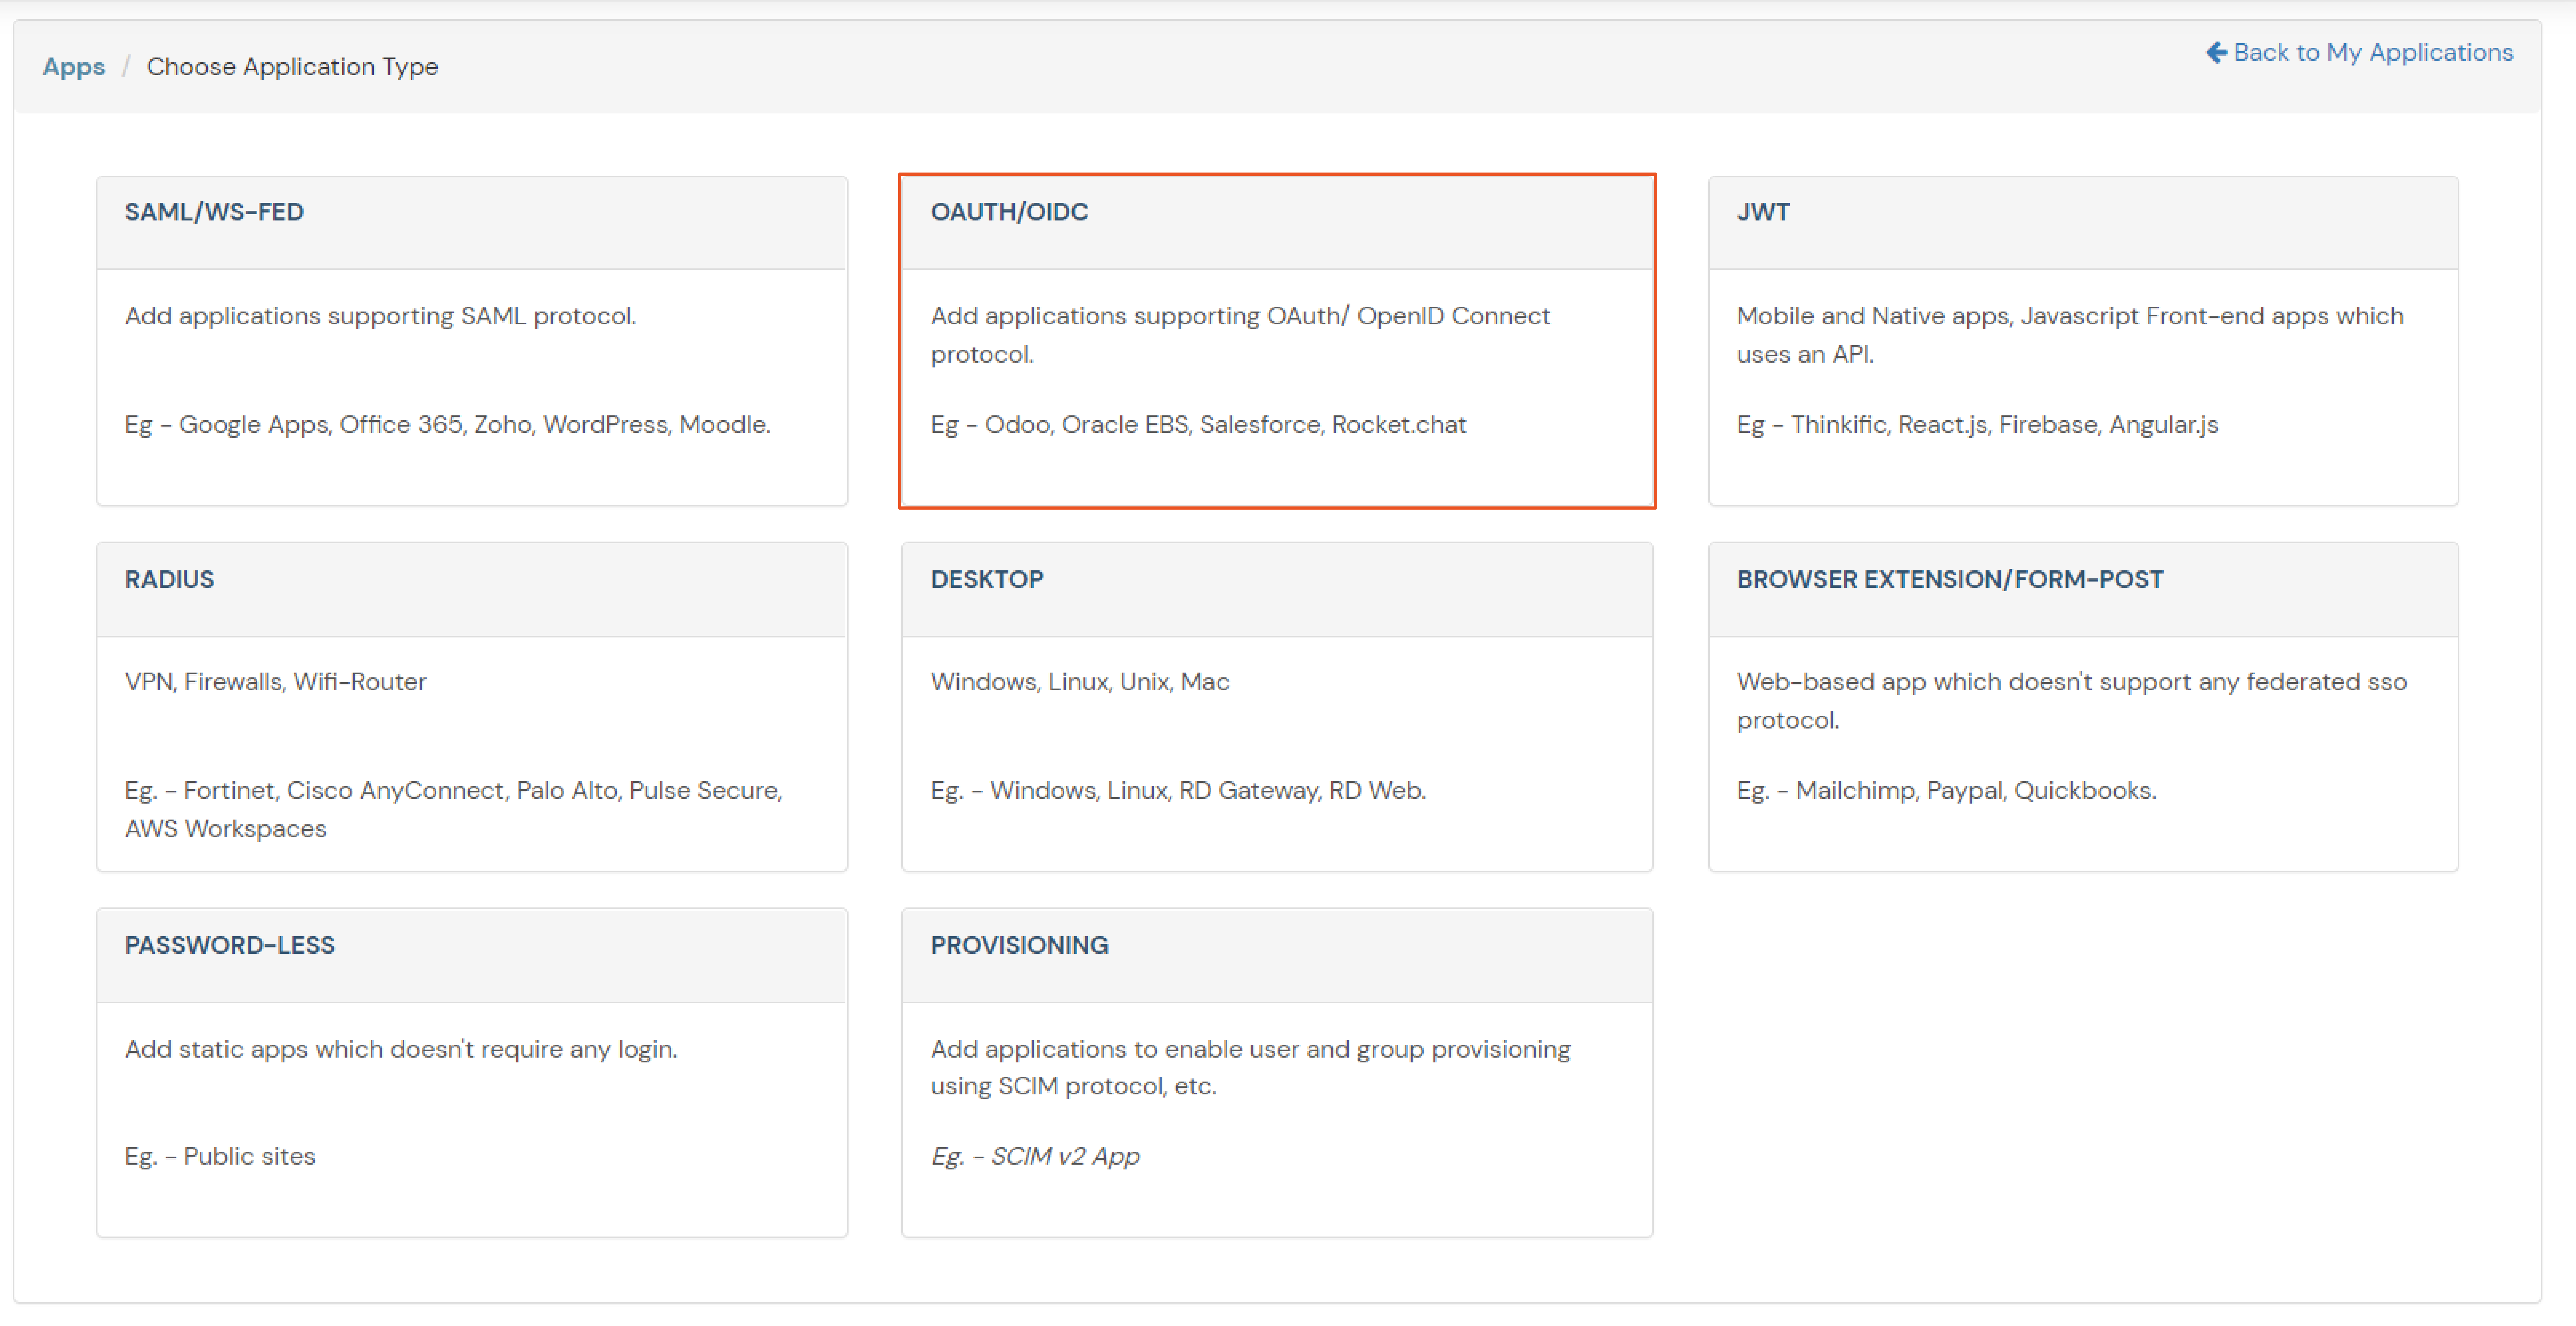
Note: Choose the Authorization Endpoint according to the identity source you configure.
https://{mycompany.domainname.com}/moas/idp/openidssohttps://{mycompany.domainname.com}/broker/login/oauth{customerid}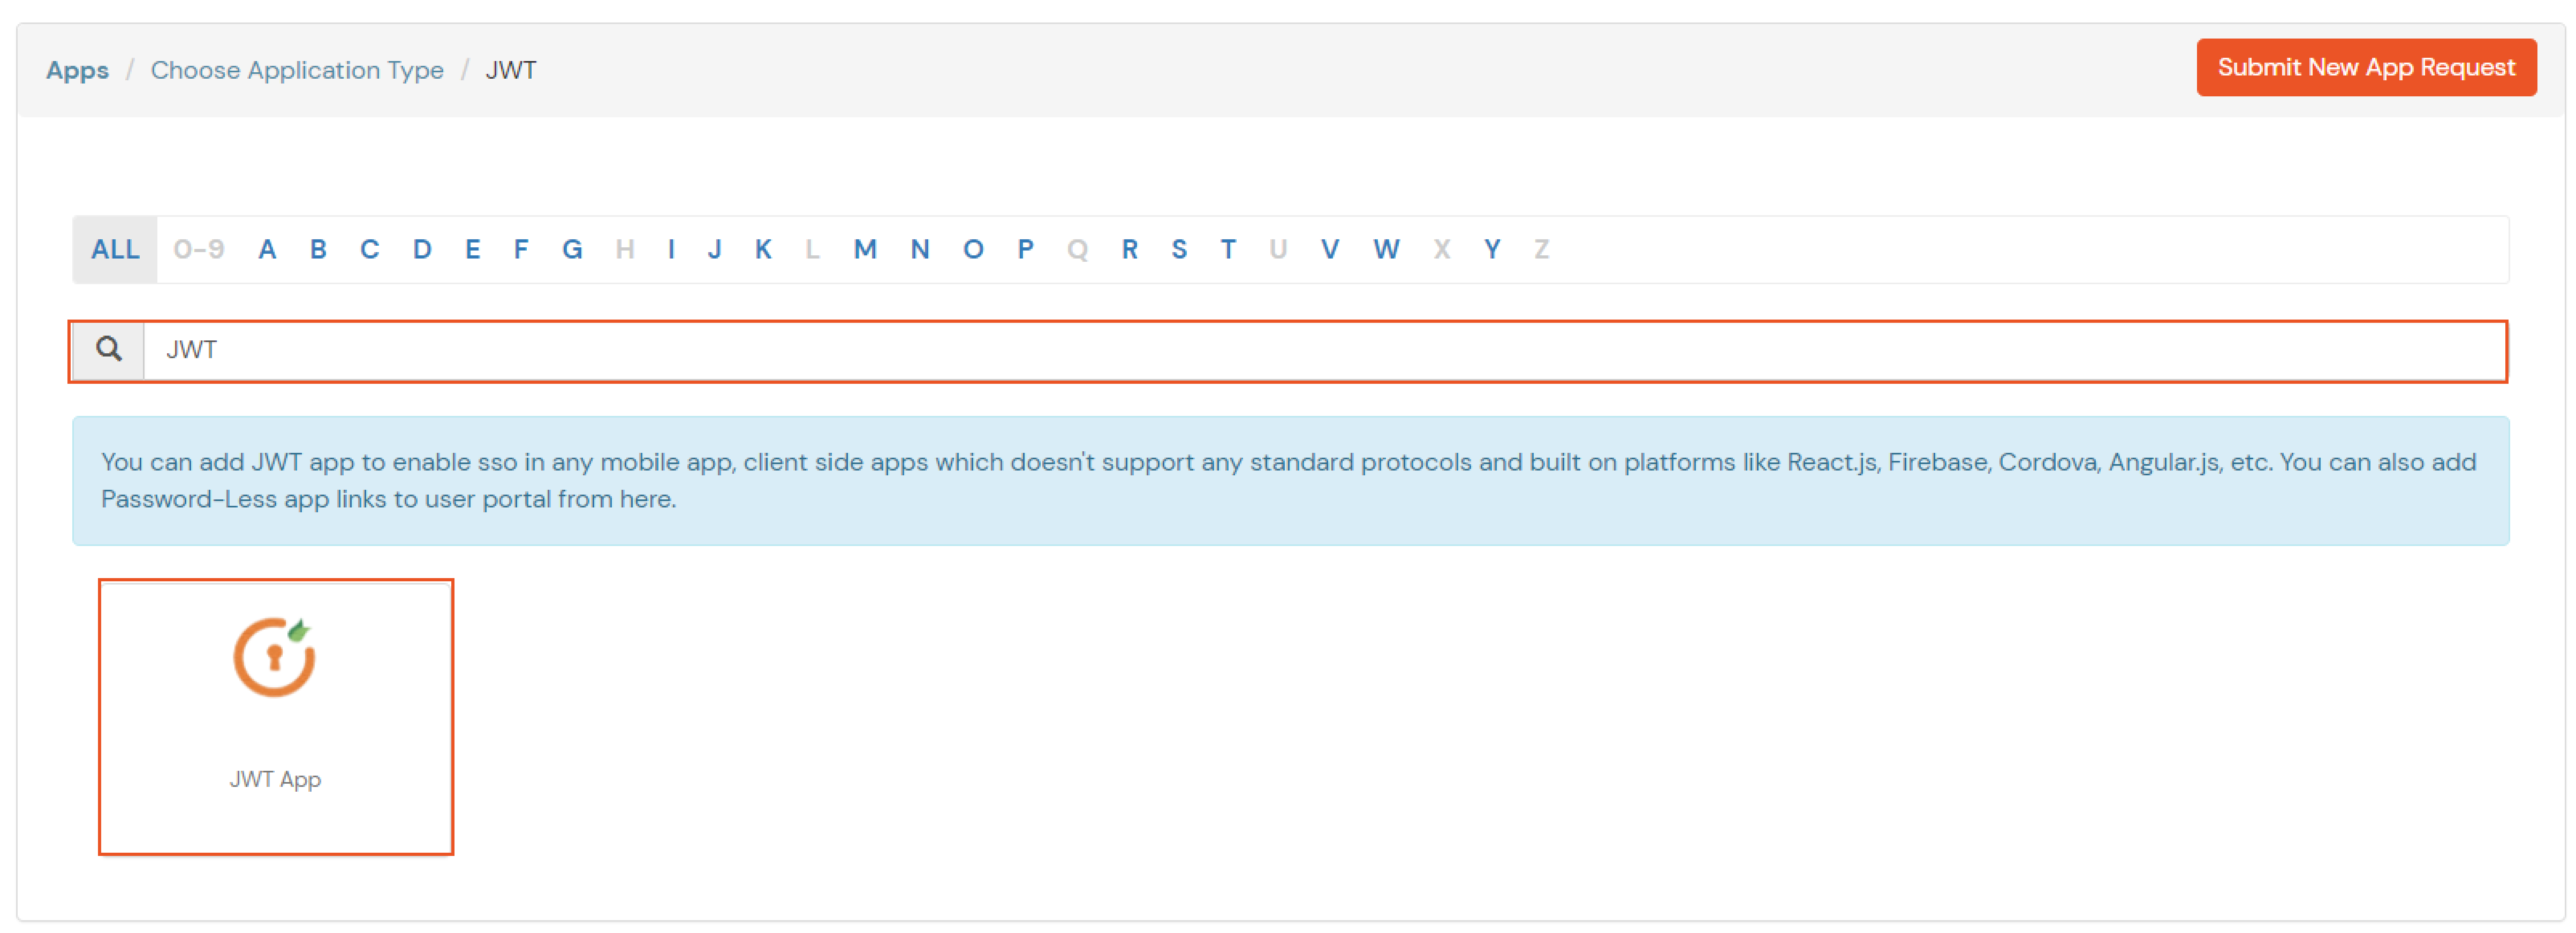

In case you are setting up SSO with Mobile Applications where you can't create an endpoint for Redirect or Callback URL, use below URL.
https://login.xecurify.com/moas/jwt/mobile

If you are looking for anything which you cannot find, please drop us an email on idpsupport@xecurify.com.
