Hello there!
Need Help? We are right here!
Need Help? We are right here!
Search Results:
×Cisco Spark Platform provide the platform with SAASPASS multi-factor authentication (MFA) and secure single sign-on (SSO) and integrate it with SAML without any time limitation and code. You have to just log into your Cisco Spark Platform services securely to your both desktop / laptop and mobile with SAASPASS Instant Login (Proximity, Scan Barcode, On-Device Login and Remote Login). Here no need to remember passwords for the same.
Single Sign-on(SSO) solution for Cisco Spark is a cloud based service. With this service you need only one password for all your web & SaaS apps including Cisco Spark. miniOrange provides secure access and full control to Cisco Spark for enterprises and applications. With the help of the given guide you can configure Cisco Spark easily.
miniOrange provides user authentication from various external sources, which can be Directories (like ADFS, Microsoft Active Directory, OpenLDAP, AWS etc), Identity Providers (like Microsoft Entra ID, Okta, AWS), and many more. You can configure your existing directory/user store or add users in miniOrange.

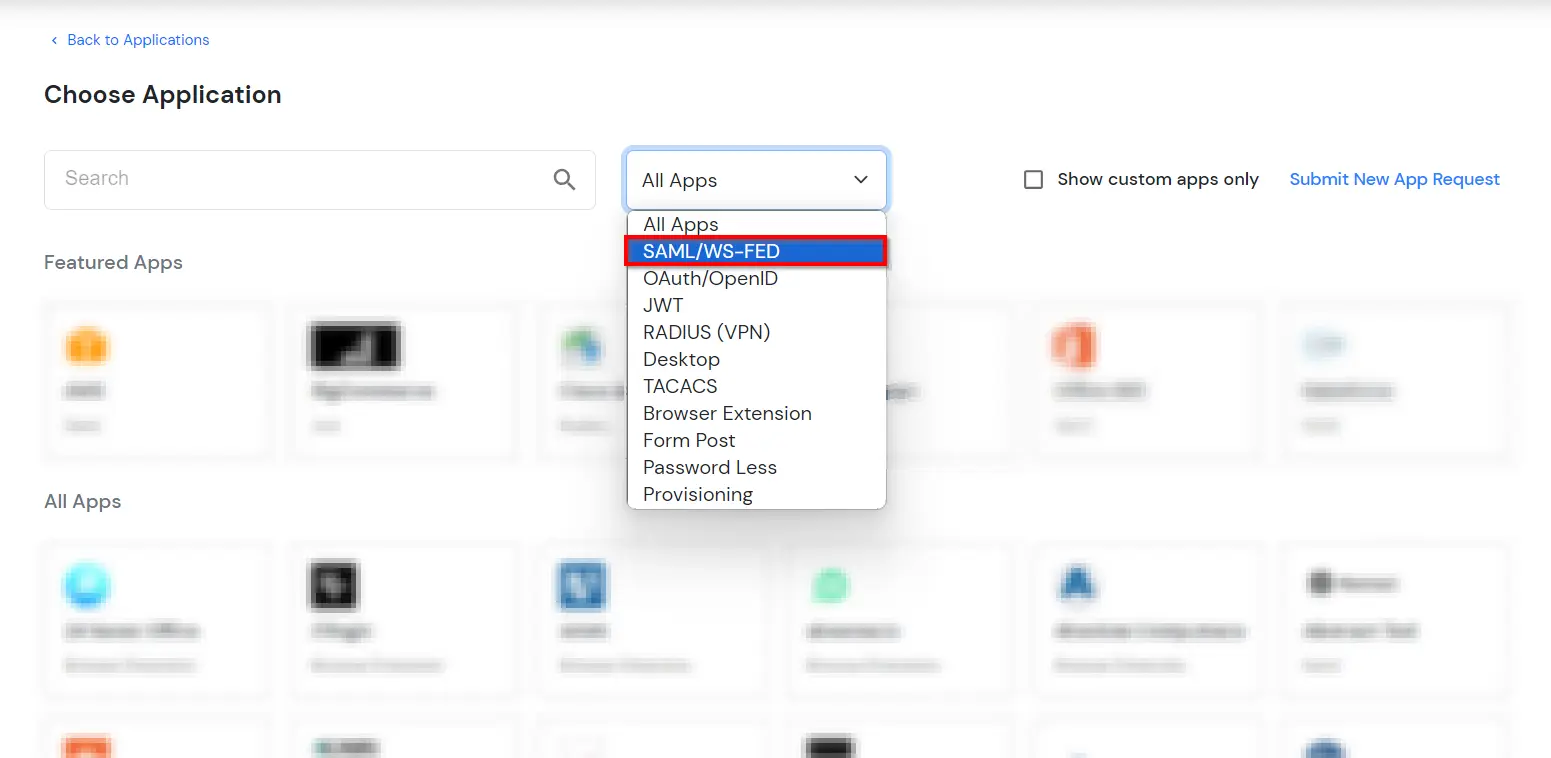
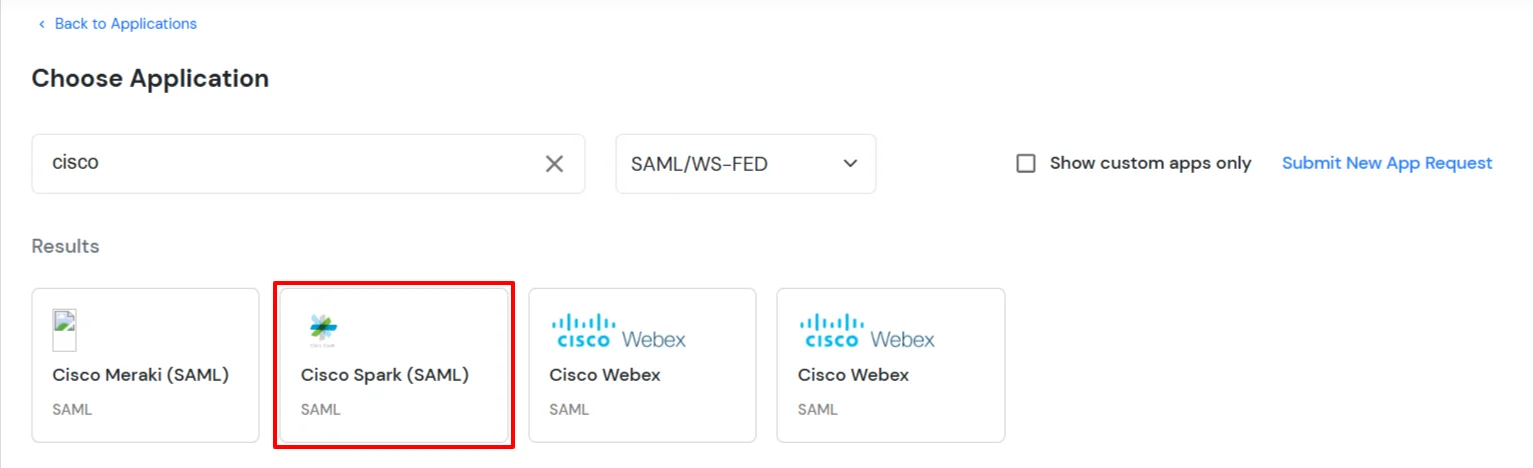
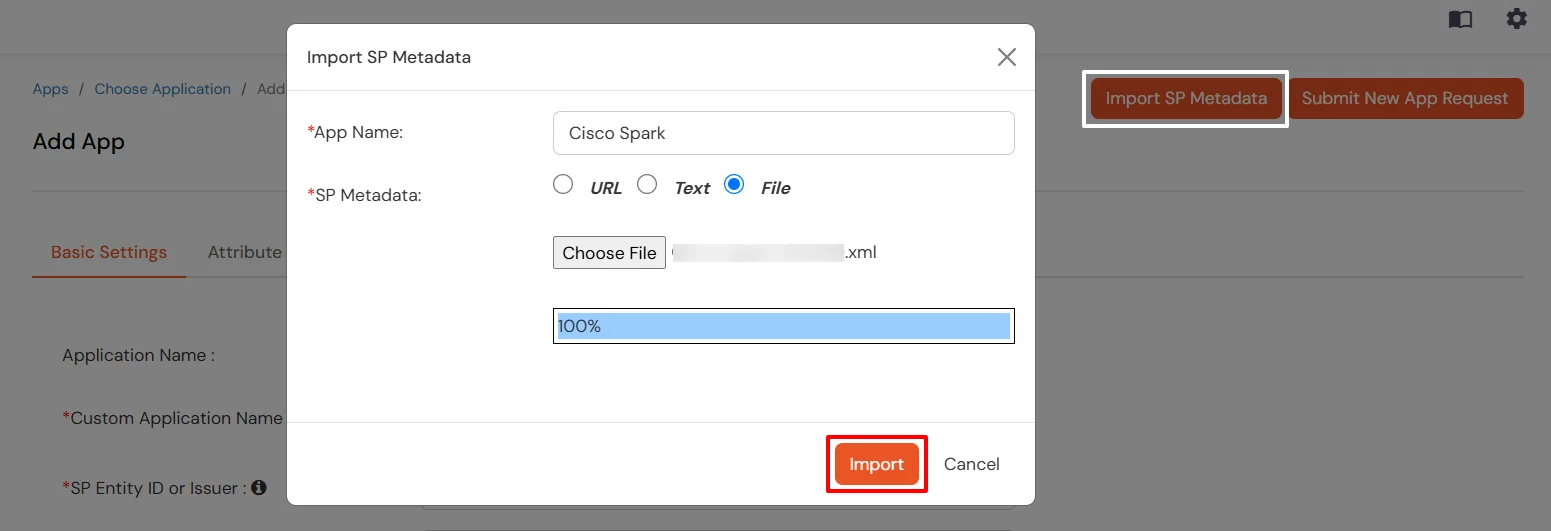
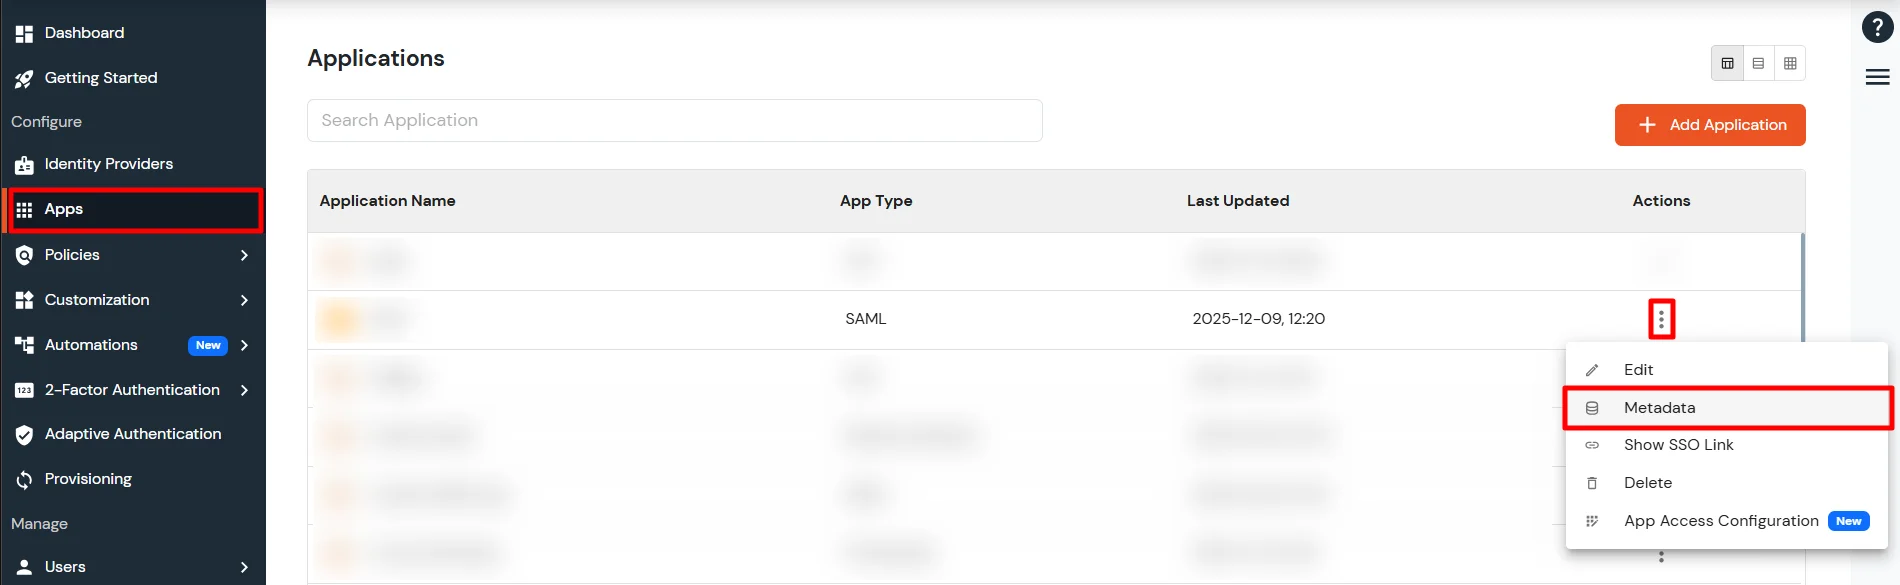
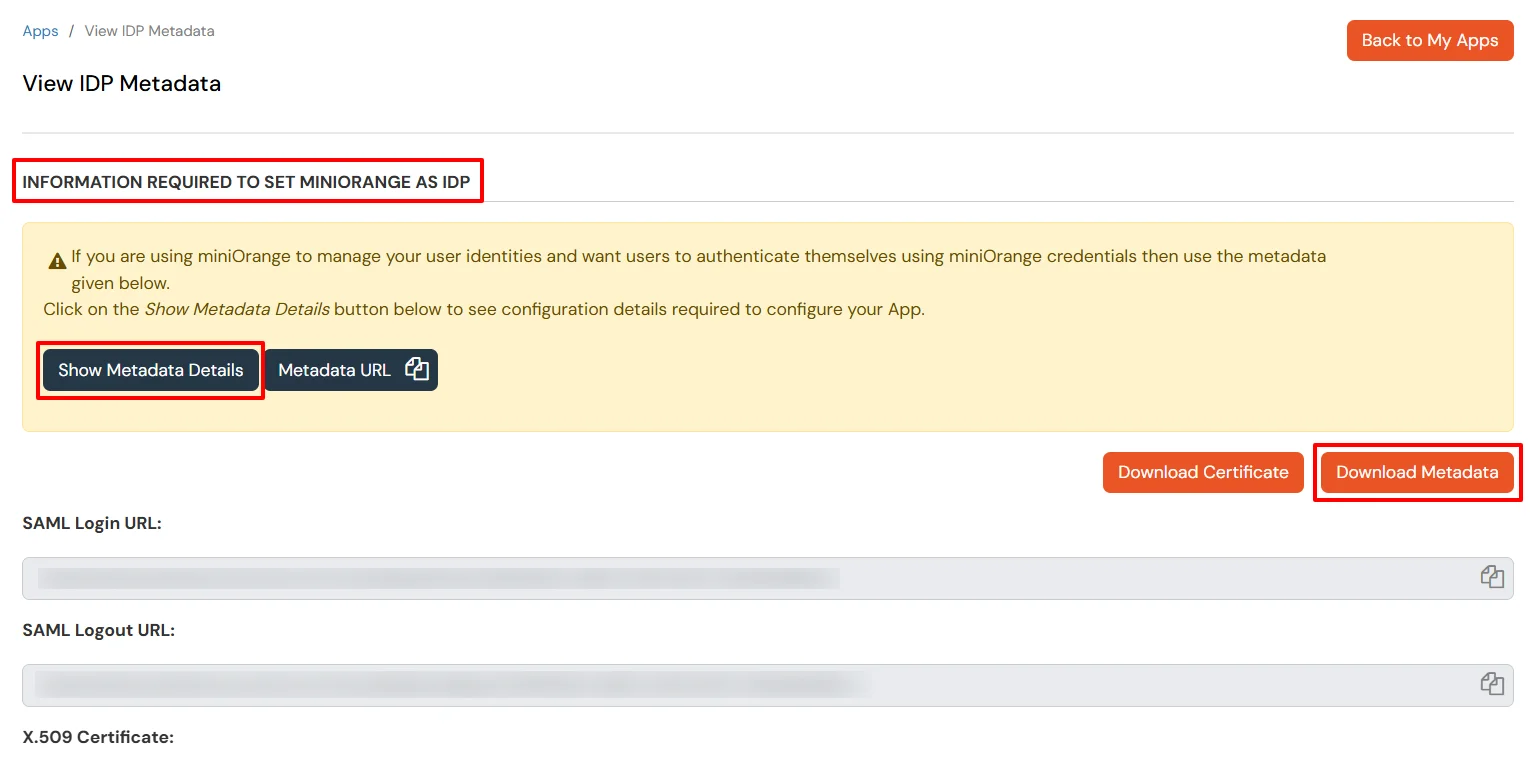
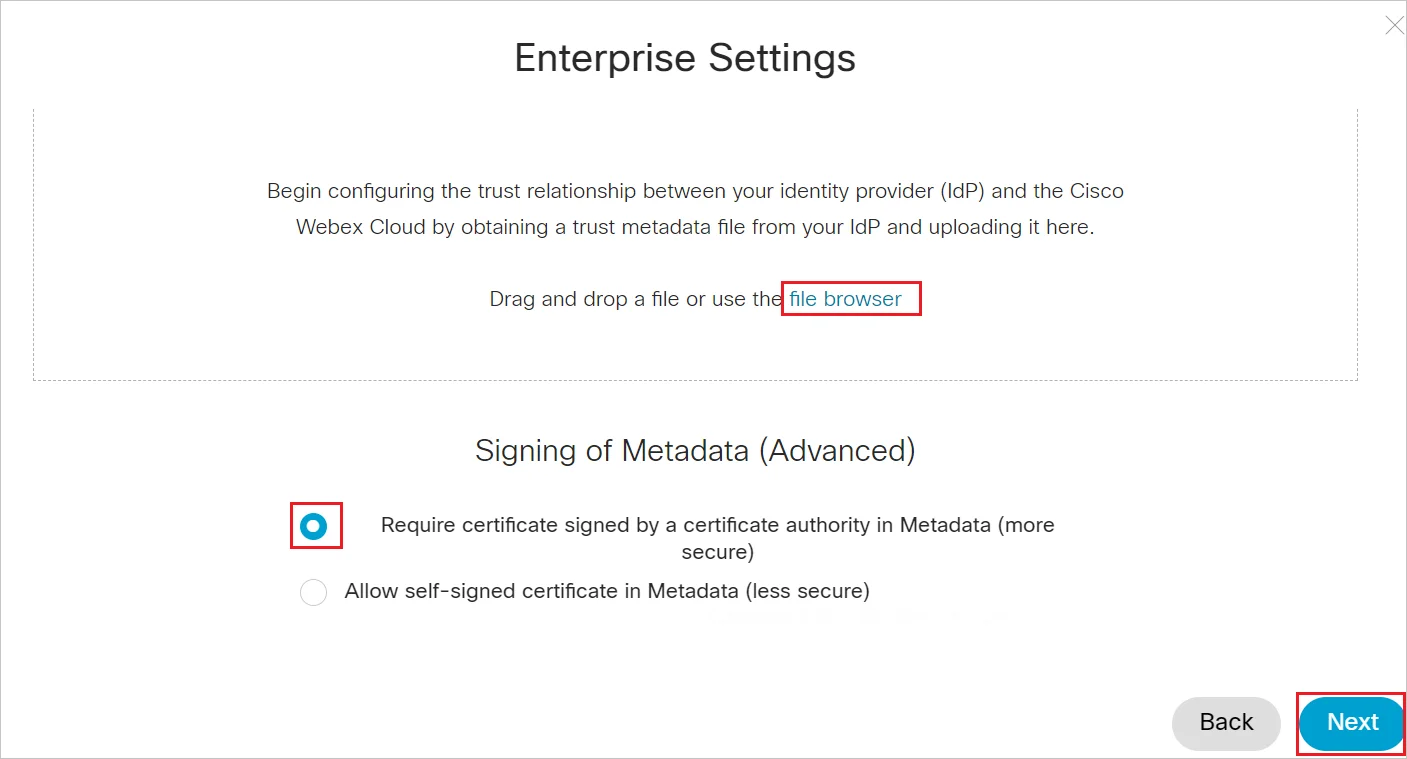
To get miniOrange metadata details in order to configure Cisco Spark Platform :

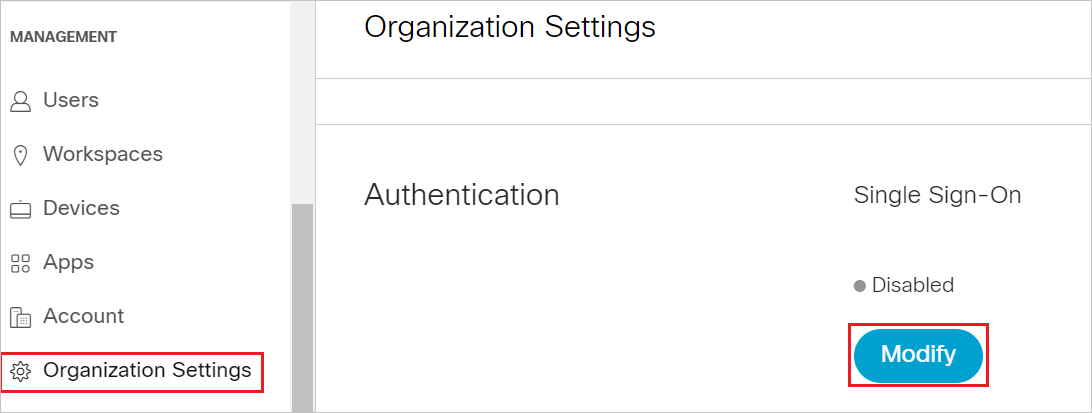
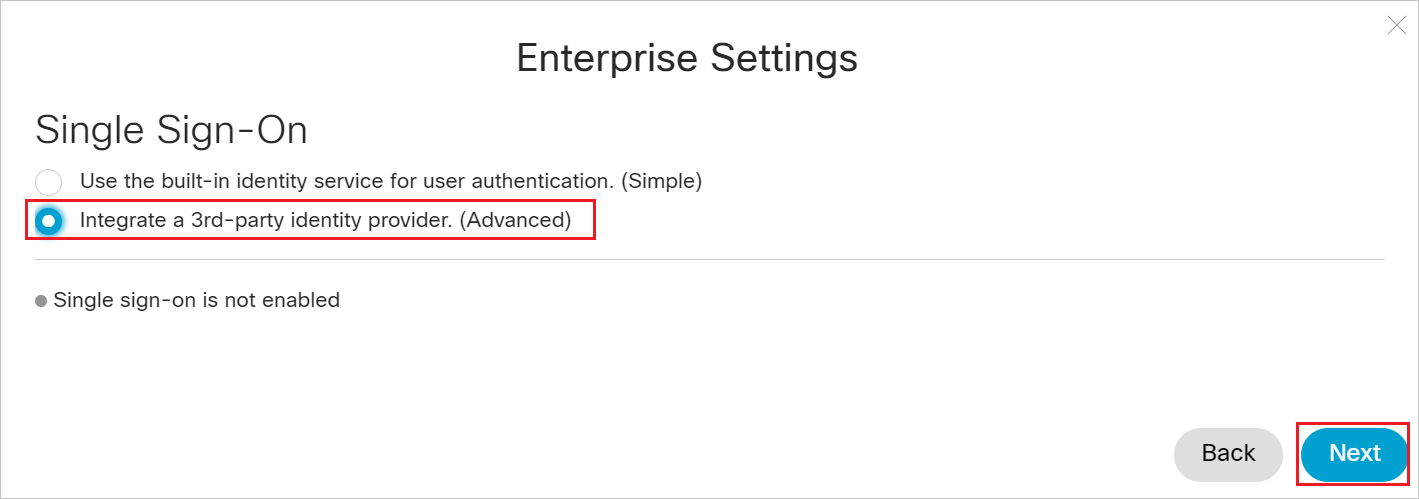
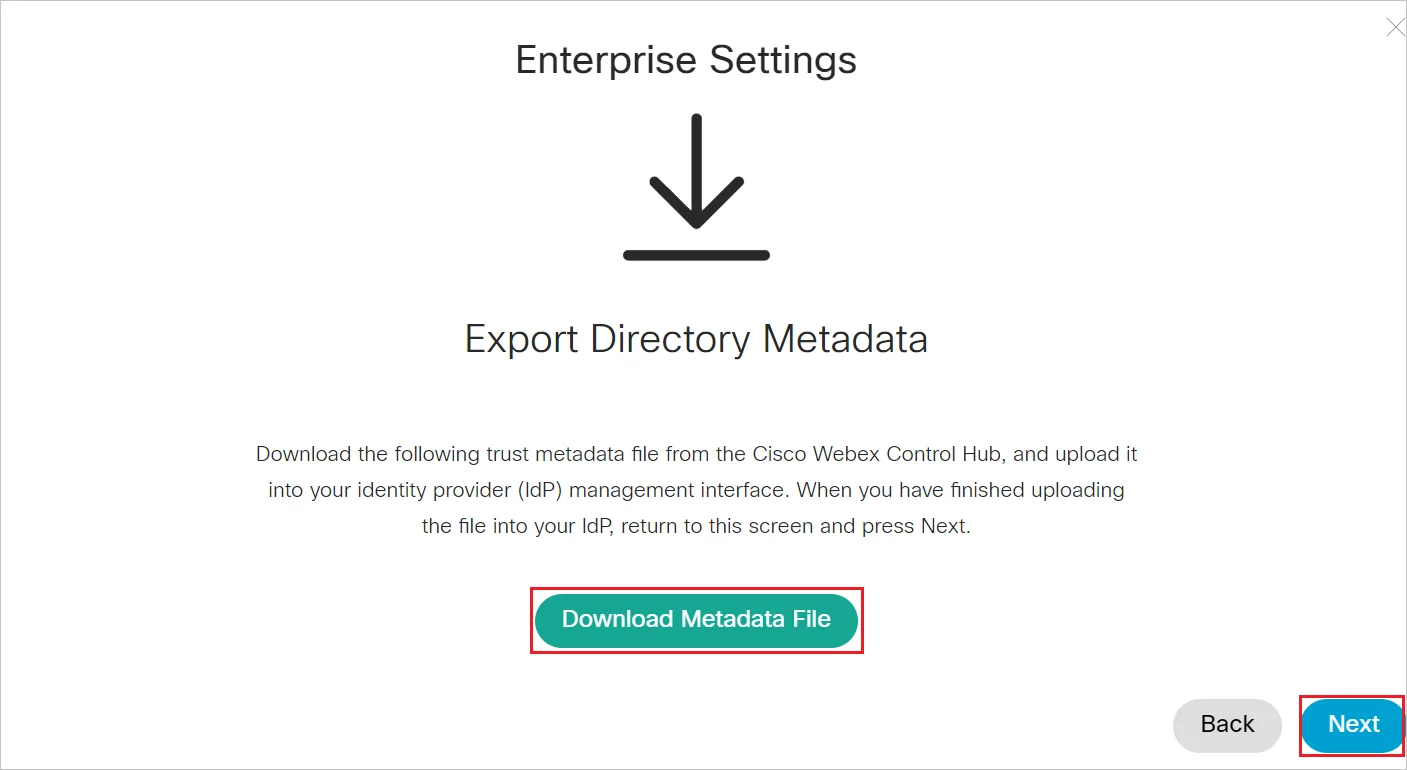
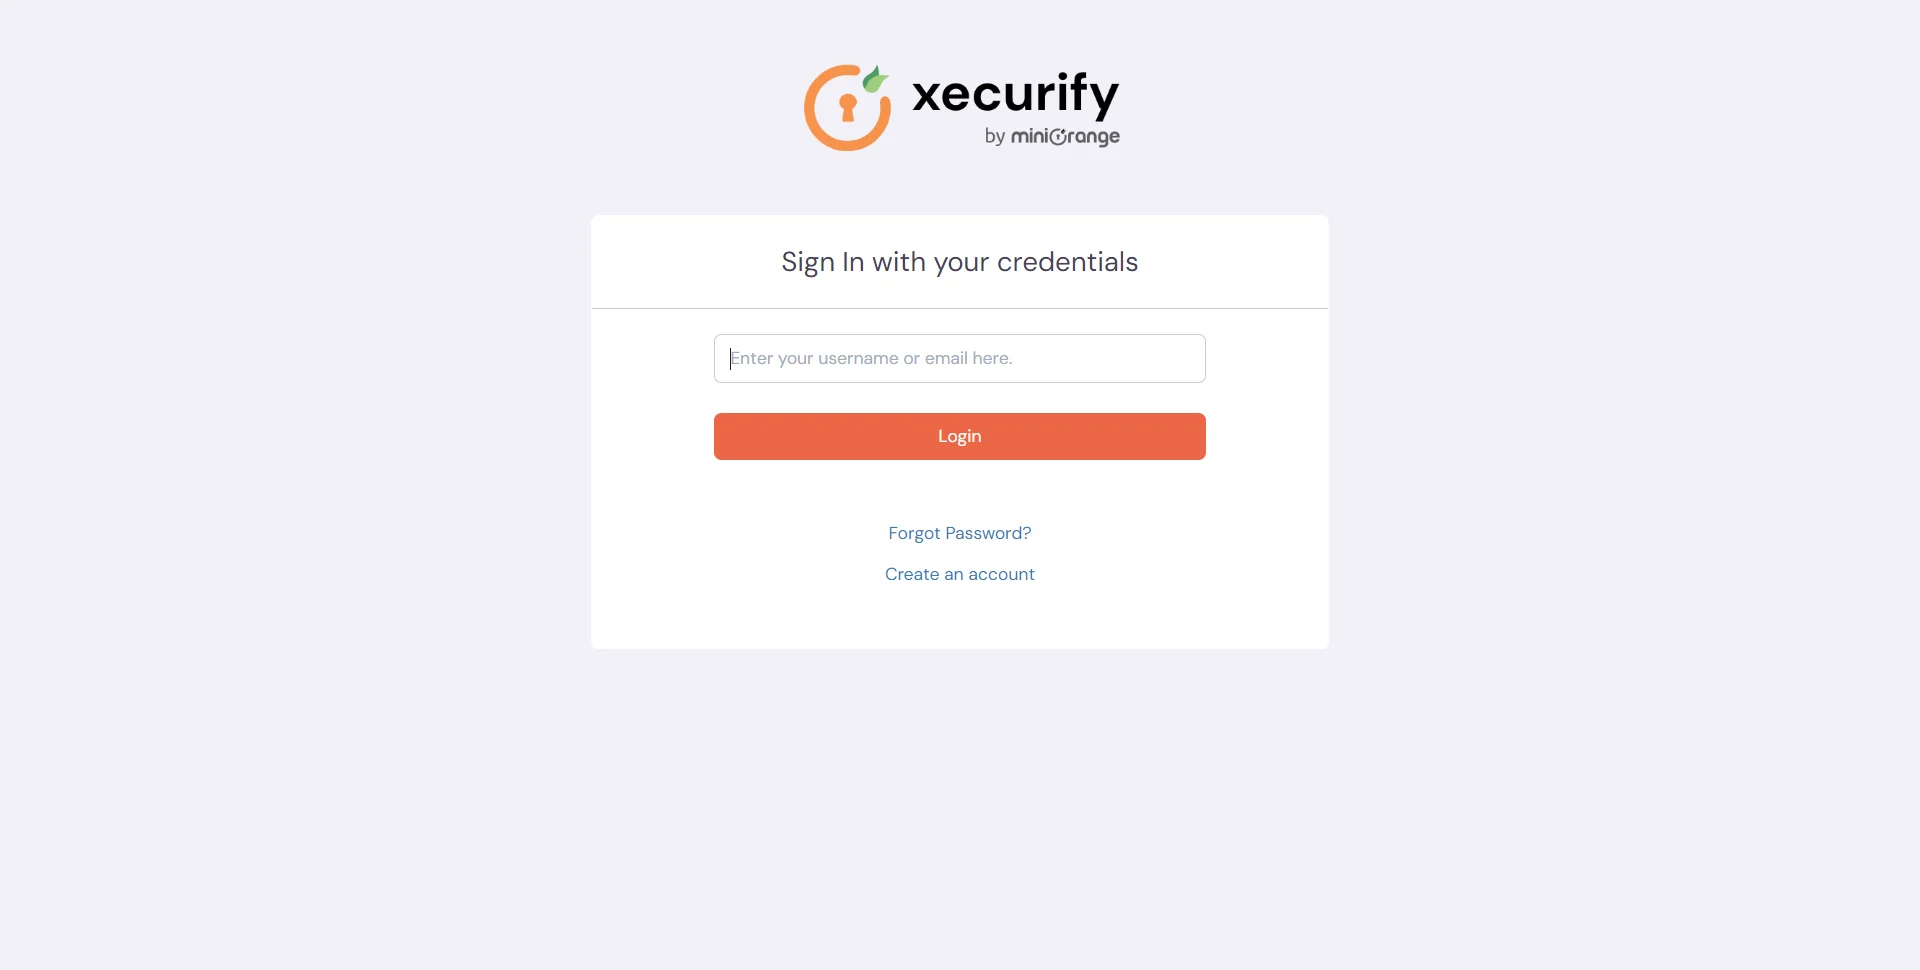
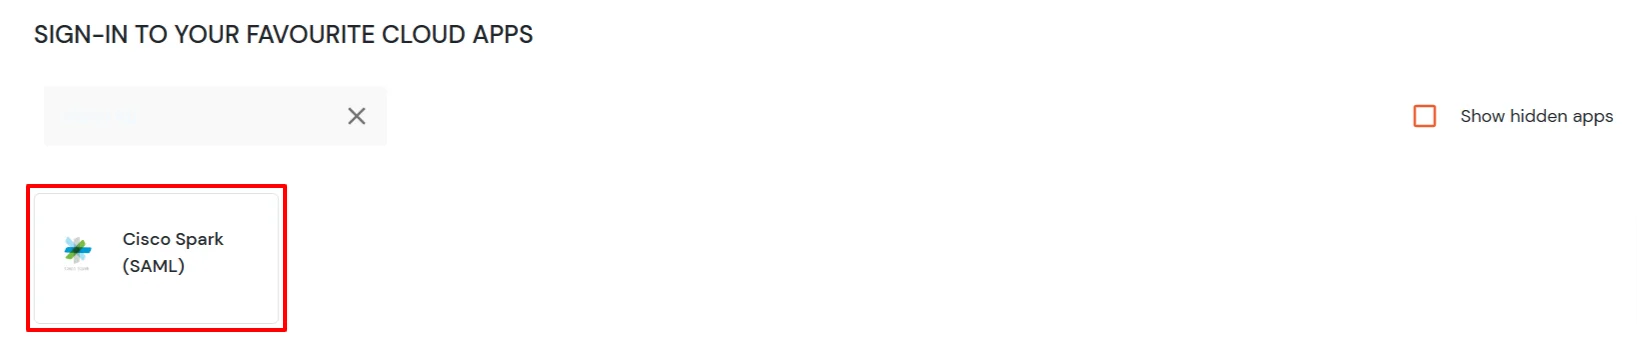
Test SSO login to your Cisco Spark Platform account with miniOrange IdP:
Contact us or email us at idpsupport@xecurify.com and we'll help you setting it up in no time.
