Hello there!
Need Help? We are right here!
Need Help? We are right here!
Search Results:
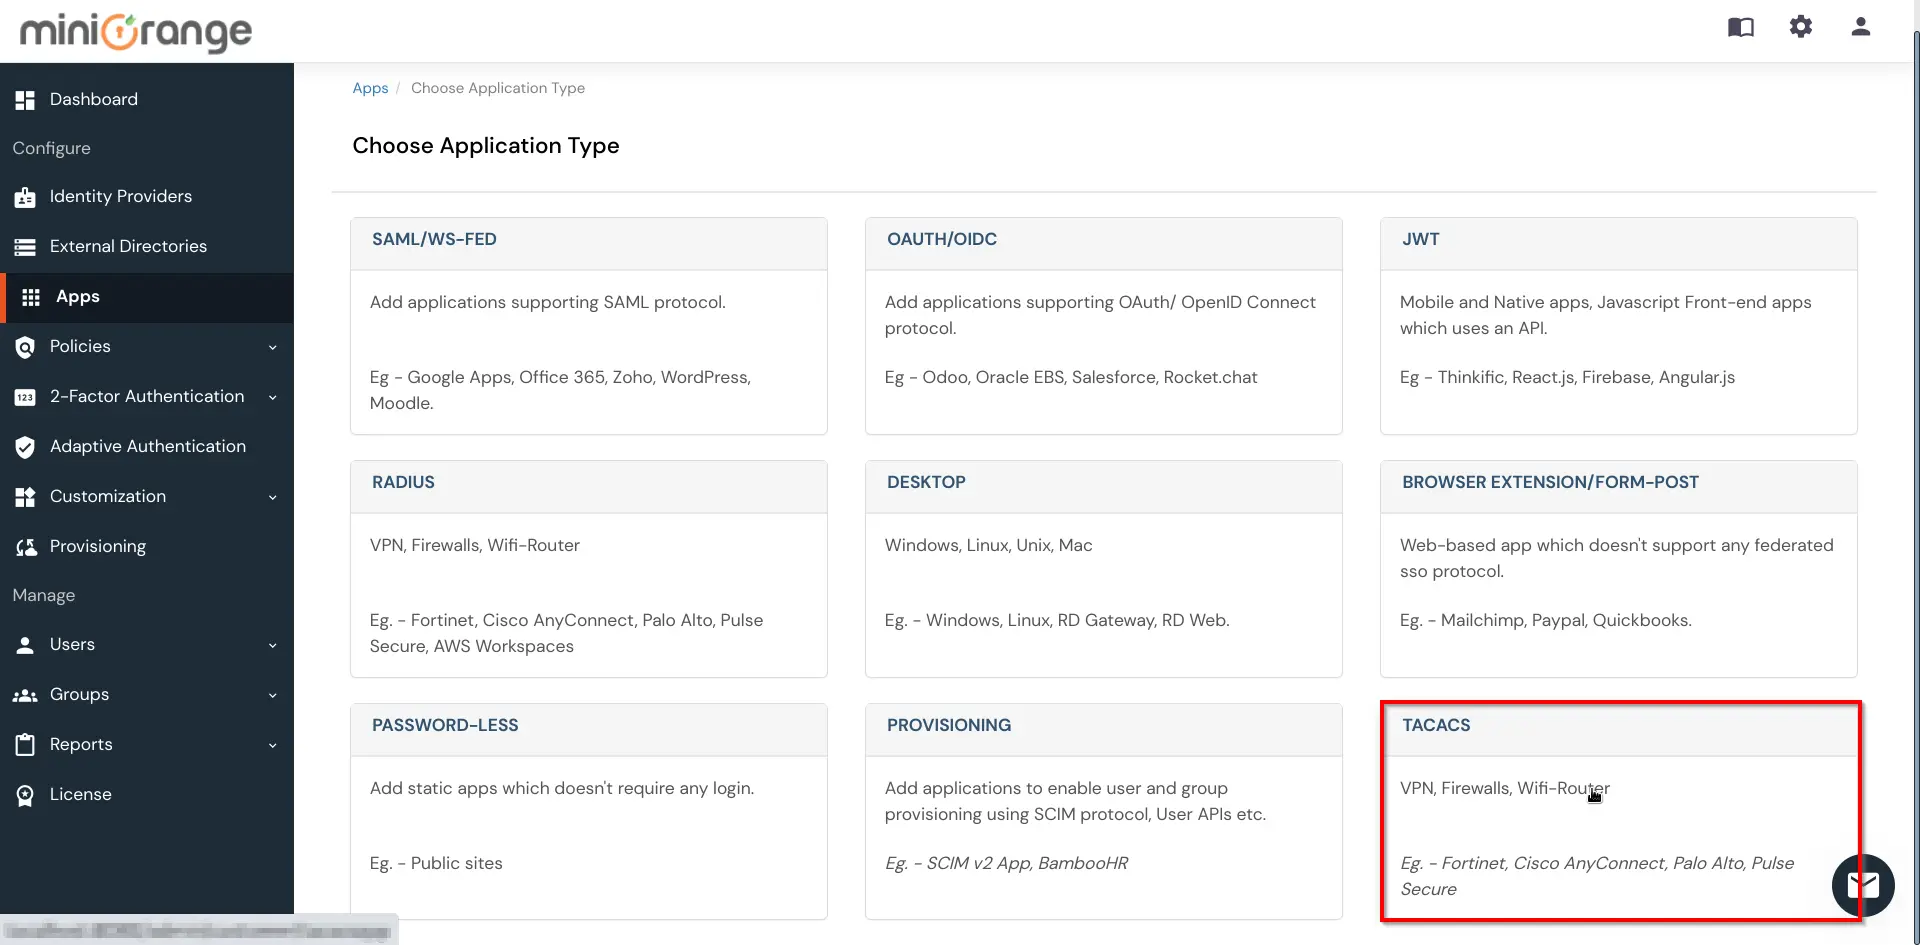
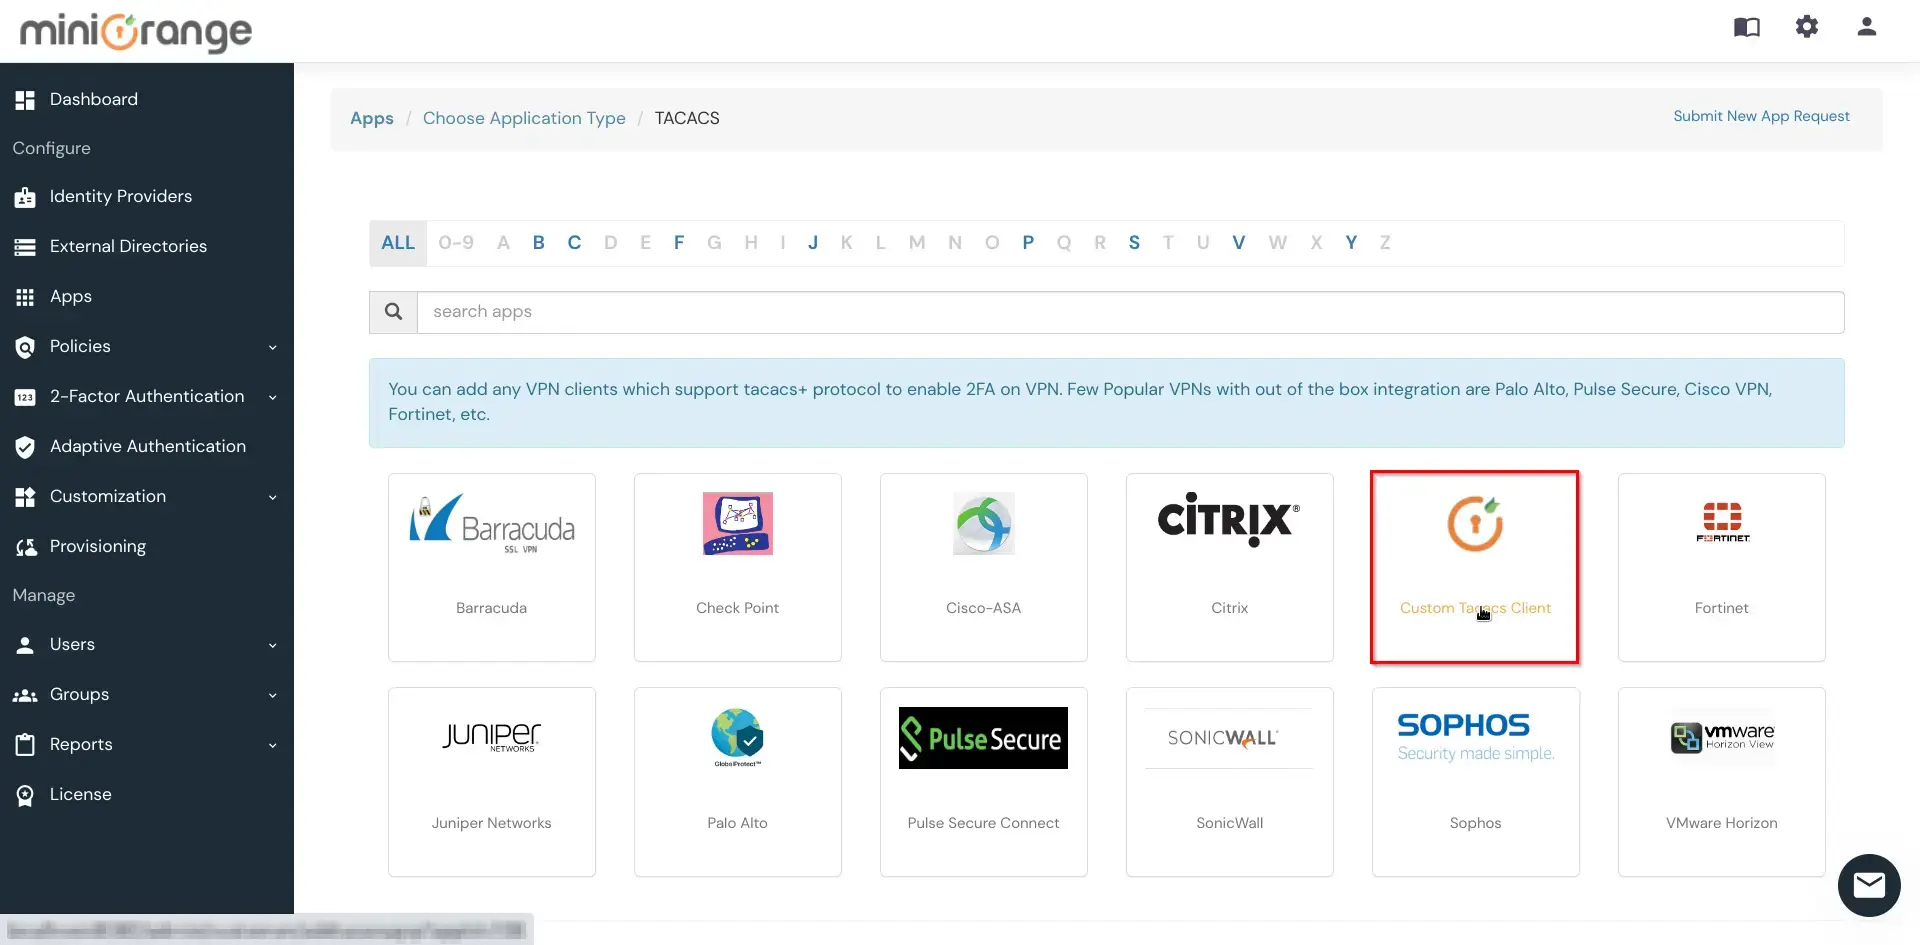
×Two Factor Authentication (2FA) or Multifactor Authentication is the process of the authentication in which you have to provide two factors to gain the access. First Factor is the one that you know username and password and Second factor is what you might have as unique like a phone (For OTP) or Fingerprint. This additional layer prevents the unauthorized person from accessing the resources even if they know your username and password. miniOrange provides 15+ authentication methods and solutions for various use cases. TACACS+ provides better authentication, authorization and accounting, which allows for more flexible administrative control. In this guide, we will learn how to configure TACACS+ on Juniper routers and switches.
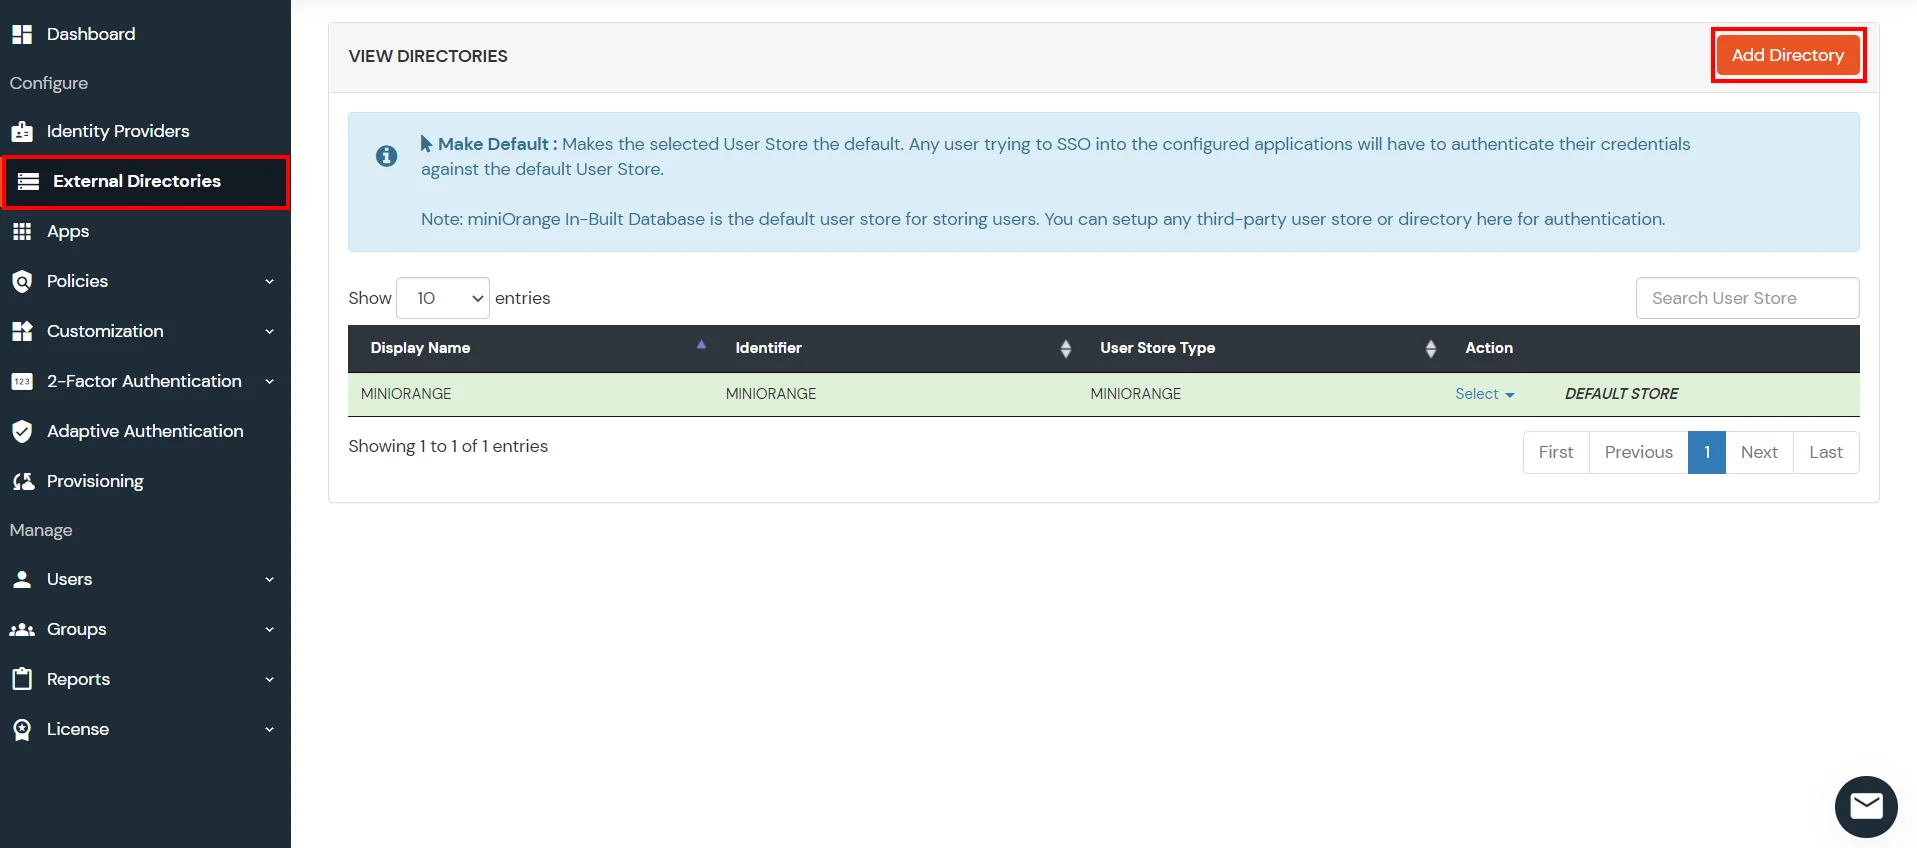
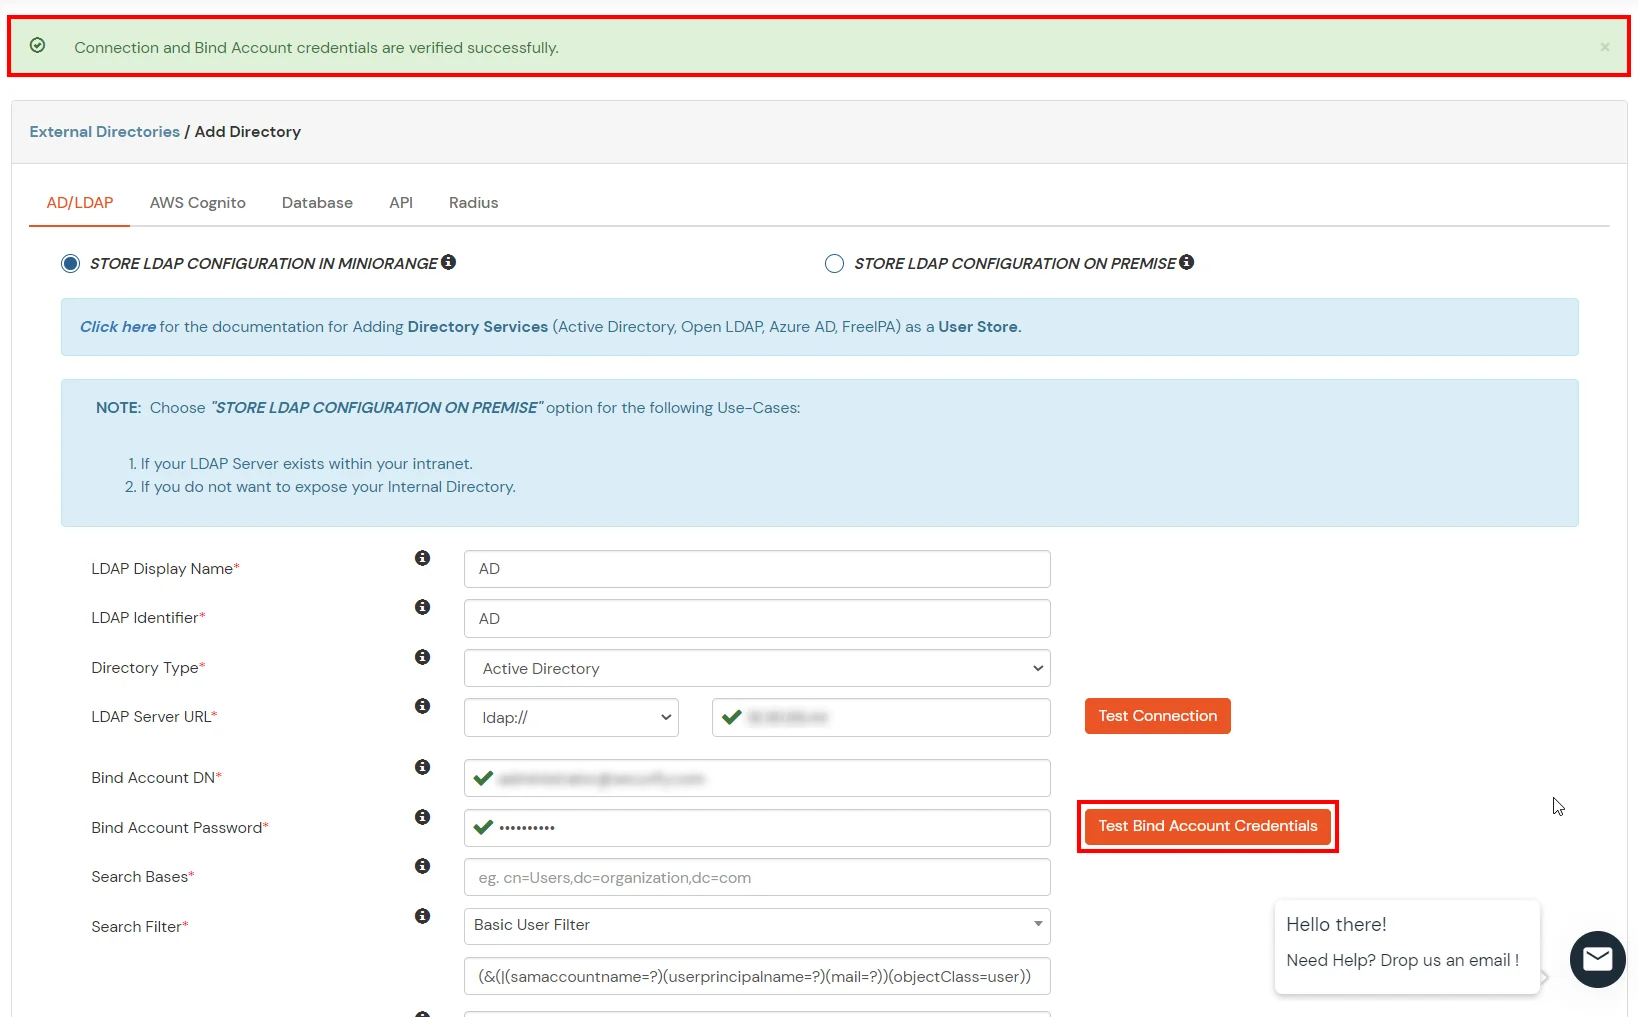
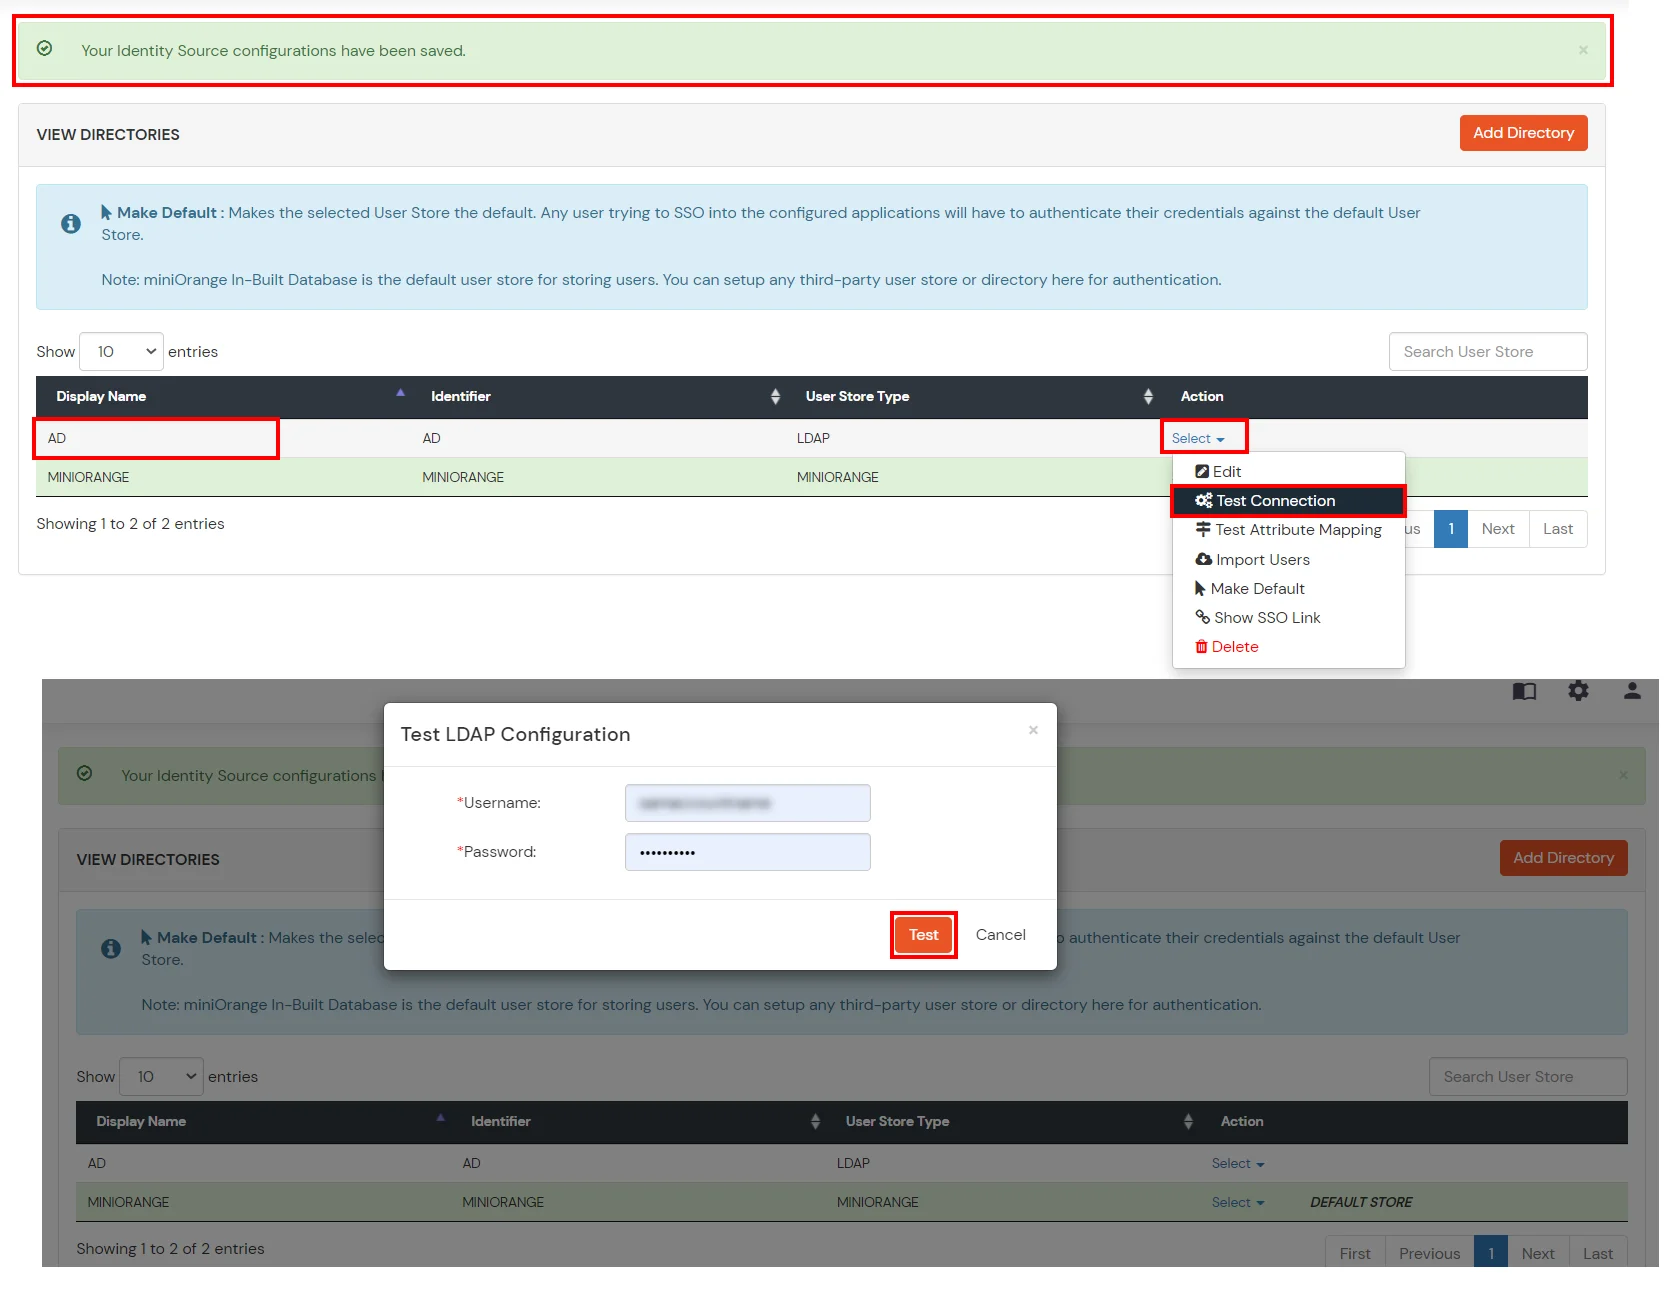
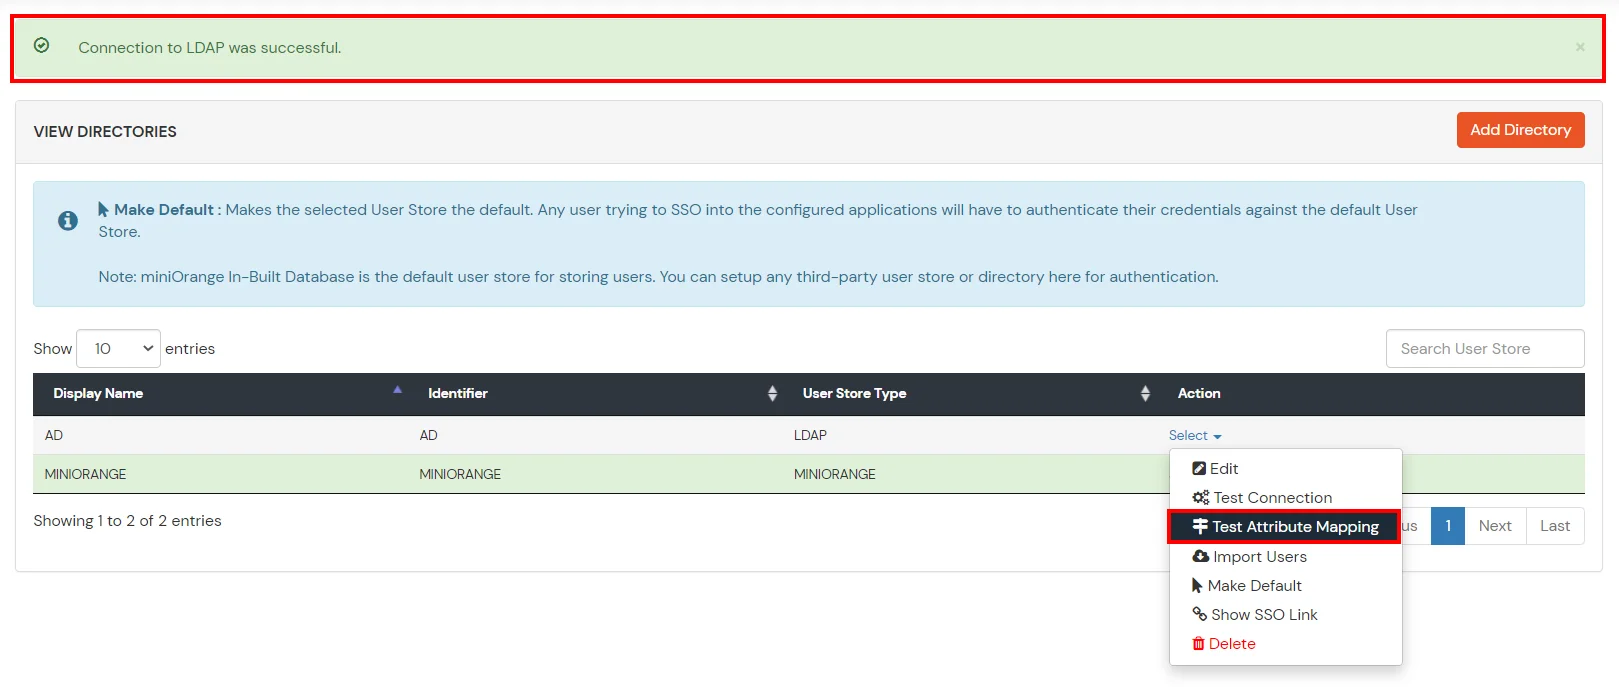
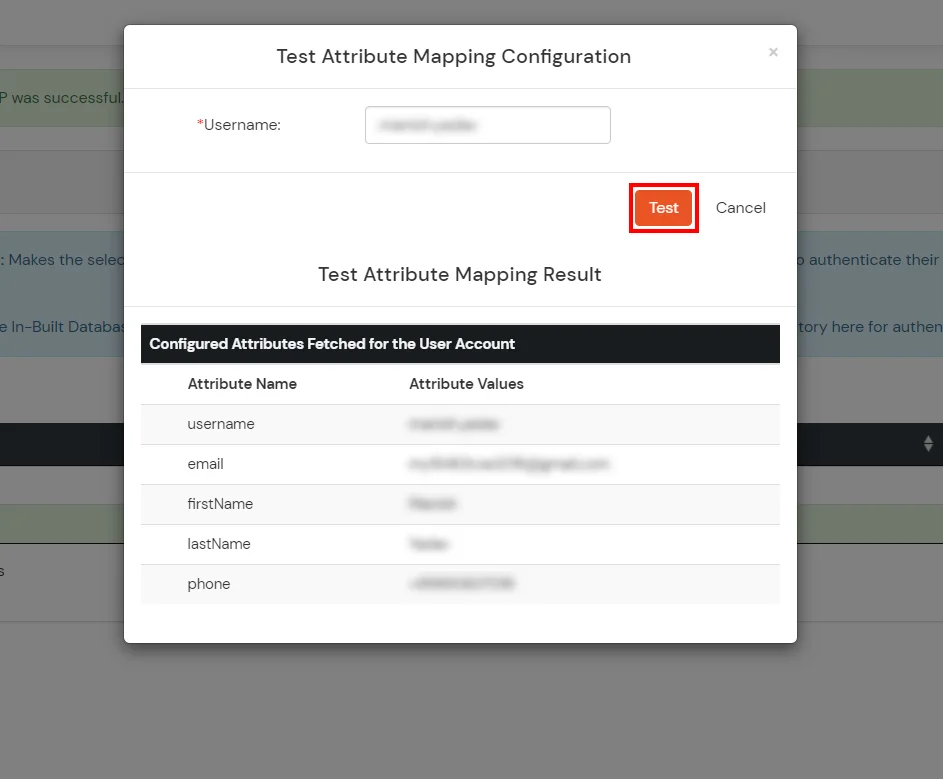
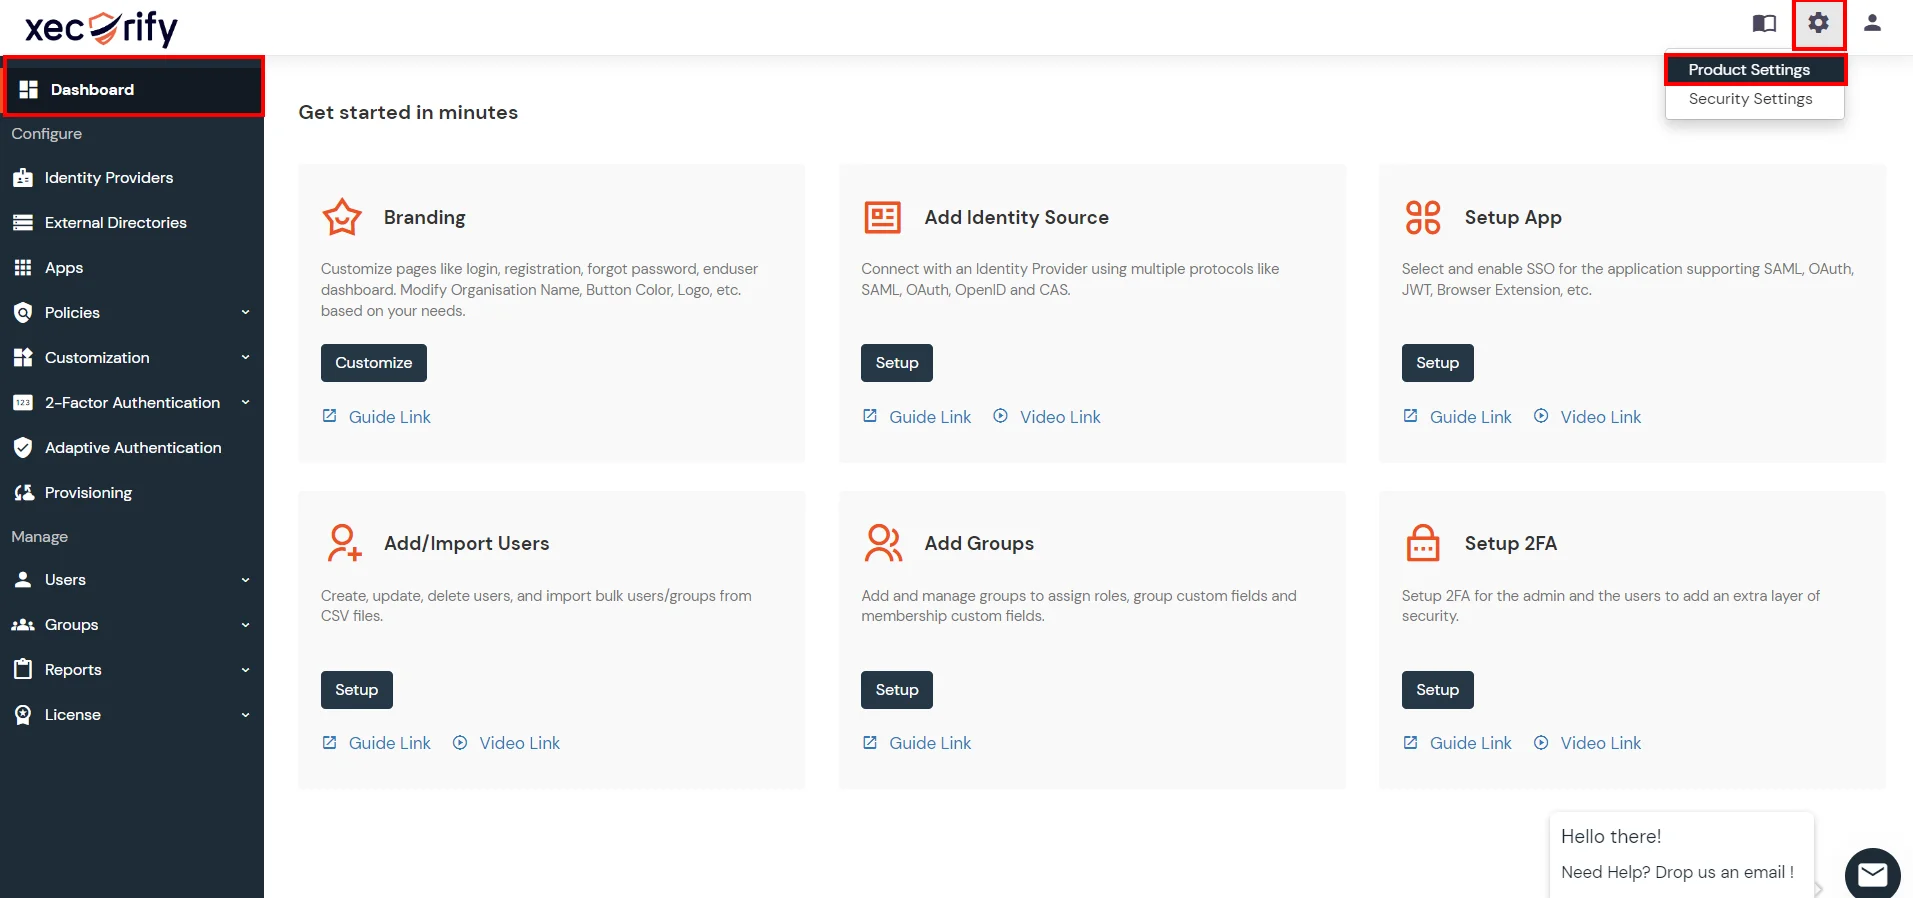
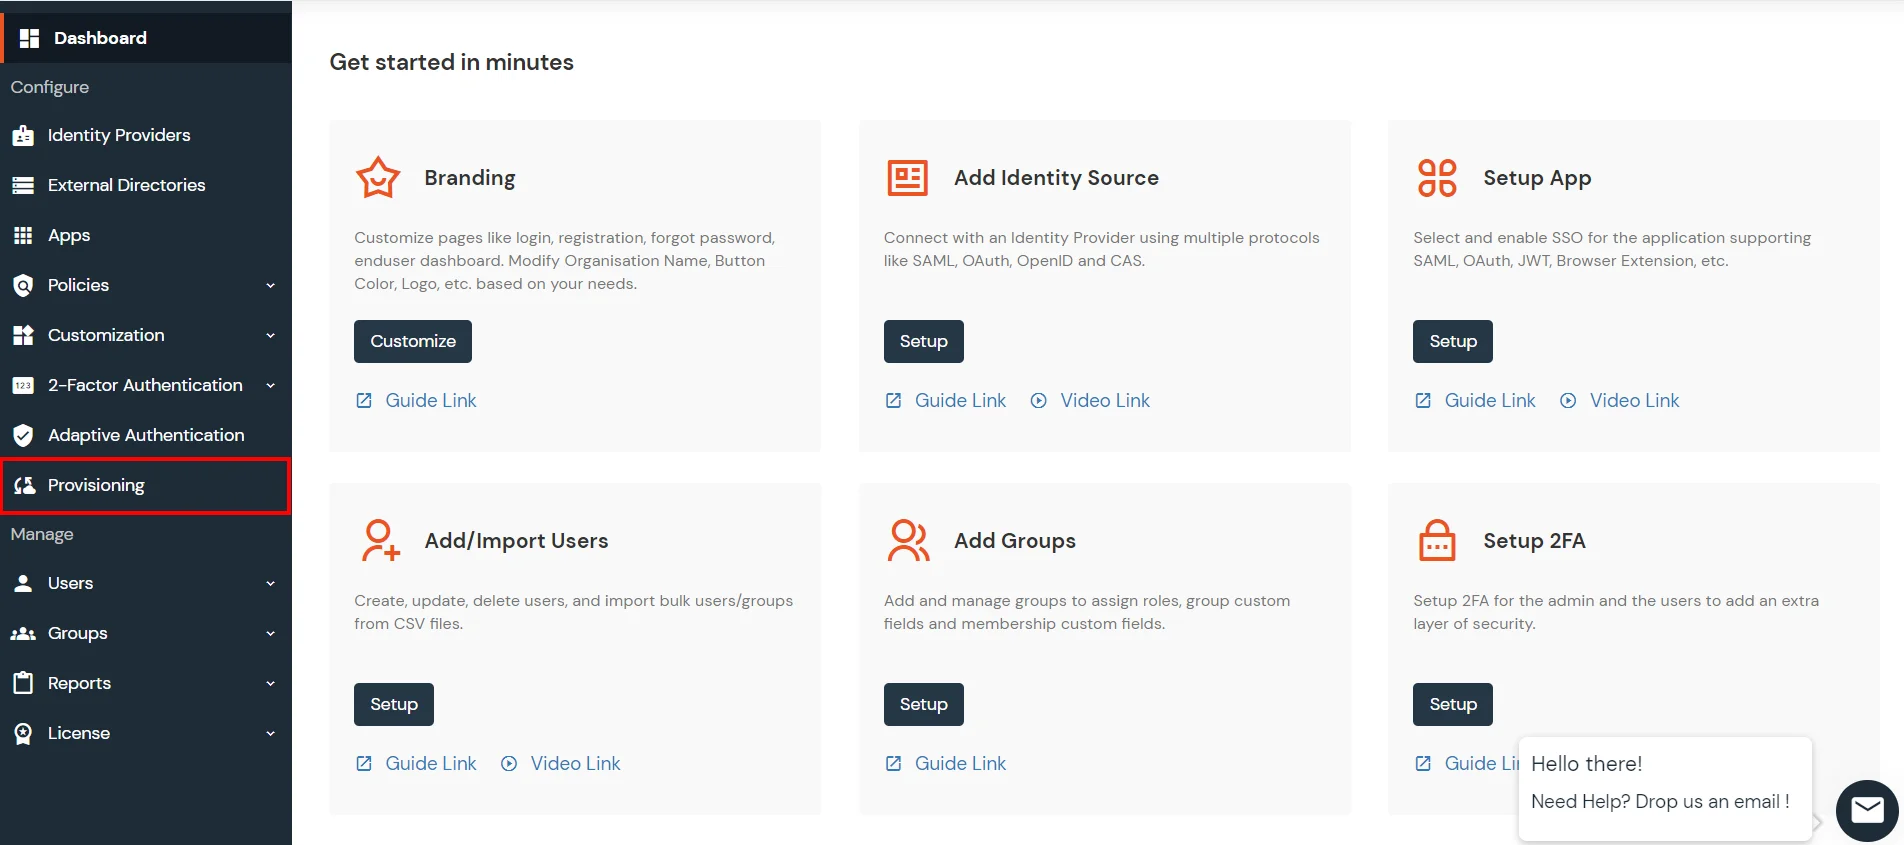
miniOrange provides user authentication from various external directories such as miniOrange Directory, Microsoft AD, Microsoft Entra ID/LDAP, AWS Cognito and many more.
Can't find your Directory? Contact us on idpsupport@xecurify.com
miniOrange offers free help through a consultation call with our System Engineers to Install or Setup Two-Factor Authentication for Juniper Routers and Switches solution in your environment with 30-day trial.
For this, you need to just send us an email at idpsupport@xecurify.com to book a slot and we'll help you setting it up in no time.

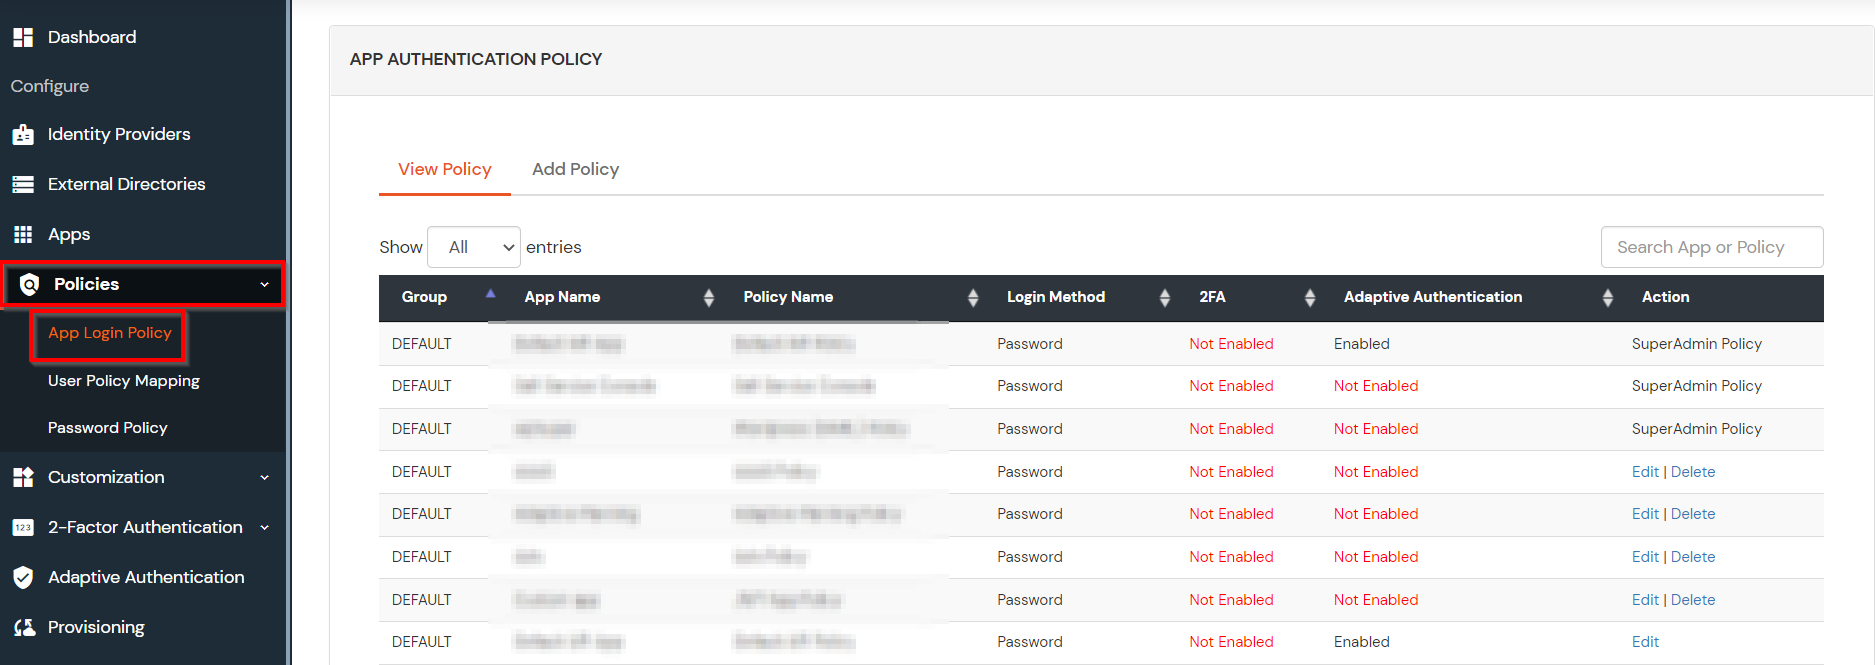
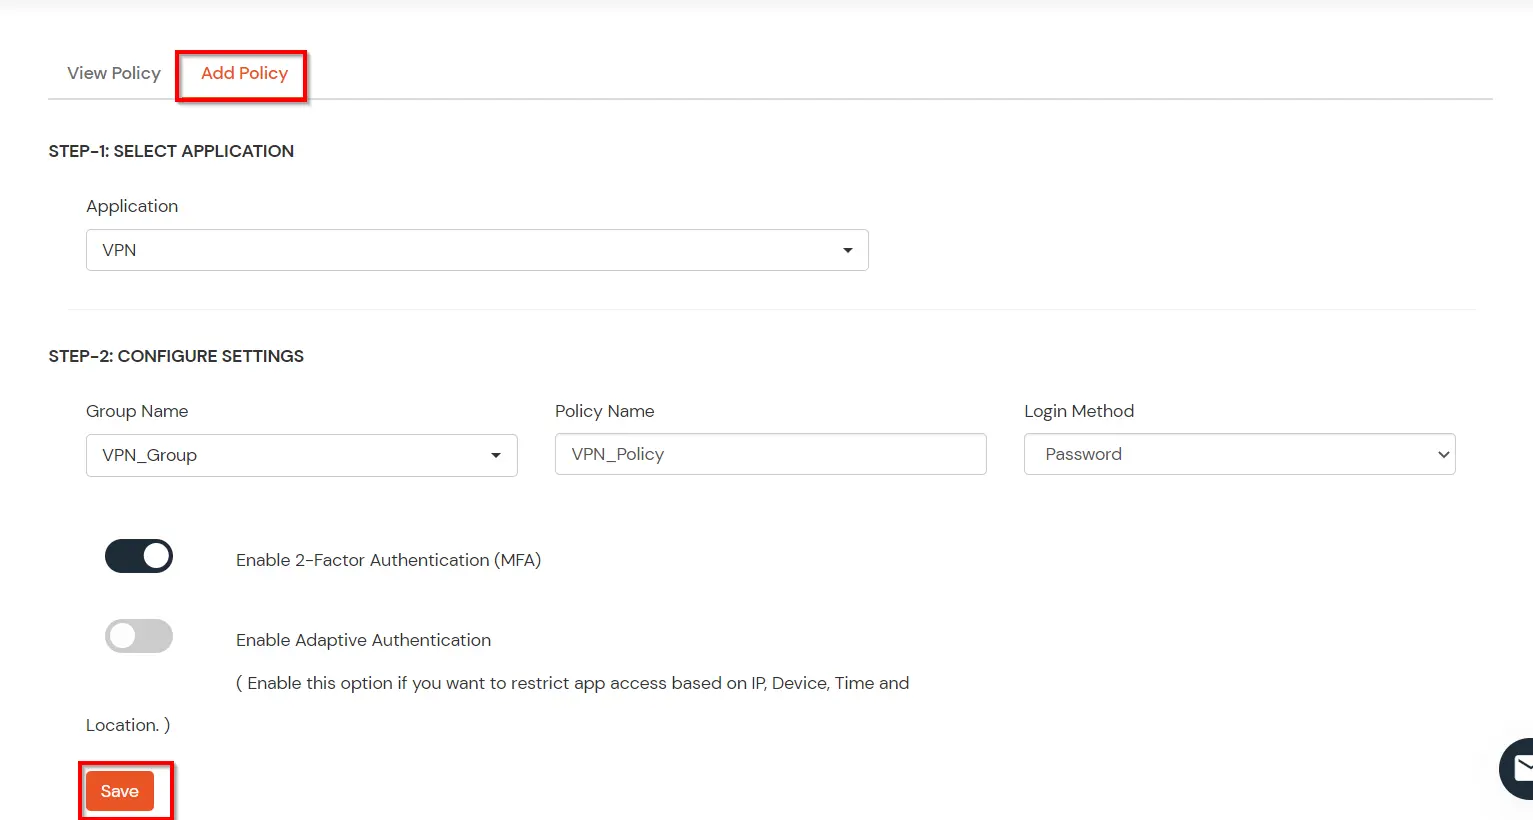
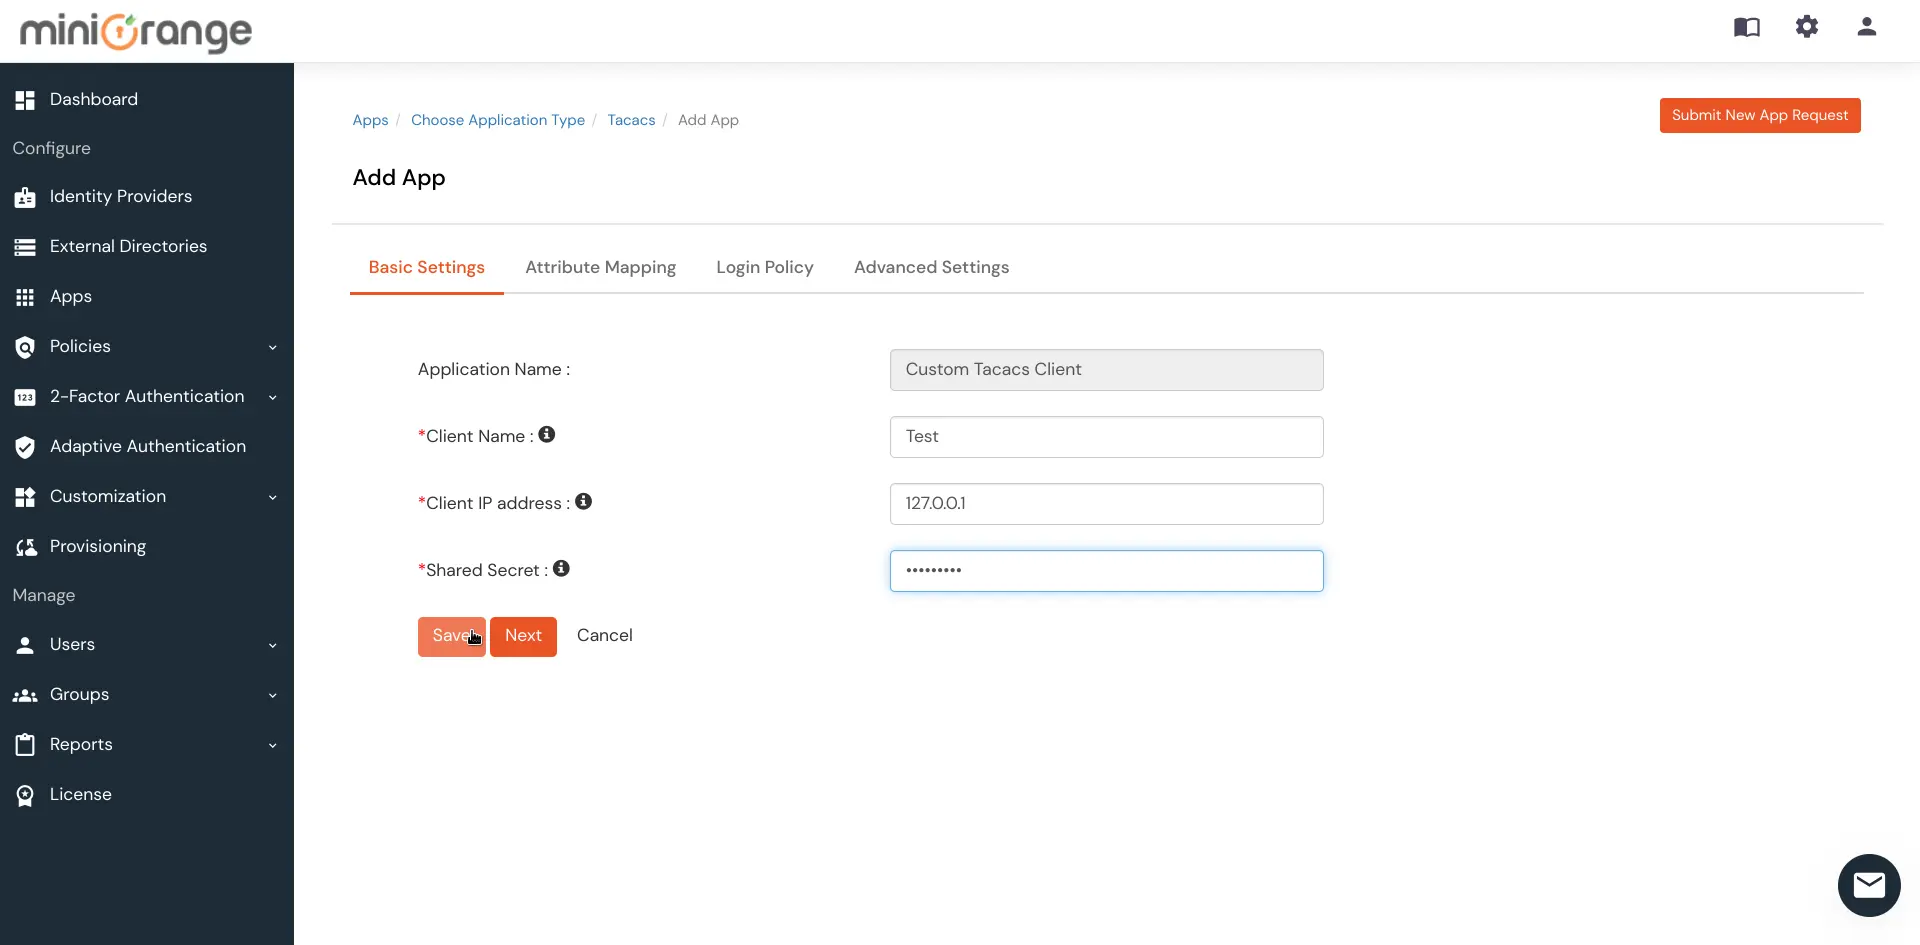
| Client Name: | Any name for your reference. |
| Client IP: | IP address of network device which will send TACACS authentication request. |
| Shared Secret: | Security key. For Eg. "sharedsecret" (Keep this with you, you will need to configure same on TACACS client). |
| Group Name: | Group for which the policy will apply. |
| Policy Name: | Any Identifier that specifies policy name. |
| Login Method | Login Method for the users associated with this policy. |
| Enable 2-Factor Authentication | Enables Second Factor during Login for users associated with this policy. |
| Enable Adaptive Authentication | Enables Adaptive Authentication for Login of users associated with this policy. |
Only For On-Premise Version
Open Firewall Ports.
set system tacplus-server <server-ip> port 49
set system tacplus-server <server-ip> < server >
set system tacplus-server <server-ip> source-address <switch-ip>
set system accounting destination tacplus server <server-ip> port 49
set system accounting destination tacplus server <server-ip> < server >
set system accounting destination tacplus server <server-ip> source-address <switch-ip>
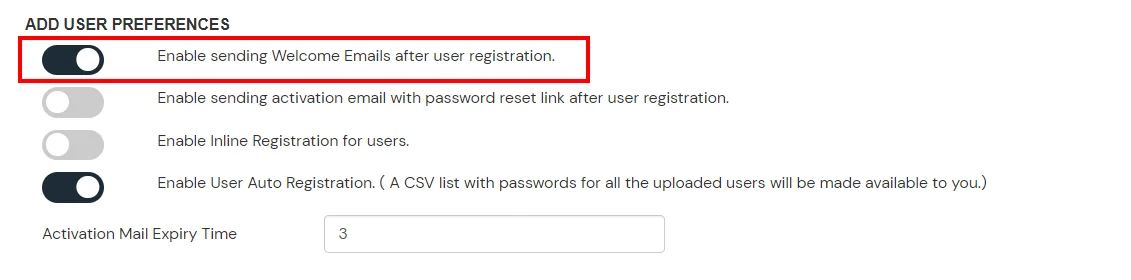
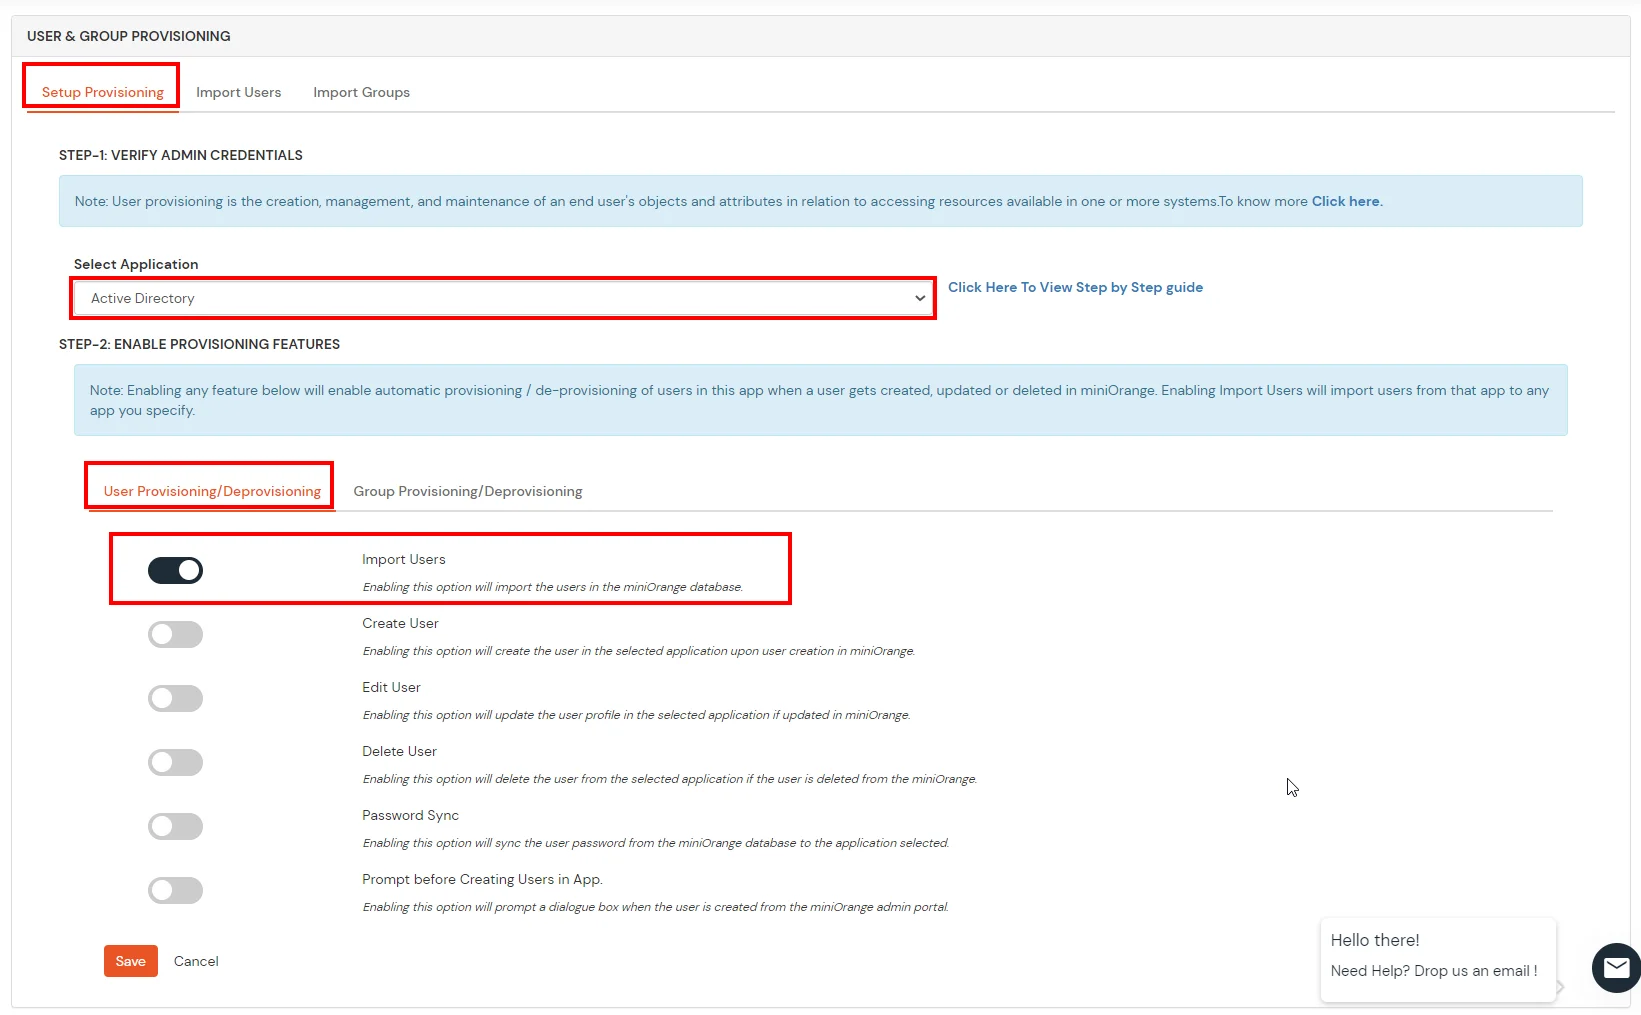
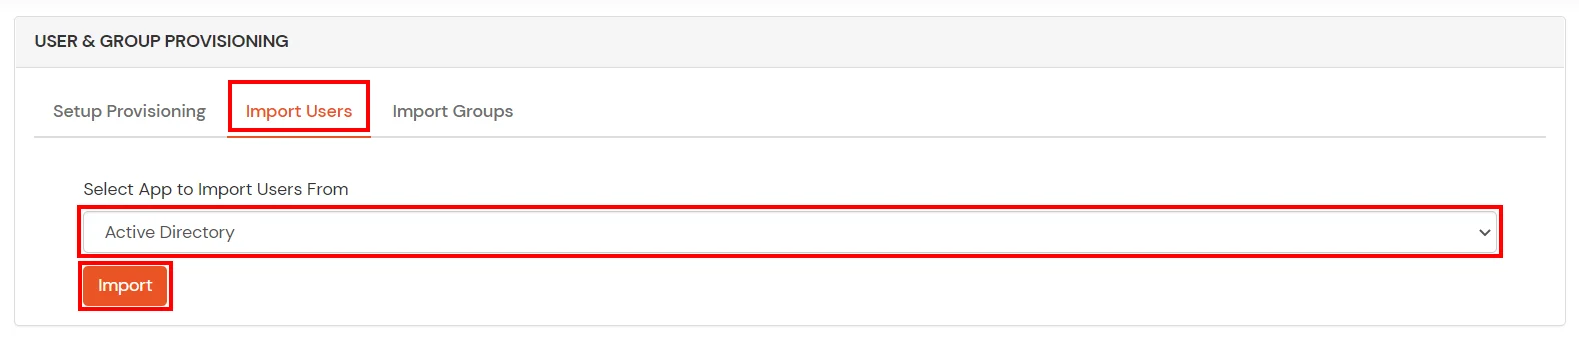
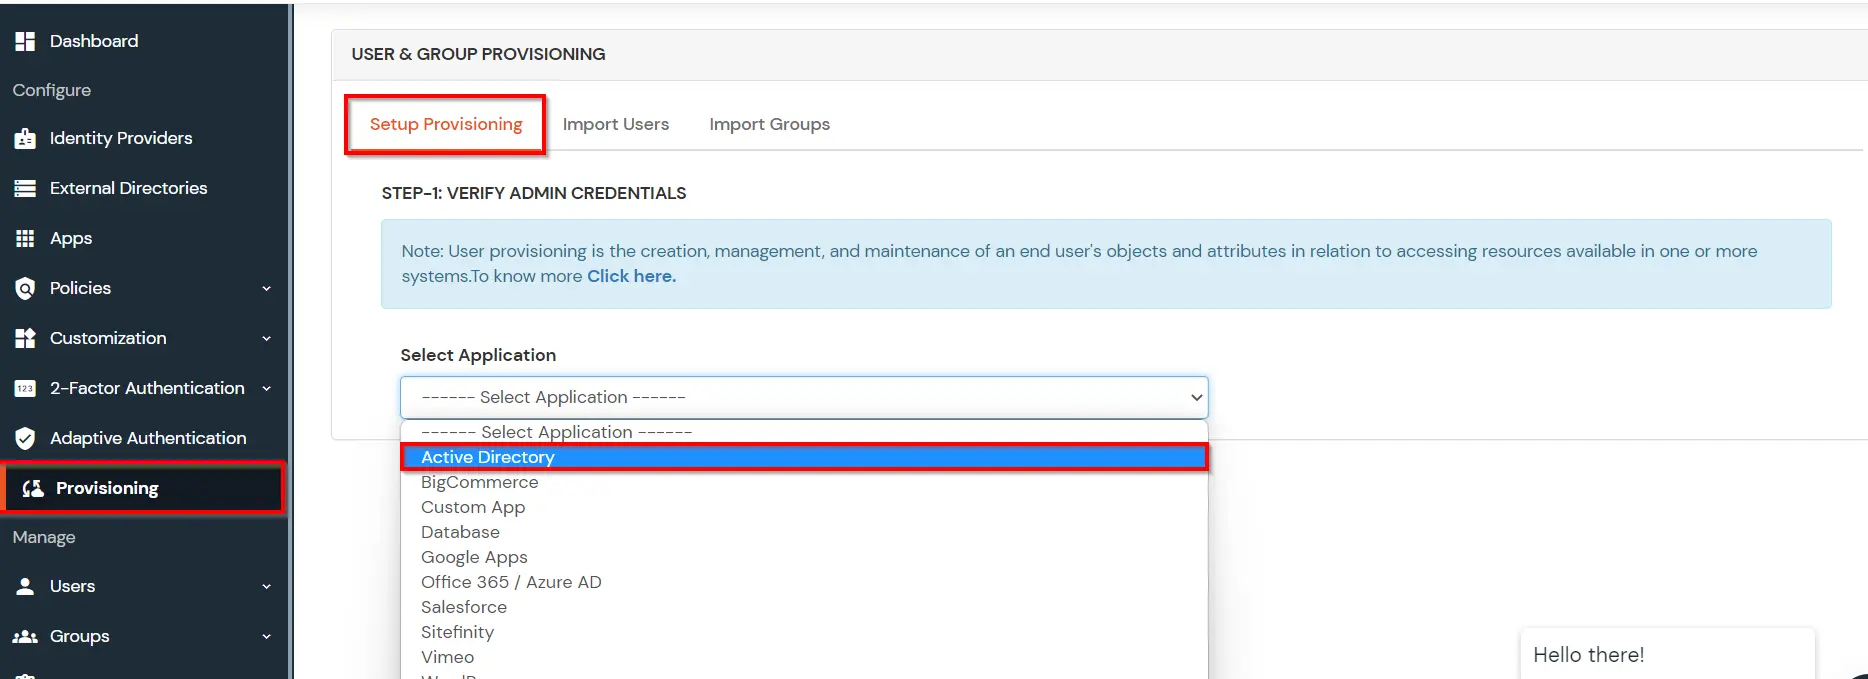
set system login user remote class operatorminiOrange provides user authentication from various external sources, which can be Directories (like ADFS, Microsoft Active Directory, Microsoft Entra ID, OpenLDAP, Google, AWS Cognito etc), Identity Providers (like Okta, Shibboleth, Ping, OneLogin, KeyCloak), Databases (like MySQL, Maria DB, PostgreSQL) and many more. You can configure your existing directory/user store or add users in miniOrange.
Note: You can follow this guide, if you want to configure Radius MFA with your users stored in Microsoft Entra ID using OAuth Password Grant.
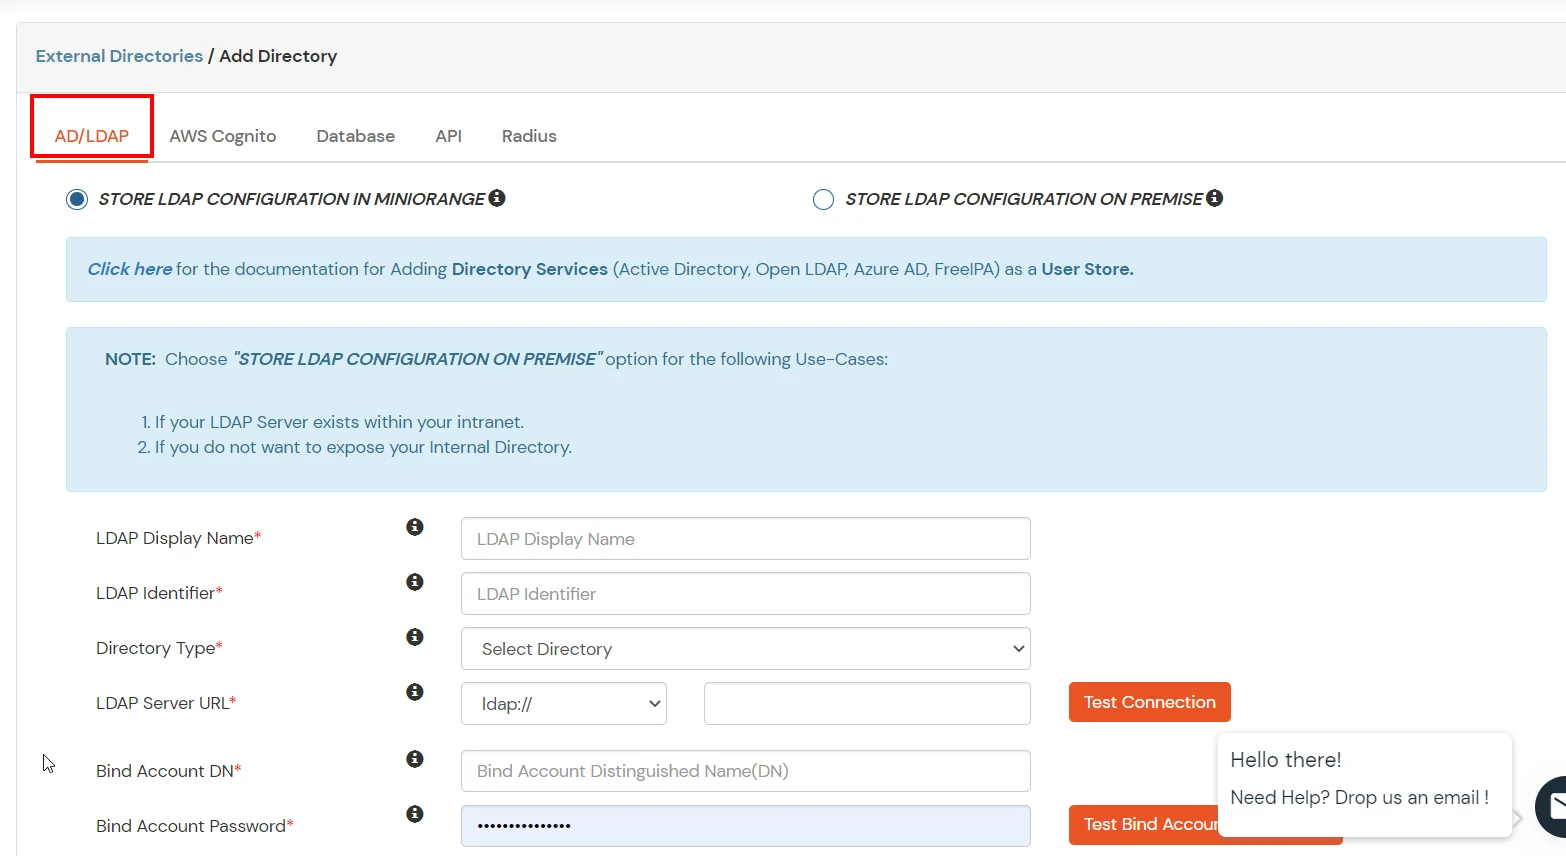
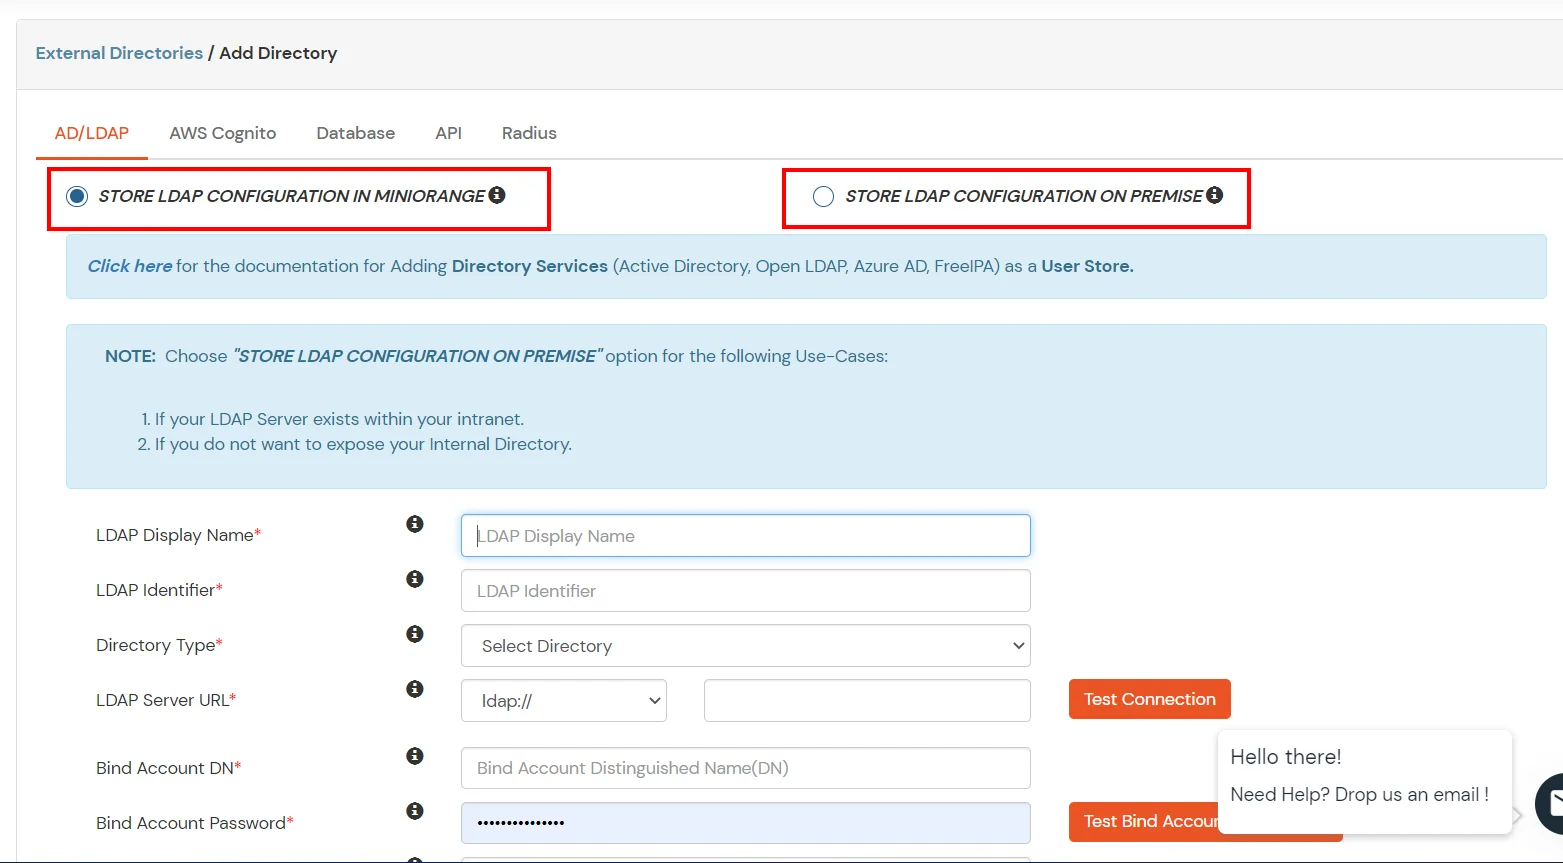
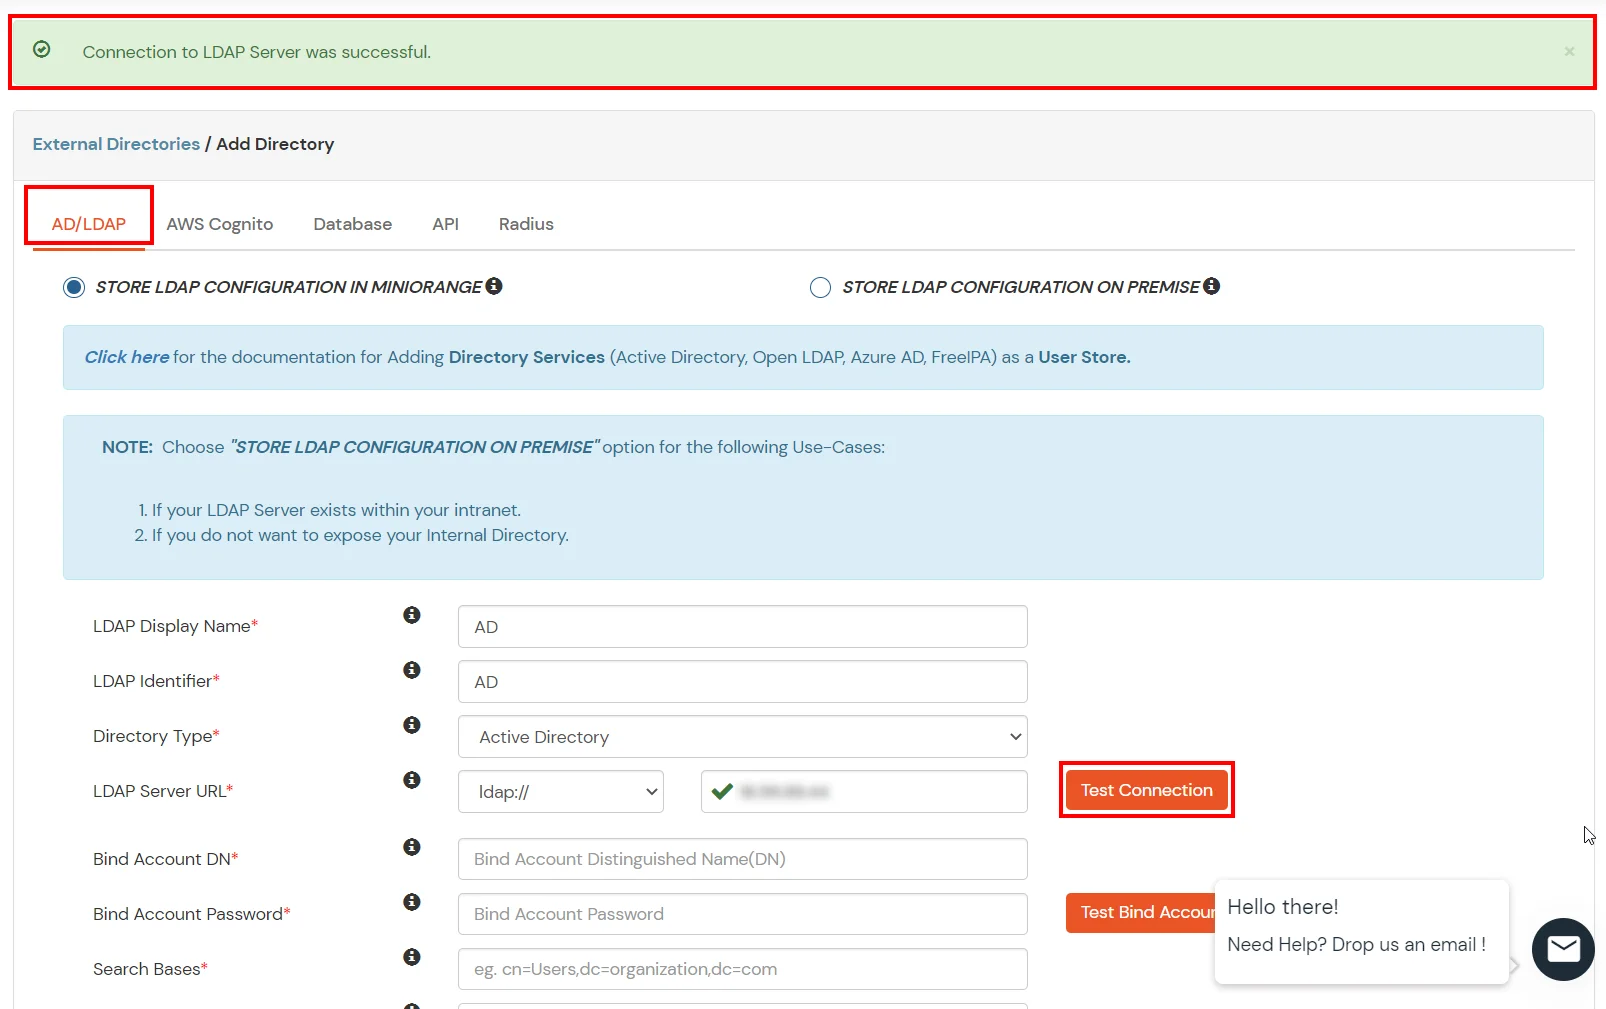
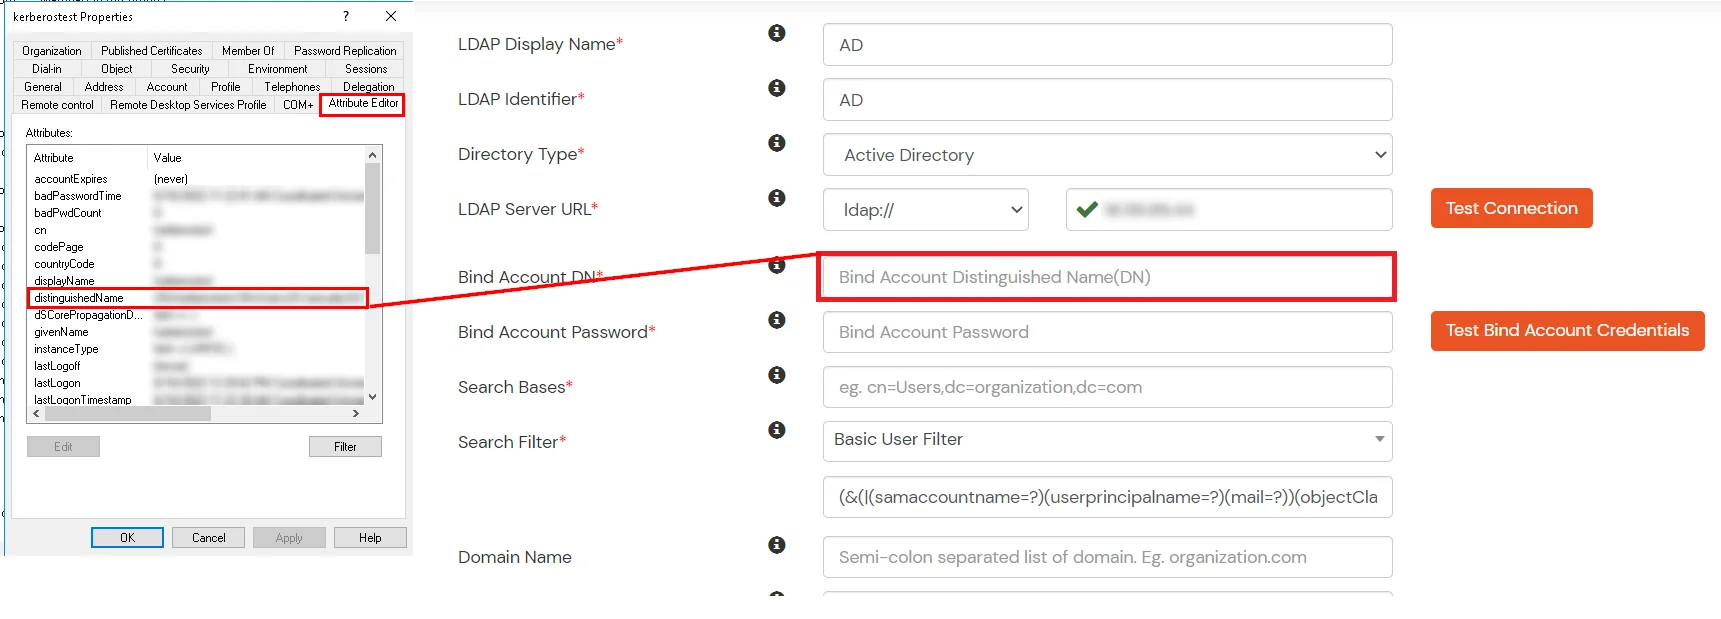
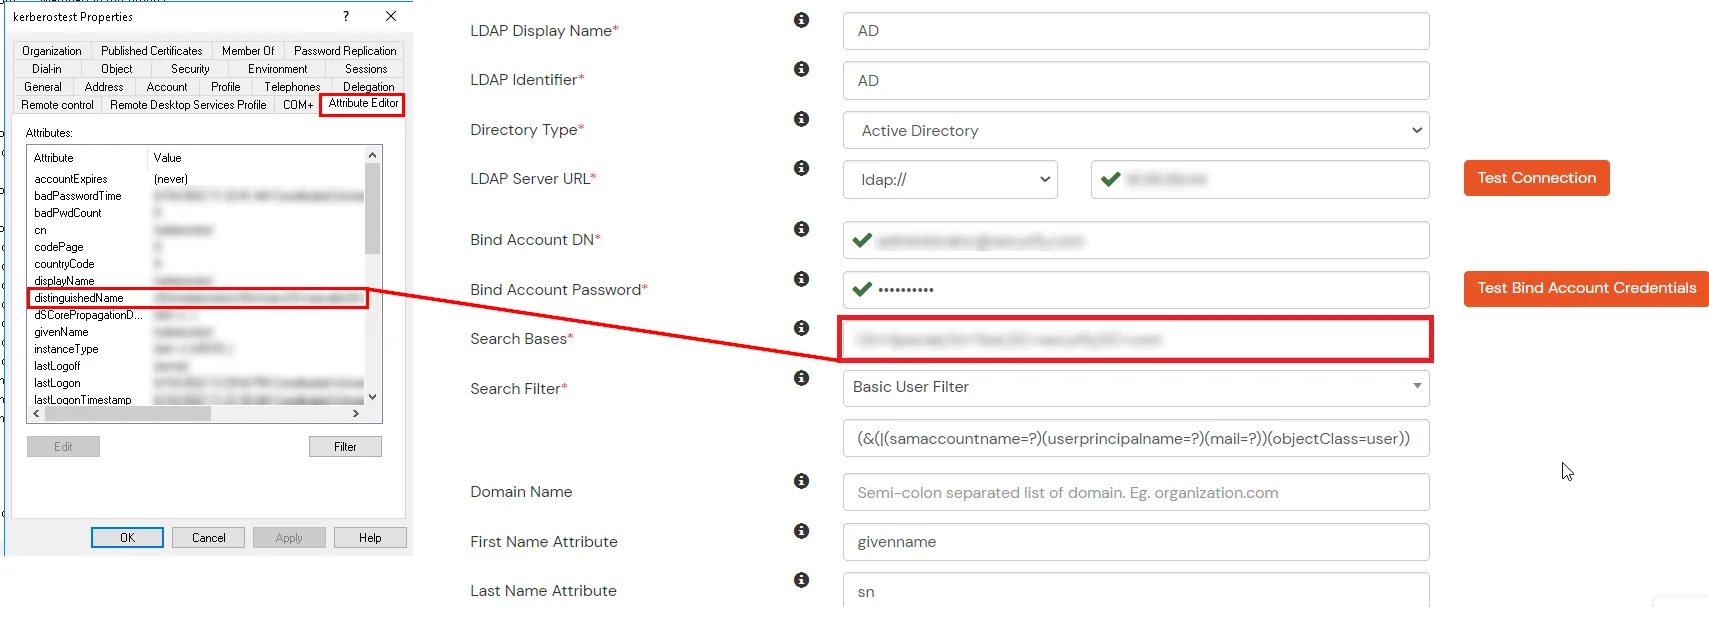
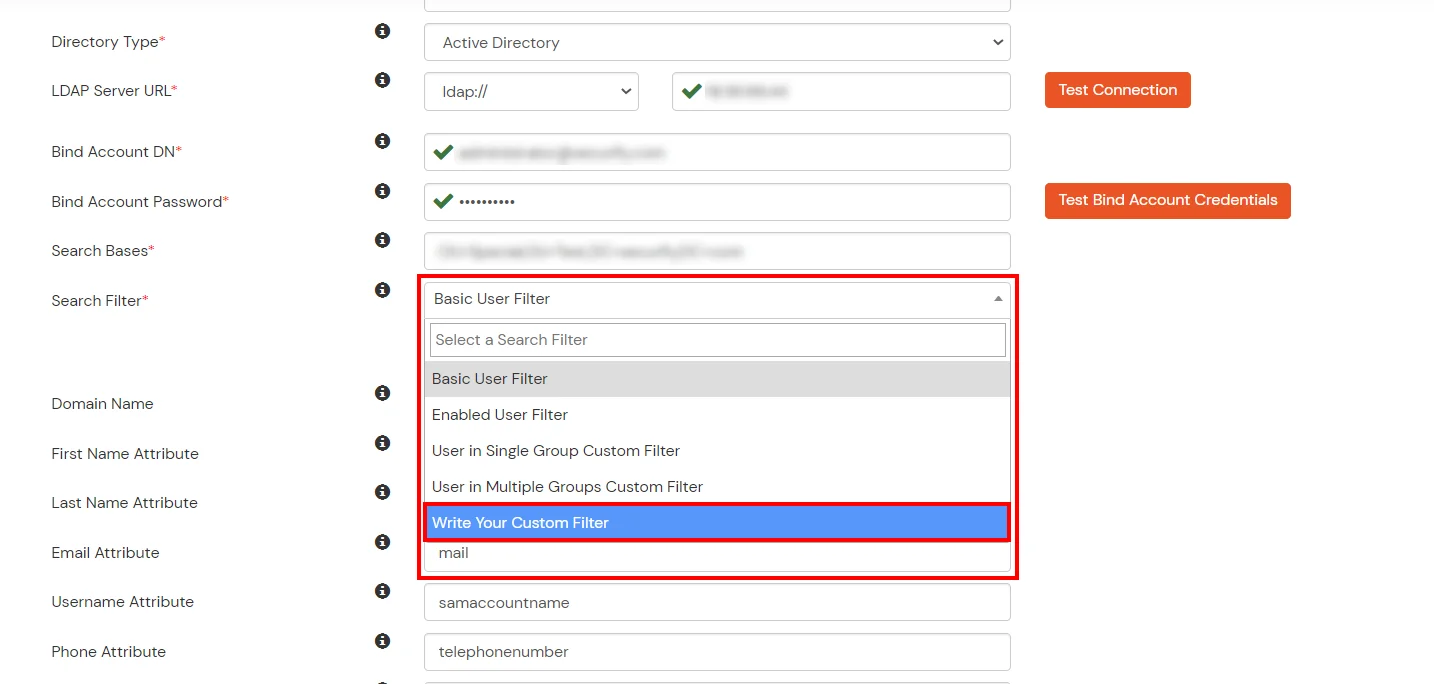
Configure your existing directories such as Microsoft Active Directory, Microsoft Entra ID, OpenLDAP, etc.
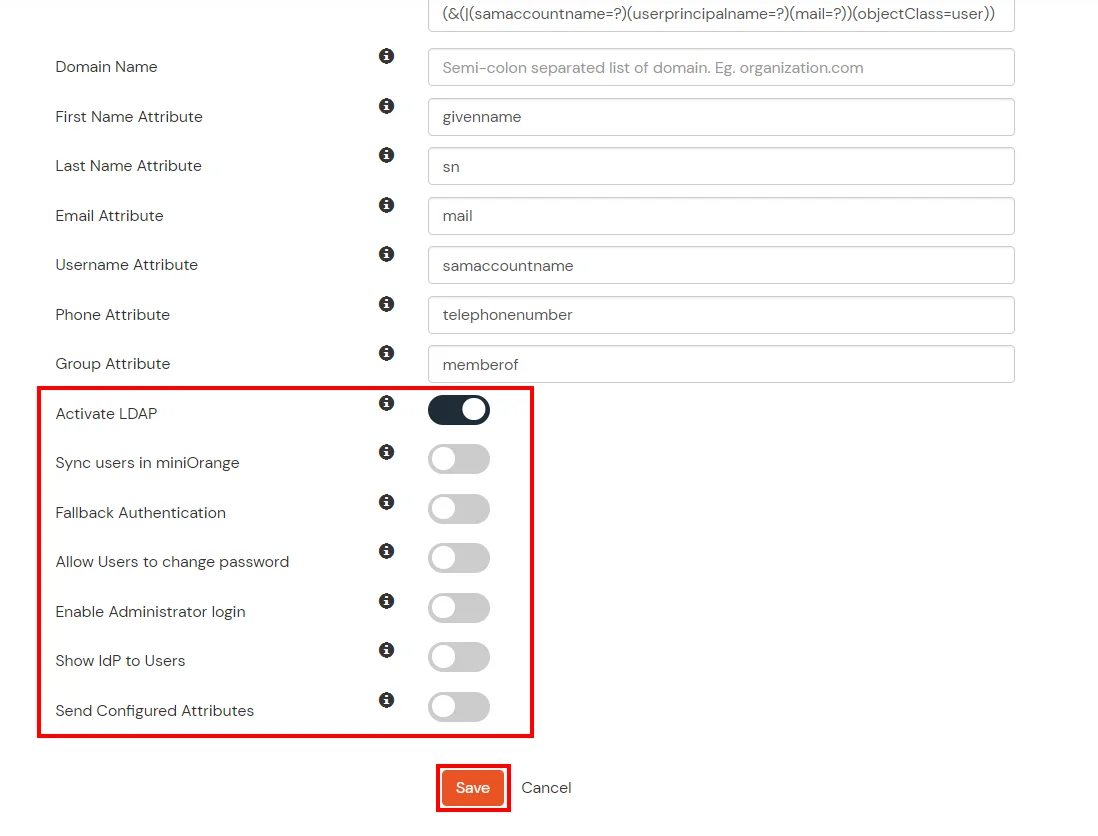
Here's the list of the attributes and what it does when we enable it. You can enable/disable accordingly.
| Attribute | Description |
|---|---|
| Activate LDAP | All user authentications will be done with LDAP credentials if you Activate it |
| Sync users in miniOrange | Users will be created in miniOrange after authentication with LDAP |
| Fallback Authentication | If LDAP credentials fail then user will be authenticated through miniOrange |
| Allow users to change password | This allows your users to change their password. It updates the new credentials in your LDAP server |
| Enable administrator login | On enabling this, your miniOrange Administrator login authenticates using your LDAP server |
| Show IdP to users | If you enable this option, this IdP will be visible to users |
| Send Configured Attributes | If you enable this option, then only the attributes configured below will be sent in attributes at the time of login |
Refer our guide to setup LDAPS on windows server.
Note: Below steps are used to enable one time or manual sync. To enable sync on scheduled basis, you should use LDAP gateway module. Read more and download the LDAP gateway module.


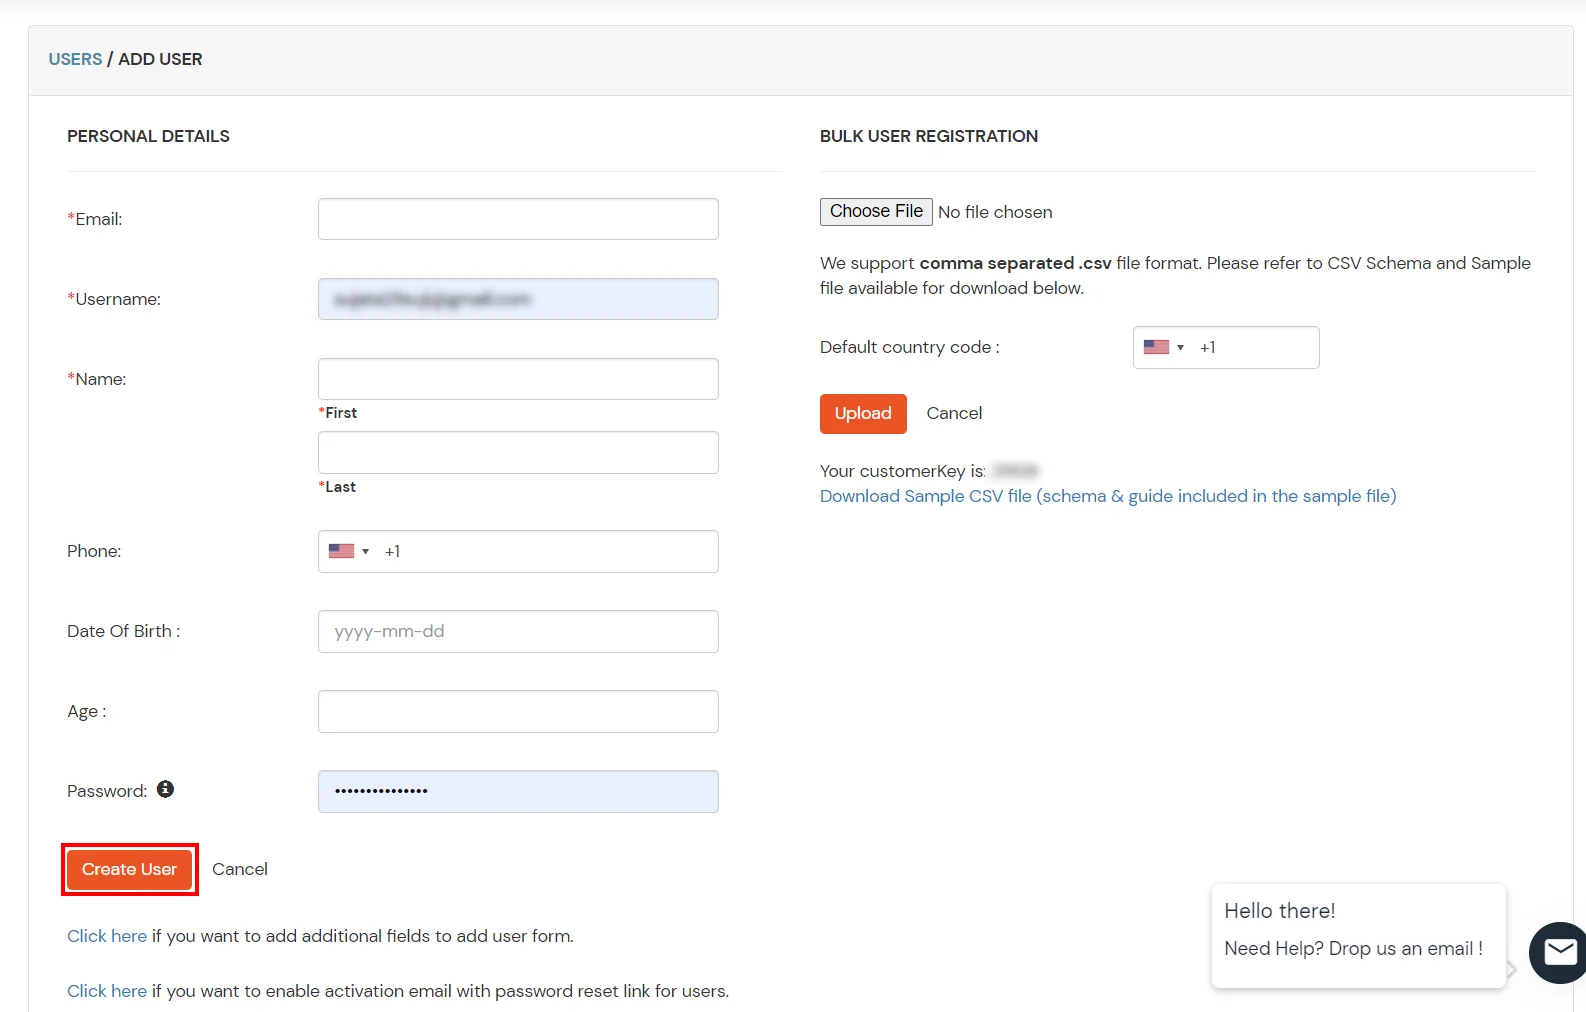
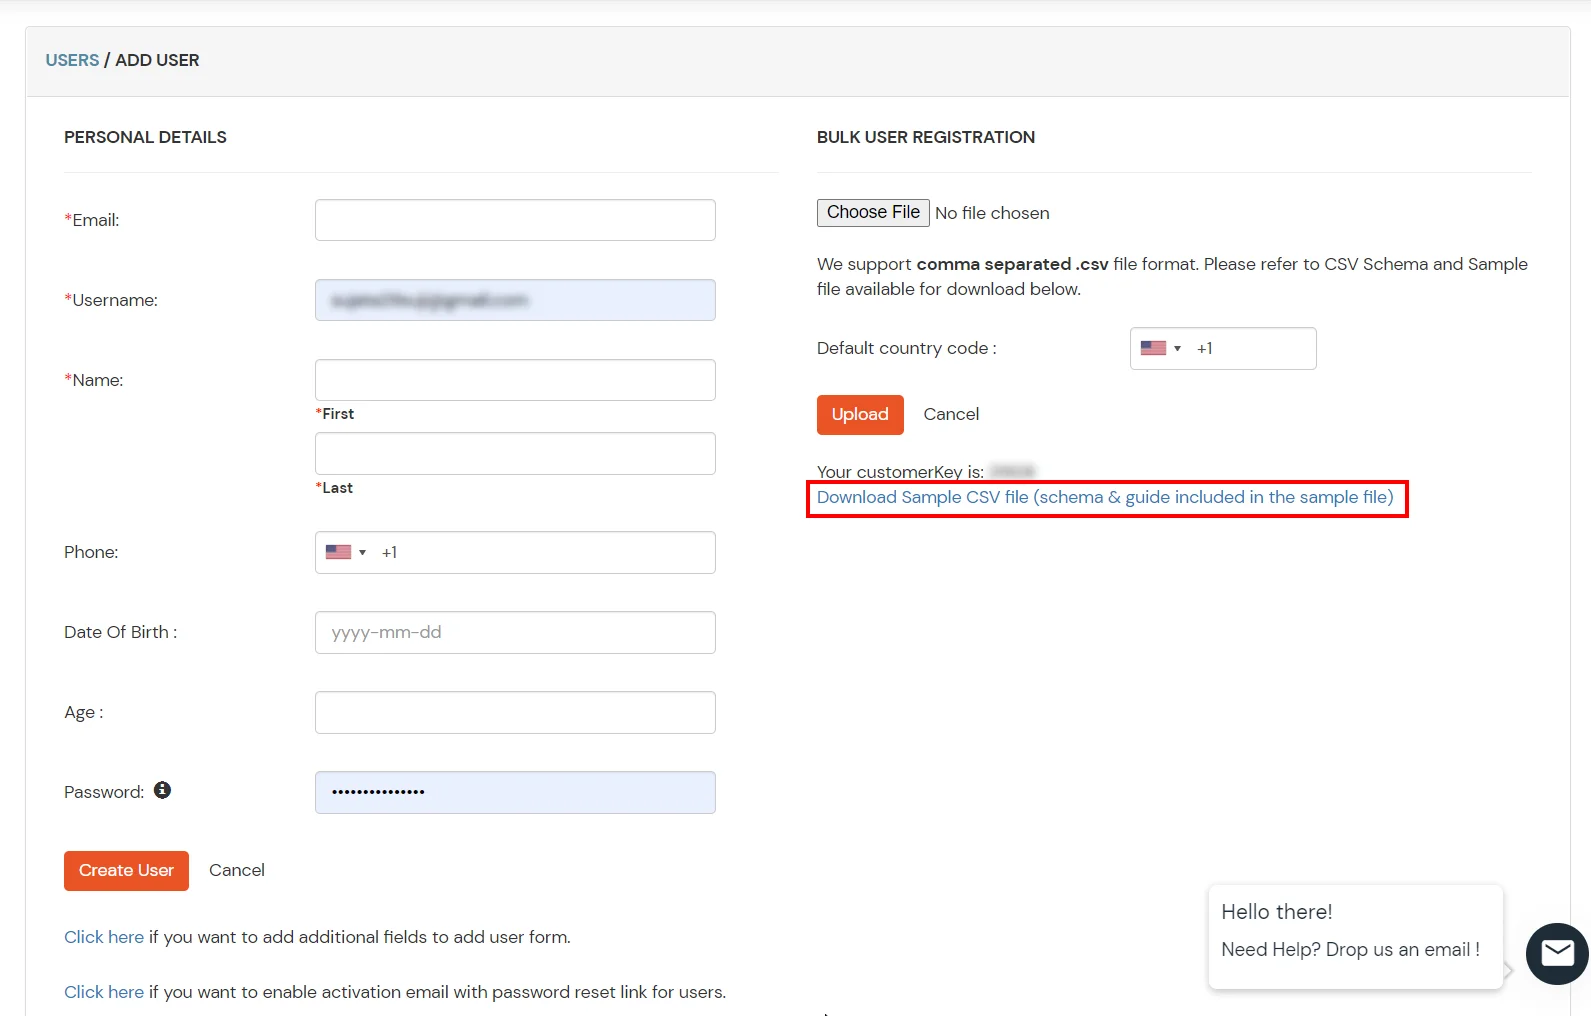
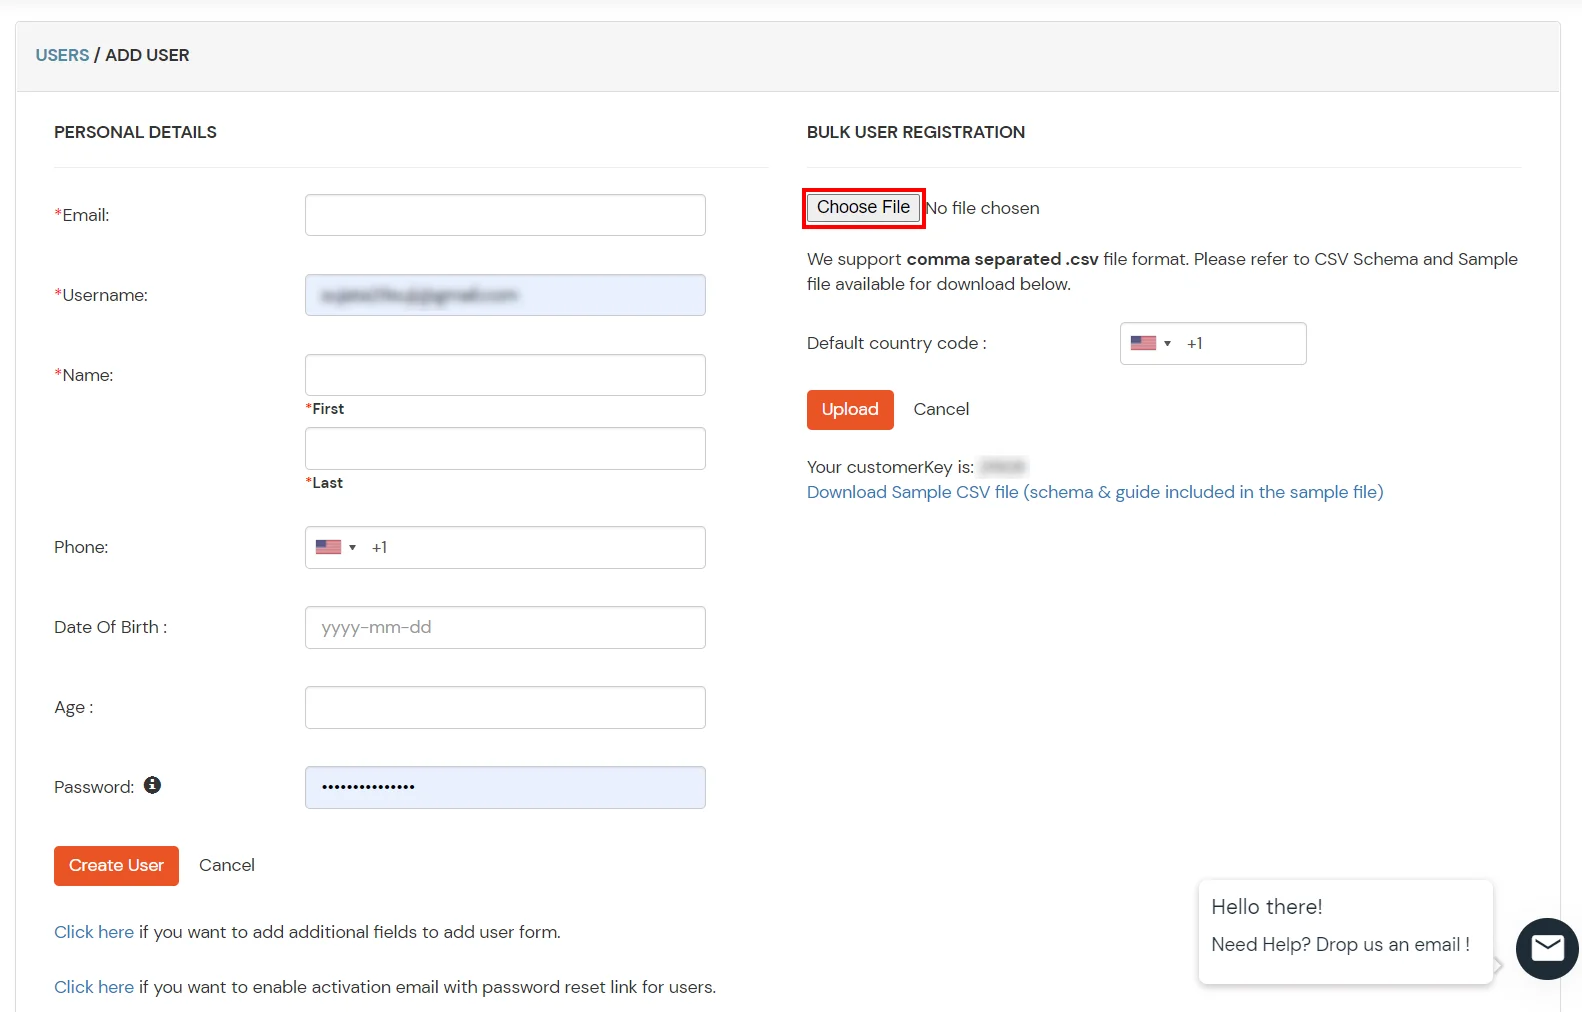
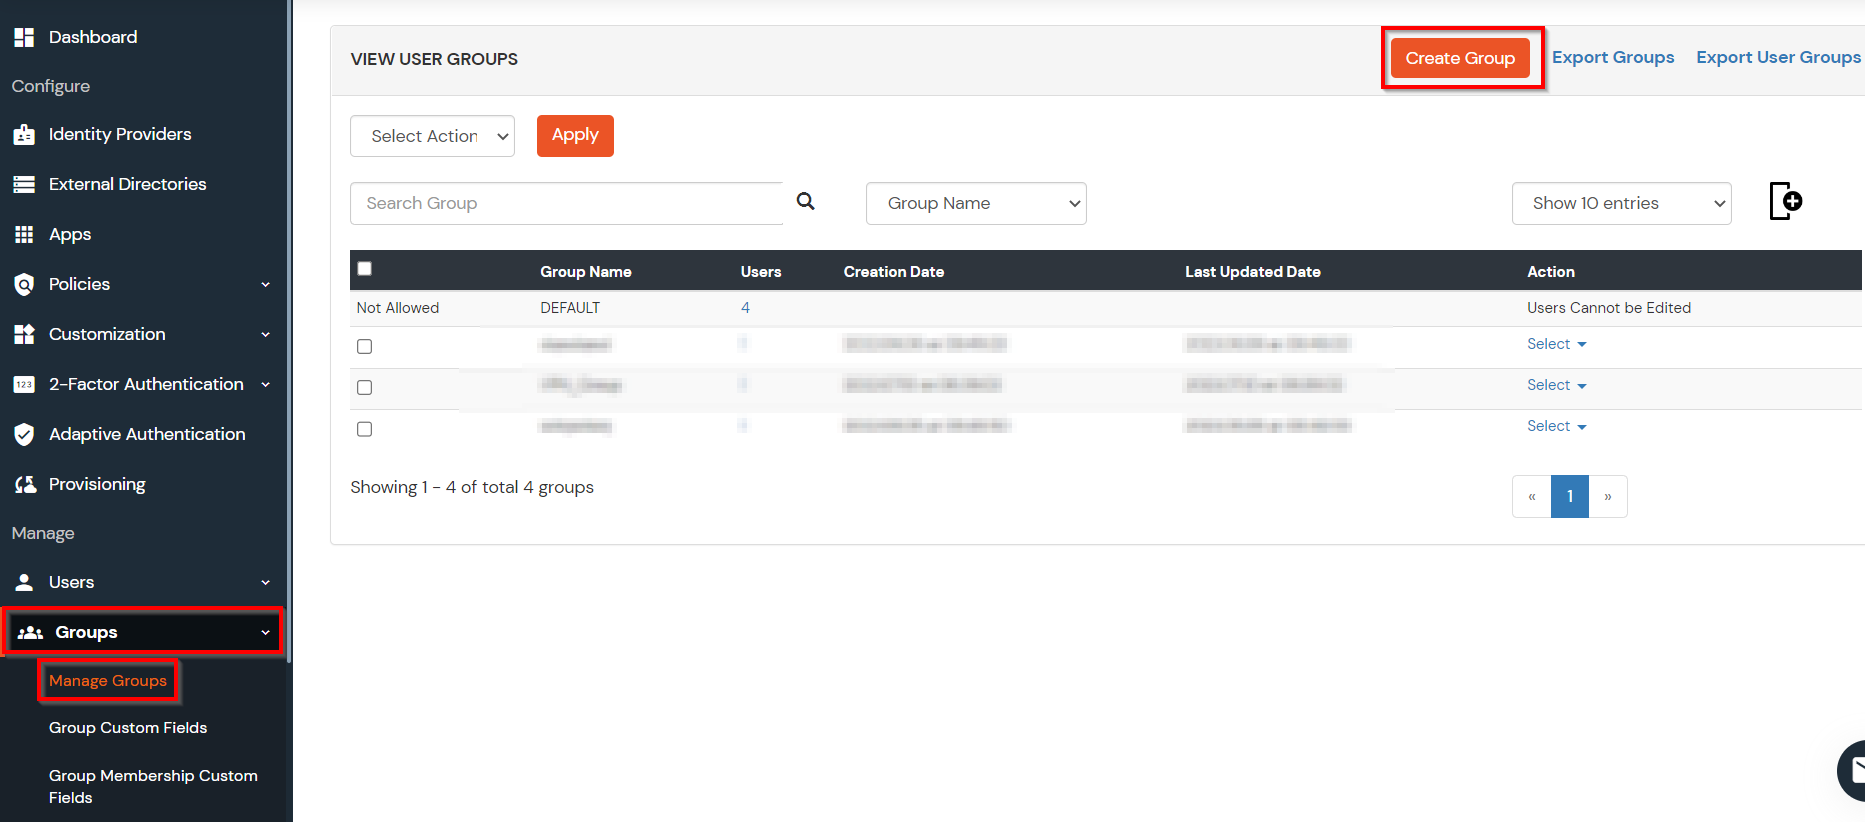
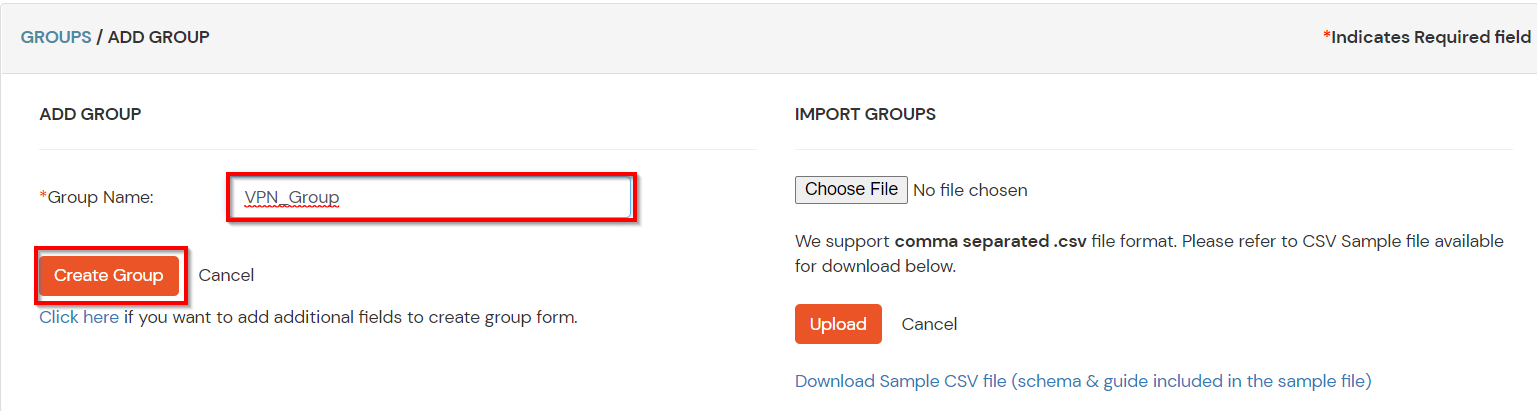
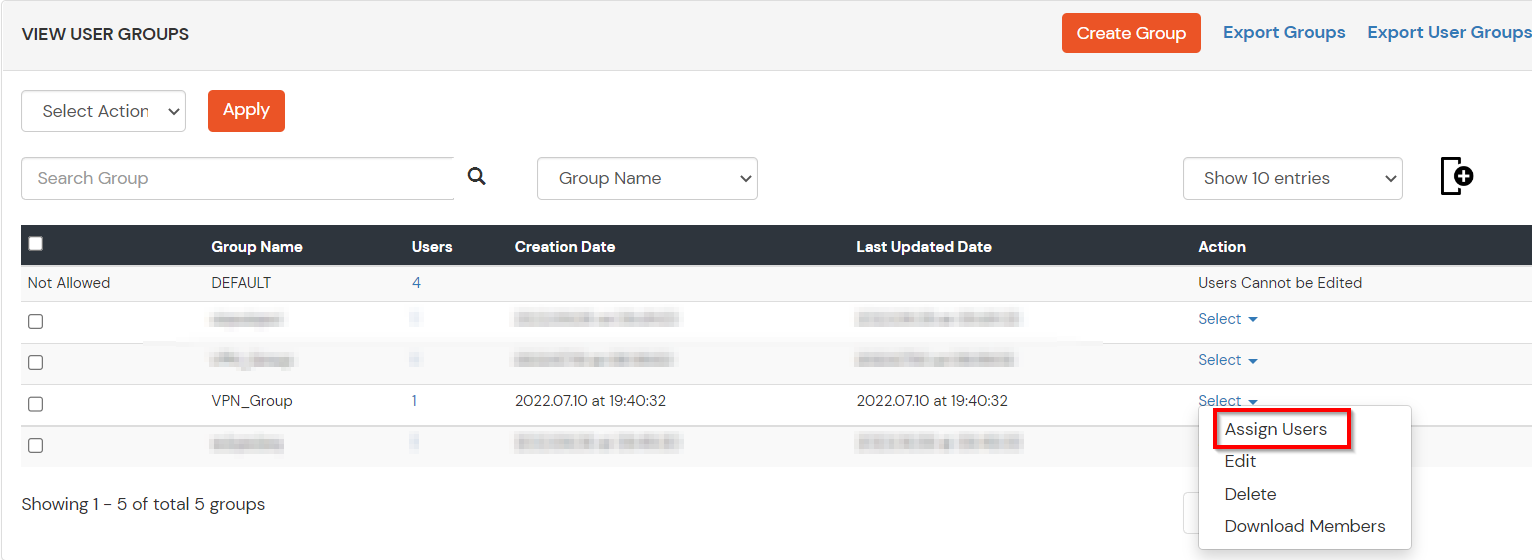
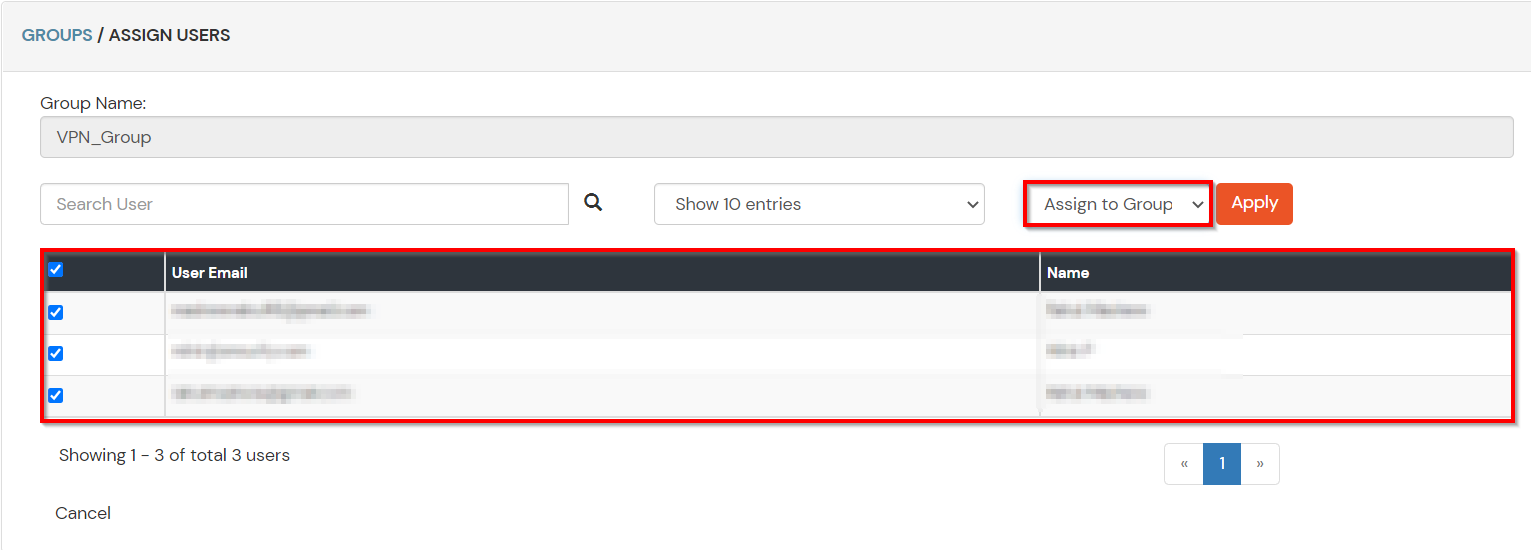
1. Create User in miniOrange
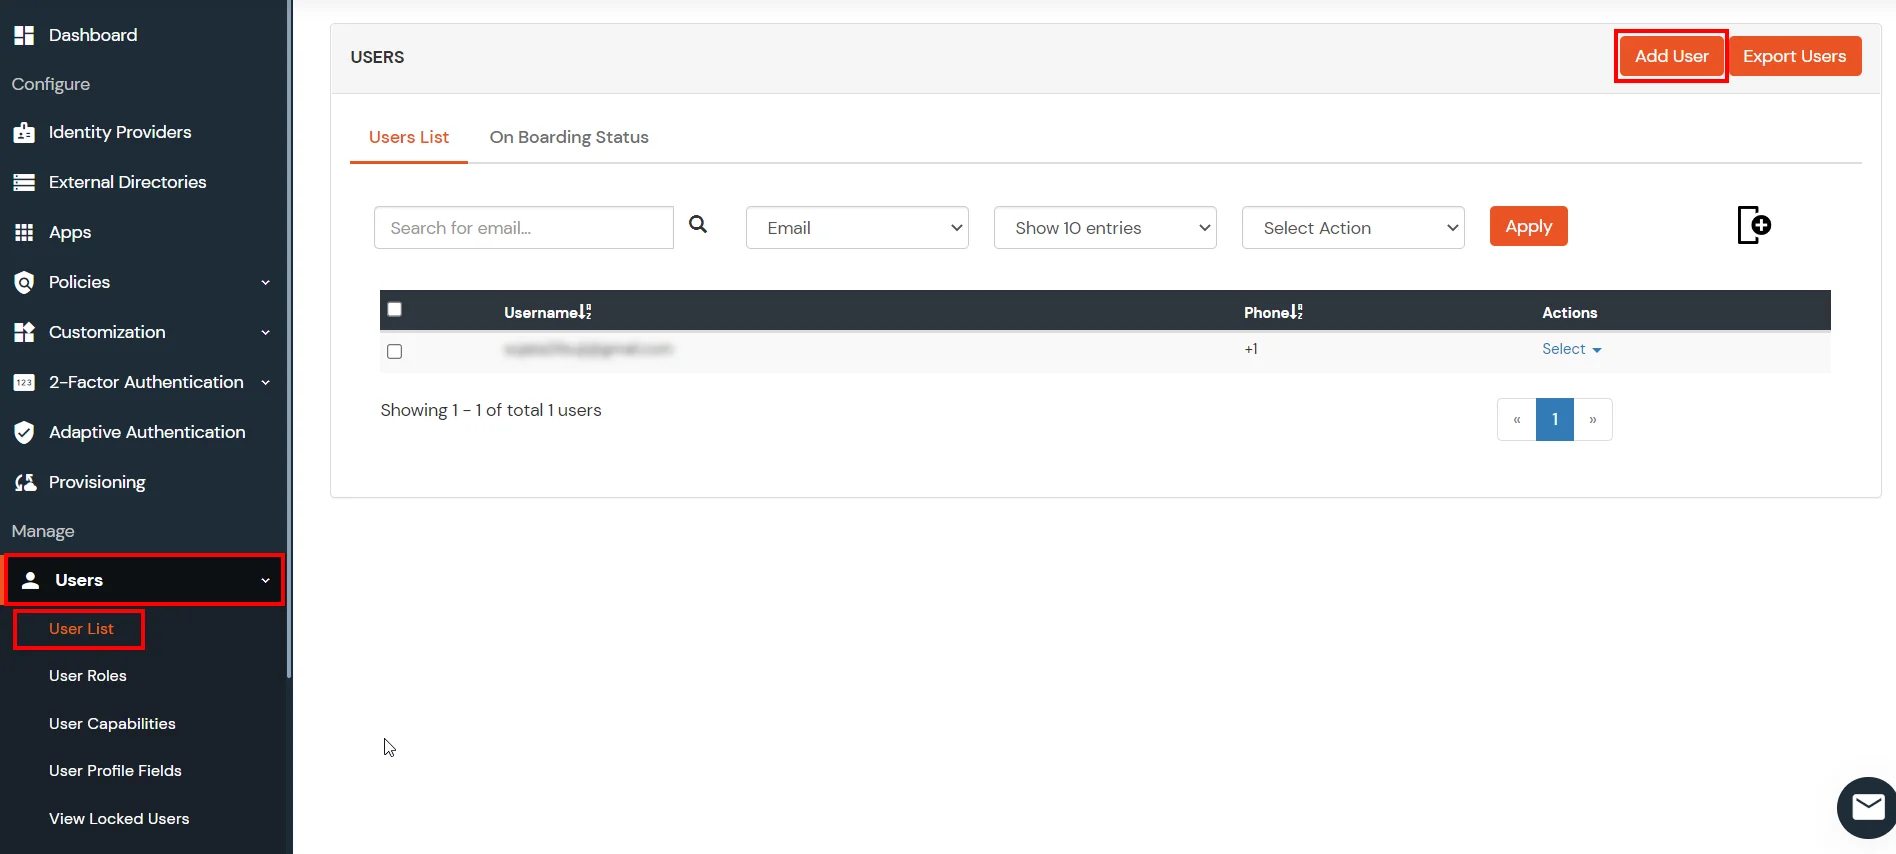
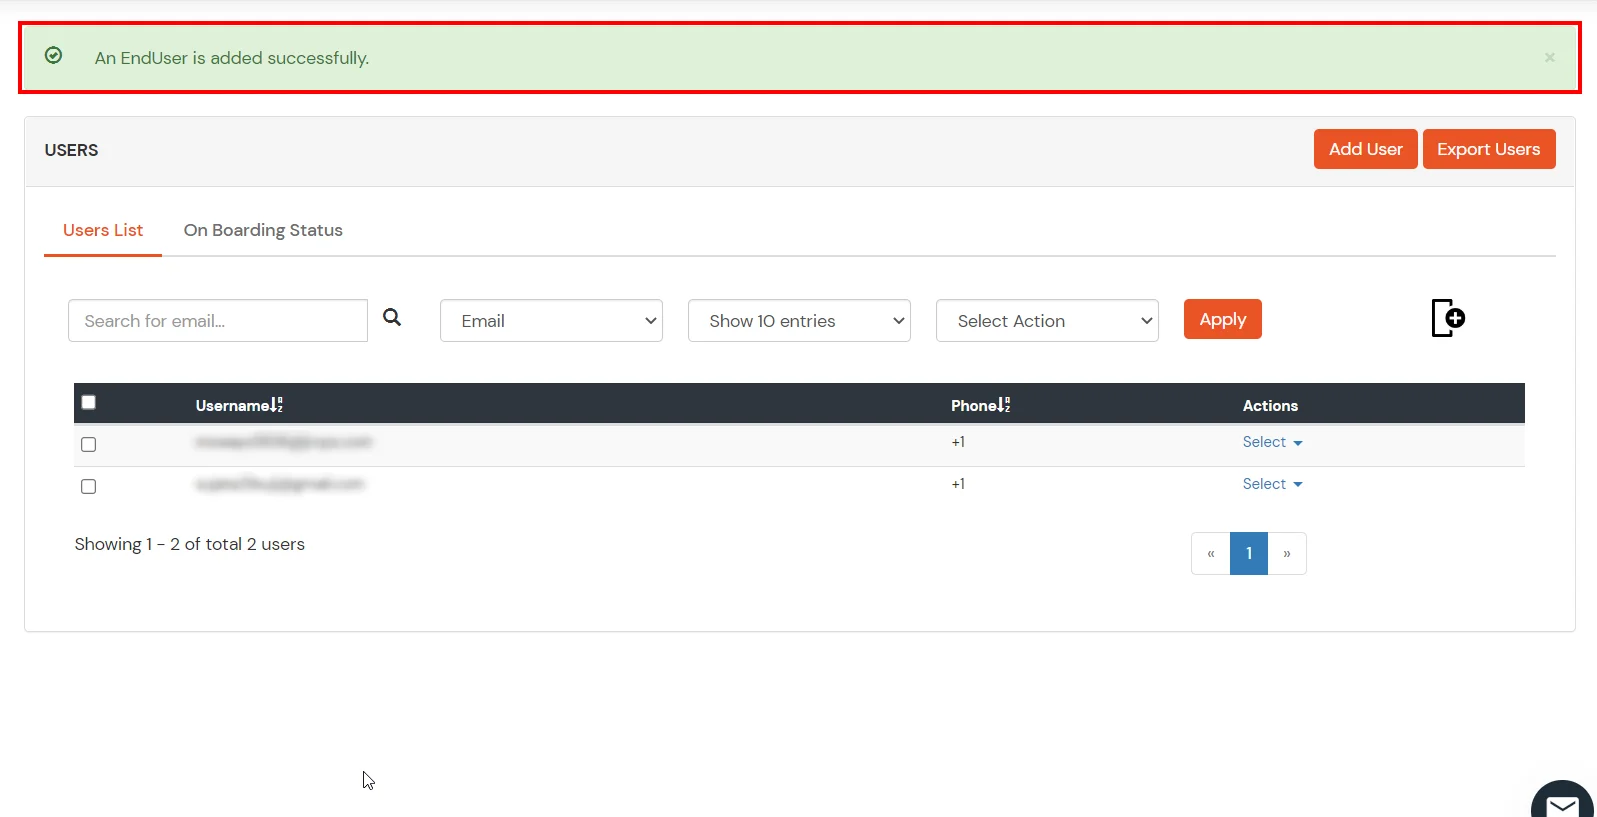
2. Bulk Upload Users in miniOrange via Uploading CSV File.
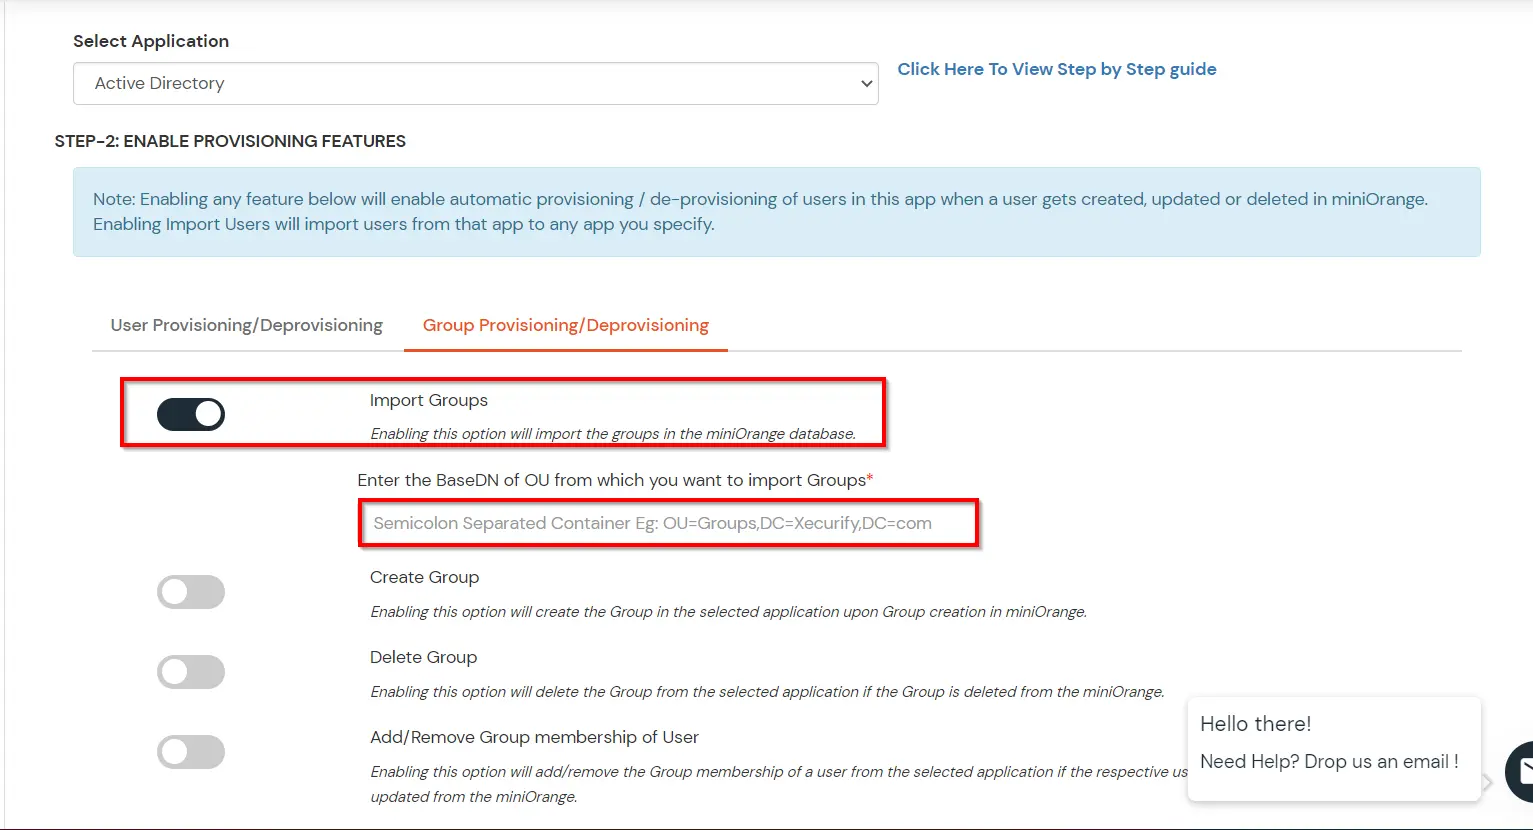
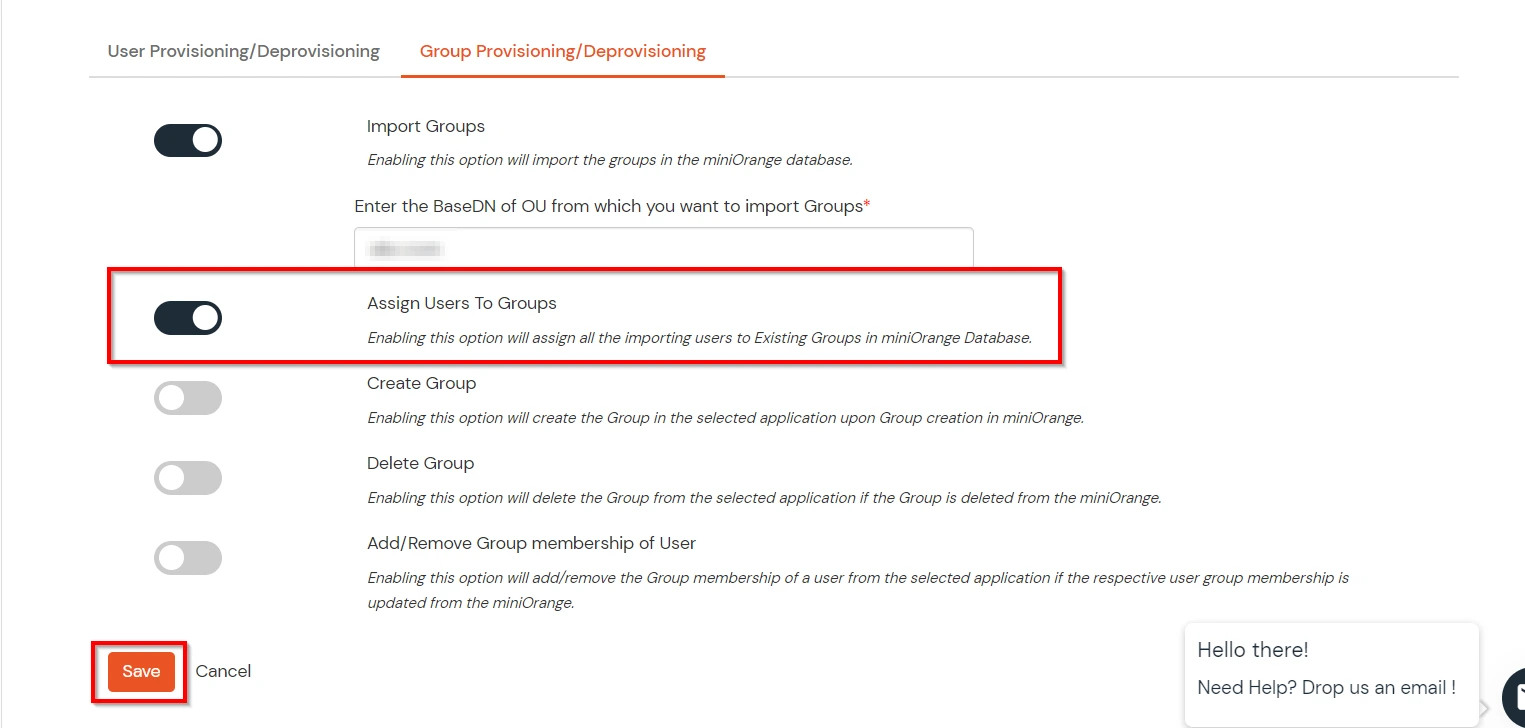
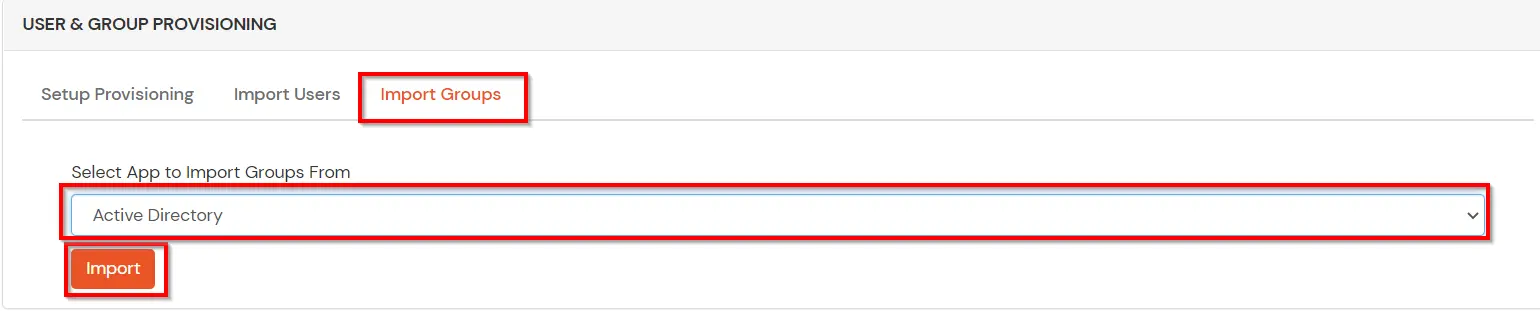
(The Active Directory Group Provisioning (Sync) setup is done. Now, whenever a user is created or modified in LDAP server and if the Assign Users to groups is enabled, then user group attribute from the LDAP server will be automatically synced and the user group will be assigned or changed accordingly in miniOrange.)
Note: You can follow this guide, if you want to customize and enroll MFA for end users.