SSO Setup in Salesforce
Streamline the SSO setup in Salesforce with this comprehensive setup guide from miniOrange. Our Salesforce SSO configuration using SAML Single Sign-On (SSO) enables seamless login to various Salesforce channels and applications using a unified set of credentials.
By enabling SSO in Salesforce, users can securely access Salesforce with just one click, eliminating the need to re-enter their username and password. Simplify your Salesforce authentication process and enhance security with miniOrange's user-friendly SSO solution.
With miniOrange Salesforce SSO, you can:
- Enable your users to automatically log in to Salesforce.
- Maintain centralized and easy access control for all users through your Salesforce single sign-on setup.
- Connect easily with any external identity source like Microsoft Entra ID, Azure Active Directory, ADFS, Cognito, and more.
-
Salesforce also works as an IDP. With miniOrange Salesforce SSO solution, you can extend the single sign-on to downstream apps like WooCommerce, Shopify, WordPress, JIRA, and Confluence, and manage the full user lifecycle without extra Salesforce licenses.
Get Free Installation Help
miniOrange offers free help through a consultation call with our System Engineers to Install or Setup Salesforce SSO solution in your environment with 30-day free trial.
For this, you need to just send us an email at idpsupport@xecurify.com to book a slot and we'll help you in no time.
Supported SSO Features
miniOrange-Salesforce SAML integration supports the following Salesforce SSO configuration features:
- SP Initiated SSO Login: Users can access their Salesforce account via a URL or bookmark. They will automatically be redirected to the miniOrange portal for login. Once they've signed on, they'll be automatically redirected and logged into Salesforce.
- IdP Initiated SSO Login: Users need to log in to the miniOrange first, and then click on the Salesforce icon on the applications dashboard to access Salesforce. (If you have set up any more Identity Sources, you will log in to that platform.)
- JIT Provisioning: Enables the automatic creation of user accounts in Salesforce when a person logs in for the first time via Desktop SSO, IDP, or Active Directory (AD) authentication.
- Single Logout: With this feature, you will be automatically logged out of all the Salesforce applications that are connected with the Identity Provider (IdP) when you log out of the Salesforce org or any other app.
- Mandate users to Login using SSO: Single Sign-On can make it mandatory for all Salesforce users to log in using SSO. This will prevent any person from logging in using any other source and bypassing the login system. No person will be able to have direct login, making it a streamlined and secure process.
- MFA and User Provisioning: Secure Salesforce logins with 29+ MFA methods while automatically creating, updating, or removing user accounts based on your identity provider data. Manage authentication and user lifecycle from one place.
- Any Salesforce Object Support: Authenticate users from Salesforce Contacts, Leads, Accounts, or Custom Objects as identity sources. This gives you the flexibility to use your existing Salesforce data to manage login without additional setup.
- Attribute and Role Mapping: Map Salesforce user fields to SAML or OpenID Connect attributes to assign roles and permissions in connected applications. This keeps access control consistent across every app your team uses.
Connect with External Source of Users
miniOrange provides user authentication from various external sources, which can be Directories (like ADFS, Microsoft Active Directory, OpenLDAP, AWS etc), Identity Providers (like Microsoft Entra ID, Okta, AWS), and many more. You can configure your existing directory/user store or add users in miniOrange.
Prerequisites
- The following Subscription plans are required for the mentioned authentication methods:
- Federated Authentication: All Editions
- Delegated Authentication Professional, Enterprise, Performance, Unlimited, Developer, and How you integrate Editions.
- Authentication Providers: Professional, Enterprise, Performance, Unlimited, and Developer Editions.
- Note - In order to do SP initiated SSO into Salesforce, you need to create a custom Domain. Check this link - Salesforce domain changes and follow the below steps:
- Login to your Salesforce account.
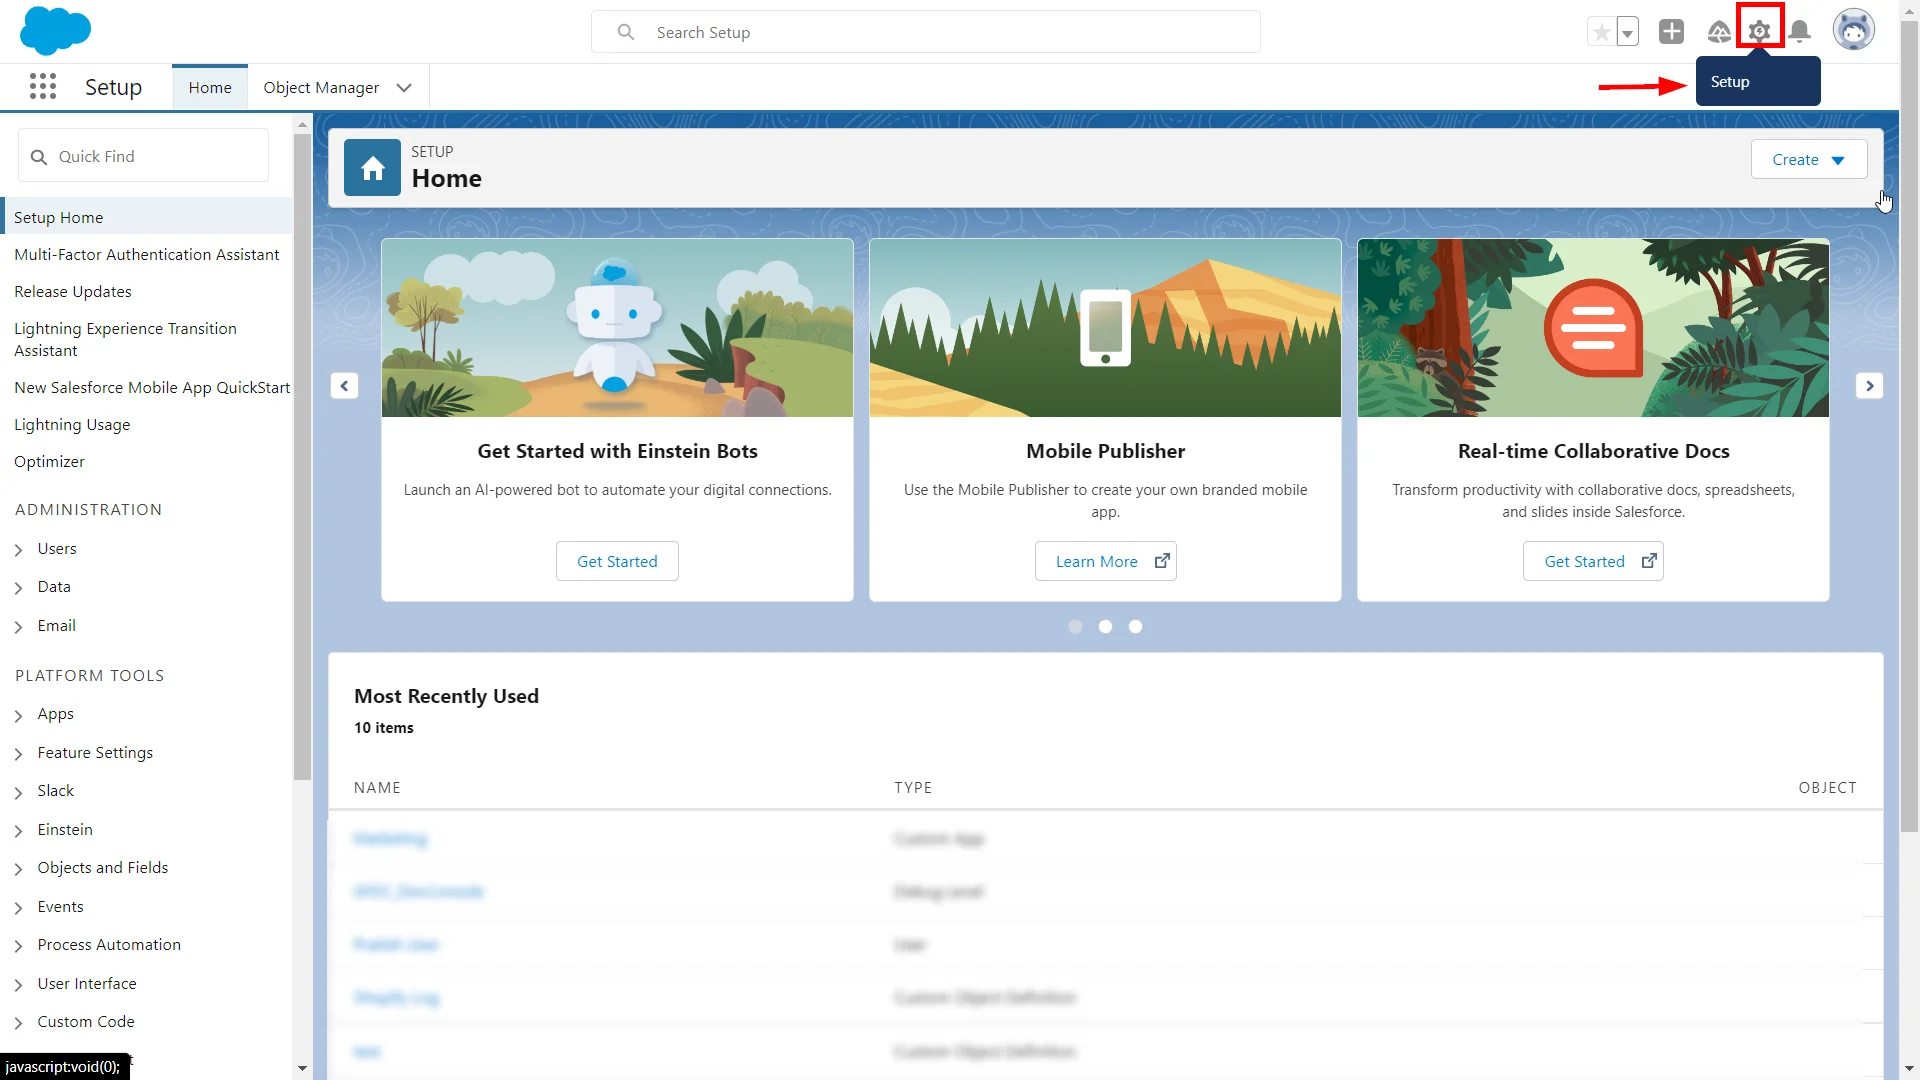
- Click on the Setup icon in the top-right section of the Salesforce lightening dashboard page.
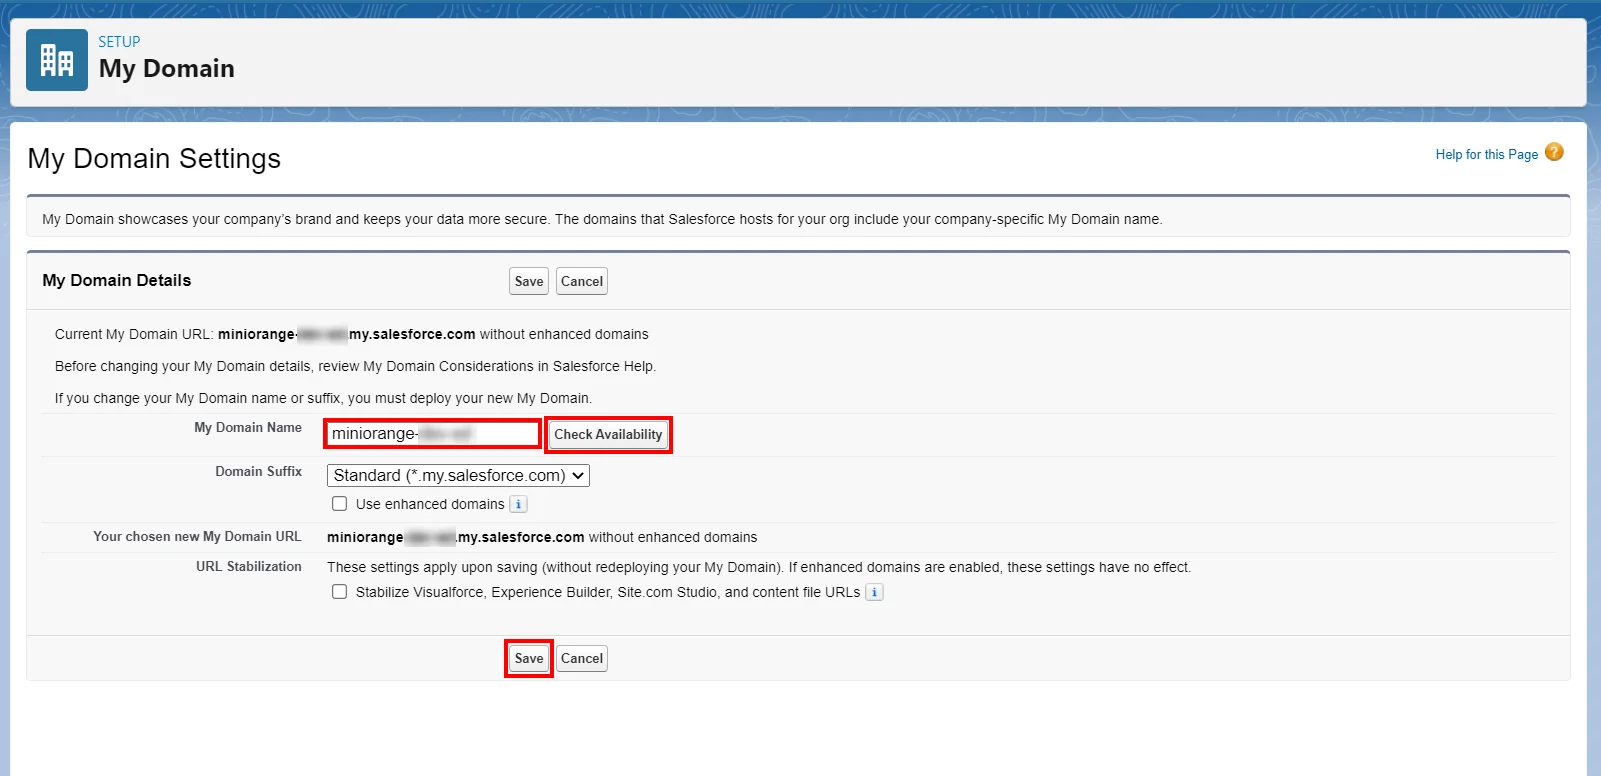
- Now in the search field, search for the My Domain Settings.
- Choose your domain name, check for availability and if available, proceed by saving the settings.
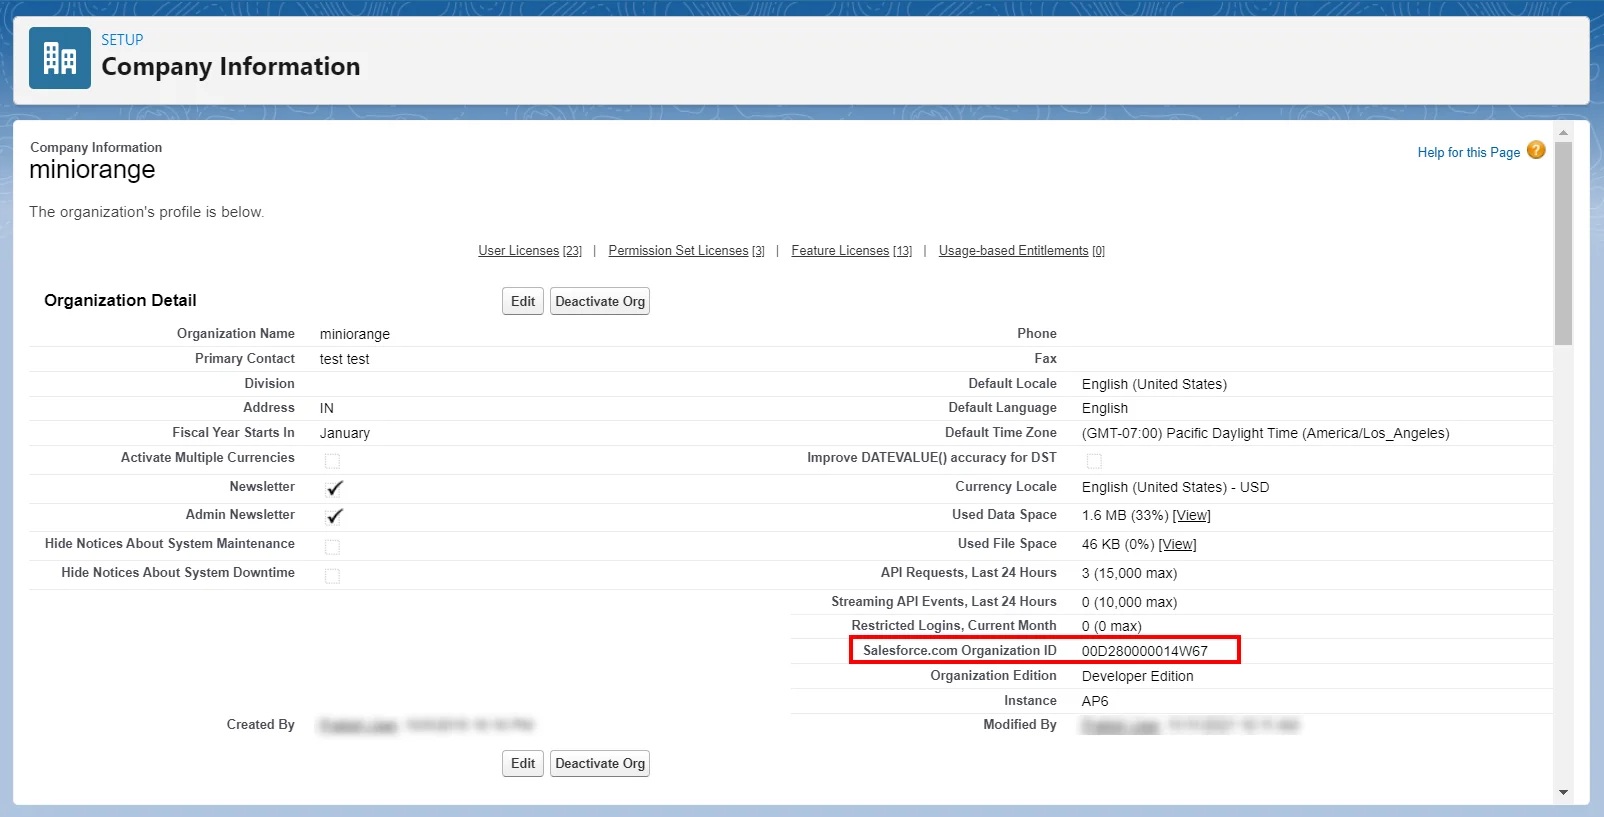
- Search for Company Information in the search bar.
- Copy the Organization Id. (This will be required later)
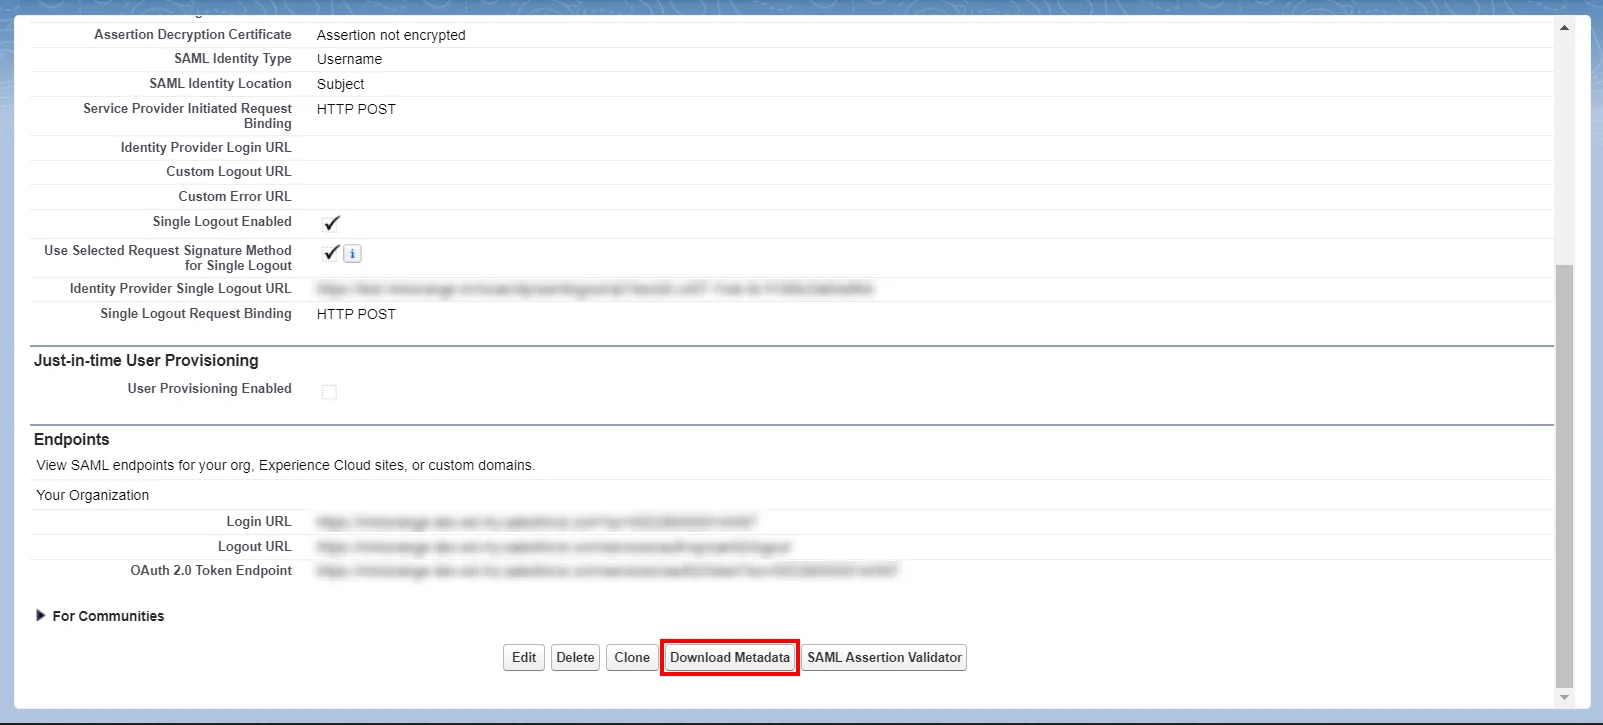
- Salesforce Metadata: After you have set up the SSO settings in Salesforce Admin Dashboard, you will get the Salesforce Metadata File. Click Download Metadata to download an XML file of your SAML configuration settings to send to your identity provider. The identity provider can then upload these configuration settings to connect to your Experience Cloud site.
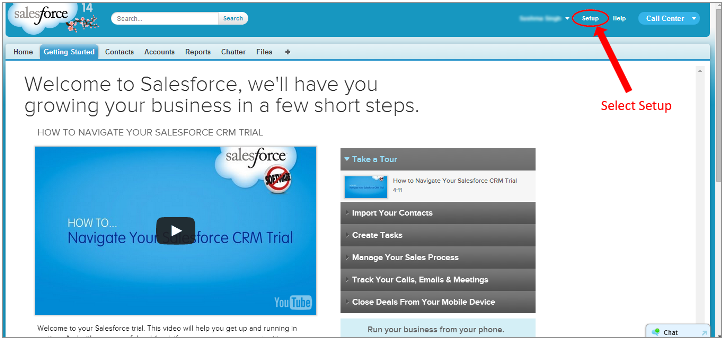
- Login to your Salesforce account.
- Go to Setup in the top-right section of the Salesforce classic dashboard page.
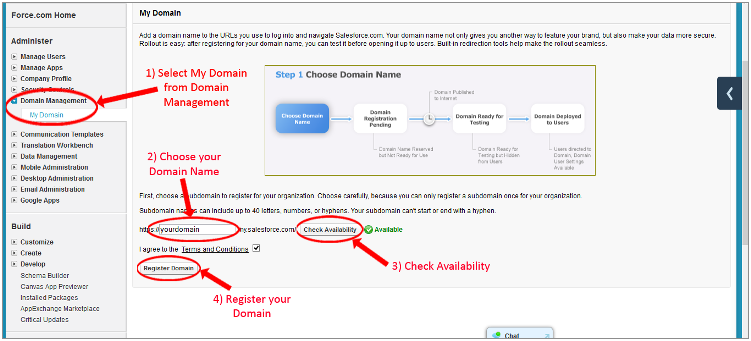
- Now in the left pane, select Domain Management.
- Select My Domain.
- Choose your domain name, check for availability and if available, proceed by clicking the Register Domain button.
- Test your domain once it is ready, by clicking the link and then click Deploy to Users.
- Search for Company Information in the search bar.
- Copy Organization Id. (This will be required later)
Follow the step-by-step guide given below for Salesforce Single Sign-On (SSO)
1. Configure Salesforce in miniOrange
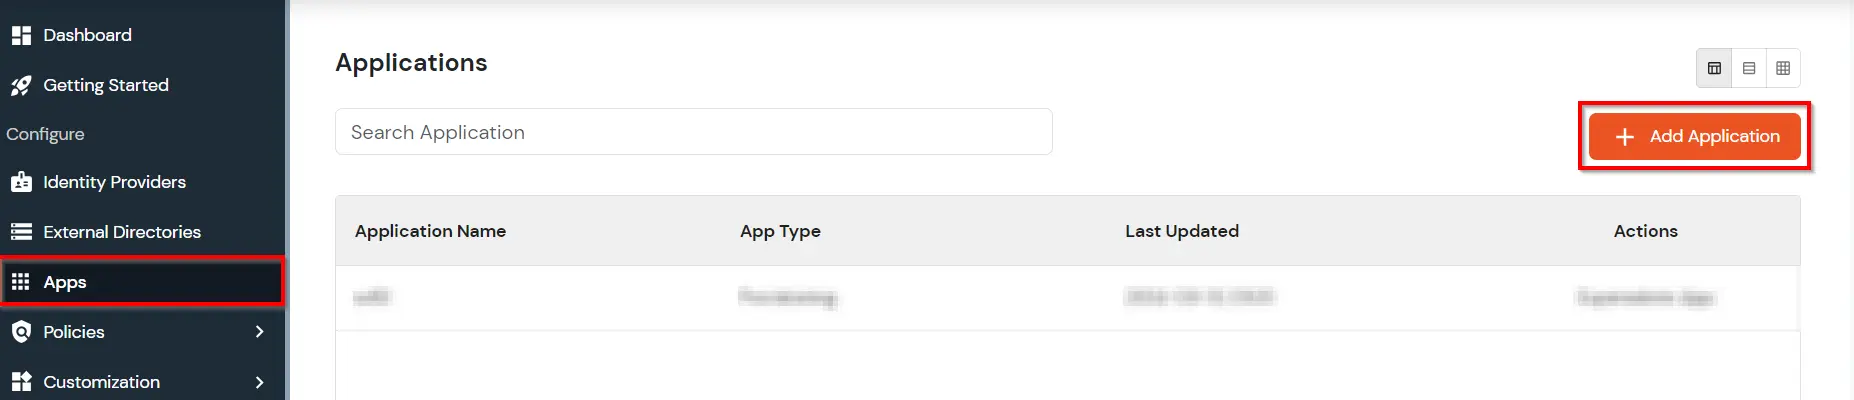
- Login into miniOrange Admin Console.
- Go to Apps and click on Add Application button.
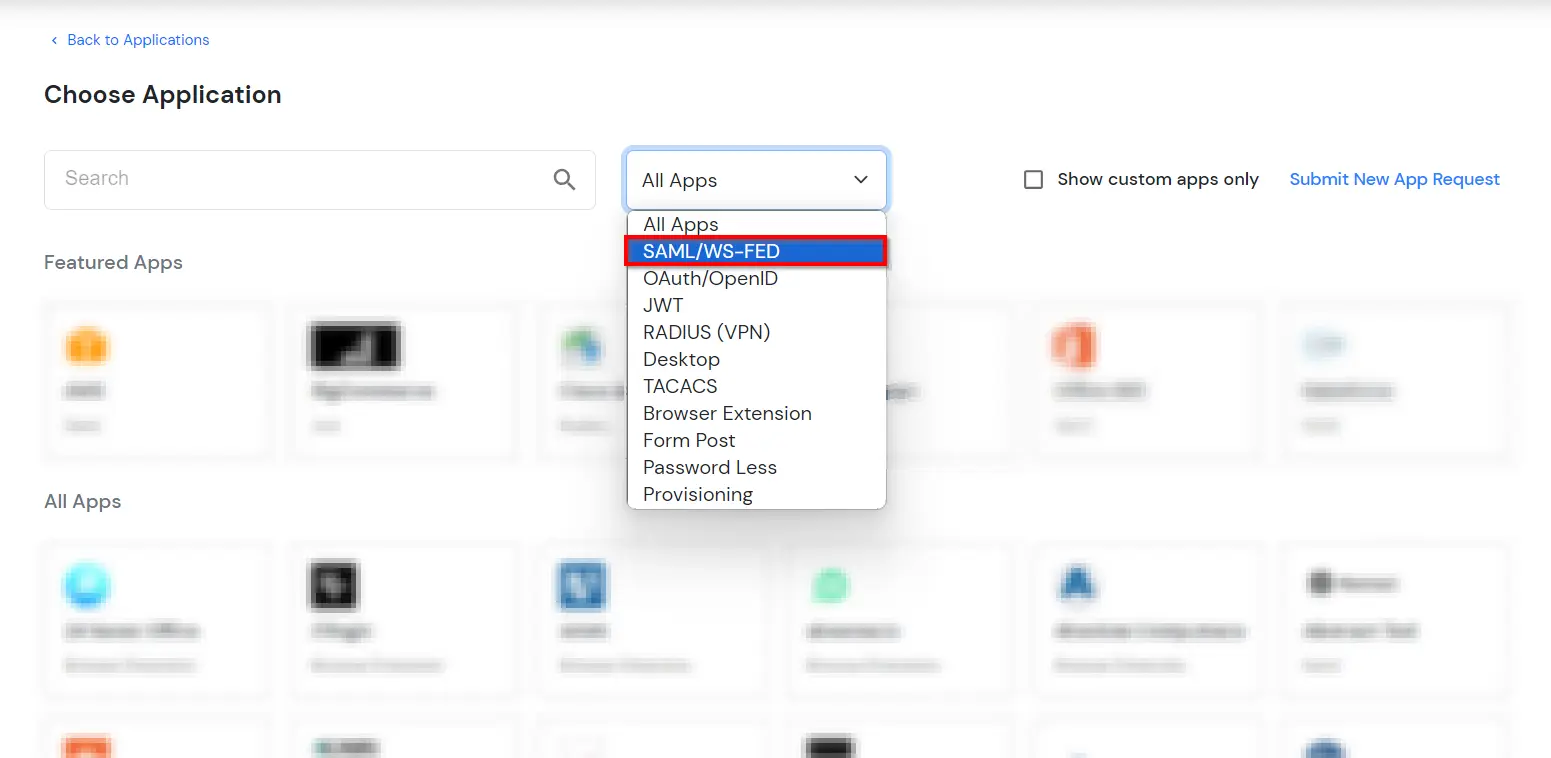
- In Choose Application Type, select SAML/WS-FED from the All Apps dropdown.
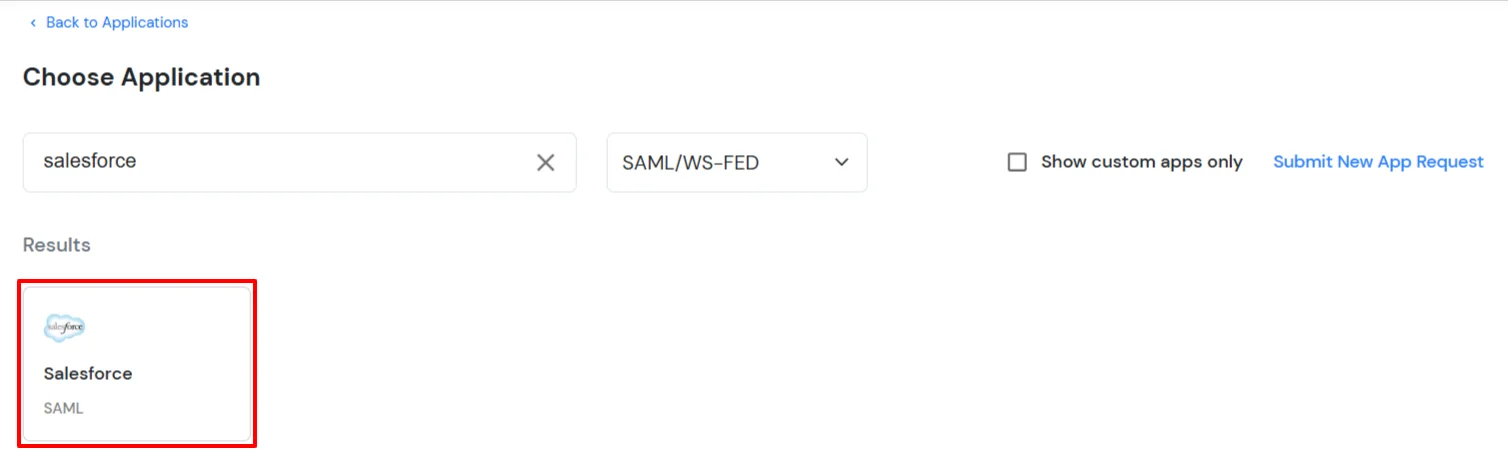
- Search for Salesforce in the list, if you don't find Salesforce in the list then, search for custom and you can set up your application in Custom SAML App.
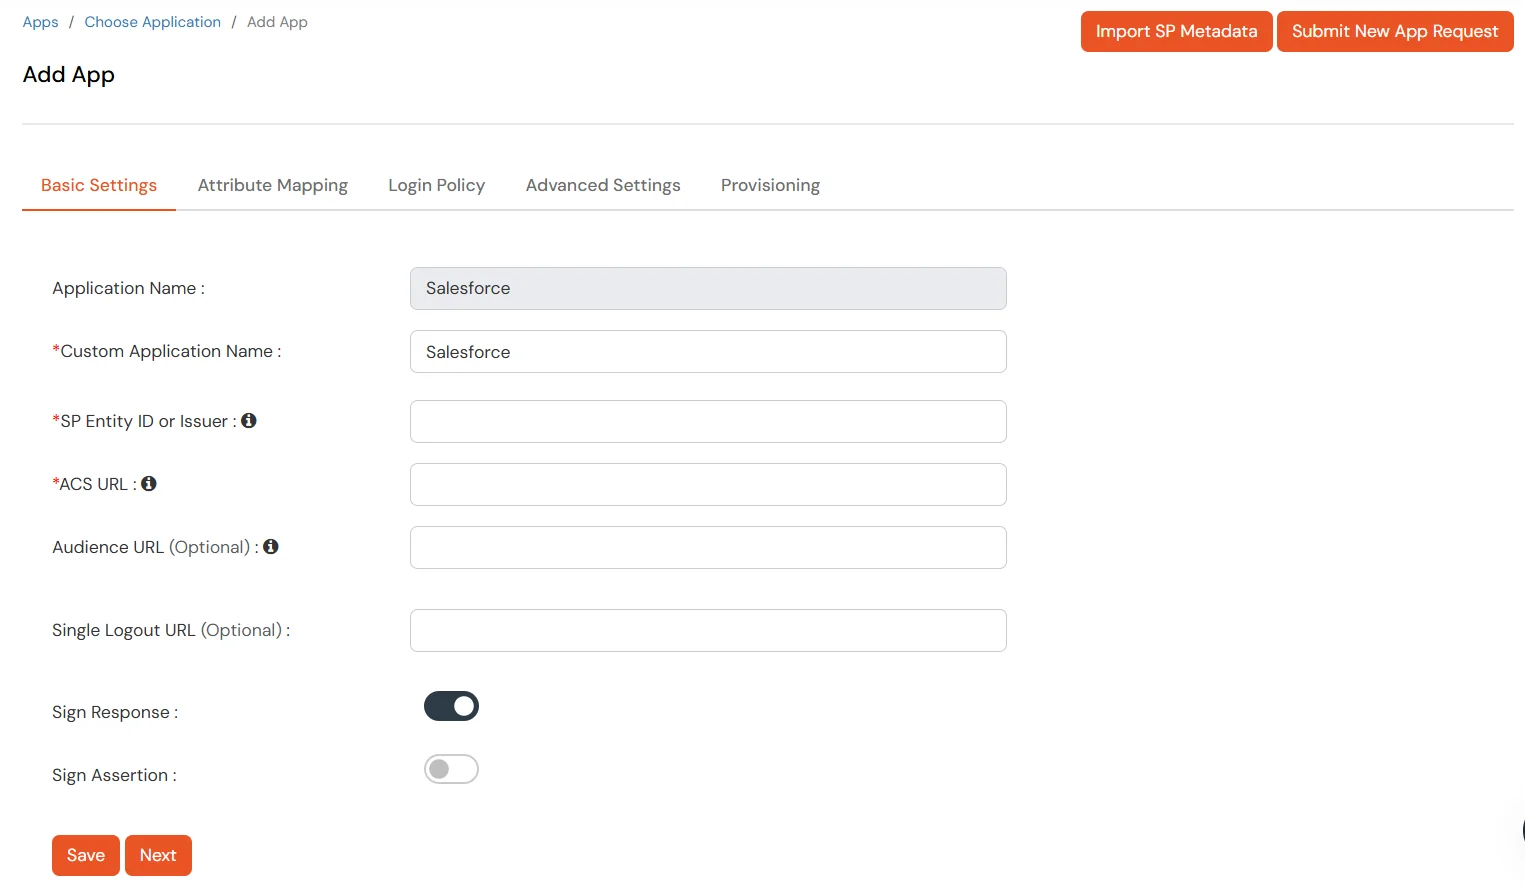
- In the Basic tab, enter the following details:
- Display Name:
Salesforce
- SP Entity ID or Issuer:
https://[yourdomain].my.salesforce.com/
- ACS URL:
https://[yourdomain].my.salesforce.com/?so=[organization_id]
- Single Logout URL:
https://[yourdomain].my.salesforce.com
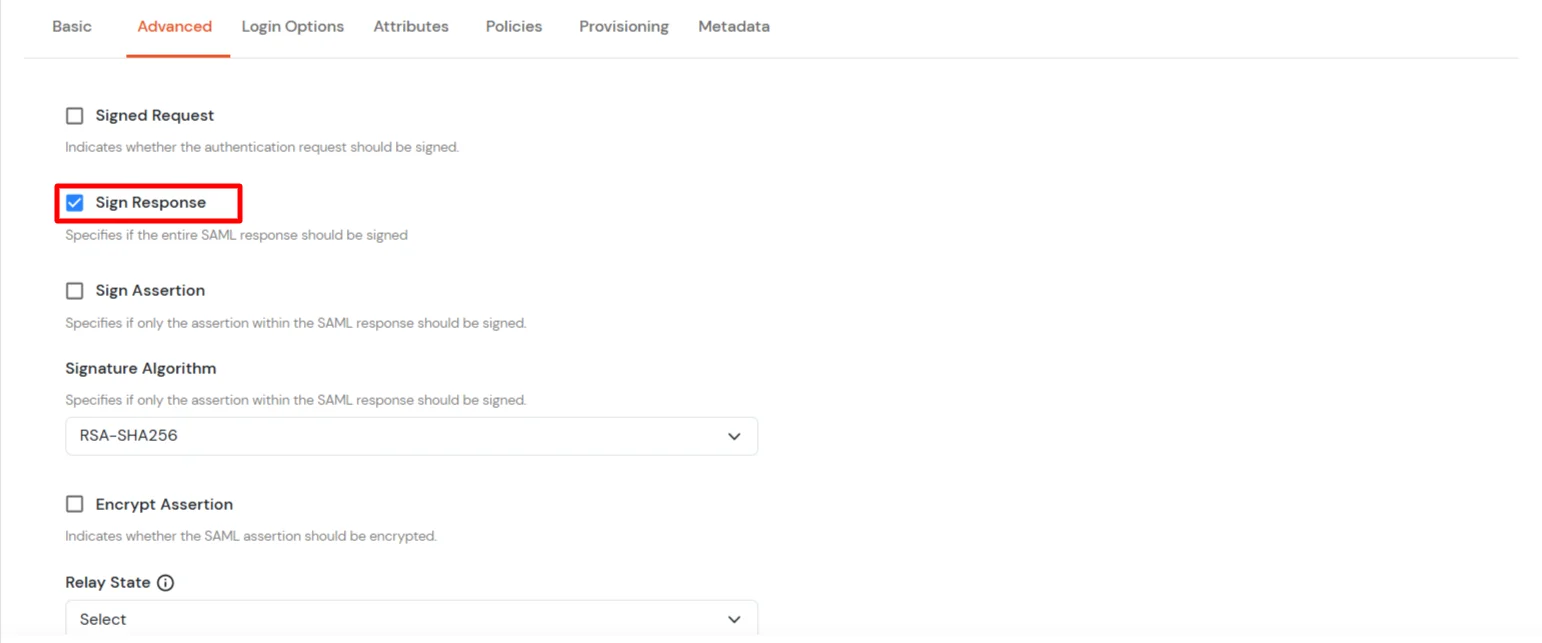
- Click Next to go to the Advanced tab and enable the Sign Response option.
- Scroll down to AuthnContext Class Schema. You can select the value of your choice, the default is PasswordProtectedTransport.
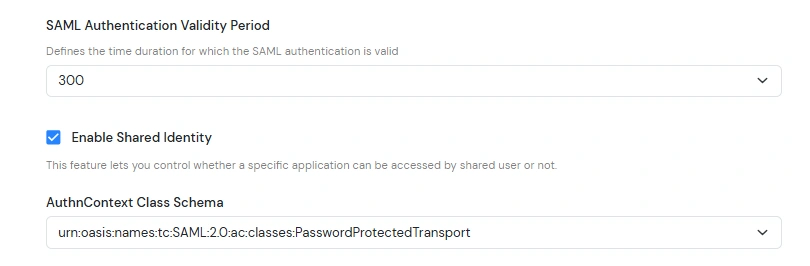
Note: Salesforce prompts for MFA during SSO login. However, Salesforce trusts the following authentication methods:
- MobileTwoFactorContract
- PGP
- Smartcard
- TimeSyncToken
Selecting any of these in the dropdown will skip the MFA prompt on the Salesforce screen.
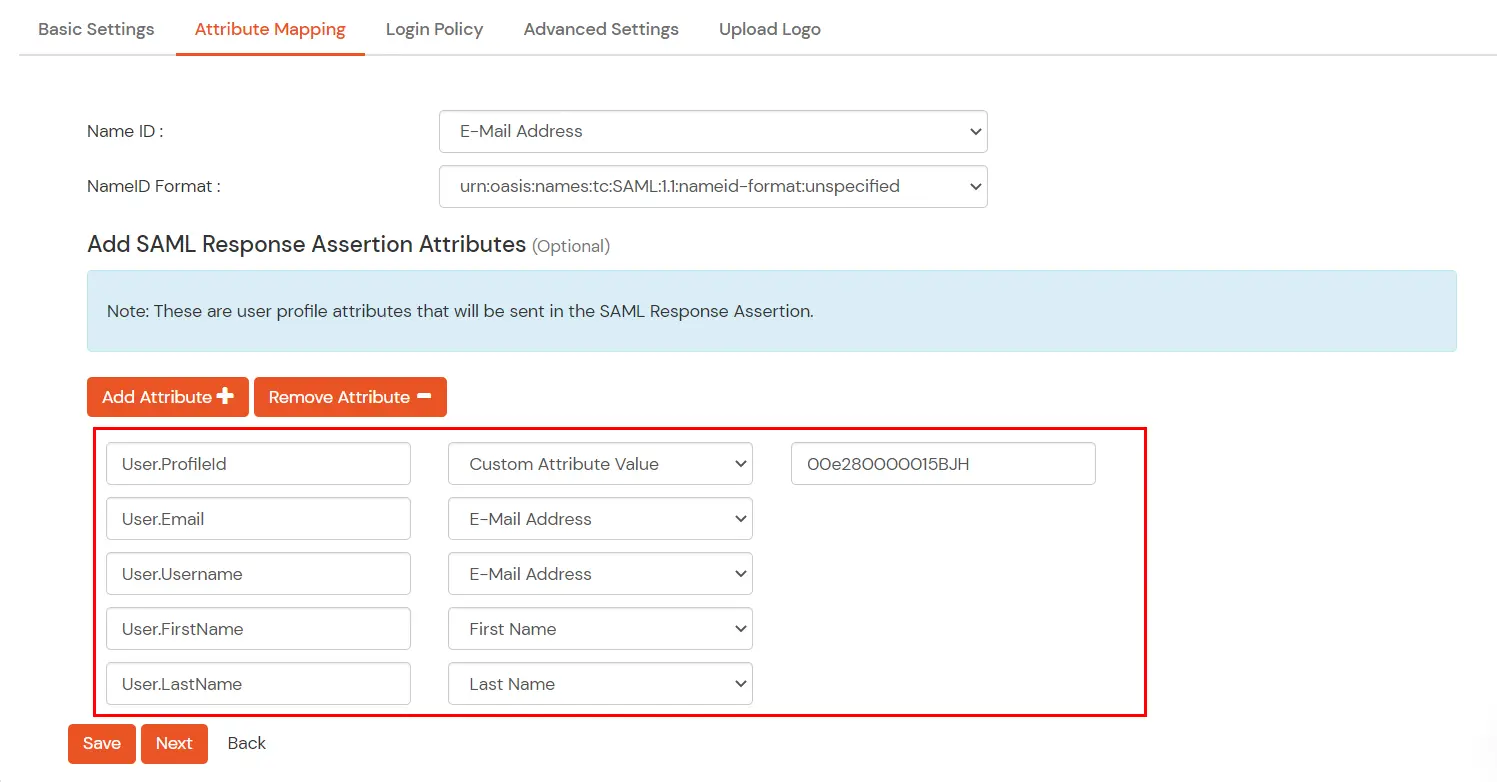
- Click Next. In the Attributes tab, click Add Attribute and enter the attribute names with their values as shown below.
(Follow the steps here to find your Salesforce profileId.)
- Click Save.
- Your application is saved successfully. Now go to the Metadata tab.
- On the Metadata tab, choose one of the following options:
- If you want to use miniOrange as User-Store (i.e., your employee identities will be stored in miniOrange), download the metadata file under miniOrange as IdP.
- If you want to authenticate via an external Identity Provider (IdP) like Active Directory, Okta, OneLogin, Google, or Apple ID, download the metadata file under External source as IdP.
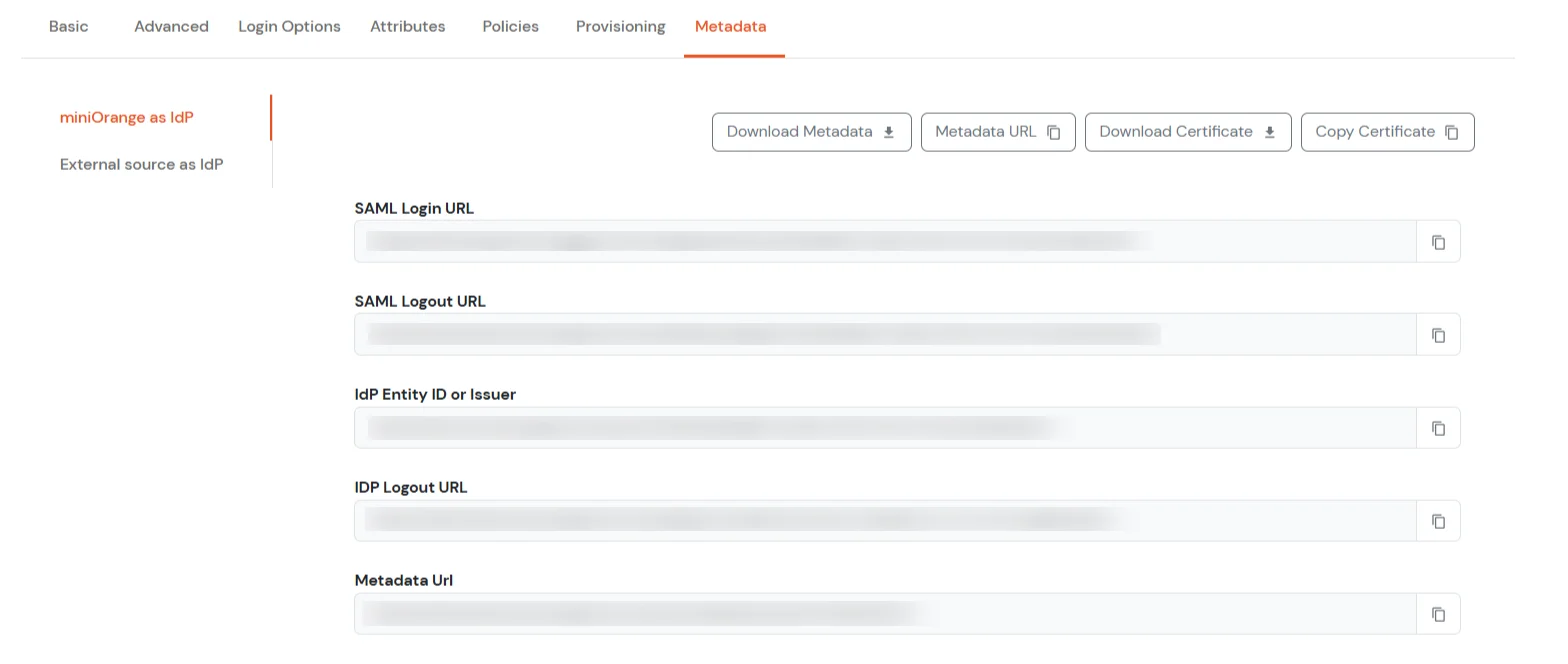
- Copy the SAML Login URL, SAML Logout URL, and IdP Entity ID or Issuer. Click Download Certificate to download the certificate (required in Step 2).
2. Configure SSO in Salesforce Admin Account
- Log in to your Salesforce account as Account Admin.
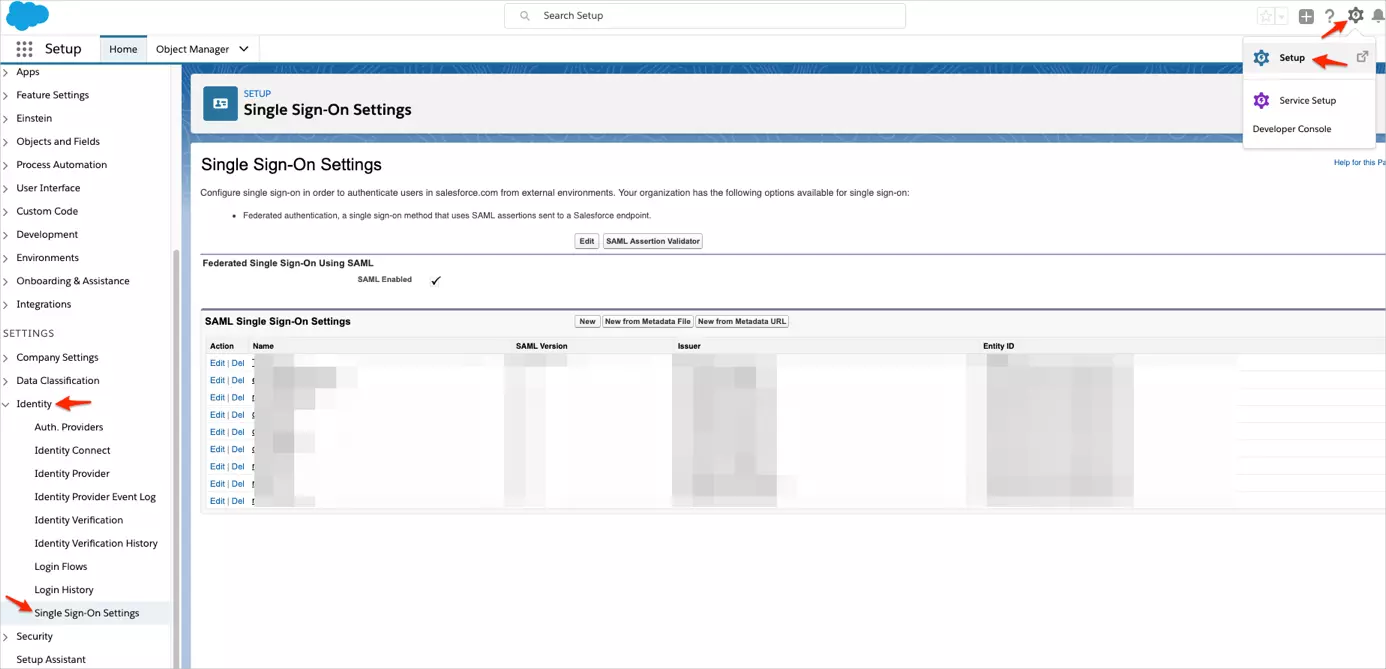
- Click the gear icon, then navigate to Setup > Identity > Single Sign-On Settings.
- Log in to your Salesforce account as Account Admin.
- Navigate to Setup > Security Controls > Single Sign-On Settings.
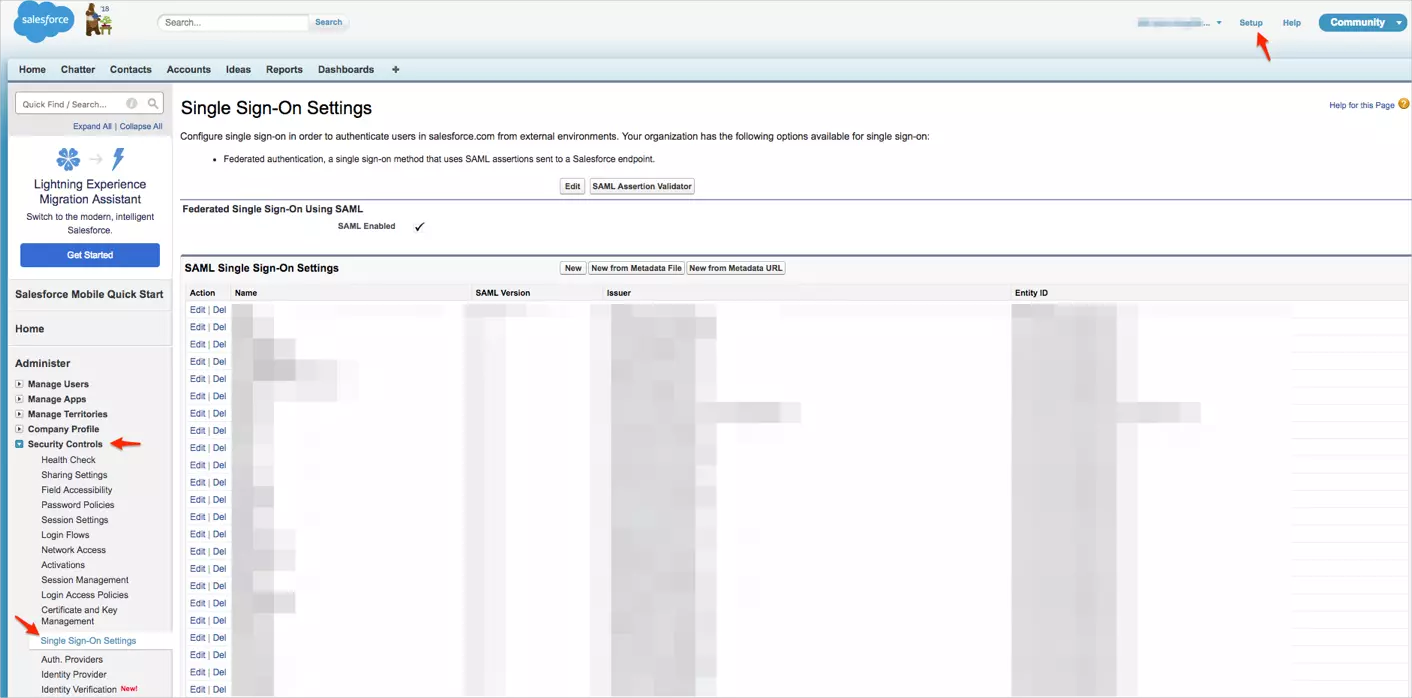
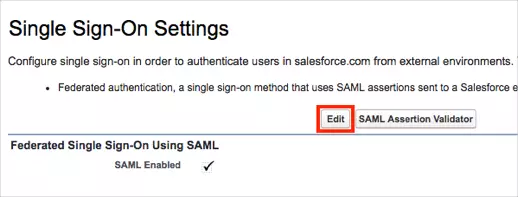
- On the Single Sign-On Settings page, click on Edit.
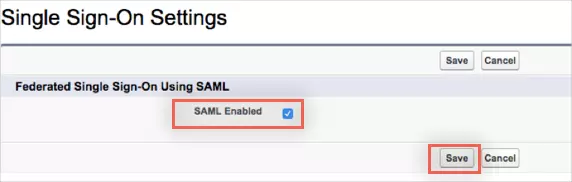
- Check the SAML Enabled box to enable the use of SAML Single-Sign On, then click on Save.
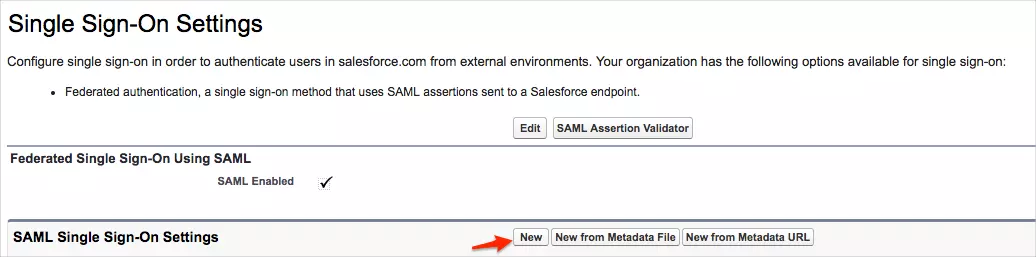
- Click New to open SAML Single Sign-On Settings.
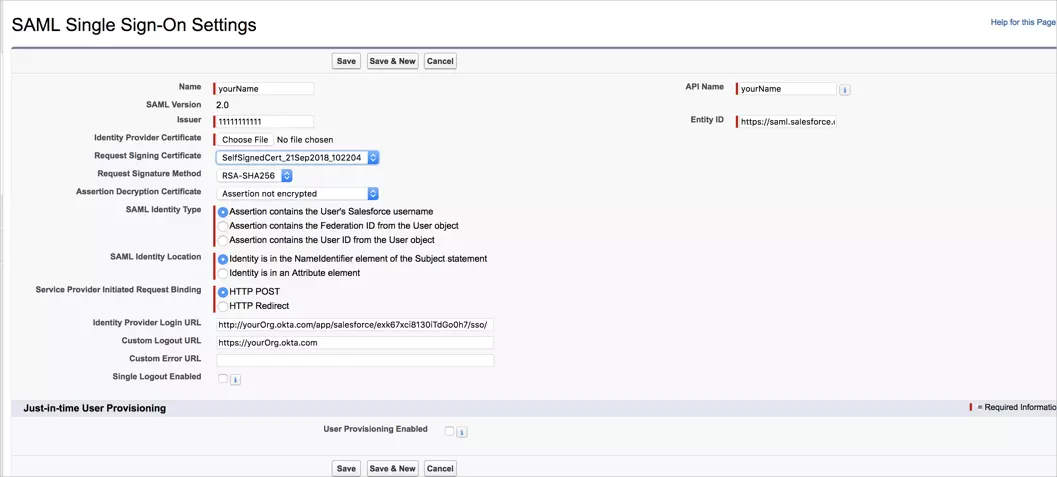
- Enter the following values in the respective fields.
- Issuer :
IDP Entity ID/Issuer in miniorange metadata
- Entity ID :
https://[yourdomain].my.salesforce.com
- Identity Provider Certificate :
Upload Certificate from miniOrange metadata
- Request Signature method :
RSA-SHA256
- Assertion Decryption Certificate :
Not encrypted
- SAML Identity Type :
Assertion contains the User's Salesforce username
- SAML Identity Location :
Identity is in the NameIdentifier element of the Subject statement
- Service Provider Initiated Request Binding :
HTTP Redirect
- Identity Provider Login URL :
SAML Login URL in miniOrange metadata
- Custom Logout URL :
https://[yourdomain].my.salesforce.com
- Click on Save.
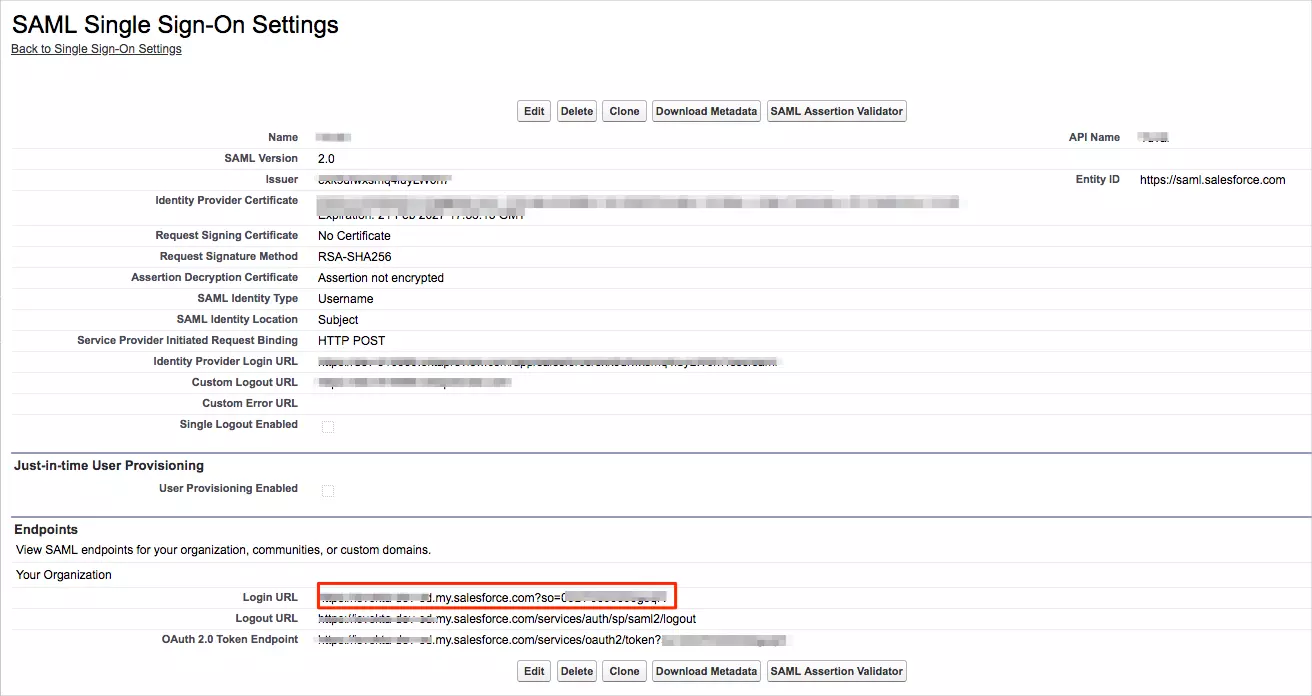
- Copy your Login URL value.
- If you want to enable "Login with SSO" button on the Salesforce Lightning login page, you can follow the steps below :
- login Salesforce as an Admin > Setup.
- Navigate to "My Domain".
- Go to Authentication Configuration > Edit.
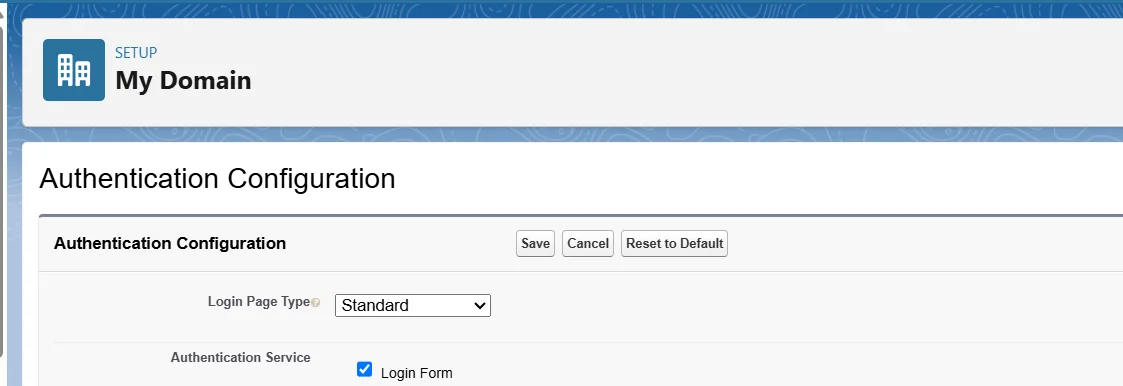
- Choose the IDP that you have configured > Save.
- Relogin to your Salesforce, you should be able to see the option on the login page.
3. Test SSO Configuration
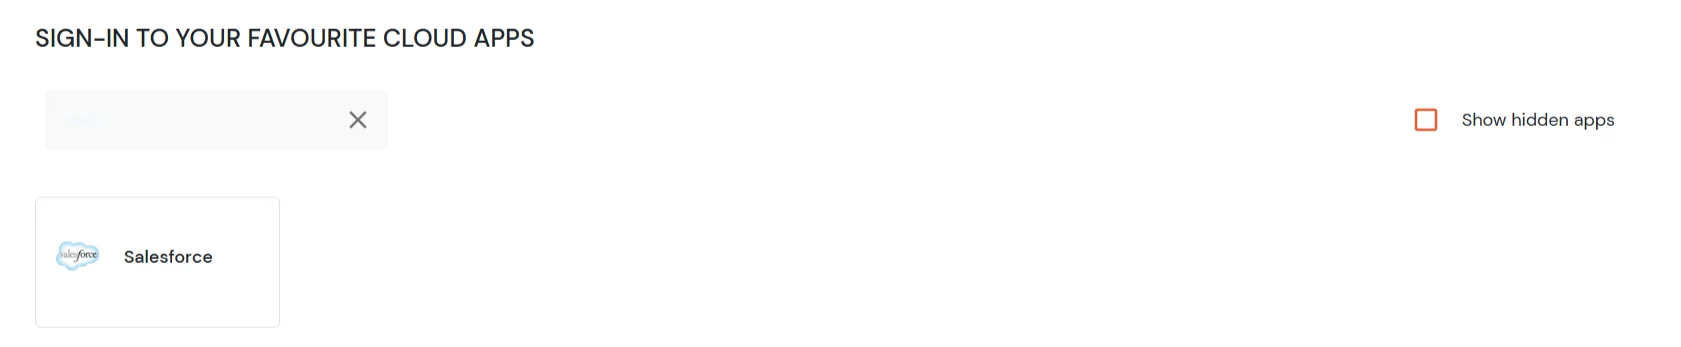
Test SSO login to your Salesforce account with miniOrange IdP:
Troubleshooting
How to identify errors in SAML assertions sent by your IDP?
- Use the SAML Assertion Validator to troubleshoot single sign-on (SSO) login problems and identify errors in SAML assertions sent by your identity provider. Click on this link know more about the error identification in SAML Assertions.
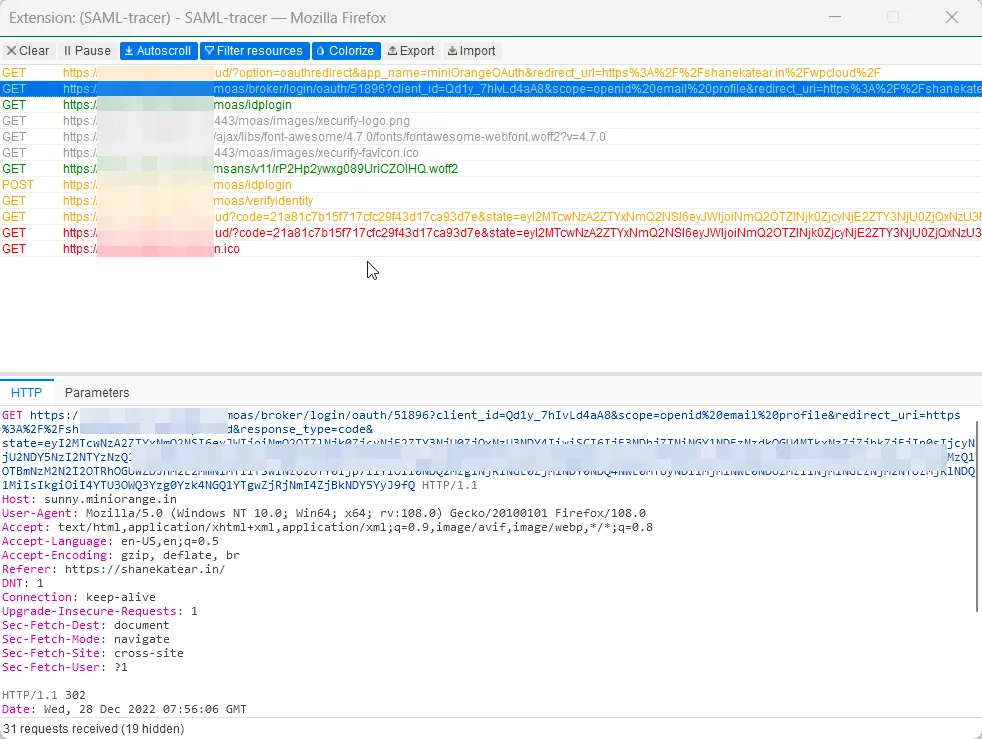
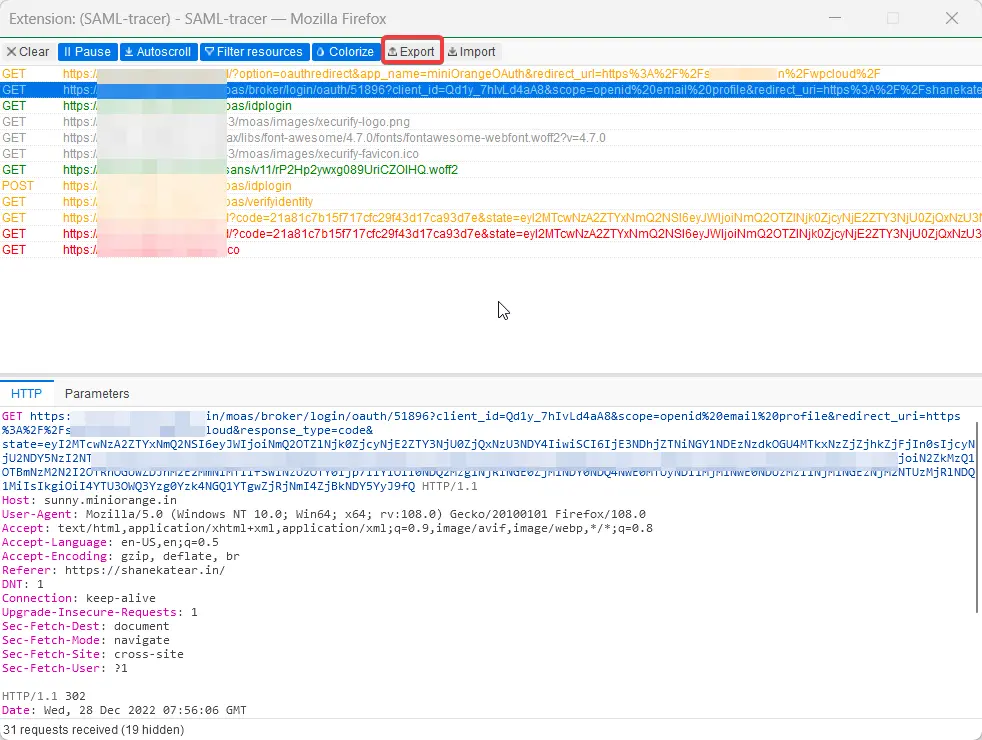
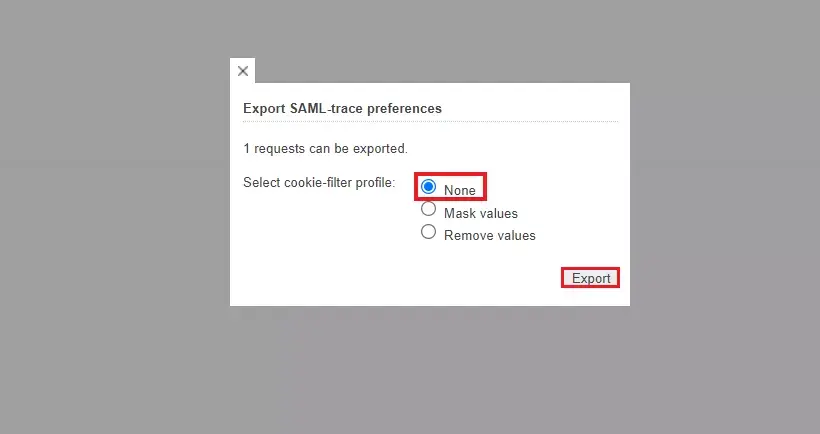
How can I trace and export the SAML tracer logs?
FAQs
What support is available for customers during Salesforce SSO setup?
miniOrange provides expert consultation, email support, and guides to help ensure you have a seamless Salesforce SSO configuration experience.
Can Salesforce contacts, accounts, and custom objects be used as an identity source for Salesforce SSO?
Yes, Salesforce contacts, accounts, and custom objects can be used as an identity source for Salesforce SSO, as long as they contain unique identity attributes such as an email or username that can be mapped during authentication.
External References