Hello there!
Need Help? We are right here!

Need Help? We are right here!
Search Results:
×This guide outlines the steps to deploy the miniOrange IAM On-Premise Server using either the BYOL or Contract AMI from the AWS Marketplace. It walks you through the launching AMI, configuring the server and database, setting up the initial admin account, and logging into the miniOrange admin dashboard to complete the setup of miniOrange on-premise identity platform on AWS.
miniOrange offers free help through a consultation call with our System Engineers to set up our on-premise server.
For this, you need to just send us an email at idpsupport@xecurify.com to book a slot and we'll help you in no time.
Before launching, ensure your EC2 Security Group has the following inbound rules:
| Port | Protocol | Description |
|---|---|---|
| 22 | TCP | SSH access |
| 443 | TCP | HTTPS (application) |
https://<your-public-ip>Note: You will see a browser warning for the self-signed certificate — this is expected. Accept and proceed.
The setup wizard will ask for your database, cache, and message queue connection details. All services are pre-installed and running locally on the instance. Use the following values:
Database (PostgreSQL)
| Field | Value |
|---|---|
| Host | localhost |
| Port | 5432 |
| Database | miniorange |
| Username | postgres |
| Password | (see /home/ec2-user/ami.env.sh on the server) |
Cache (Redis)
| Field | Value |
|---|---|
| Host | localhost |
| Port | 6379 |
Message Queue (RabbitMQ)
| Field | Value |
|---|---|
| Host | localhost |
| Port | 5672 |
| Username | admin |
| Password | (see /home/ec2-user/ami.env.sh on the server) |
Complete the wizard and save the configuration.
After saving the setup, SSH into the instance and restart all microservices so they pick up the new configuration:
         ssh -i your-key.pem ec2-user@<your-public-ip>
         sudo moctl service restart
Wait about 2-3 minutes, then refresh the application in your browser.
moctl service statusAll services should show as active/running.
If you want to use a custom domain (e.g. https://sso.yourcompany.com) instead of the public IP:
Note:
If using a custom domain, ensure your DNS points to this instance's public IP and update your SSL certificate in /etc/nginx/conf/.
All service connection details are stored on the instance at:
/home/ec2-user/ami.env.shSSH into the instance and run:
sudo cat /home/ec2-user/ami.env.shNavigate to the pricing details.
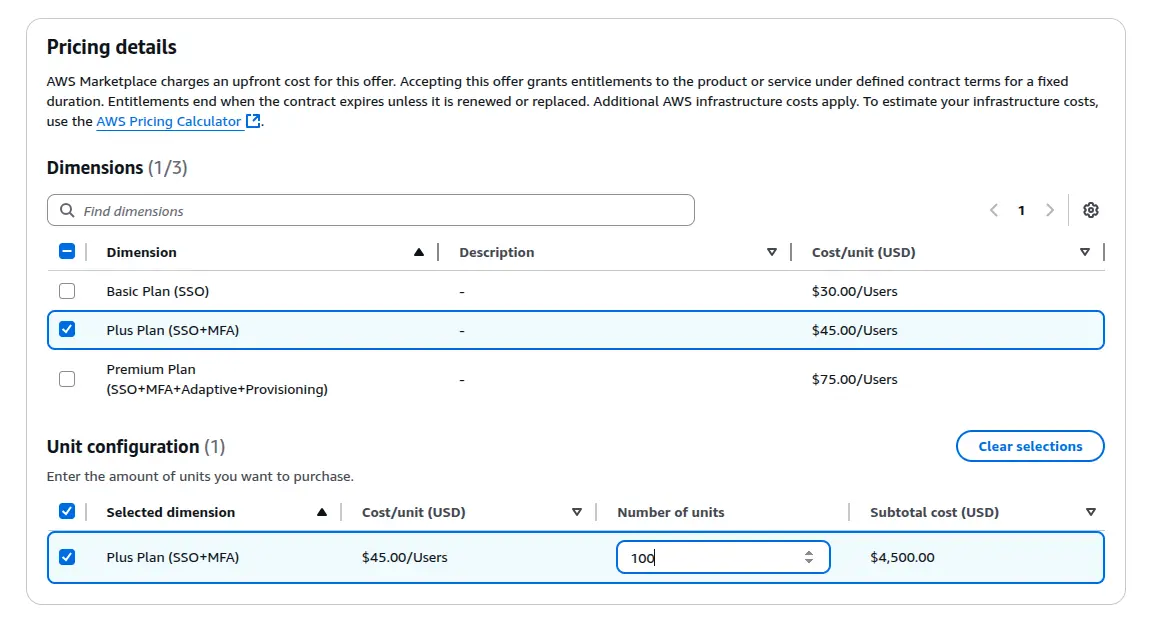
http://<public-ip-of-machine>:8080 is reachable.
                    {
                    "Version": "2012-10-17",
                    "Statement": [
                      {
                        "Sid": "VisualEditor0",
                        "Effect": "Allow",
                        "Action": "license-manager:*",
                        "Resource": "*"
                      }
                    ]
                }
                {
                    "Version": "2012-10-17",
                    "Statement": [

                    {
                        "Effect": "Allow",
                        "Principal": {
                            "Service": "ec2.amazonaws.com"
                        },
                        "Action": "sts:AssumeRole"

                    }
                ]
            }
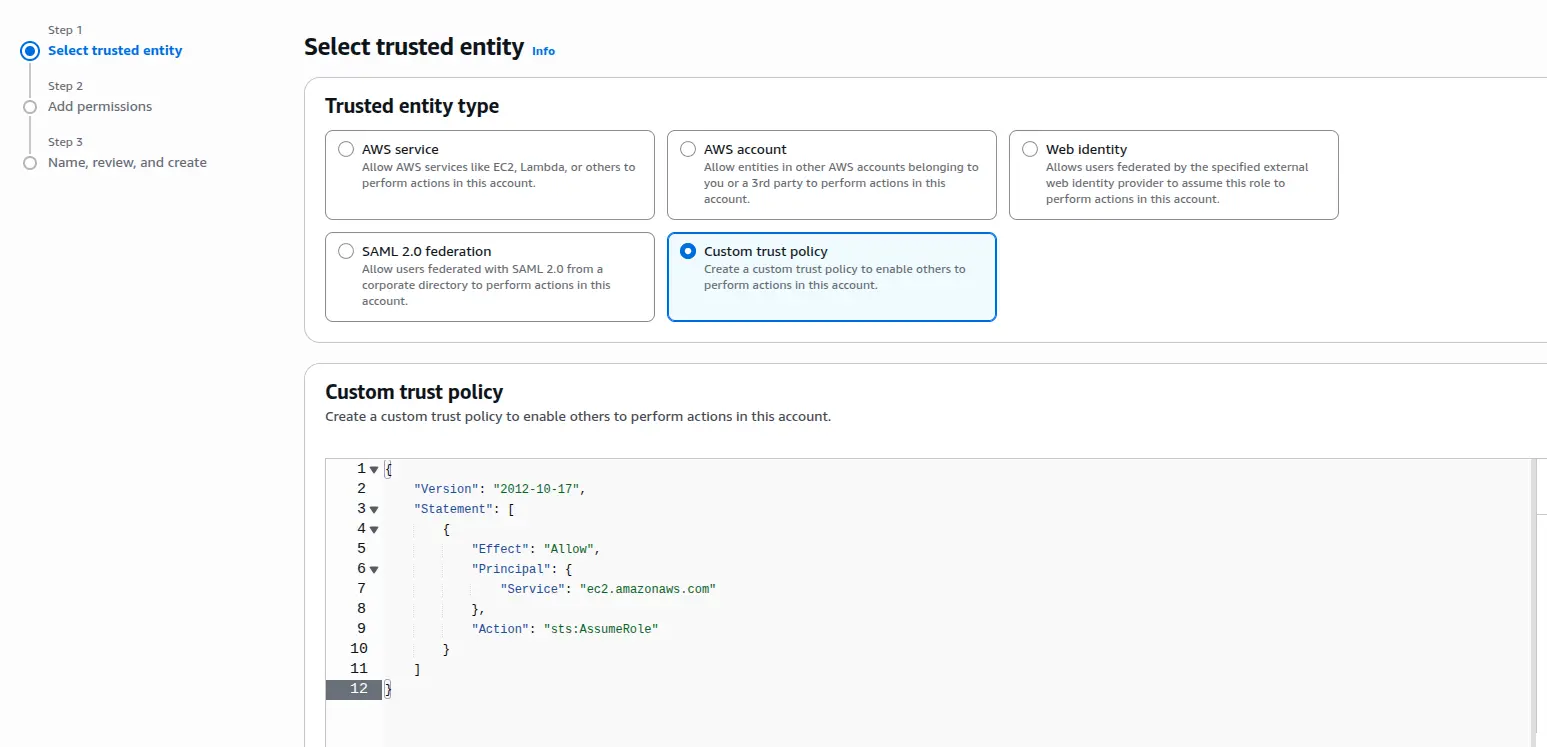
sudo chown -R mo-idp:mo-idp /opt/mo-idp-server-ami-4.10.1/moas
http://<public-ip-of-machine>:8080. You will be prompted for the database setup page.To Configure database :
postgres user.sudo -u postgres psqlALTER USER postgres WITH PASSWORD <enter-password>To Setup Database :
http://<public-ip-of-machine>:8080