Certificate Manager
The Certificate Manager provides enterprise-grade, end-to-end SSL/TLS certificate lifecycle management from a unified platform, including creation, secure vault storage, monitoring, renewal, and CA integration.
- Users can upload certificates and passphrase-protected private keys, which are decrypted, validated, and stored securely without exposing sensitive data like keys or CA credentials.
- CSR Generation & Templates: Generate CSRs with customizable parameters (RSA/ECC keys, sizes, hash, SANs, passphrase encryption); save/reuse CSRs and private keys; use templates for standardized organization details to reduce errors.
- Issuance Workflows: Create self-signed certificates with custom validity; submit CSRs to CAs like GoDaddy/Let's Encrypt (with ACME account integration); auto-polls status, stores issued certs in vault.
- Management Features: Download certs/CSRs/keys in CRT/PEM/DER/PFX/JKS formats; monitors expiry with email/dashboard alerts (30/7/1 days); organized views for Saved Certificates, CSRs, Templates, Signing Requests, and CA Configurations, ensuring security, efficiency, and compliance.
1. Steps to Upload a Certificate
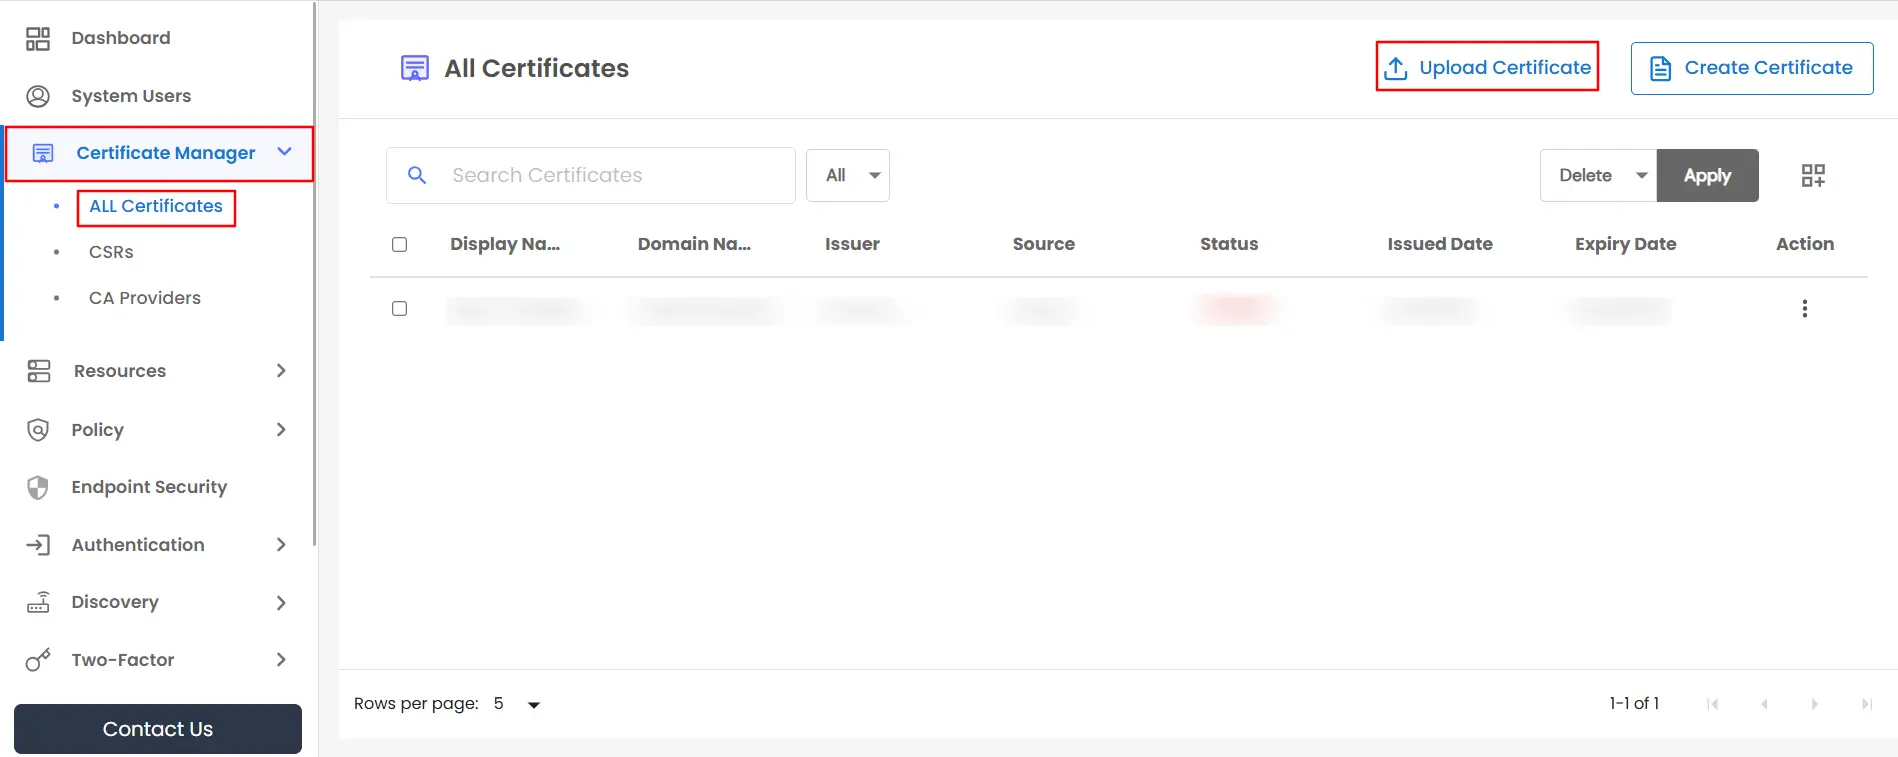
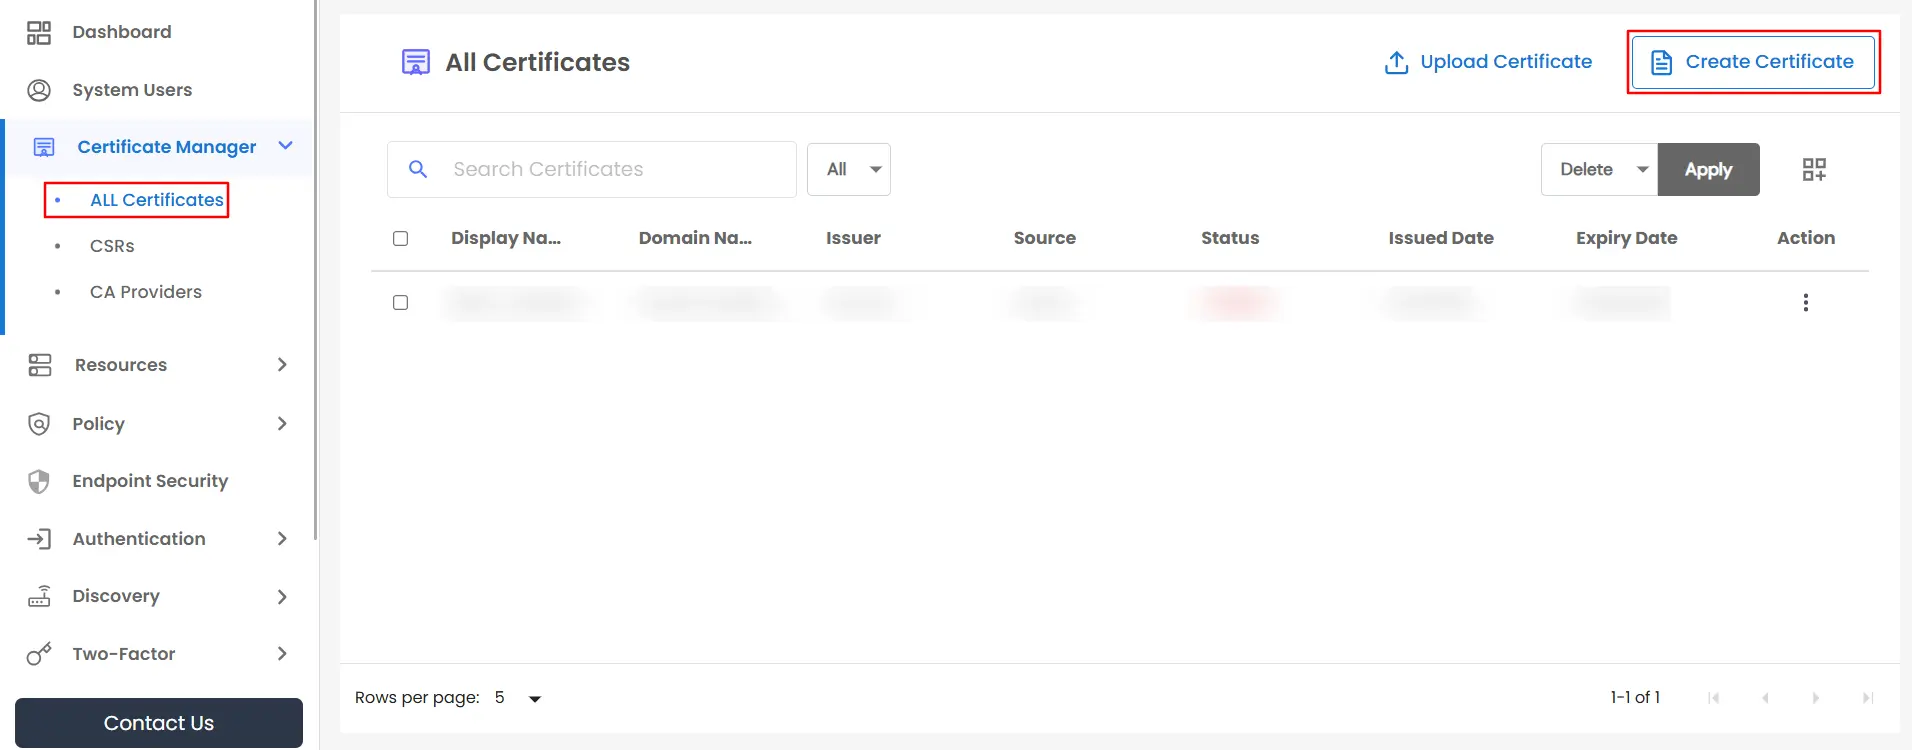
- Step I : Navigate to the All Certificates tab from the sidebar in Certificate Manager and click the Upload Certificate button in the top-right corner.
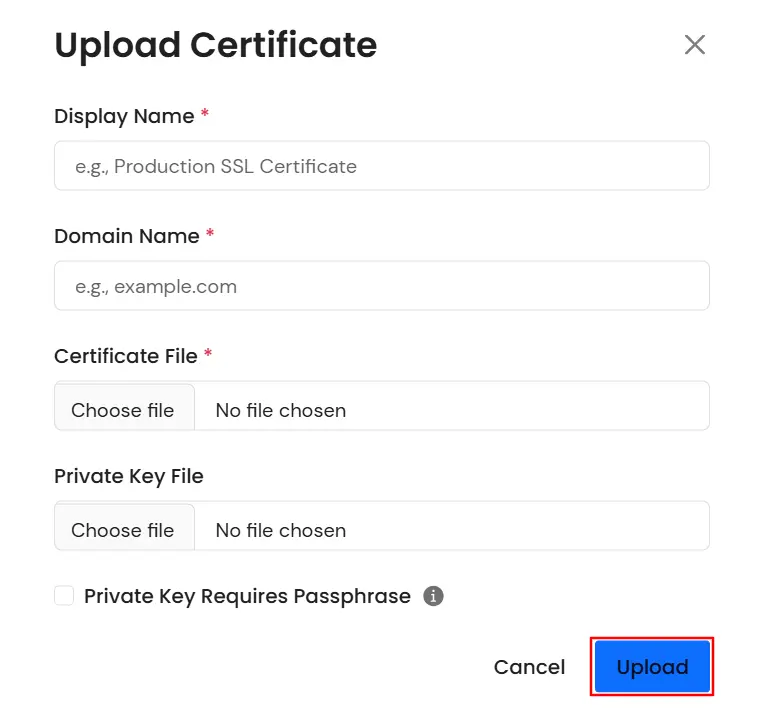
- Step II : After clicking the Upload button, enter the Display Name and Domain Name, then upload the Certificate File. Optionally, you may also upload the Private Key.
- If the private key is protected with a passphrase, select the Private Key Requires Passphrase checkbox and provide the corresponding passphrase.
- Once all required details are filled in, click the Upload Certificate button.
Note:
The domain name must exactly match the domain name specified in the certificate.
The uploaded private key must correspond to the certificate.
Expired certificates cannot be uploaded.
2. Download Certificates
- In All Certificates, accessible from the Certificate Manager sidebar, you can view all uploaded certificates for which expiry monitoring is enabled.
- In the Actions column, you will see multiple options, including: Edit Display Name, Create Certificate, Delete, and Download.
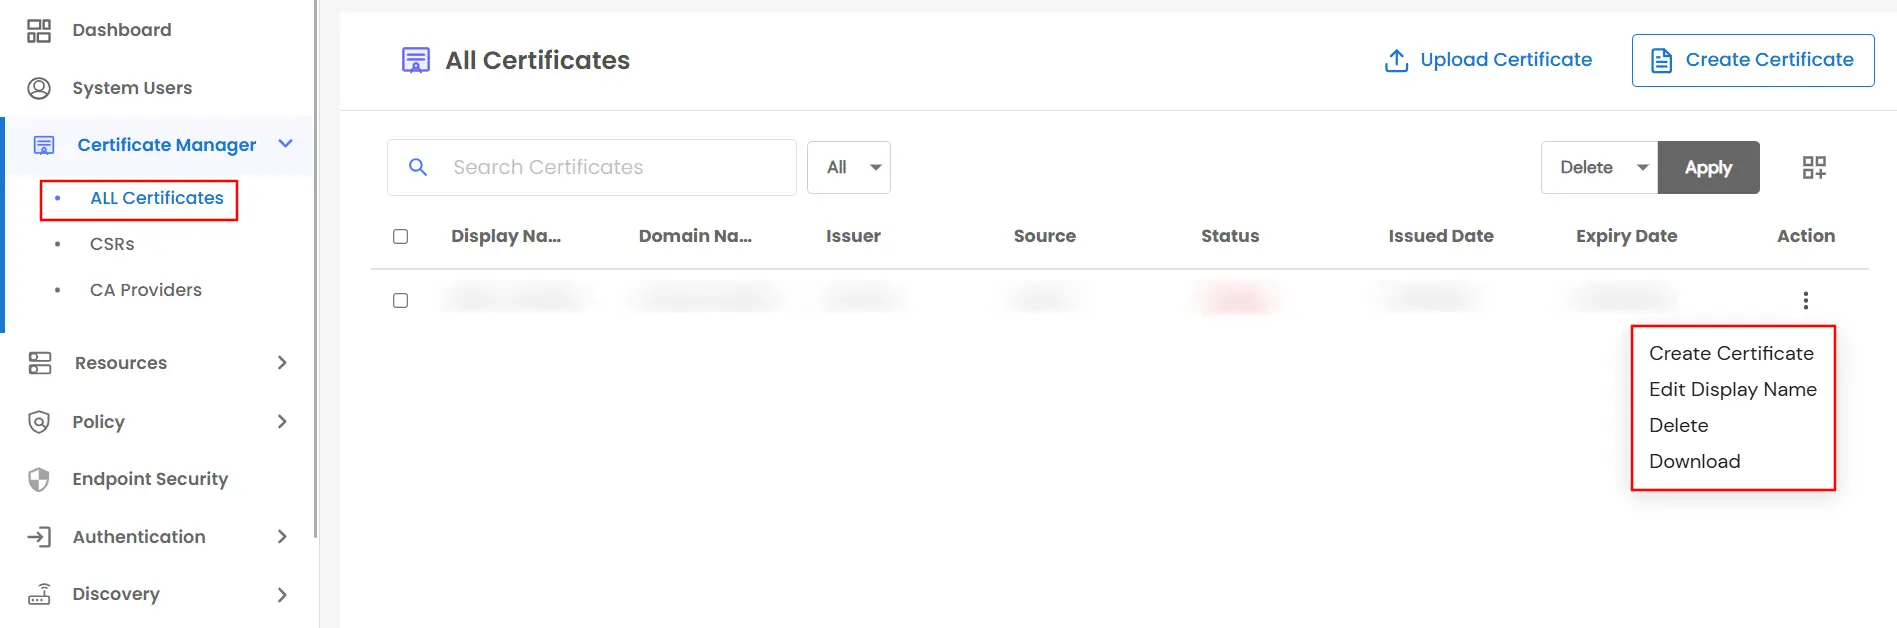
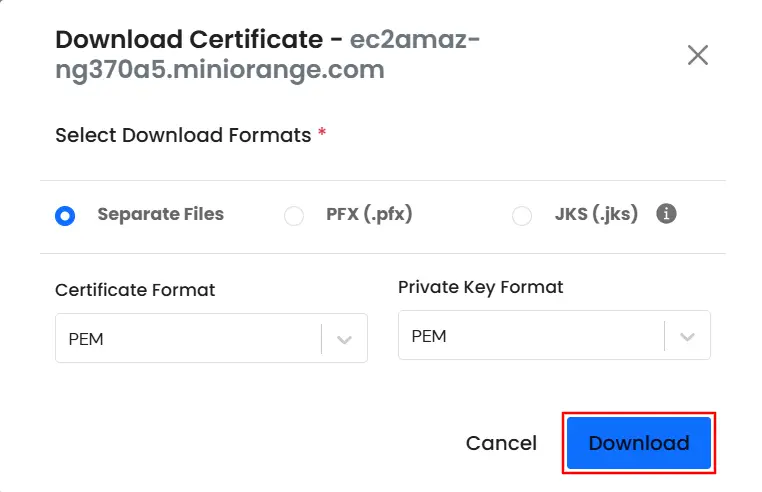
- When you click the Download button, a list of available formats is displayed for downloading the certificate and private key, such as CSR, DER, PEM, and KEY.
- If required, additional formats like PFX and JKS are also available. Simply select your preferred download format and click Download.
3. Steps to Create Self-Signed or CA-Signed Certificates
- Step I : To generate a new Self-Signed or CA-Signed certificate, click the Create Certificate button located at the top-right corner of the All Certificates page within the Certificate Manager from the sidebar.
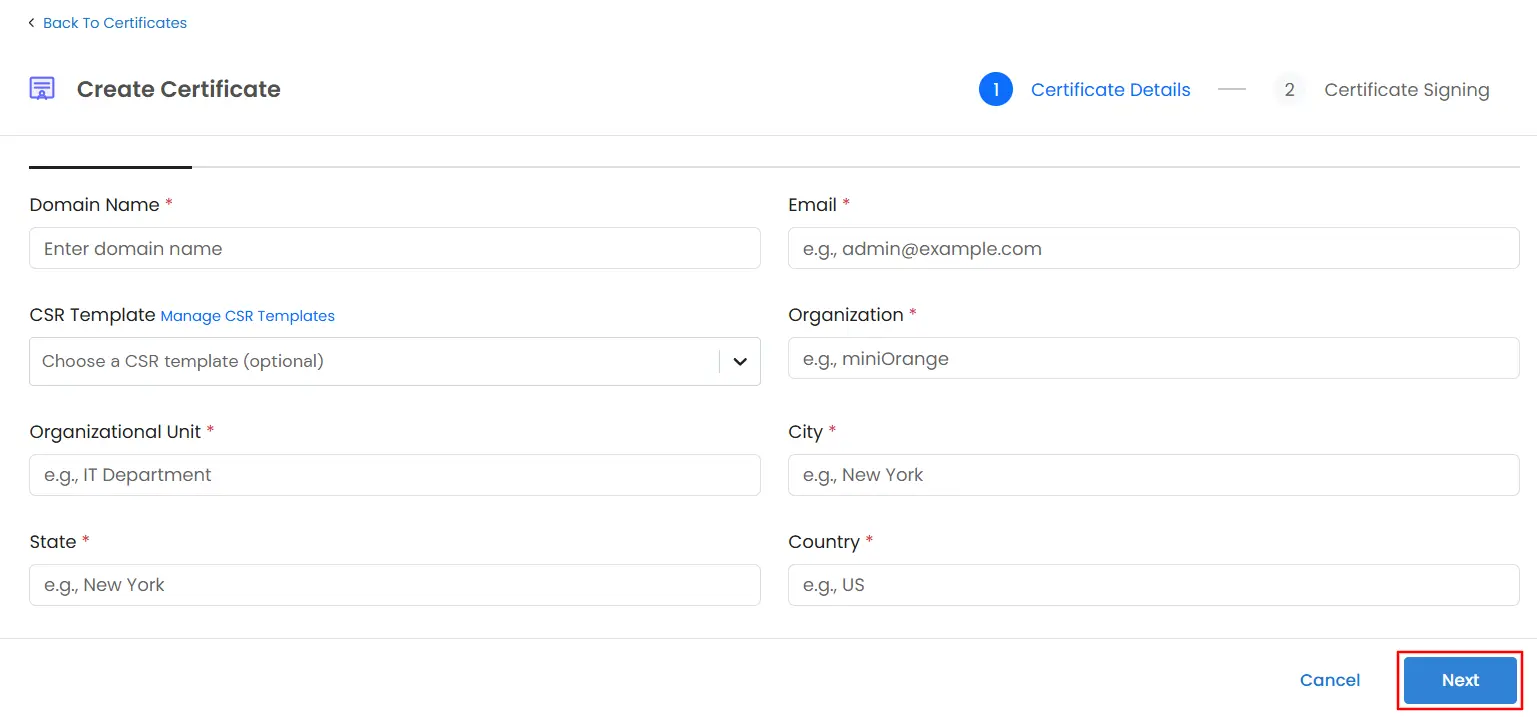
- Step II : After clicking Create Certificate, you will be redirected to Step 1, where you need to enter the basic information required for CSR generation. Fill in all the mandatory fields as prompted.
- You will also see an option to select CSR Templates. By choosing an existing CSR template, all required fields will be automatically populated, eliminating the need to enter the details manually each time you generate a CSR.
- Once all fields are completed, click Next to proceed.
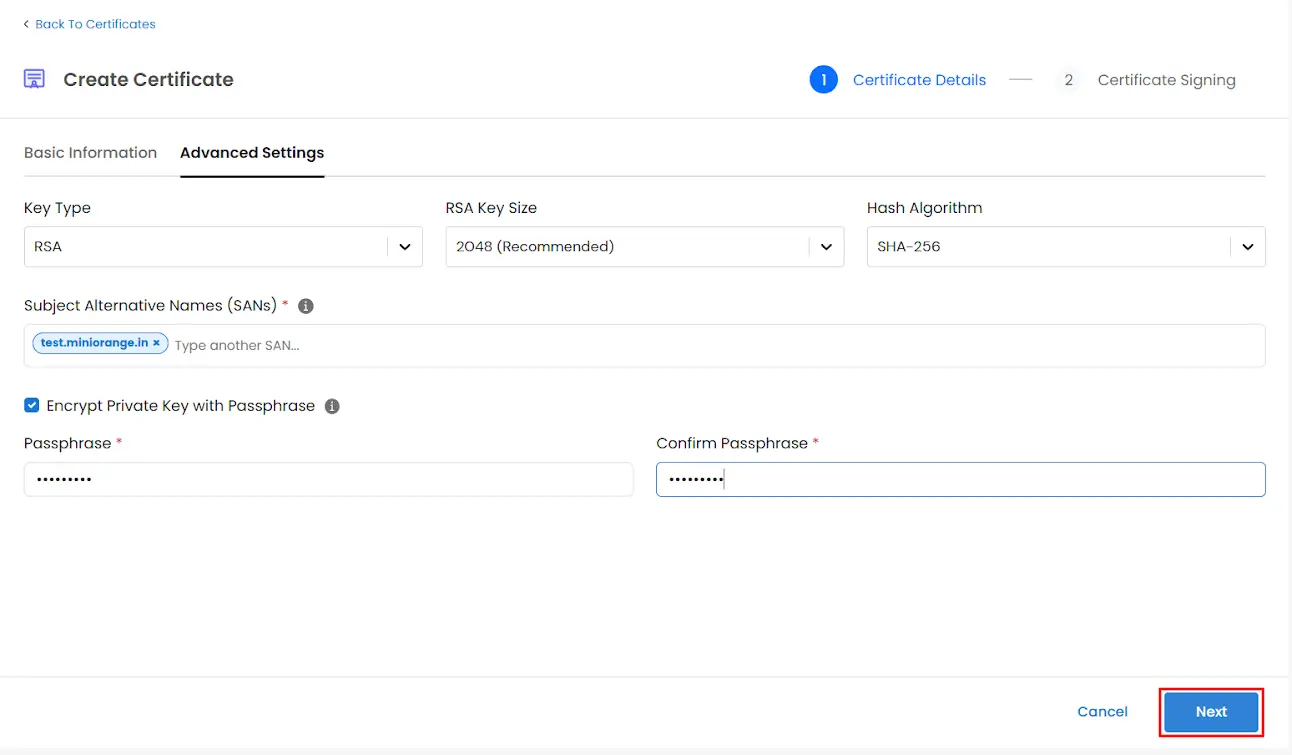
- Step III : After clicking Next, you will be redirected to the Advanced Settings tab. Here, you can select the Private Key Type, Key Size, and Hash Algorithm. You may also add Subject Alternative Names (SANs) if required.
- If you want to protect the private key with a passphrase, you can provide the passphrase in this step.
- Once all advanced settings are configured, click Next to continue.
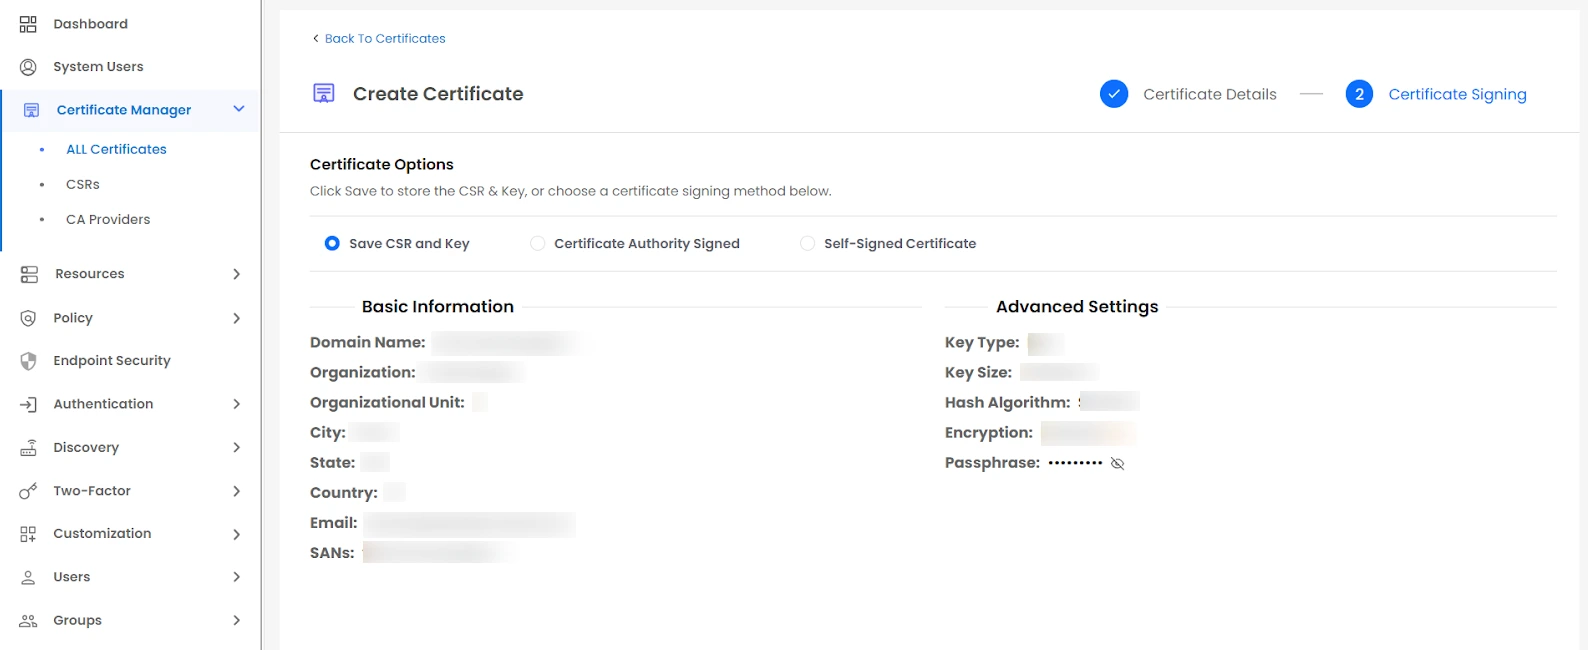
- Step IV : After clicking Next, you will be redirected to Step 2: Certificate Signing, where you can choose one of the following options:
- Save CSR – Save the CSR without signing it
- Self-Signed Certificate – Generate a self-signed certificate
- CA Sign Certificate – Select a Certificate Authority (CA) and submit the CSR for CA signing
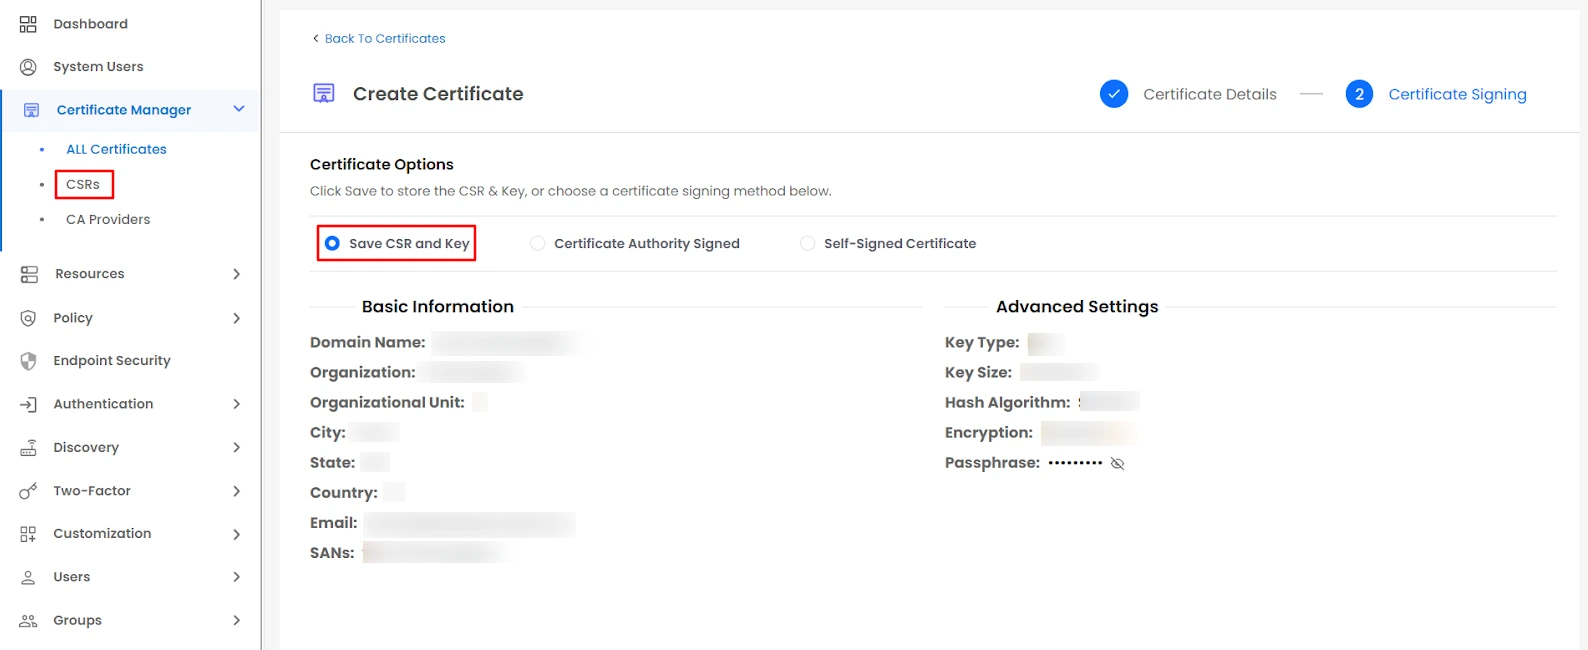
- If you choose Save, the CSR and private key will be securely stored in the vault and will be available for future signing. You can view the saved CSR under the CSRs section in the sidebar within the Certificate Manager.
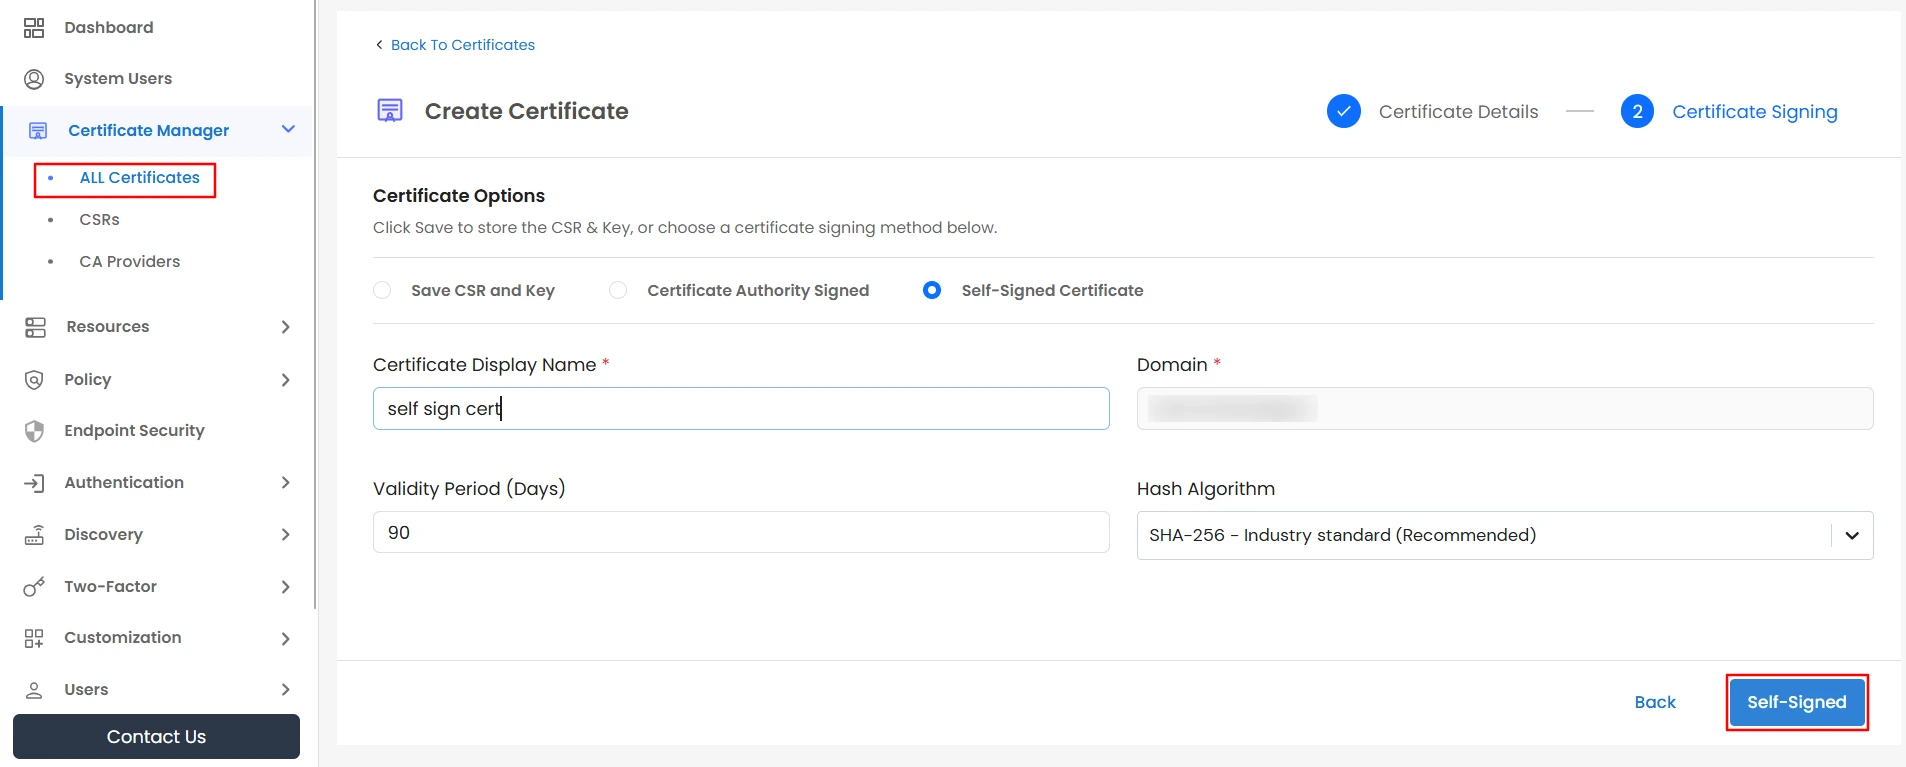
- If you want to self-sign your certificate, select the Self Sign option and provide a Display Name, Validity Period (in days), and Hash Algorithm. Then, click the Self Sign button.
- Once the certificate is successfully self-signed, it will be created and listed under All Certificates in the Certificate Manager (from the sidebar). From there, you can view and download the certificate and its associated private key.
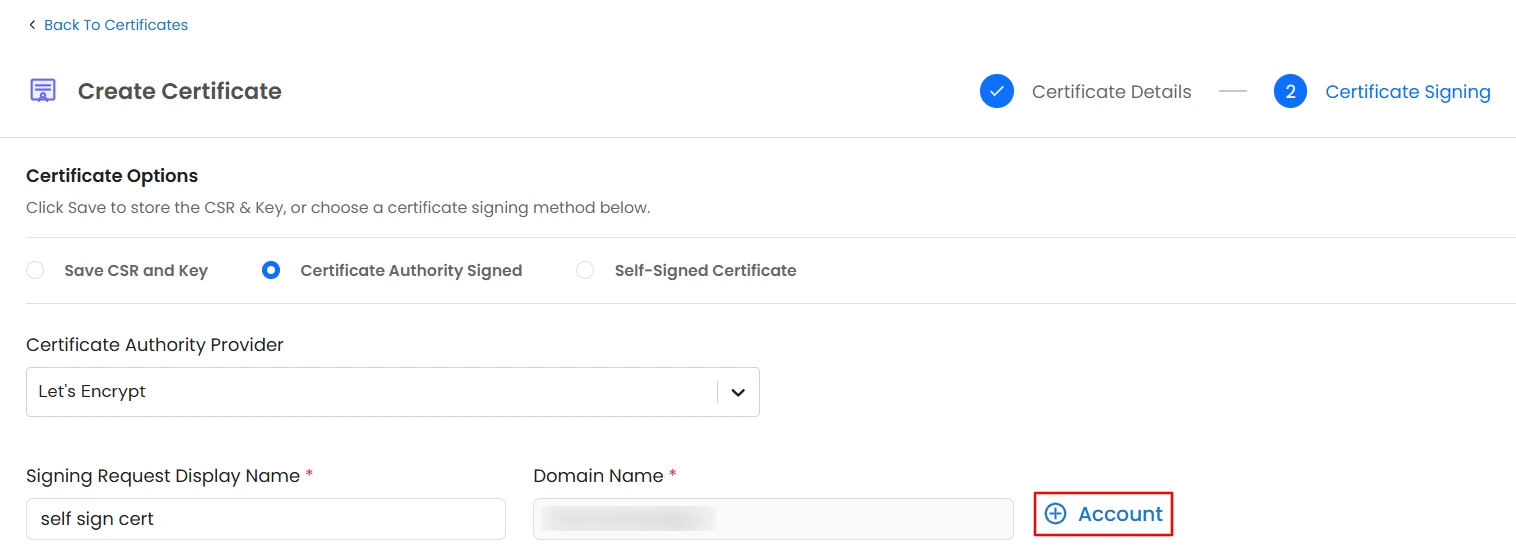
- If you want to have your certificate signed by a Certificate Authority (CA), select the Certificate Authority Sign option and choose the required CA from the Certificate Authority Provider dropdown.

- After selecting the required CA provider, enter a Certificate Signing Request (CSR) Display Name. If no CA account is available, click Add Account to create a new one.
- In the case of Let's Encrypt, when you click Add Account, an Add Account modal appears with two options:
- Add Existing Account – Use an already registered Let's Encrypt account.
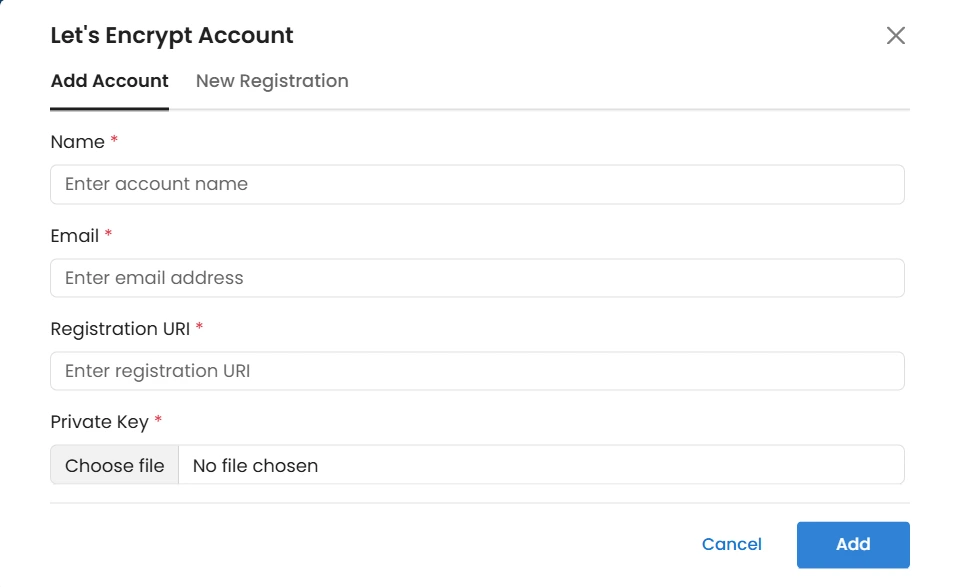
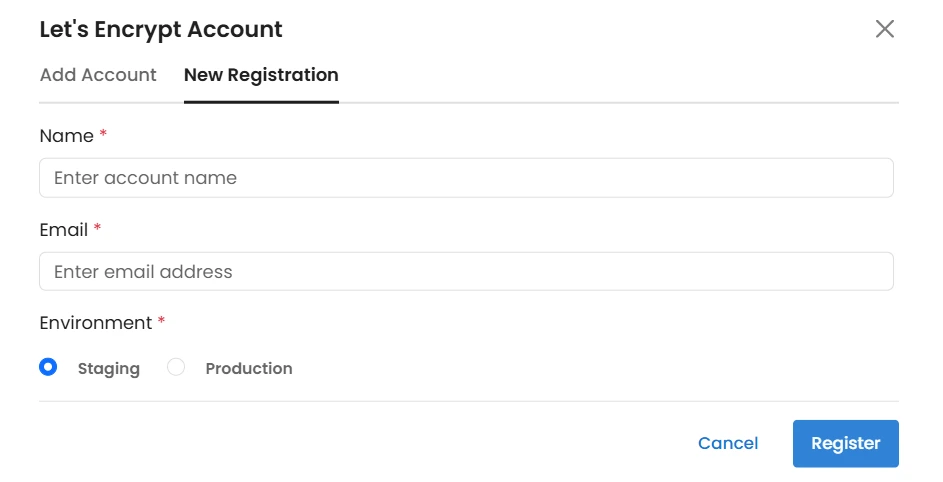
- Register New Account – Create a new Let's Encrypt account directly through PAM.
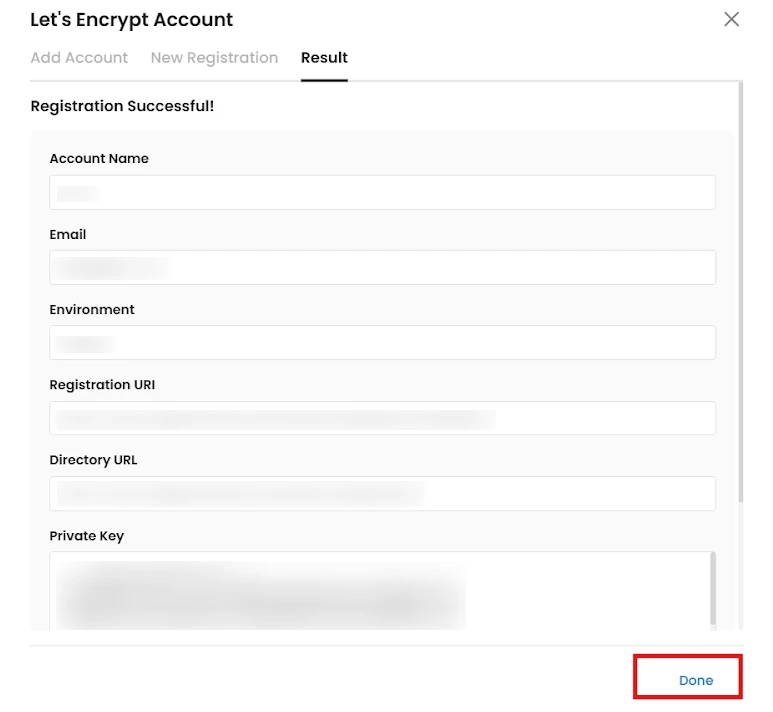
- After completing a new registration, and once it is successful, you will be redirected to the Result tab. This tab displays all the details related to the newly created account. Simply review the information and click Done to complete the process.
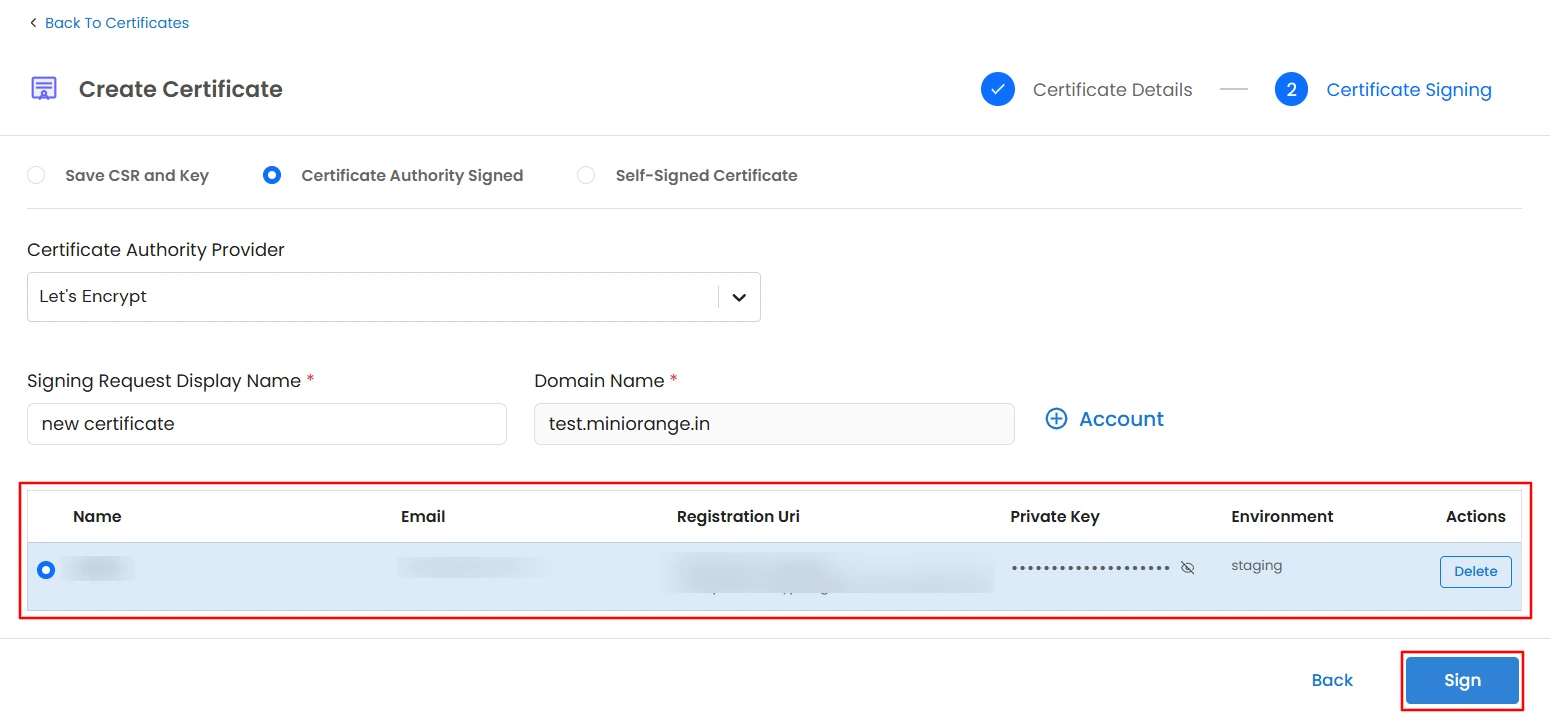
- After adding or registering a new account, you will see the account listed, as shown in the image below. You can add multiple accounts if required. Select the desired account and click the Sign button to submit the CSR to the Let’s Encrypt CA for signing.
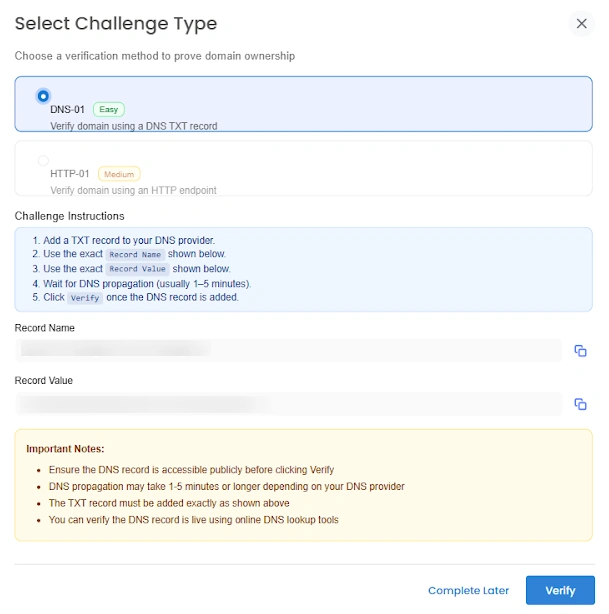
- Once you click Sign, Let's Encrypt will return one or more challenges, such as HTTP-01 and DNS-01. You must complete at least one of these challenges to prove domain ownership.
- Each challenge includes detailed instructions and important notes. Follow the provided instructions to complete the challenge. If you need more time, you can click Complete Later to finish the challenge at a later time.
- After completing the challenge, click Verify.
- Once verification is successful, a Finalize Order modal will appear. Click Finalize to complete the process. Your issued certificate will then be automatically downloaded and securely stored in the vault. You can also add this certificate in All Certificates, where it can be added for expiry monitoring.
- If you choose Complete Later, the signing request will remain under the Signing Requests tab inside the Let's Encrypt card under CA Provider in the Certificate Manager sidebar, allowing you to resume and complete the challenge later.
- After clicking Complete Later, go to CA Providers in the Certificate Manager sidebar. You will see different CA provider cards—click on the Let's Encrypt card.
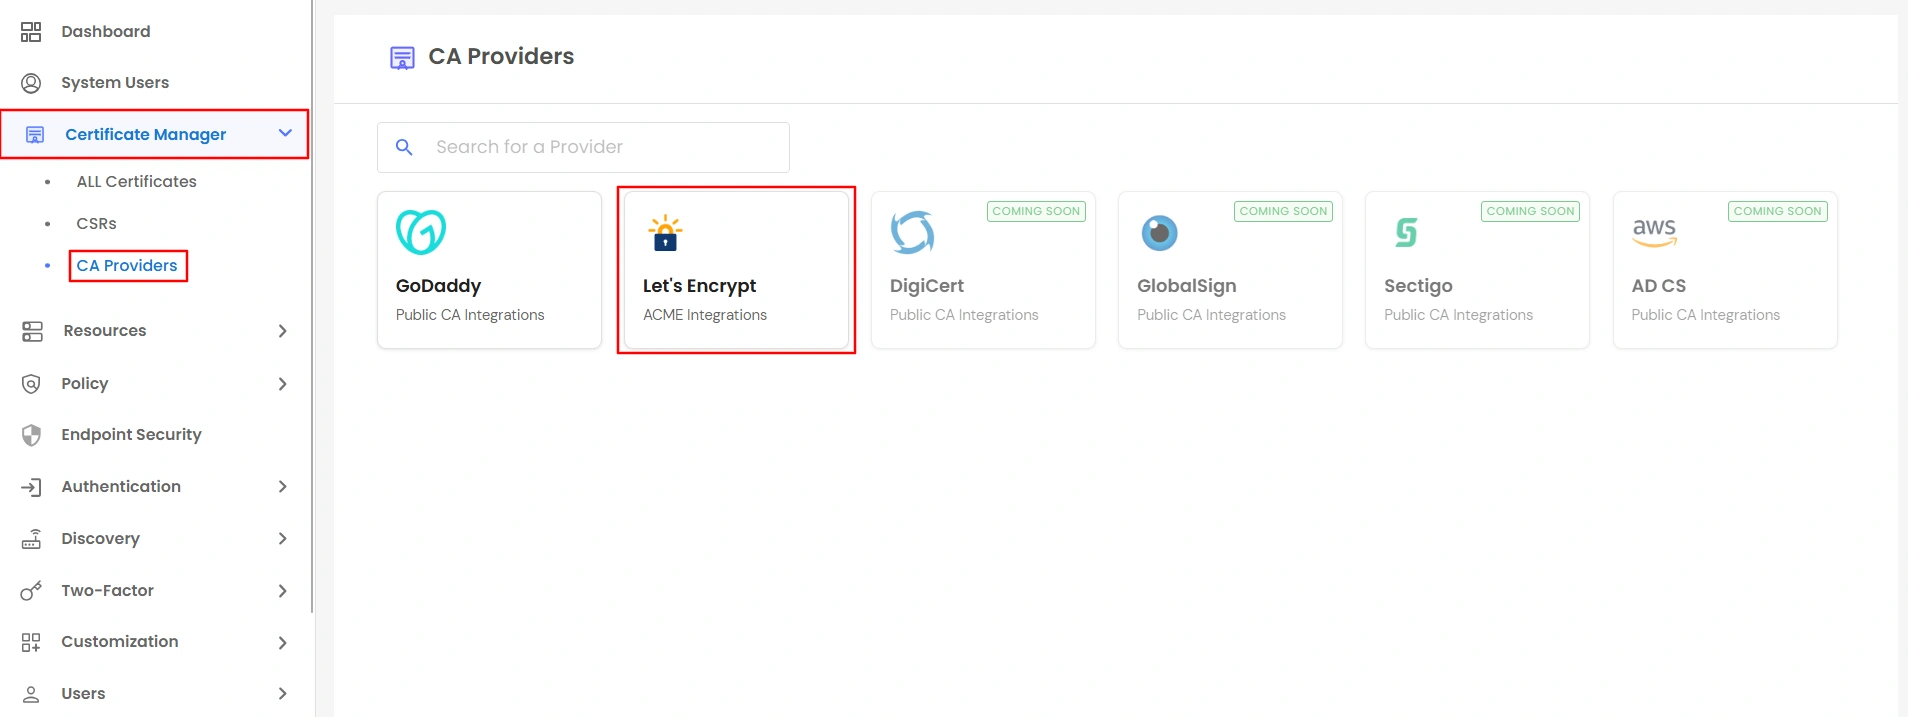
- After clicking the Let's Encrypt card, you will be redirected to the Let's Encrypt page, where you will see two tabs: Signing Requests and Configuration.
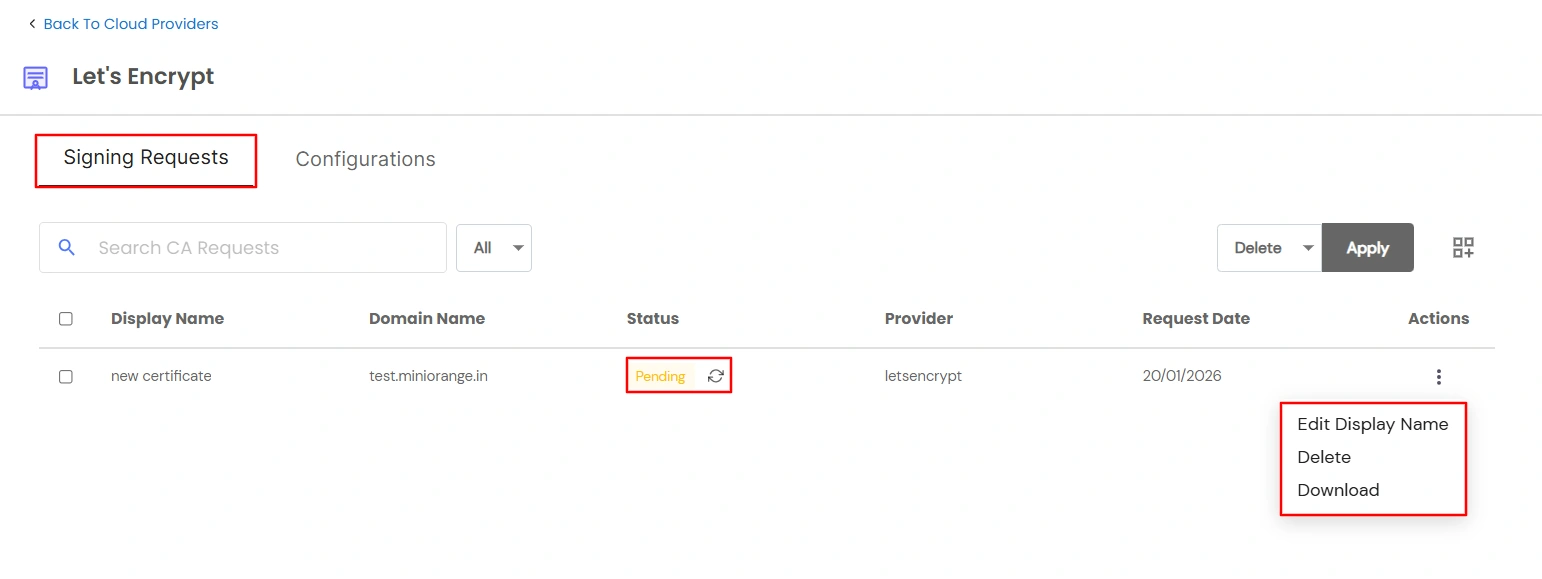
- In the Signing Requests tab, you can view all signing requests submitted to Let's Encrypt. The table includes a Status column with a Refresh button. Clicking Refresh will display the current challenge details again, allowing you to complete the domain ownership verification.
- In the Actions column, you have the following options:
- Edit Display Name
- Delete the Signing Request
- Download
- Once the certificate is successfully issued after challenge verification and order finalization, an additional action, Add to All Certificates, becomes available. This option allows you to add the issued certificate to All Certificates in the Certificate Manager sidebar for expiry monitoring.
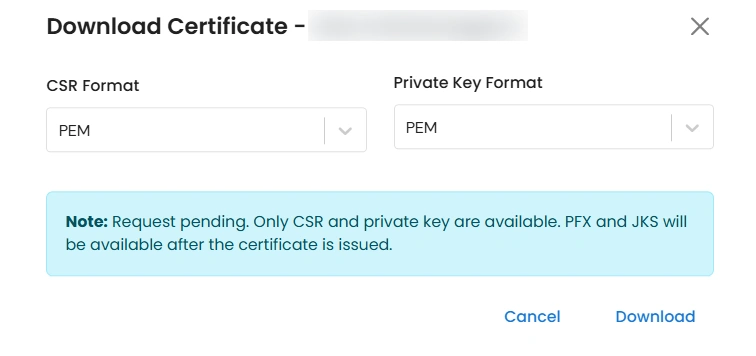
- When you click Download, you can download the CSR and private key in different formats until the certificate is issued.
- Once the certificate has been successfully issued, the download options change, allowing you to download the certificate instead of the CSR and private key. At this stage, the certificate is available in multiple formats, including PFX and JKS.
- In the Configuration tab, you can view all the accounts configured under the Let's Encrypt CA provider. You also have the option to Add Account, allowing you to add a new account. In the case of Let's Encrypt, you can also perform a new account registration directly from this section.
- In the Actions column, you also have the option to delete an account.
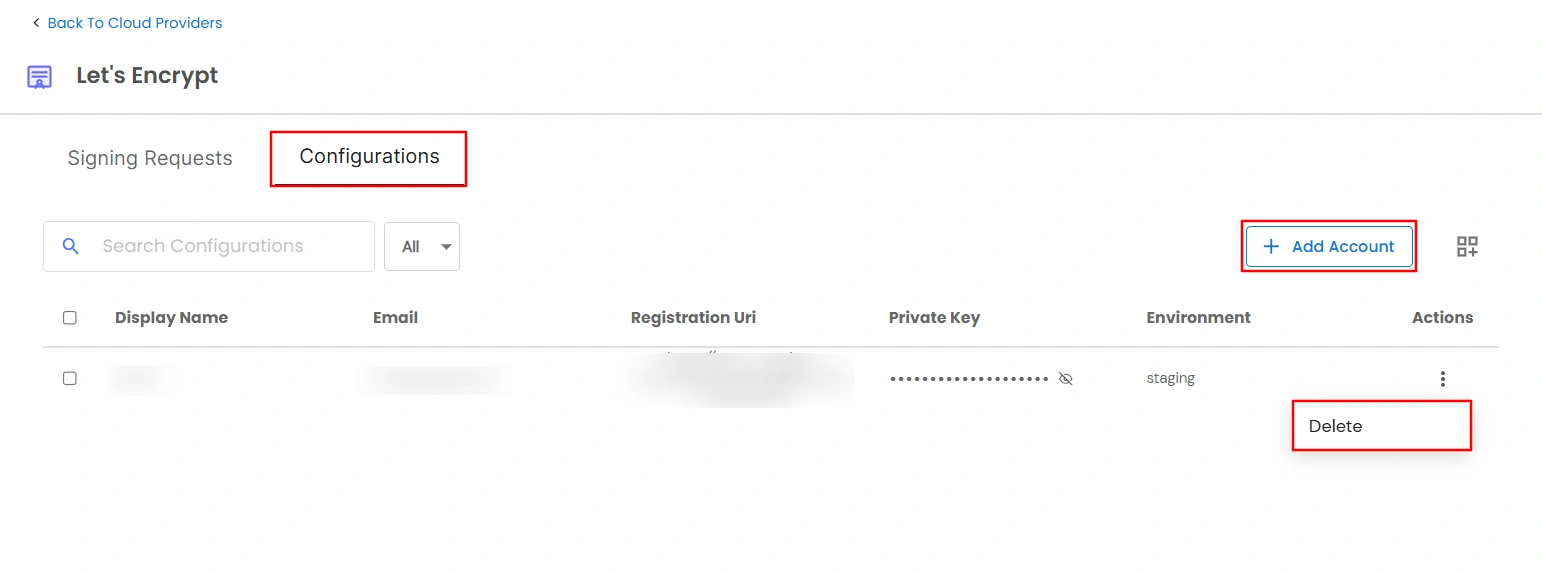
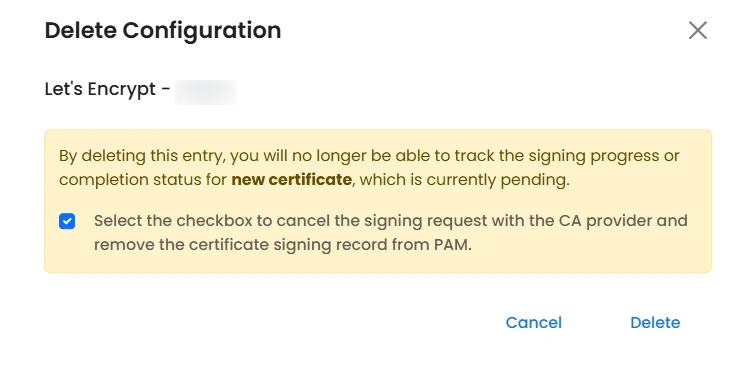
- When you click the Delete button, a confirmation modal is displayed with the following information:
- By deleting this entry, you will no longer be able to track the signing progress or completion status for the new certificate that is currently pending.
- Select the checkbox to cancel the signing request with the CA provider and remove the certificate signing record from PAM.
- After selecting the checkbox and confirming the action, the account will be deleted, and all signing requests associated with that account will also be removed.
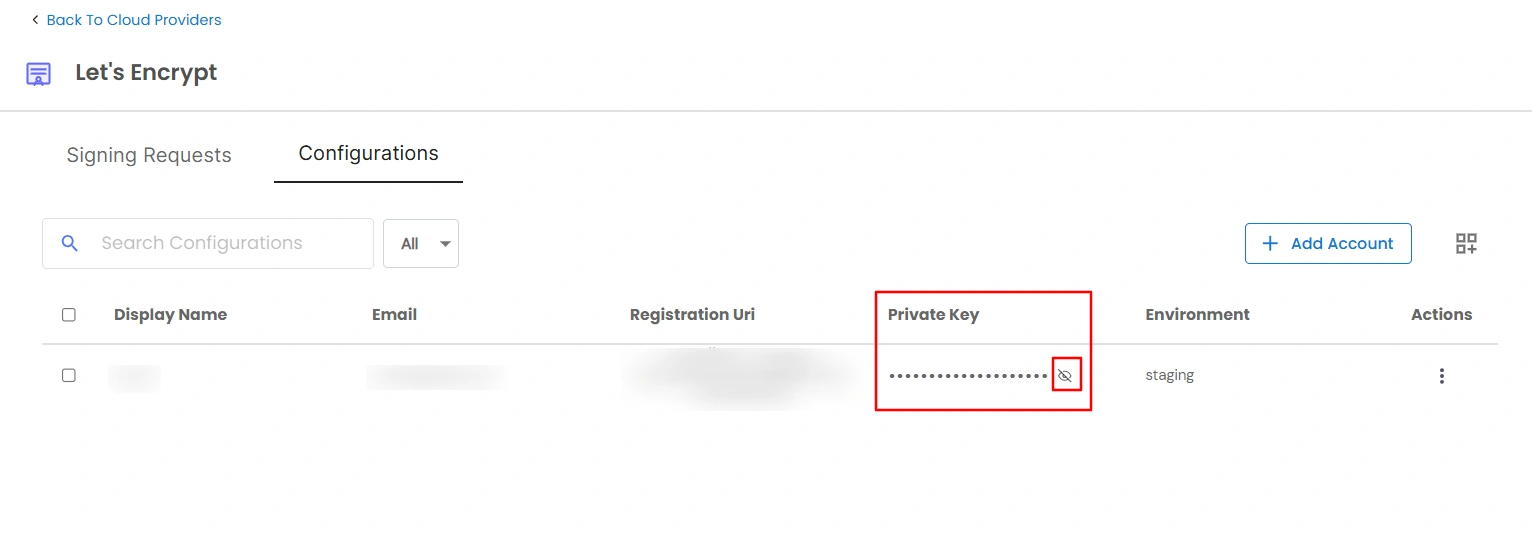
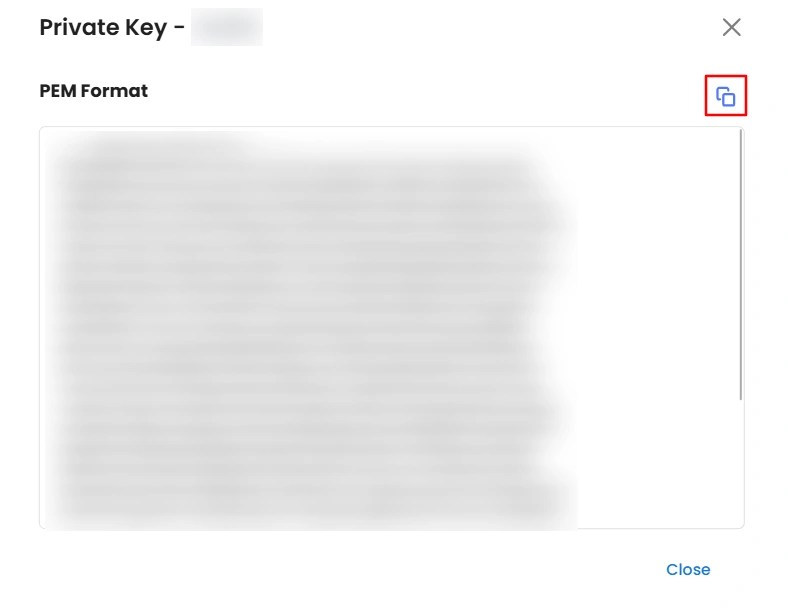
- When you click the eye icon in the Private Key column, a modal opens displaying the private key. You can view the key and copy it using the clipboard option provided in the modal.
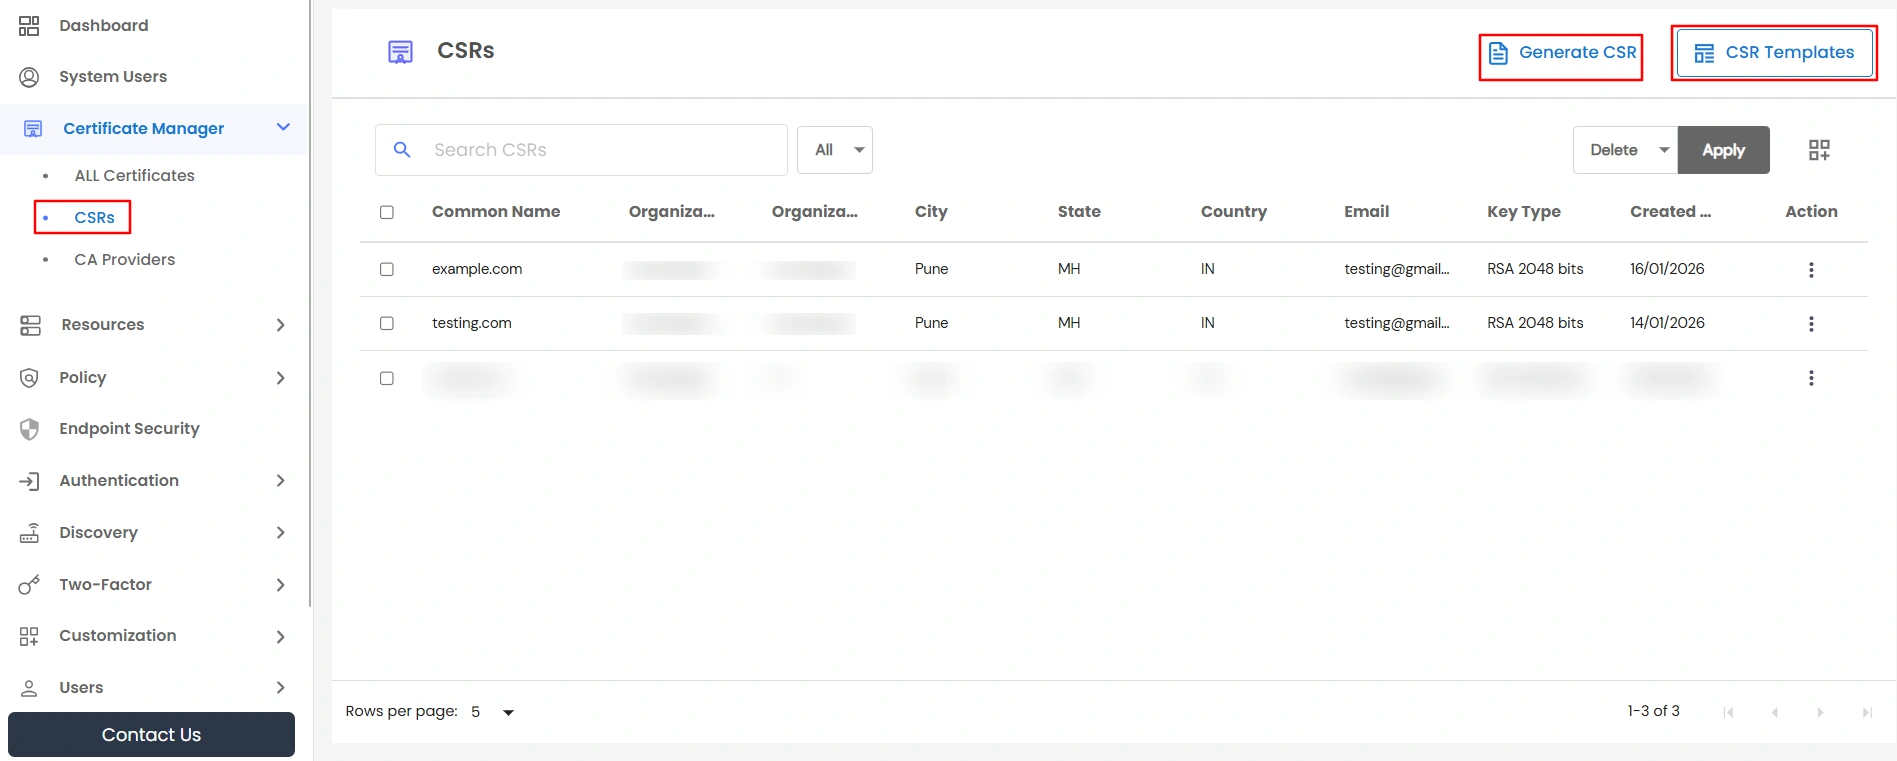
4. Simple CSR and Private Key Generation
In the Certificate Manager sidebar, click on CSRs to navigate to the CSR management page. From this page, you can generate CSRs and private keys and securely store them for future signing requests.
You also have the option to create and manage CSR Templates, which help prefill required fields when generating CSRs.
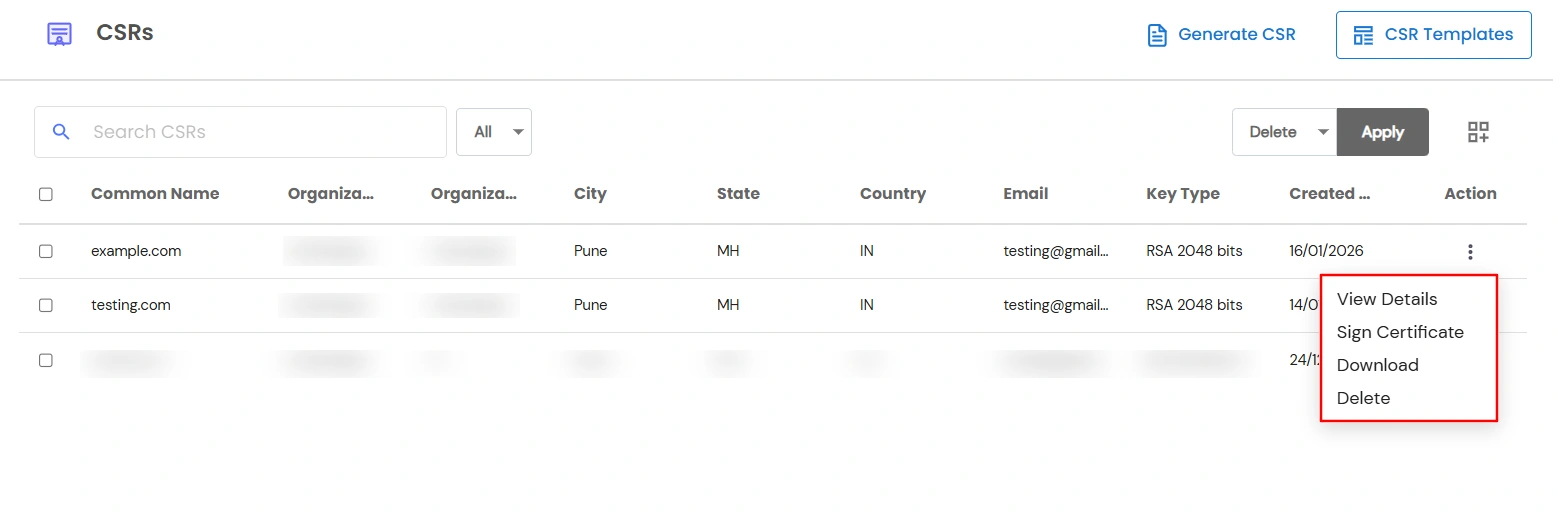
In the Actions column, the following options are available:
- Delete the CSR and private key
- Download
- View Details
- Sign the Certificate to create a new signing request
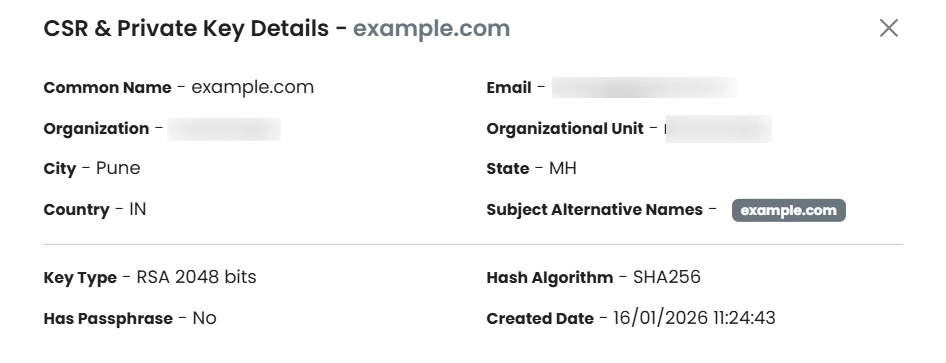
- When you click View Details, you will be able to see all the details related to the selected CSR and private key, as shown below.
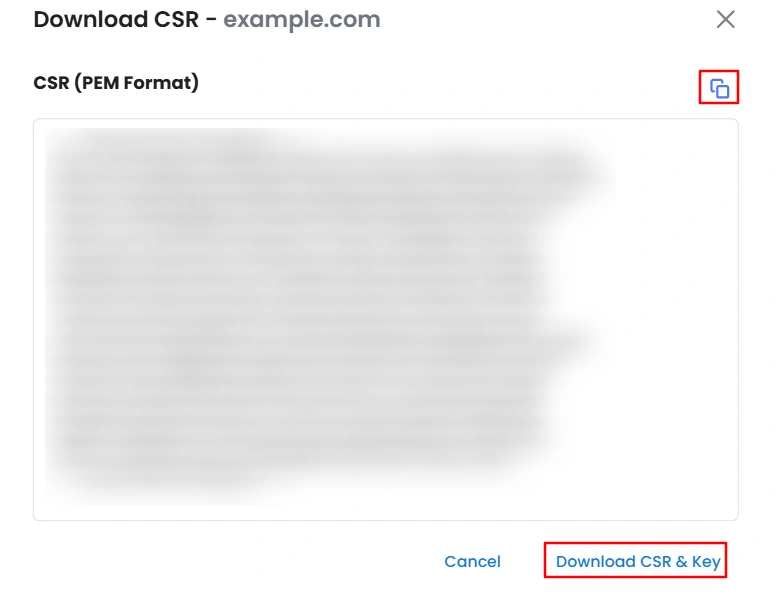
- When you click Download, a modal opens as shown below. From this modal, you can either copy the CSR using the clipboard option or click Download CSR and Key to download the CSR and private key.
- To generate a CSR and private key, click the Generate CSR button located at the top-right corner of the page.
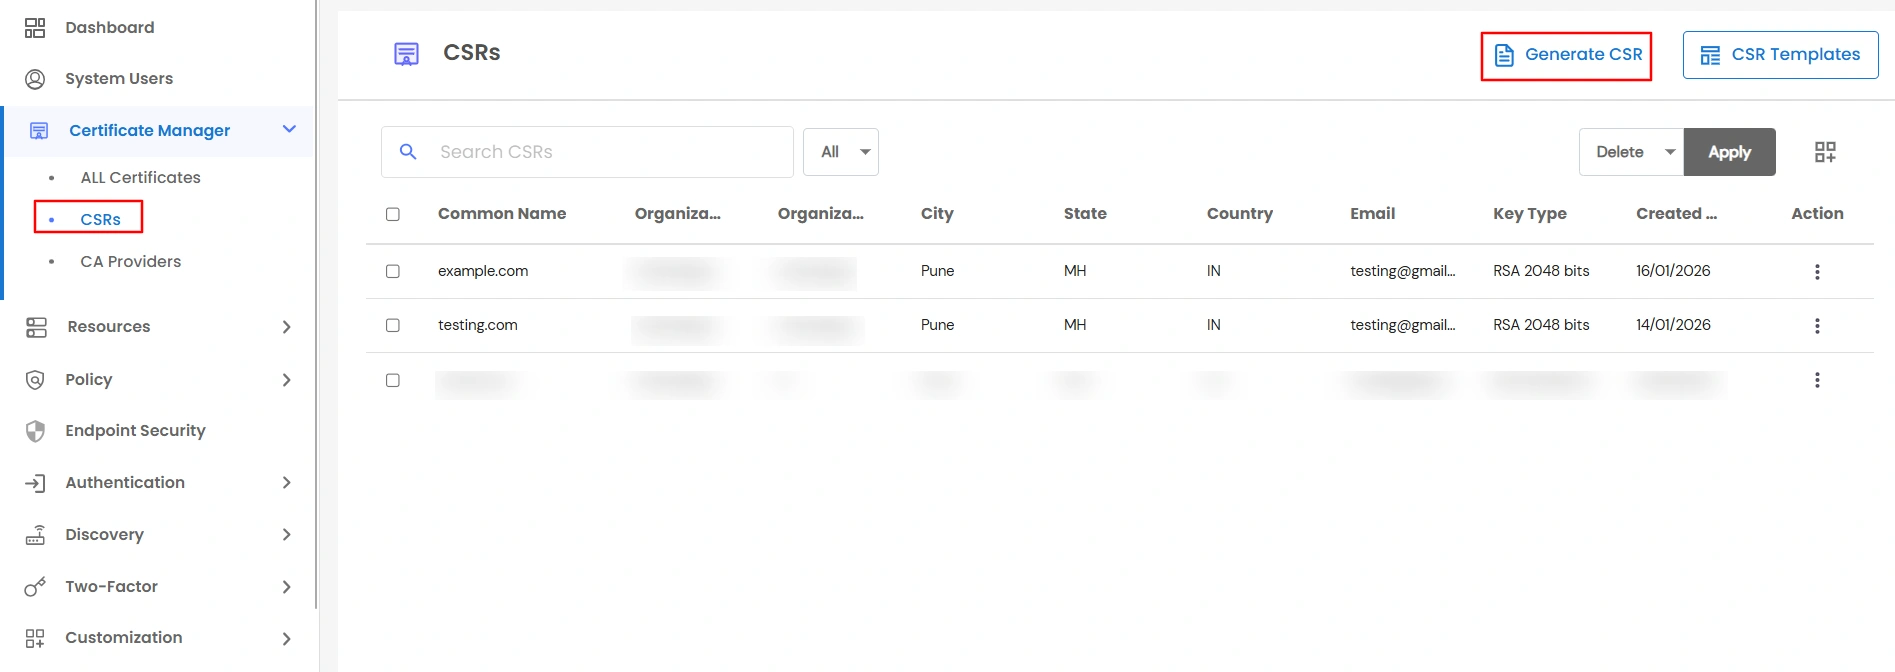
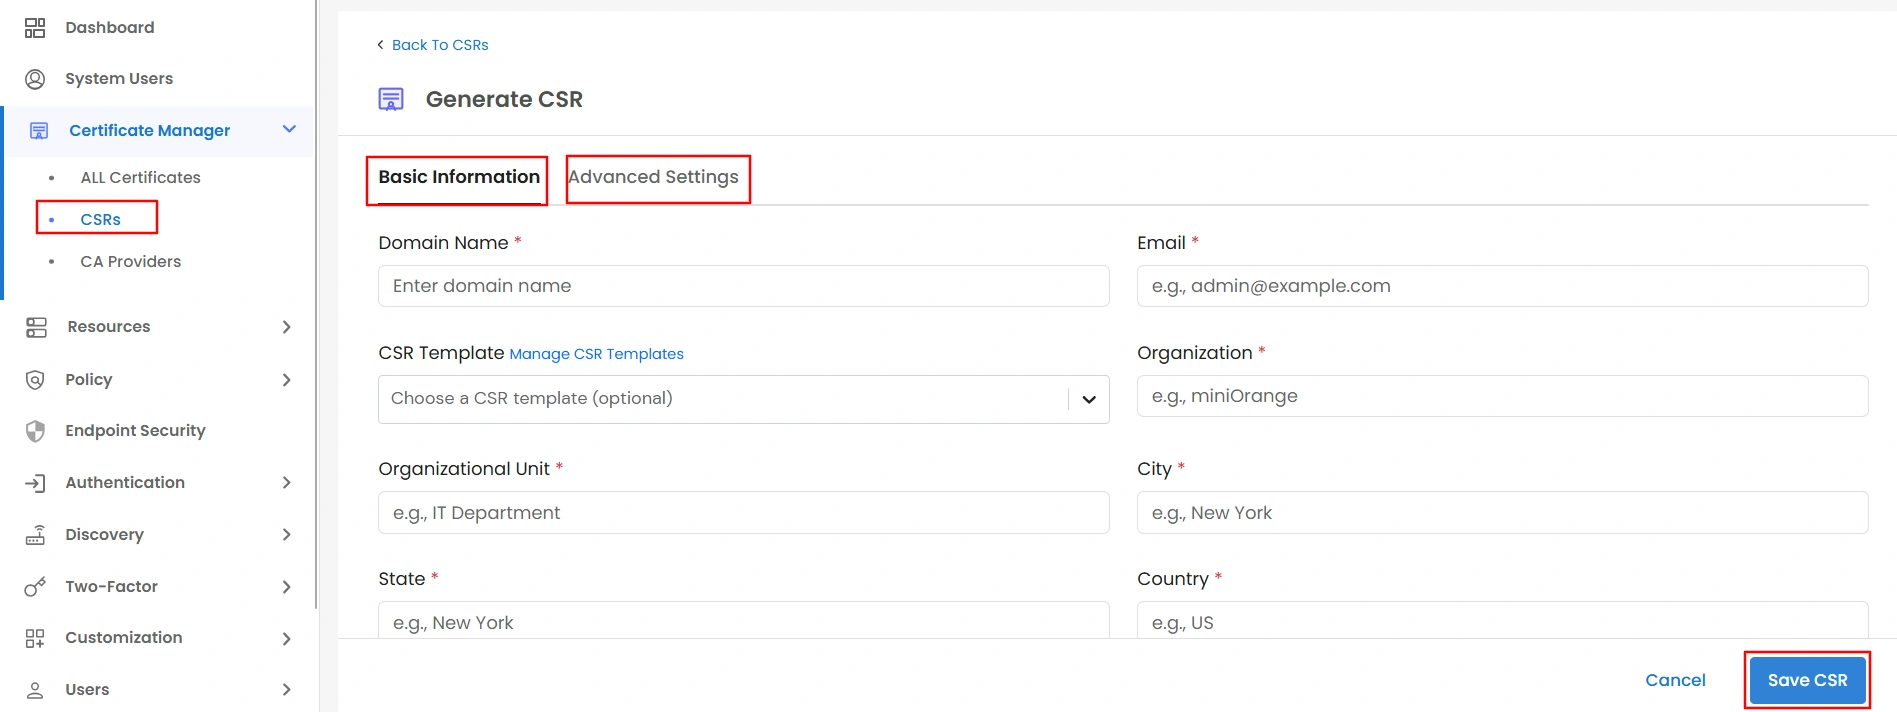
- After clicking Generate CSR, you will be redirected to the Generate CSR page, which contains two tabs: Basic Information and Advanced Settings. Provide the required details as needed, then click Save to generate and store the CSR and private key.
- The saved CSR and private key will be available under CSRs in the Certificate Manager sidebar.
- This process is the same as the first step of the Create Certificate flow and is provided to allow you to generate and securely store CSRs and private keys for future signing requests.
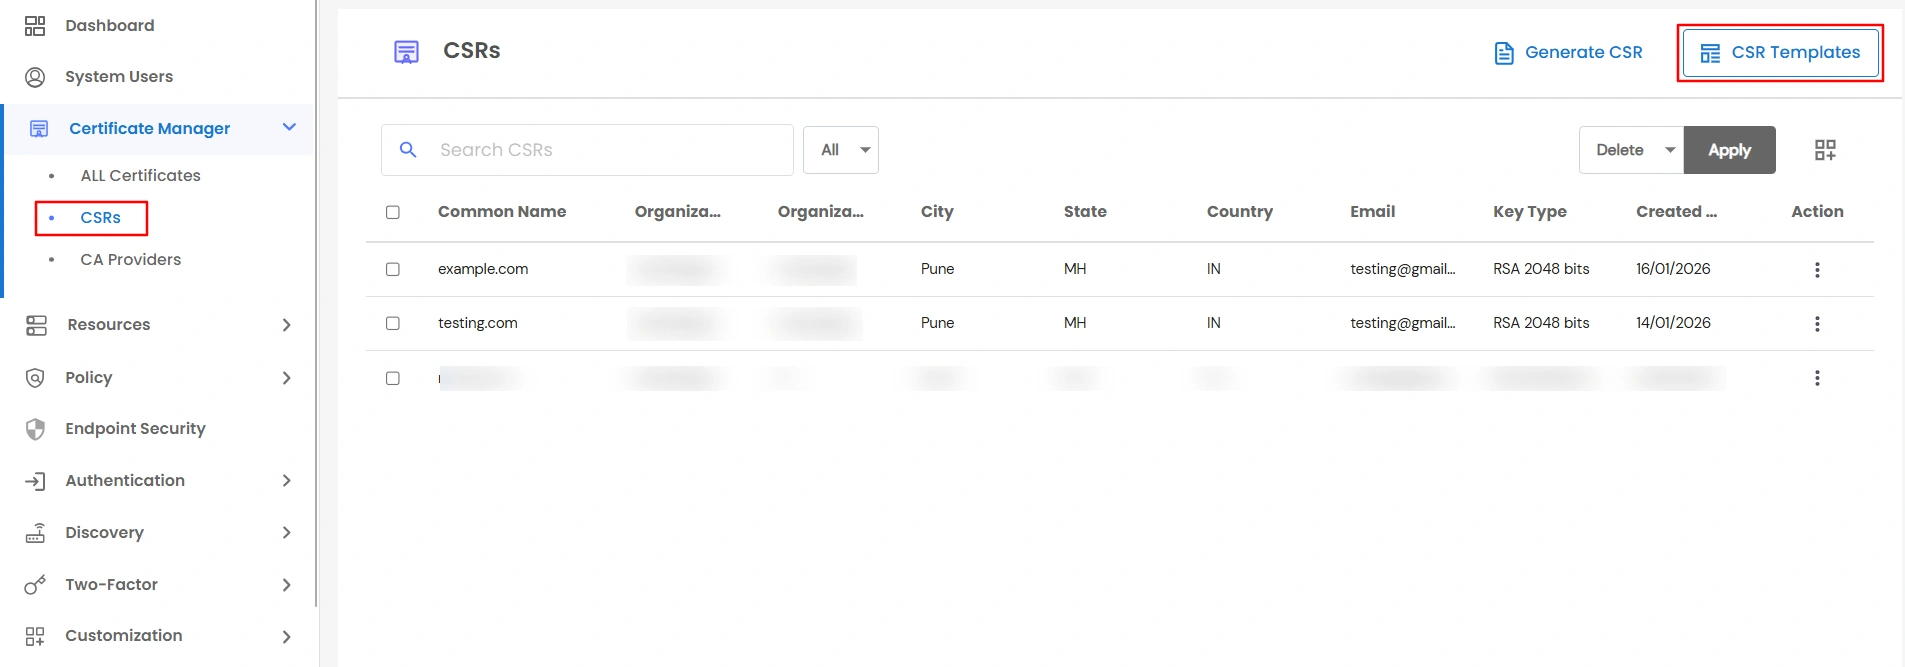
- You also have the option to create CSR Templates. To do this, click the CSR Template button located at the top-right corner of the CSRs page in the Certificate Manager sidebar.
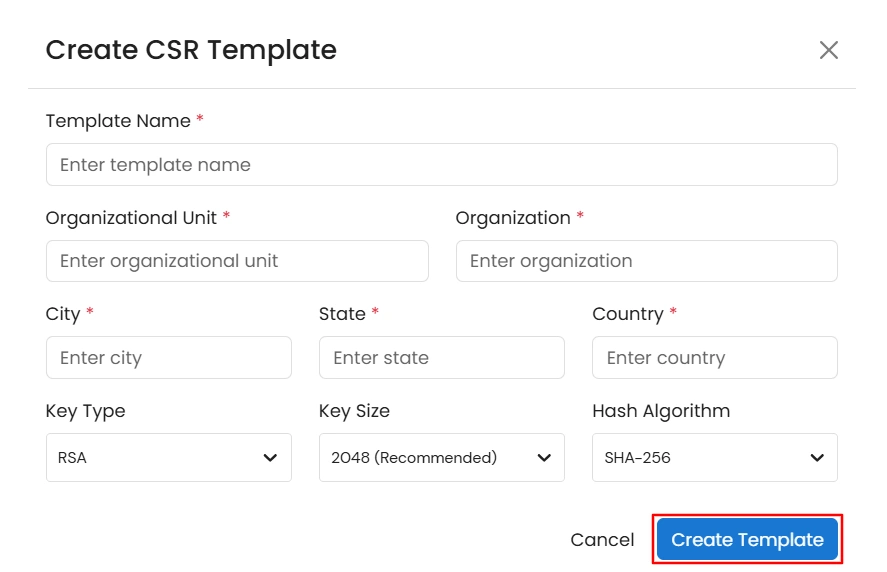
- After clicking the CSR Template button, you will be redirected to the CSR Templates page. Here, you can view all existing CSR templates and use the Add New Template button to create a new template.
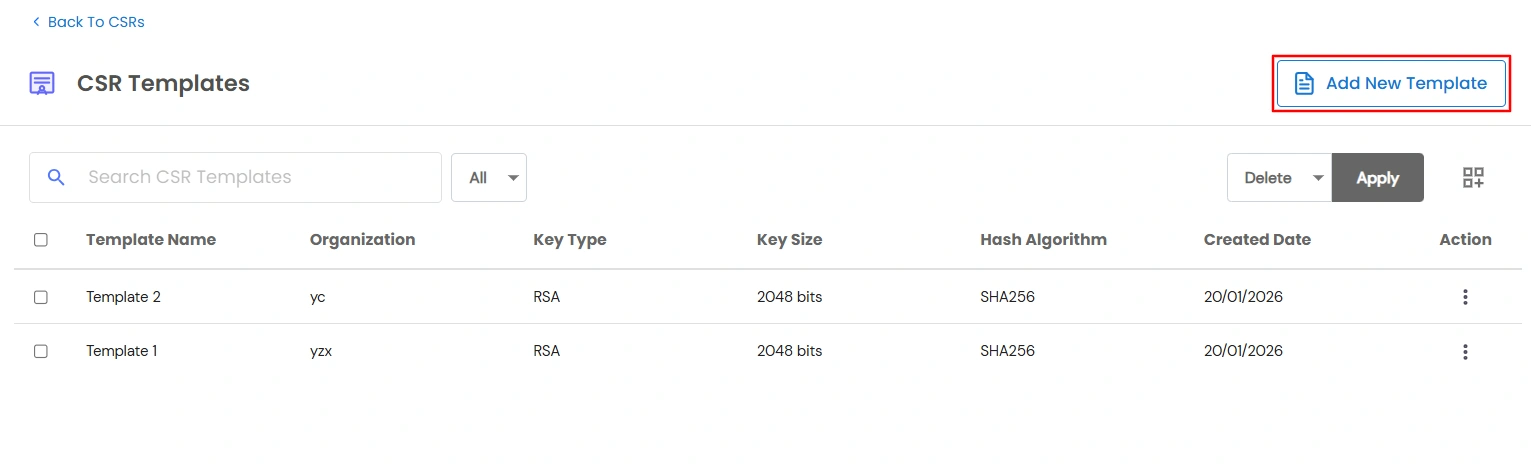
- Click Add New Template. A modal will appear—fill in the required details and click Create Template to complete the process.