Hello there!
Need Help? We are right here!
Need Help? We are right here!
Search Results:
×Power BI SAML Single Sign-On (SSO) solution by miniOrange provides secure Single Sign-On access into Power BI using a single set of login credentials. This allows organizations to secure access to their Power BI team and easily manage user access, while also providing a seamless login experience for users.
With miniOrange Power BI SSO, you can:
miniOrange offers free help through a consultation call with our System Engineers to Install or Setup Power BI SSO solution in your environment with 30-day free trial.
For this, you need to just send us an email at idpsupport@xecurify.com to book a slot and we'll help you in no time.
miniOrange Power BI SAML integration supports the following features:
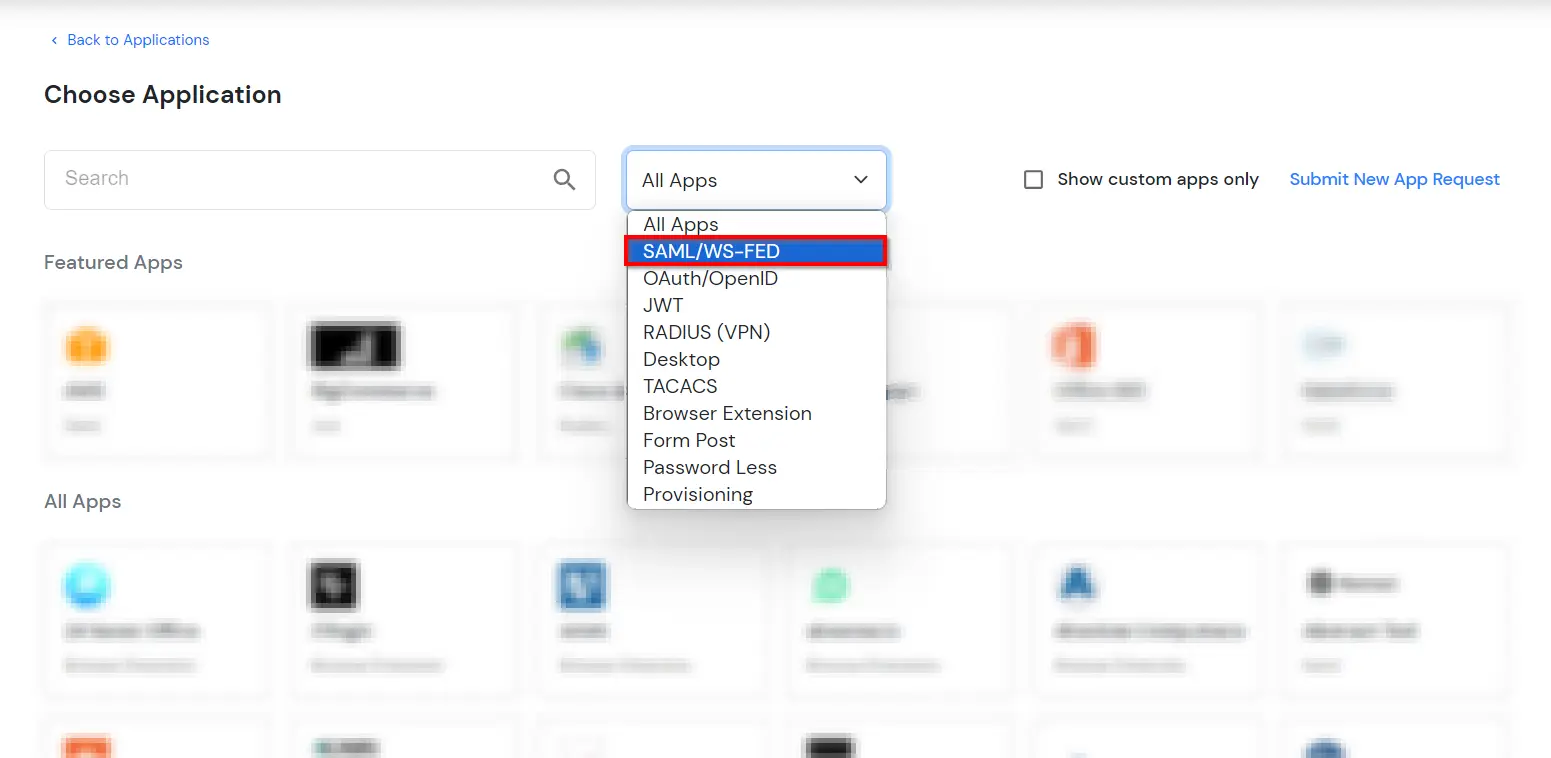
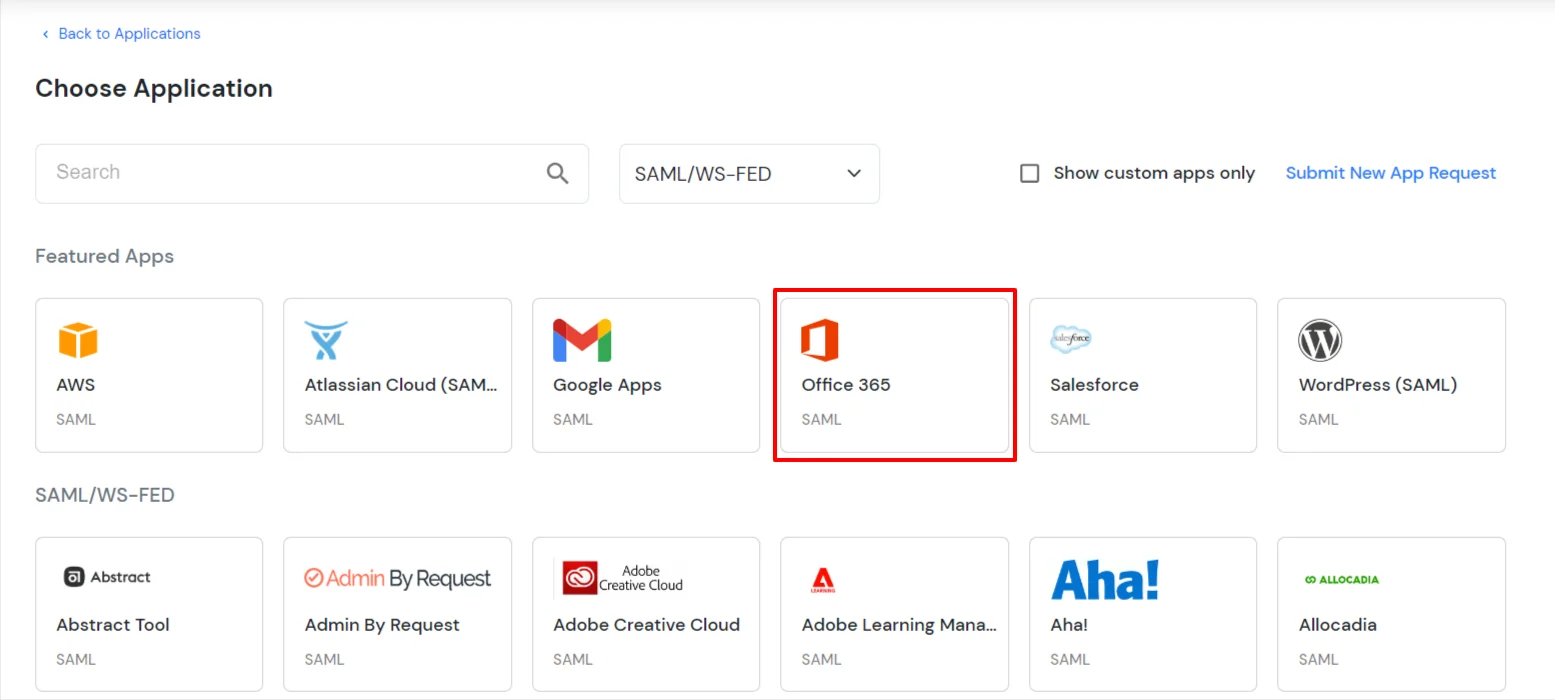
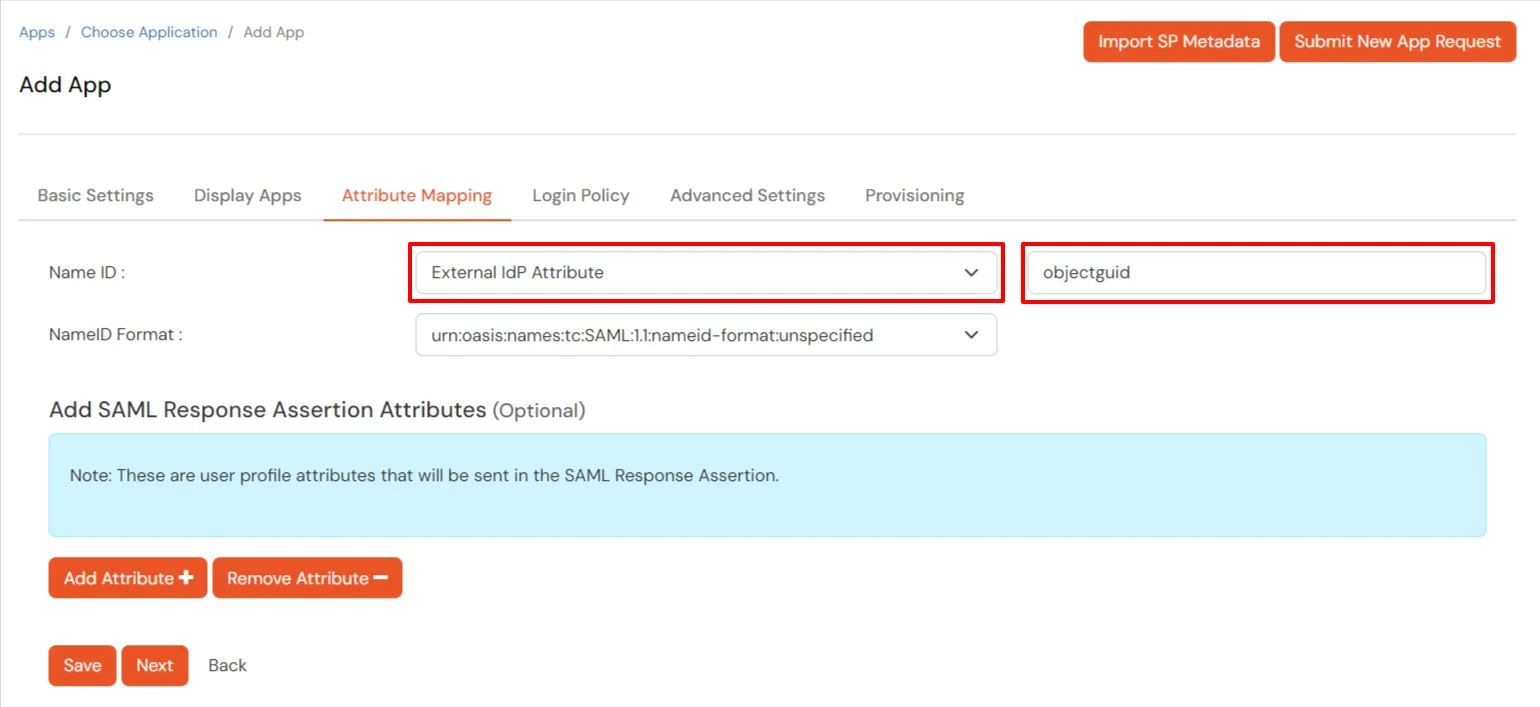
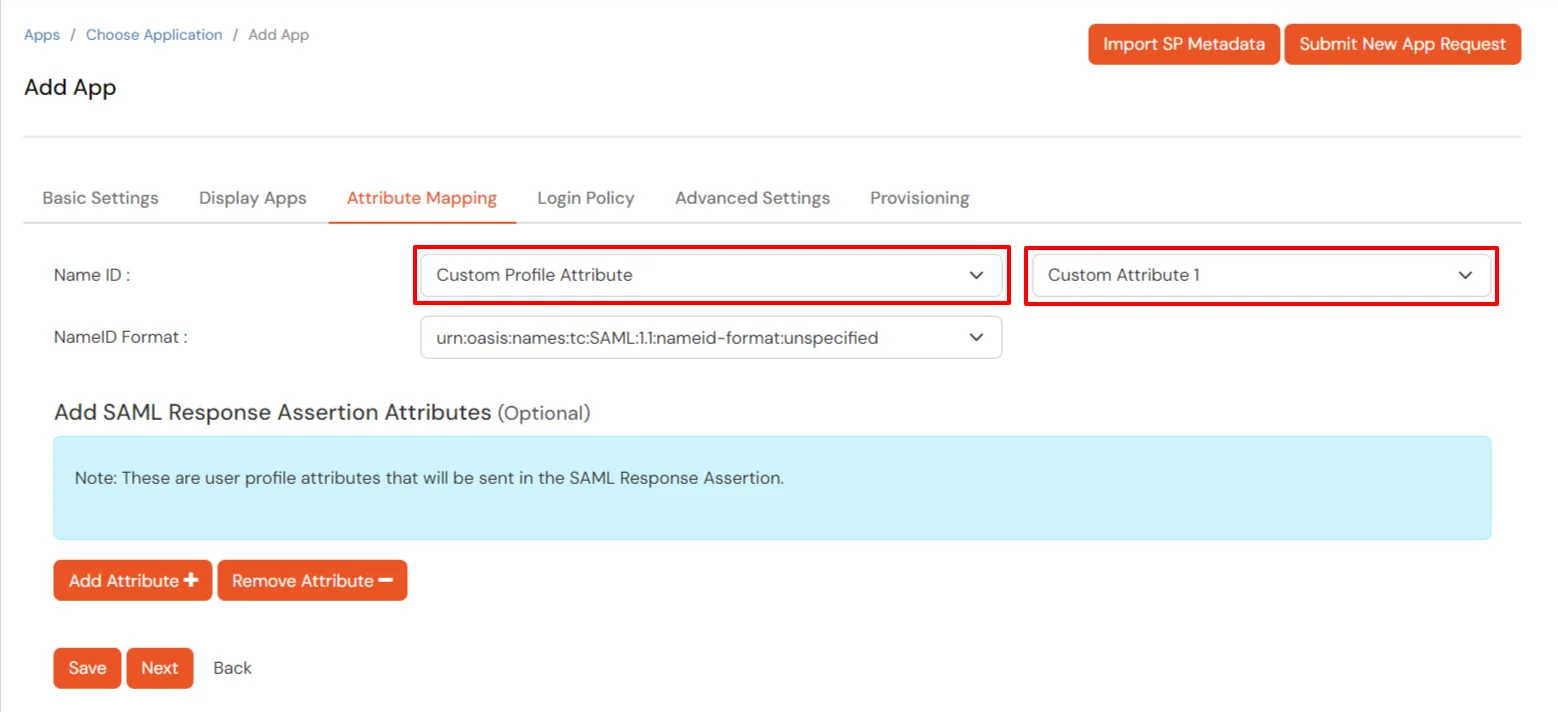
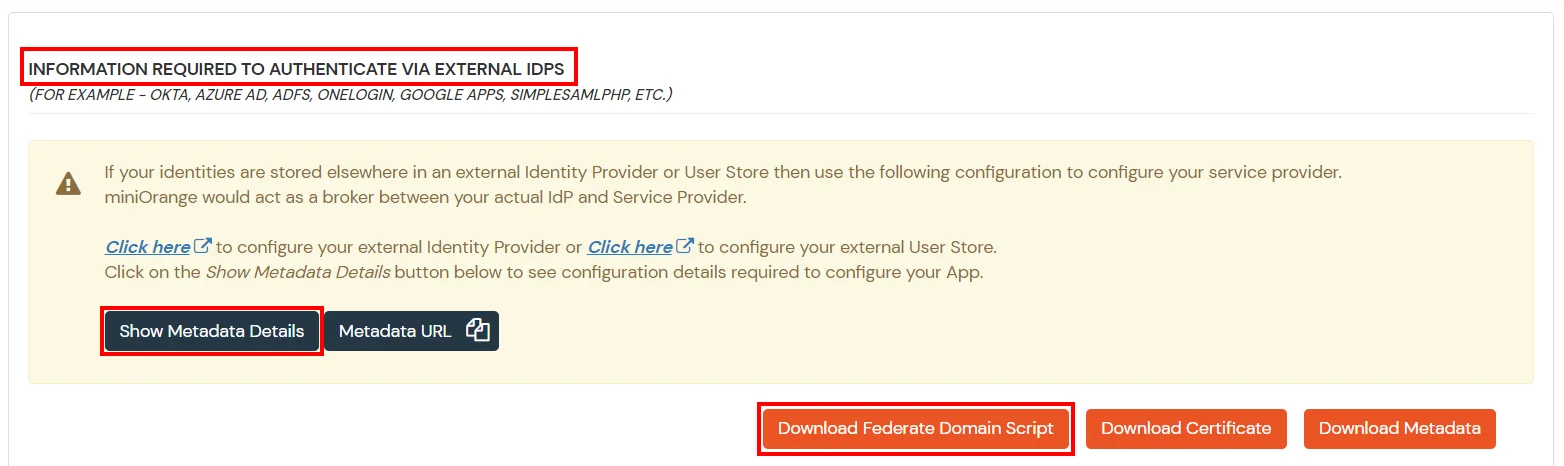
miniOrange provides user authentication from various external sources, which can be Directories (like ADFS, Microsoft Active Directory, OpenLDAP, AWS etc), Identity Providers (like Microsoft Entra ID, Okta, AWS), and many more. You can configure your existing directory/user store or add users in miniOrange.
1. Sync On-Premise Active Directory with Microsoft Entra ID
NOTE: If you want to use your On-Premise Active Directory as a user store to Single Sign-On into Power Bi then follow the below steps to sync your AD and Microsoft Entra ID.
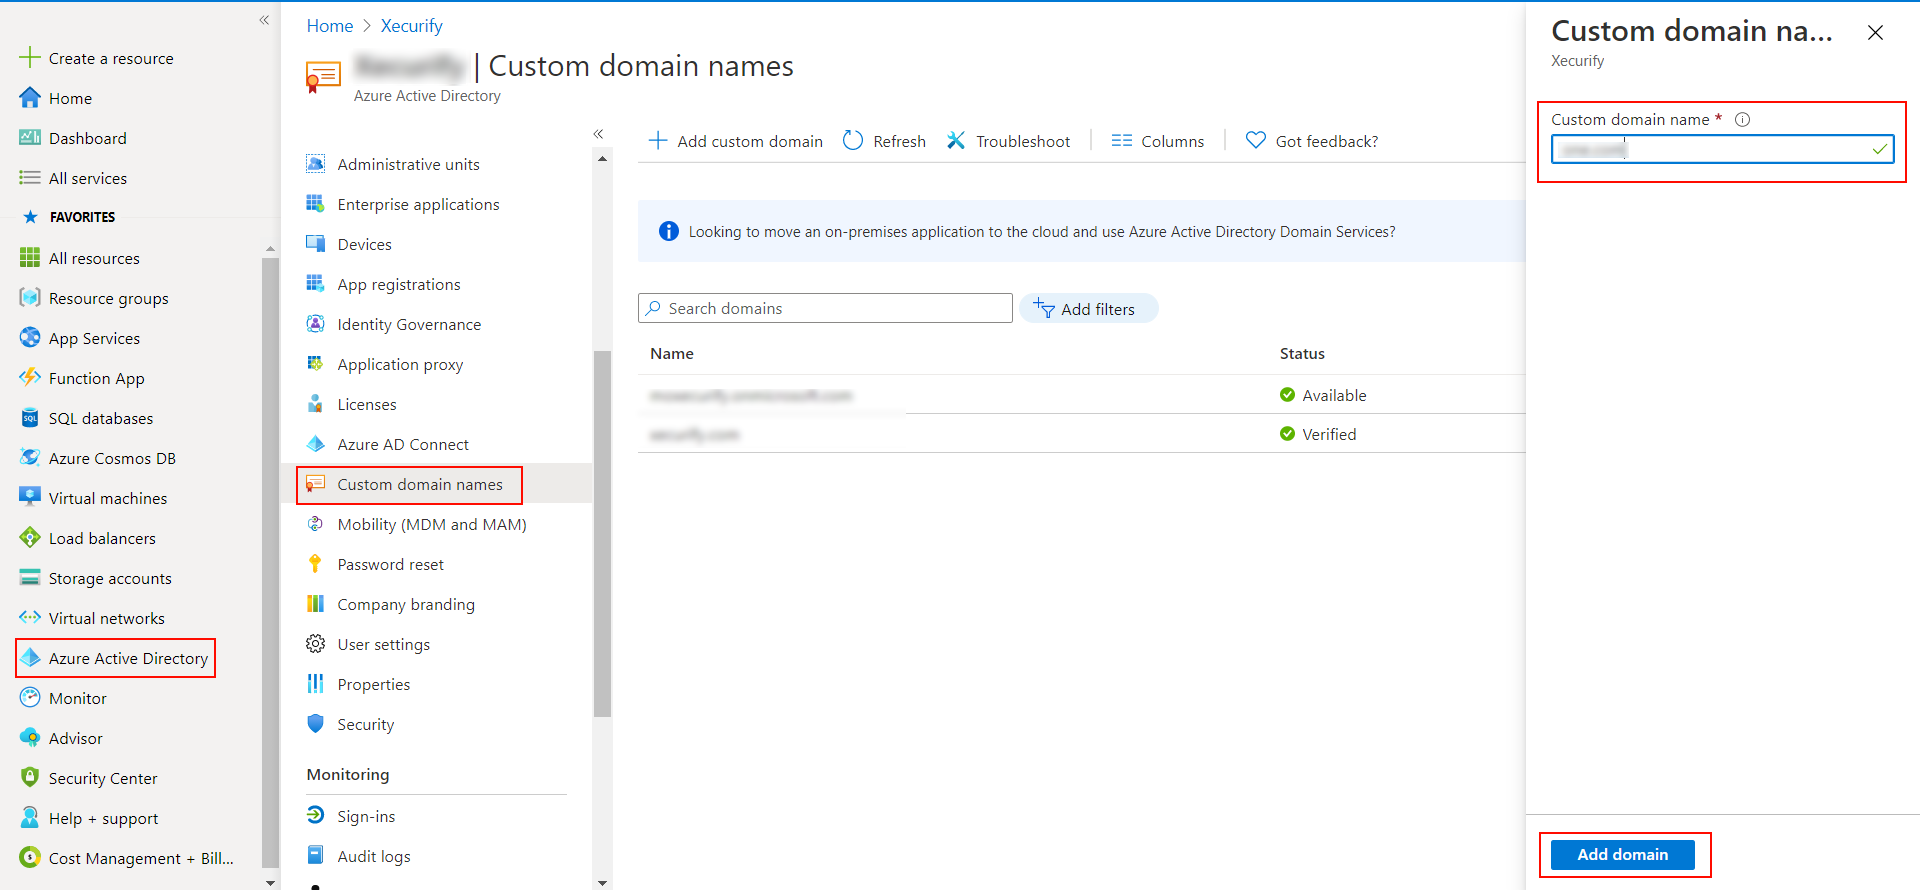
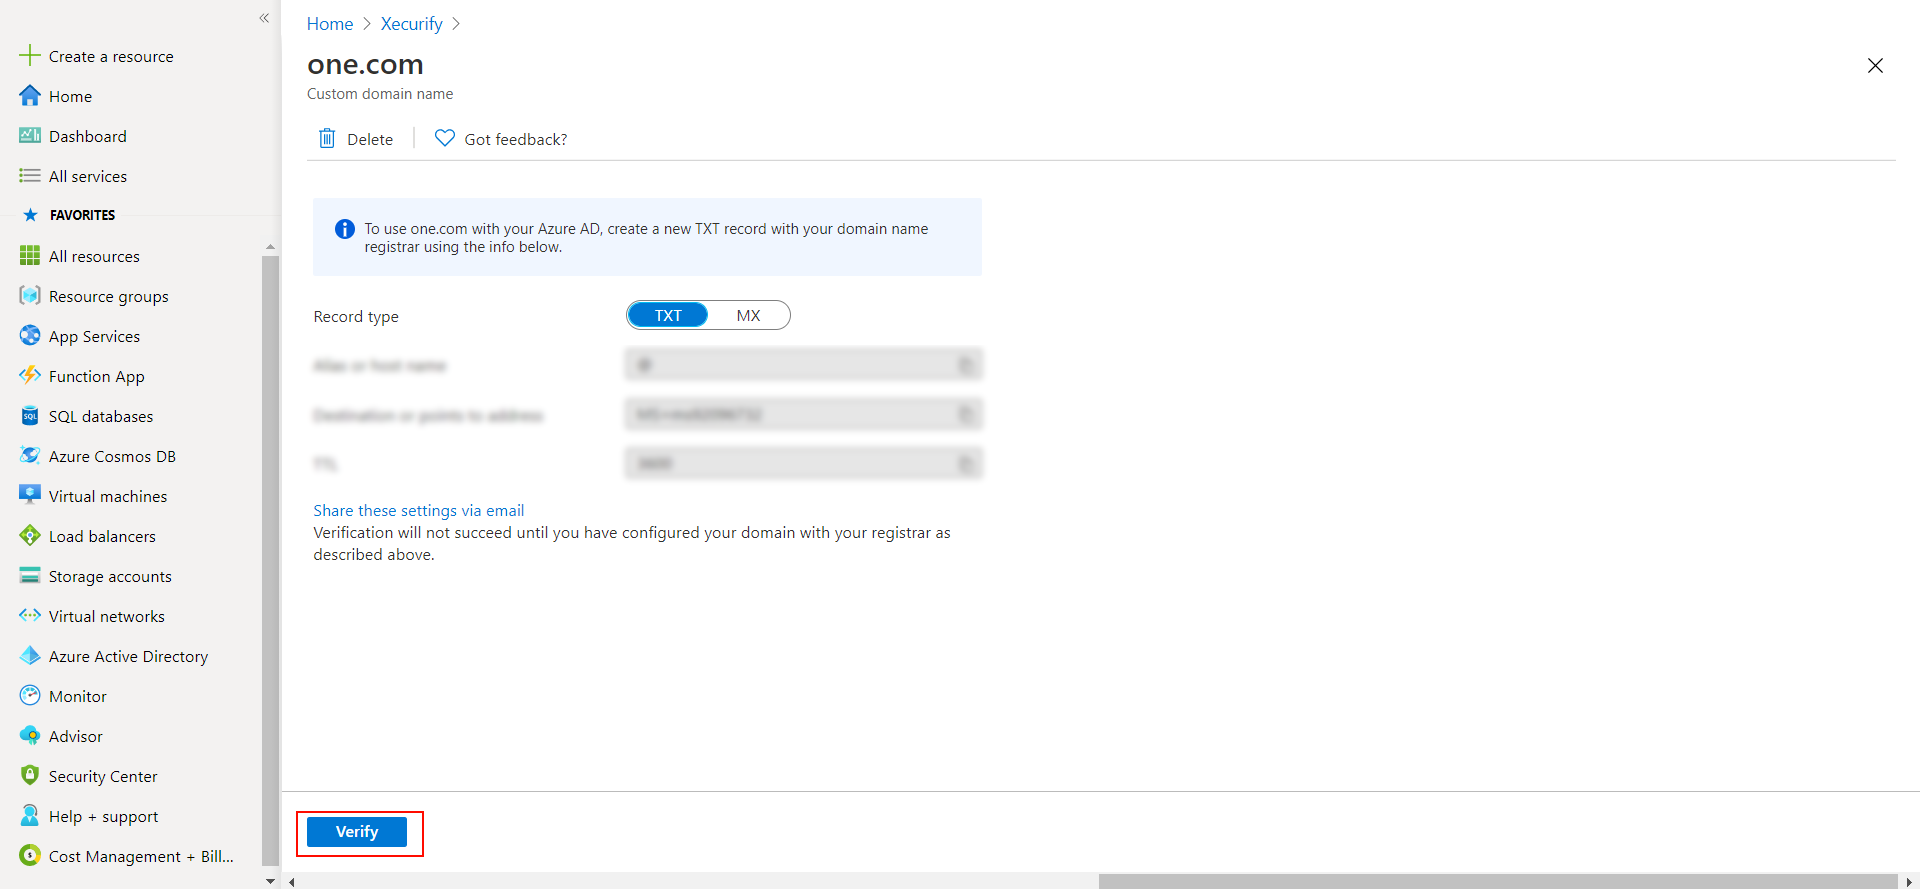
2. Verify your UPN Domain in Azure Portal
Please make sure your organisation branding is already set under Customization >> Login and Registration Branding in the left menu of the dashboard.

urn:federation:MicrosoftOnlinehttps://login.microsoftonline.com/login.srf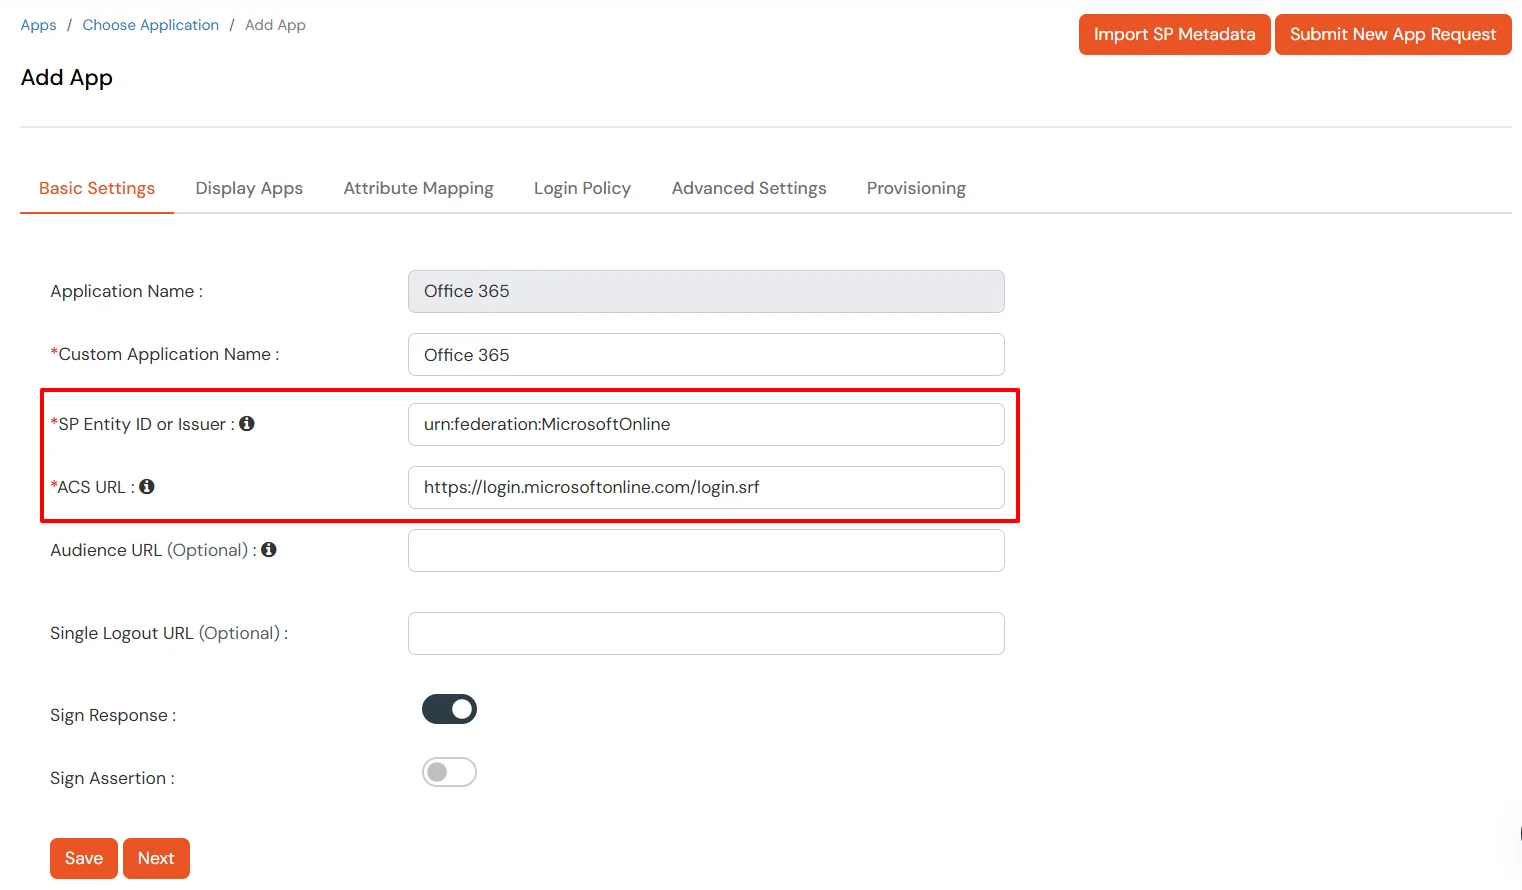
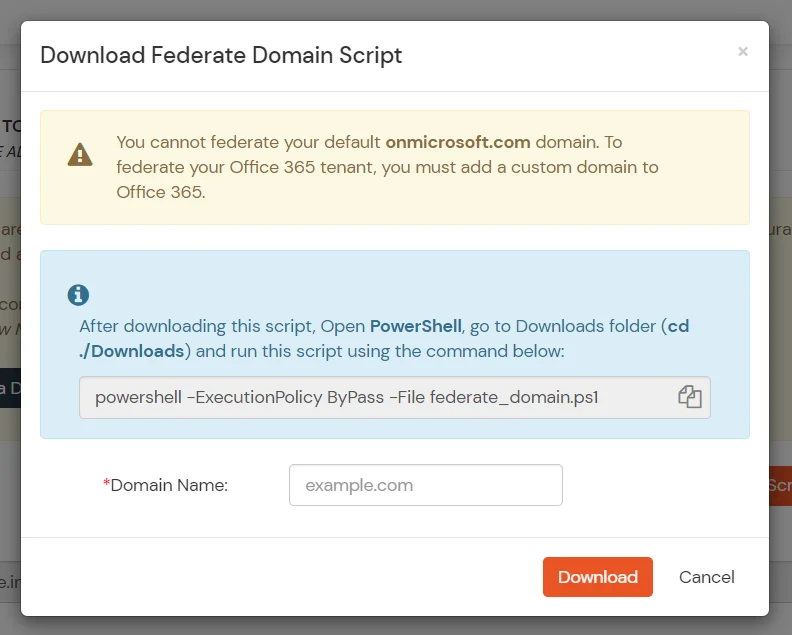
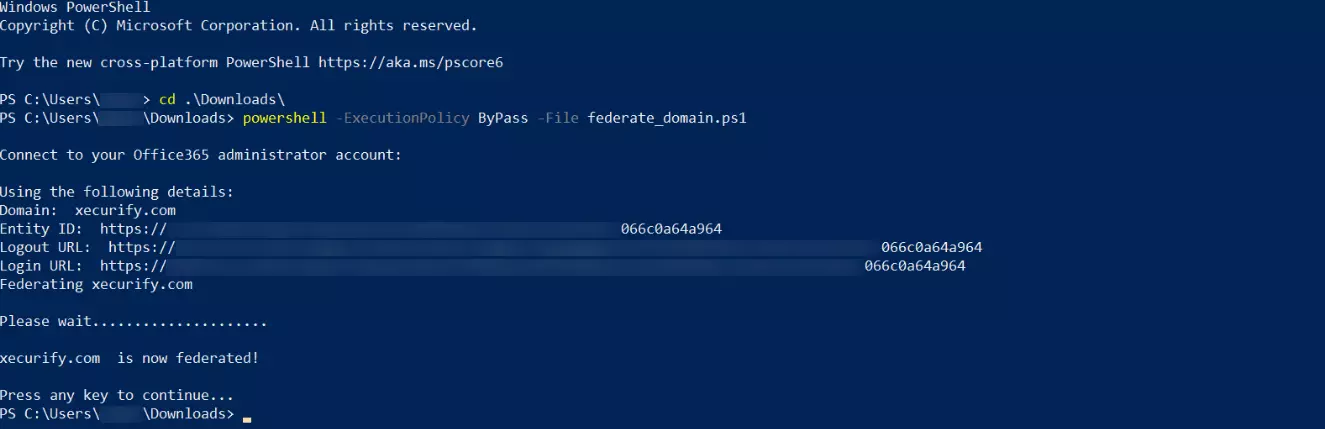
cd ./Downloads
    powershell -ExecutionPolicy ByPass -File federate_domain.ps1
Get-MgDomain -DomainId "<domain>" | Select-Object Id, AuthenticationType

1. Using SP initiated login :-
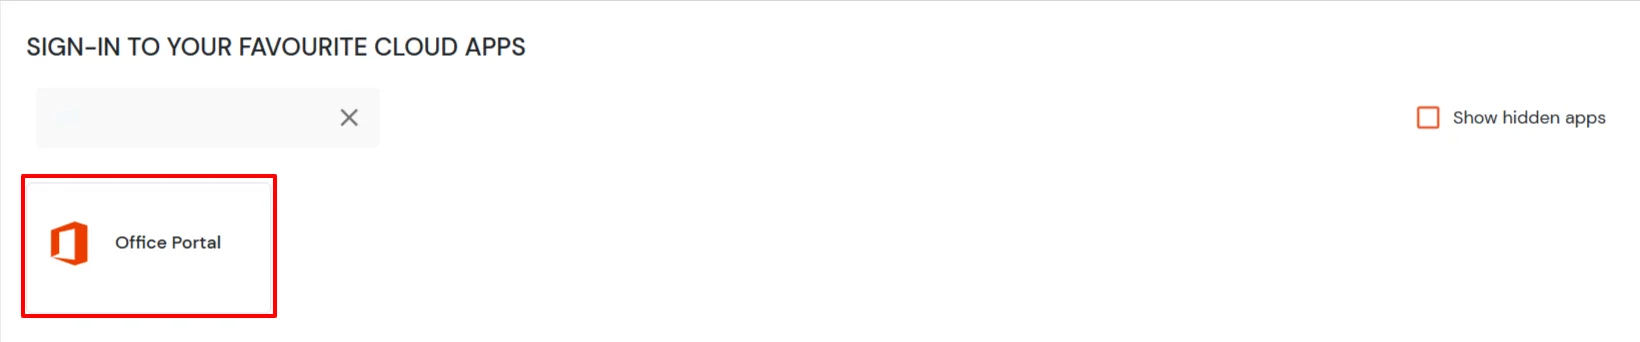
2. Using IdP initiated login :-
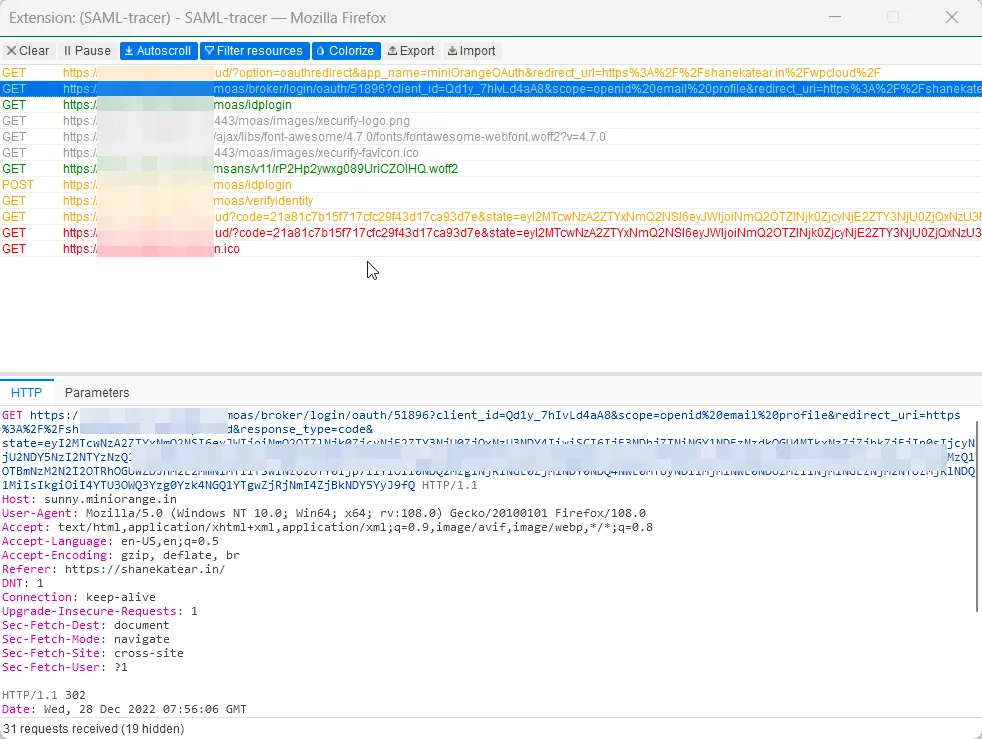
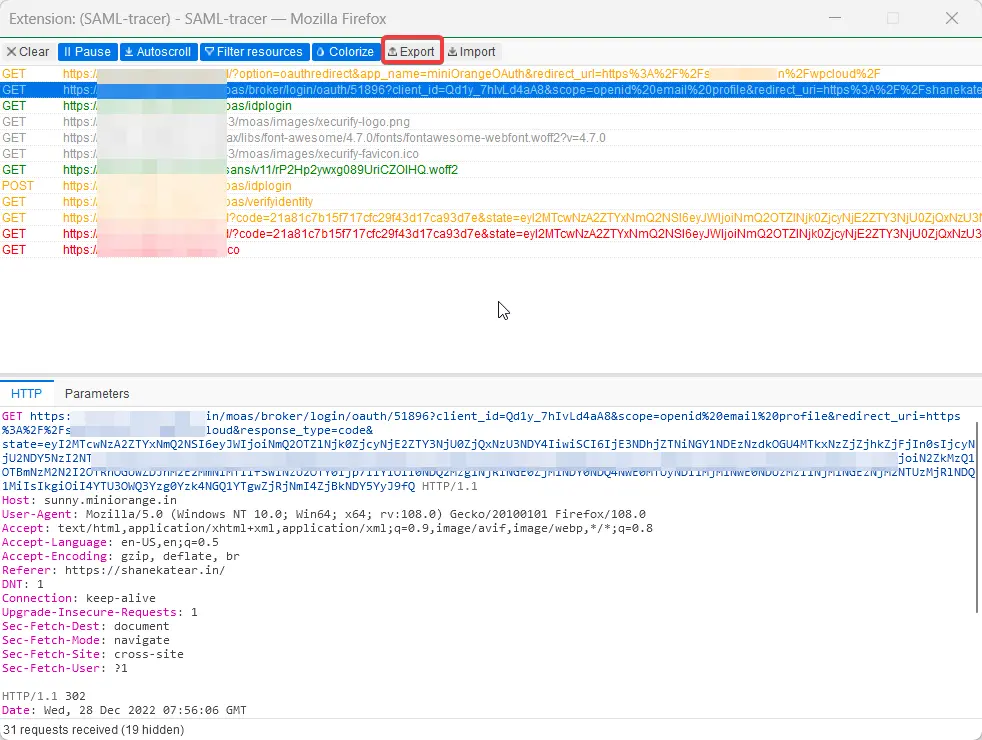
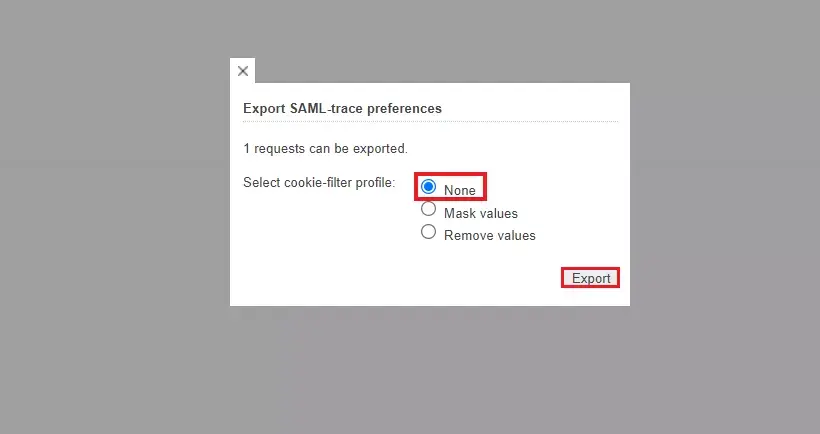
For Firefox: Add SAML tracer Add-On from the Firefox marketplace.
For Chrome / Edge or Chromium-based browsers: Install the SAML tracer extension from Chrome Webstore.