Hello there!

Need Help? We are right here!

Support Icon
miniOrange Email Support
success

Thanks for your Enquiry. Our team will soon reach out to you.

If you don't hear from us within 24 hours, please feel free to send a follow-up email to info@xecurify.com

Search Results:

×

BigCommerce Restricted Cart


The Cart Restrict app lets store owners require Single Sign-On (SSO) login for customers who buy from specific product categories, while keeping guest checkout available for everything else. You choose which categories are restricted from the app dashboard. When a guest tries to check out with a restricted item in their cart, they are sent to your SSO provider to log in first, then returned to checkout with their cart intact.

you can set up BigCommerce SSO to let them sign in through social login or your identity provider.


Get Free Installation Help


miniOrange offers free help through a consultation call with our System Engineers to Install or Setup BigCommerce Restricted Cart in your environment with 30-day free trial.

For this, you need to just send us an email at idpsupport@xecurify.com to book a slot and we'll help you in no time.
Follow the step-by-step guide given below for BigCommerce Restricted Cart

1. Install miniOrange Restricted Cart from the App Marketplace

  • Log in to your BigCommerce account.
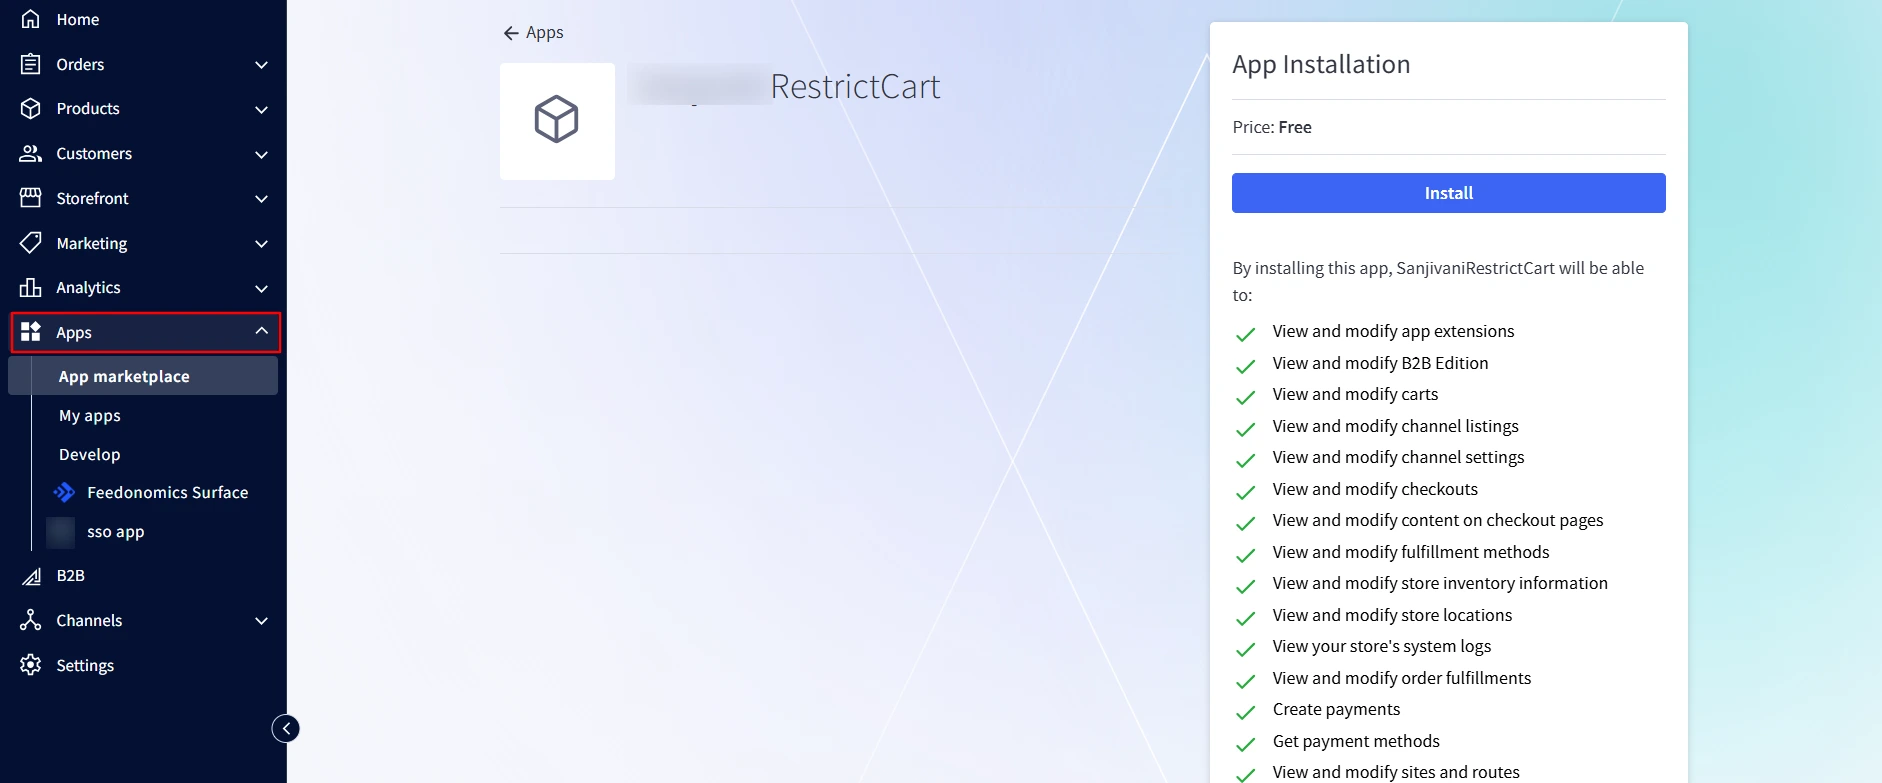
  • Navigate to the App Marketplace (Apps >> App Marketplace in the left sidebar).
  • Search for miniOrange Restricted Cart, select the app from the results, and click Get This App.
  • After adding the app, open Your Apps in the left sidebar under Apps.
  • Click miniOrange Restricted Cart from the list and click Install.
  • BigCommerce Restricted Cart: Install from Your Apps

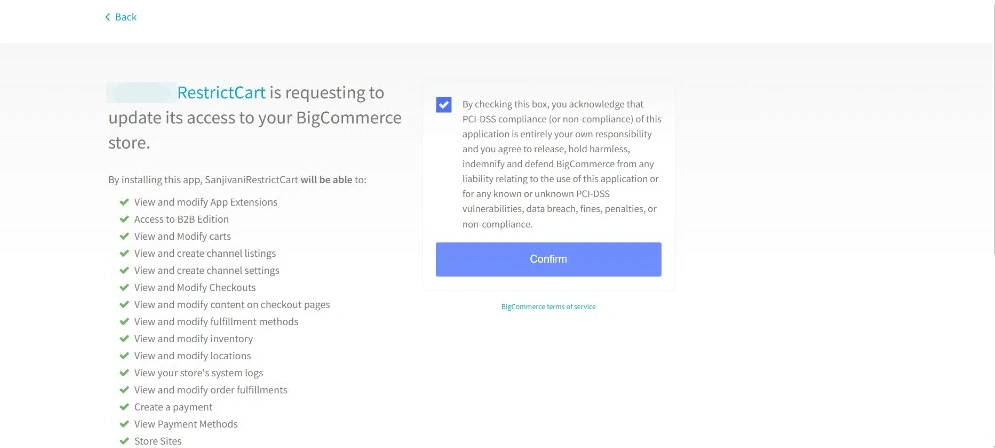
  • Review the permissions, check the agreement box, accept the PCI notice if shown, and click Confirm.
  • BigCommerce Restricted Cart: Confirm app permissions


2. Sign in to your miniOrange account

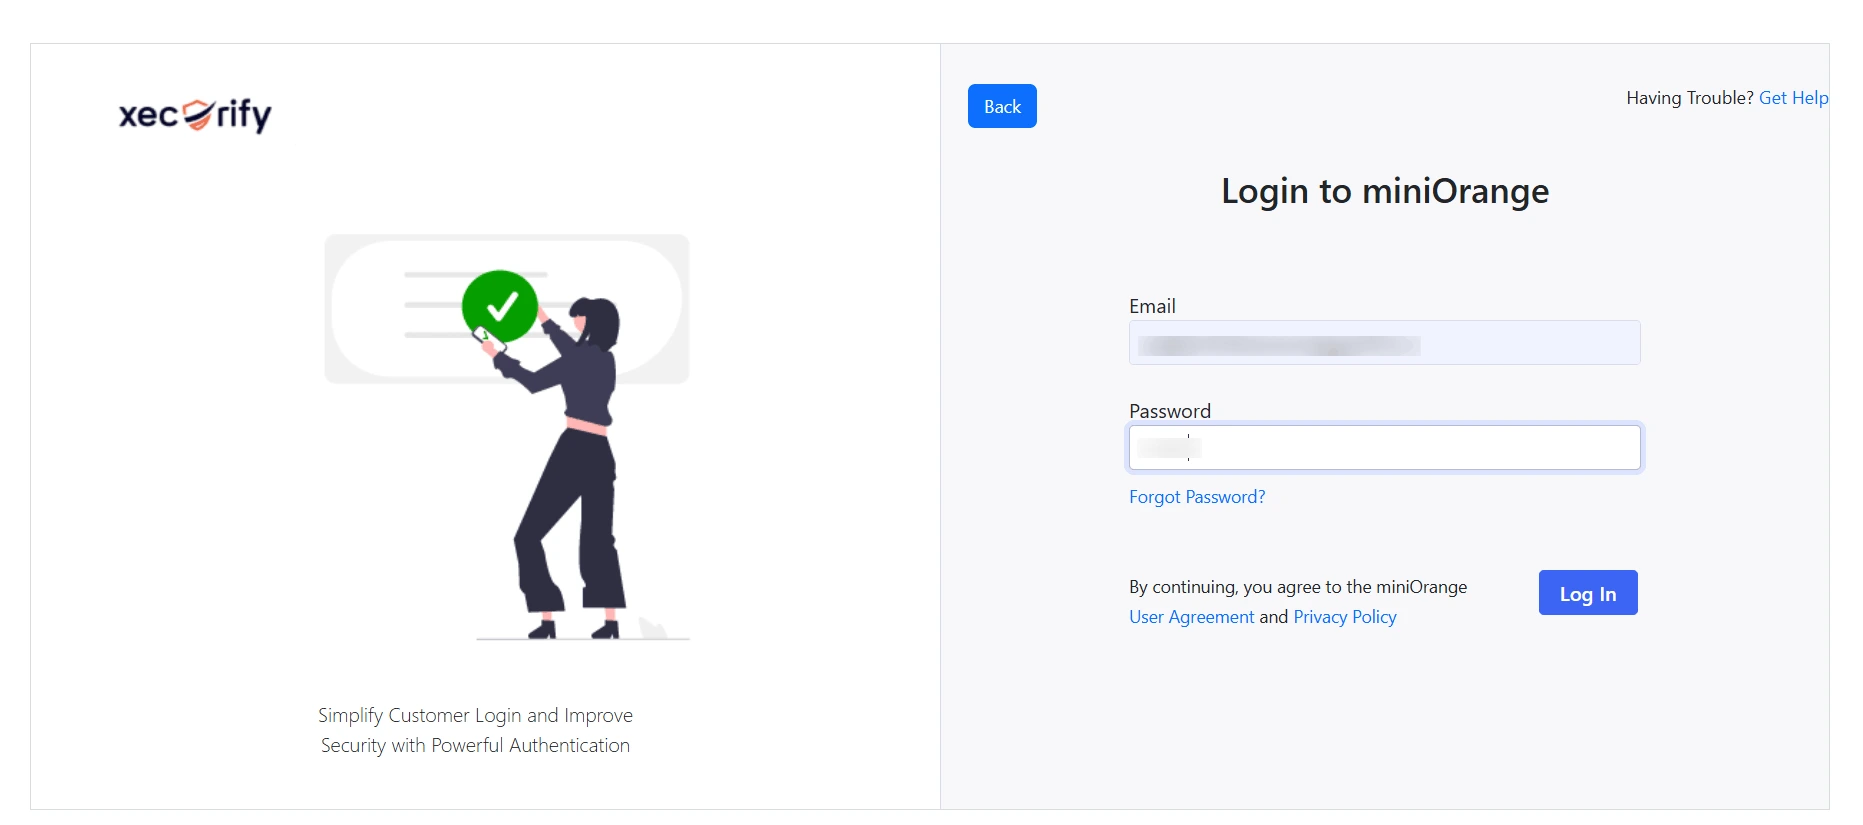
  • After install, the app shows the miniOrange sign-in page.
  • Existing miniOrange users: Enter your email and password, then click Log In.
  • New users: Click to create an account, complete registration, then sign in.
  • BigCommerce Restricted Cart: Sign in to miniOrange

  • After a successful login, you land on the Restrict Categories page.

NOTE:

Use the same miniOrange credentials as for other miniOrange BigCommerce apps on this store, if you already use them.

If login fails or the app does not open, contact idpsupport@xecurify.com.

3. Configure restricted categories

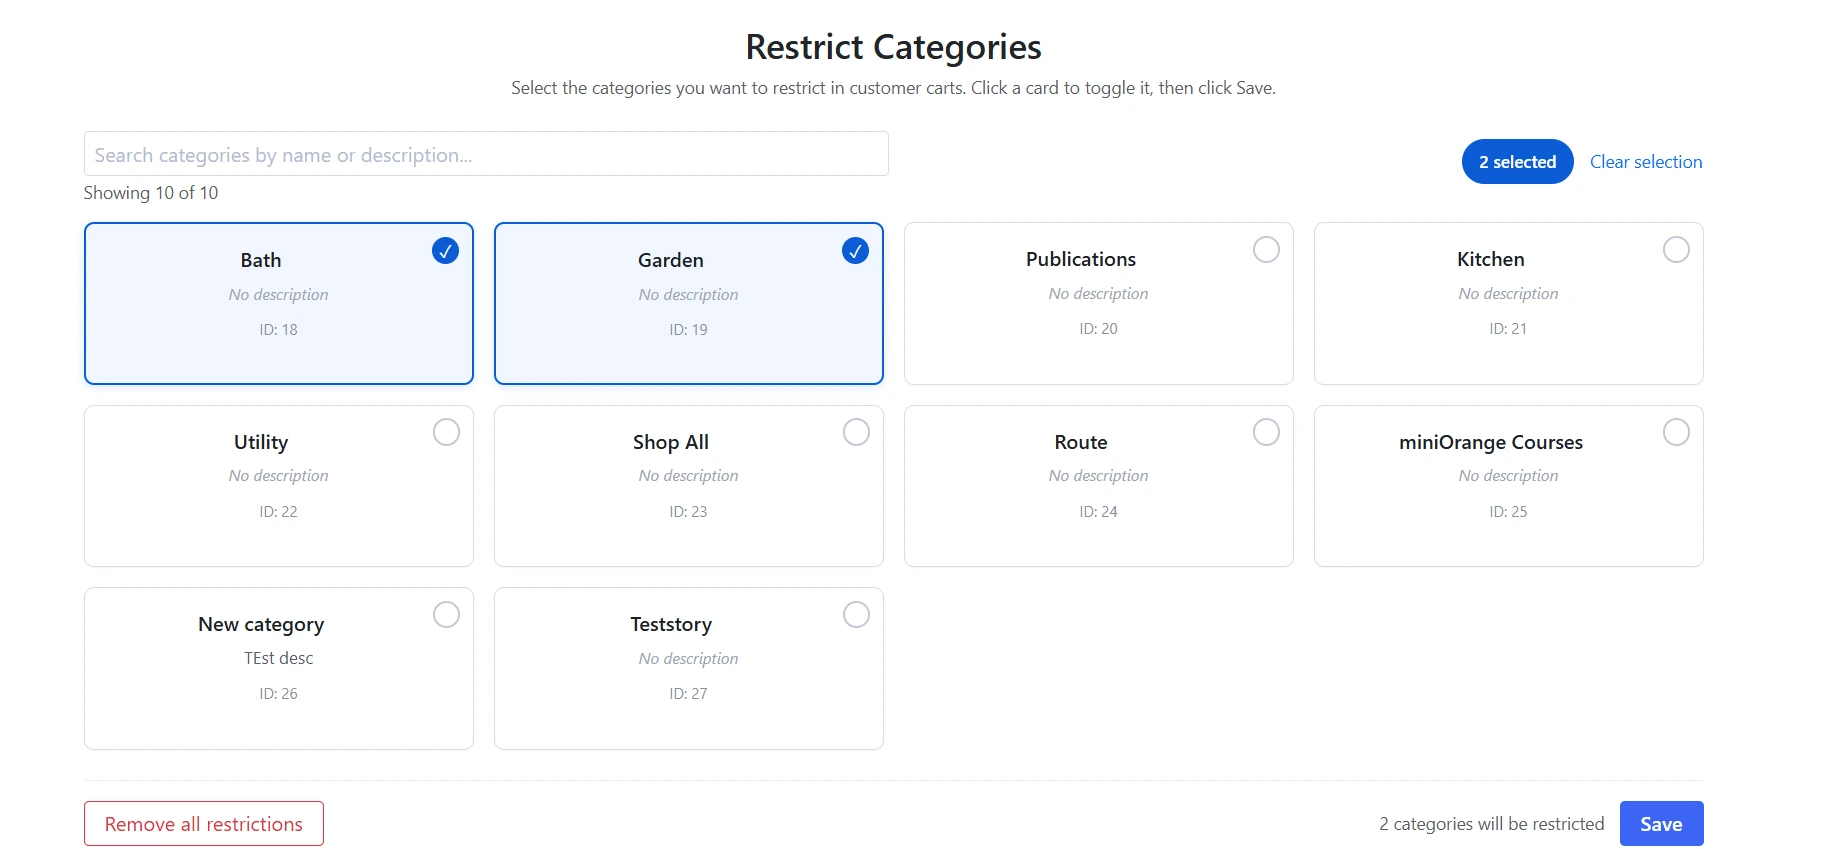
  • On Restrict Categories, you see all categories from your BigCommerce catalog.
  • Use the search box to find a category by name if your list is long.
  • Click each category that should require login. Selected categories are highlighted.
  • Confirm the selection count at the top (for example, 2 selected).
  • Click Save at the bottom right.
  • BigCommerce Restricted Cart: Save selected categories

  • When the save completes, confirm you see Restricted categories saved successfully.

4. Add the Restricted Cart script in Script Manager

  • Download the script for Restricted Cart.
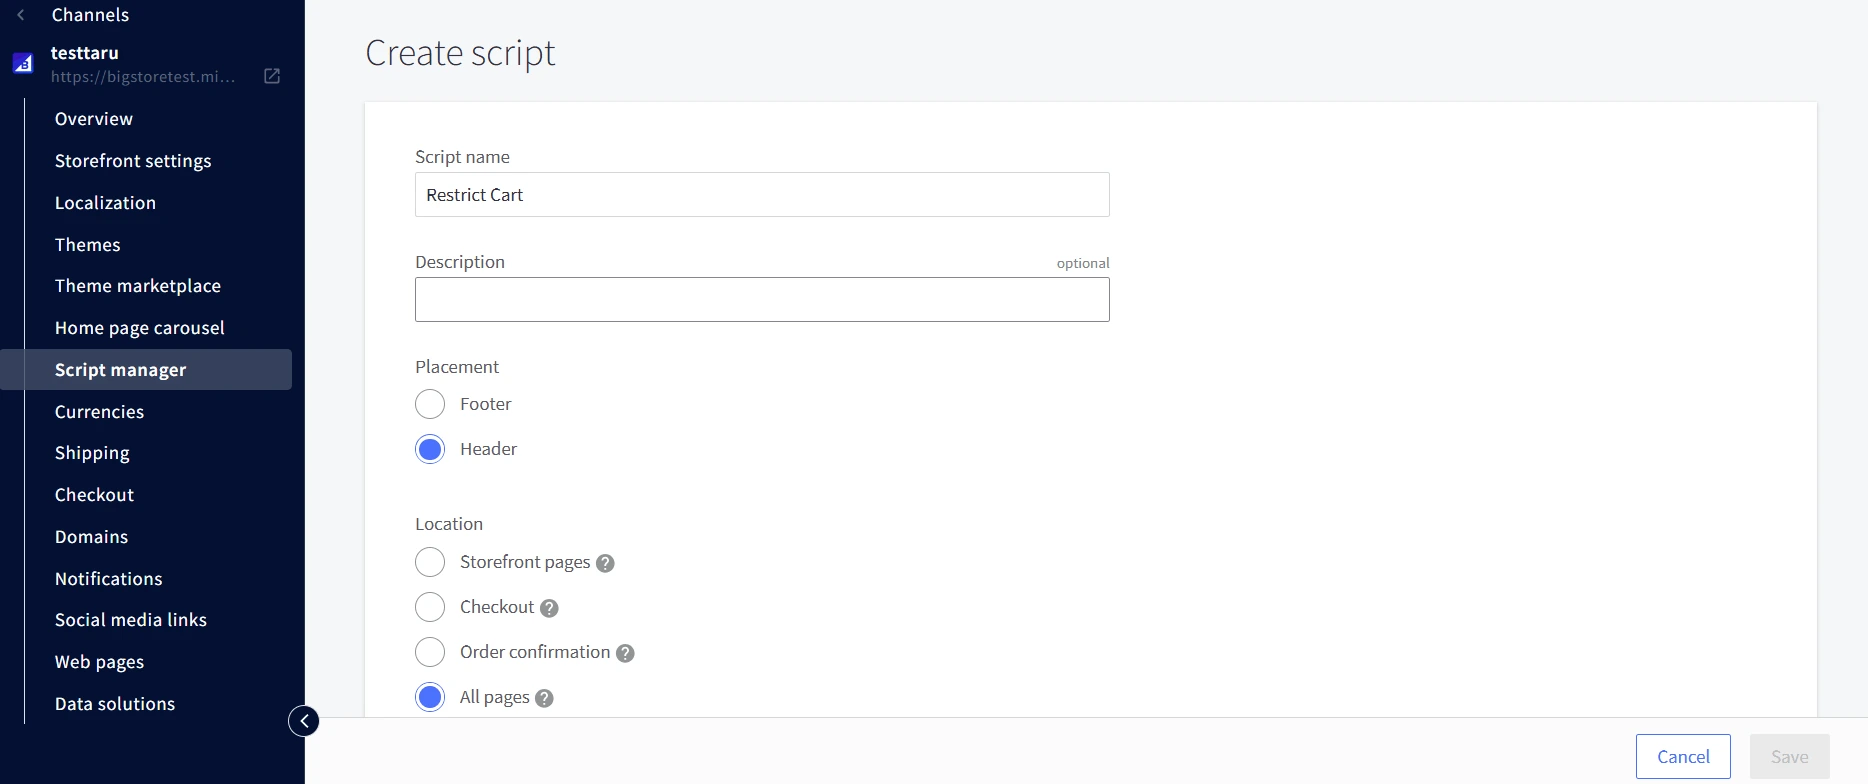
  • In your BigCommerce dashboard, go to Storefront >> Script manager.
  • Click Create script.
  • Set Script name to Restrict Cart, Placement to Header, and Location to All pages.
  • BigCommerce Restricted Cart: Script name Restrict Cart, Header placement, All pages location

  • Paste the downloaded script into the script editor and click Save.

5. Verify Restricted Cart on your storefront

  • Open your storefront in a private or incognito browser window (or log out as a customer).
  • Browse to a product in a restricted category and try to add it to the cart or go to checkout.
  • Confirm the store asks the customer to log in (or register) before the purchase can continue.
  • Open a product in a non-restricted category and confirm guests can still shop normally.

Want To Schedule A Demo?

Request a Demo


Our Other Identity & Access Management Products