Hello there!
Need Help? We are right here!
Need Help? We are right here!
Search Results:
×An SMTP Server is an application that allows your device or server to send and receive electronic mails (emails) to and from various recipients. SMTP stands for Simple Mail Transfer Protocol and is a standard protocol used for sending emails.
By default, miniOrange provides and uses its own SMTP server to send OTPs and system emails to users. If you have a custom SMTP server configured, you can use it to send emails from your miniOrange account. miniOrange supports both Basic Authentication and OAuth 2.0–based authentication for Google, allowing you to choose the method that best fits your security requirements. Check out our list of Supported SMTP Servers.
miniOrange IdP allows you to configure Google as an SMTP email provider using either basic configuration or OAuth 2.0, giving you greater control to manage, monitor, and troubleshoot your email communications securely.
You can contact idpsupport@xecurify.com for adding your own SMTP/Email Server or if you need help with any SMTP Server integration.

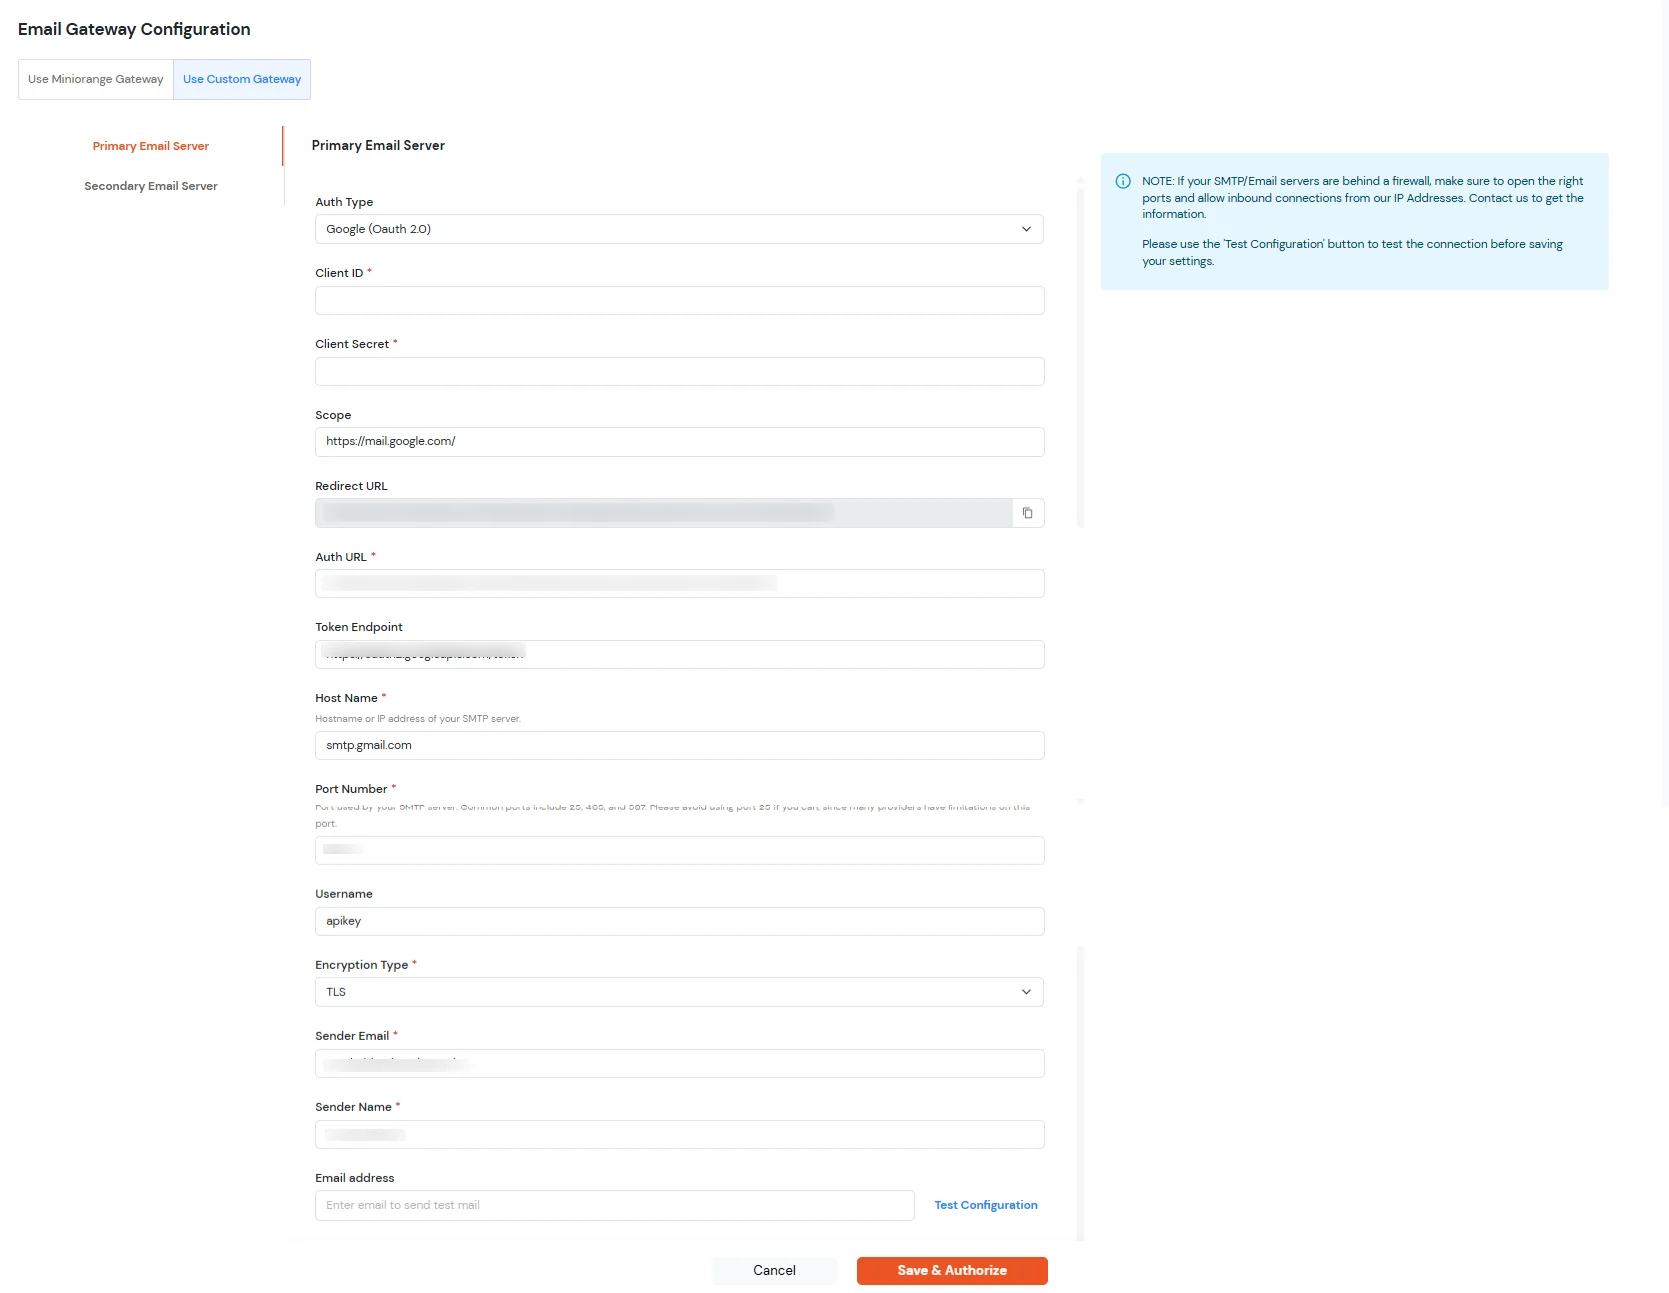
| Auth_url | https://accounts.google.com/o/oauth2/auth?prompt=consent&access_type=offline |
| Access token URL | https://oauth2.googleapis.com/token |
| Host | smtp.gmail.com |
| Port | 587 (STARTTLS) |
| Encryption Type | TLS |
| Scope | https://mail.google.com/ |
| Username | <your google admin account username> |
| Sender Name | miniOrange |
| Email address | your email address where you want to receive the email. |
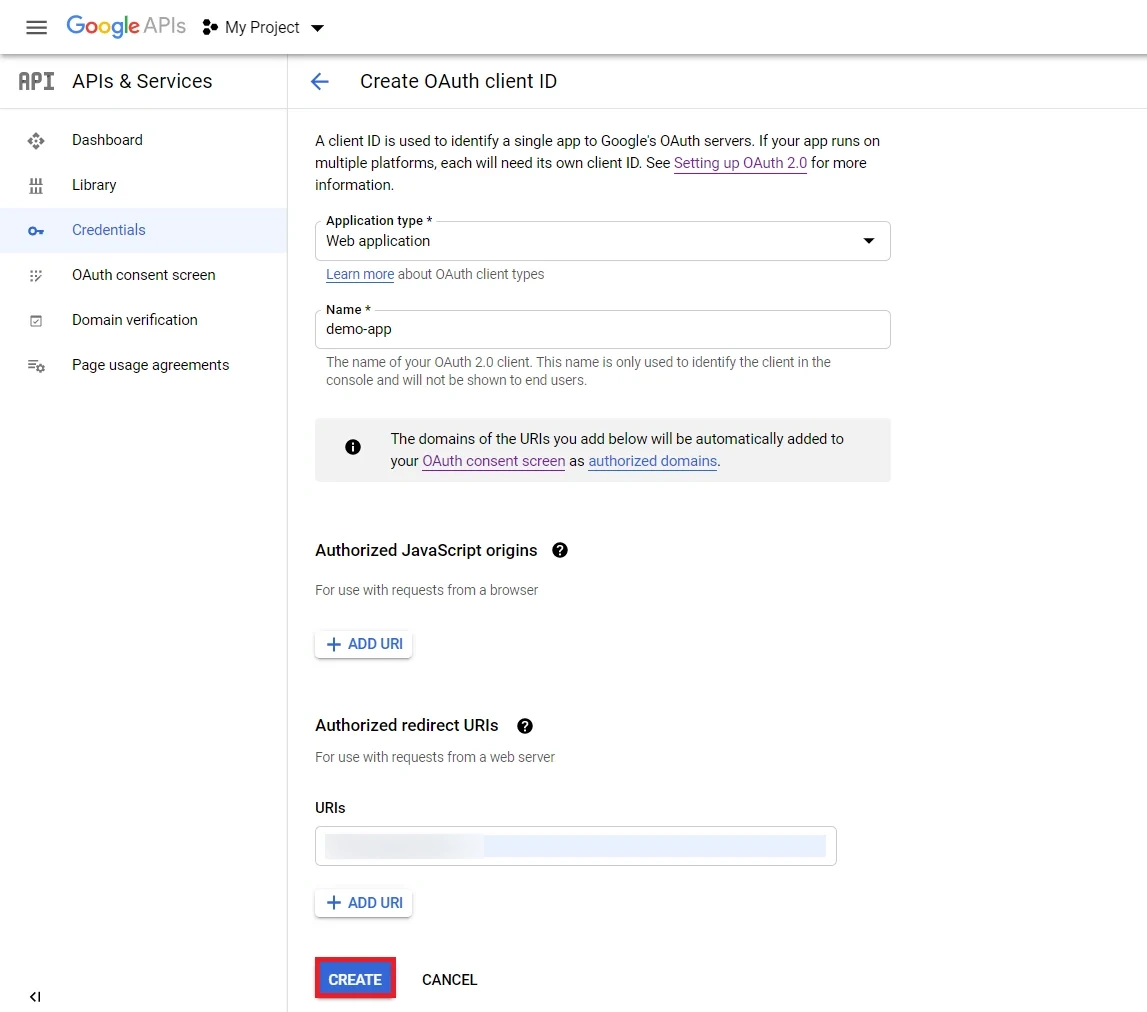
Copy the below callback URL
https://<branding>.miniorange.in/services/api/provisioning/app/authorize/custom-provisioning/callback