React Single Sign On (SSO) Configuration
React JWT Single Sign-On (SSO) solution by miniOrange provides secure Single Sign-On access into React application using a single set of login credentials. This is done using JSON Web Token (JWT). You can enable social login for your users to get secure access to applications using any of their existing social providers such as Facebook, Twitter, Google, or LinkedIn.
With miniOrange React SSO, you get:
- Seamless user login experience.
- Endless customizations to your login forms and pages.
- Simplified customer or user on-boarding.
Connect with External Source of Users
miniOrange provides user authentication from various external sources, which can be Directories (like ADFS, Microsoft Active Directory, OpenLDAP, AWS etc), Identity Providers (like Microsoft Entra ID, Okta, AWS), and many more. You can configure your existing directory/user store or add users in miniOrange.
Prerequisites
Please make sure your organisation branding is already set under Customization >> Login and Registration Branding in the left menu of the dashboard.
Follow the step-by-step guide given below for React Single Sign-On (SSO)
1. Configure React in miniOrange:
- Login into miniOrange Admin Console.

- Go to Apps and click on Add Application button.

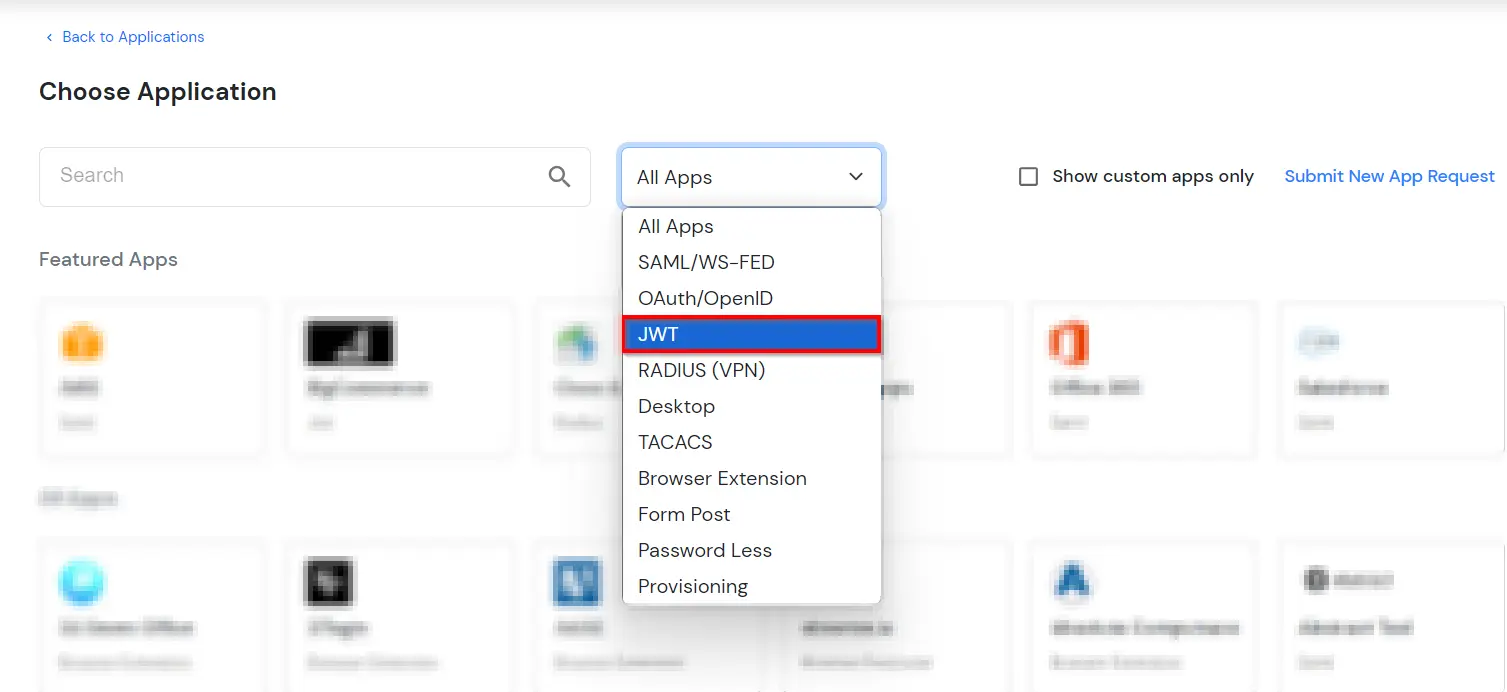
- In Choose Application, select JWT from the application type dropdown.
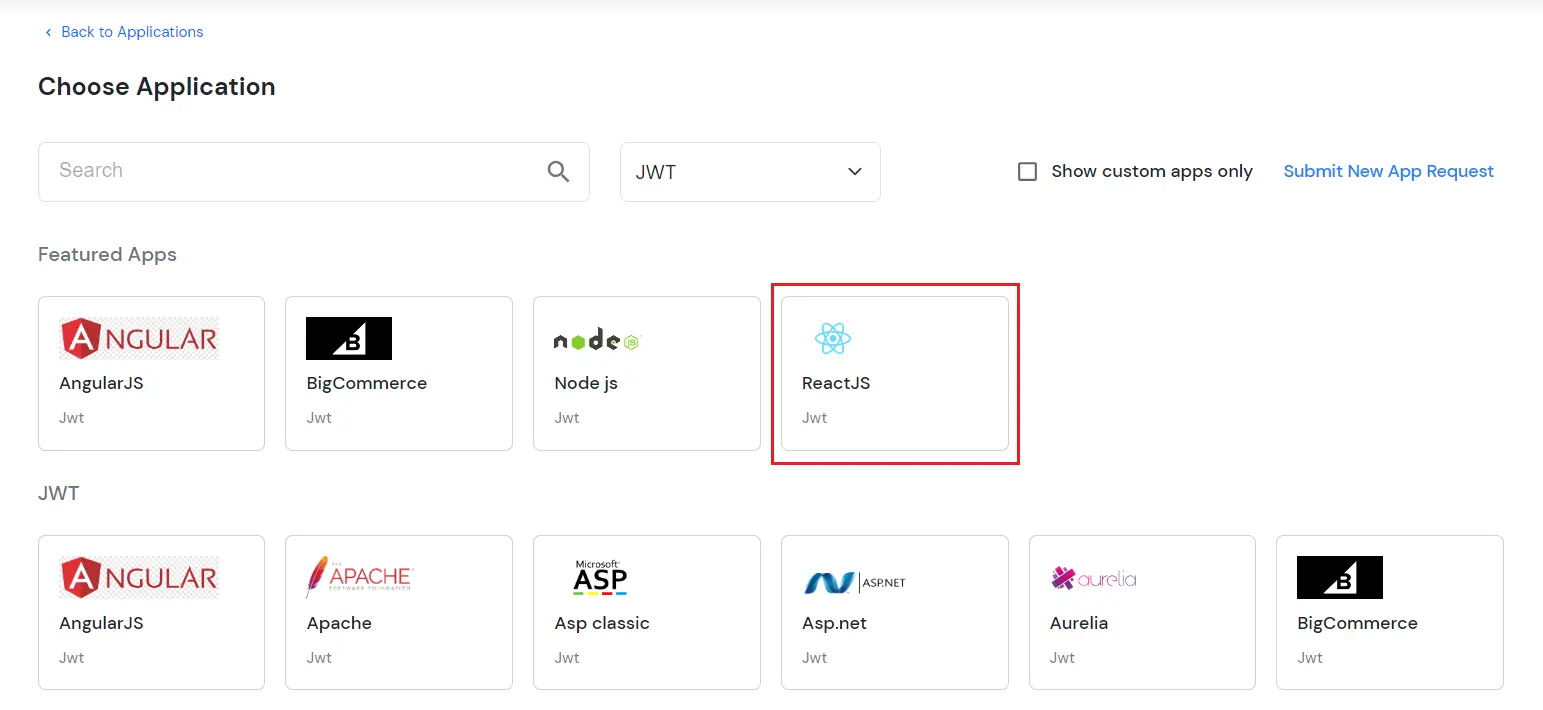
- In the next step, search for React application from the list. If your application is not found, search for JWT App and you can set up your Application.
-
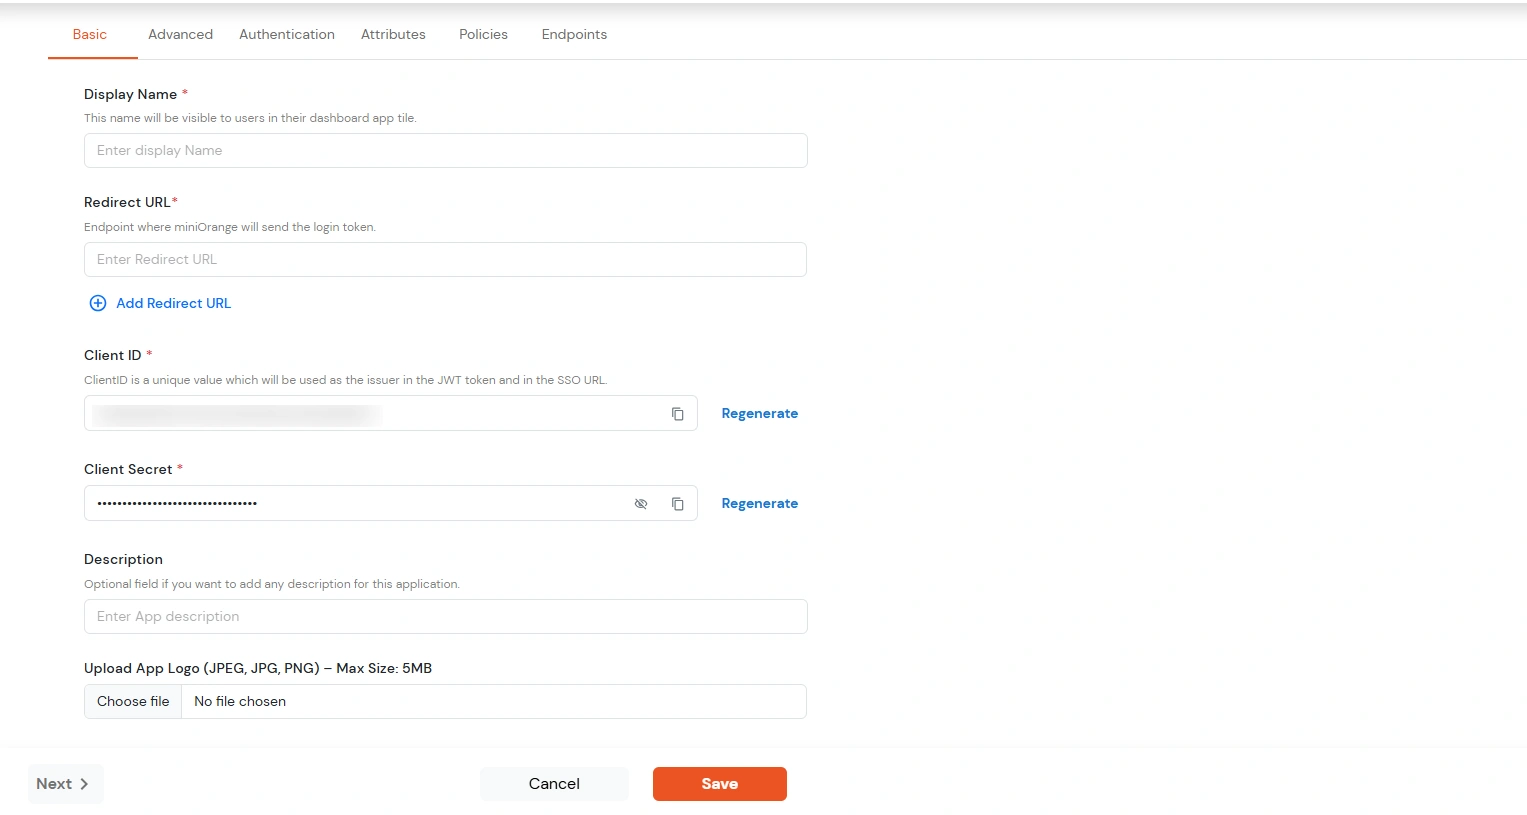
You can configure the following details in the application:
| Display Name |
Enter the Display Name (i.e. the name for this application) |
| Redirect URL |
Enter the Redirect URL (i.e. the endpoint where you want to send/post your JWT token).
You can add multiple redirect URLs by separating them with a ‘;’.E.g. abc.com;xyz.com
|
| Client ID |
The Client ID is shown in the field below. Click the clipboard icon to copy it. |
| Client Secret |
Client Secret is hidden by default. Click the eye icon to reveal it and use the clipboard icon to copy it. This is used in the HS256 signature algorithm for generating the signature.
|
| Description (Optional) |
Add a description if required.
|
- Click Save.
- You will be redirected to the Policies section.

- Click on the Assign group button. A new Configure Group Assignment Modal will open.
- Assign Group: Select the groups you want to link with the application. You can select up to 20 groups at a time.
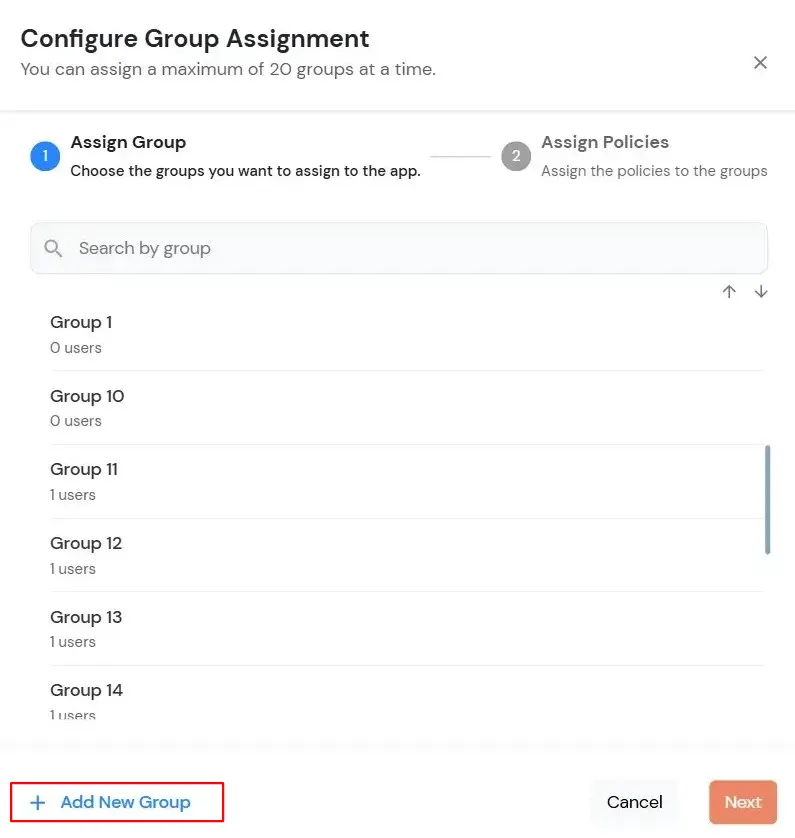
- If you need to create new group. Click on Add New Group button.
- Enter the Group name and click on Create Group.
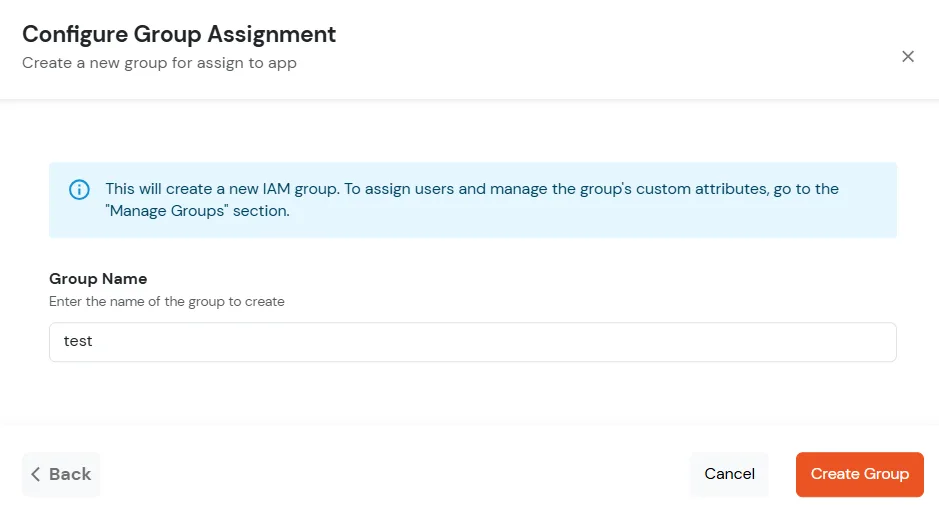
- Click on Next.
- Assign Policies: Add the required policies to the selected groups. Enter the following details:
- First Factor: Select the login method from the dropdown.
- If you select Password as the login method, you can enable 2-Factor Authentication (MFA) and Adaptive Authentication, if needed.
- If you select Password-less as login method, you can enable 2-Factor Authentication (MFA) if needed.
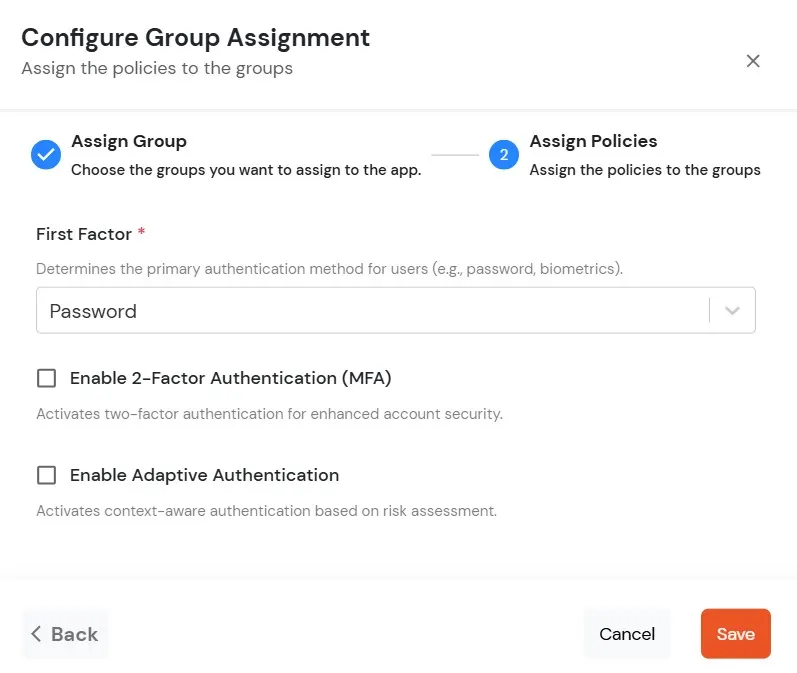
- Click on Save. Policies will be created for all the selected groups.
- You will see the policy listed once it’s successfully added.

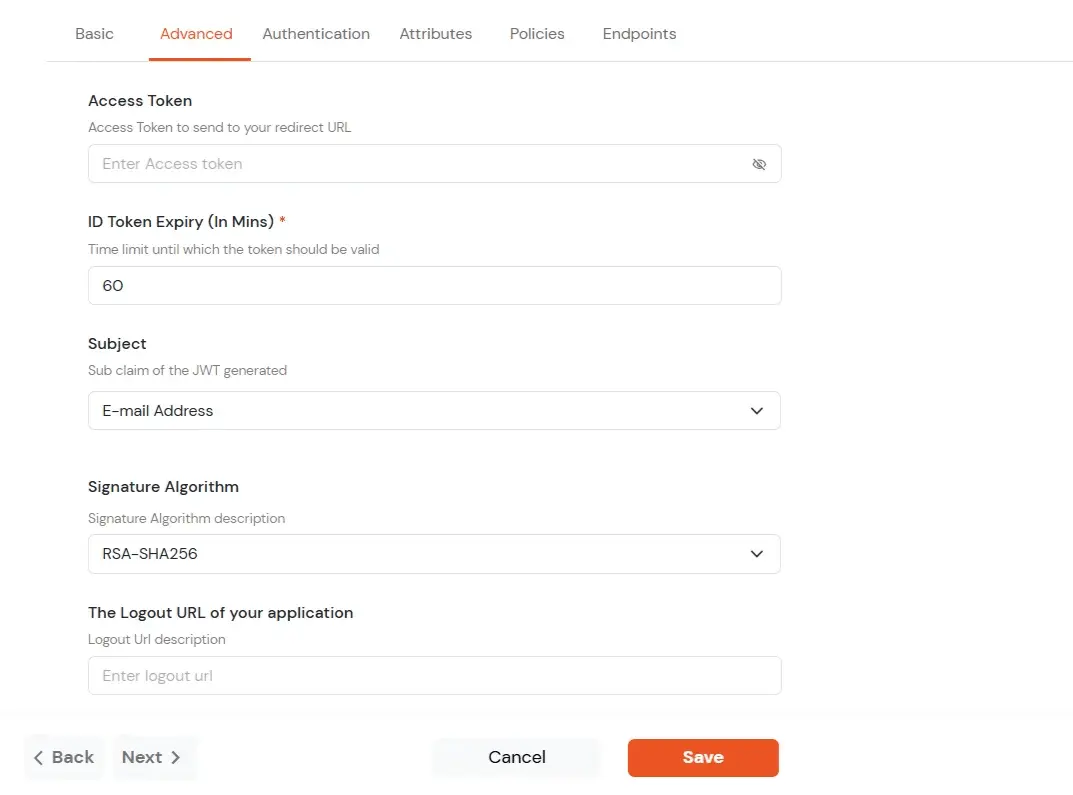
- Click on Advanced tab.
- Enter the following details as required:
| Access Token |
Enter the access token that will be sent to your redirect URL after a user logs in. This token helps your app know the user is allowed to access certain features. |
| ID Token Expiry (In Mins) |
Set how long (in minutes) the ID token will be valid. After this time, the user will need to log in again to get a new token. |
| Subject |
Choose what information, like the user’s email address, will be used to identify them in the token. This helps your app know which user is logged in. |
| Signature Algorithm |
Select your signature algorithm from the dropdown. |
| The Logout URL of your application |
Enter the web address where users should be sent after they log out. |
- Signature Algorithms for JWT
RSA-SHA256
- Asymmetric, uses a set of private and public keys to generate and validate the signature which is included in the JWT token.
- The private key is used to generate the signature on the IDP side.
- The public key is used to verify the signature on the SP side.
- We provide the public key for this.
HS256
- Symmetric, uses the same secret key to generate and validate the signature
- The secret key in this case is configurable from the app configuration page.
-
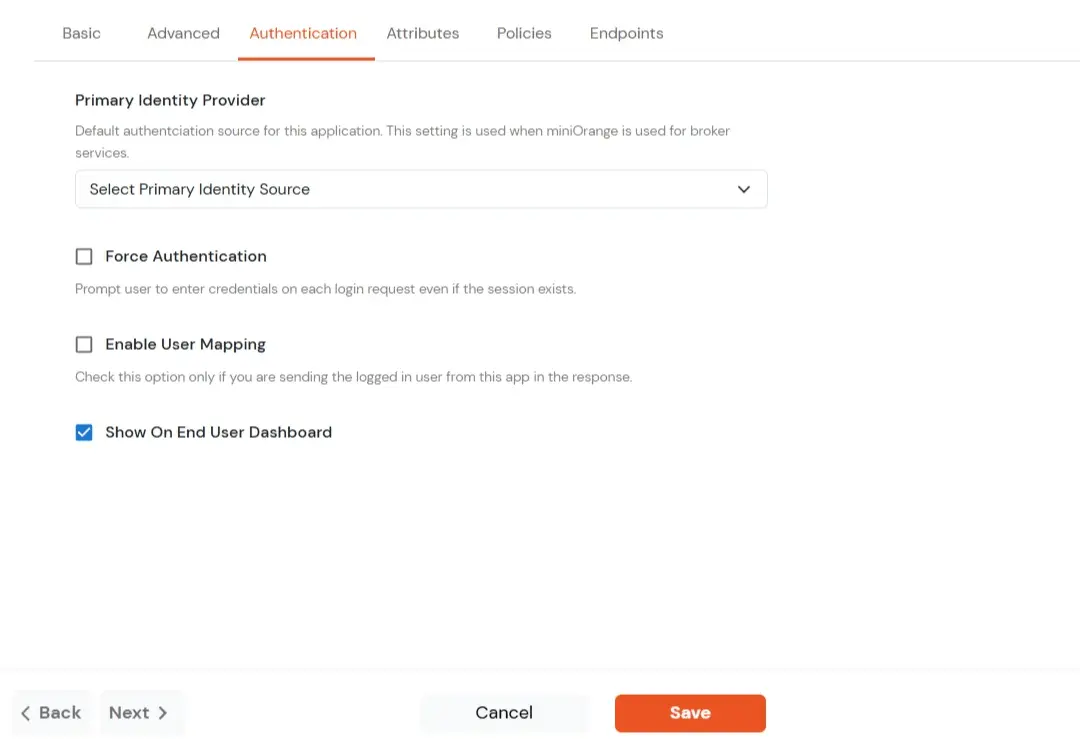
Switch to Login options tab.
| Primary Identity Provider |
Select the default ID source from the dropdown for the application. If not selected, users will see the default
login screen and can choose their own IDP. [Choose miniOrange in this case.]
|
| Force Authentication |
If you enable this option, users will have to log in every time, even if their session already exists. |
| Enable User Mapping |
Enable this option, if you want the app to show which user is signed in when it responds. |
| Show On End User Dashboard |
Enable this option if you want to show this app in the end-user dashboard. |
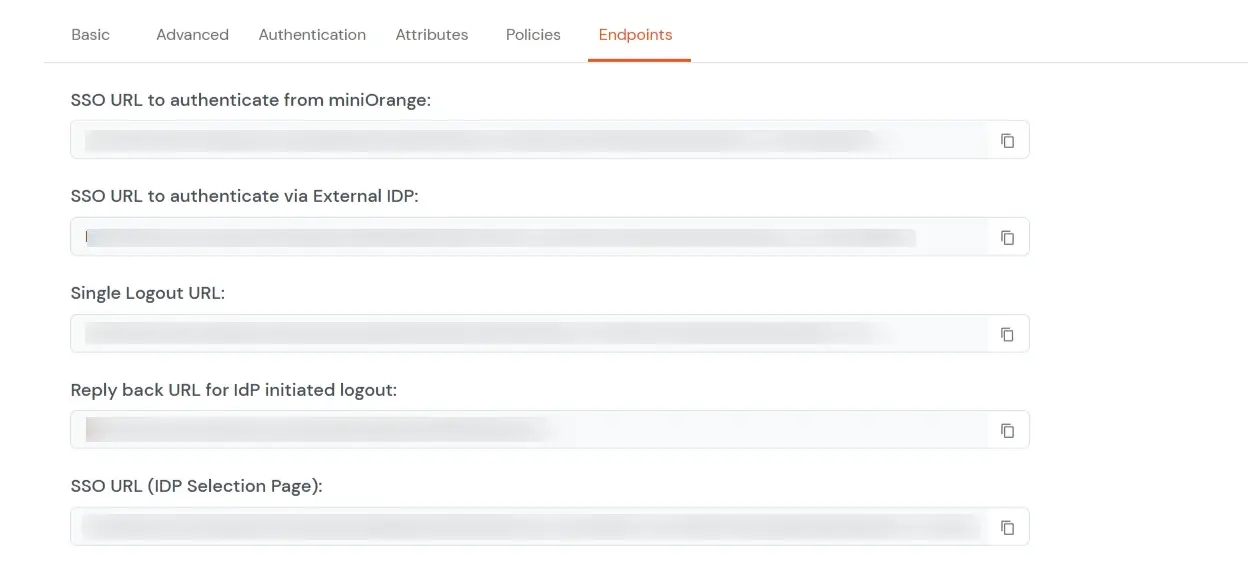
- Navigate to Endpoints and copy the following details:
-
Single Sign-On URL:
- This URL is used to initiate user authentication to obtain the JWT token.
- Take redirect_uri as one of the query parameters.
- After successful authentication on the IDP end, an active user session is created in the IDP and the user is redirected to the redirect_uri with the JWT token.
-
-
Single Logout URL:
- This URL is used to log out the user from the IDP by removing the active user session.
- Take redirect_uri as one of the query parameters.
- After removing the active user session, the IDP redirects the user to the redirect_uri.
-
Reply back URL for IdP initiated logout:
- This URL is used to initiate the logout in case the JWT user login was IDP Initiated [User logged in to the dashboard
first and then initiated the login for the app from the dashboard.]
- After logging out the user from the IDP, the user is redirected to the IDP dashboard login page.
2. Configure SSO in React
- Select a component that will be responsible for verifying the JWT token most preferably the login component.
- Click on Download Connector and download miniOrange React SSO Connector from this link. Extract this folder and place it in the src folder of your app.
- Go to Apps, Click on the 3 dots against your configured React App.
- Click on Certificate to download the RSA256 certificate.
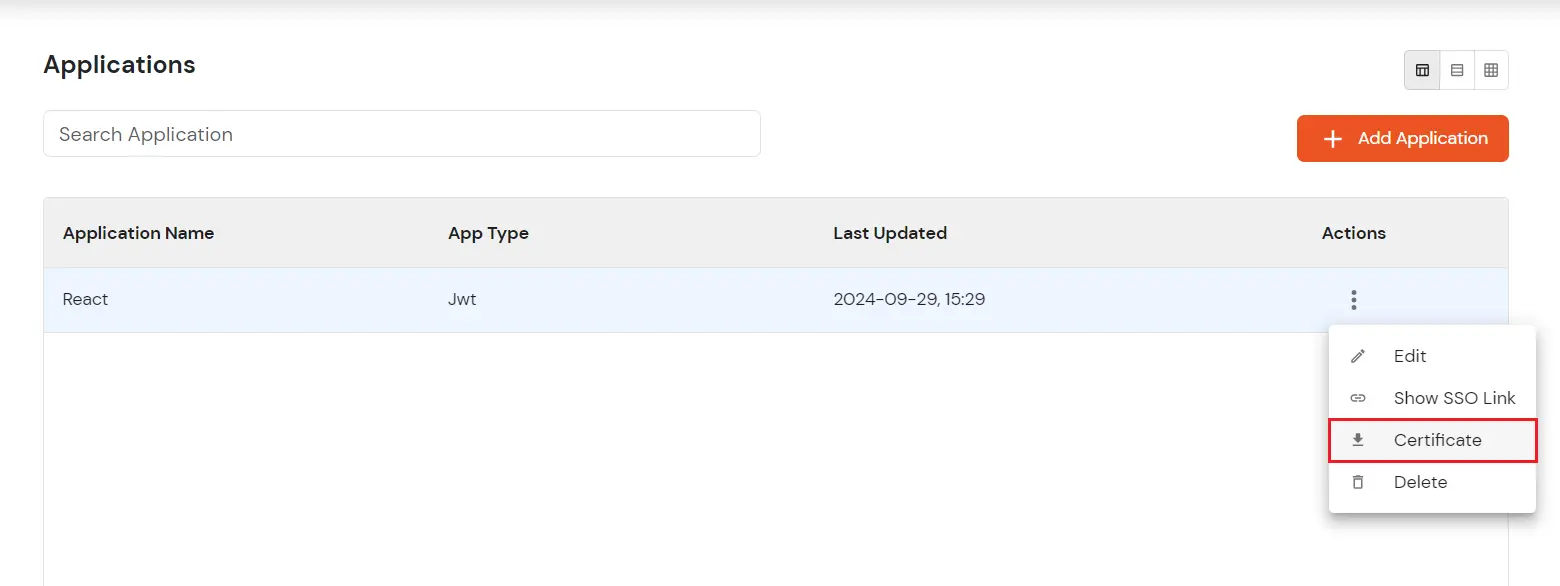
- Place the downloaded certificate in the `src` folder of your react app. Make sure it’s name is RSA256Cert.crt
- In TokenHandler.js, locate the following line. You can replace this with any other route where you want to redirect users after successful authentication.
navigate('/home');
- You can use the following code snippet to retrieve the attributes from the session storage
sessionStorage.getItem('decodedToken');
- You can add a button on your login screen to redirect to the SSO URL. You can get this SSO URL from previous step.
import React from 'react';
const Login = () => {
const handleSingleSignOn = () => {
const ssoUrl = 'Your SSO URL here';
window.location.href = ssoUrl;
};

return (
<div>
<button onClick={handleSingleSignOn}>Single Sign On</button>
</div>
);
};
export default Login;
- On Clicking the SSO button the user will be redirected to chosen IdP.
3. Test SSO Configuration
Test SSO login to your React account with miniOrange IdP:
Using IDP Initiated Login
- Login to miniOrange IdP using your credentials.

- On the Dashboard, click on React application which you have added, to verify SSO configuration.

Using SP Initiated Login
- Open your application and click the Login button configured with the SSO URL.
- You should be redirected to the IdP (Identity Provider) login page.
- Enter the valid user credentials stored in the IdP.
- After entering the credentials, you should be successfully logged into your application.
4. Single Logout (Optional)
If you want to ensure that all sessions (SP and IDP) for a user are properly closed, you can configure Single Logout with the steps below.
A. Configure your JWT application with SLO endpoint:
- You can configure the below SLO endpoint directly in your application's Logout Button:
https://login.xecurify.in/moas/broker/login/jwt/logout/<your-customer-id>?redirect_uri=<redirect-url>
| your-customer-id |
You have to add your miniOrange account customer ID here. |
| redirect-url |
This should be replaced with the logout URL of your JWT application. |
OR
- Go to miniOrange Dashboard -> Apps -> Your Configured JWT APP-> Select Edit.
- Enter your Logout URL. This will be the URL where, after logging out, the user will be redirected.
- Save and edit your app again.
- Scroll down to Endpoints and copy your Single Logout URL. Copy this URL and embed it in your Logout button of your app.

B. In case of SAML External IdP as an Authentication Source, follow the below steps to configure SLO:
Configure miniOrange with External IdP SLO endpoint:
- Go to the Identity Provider tab and edit the configured Identity Provider.
- Find the option Single Logout URL and configure the SLO URL provided by your IdP.

Configure IdP with miniOrange SLO endpoint:
- Configure your Identity Provider with below Single logout endpoint.
https://login.xecurify.in/moas/broker/login/saml_logout/<your-customer-id>
- You can find the SSO Binding option to configure the logout binding type to either REDIRECT or POST.
External References


