Two-Factor Authentication (2FA) for Zscaler
Zscaler Two-Factor Authentication (2FA) or Multi-Factor Authentication (MFA) is an additional layer of security in which a user or an organizational employee have to provide two factors to gain access to the Zscaler account. With Zscaler TFA being enabled, anyone trying to login to your Zscaler account from an unrecognized computer/device must provide additional authorization. Authentication starts with a user submitting his traditional username and password. Once the user successfully gets authenticated with the 1st step verification, configured 2FA (OTP over SMS, Push Notifications, YubiKey, TOTP, Google Authenticator etc) method prompts for 2nd-step verification. After successfully authenticating with both of the steps a user is granted with the access to the Zscaler account. This extra layer prevents the unauthorized person from accessing the resources even if cyber attackers get to know your credentials.
miniorange provides 15+ authentication methods and solutions for various use cases. It allows users and organizations to set up certain authentication and settings which includes password restrictions, restricting sign-in methods, as well as other security settings. miniorange also makes way for authentication apps that support Time-Based One-Time Password (TOTP) Google Authenticator, Microsoft Authenticator, Authy 2-Factor authentication app and our own miniorange Authenticator app.
Connect with External Source of Users
miniOrange provides user authentication from various external sources, which can be Directories (like ADFS, Microsoft Active Directory, OpenLDAP, AWS etc), Identity Providers (like Microsoft Entra ID, Okta, AWS), and many more. You can configure your existing directory/user store or add users in miniOrange.

miniOrange
Authenticator App

Google
Authenticator App

Authy 2-Factor
Authentication App
Microsoft
Authenticator App
Follow the Step-by-Step Guide given below for Zscaler Single Sign-On (SSO)
1. Configure Zscaler in miniOrange
- Login into miniOrange Admin Console.
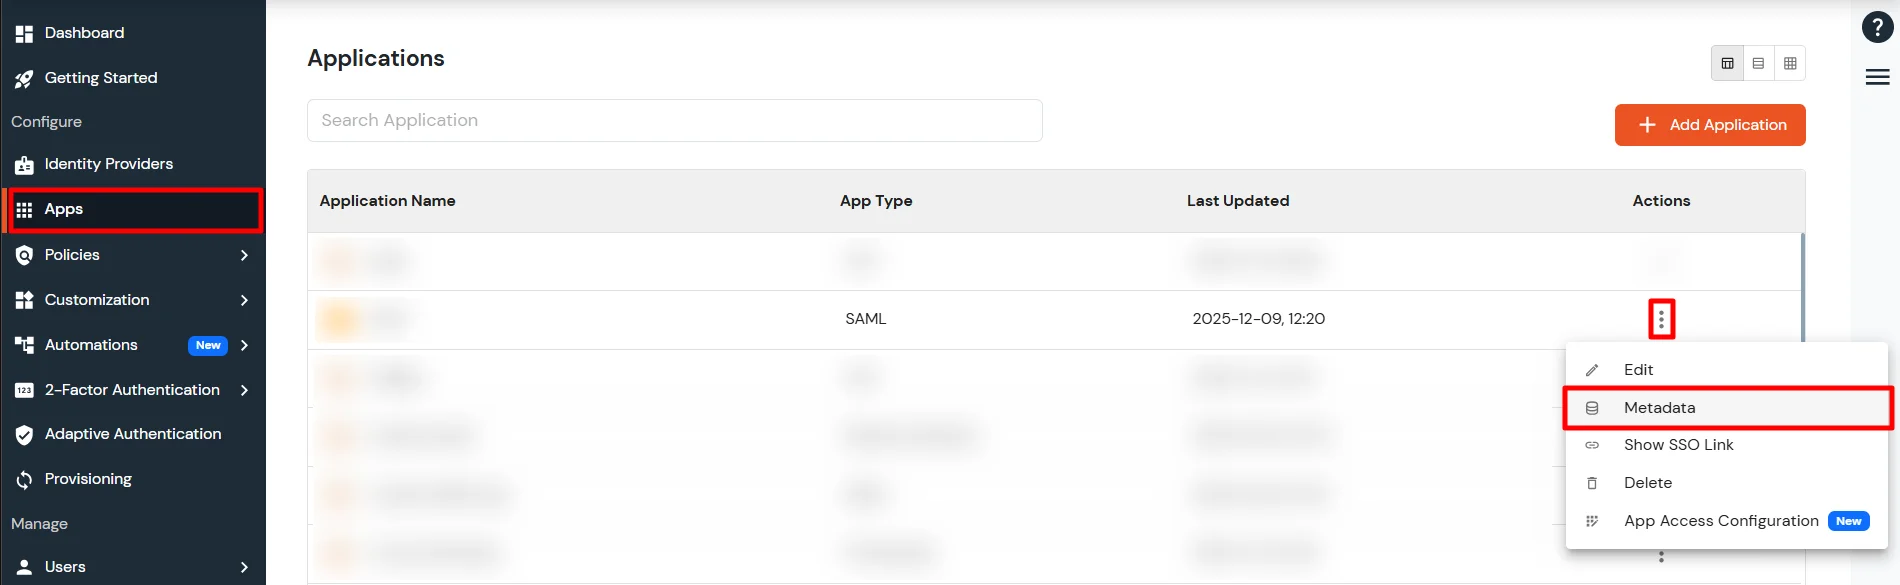
- Go to Apps and click on Add Application button.

- In Choose Application Type, select SAML/WS-FED from the All Apps dropdown.
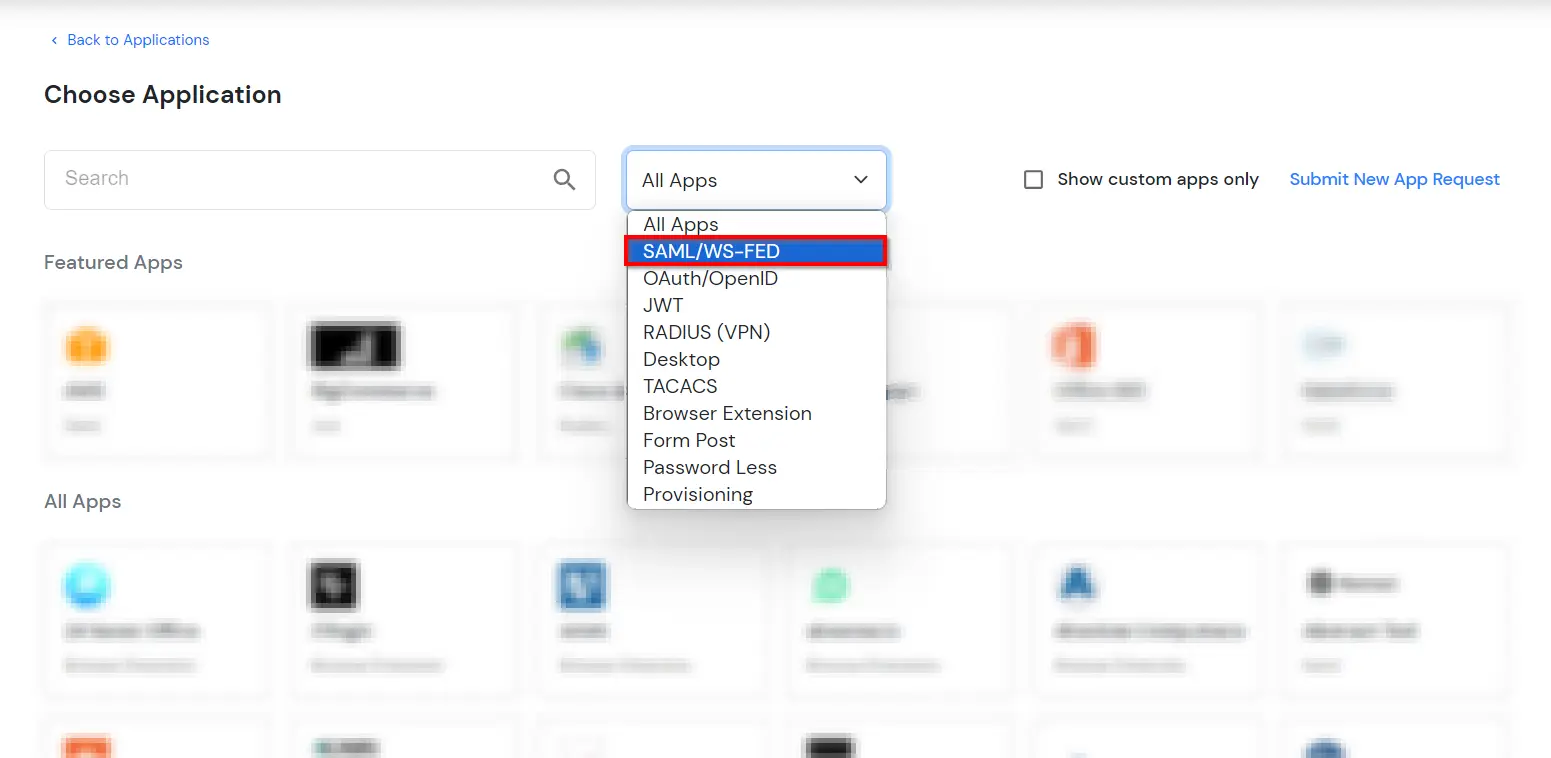
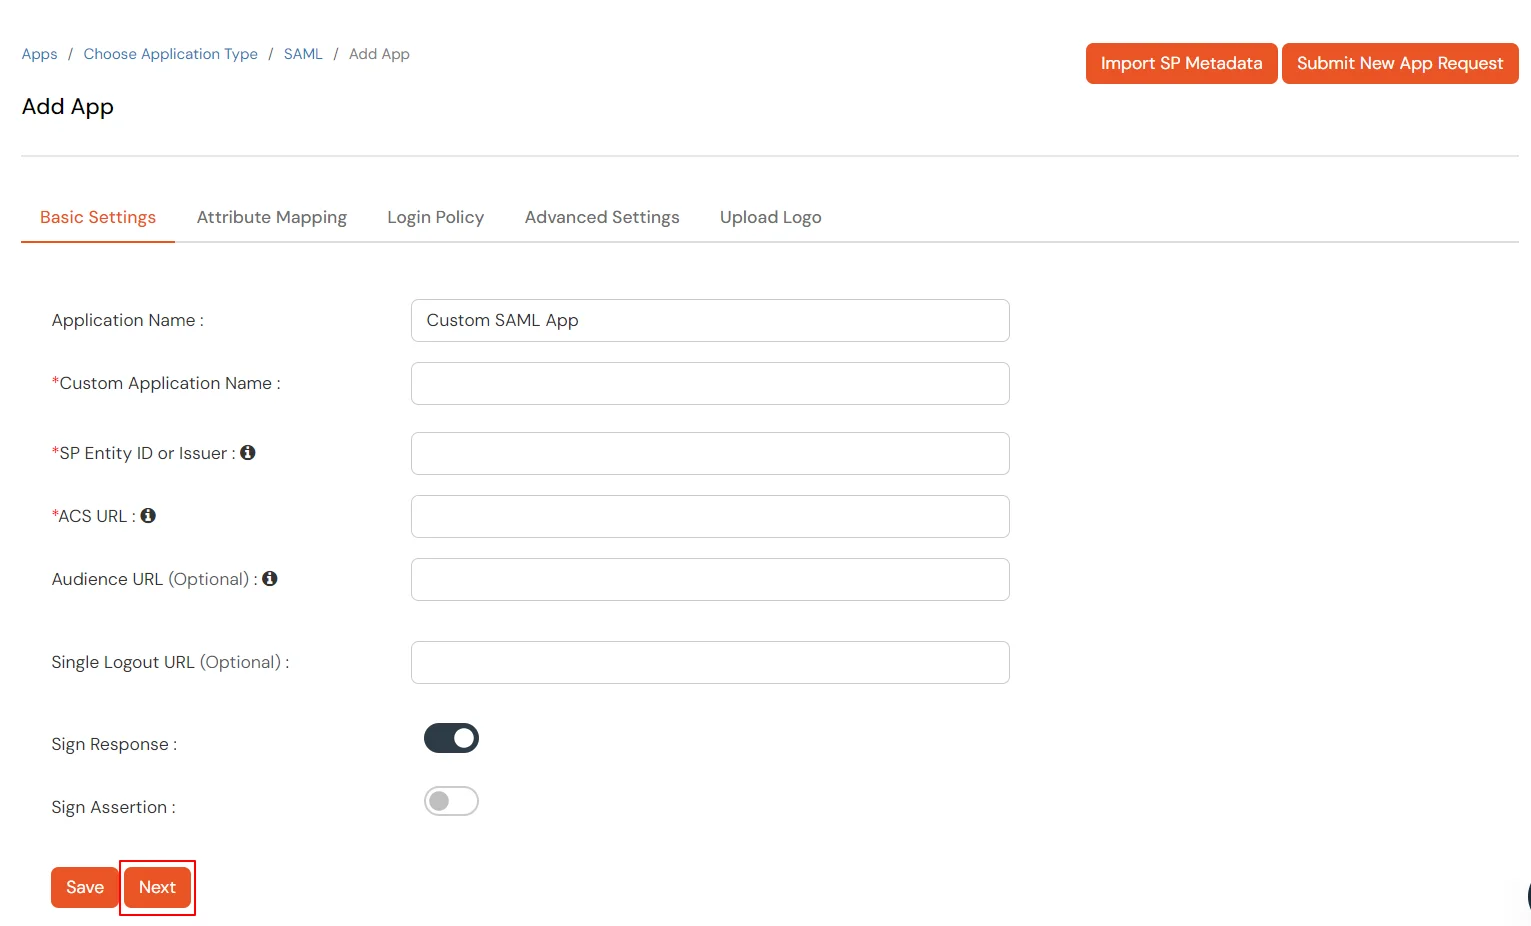
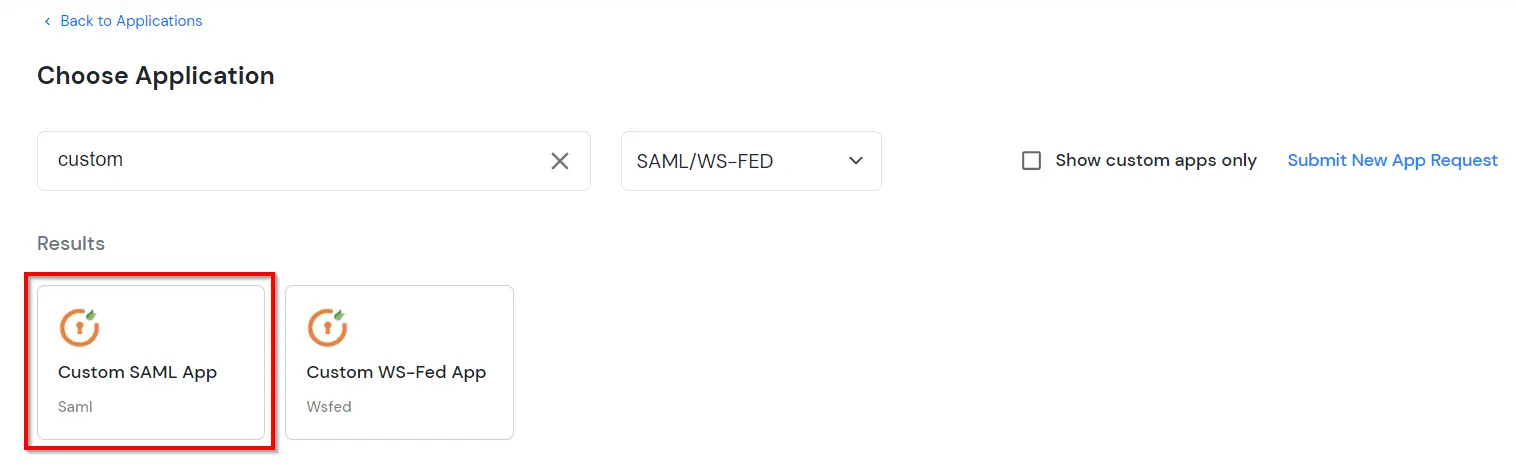
- Search for Zscaler in the list, if you don't find Zscaler in the list then, search for custom and you can set up your application in Custom SAML App.
2. Configure SSO in Zscaler
- Go to Administration → Authentication Settings.
- Click the Identity Providers tab.
- Click Add IdP.
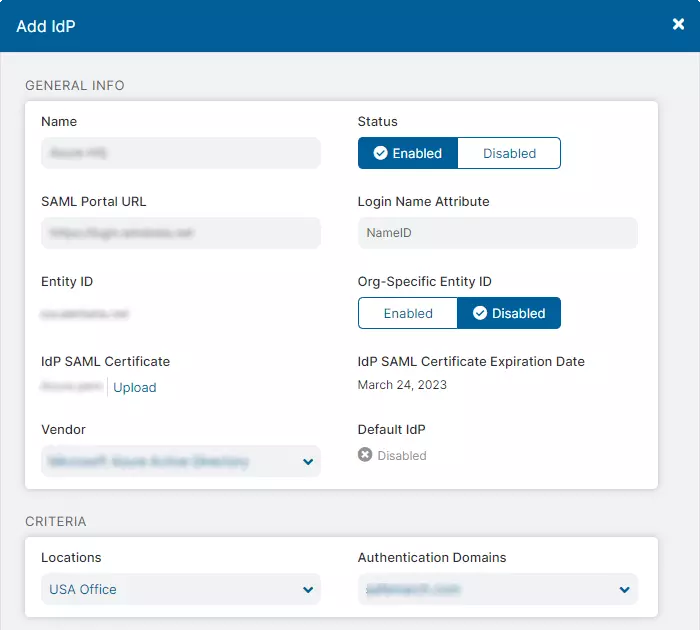
- In the Add IdP window:
- Name: Enter a name for the IdP.
- Status: Enable or Disable the IdP.
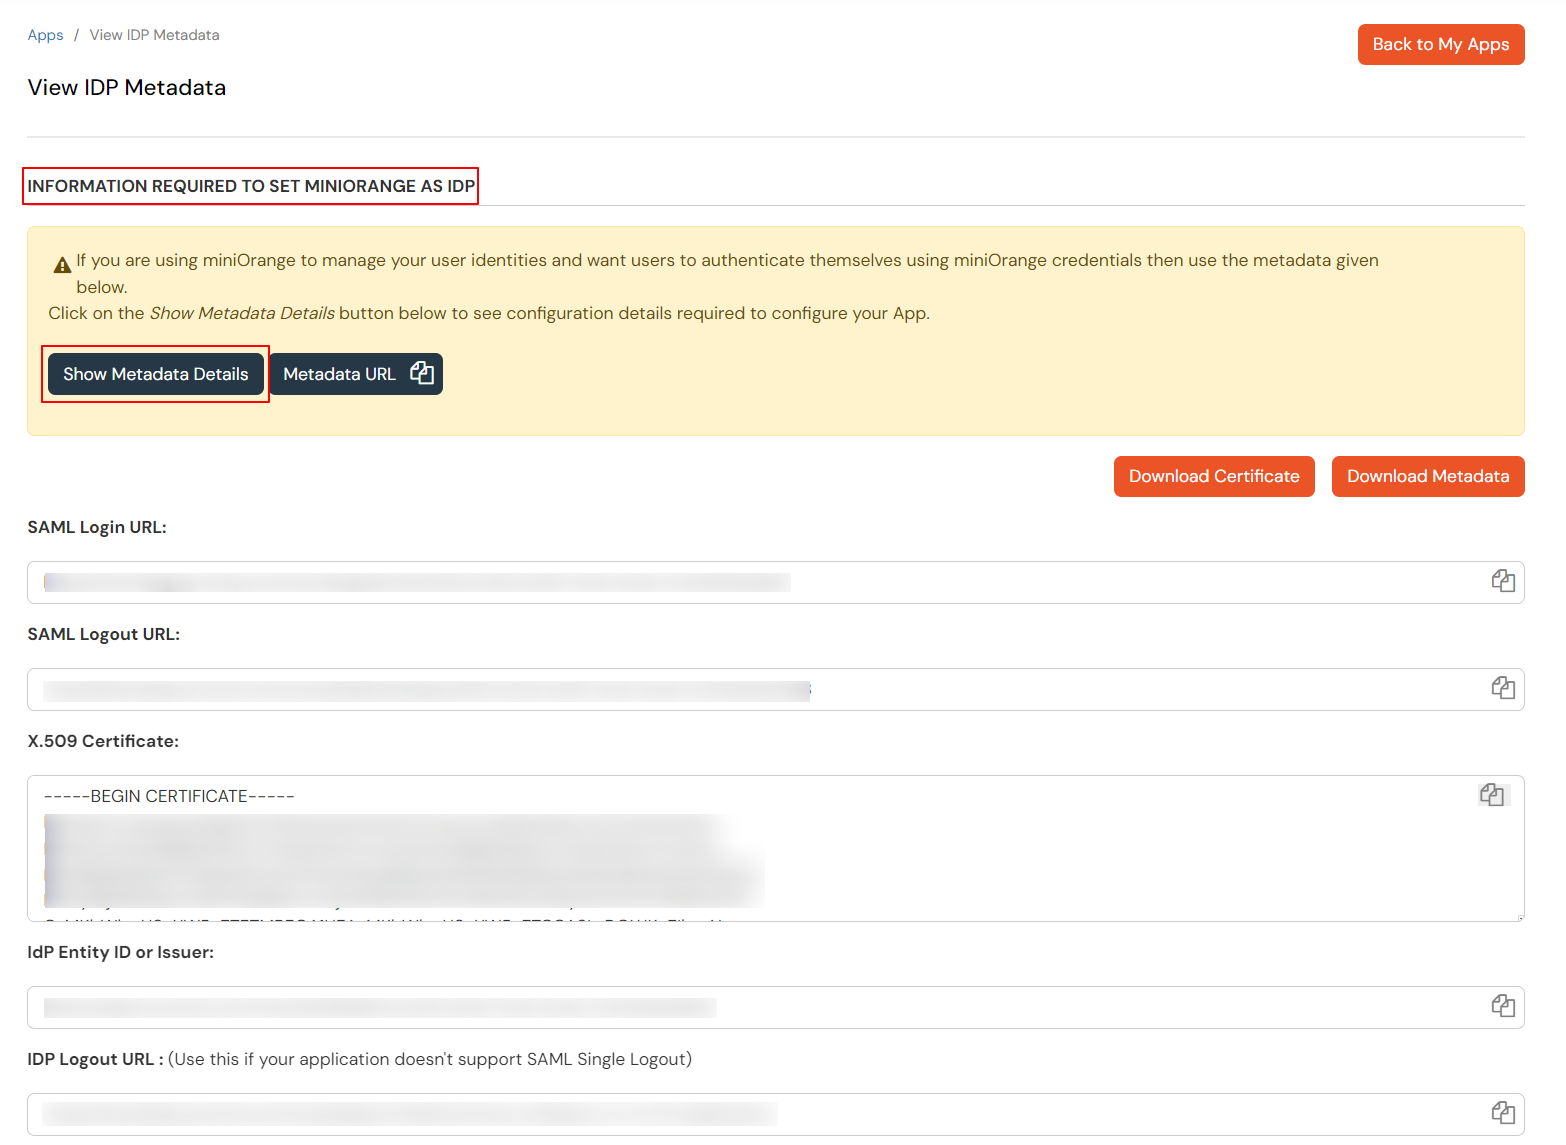
- SAML Portal URL: Enter the SSO URL of the SAML portal to which users are sent for authentication. Ensure that it is publicly resolvable if you want users to authenticate from the Internet. Additionally, ensure that it's protected using HTTPS. This information is in the XML metadata of the IdP or obtained during the configuration.
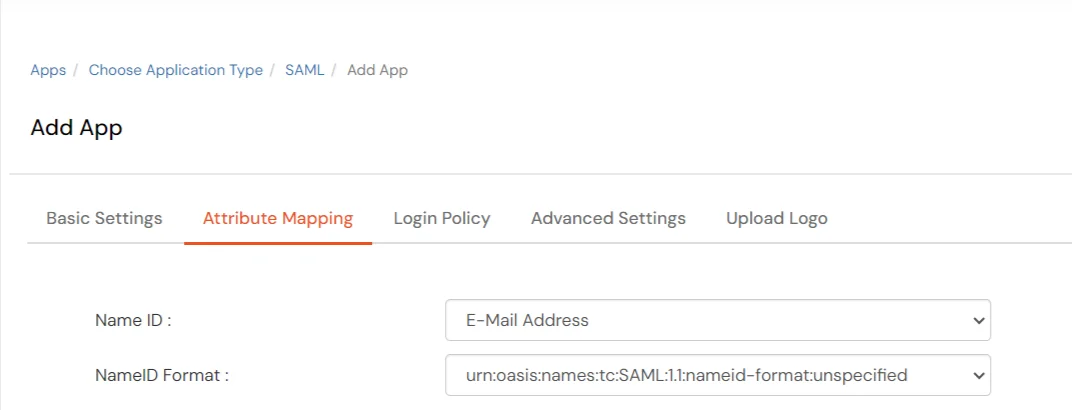
- Login Name Attribute: Enter the SAML attribute that maps to the login name that users enter when they authenticate to the zscaler service. Typically, it's NameID, which is entered as one word, with no spaces. This field is case-sensitive.
- Entity ID: The entity ID is the globally unique name for this SAML entity.
- Org-Specific Entity ID: Enable if you have more than one organization instance on the same zscaler cloud. For example, if you have two organization instances on the same zscaler cloud and must authenticate both instances against the same Azure AD account, you can't use the same entity ID for multiple apps in Azure AD. For this situation, you must enable this setting for both instances to generate a unique organization-specific entity ID.
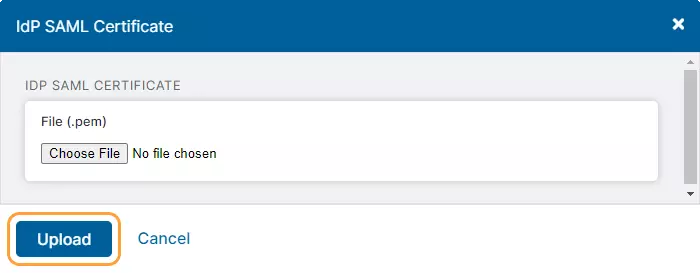
- IdP SAML Certificate: Upload the SAML certificate that is used to verify the digital signature of the IdP. This is the certificate you downloaded from your IdP. The certificate must be in base-64 encoded PEM format. The file extension must be .pem and have no other periods (.) in the file name.
- IdP SAML Certificate Expiration Date: Displays the expiration date for the SAML certificate of the IdP. You will see this field if the certificate is about to expire or has expired. A Caution icon appears if the certificate expires within 30 days.
- Vendor: Choose the vendor of the IdP.
- Default IdP: Displays if this IdP is Enabled or Disabled as the default IdP. You can only have one default IdP. The first IdP added will be the default IdP. Any additional IdPs will be Disabled as the default, and you won't be able to modify this field.
- Locations: Select the locations to map to this IdP. You can also search for a location. Any unselected locations will be mapped to the default IdP. This field is set to Any for the default IdP, and you can't modify it.
- Authentication Domains: Select the domains to map to this IdP. This allows the zscaler service to display the correct IdP to authenticate an incoming user. Any unselected domains will be mapped to the default IdP. This field is set to Any for the default IdP, and you can't modify it. Apart from the default IdP, any additional IdPs must be mapped to at least one domain.
- Sign SAML Request: Enable if the IdP expects the SAML request to be signed. The following fields will appear:
- Signature Algorithm: Choose whether to sign the SAML request with a SHA-1 (160-bit) hashing algorithm or with a SHA-2 (256-bit) hashing algorithm. If you are reconfiguring SAML because the certificate expired, zscaler recommends that you select the certificate with the later expiration date.
- Request Signing SAML Certificate: Choose which certificate you want to use for signing SAML requests. Zscaler recommends choosing the one with the longest validation period.
- SP SAML Certificate Expiration Date: Displays the expiration date for the SAML certificate of Zscaler, your SP. You will see this field if the certificate is about to expire or has expired. A Caution icon appears if the certificate expires within 30 days.
- SP SAML Certificate: Download the Zscaler certificate that you will upload to your IdP when you configure it.
- SP Metadata: Download the metadata of the Zscaler service. The metadata advertises the Zscaler SAML capabilities and is used for auto-configuration.
- Click Save to exit the window.
- Go to Administration > Authentication Settings.
- Under Authentication Frequency, choose how often users are required to authenticate to the Zscaler service. If you select Custom, the following field will appear:
- Custom Authentication Frequency (days): Specify 1 to 180 days.
- Under Authentication Type, choose SAML.

- Click Save .
- Hover over the Activation menu near the bottom left and click on Activate.
3. Configure 2FA for Zscaler
3.1: Enable 2FA for Users of Zscaler app
- To enable 2FA for Users of Zscaler application. Go to Policies >> App Login Policy
- Click on Edit icon against the application you have configured.
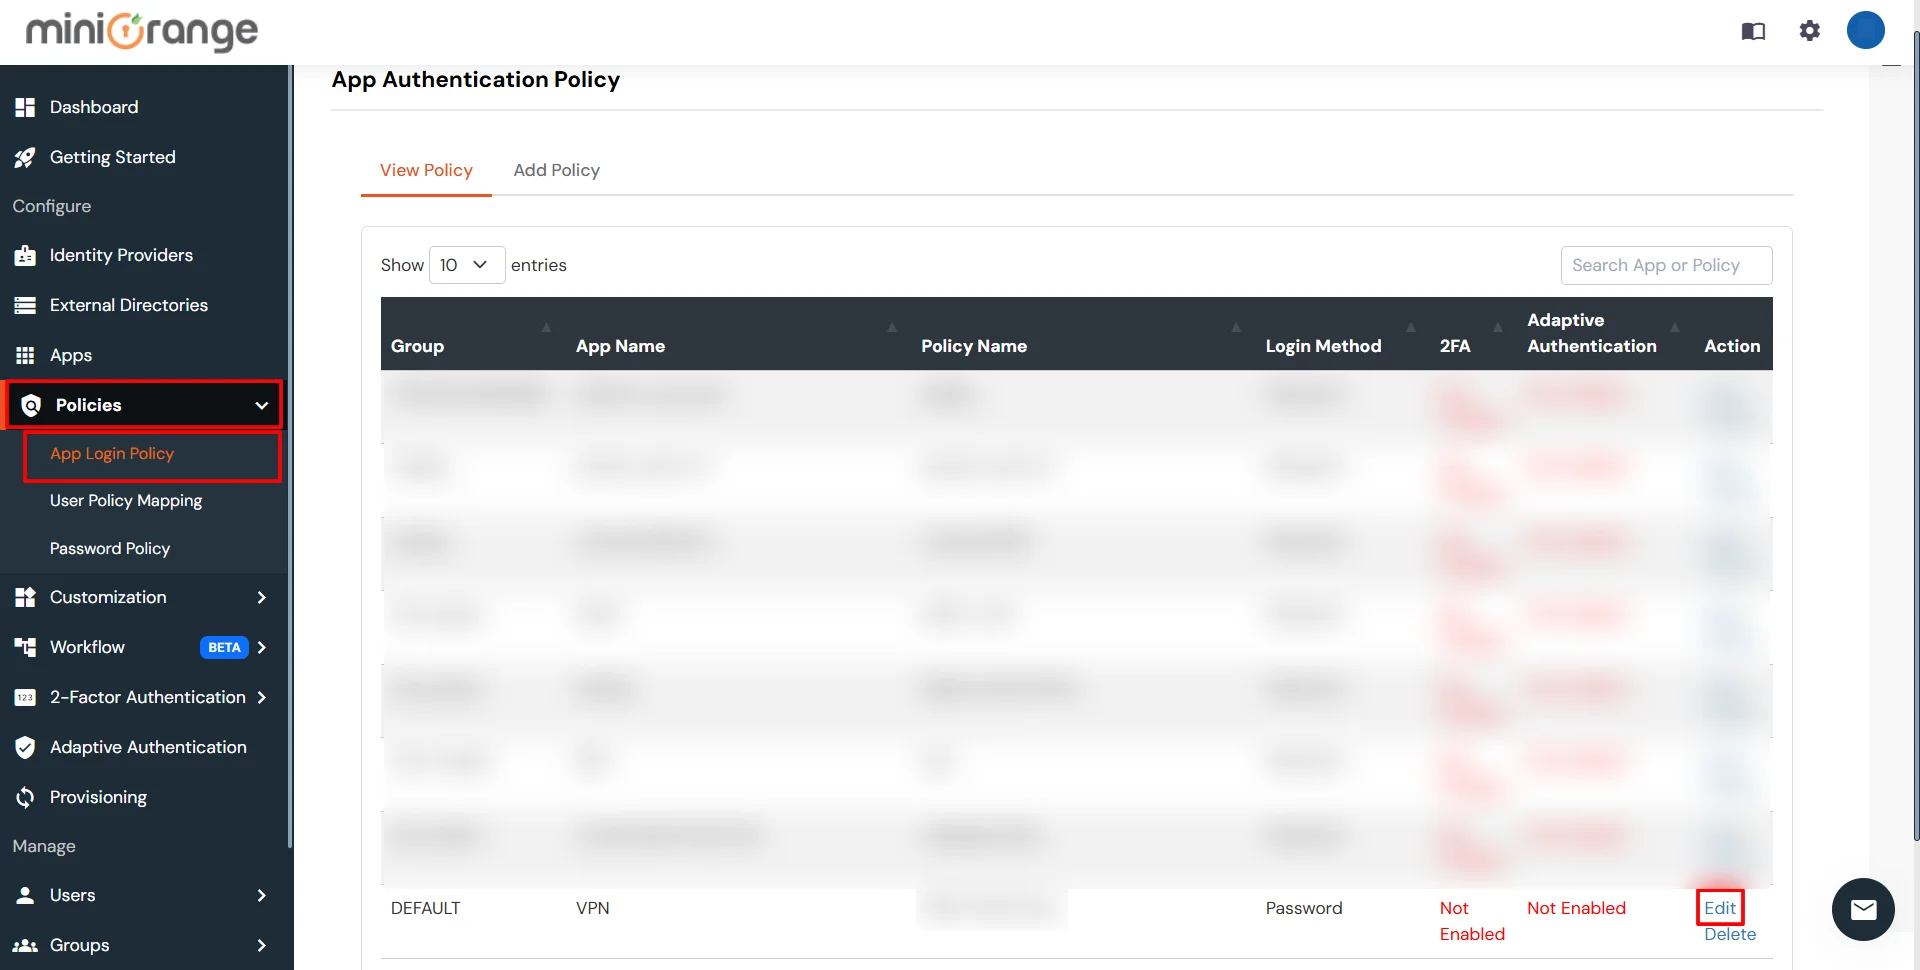
- Check the Enable 2-Factor Authentication (MFA) option.
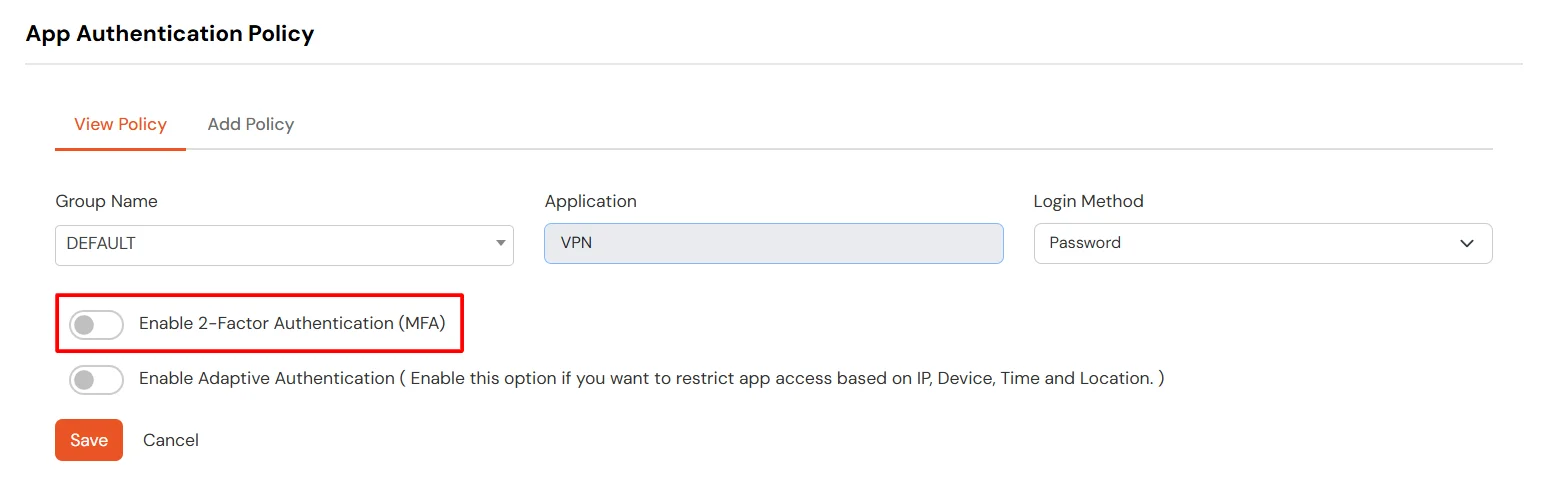
- Click on Submit.
3.2: Configure 2FA for your Endusers
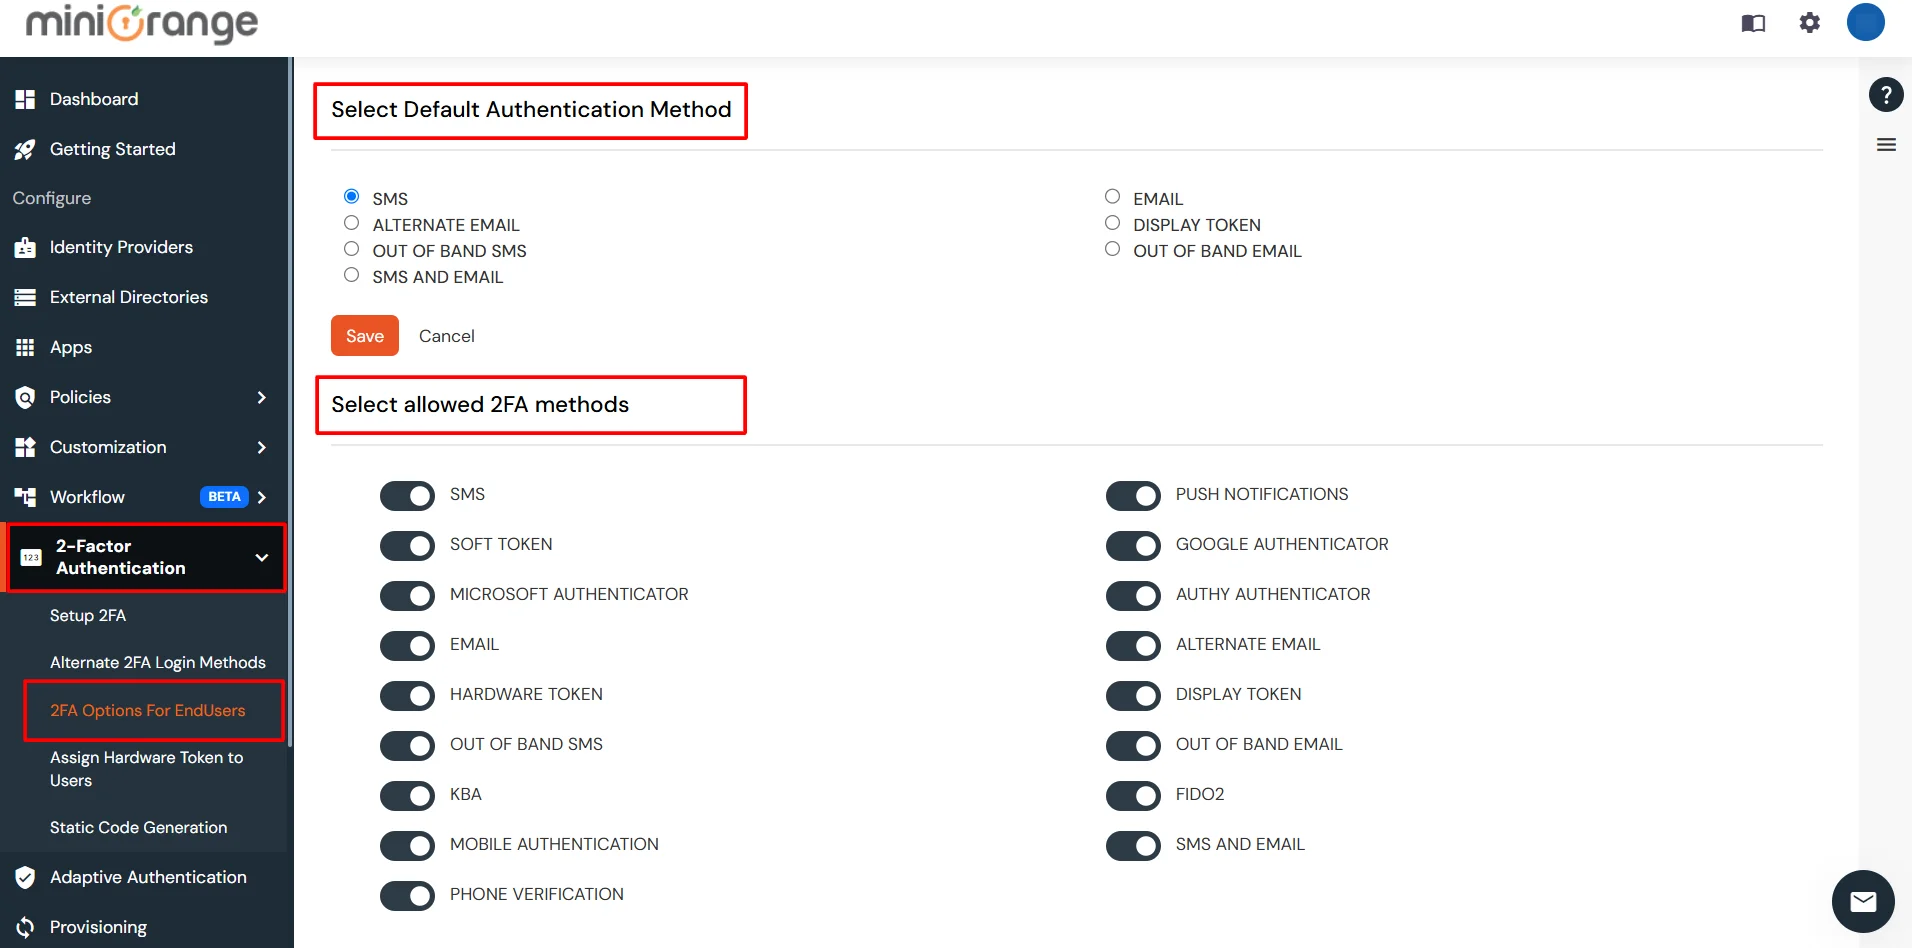
- To enable 2FA/MFA for Zscaler endusers, go to 2-Factor Authentication >> 2FA Options For EndUsers.
- Select default Two-Factor authentication method for end users. Also, you can select particular 2FA methods, which you want to show on the end users dashboard.
- Once Done with the settings, click on Save to configure your 2FA settings.
3.3: Enduser 2FA Setup
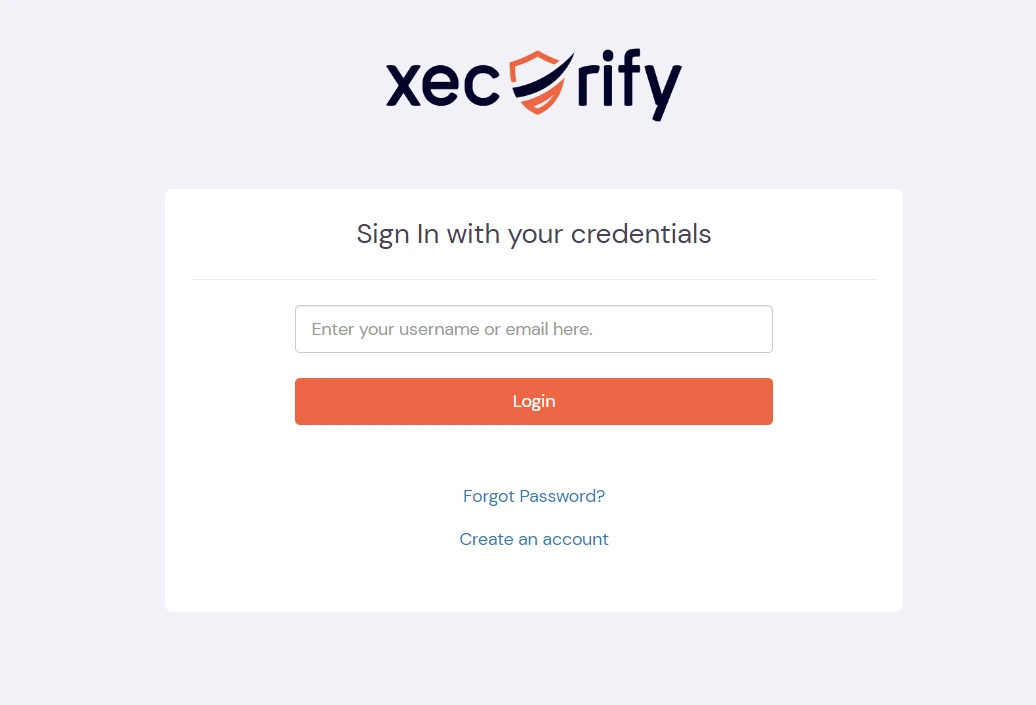
- Login to End-User Dashboard using end user login URL.
- For Cloud Version: The login URL (branding url) which you have set.
- For On-Premise version: The login URL will be the same as of Admin Login URL.
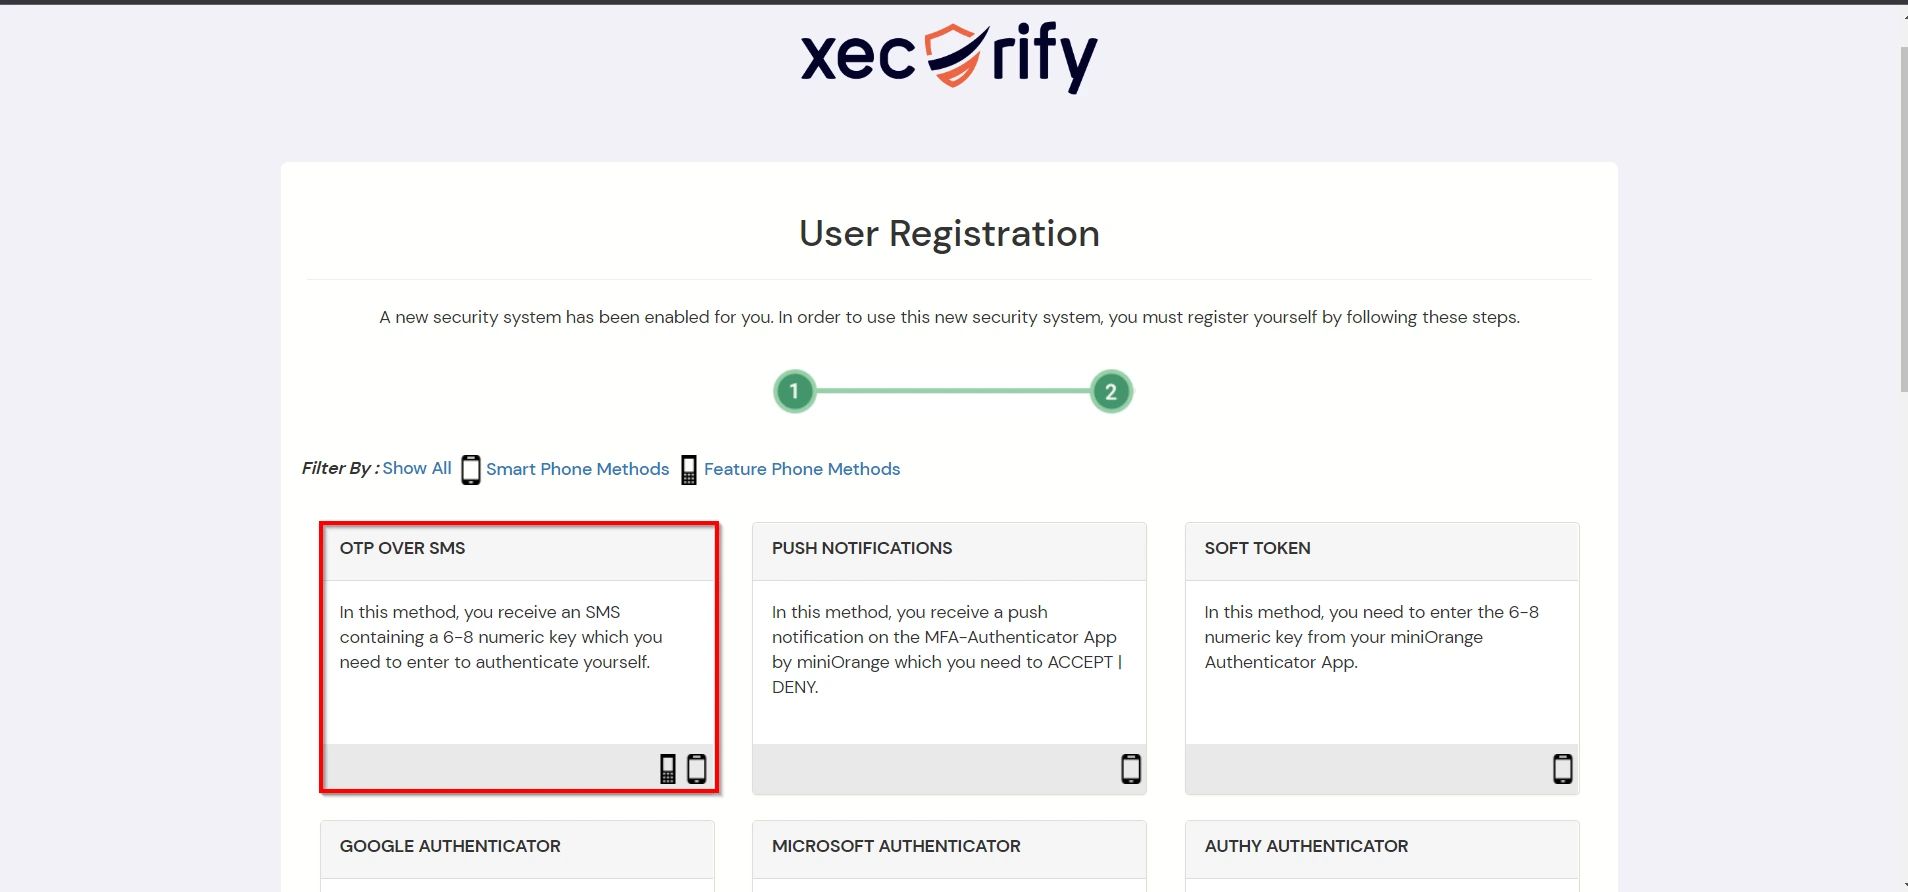
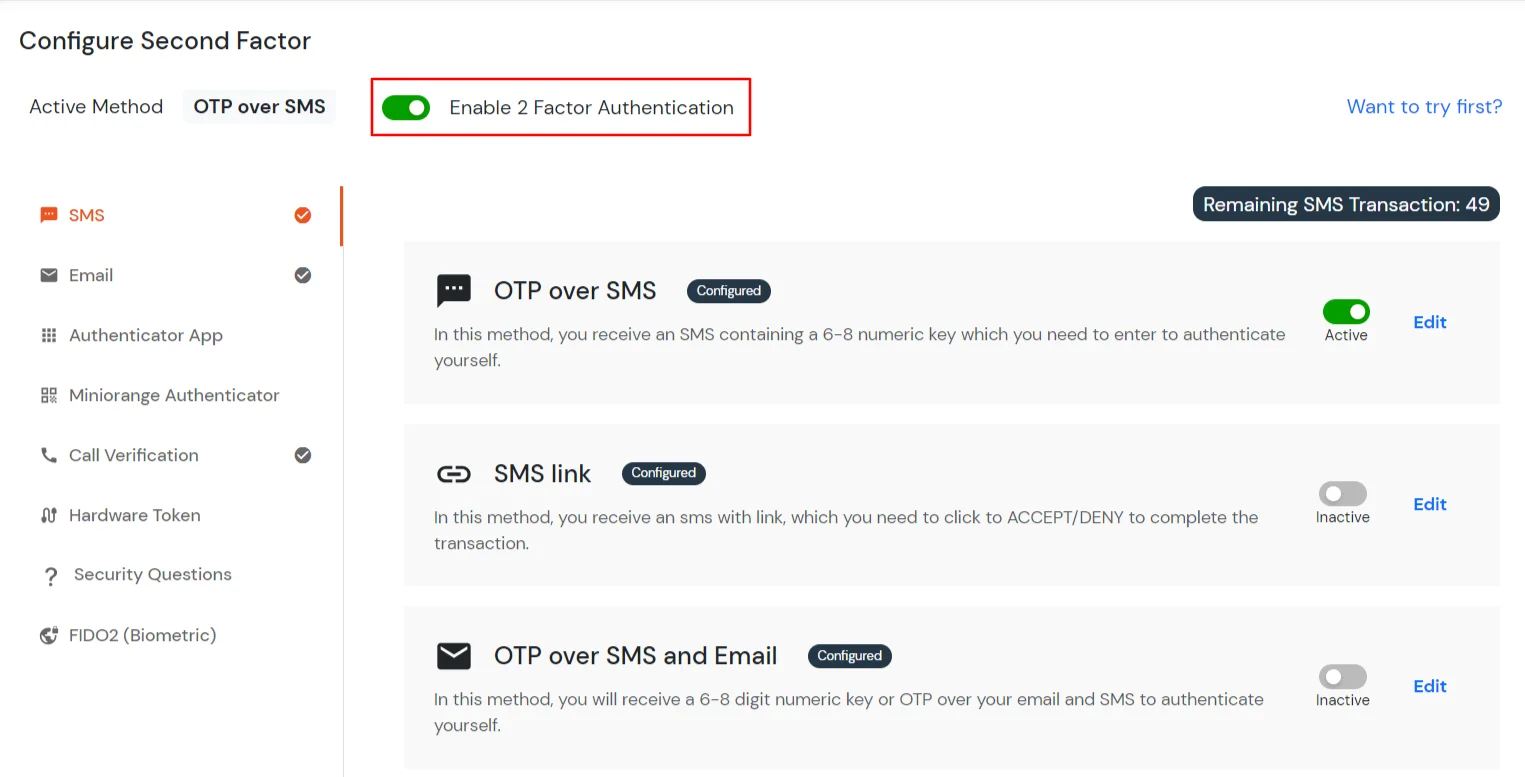
- Select Setup 2FA from left panel. Then select any of the 2FA method available.
- For now, we have selected the SMS >> OTP OVER SMS as our 2FA method. You can explore the guide to setup other 2FA methods here.
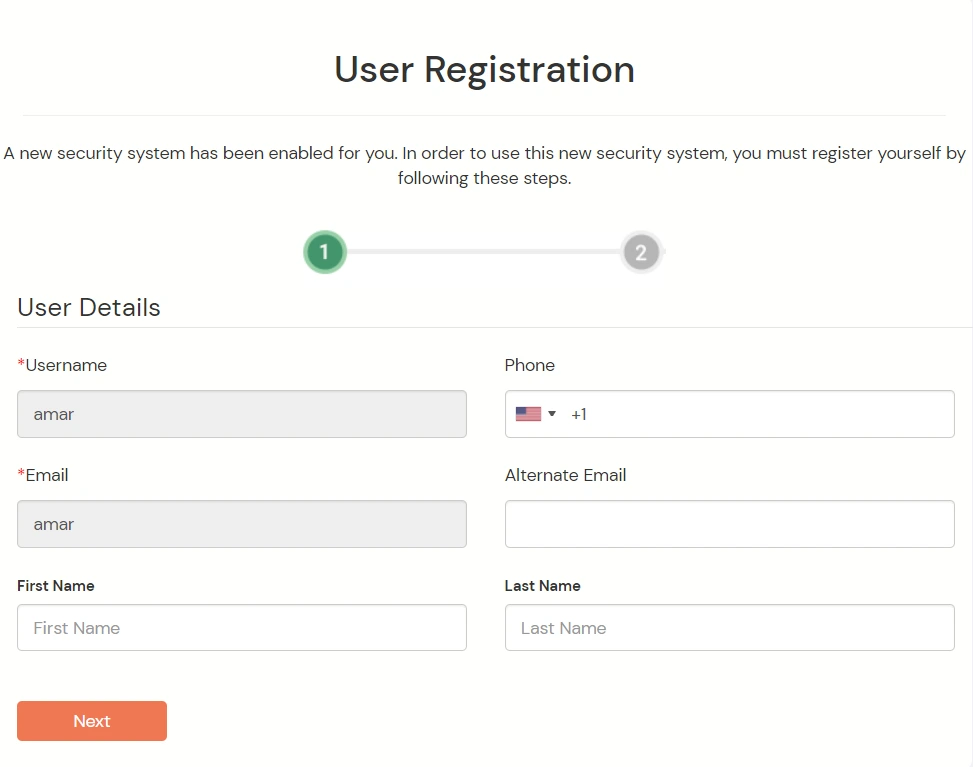
- Enable the OTP over SMS if you have your phone number added under your account information else click on Edit >> Click here to update your phone number link.
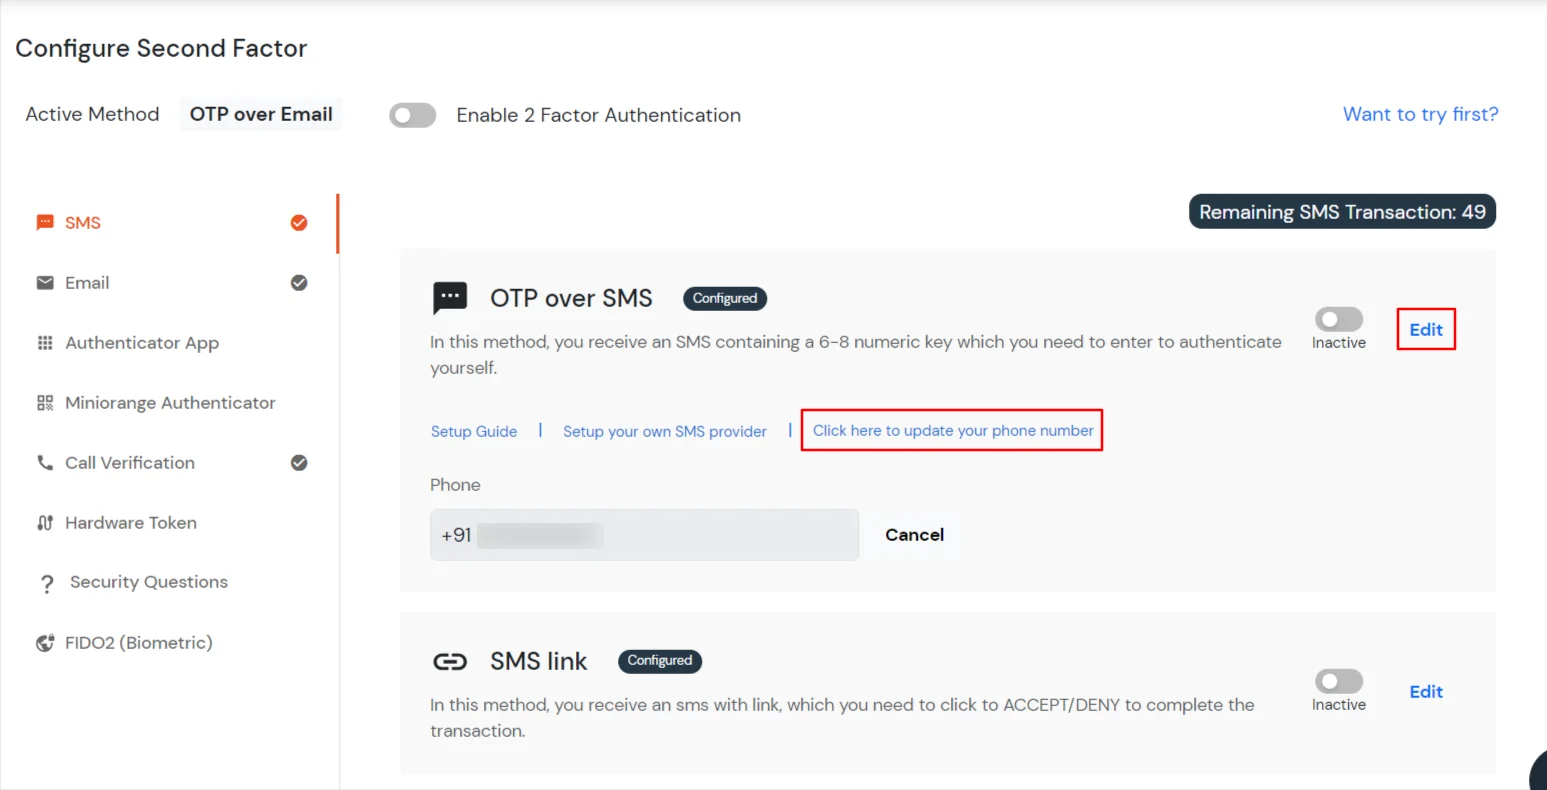
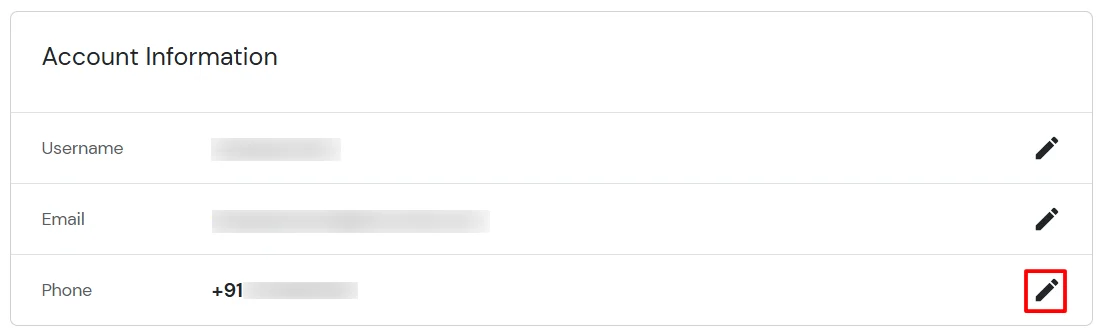
- In Account Information, click on edit icon.
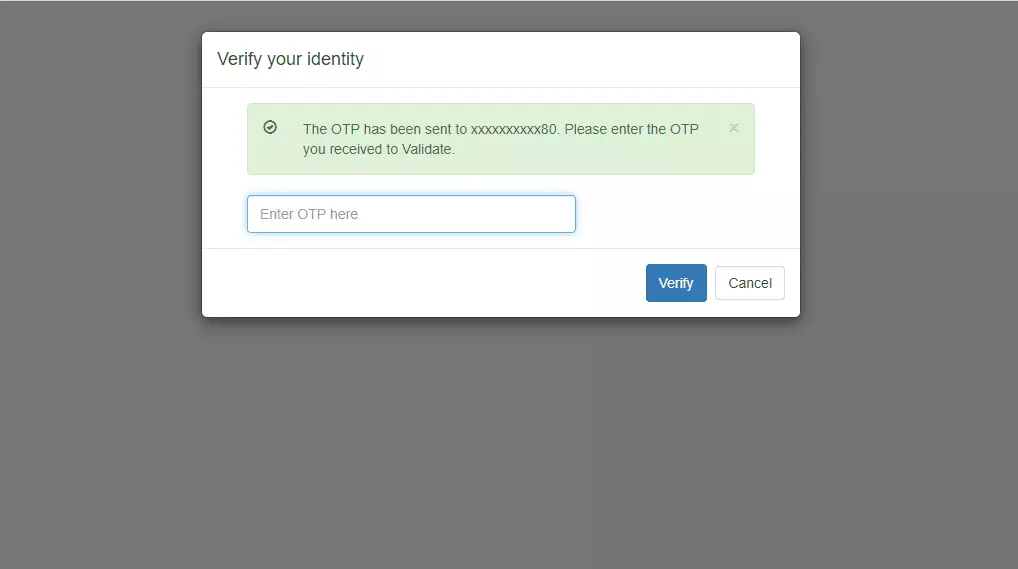
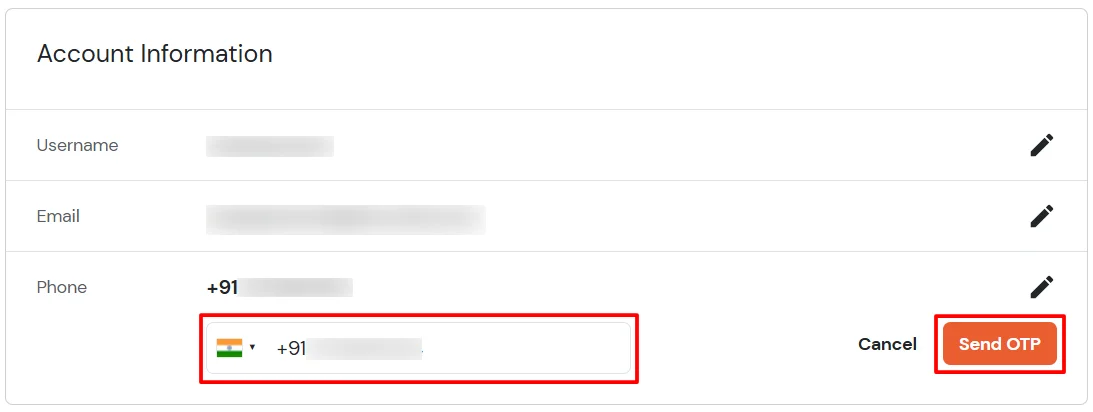
- Select your country code, enter your mobile number, and click Send OTP.
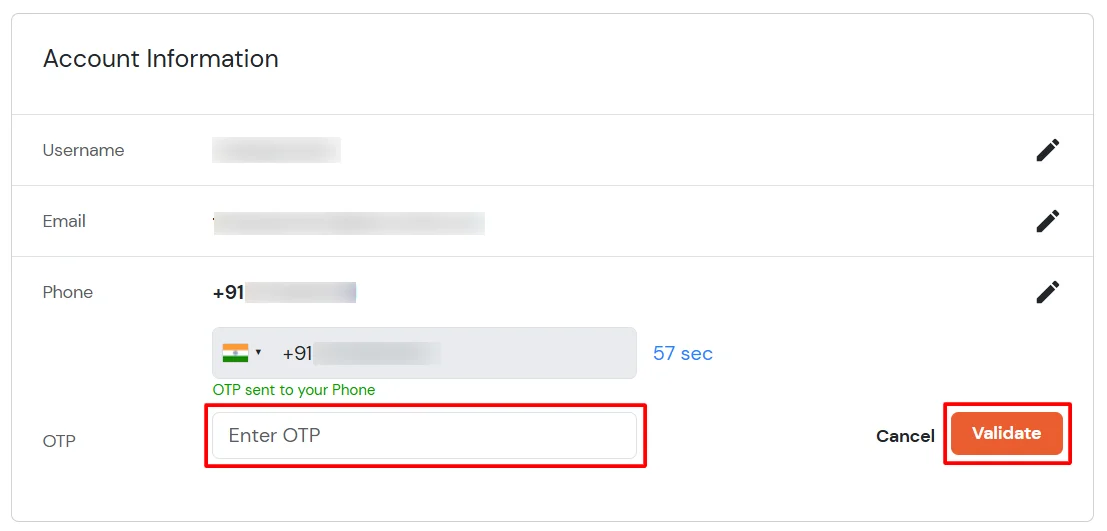
- Enter the OTP sent to your phone and click Validate.
- After adding your phone number, turn on the toggle to activate OTP over SMS.
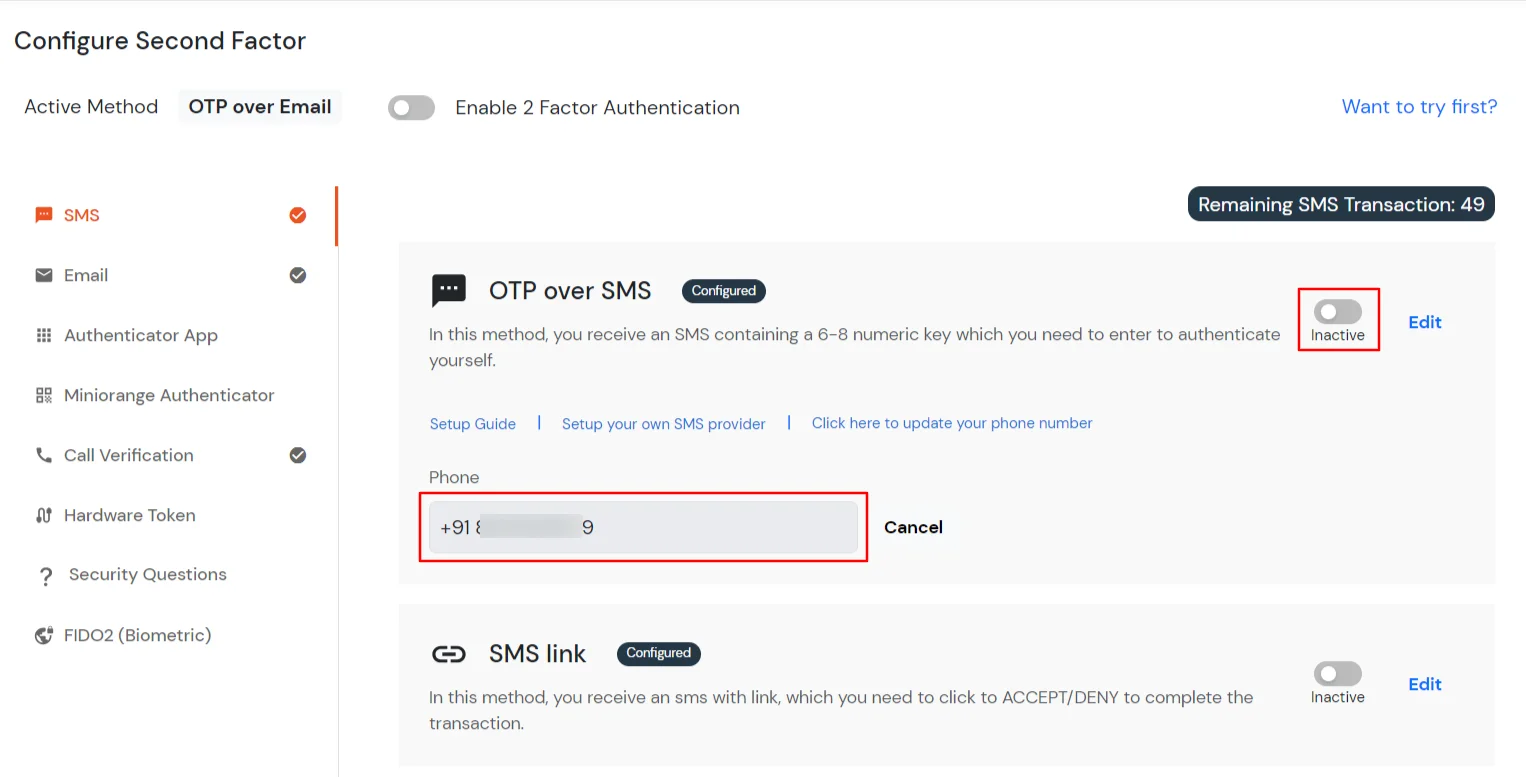
- Now Enable 2 Factor Authentication toggle if not done before as shown below.
4. Test 2FA for Zscaler
5. Adaptive Authentication with Zscaler
A. Restricting access to Zscaler with IP Configuration
You can use adaptive authentication with Single Sign-On (SSO) for Zscaler to improve the security and functionality of Single Sign-On. You can allow a IP Address in certain range for SSO or you can deny it based your requirements and you can also challenge the user to verify his authenticity. Adaptive authentication manages the user authentication bases on different factors such as Device ID, Location, Time of Access, IP Address and many more.
You can configure Adaptive Authentication with IP Blocking in following way :
- Login to Self Service Console >> Adaptive Authentication >> Add Policy.
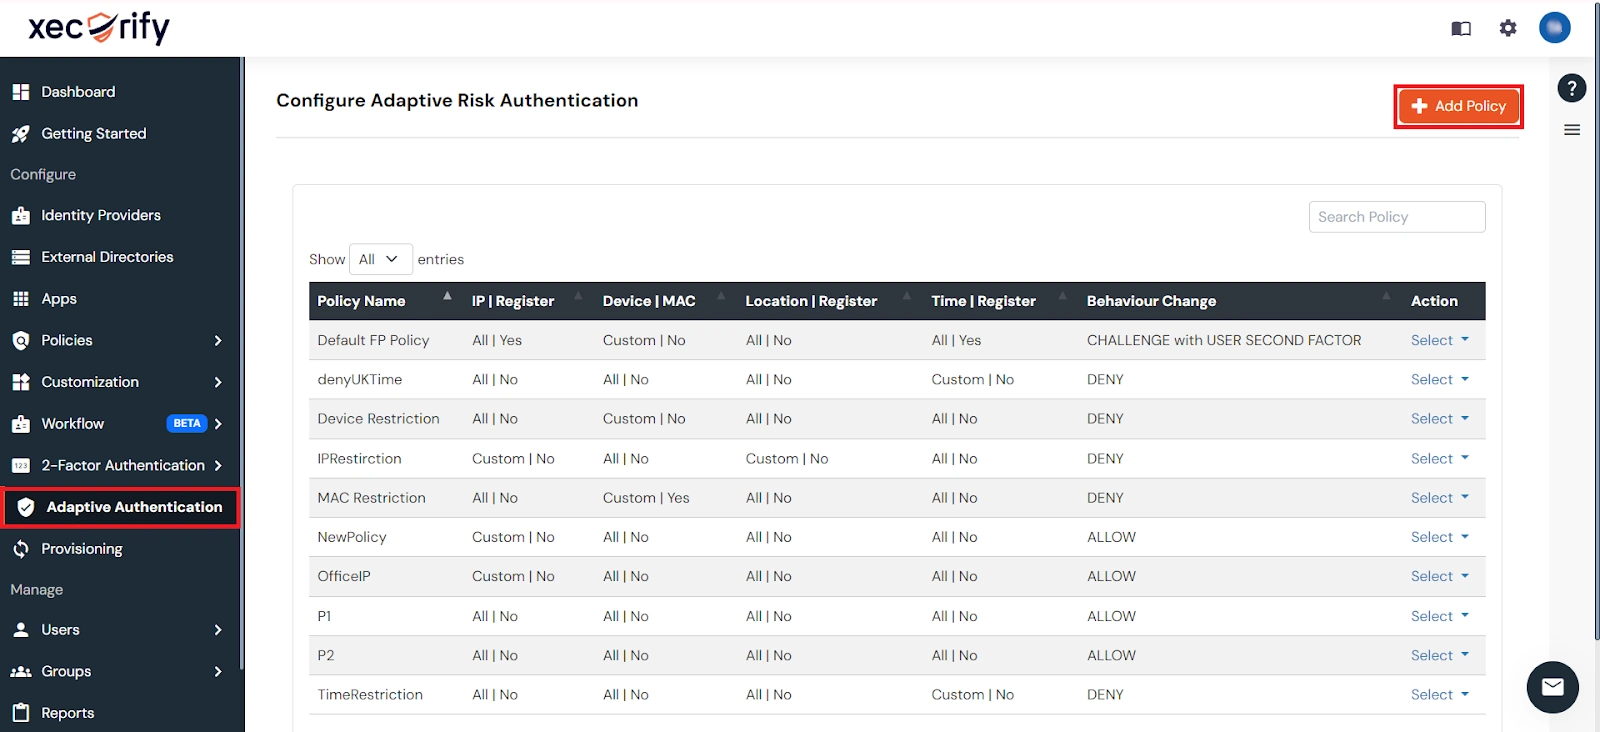
- Add a Policy Name for your Adative Authentication Policy.
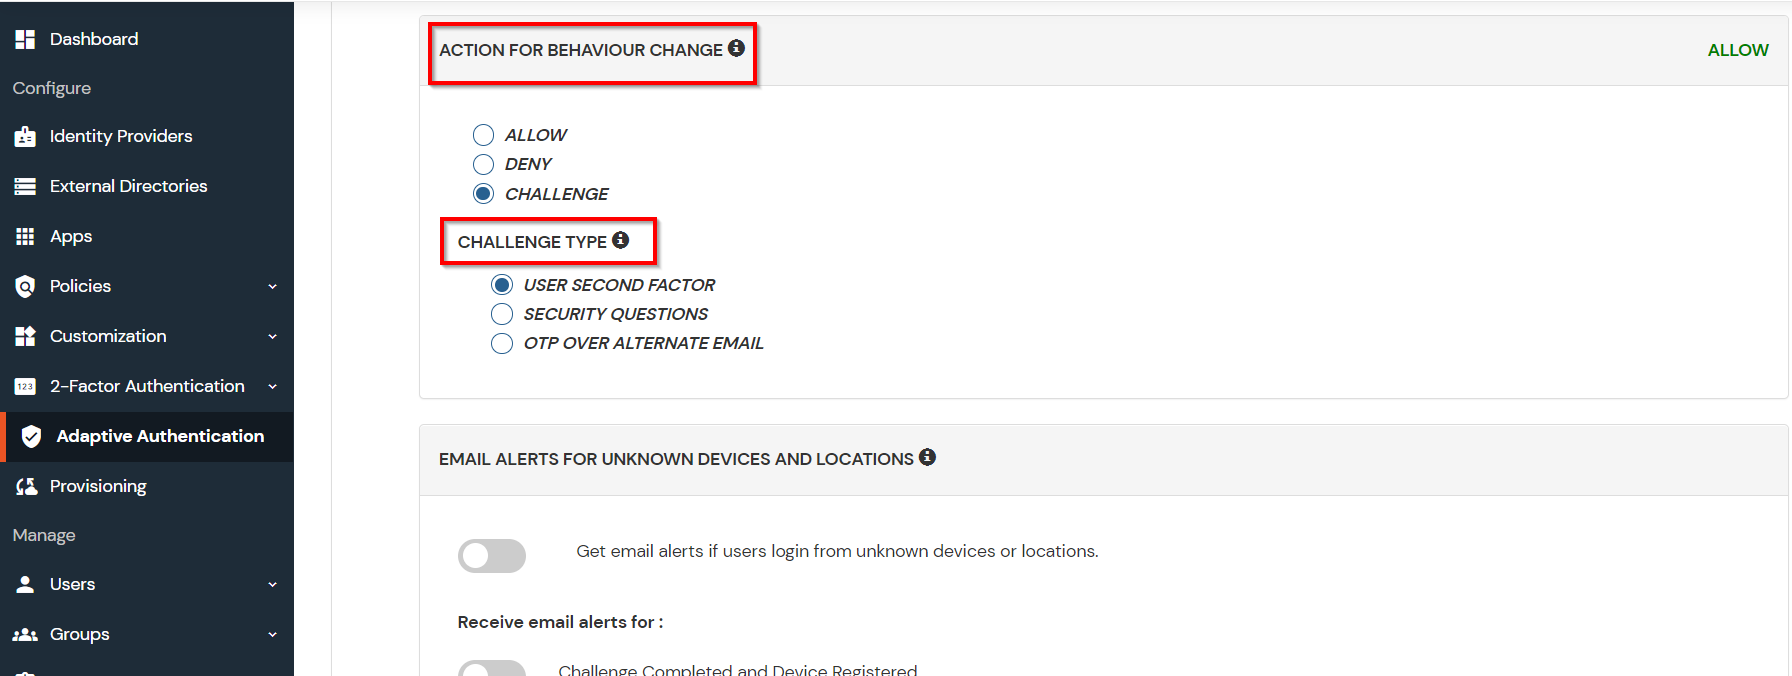
- Select Action for Behavior Change, click the Edit link, and then choose the appropriate Action and Challenge Type for the user from that section.
Action for behavior Change Options :
| Attribute |
Description |
| Allow |
Allow users to authenticate and use services if Adaptive authentication condition is true. |
| Deny |
Deny user authentications and access to services if Adaptive authentication condition is true. |
| Challenge |
Challenge users with one of the three methods mentioned below for verifying user authenticity. |
Challenge Type Options :
| Attribute |
Description |
| User second Factor |
The User needs to authenticate using the second factor he has opted or assigned for such as
- OTP over SMS
- PUSH Notification
- OTP over Email and, many more.
|
| KBA (Knowledge-based authentication) |
The System will ask the user for 2 of 3 questions he has configured in his Self-Service Console. Only after the right answer to both questions is the user allowed to proceed further. |
| OTP over Alternate Email |
User will receive an OTP on the alternate email they have configured through the Self Service Console. Once the user provides the correct OTP, they are allowed to proceed further. |
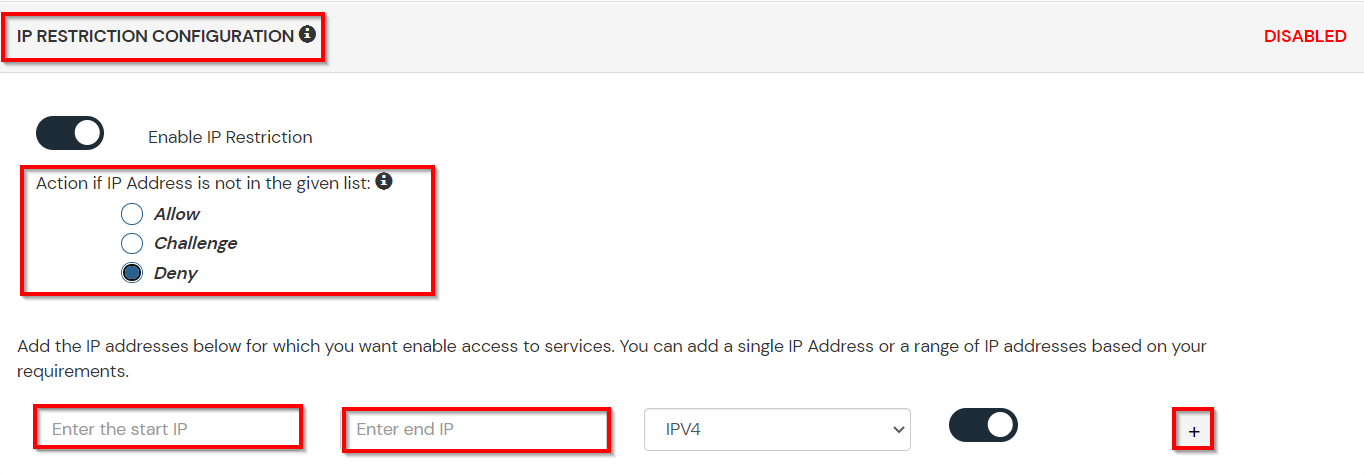
- Now click Edit option from the IP Configuration section to configure custom IP range.
- Select Add IP if the User's IP Address is not in the configured list.
- Specify the IP Address that you want to whitelist. For the IP Range other than the whitelisted one, you can select the above setting to reflect.
- Choose either allow or deny by selecting the corresponding option from the dropdown.
- If a user tries to login with the whitelisted IP address, they will always be allowed access.
- We support IP address range in three formats i.e., IPv4, IPv4 CIDR, and IPv6 CIDR. You can choose whichever is suitable for you from the dropdown menu.
- You can add multiple IPs or IP ranges by clicking the + Add IP button.
- Once the changes are made, scroll down to the end and click on Save.
B. Adaptive Authentication with Limiting number of devices
Using Adaptive Authentication you can also restrict the number of devices the end user can access the Services on. You can allow end users to access services on a fixed no. of devices. The end users will be able to access services provided by us on this fixed no. of devices.
You can configure Adaptive Authentication with Device Restriction in following way
- Login to Self Service Console >> Adaptive Authentication >> Add Policy.
- Add a Policy Name for your Adaptive Authentication Policy.
- Select your Action for behavior Change and Challenge Type for user from the Action for behavior Change Section.
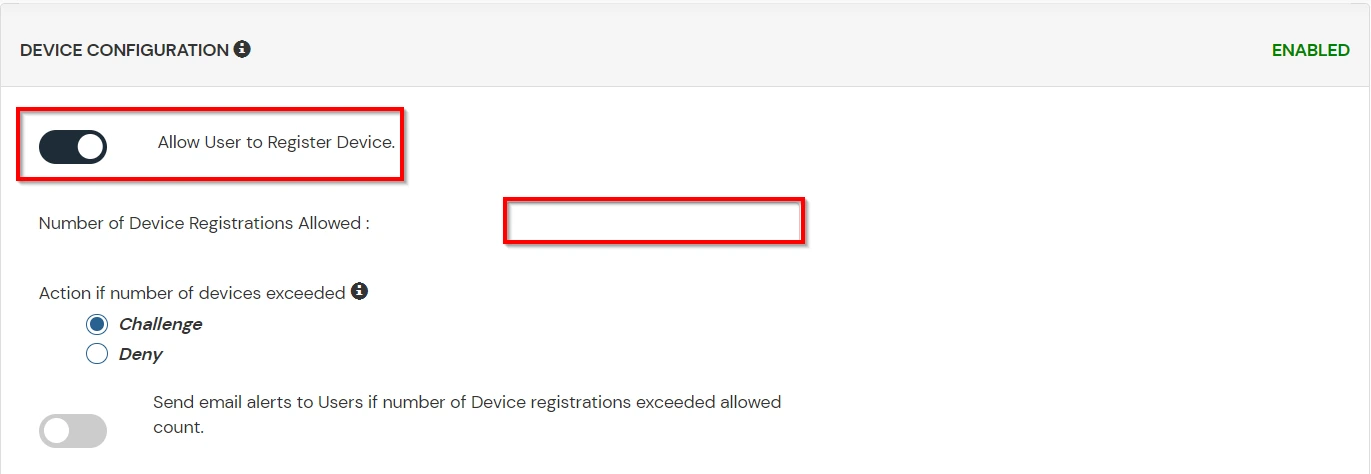
- On the Add Policy tab, go to the Device Configuration section and click the Edit button.
- Enter the Number of Device Registrations Allowed as per your requirement. (2-3 devices are recommended.)
- Choose Action if number of devices exceeded (This will override your setting for Action for behavior Change.)
- Challenge: The user needs to verify himself using any of the three methods mentioned in table in step 5.1
- Deny : Deny users access to the system
- Enable Mobile Device Restriction to block logins from mobile devices. This ensures all login attempts from mobile devices will be declined.
- Enable MAC Address Based Restriction if you want to restrict access based on device MAC address.
- Scroll down to the bottom of the page and click on Save.
C. Add Adaptive Authentication policy to Zscaler
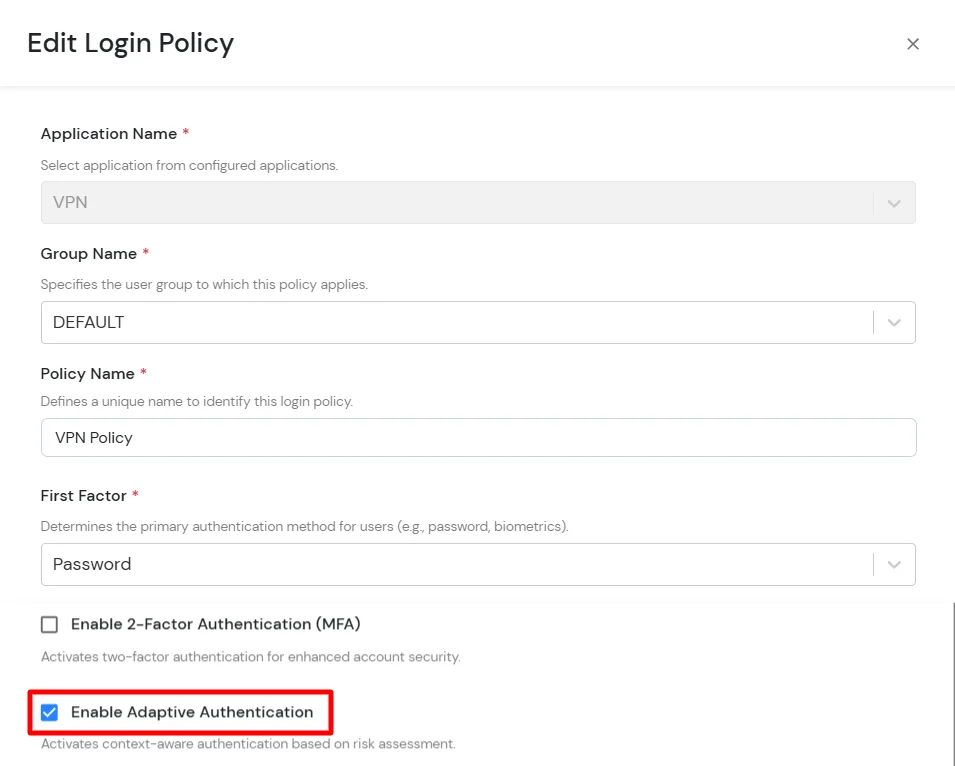
- Login to Self Service Console >> Policies >> Add Login Policy.
- Click on Edit icon option for predefined app policy.
- Set your policy in the Policy Name and select Password as First Factor.
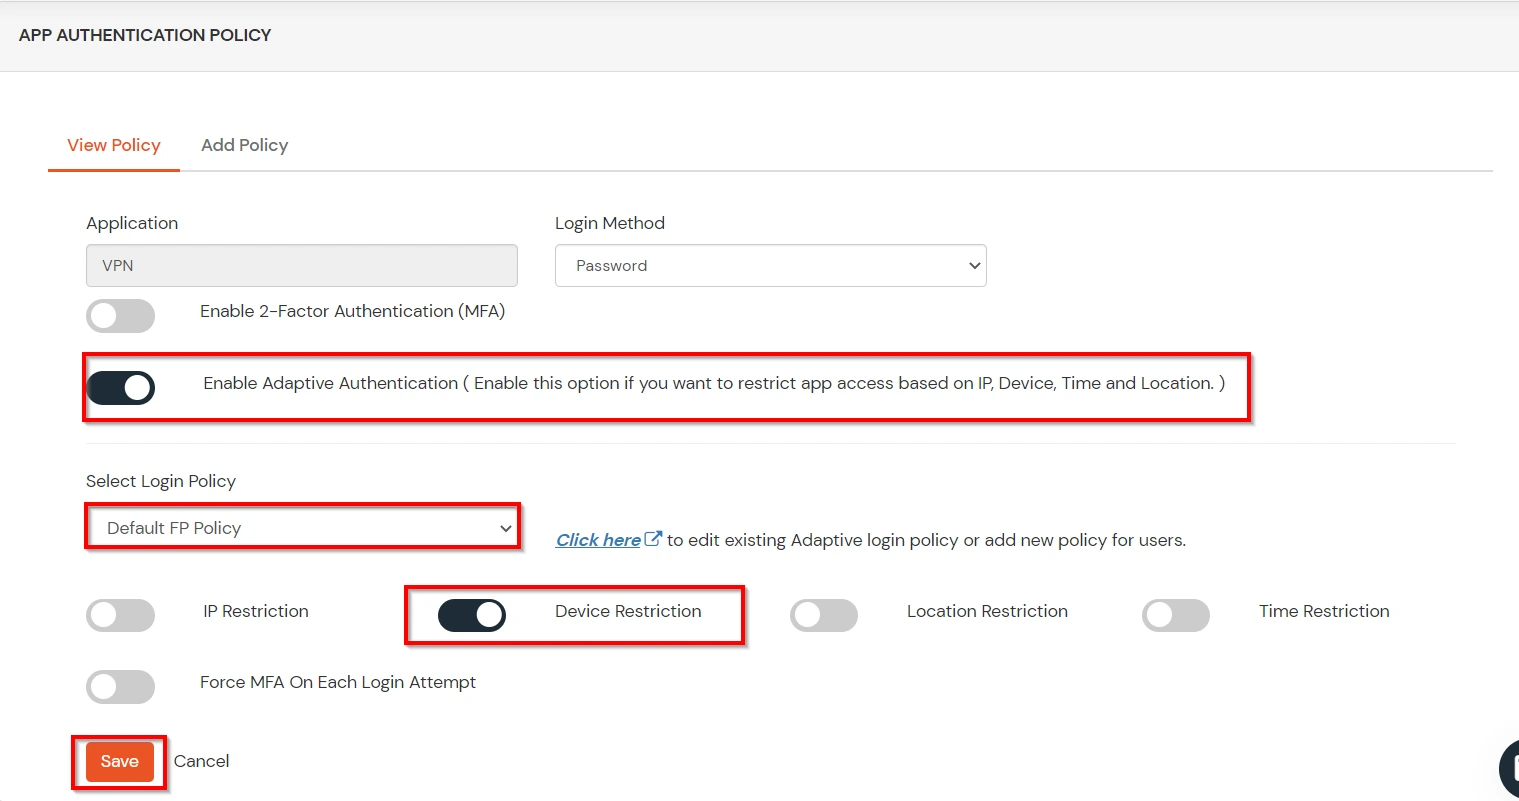
- Enable Adaptive Authentication on Edit Login Policy page and select the required restriction method as an option.
- From Select Login Policy dropdown select the policy we created in last step and click on Submit.
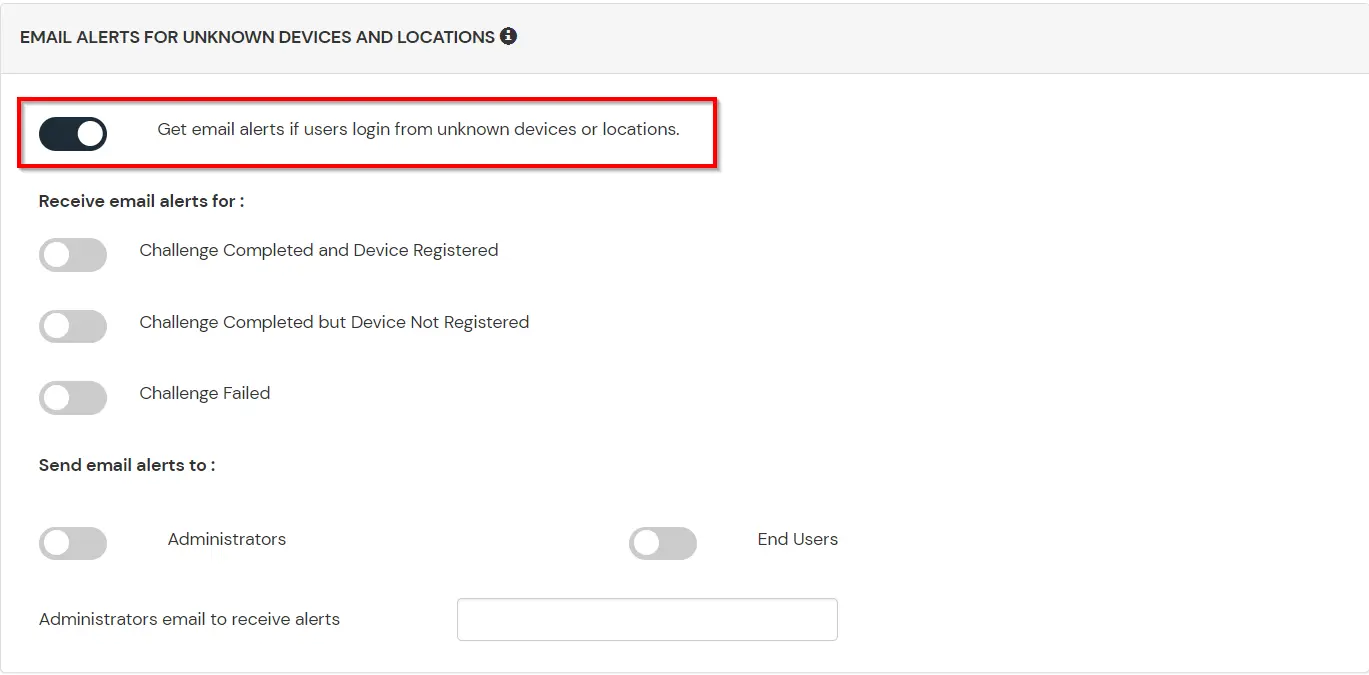
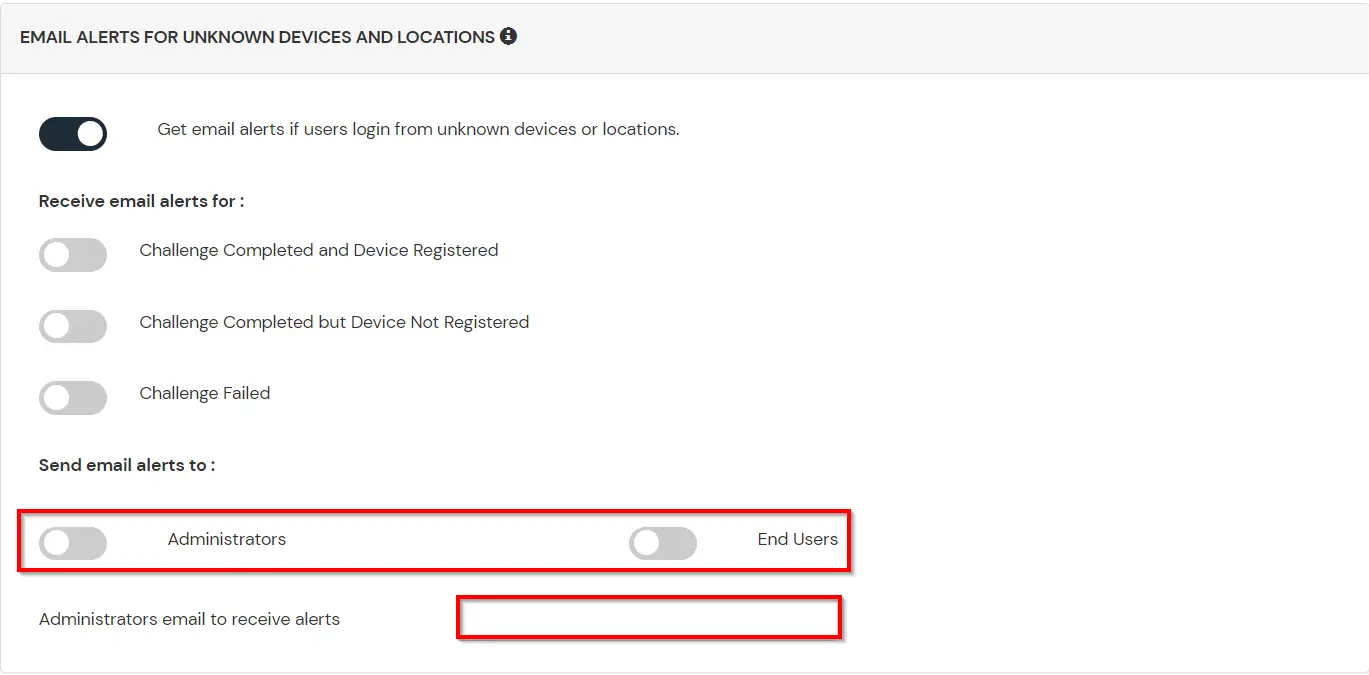
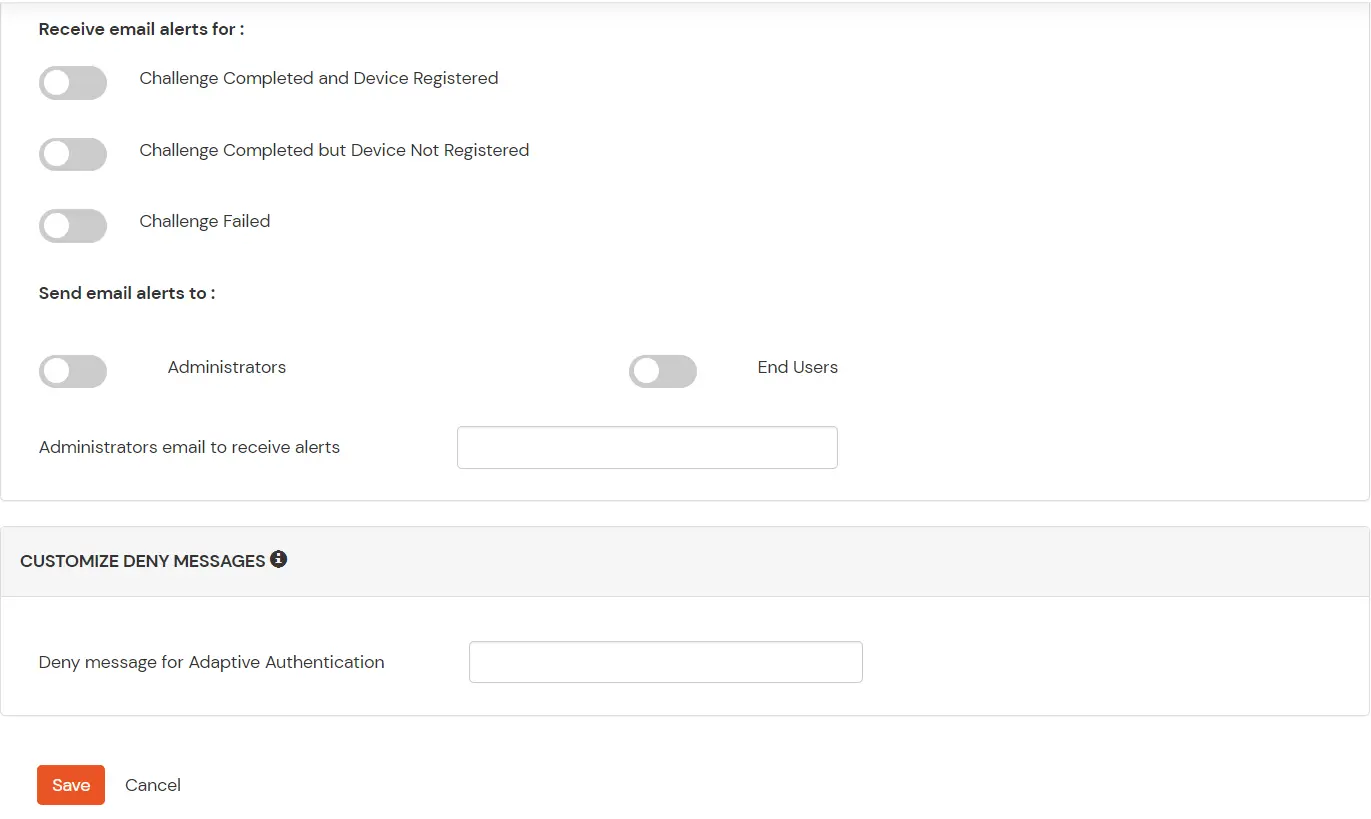
D. Notification and Alert Message.
How to add a trusted Device
- When End-user log in to the self service console after the policy for device restriction is on, he is provided the option to add the current device as a trusted device.
External References