Z-Scaler Single Sign-On SSO
miniOrange provides a ready to use solution for Z-Scaler. This solution ensures that you are ready to roll out secure access to Z-Scaler to your employees within minutes. miniOrange provides secure access to Z-Scaler for enterprises and full control over access to the application. Single Sign-On (SSO) into Z-Scaler with one set of login credentials.
miniOrange and Z-Scaler Single Sign-On (SSO) integration supports the following features:
- SP Initiated Single Sign-On (SSO)
- IdP Initiated Single Sign-On (SSO)
Connect with External Source of Users
miniOrange provides user authentication from various external sources, which can be Directories (like ADFS, Microsoft Active Directory, OpenLDAP, AWS etc), Identity Providers (like Microsoft Entra ID, Okta, AWS), and many more. You can configure your existing directory/user store or add users in miniOrange.
Follow the Step-by-Step Guide given below for Z-Scaler Single Sign-On (SSO)
1. Configure Z-Scaler in miniOrange
- Login into miniOrange Admin Console.
- Go to Apps and click on Add Application button.

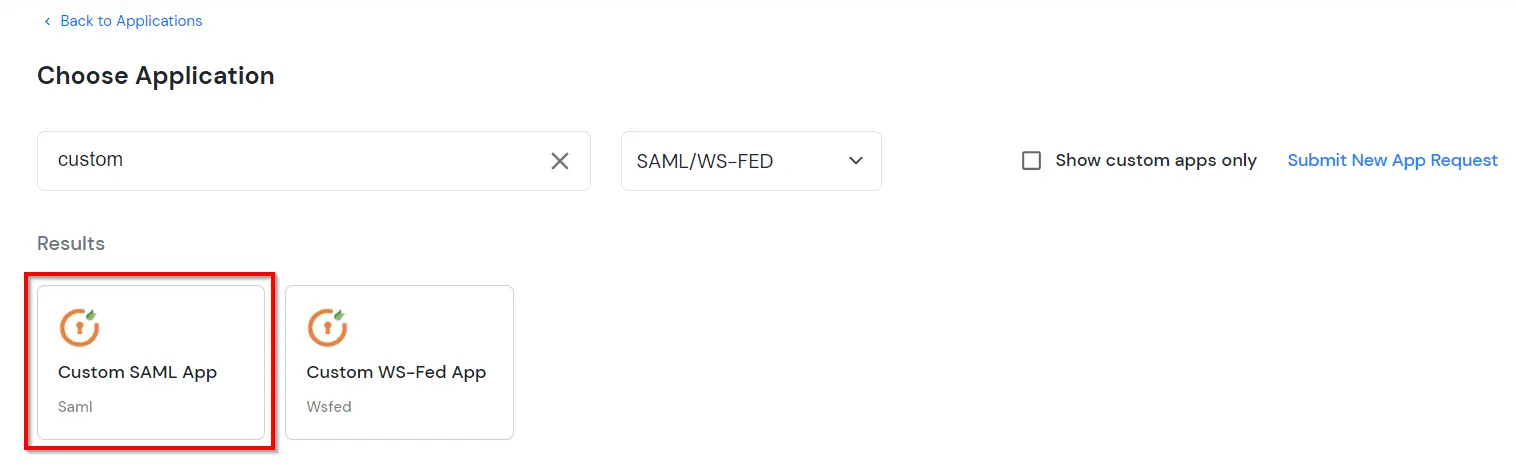
- In Choose Application Type, select SAML/WS-FED from the All Apps dropdown.
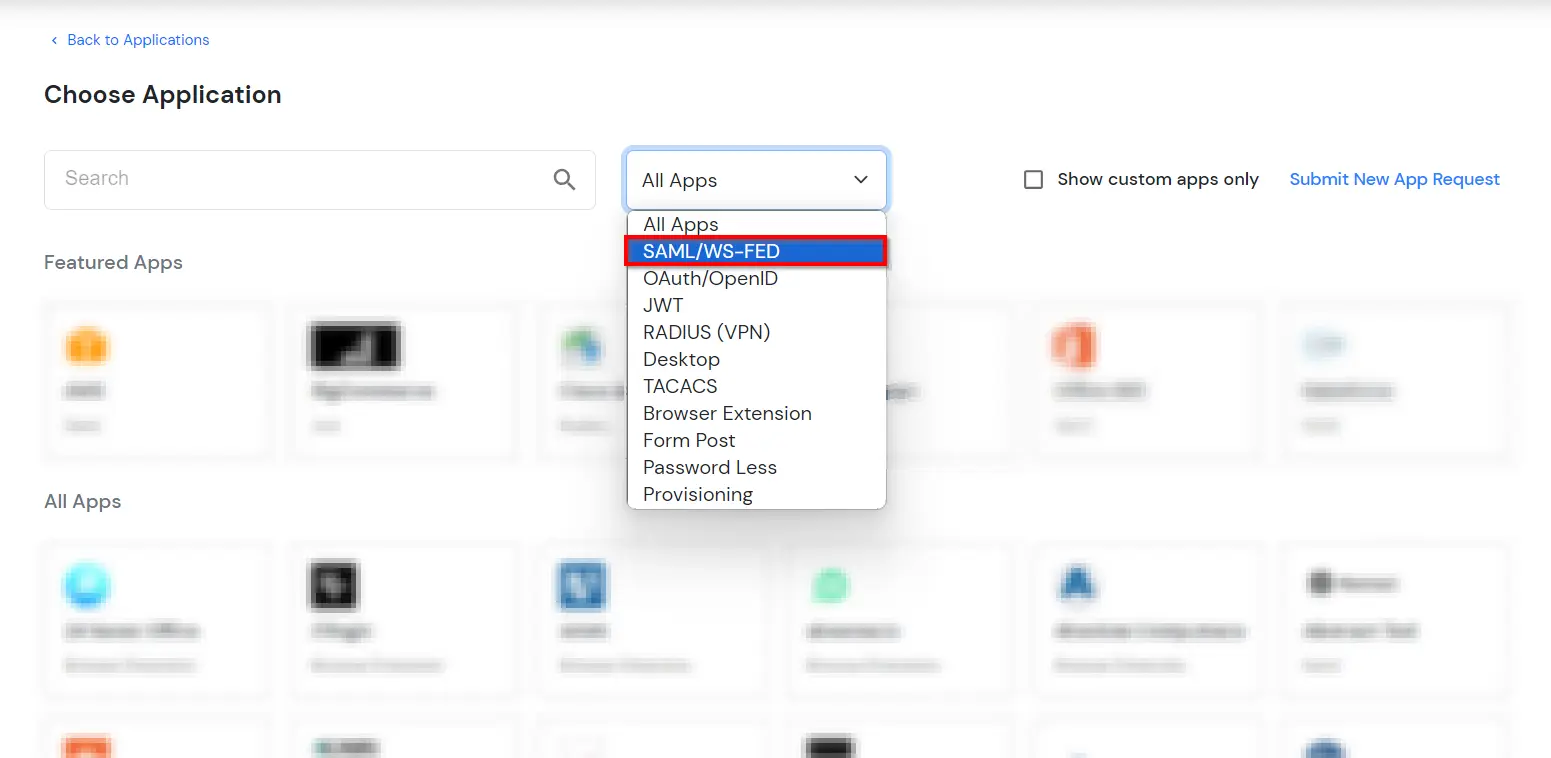
- Search for Z-Scaler in the list, if you don't find Z-Scaler in the list then, search for custom and you can set up your application in Custom SAML App.
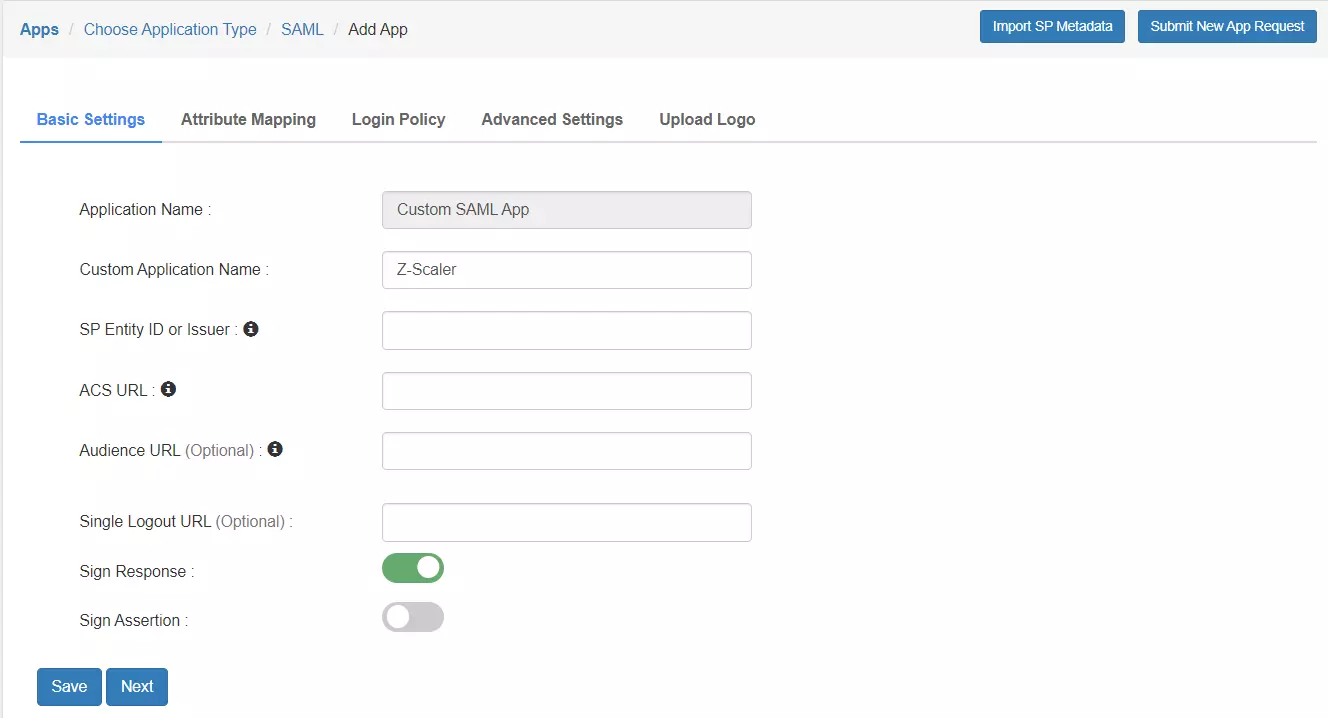
- Enter the following values in the respective fields.
|
SP Entity ID or Issuer:
|
<Zscaler Cloud Name> |
|
ACS URL:
|
https://login.<Zscaler Cloud Name>:443/sfc_sso |
|
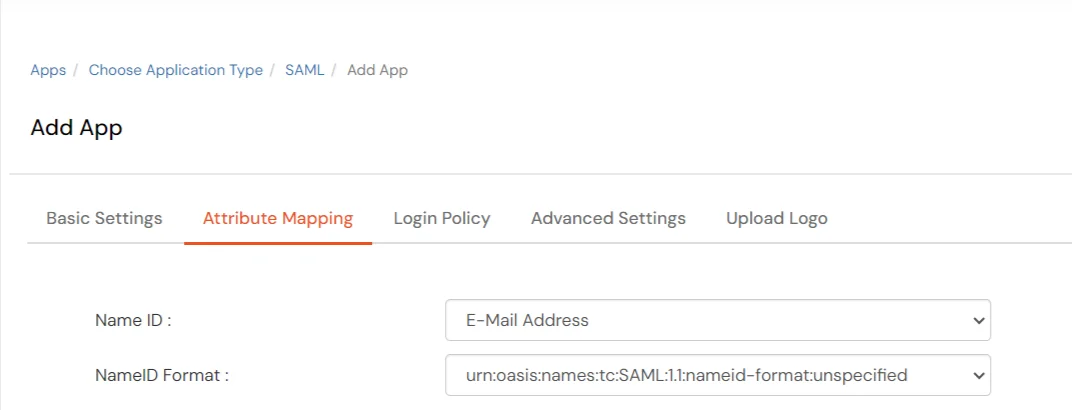
Name ID:
|
E-mail Address |
|
NameID format:
|
urn:oasis:names:tc:SAML:2.0:nameid‑format:emailaddress |
- Click Next, now in the Attribute Mapping configure the following attributes as shown in the image below.
- To upload respective app logo for a Custom SAML App, click on Upload Logo tab.
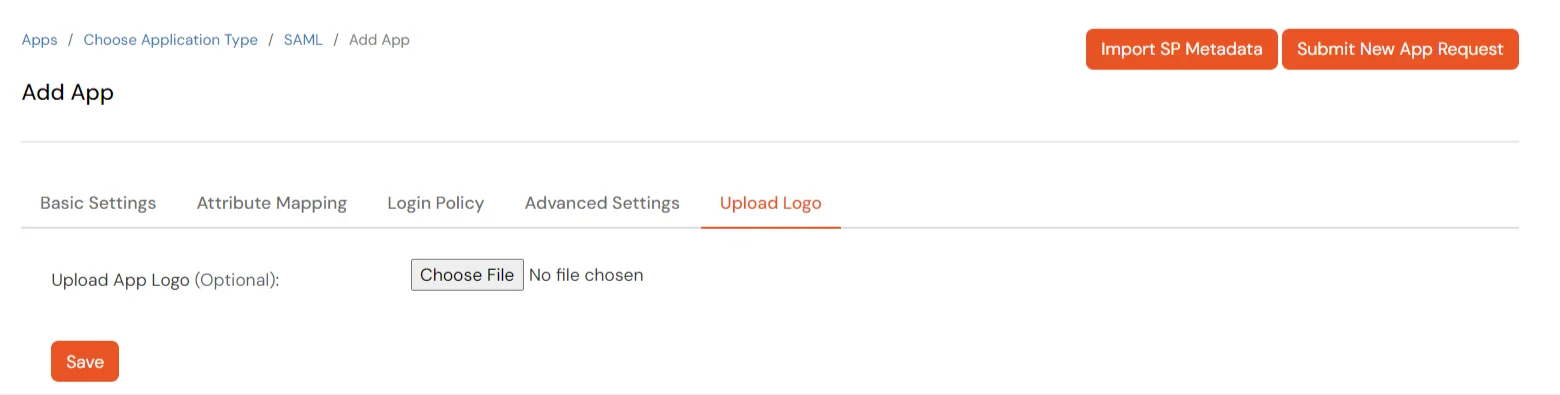
- Click on Save.
- Your application is saved successfully. Now click on the Select button against your newly created application. Go to Metadata.
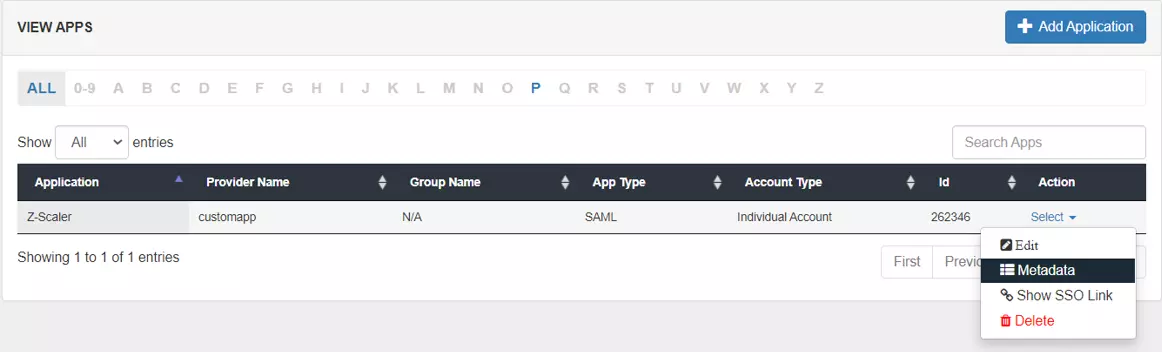
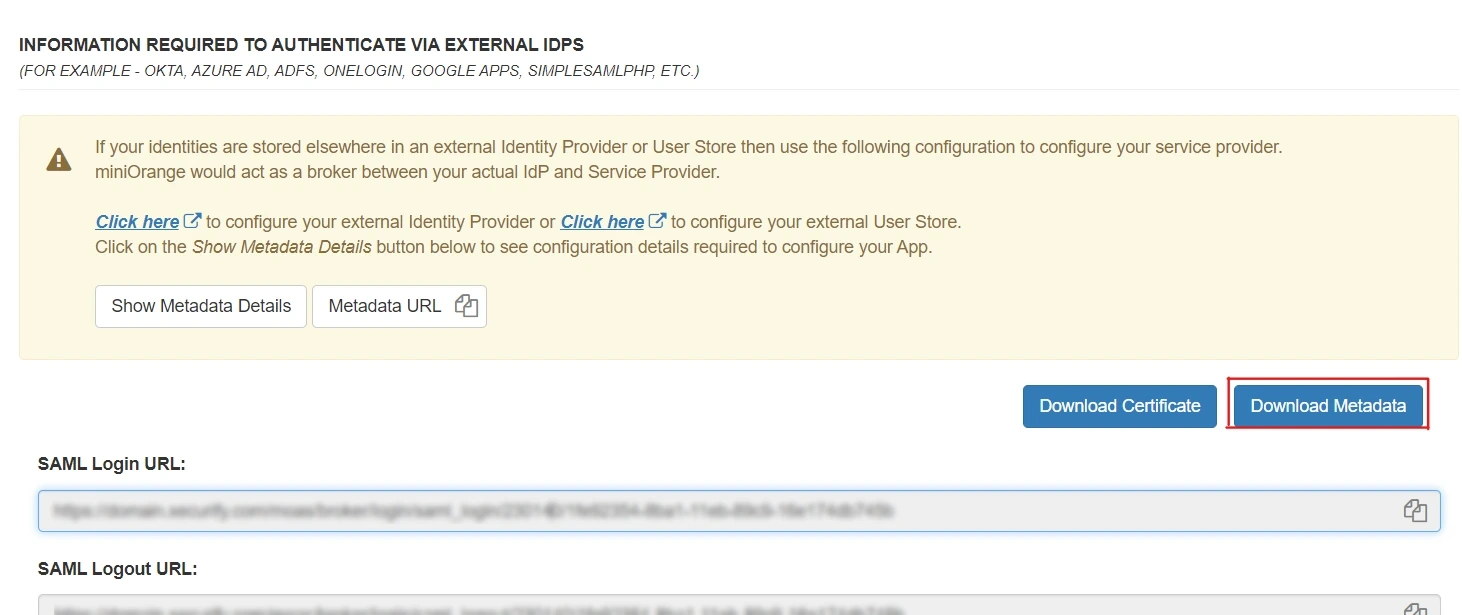
- On the Metadata page -
1. If you want to use miniOrange as User-Store i.e., your user identities will be stored in miniOrange then download the metadata file under the heading 'INFORMATION REQUIRED TO SET MINIORANGE AS IDP'.
2. If you want to authenticate your users via any external Identity Provider like Active Directory, Okta, OneLogin, Google, Apple ID, etc then download the Metadata file under the heading 'INFORMATION REQUIRED TO AUTHENTICATE VIA EXTERNAL IDPS'.
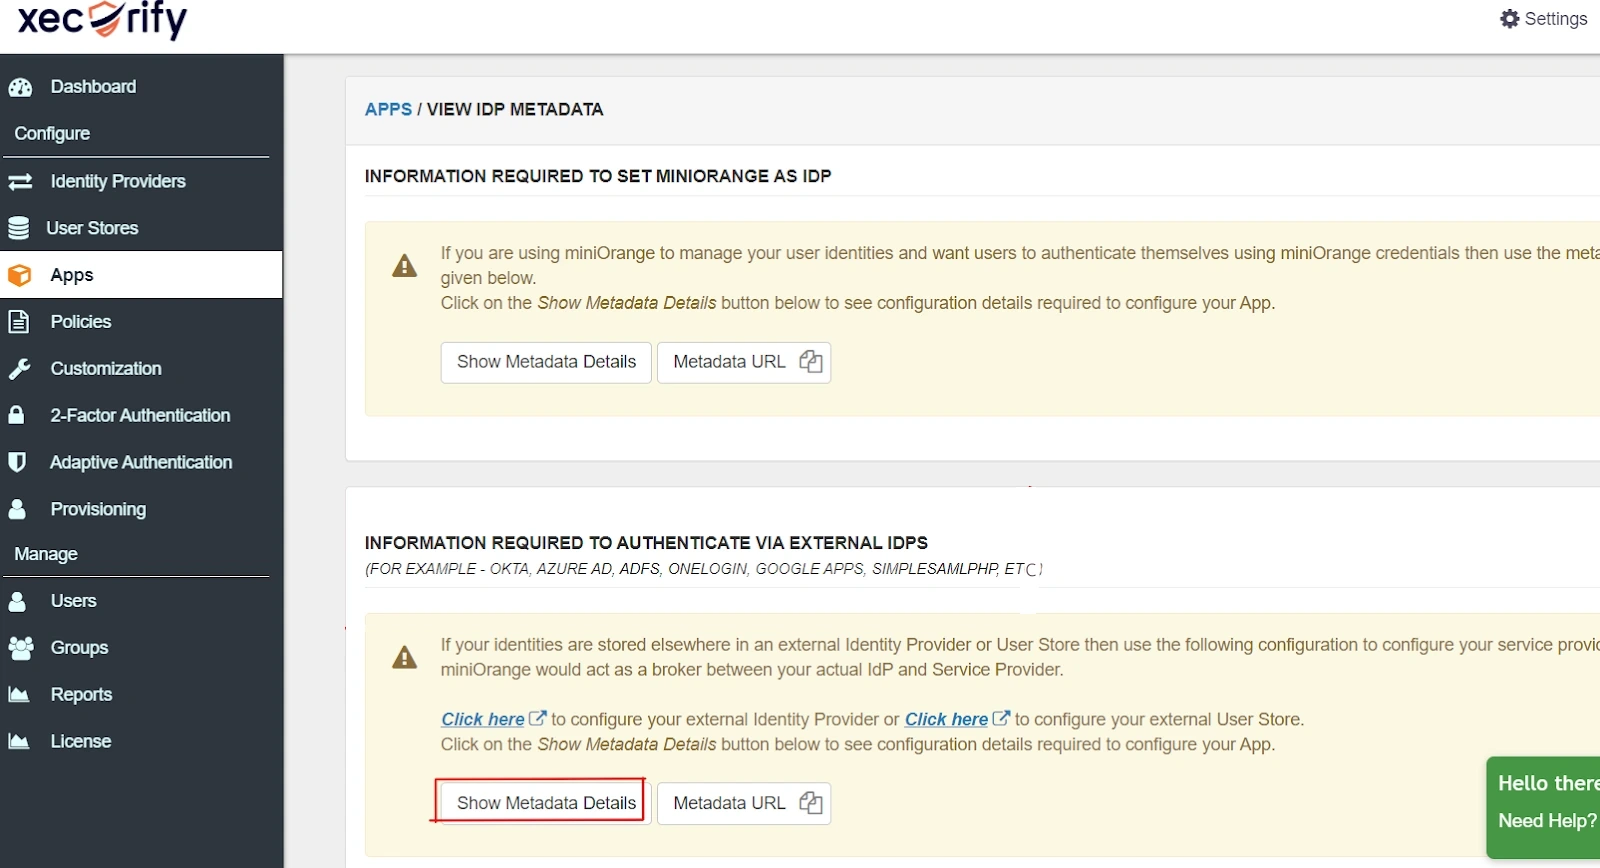
- Then click on Download Metadata.
2. Configure SSO in Z-Scaler
- Go to Administration → Authentication Settings.
- Click the Identity Providers tab.
- Click Add IdP.
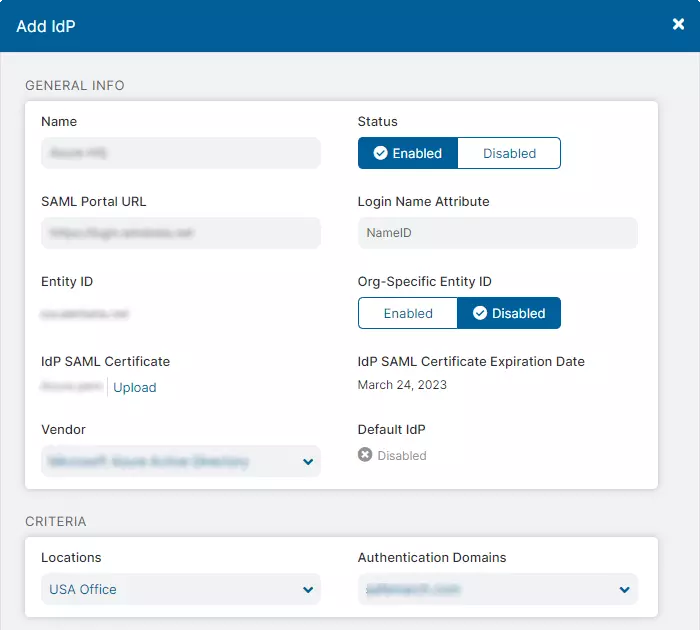
- In the Add IdP window:
- Name: Enter a name for the IdP.
- Status: Enable or Disable the IdP.
- SAML Portal URL: Enter the SSO URL of the SAML portal to which users are sent for authentication. Ensure that it is publicly resolvable if you want users to authenticate from the Internet. Additionally, ensure that it's protected using HTTPS. This information is in the XML metadata of the IdP or obtained during the configuration.
- Login Name Attribute: Enter the SAML attribute that maps to the login name that users enter when they authenticate to the zscaler service. Typically, it's NameID, which is entered as one word, with no spaces. This field is case-sensitive.
- Entity ID: The entity ID is the globally unique name for this SAML entity.
- Org-Specific Entity ID: Enable if you have more than one organization instance on the same zscaler cloud. For example, if you have two organization instances on the same zscaler cloud and must authenticate both instances against the same Azure AD account, you can't use the same entity ID for multiple apps in Azure AD. For this situation, you must enable this setting for both instances to generate a unique organization-specific entity ID.
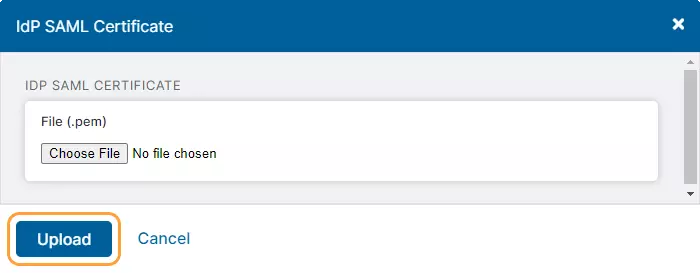
- IdP SAML Certificate: Upload the SAML certificate that is used to verify the digital signature of the IdP. This is the certificate you downloaded from your IdP. The certificate must be in base-64 encoded PEM format. The file extension must be .pem and have no other periods (.) in the file name.
- IdP SAML Certificate Expiration Date: Displays the expiration date for the SAML certificate of the IdP. You will see this field if the certificate is about to expire or has expired. A Caution icon appears if the certificate expires within 30 days.
- Vendor: Choose the vendor of the IdP.
- Default IdP: Displays if this IdP is Enabled or Disabled as the default IdP. You can only have one default IdP. The first IdP added will be the default IdP. Any additional IdPs will be Disabled as the default, and you won't be able to modify this field.
- Locations: Select the locations to map to this IdP. You can also search for a location. Any unselected locations will be mapped to the default IdP. This field is set to Any for the default IdP, and you can't modify it.
- Authentication Domains: Select the domains to map to this IdP. This allows the zscaler service to display the correct IdP to authenticate an incoming user. Any unselected domains will be mapped to the default IdP. This field is set to Any for the default IdP, and you can't modify it. Apart from the default IdP, any additional IdPs must be mapped to at least one domain.
- Sign SAML Request: Enable if the IdP expects the SAML request to be signed. The following fields will appear:
- Signature Algorithm: Choose whether to sign the SAML request with a SHA-1 (160-bit) hashing algorithm or with a SHA-2 (256-bit) hashing algorithm. If you are reconfiguring SAML because the certificate expired, zscaler recommends that you select the certificate with the later expiration date.
- Request Signing SAML Certificate: Choose which certificate you want to use for signing SAML requests. Zscaler recommends choosing the one with the longest validation period.
- SP SAML Certificate Expiration Date: Displays the expiration date for the SAML certificate of Zscaler, your SP. You will see this field if the certificate is about to expire or has expired. A Caution icon appears if the certificate expires within 30 days.
- SP SAML Certificate: Download the Zscaler certificate that you will upload to your IdP when you configure it.
- SP Metadata: Download the metadata of the Zscaler service. The metadata advertises the Zscaler SAML capabilities and is used for auto-configuration.
- Click Save to exit the window.
- Go to Administration > Authentication Settings.
- Under Authentication Frequency, choose how often users are required to authenticate to the Zscaler service. If you select Custom, the following field will appear:
- Custom Authentication Frequency (days): Specify 1 to 180 days.
- Under Authentication Type, choose SAML.

- Click Save .
- Hover over the Activation menu near the bottom left and click on Activate.
3. Test SSO Configuration
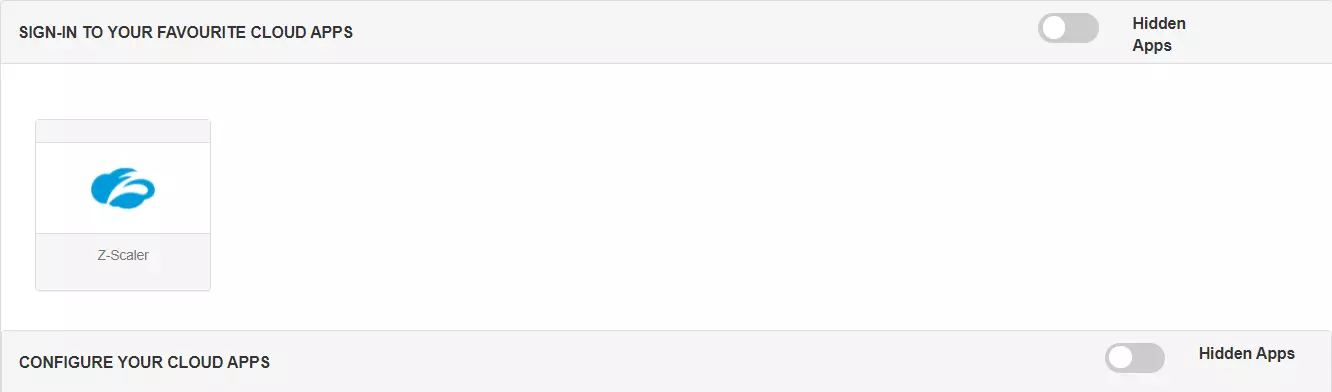
Test SSO login to your Z-Scaler account with miniOrange IdP:
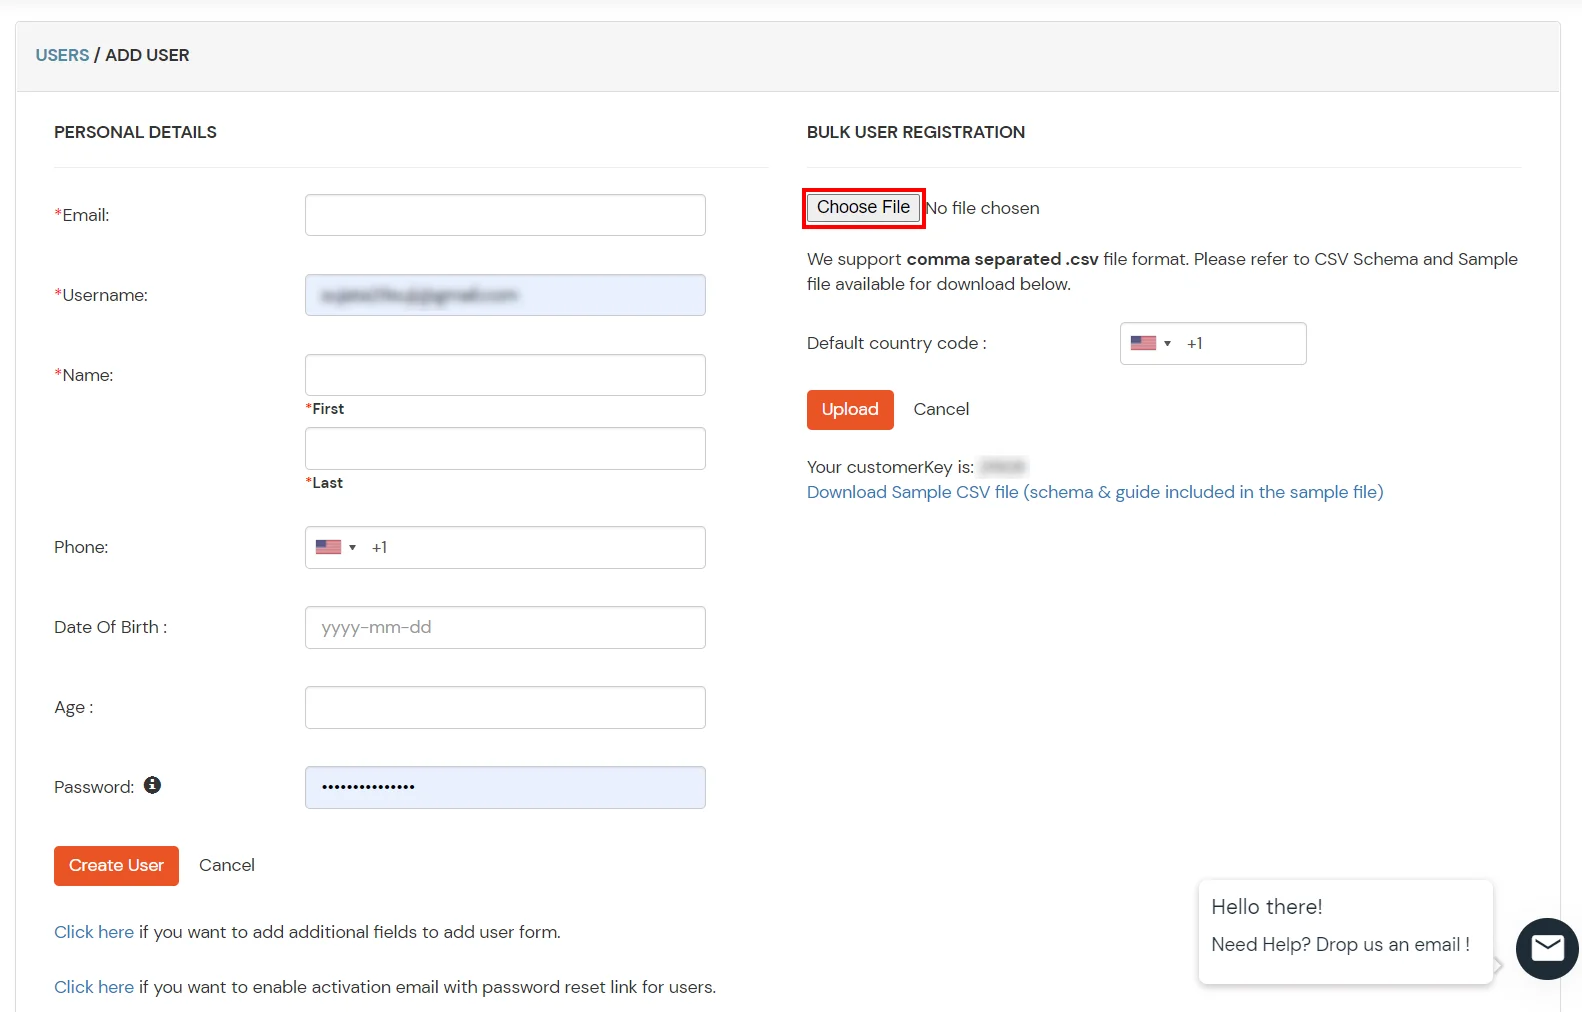
4. Configure Your User Directory (Optional)
miniOrange provides user authentication from various external sources, which can be Directories (like ADFS, Microsoft Active Directory, Microsoft Entra ID, OpenLDAP, Google, AWS Cognito etc), Identity Providers (like Okta, Shibboleth, Ping, OneLogin, KeyCloak), Databases (like MySQL, Maria DB, PostgreSQL) and many more. You can configure your existing directory/user store or add users in miniOrange.
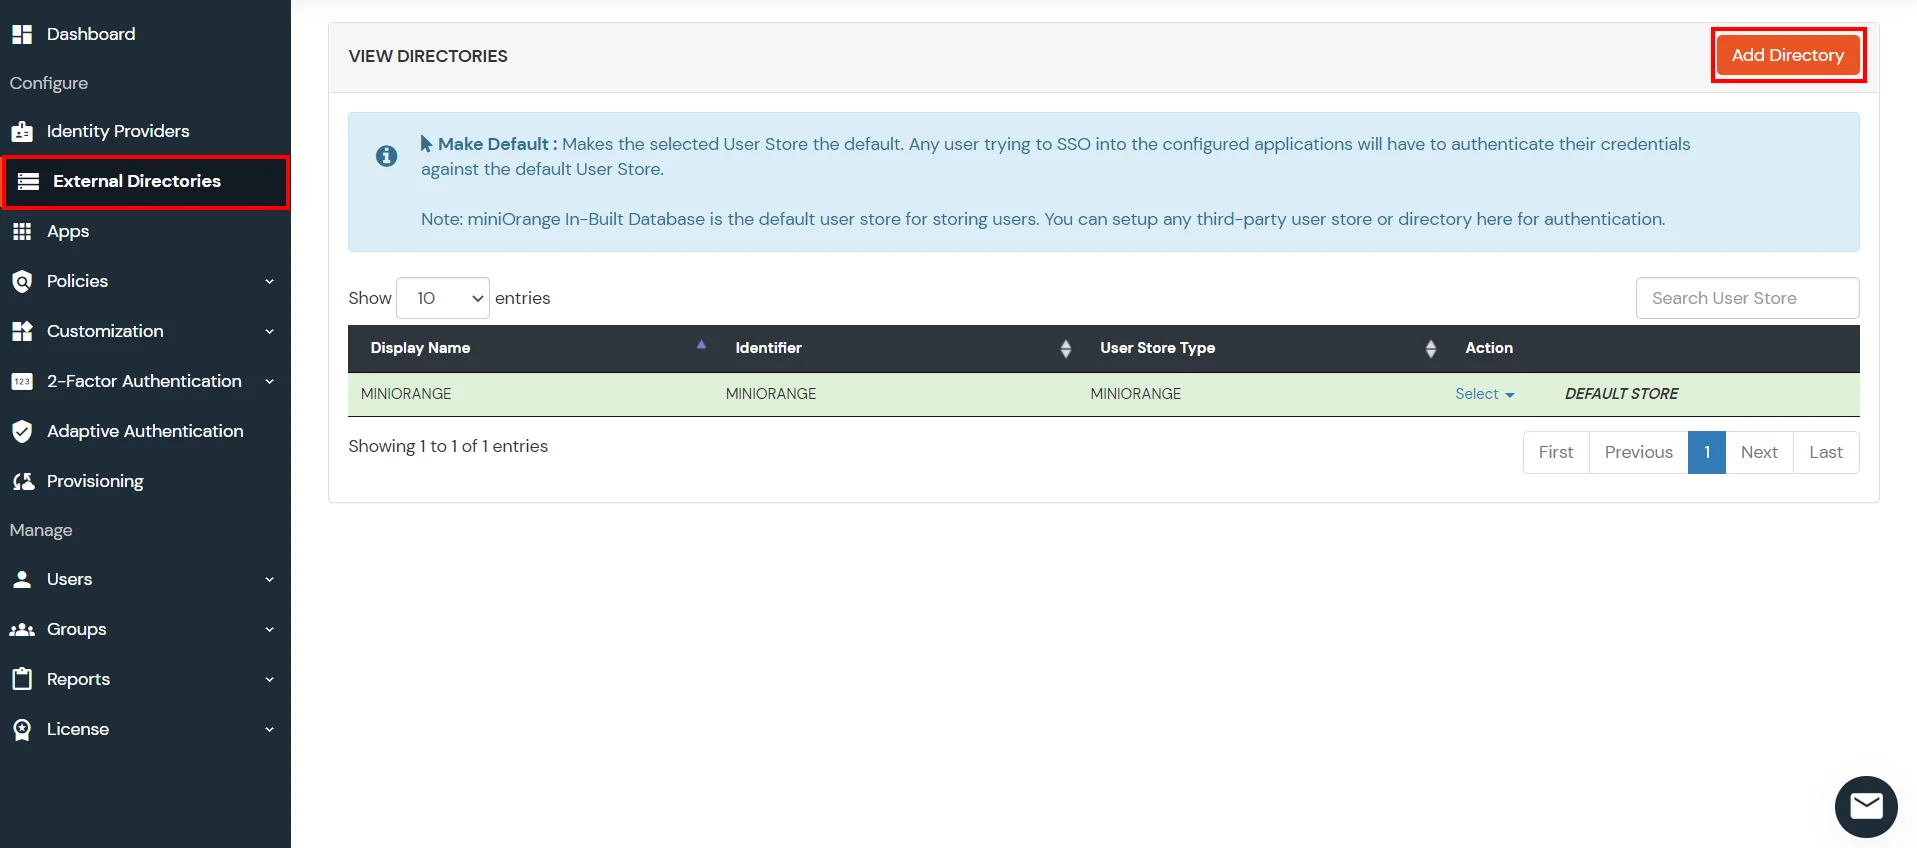
- Click on Identity Providers >> Add Identity Provider in the left menu of the dashboard
- In Choose Identity Provider, select AD/LDAP Directories from the dropdown.

- Then search for AD/LDAP and click it.
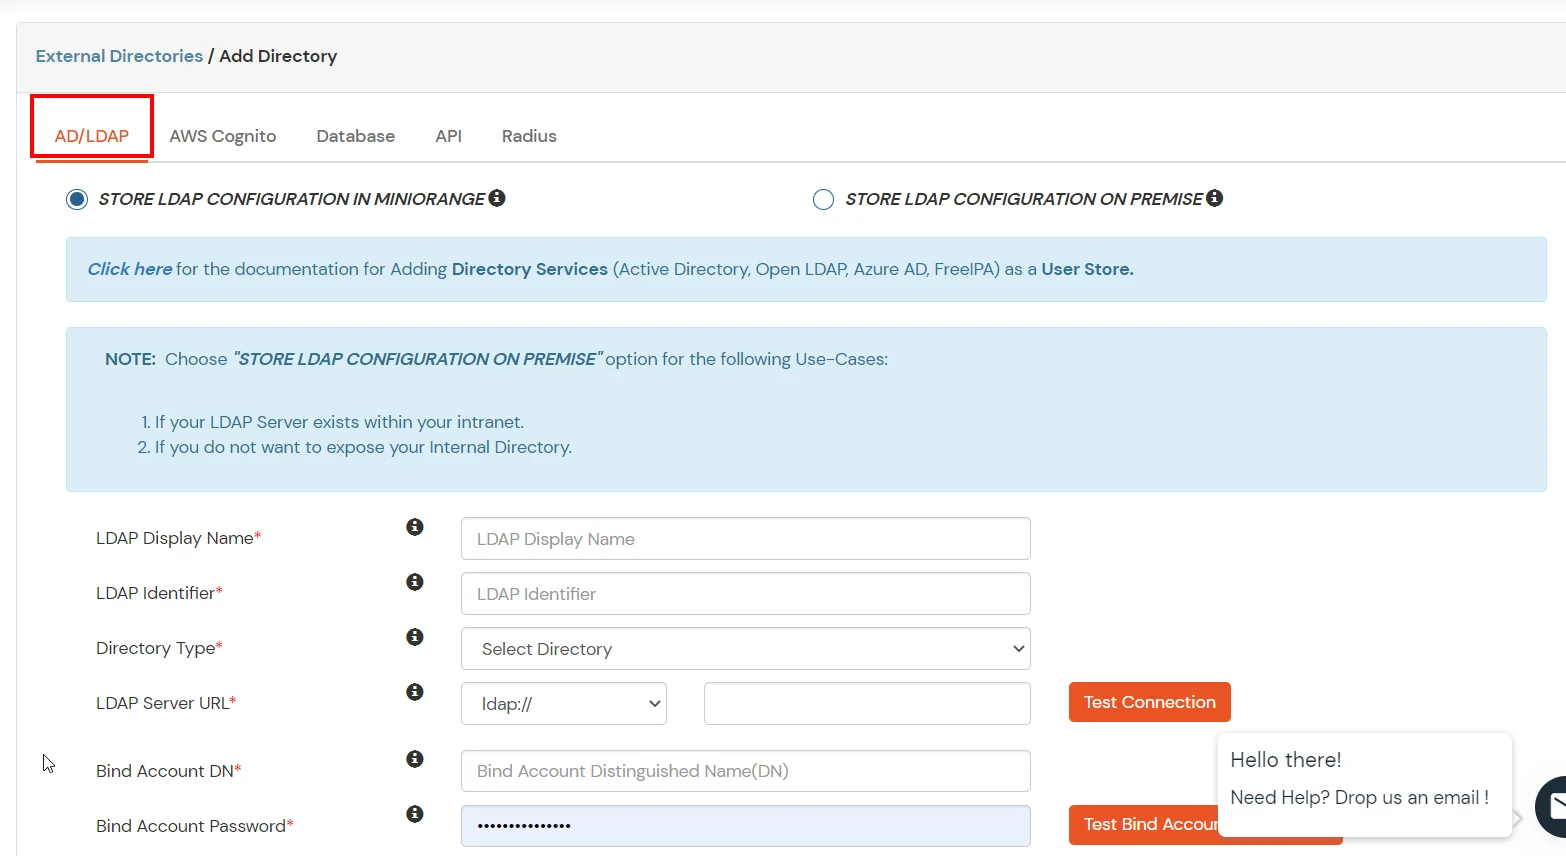
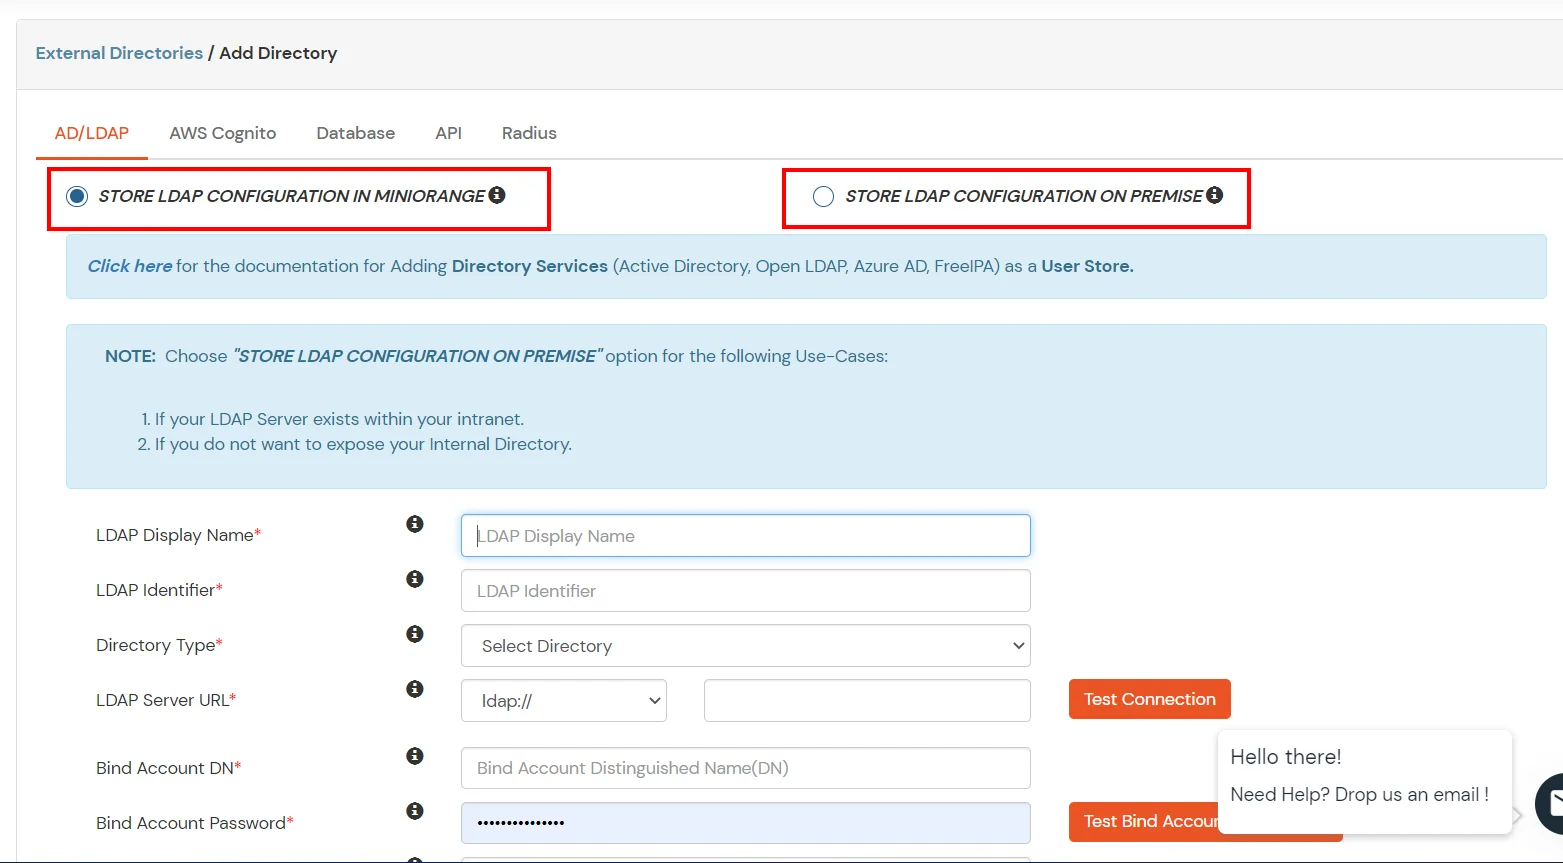
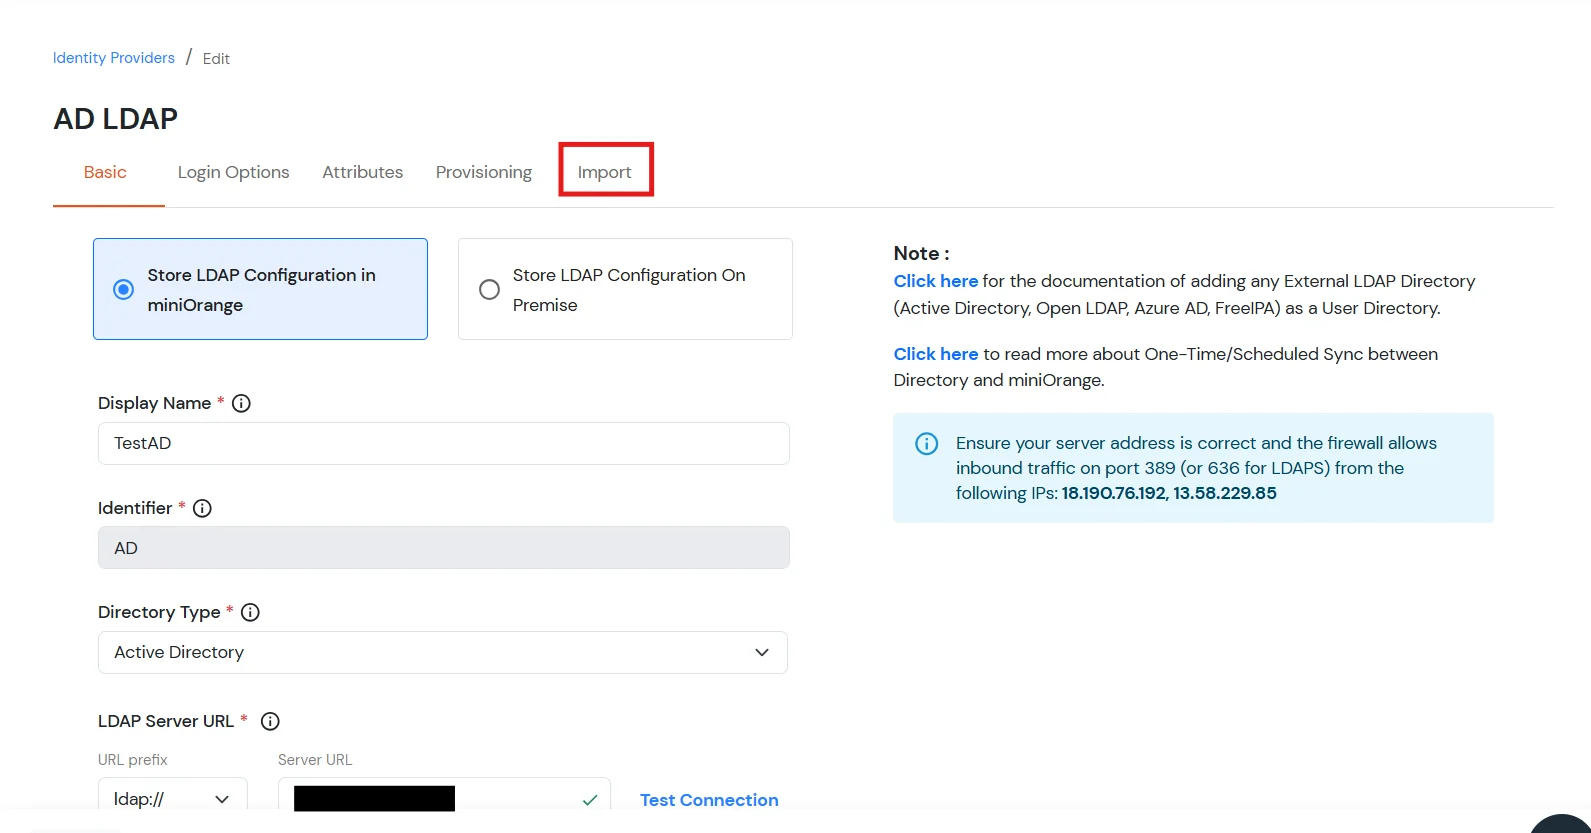
- STORE LDAP CONFIGURATION IN MINIORANGE: Choose this option if you want to keep your configuration in miniOrange. If the active directory is behind a firewall, you will need to open the firewall to allow incoming requests to your AD.
- STORE LDAP CONFIGURATION ON PREMISE: Choose this option if you want to keep your configuration in your premise and only allow access to AD inside premises. You will have to download and install miniOrange gateway on your premise.
- Enter AD/LDAP Display Name and Identifier name.
- Select Directory Type as Active Directory.
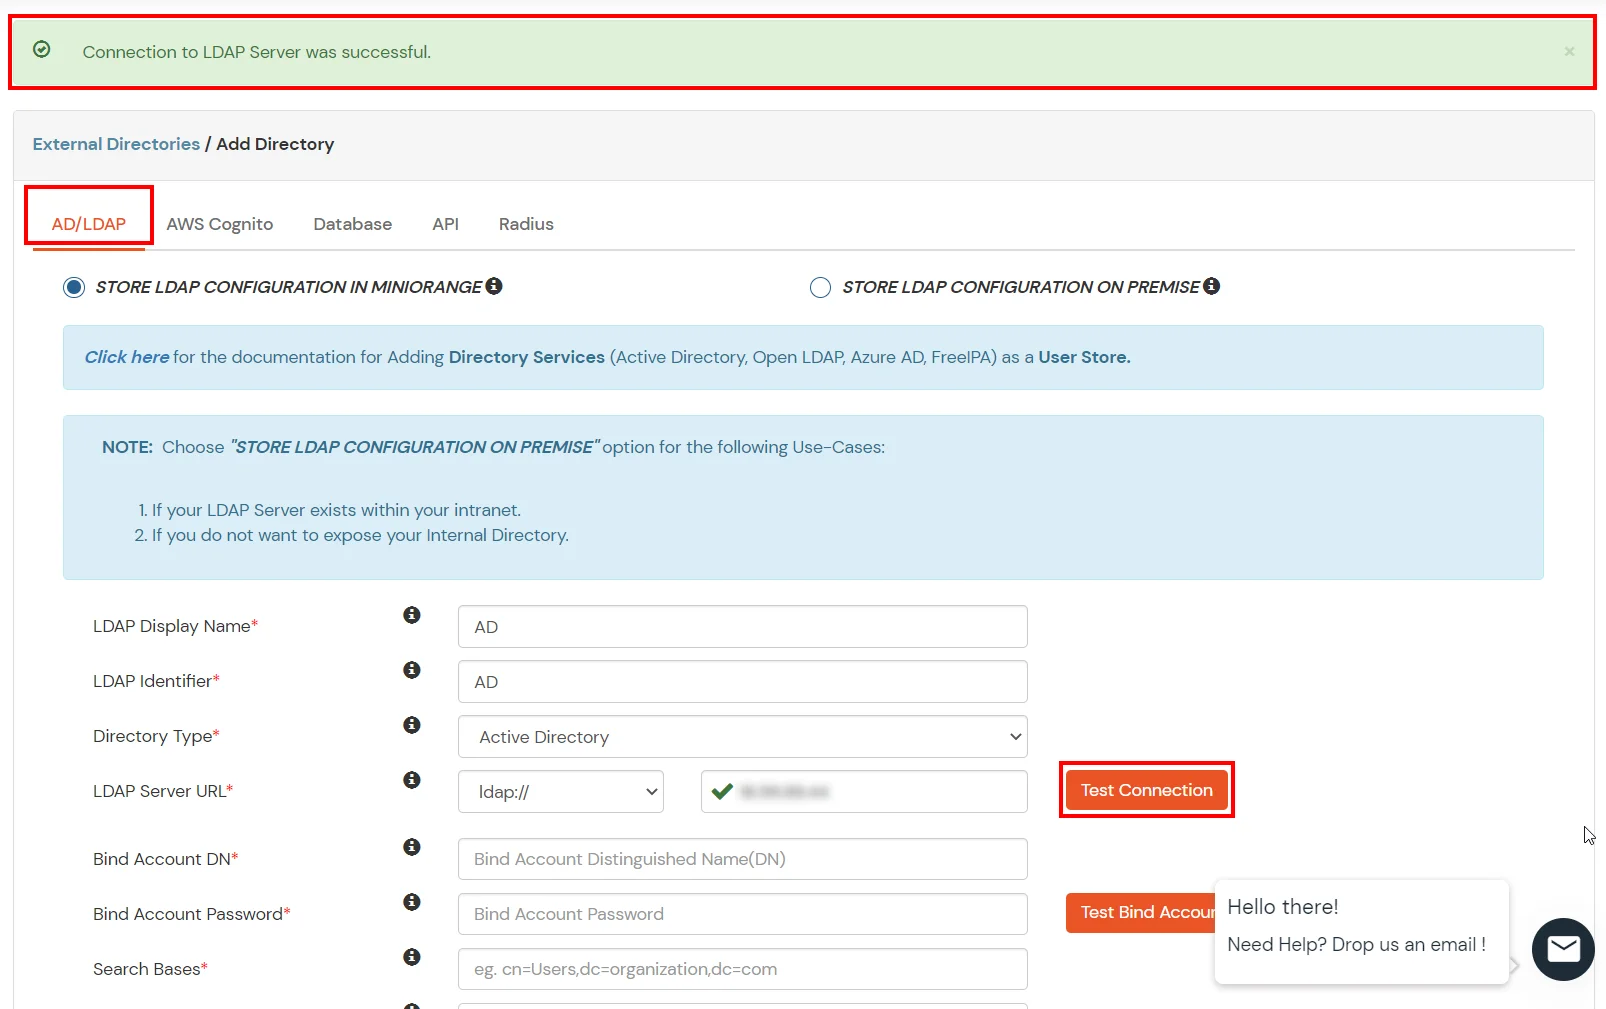
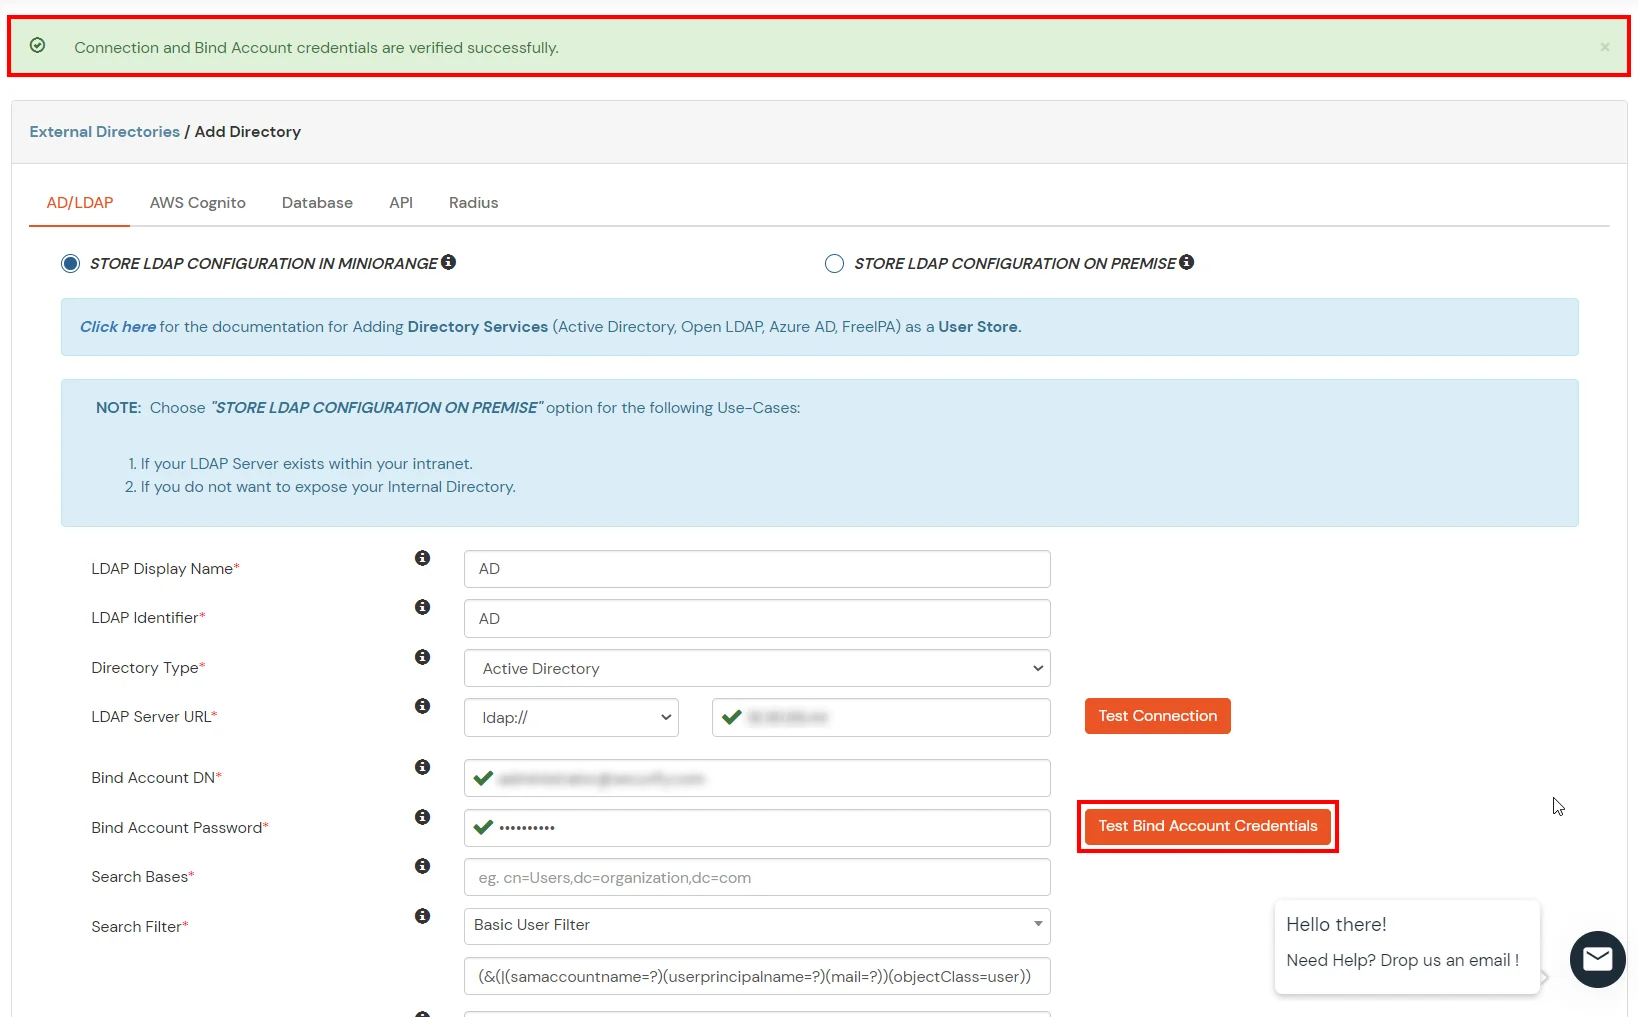
- Enter the LDAP Server URL or IP Address against the LDAP Server URL field.
- Click on the Test Connection button to verify if you have made a successful connection with your LDAP server.
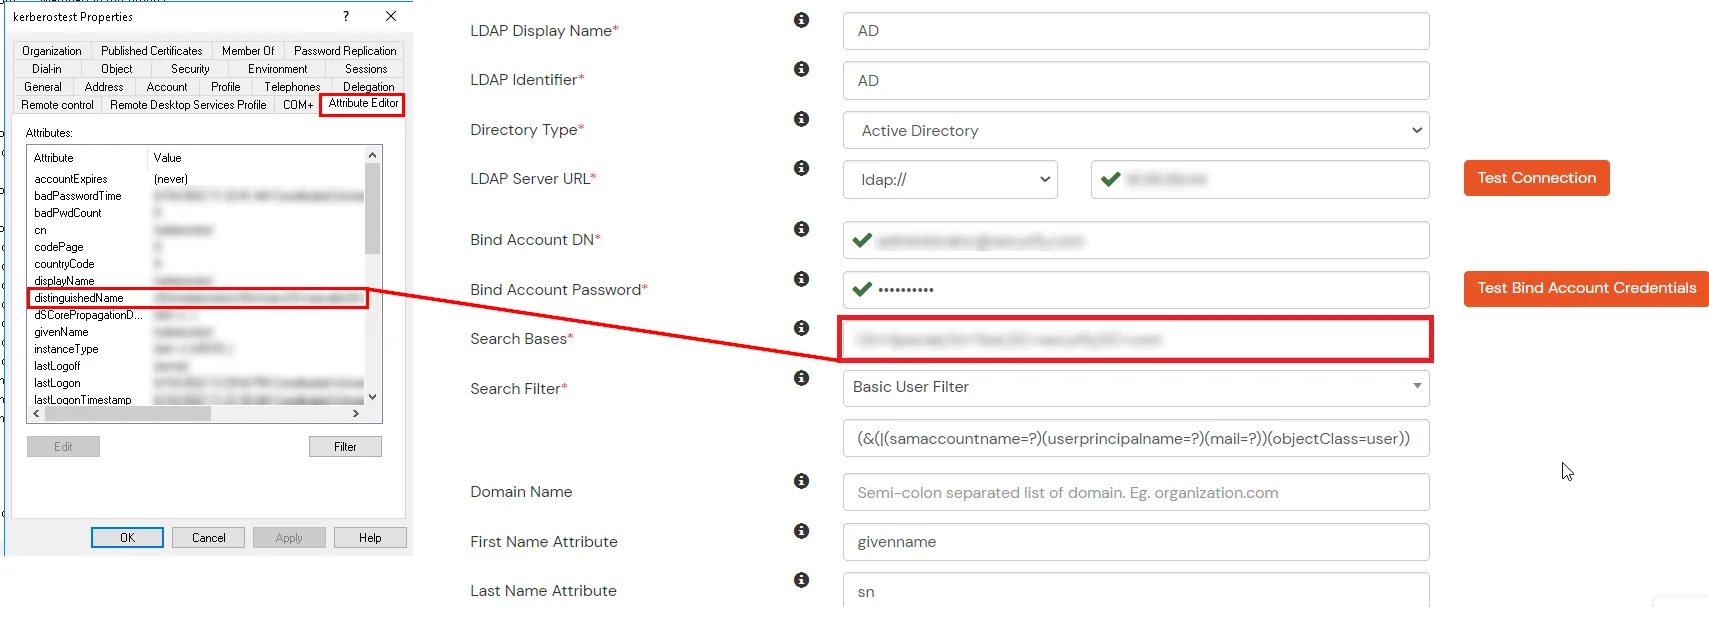
- In Active Directory, go to the properties of user containers/OU's and search for the Distinguished Name attribute. The bind account should have minimum required read privileges in Active Directory to allow directory lookups. If the use case involves provisioning (such as creating, updating, or deleting users or groups), the account must also be granted appropriate write permissions.
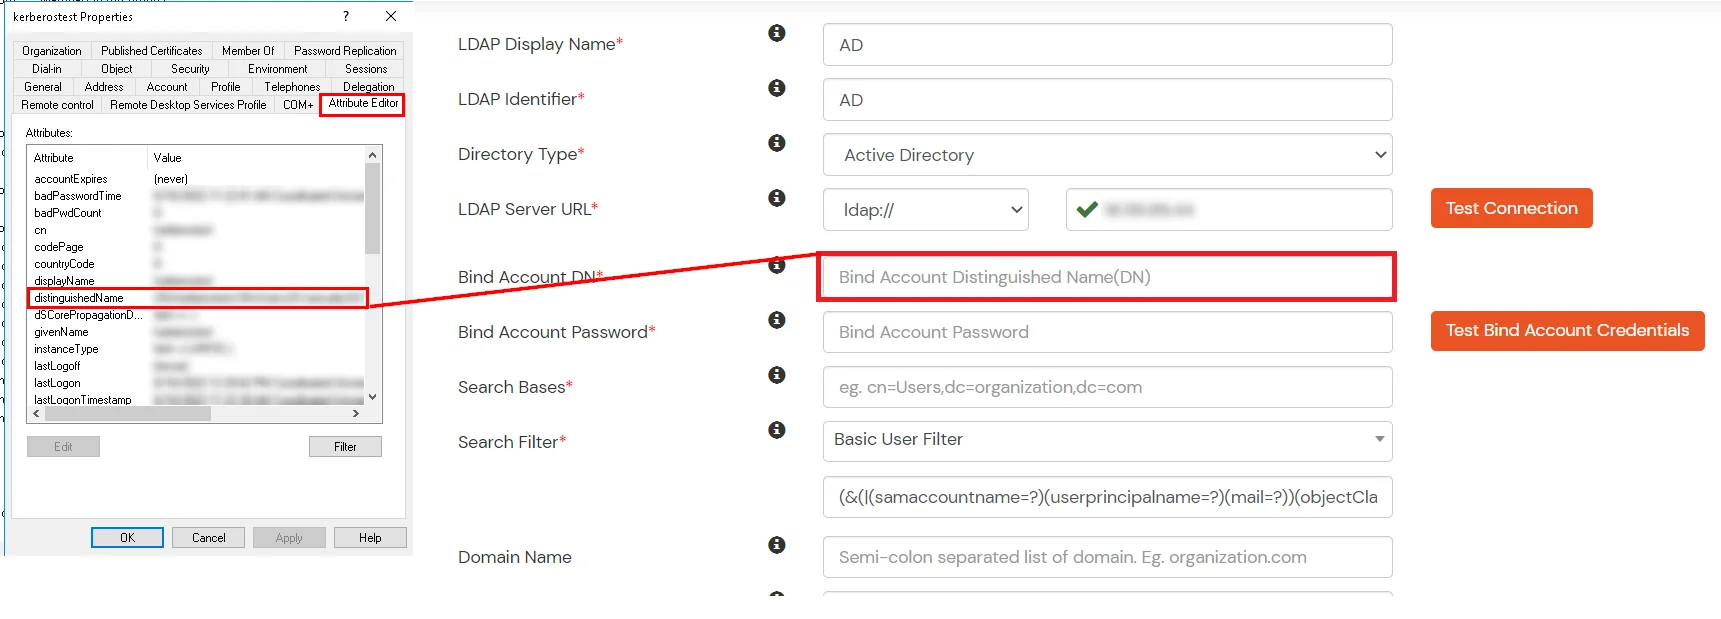
- Enter the valid Bind account Password.
- Click on the Test Bind Account Credentials button to verify your LDAP Bind credentials for LDAP connection.
- Search Base is the location in the directory where the search for a user begins. You will get this from the same place you got your Distinguished name.
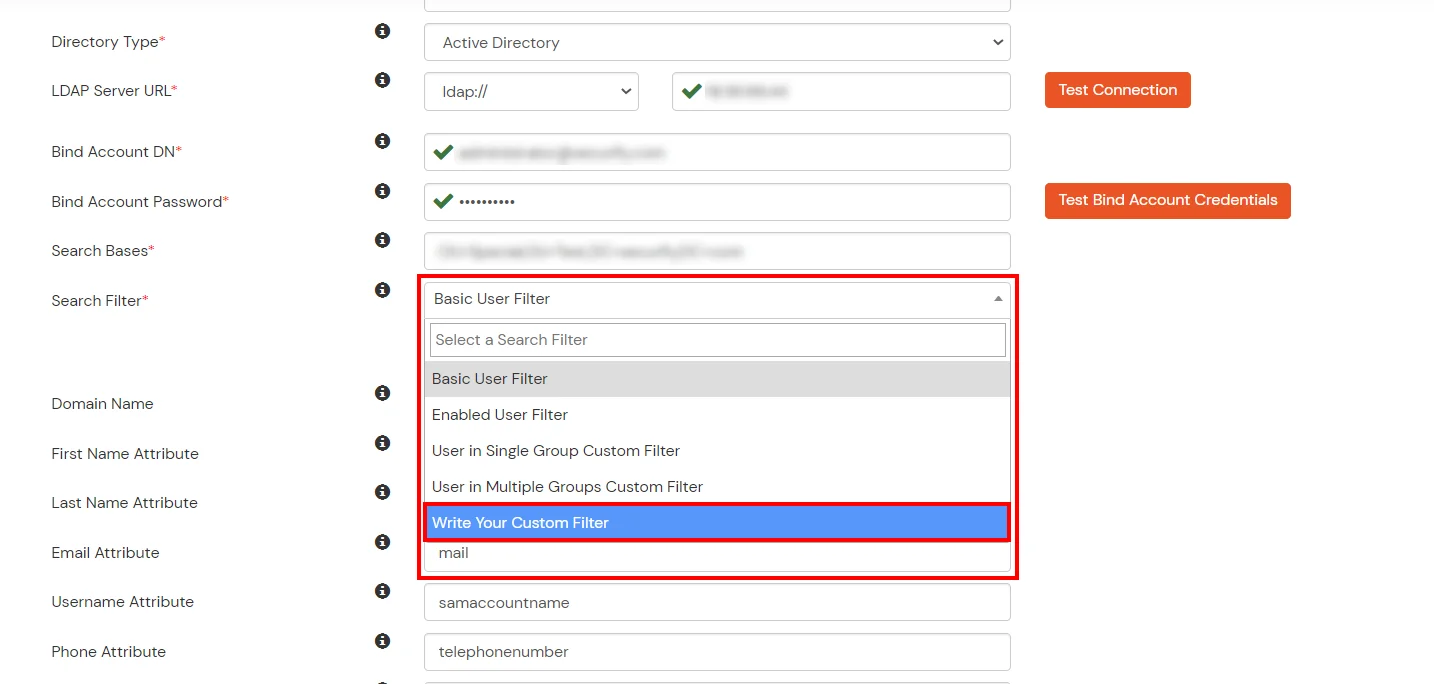
- Select a suitable Search filter from the drop-down menu. If you use User in Single Group Filter or User in Multiple Group Filter, replace the <group-dn> in the search filter with the distinguished name of the group in which your users are present. To use custom Search Filter select "Write your Custom Filter" option and customize it accordingly.
- Click on the Next button, or go to the Login Options tab.
- You can also configure following options while setting up AD. Enable Activate LDAP in order to authenticate users from AD/LDAP. Click on the Next button to add user store.
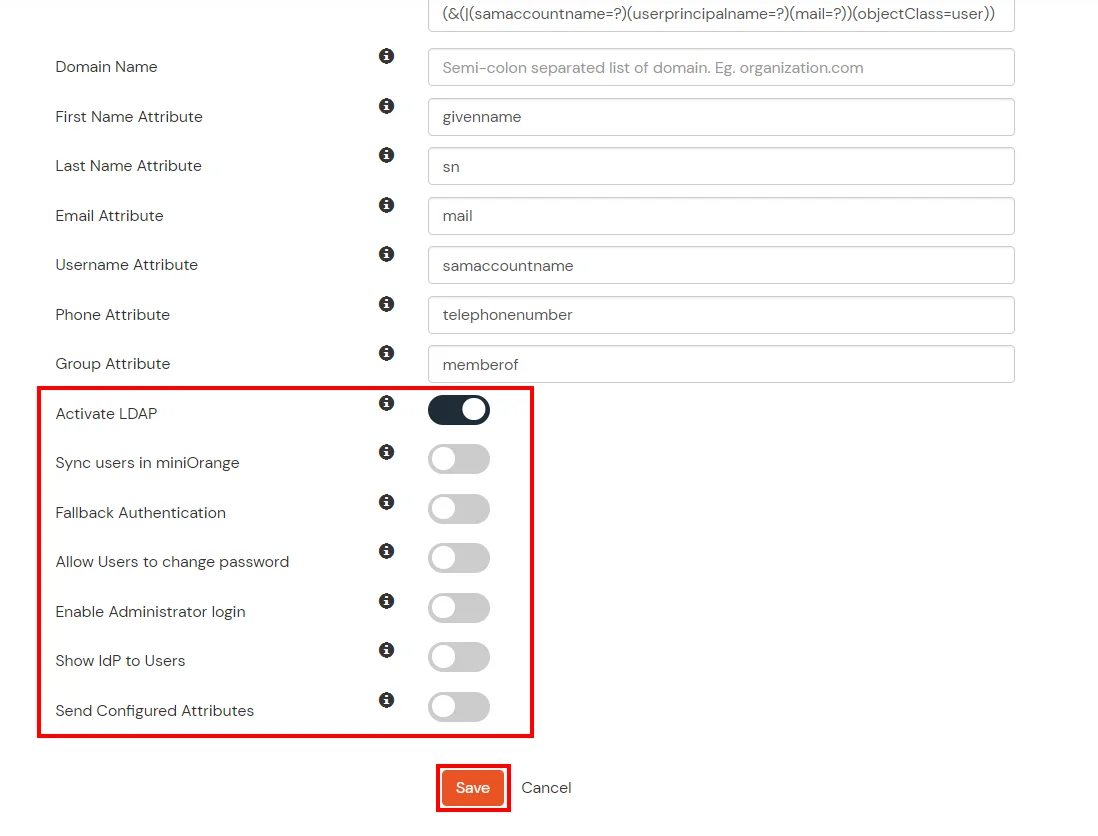
Here's the list of the attributes and what it does when we enable it. You can enable/disable accordingly.
| Attribute |
Description |
| Activate LDAP |
All user authentications will be done with LDAP credentials if you Activate it |
| Fallback Authentication |
If LDAP credentials fail then user will be authenticated through miniOrange |
| Enable administrator login |
On enabling this, your miniOrange Administrator login authenticates using your LDAP server |
| Show IdP to users |
If you enable this option, this IdP will be visible to users |
| Sync users in miniOrange |
Users will be created in miniOrange after authentication with LDAP |
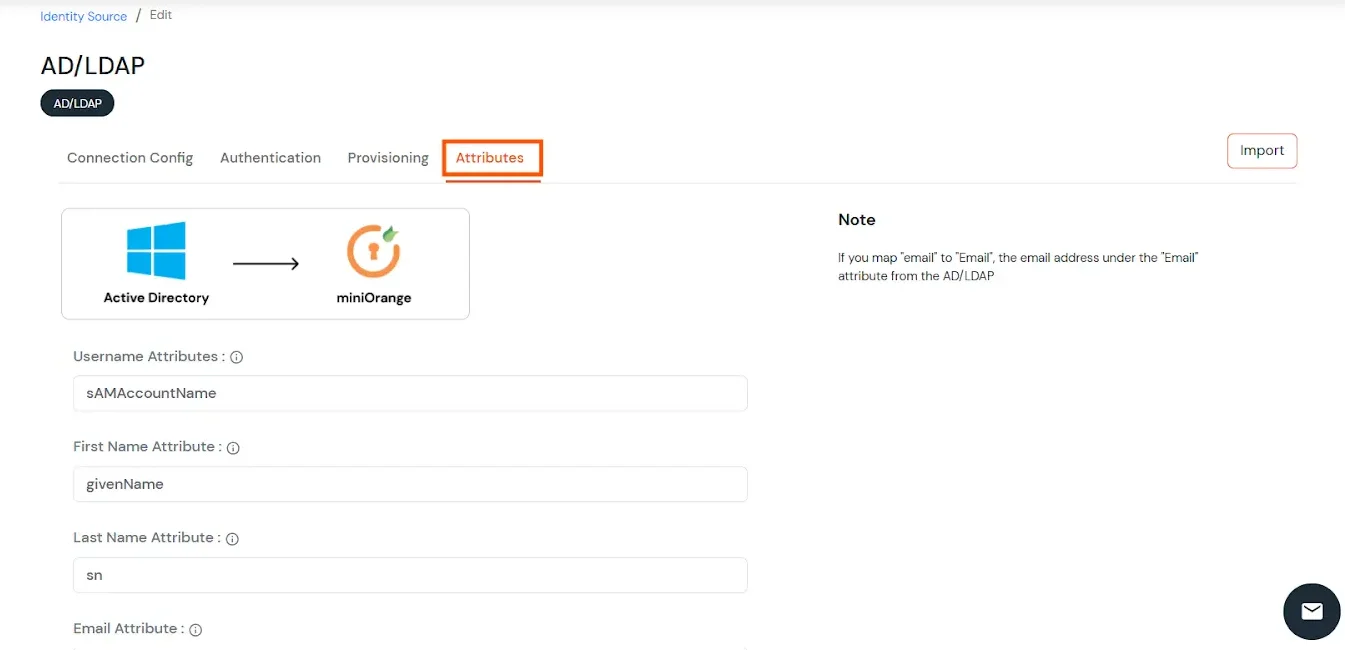
- Click on the Next button, or go to the Attributes tab.
Attributes Mapping from AD
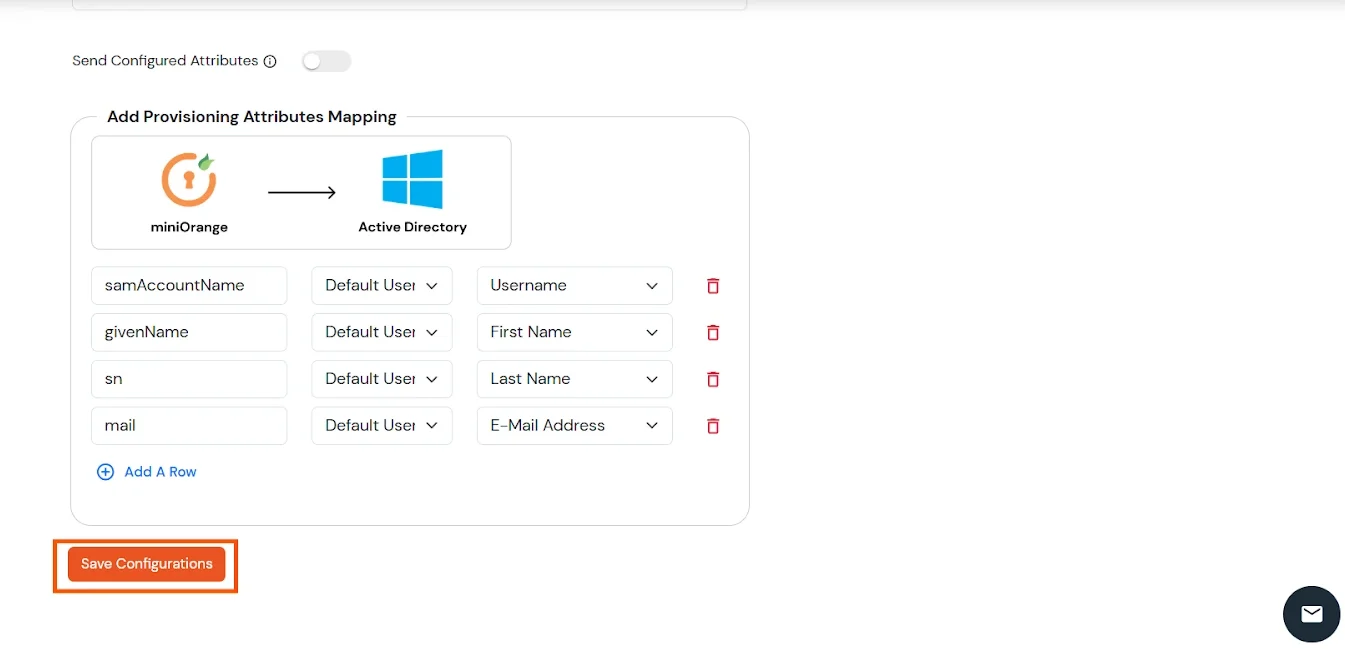
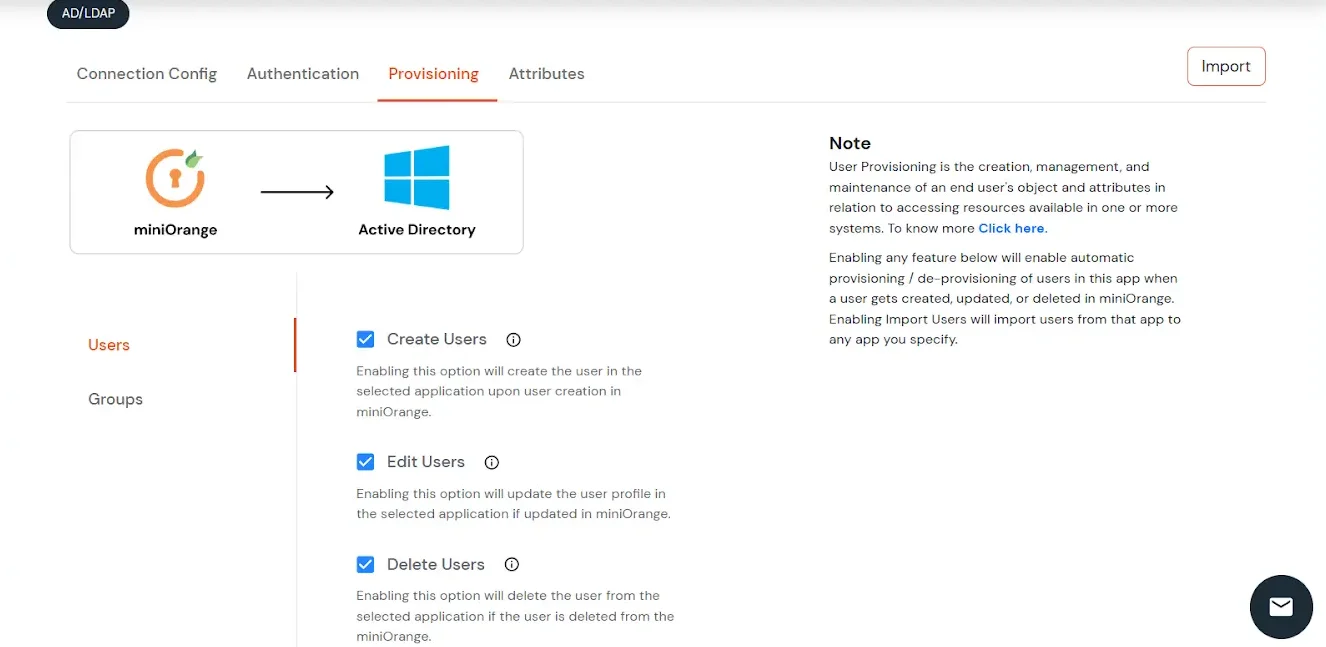
User Import and Provisioning from AD
- If you want to set up provisioning, click here for detailed information. We will skip this step for now.
Import Password Policy from AD
- If you want to import your Active Directory password policy into miniOrange, click here for detailed information. We will skip this step for now.
Test Connections
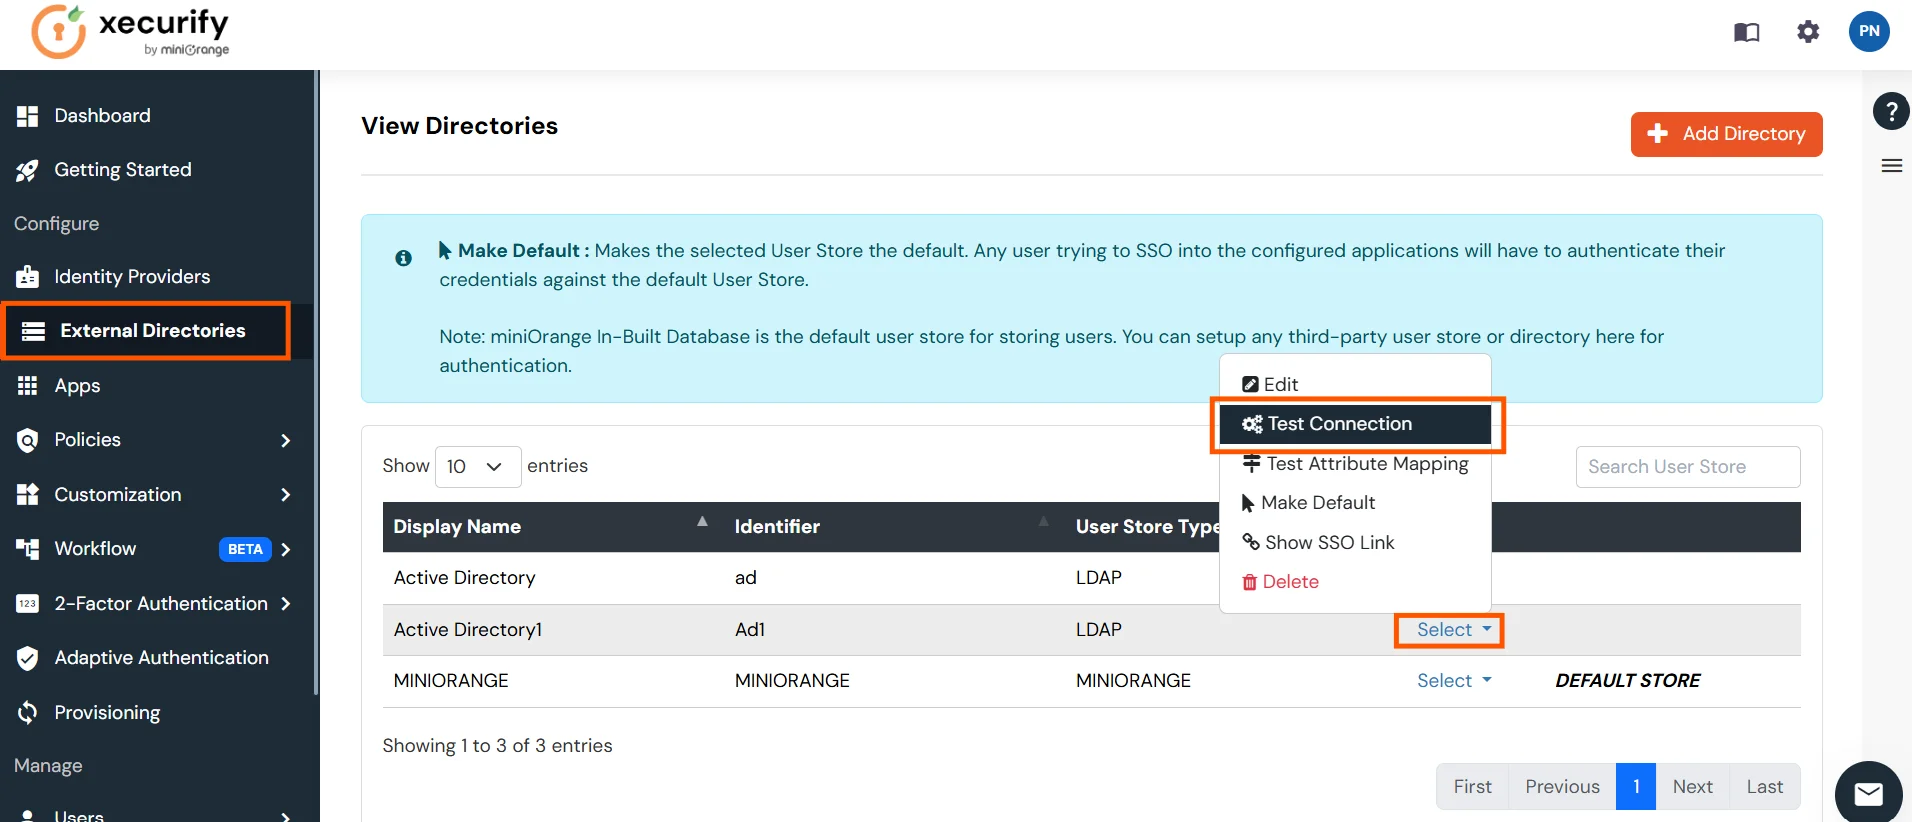
- You will see a list of directories under Identity Providers. From the dropdown, select AD/LDAP Directories, search for your configured directory, click the three dots next to it, and select Test Connection.
- A pop-up appears prompting you to enter a username and password to verify your LDAP configuration.
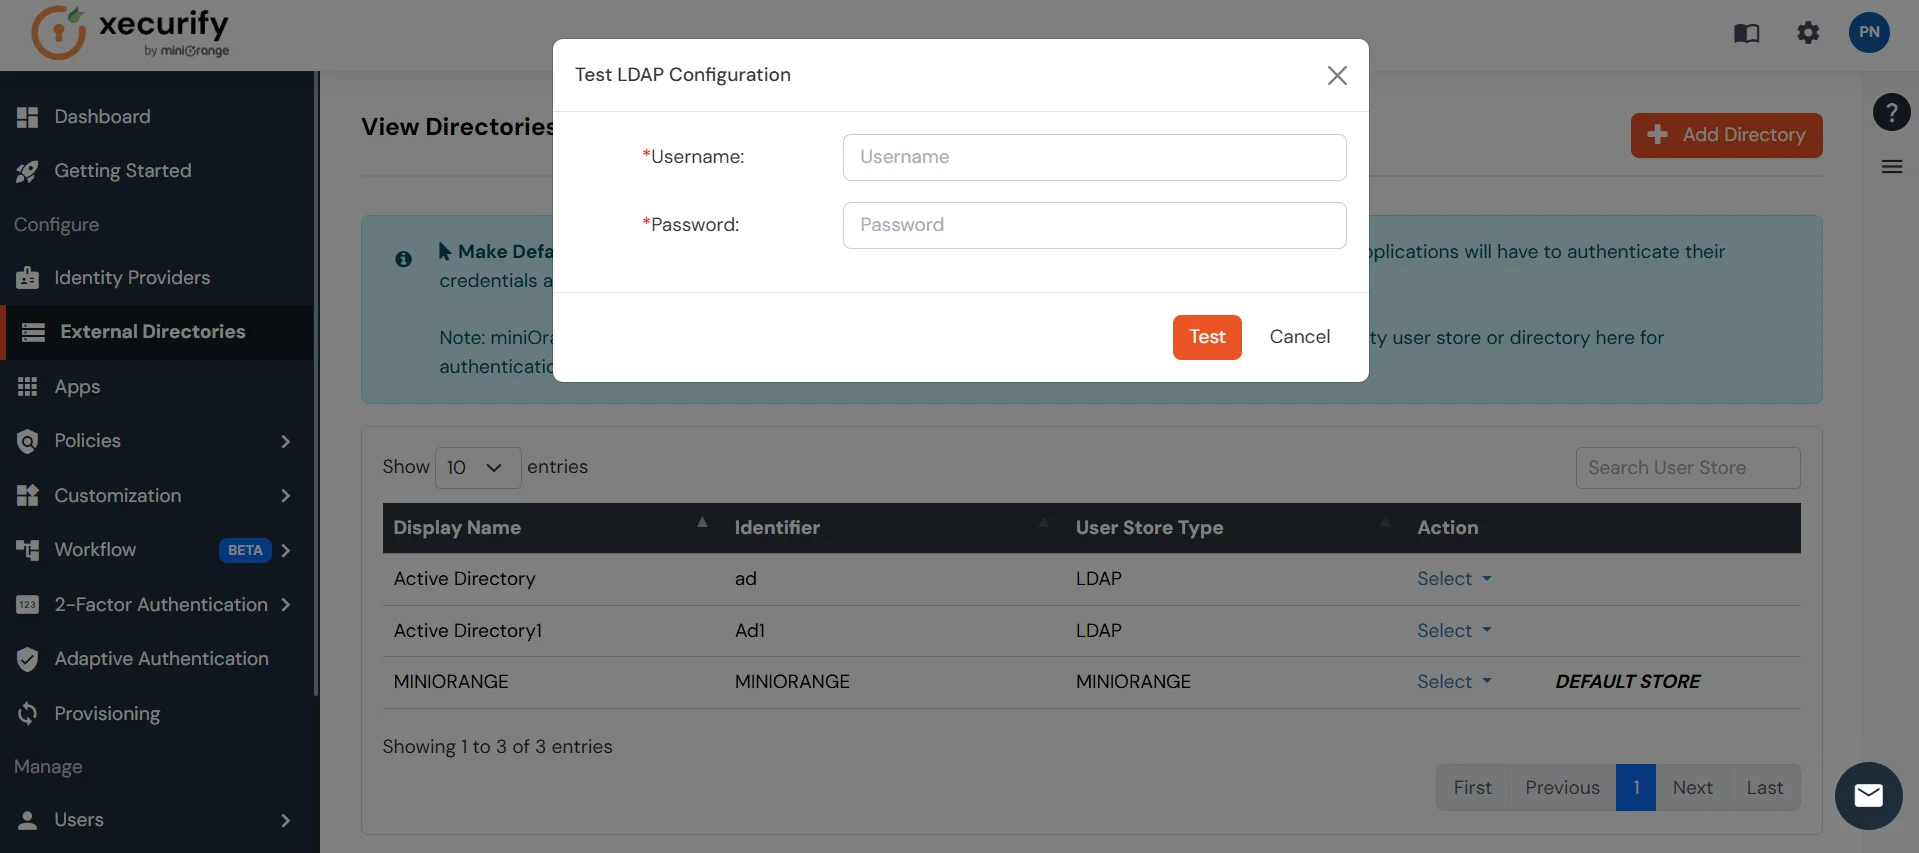
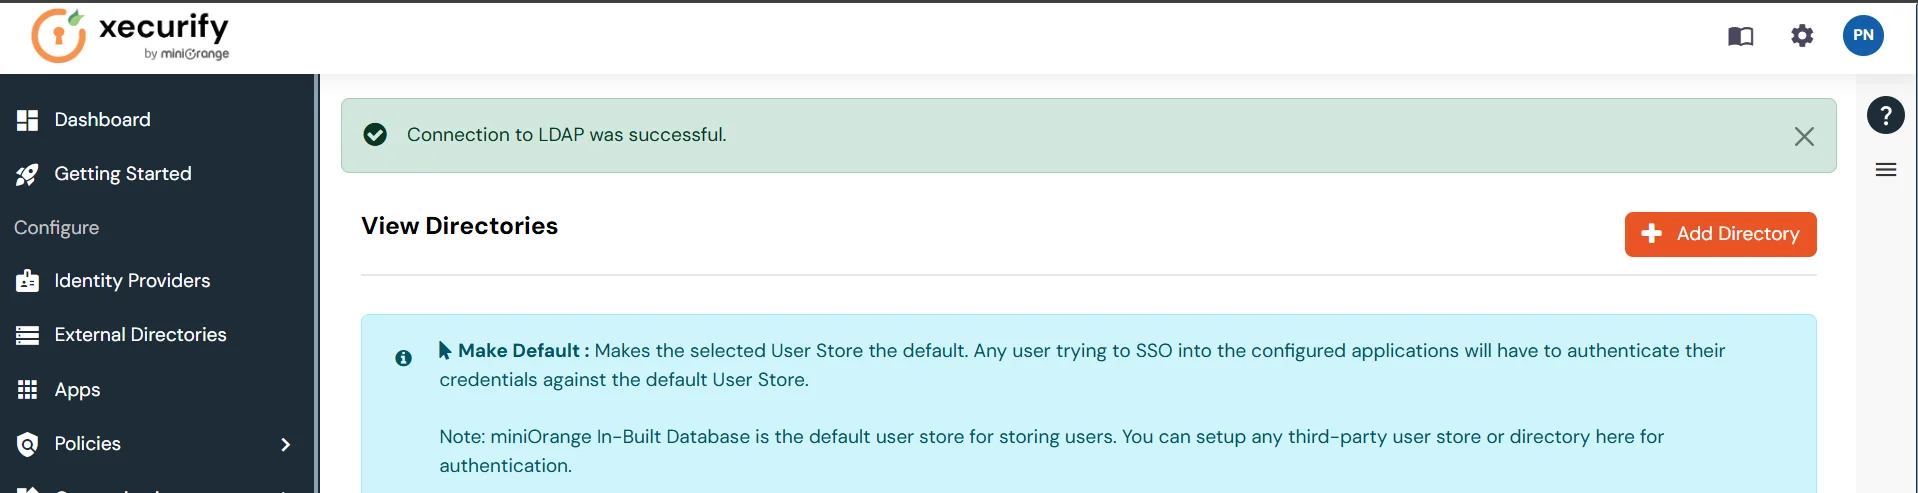
- On Successful connection with LDAP Server, a success message is shown.
Test Attribute Mapping
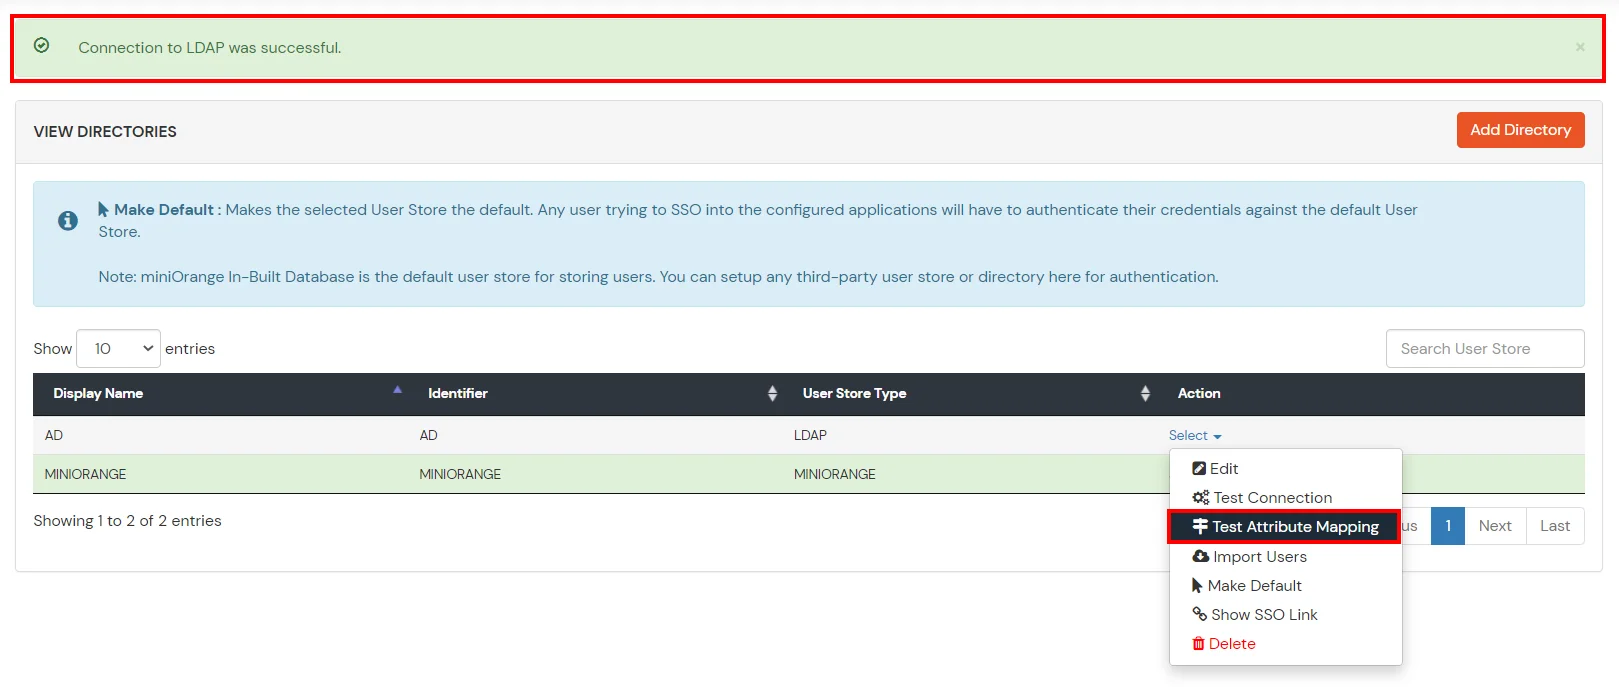
- You will see a list of directories under Identity Providers. From the dropdown, select AD/LDAP Directories, search for your configured directory, click the three dots next to it, and select Test Attribute Mapping.
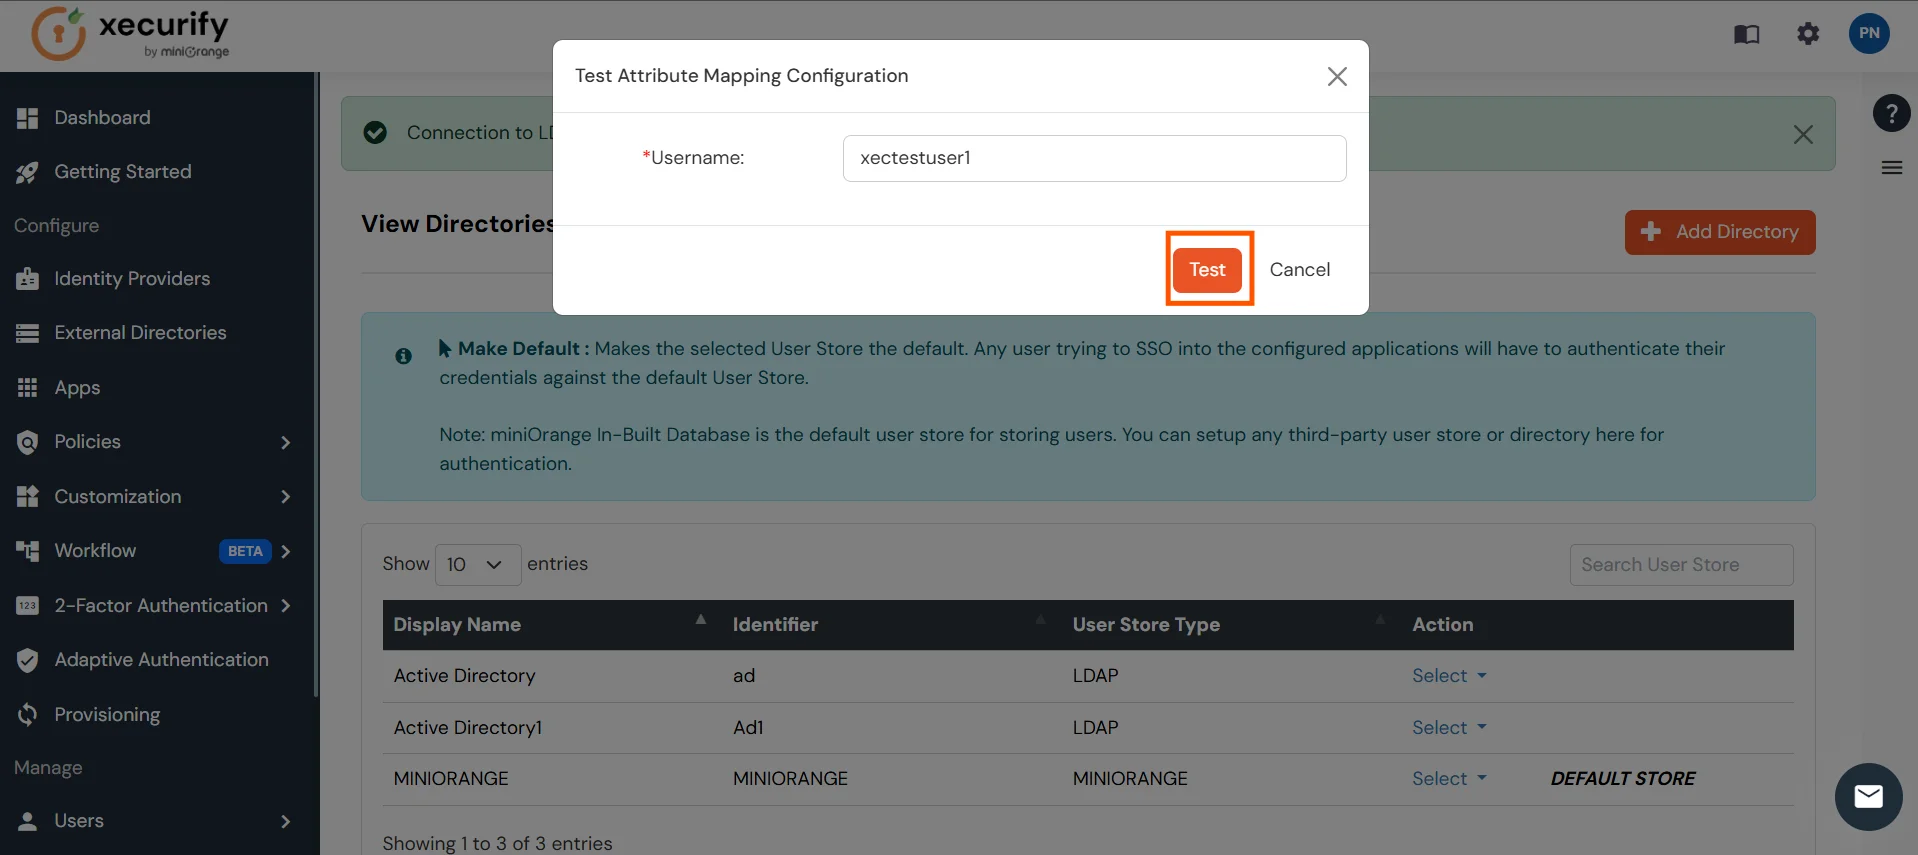
- A pop‑up appears to enter a username and click Test.
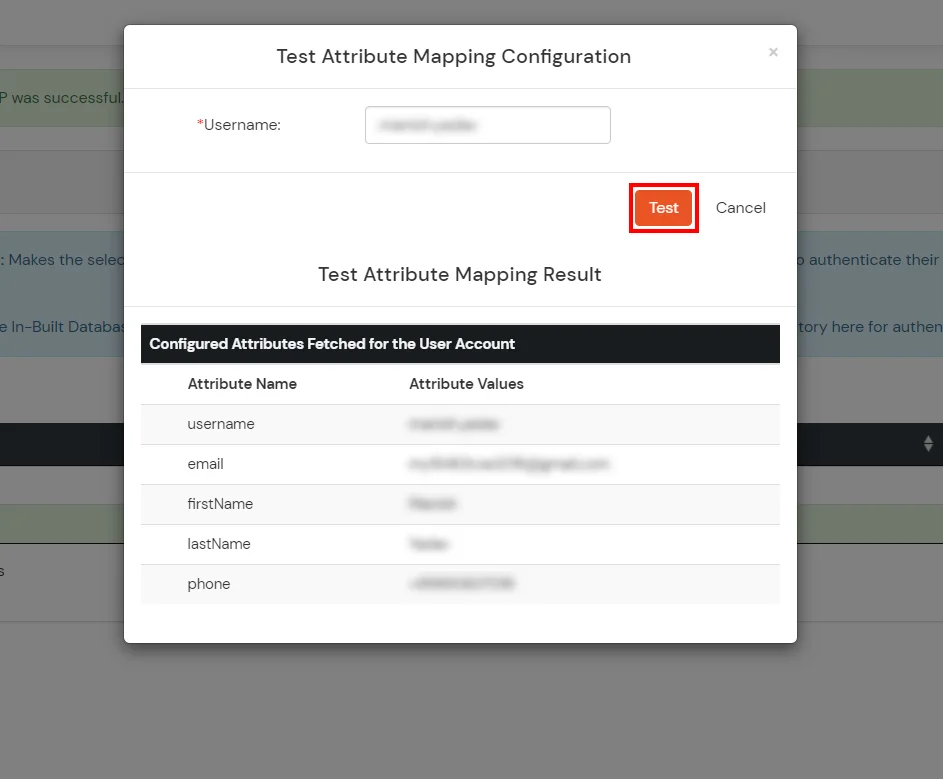
- The Test Attribute Mapping Result will be displayed.
Set up AD as External Directory configuration is complete.
Note: Refer our guide to setup LDAP on windows server.
miniOrange integrates with various external user sources such as directories, identity providers, and etc.
5. Adaptive Authentication with Z-Scaler [This will be released soon]
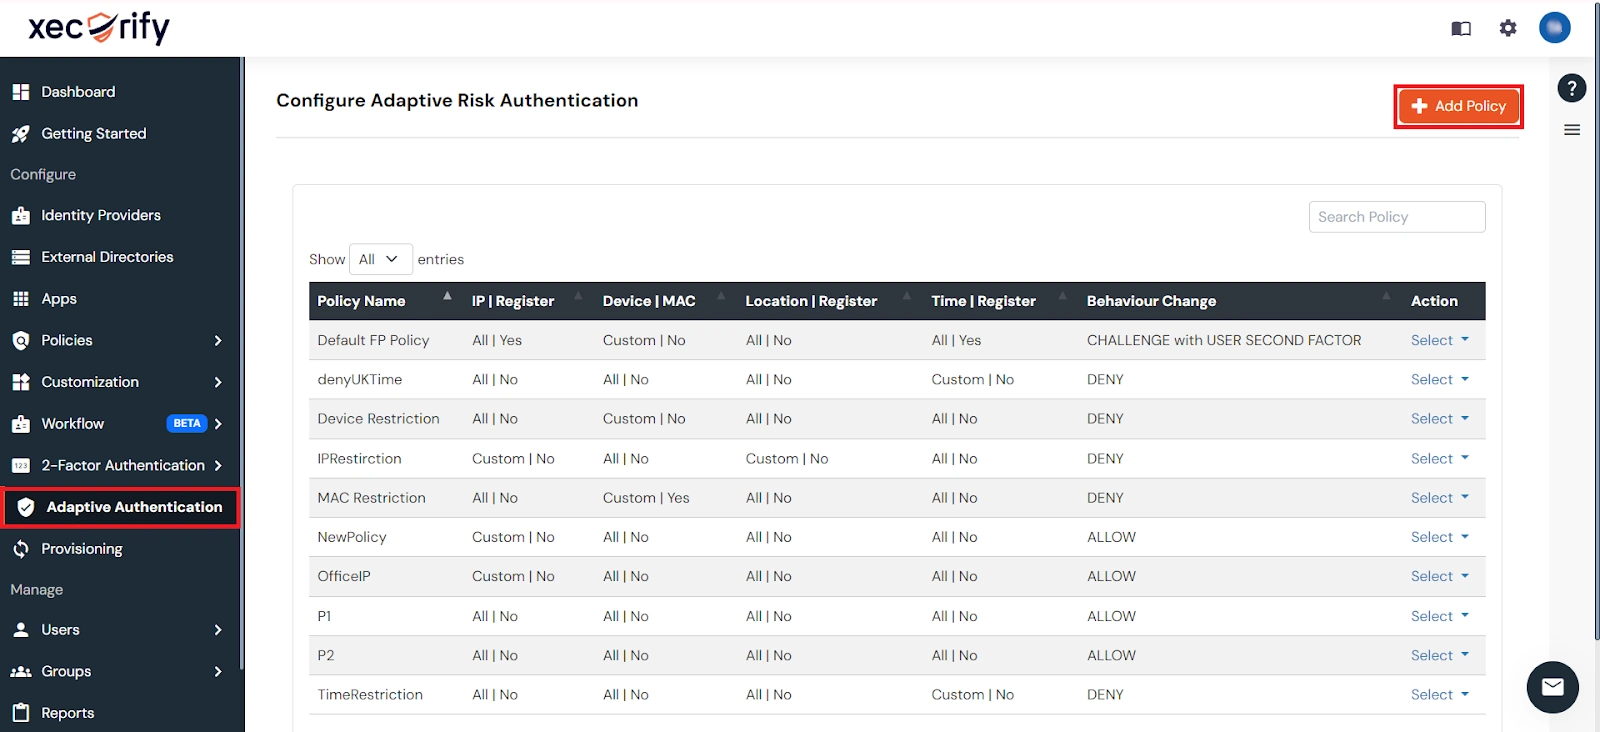
Adaptive Authentication for Z-Scaler enables administrators to enforce context-aware access policies by evaluating user login conditions such as IP address, device, location and login time. Based on the configured policy, users can be allowed access, challenged with additional verification or denied access. Administrators can also configure email alerts, customize user-facing error messages, review policy settings before deployment and assign adaptive authentication policies to application login policies to strengthen security and prevent unauthorized access.
[Note: The Adaptive Authentication section has been moved from the left navigation menu. You can now access and manage adaptive authentication policies by navigating to Policies >> Adaptive Access Policy.]
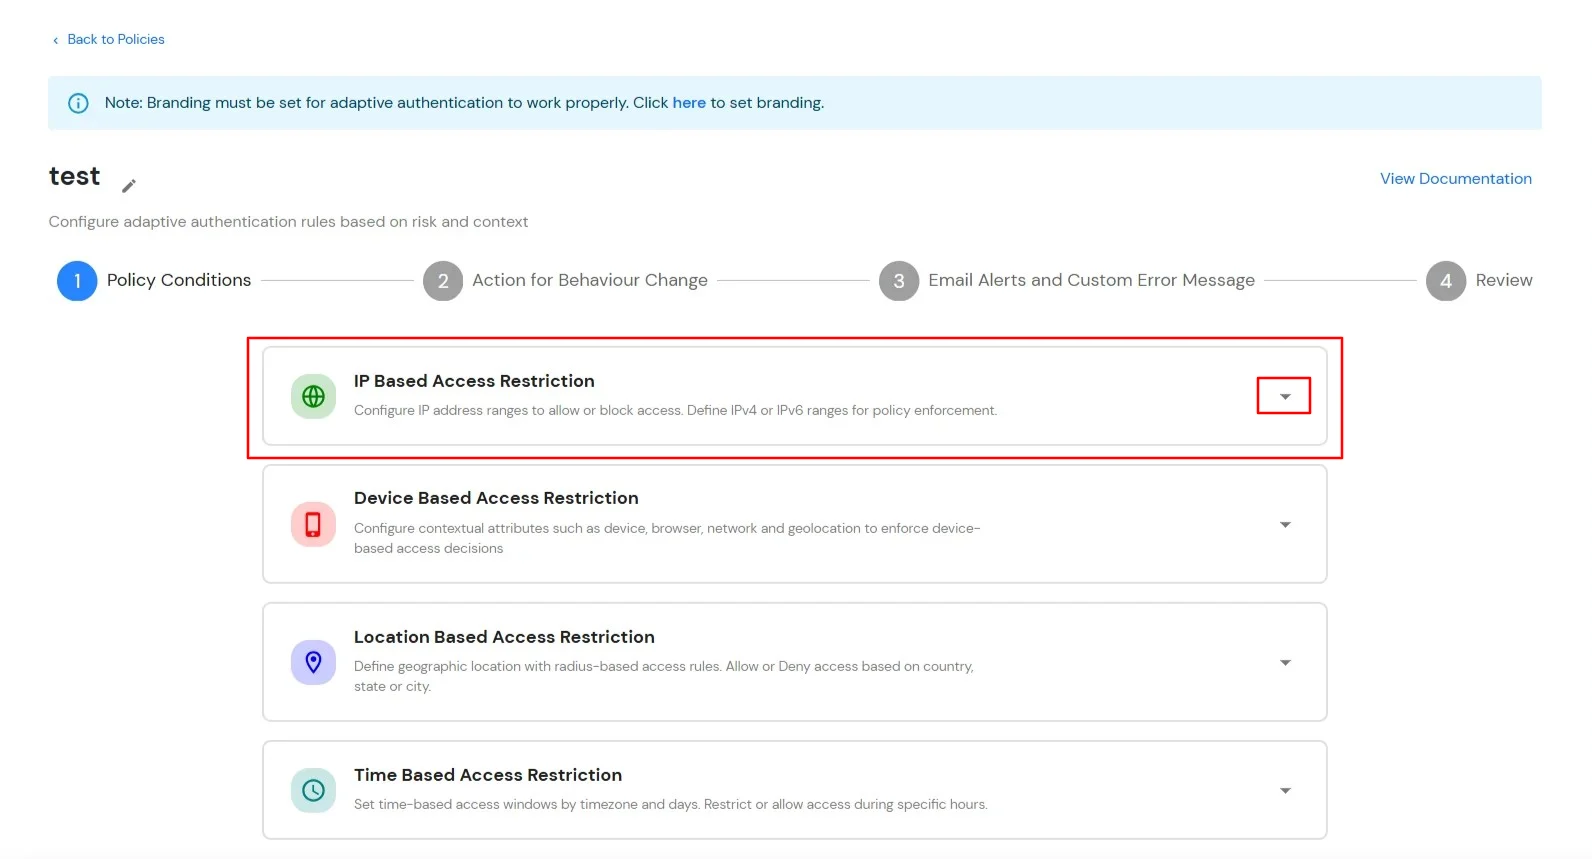
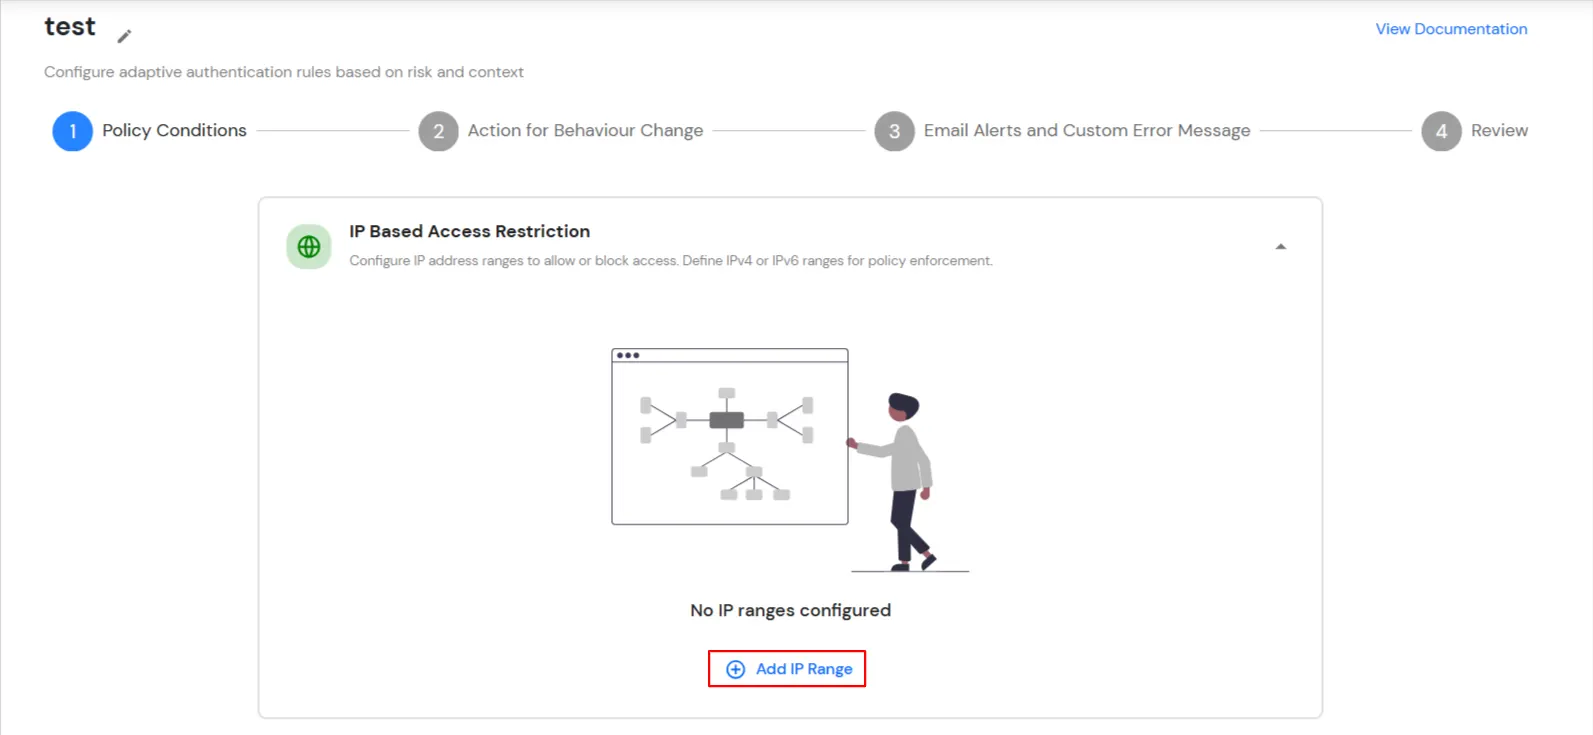
A. Restricting access to Z-Scaler with IP Based Access Restriction
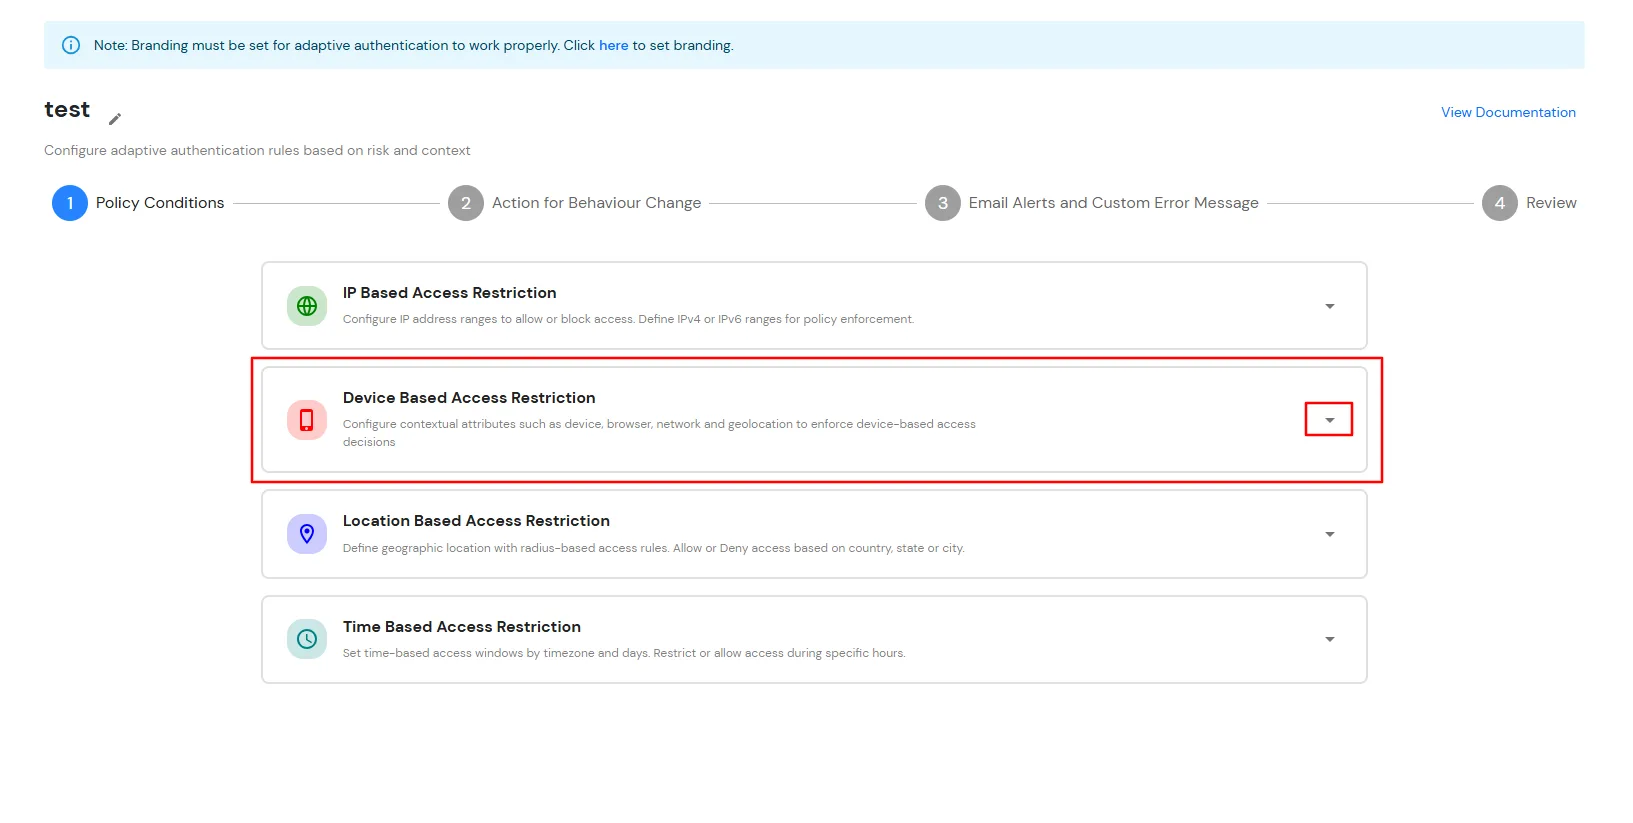
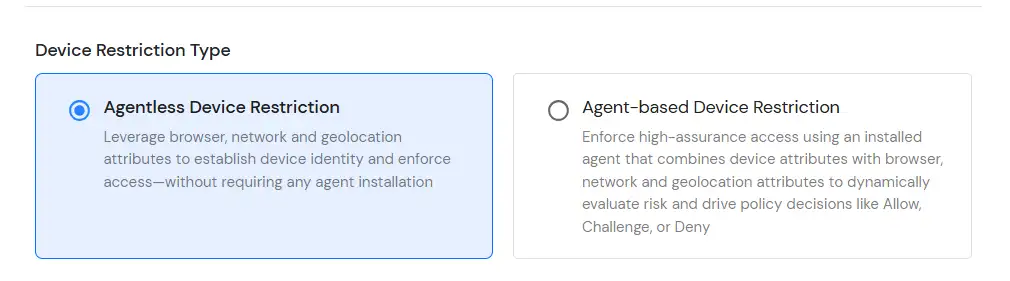
B. Restricting access to Z-Scaler with Device Based Access Restriction
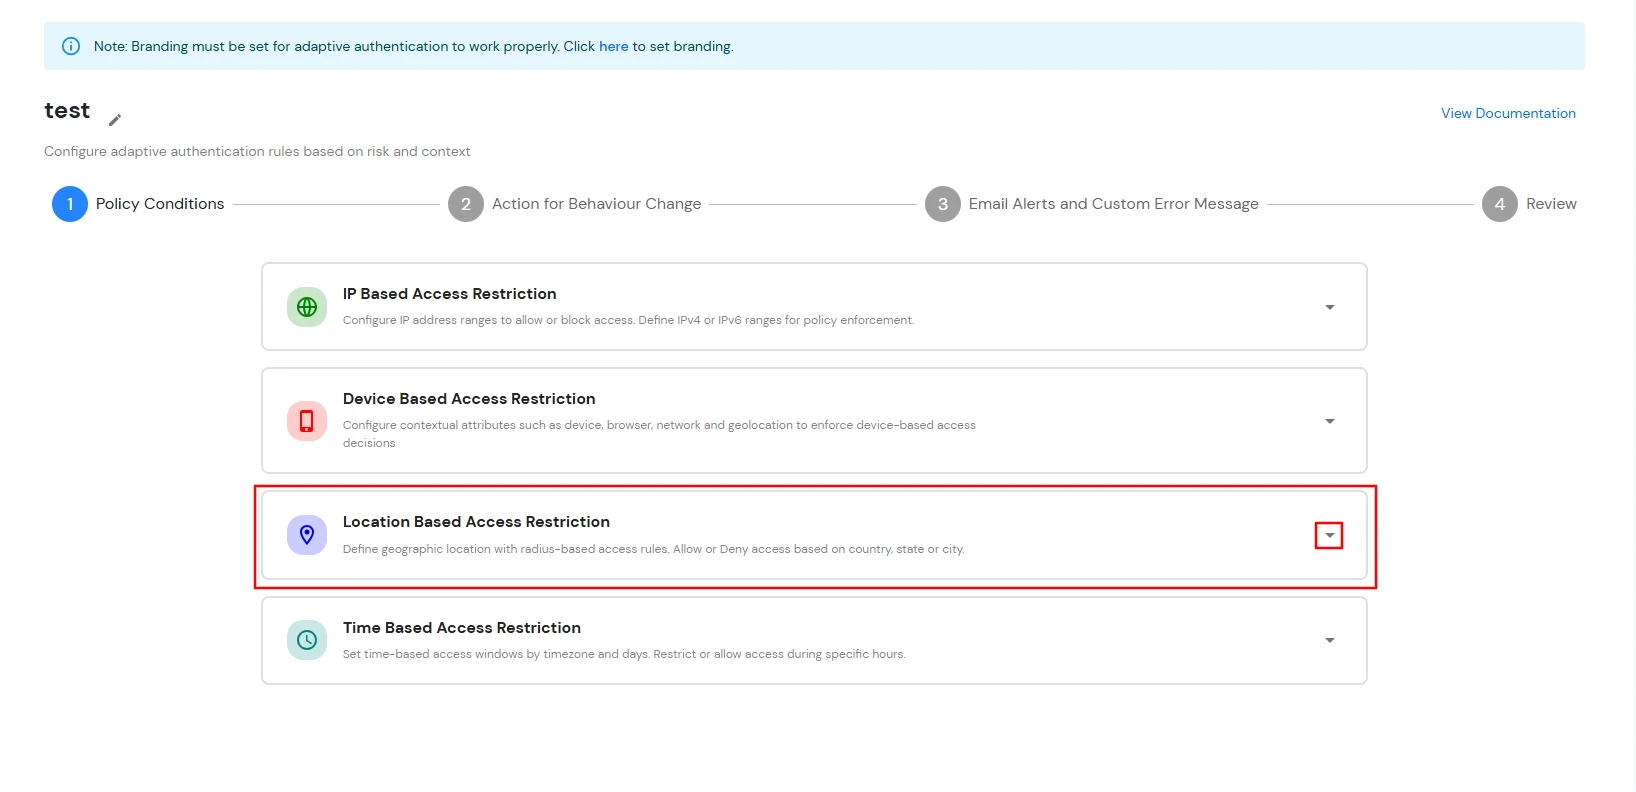
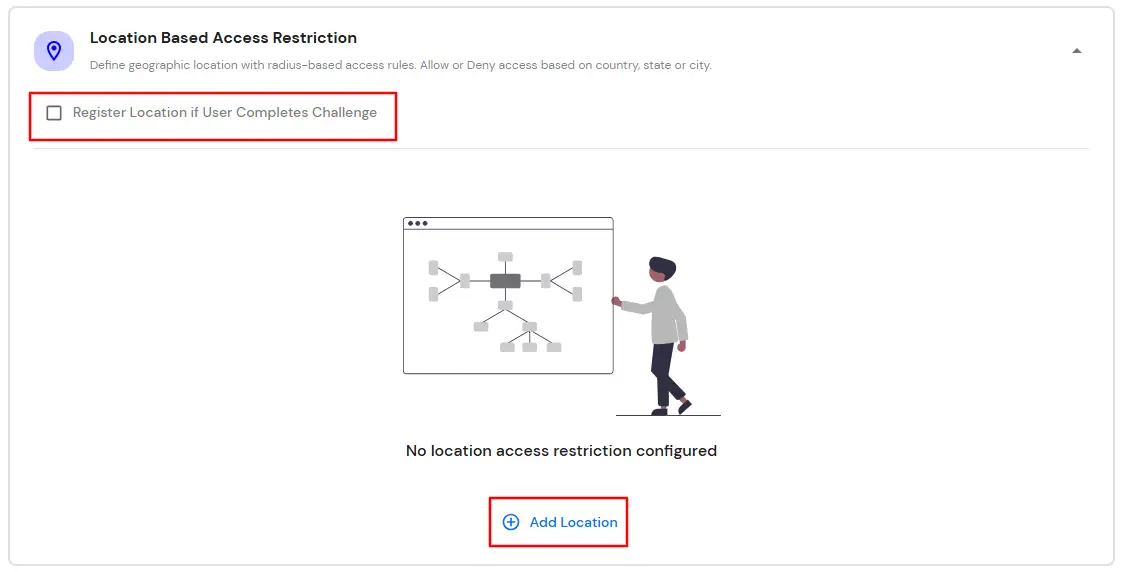
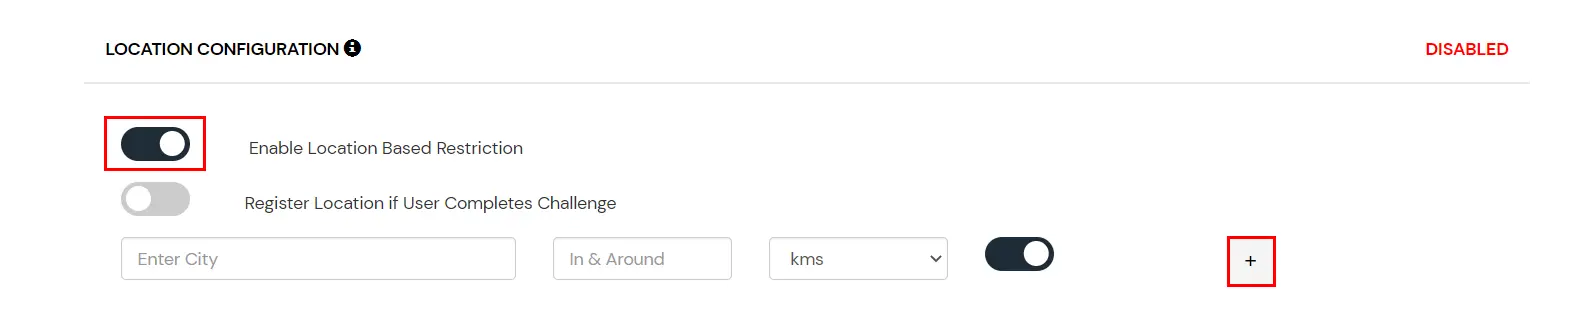
C. Restricting access to Z-Scaler with Location Based Access Restriction
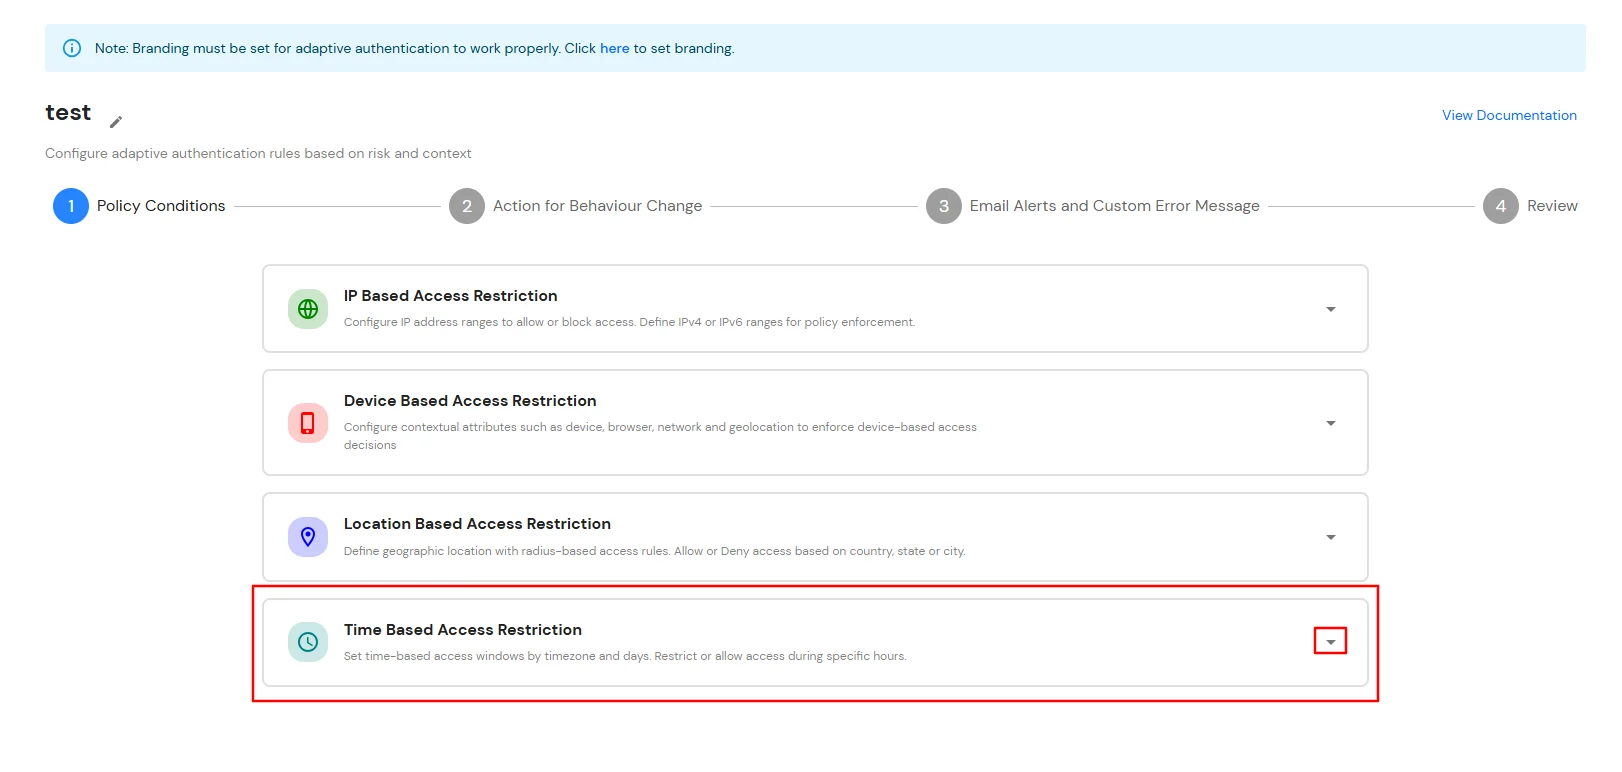
D. Restricting access to Z-Scaler with Time Based Access Restriction
In time restriction, admin configures a time zone with Start and End Times for that timezone and users are either allowed, denied or challenged based on the condition in the policy. When an end-user tries to login with the adaptive authentication enabled, their time zone-related attributes such as Time-Zone and Current System Time, are verified against the list configured by the admin and based on the configuration, the user is either allowed, denied or challenged.
You can configure Adaptive Authentication with Time Based Restriction in following way :
- Login to Self Service Console >> Policies >> Adaptive Access Policy section from the left side menu.
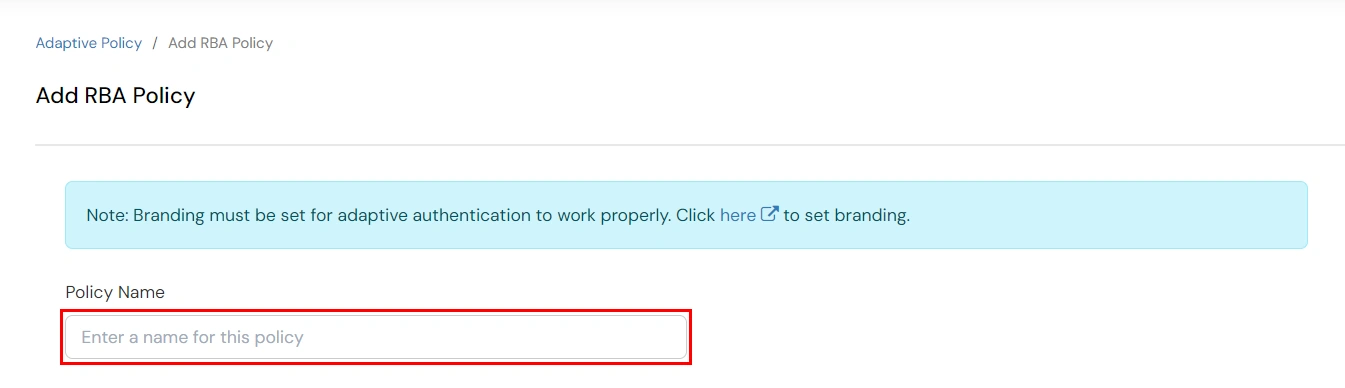
- Click on the Create Policy button on the upper right. Add a suitable policy name and click on Create Policy.
- Expand the Time Based Access Restriction section by clicking on the dropdown icon to Time Based Access Restriction rules.
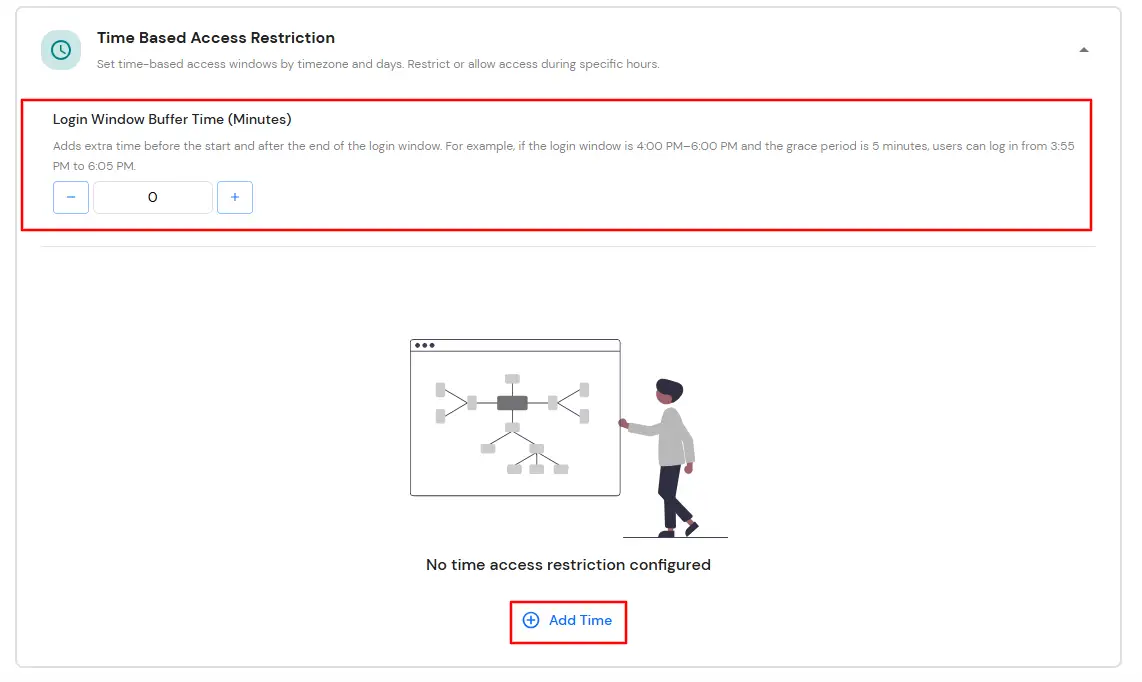
- Enter the Login Window Buffer Time (Minutes) to allow a grace period before the start time and after the end time of the configured login window. If no value is specified, the default buffer time of 0 minutes is applied.
- Click Add Time to create a time-based access rule.
- Select the required Timezone, configure the Start Time and End Time and choose the applicable days.
- For each time-based rule, select whether access should be Allowed or Denied.
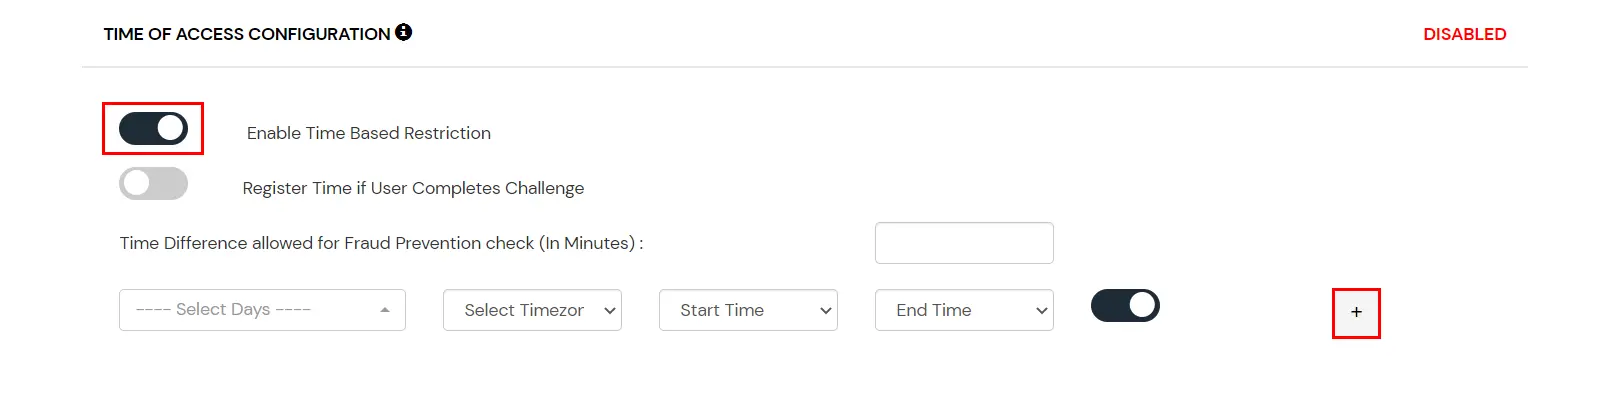
- Click on the Add Time to add more than one timezones.
- Once the changes are made, click on Next.
- Select your Action for behavior Change and Challenge Type for user from the Action for behavior Change Section.
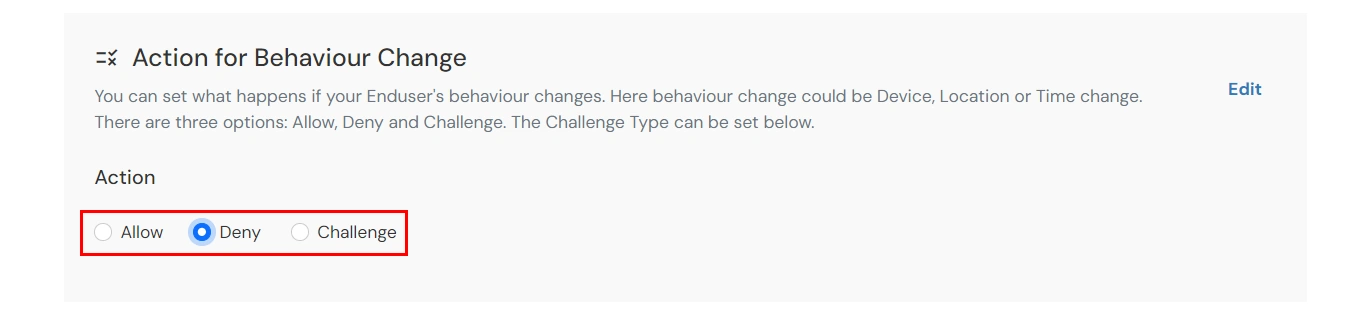
- Click on Next to continue.
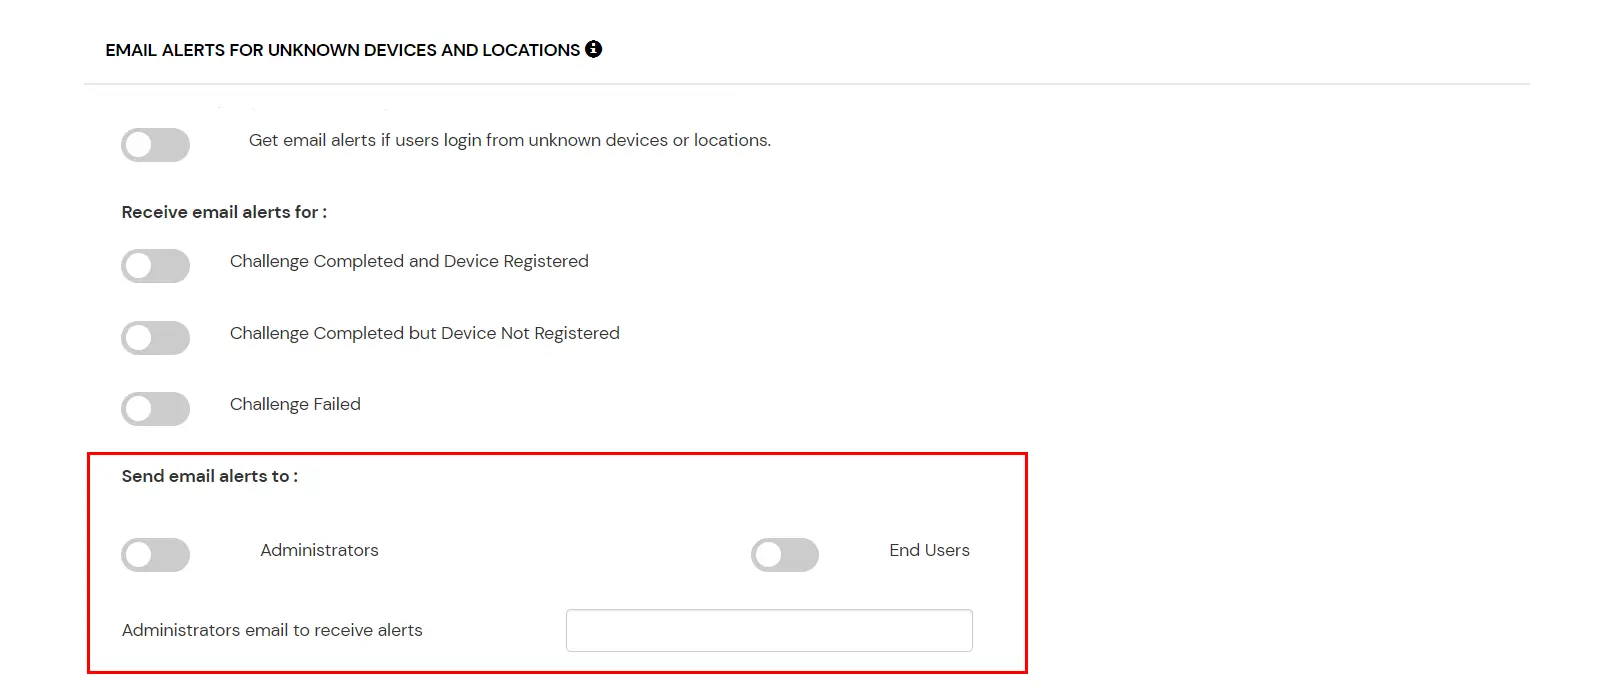
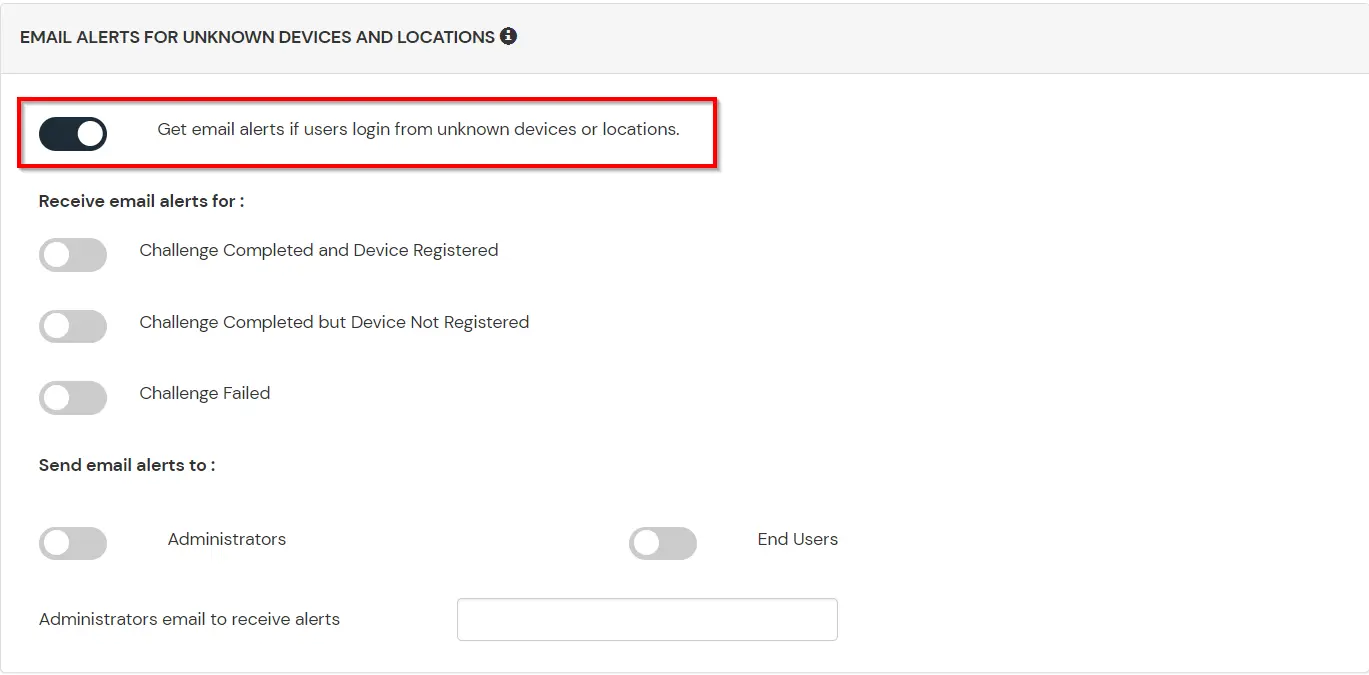
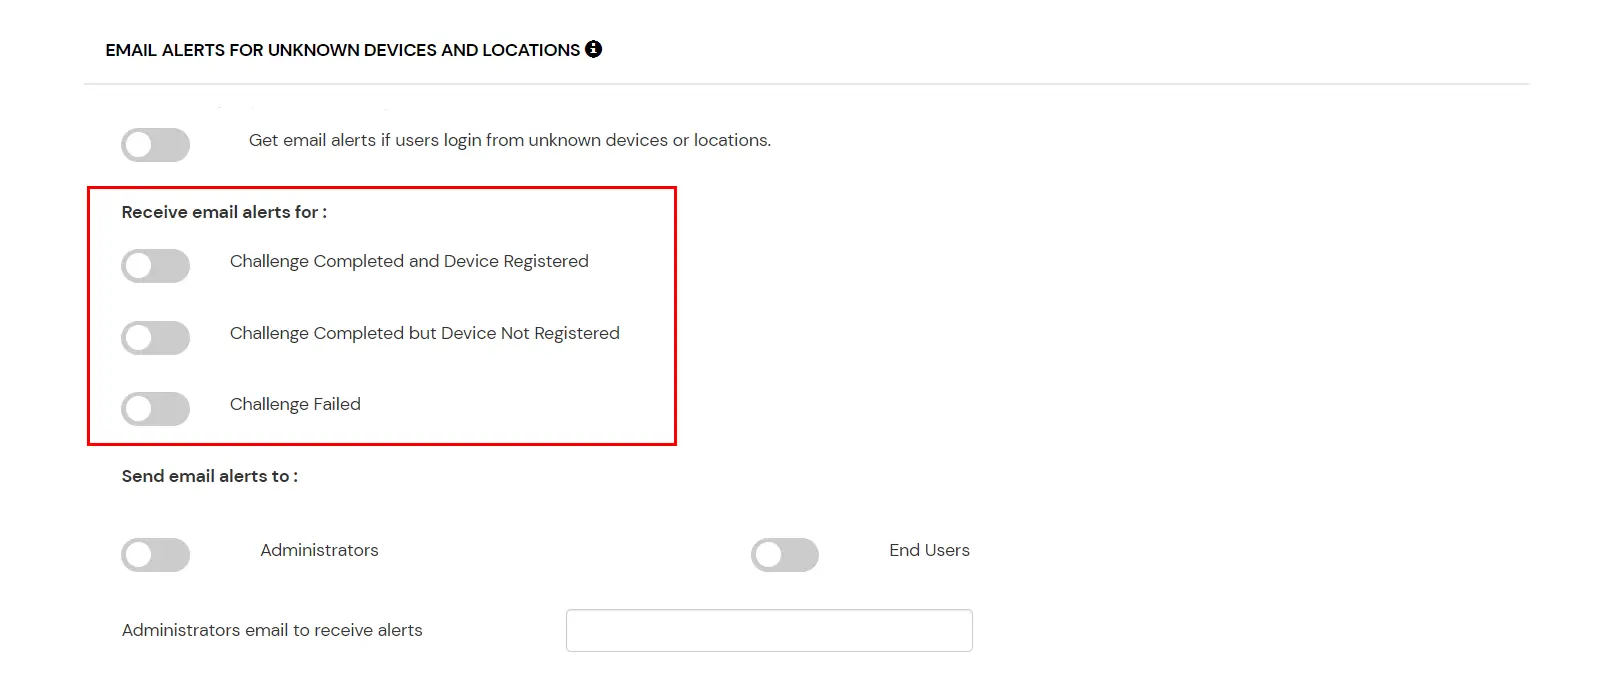
E. Email Alerts and Custom Email Message
F. Review
Review the configured policy conditions, behavior change actions, email alert settings and custom error messages before creating the adaptive authentication policy. This step provides a consolidated view of all configured settings, allowing you to verify the policy configuration and make any necessary changes before saving.
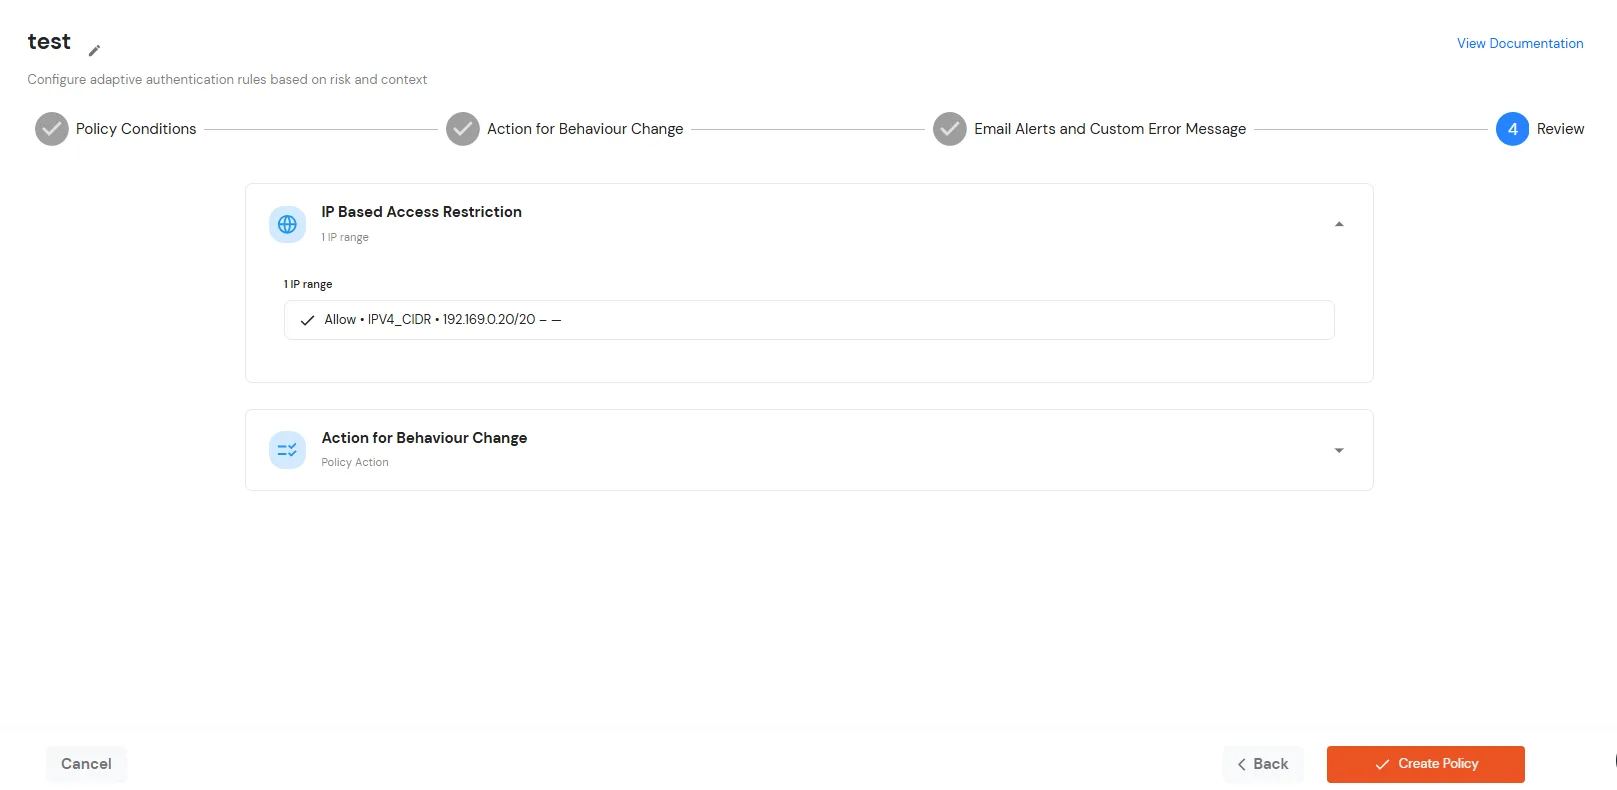
- Click on Create Policy.
G. Add Adaptive Authentication policy to Z-Scaler
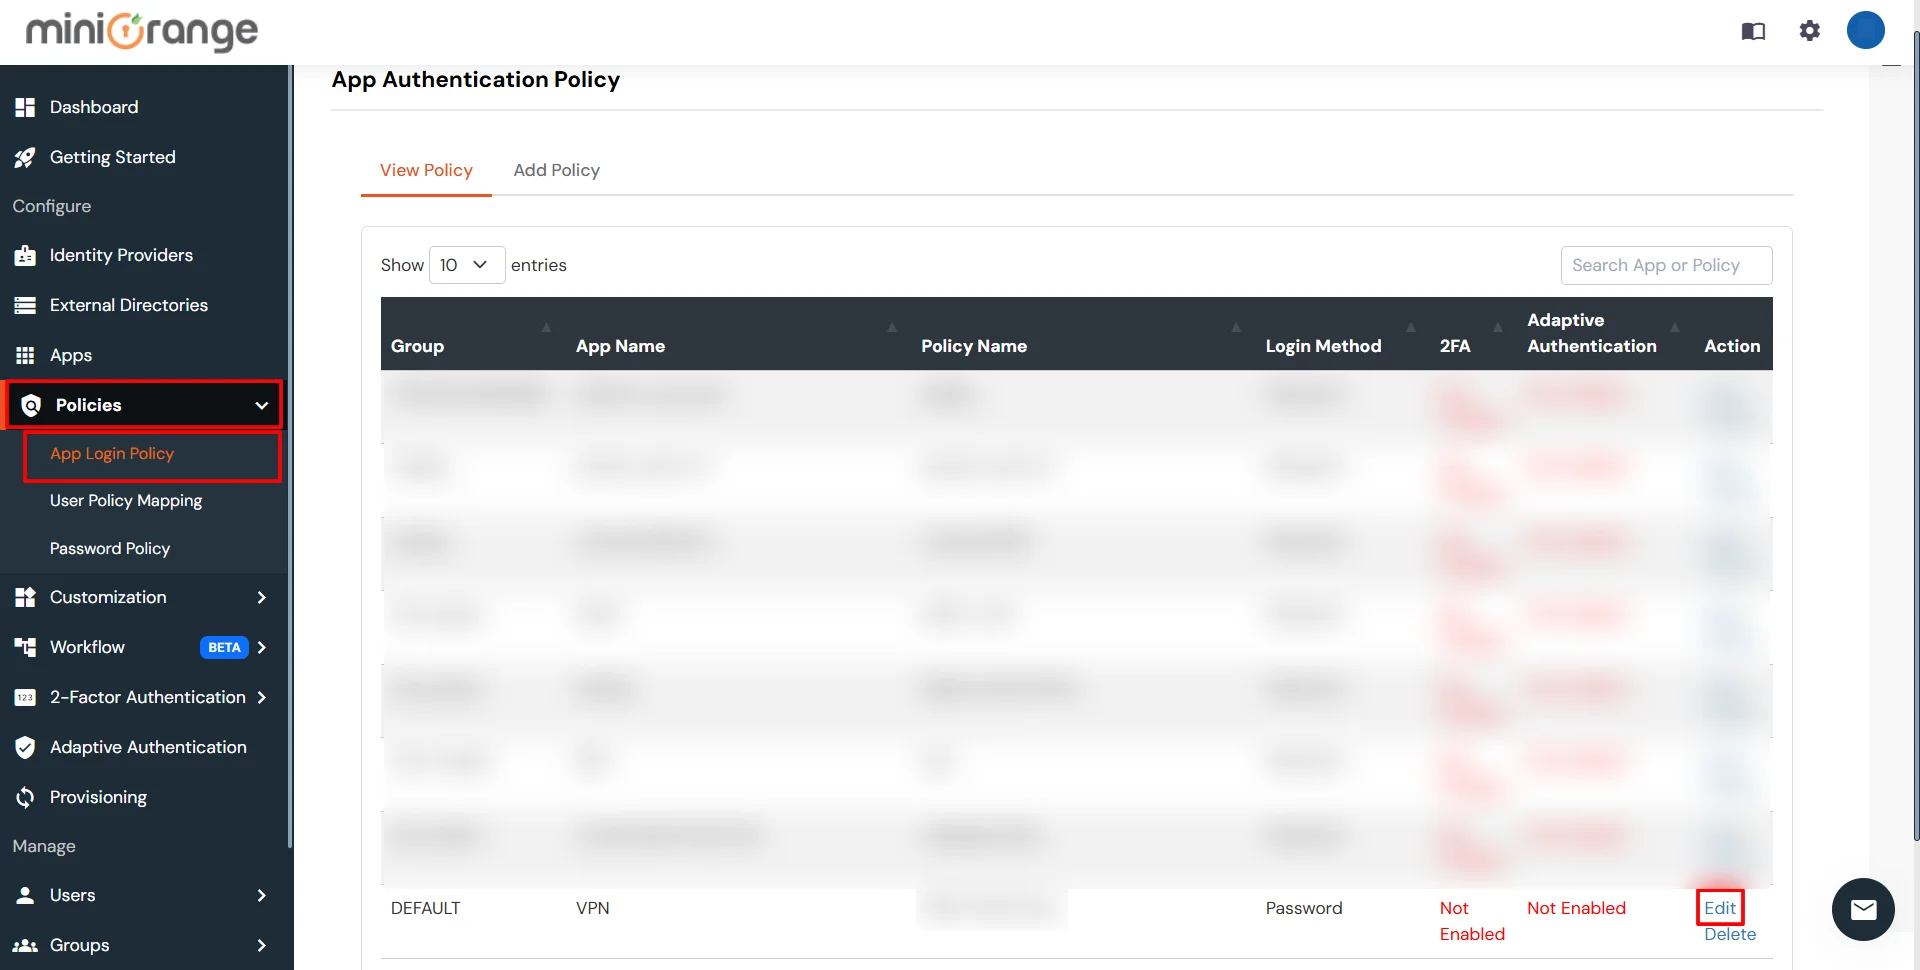
- Login to Self Service Console >> Policies >> App Login Policy.
- Click on Edit icon option for predefined app policy.
- Set your policy in the Policy Name and select Password as First Factor.
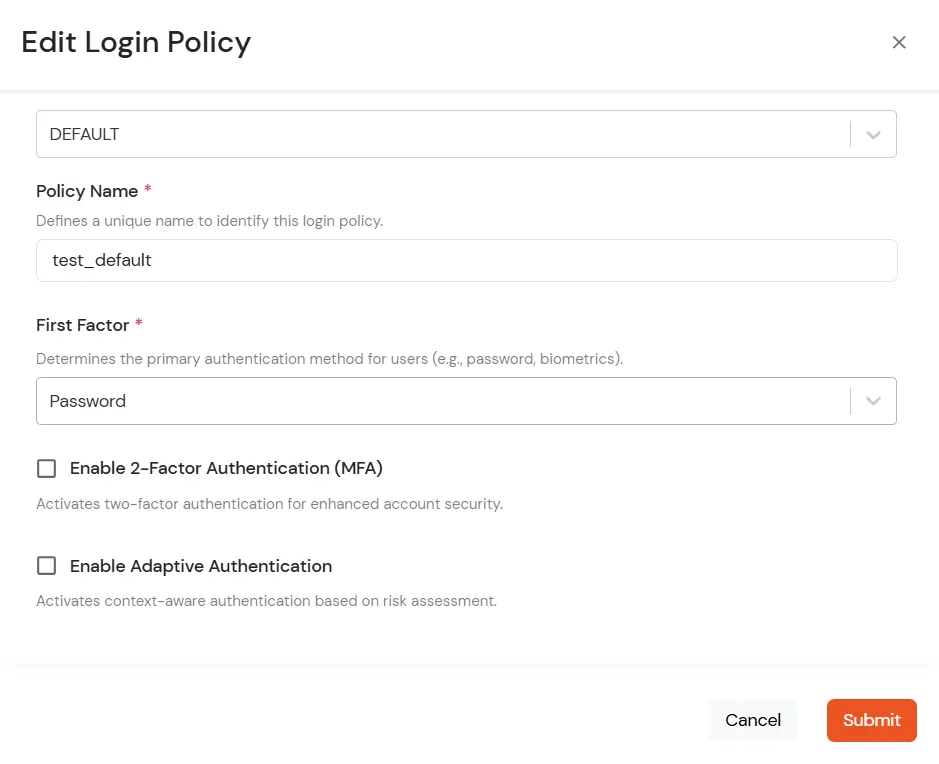
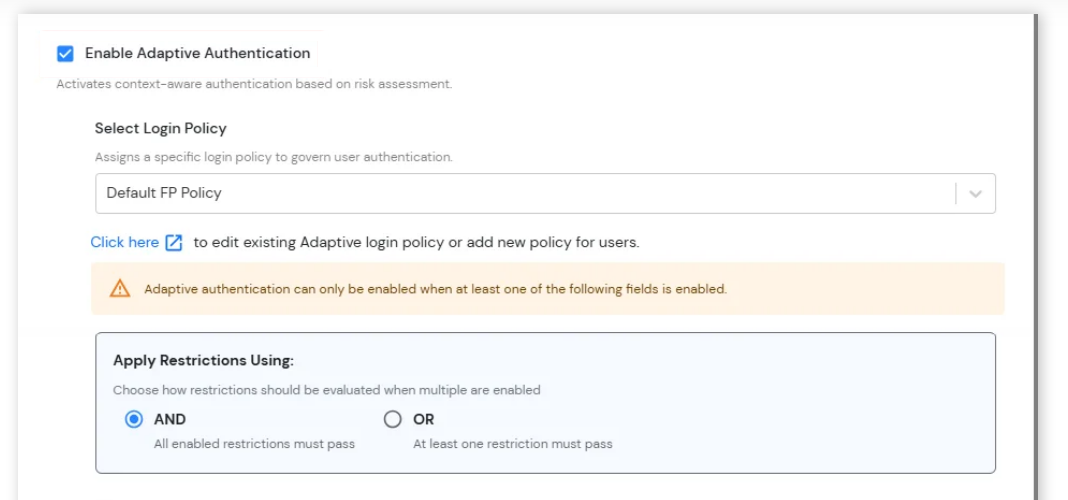
- Enable Adaptive Authentication on Edit Login Policy page and select the required restriction method as an option.
- From Select Login Policy dropdown select the policy we created in last step.
-
Apply Restrictions Using: Configure how multiple adaptive authentication restrictions should be evaluated during user login.
- AND: All enabled restrictions must be successfully satisfied for the login attempt to be allowed.
- OR: At least one enabled restriction must be successfully satisfied for the login attempt to be allowed.
-
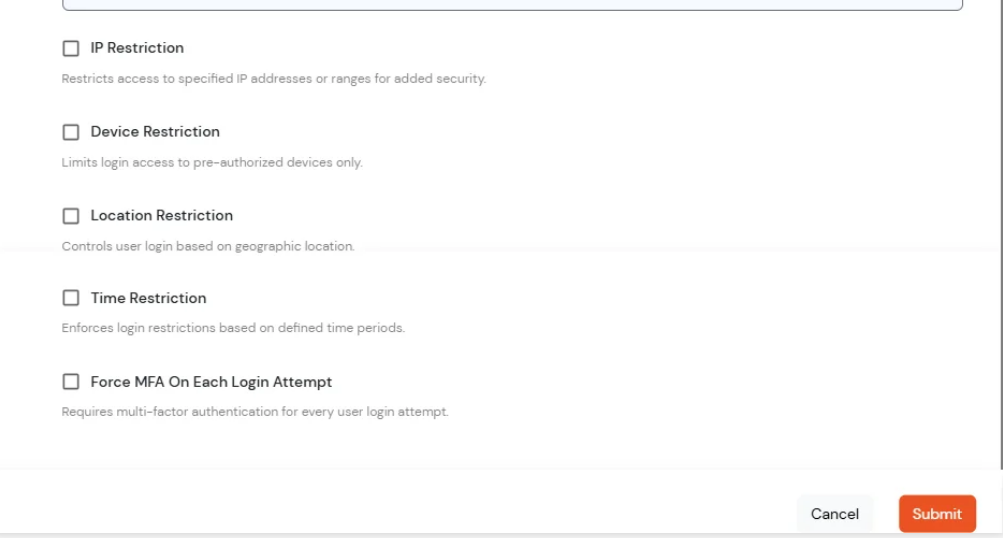
Adaptive Authentication Restrictions: Configure additional login restrictions and verification conditions to strengthen account security and control user access based on contextual risk factors.
- IP Restriction: Restrict login access to specific IP addresses or IP ranges for enhanced security.
- Device Restriction: Allow login access only from trusted or pre-authorized devices.
- Location Restriction: Control user login access based on geographic location.
- Time Restriction: Restrict user login access to specific days or time periods.
- Force MFA On Each Login Attempt: Require users to complete MFA verification during every login attempt regardless of device or session state.
How to add a trusted Device
- When End-user log in to the self service console after the policy for device restriction is on, he is provided the option to add the current device as a trusted device.
External References