Office 365 Single Sign-On (SAML SSO)
Office 365 Single Sign-On (SSO) integration lets you to configure client application that uses Identity Provider (IDP), Directory - Okta, Ping, Azure Active Directory, ADFS for SSO authentication. With SSO being enabled users can use the same Office 365 username and password (credentials) to access multiple apps as they don’t need to remember different passwords for multiple apps.
Seamless Office 365 SSO configuration by miniOrange
Office 365 SAML Single Sign-On (SSO) solution by miniOrange provides secure Single Sign-On access into Office 365 using a single set of login credentials. This allows organizations to secure access to their Office 365 team and easily manage user access, while also providing a seamless login experience for users.
With miniOrange Office 365 SSO, you can:
- Enable your users to automatically login to Office 365
- Have centralized and easy access control of the users
- Connect easily with any external identity source like Azure AD, ADFS, Cognito, etc
Along with SSO, Users requirement around advanced security for Office 365 helped us to introduce enhanced Office 365 Two-Factor Authentication solution. Office 365 2FA security makes it easier for users and organizations to safeguard and prevent themselves from security breaches.
Get Free Installation Help
miniOrange offers free help through a consultation call with our System Engineers to Install or Setup Office 365 SSO solution in your environment with 30-day free trial.
For this, you need to just send us an email at idpsupport@xecurify.com to book a slot and we'll help you in no time.
Supported SSO Features
miniOrange Office 365 SAML integration supports the following features:
- SP Initiated SSO Login: Users can access their Office 365 account via a URL or bookmark. They will automatically be redirected to the miniOrange portal for login. Once they've signed on, they'll be automatically redirected and logged into Office 365.
- IdP Initiated SSO Login: Users need to login to the miniOrange first , and then click on the Office 365 icon on the applications dashboard to access Office 365.(If you have set up any more Identity Sources, you will log in to that platform).
Connect with External Source of Users
miniOrange provides user authentication from various external sources, which can be Directories (like ADFS, Microsoft Active Directory, OpenLDAP, AWS etc), Identity Providers (like Microsoft Entra ID, Okta, AWS), and many more. You can configure your existing directory/user store or add users in miniOrange.
Prerequisites
1. Sync On-Premise Active Directory with Microsoft Entra ID
NOTE: If you want to use your On-Premise Active Directory as a user store to Single Sign-On into Office 365 then follow the below steps to sync your AD and Microsoft Entra ID.
- Download the Microsoft Entra ID Connect
- Run the Microsoft Entra ID installer on your domain machine and follow the setup.
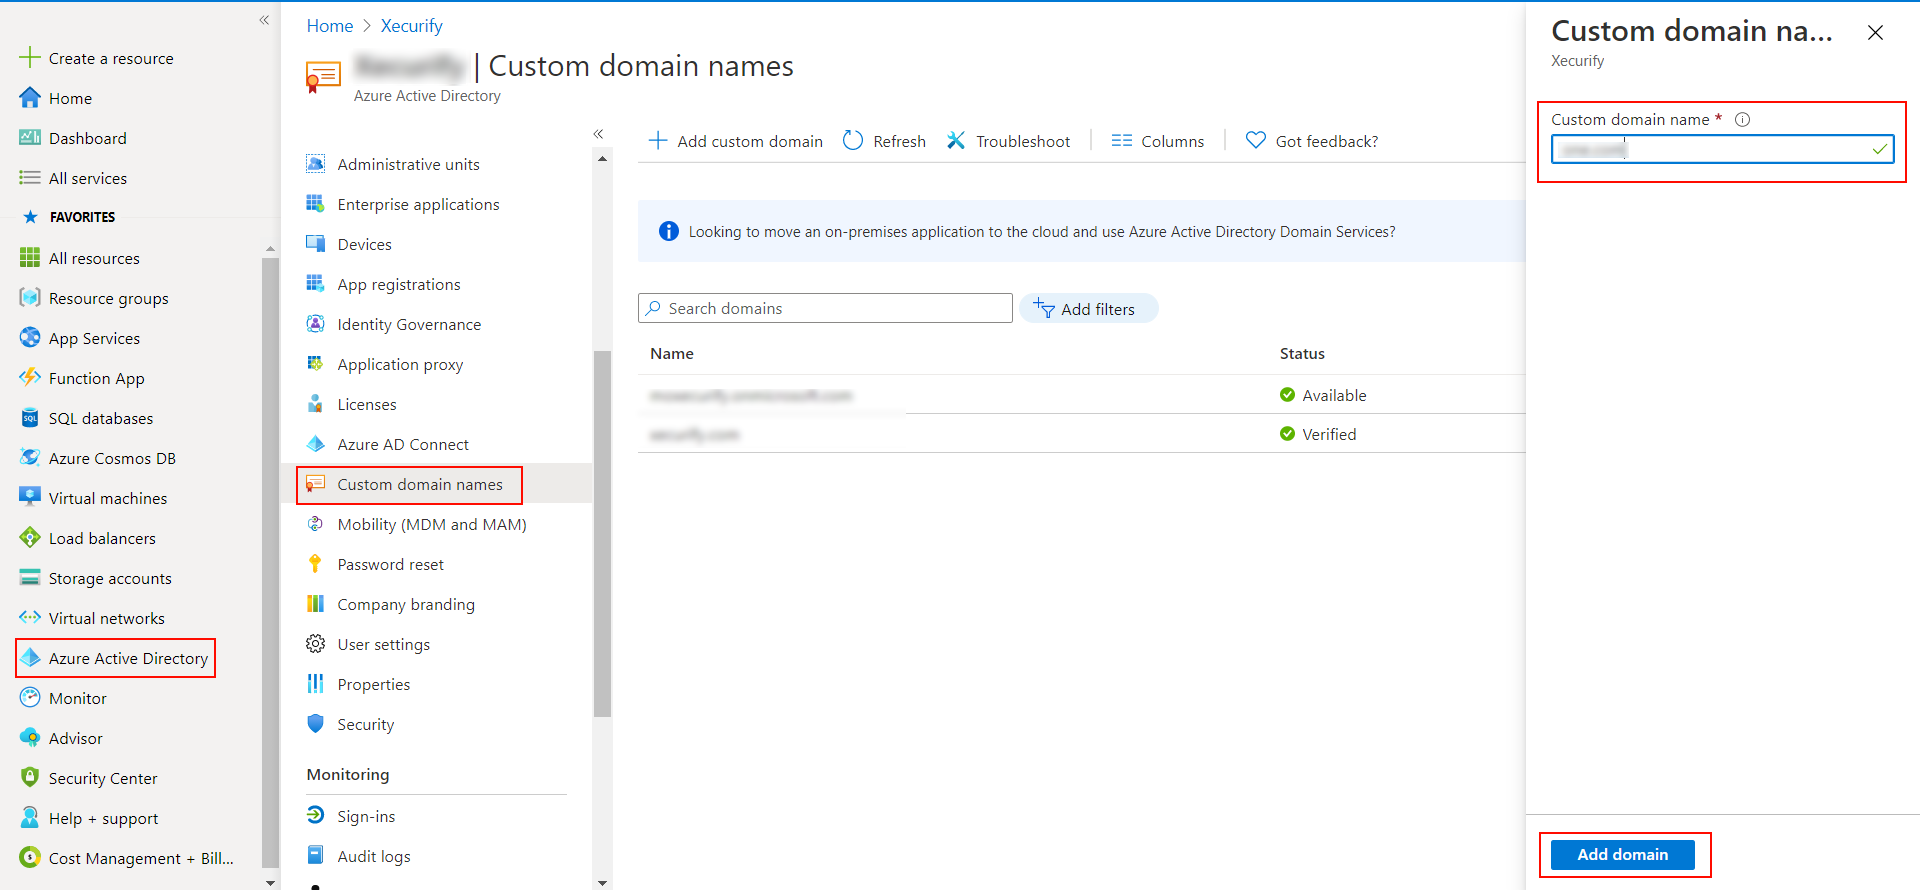
2. Verify your UPN Domain in Azure Portal
- In the Azure portal navigate to Microsoft Entra ID >> Custom domain names and click on Add custom domain.
- Enter the full domain name in the right pane that pops up and click on Add domain.
- A new window will open up with TXT/MX records for the domain. You will have to add the resented entry in your domain name registrar.
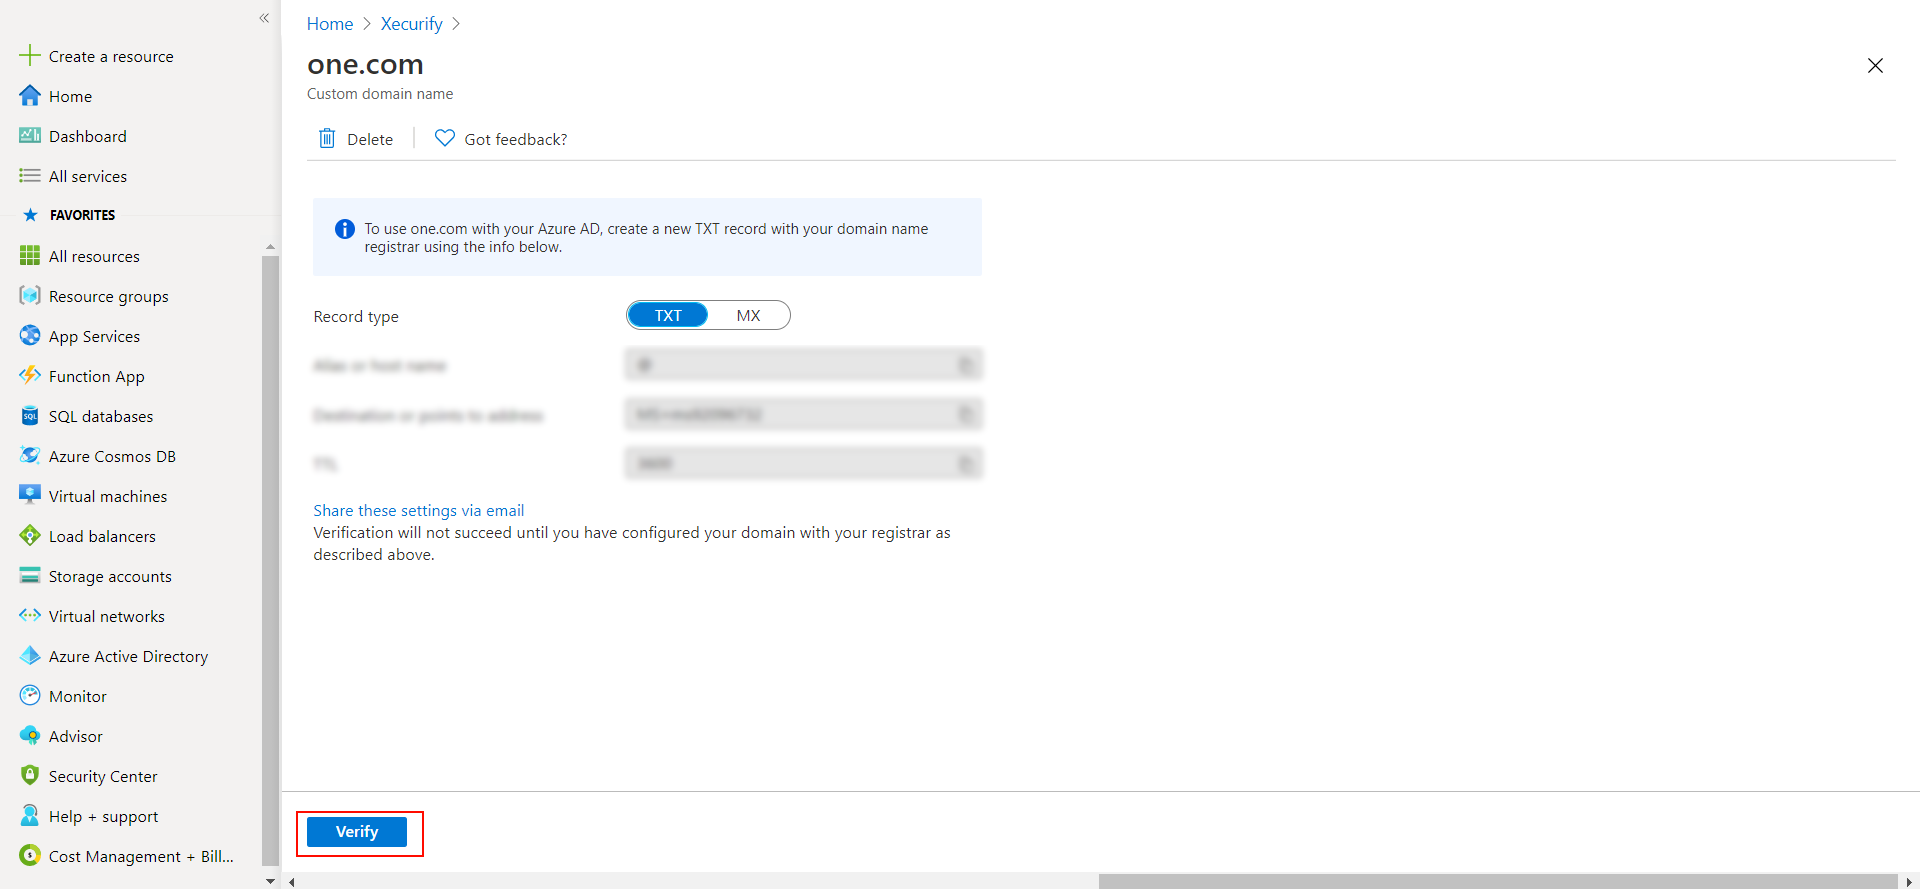
- Click on verify once you have added the entry
Please make sure your organisation branding is already set under Customization >> Login and Registration Branding in the left menu of the dashboard.
Follow the step-by-step guide given below for Office 365 Single Sign-On (SSO)
1. Configure Office 365 in miniOrange
- Login into miniOrange Admin Console.
- Go to Apps and click on Add Application button.

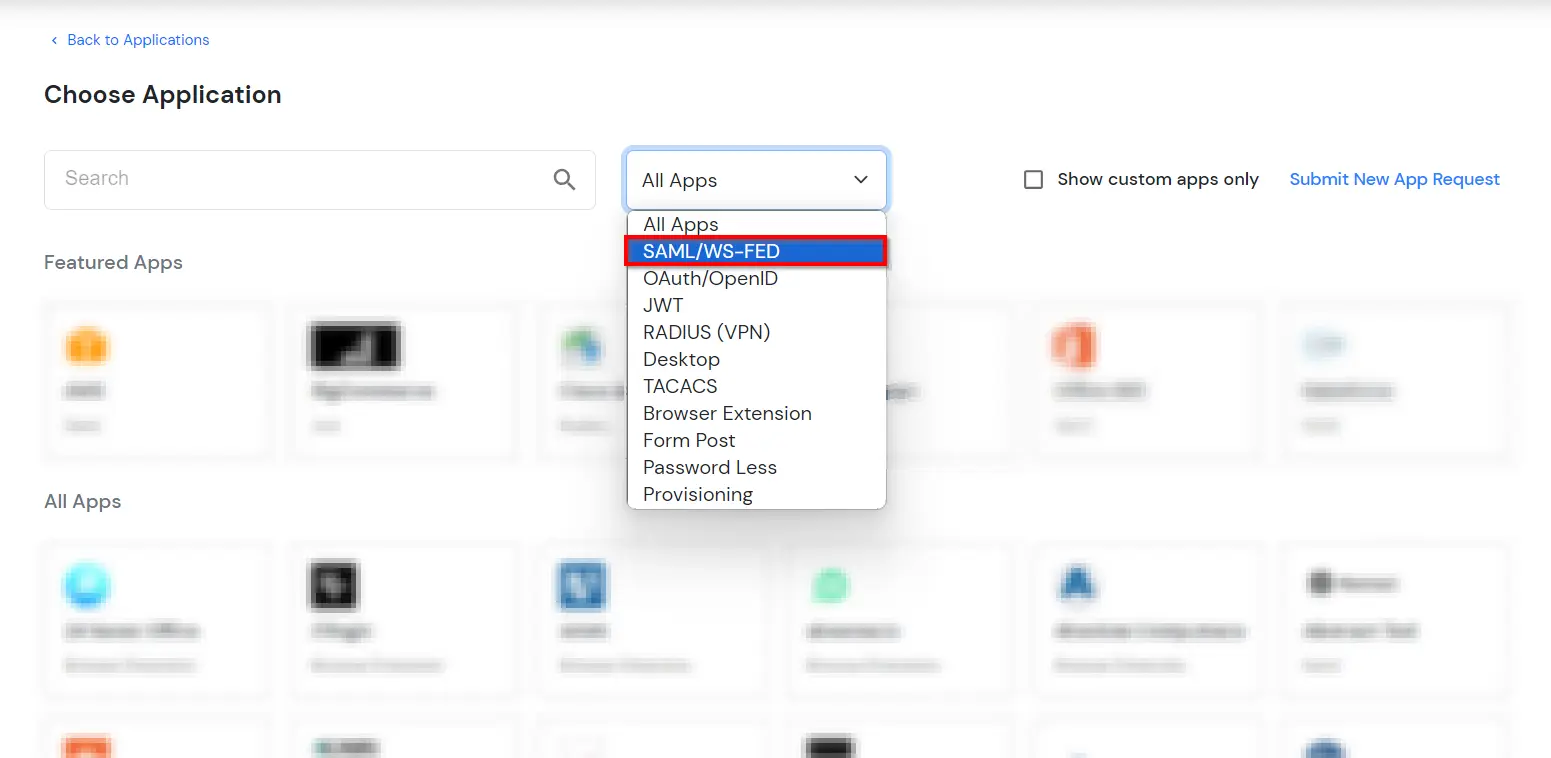
- In Choose Application Type click on Create App button in SAML/WS-FED application type.
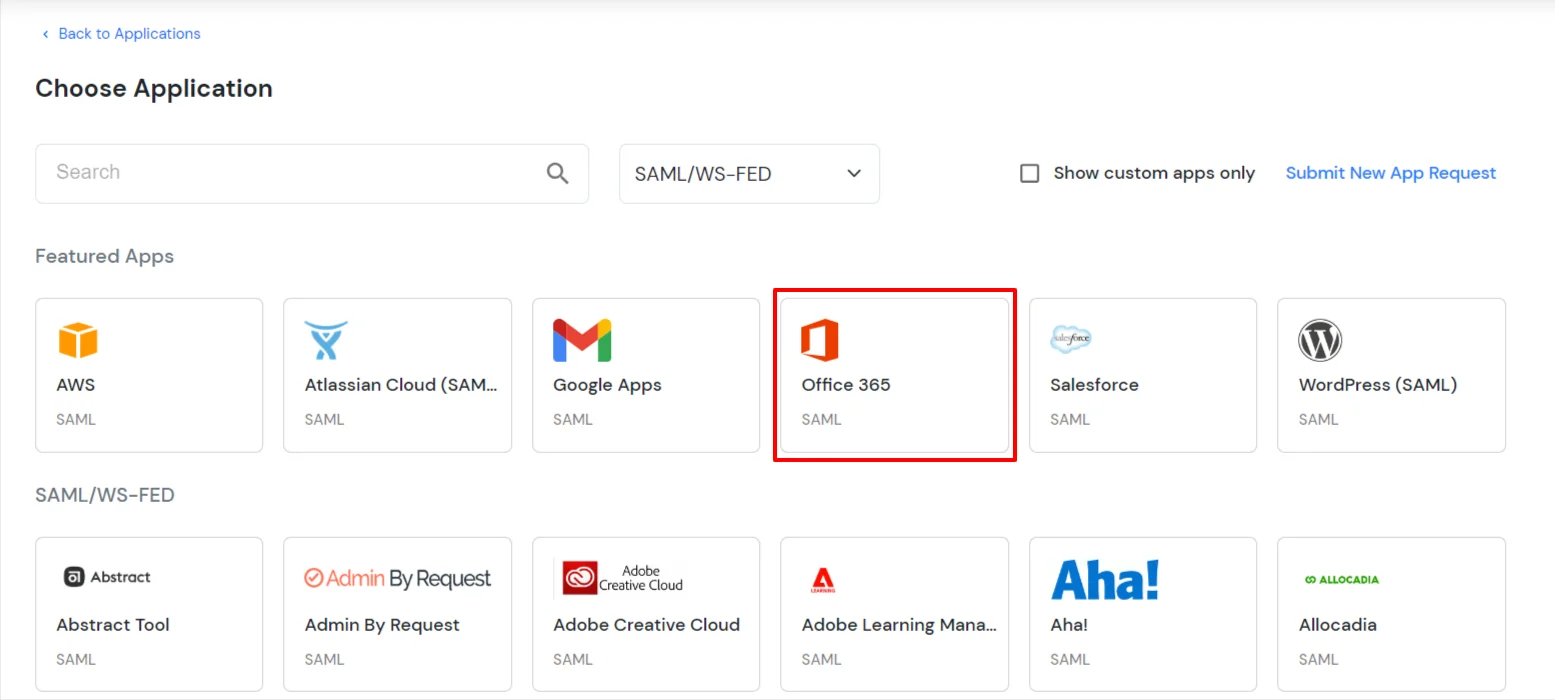
- In the next step, search for Office 365. Click on Office 365 app.
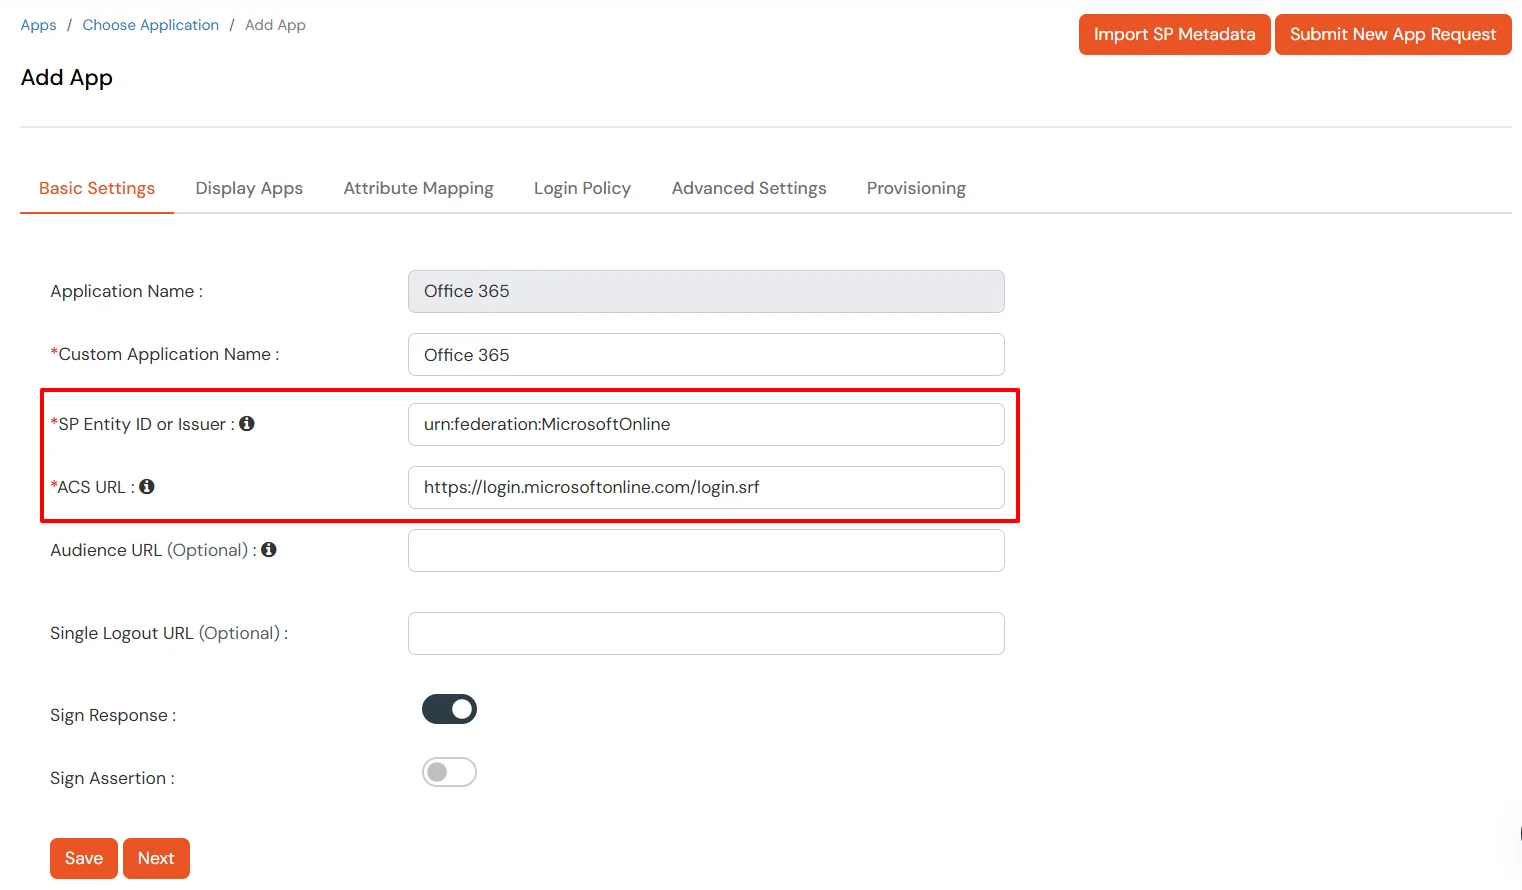
- Make sure the SP Entity ID or Issuer is:
urn:federation:MicrosoftOnline
- Make sure the ACS URL is:
https://login.microsoftonline.com/login.srf
- Click on Next.
-
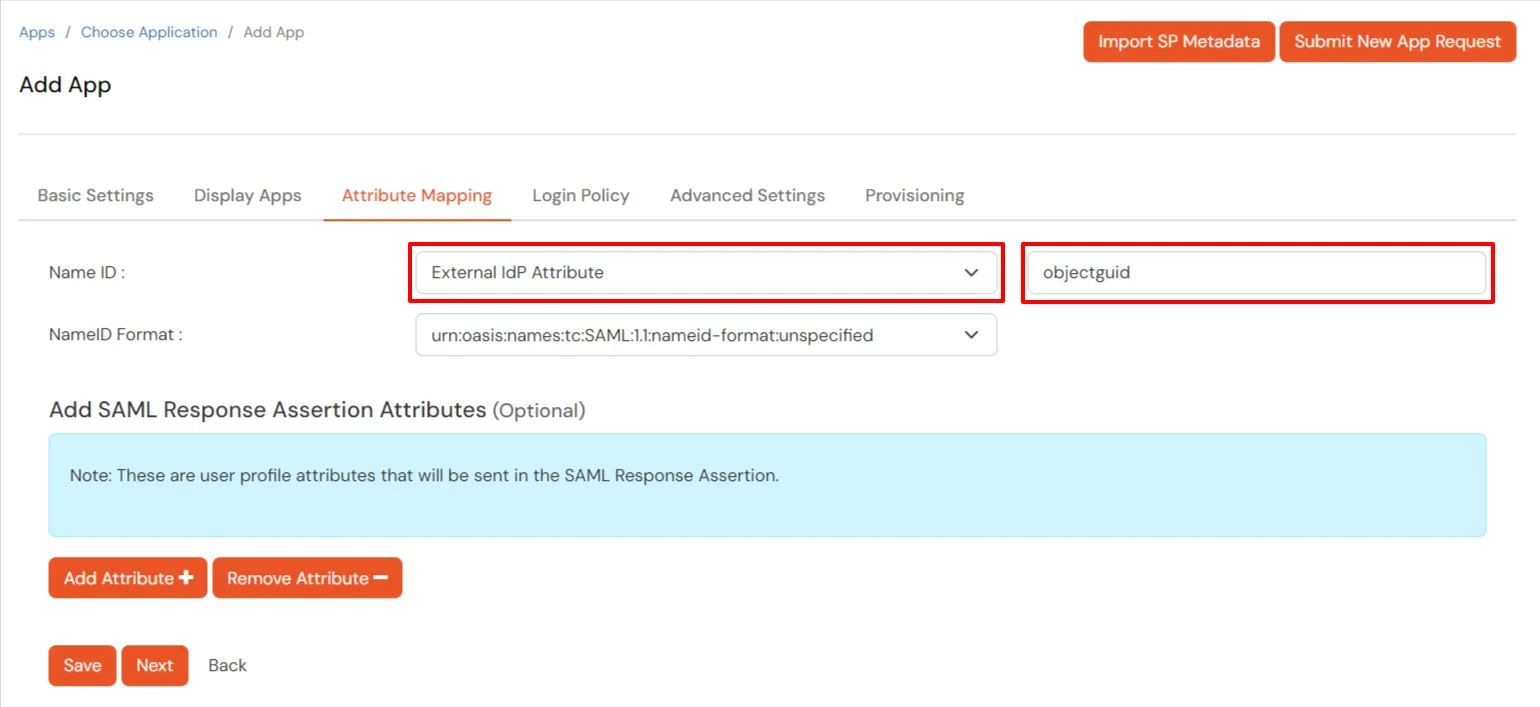
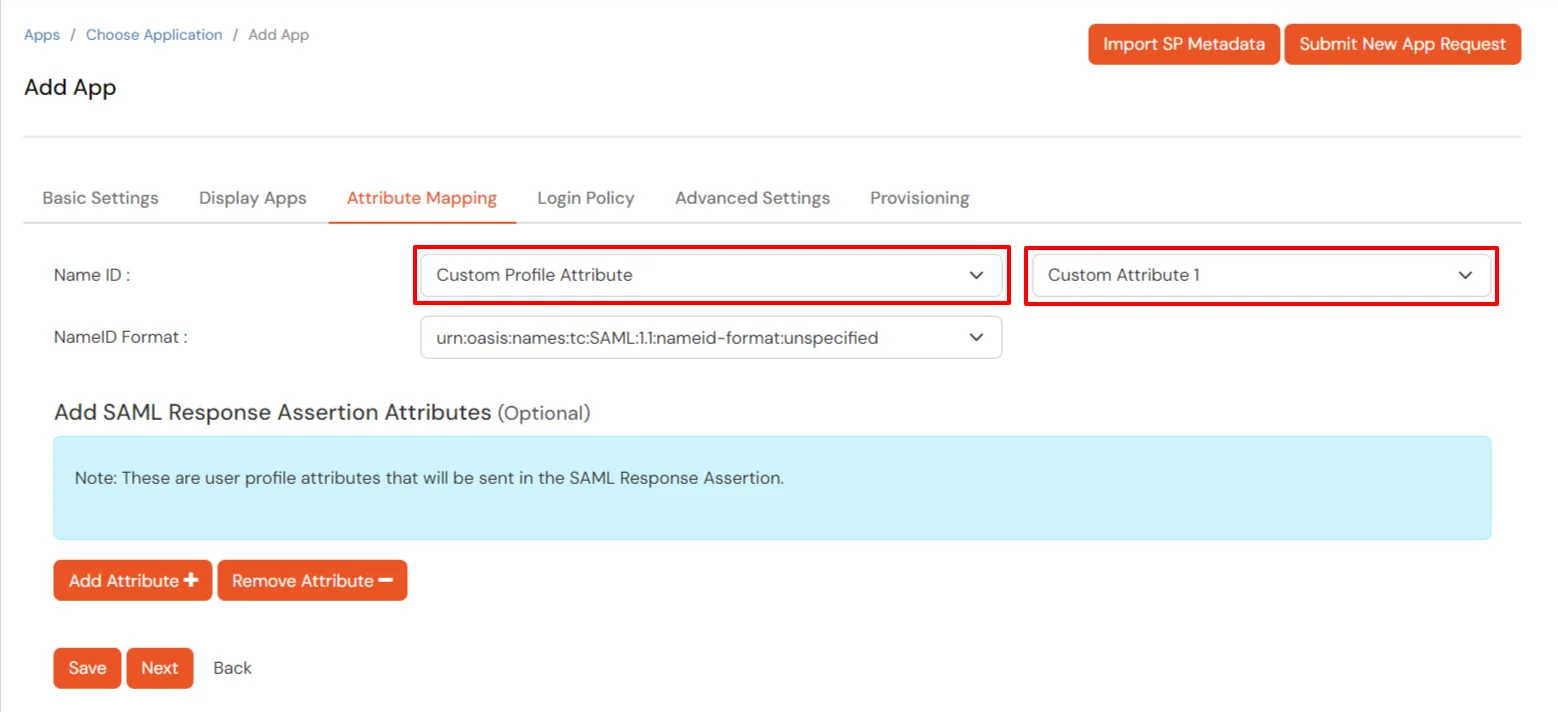
Configure Name ID based on the User Store you are using:
- Using Active Directory / miniOrange brokering service: Select External IDP Attribute from the dropdown and add objectguid in the text-box that appears.
- Using miniOrange as a User Store: Select Custom Profile Attribute and select a Custom Attribute from the drop-down.
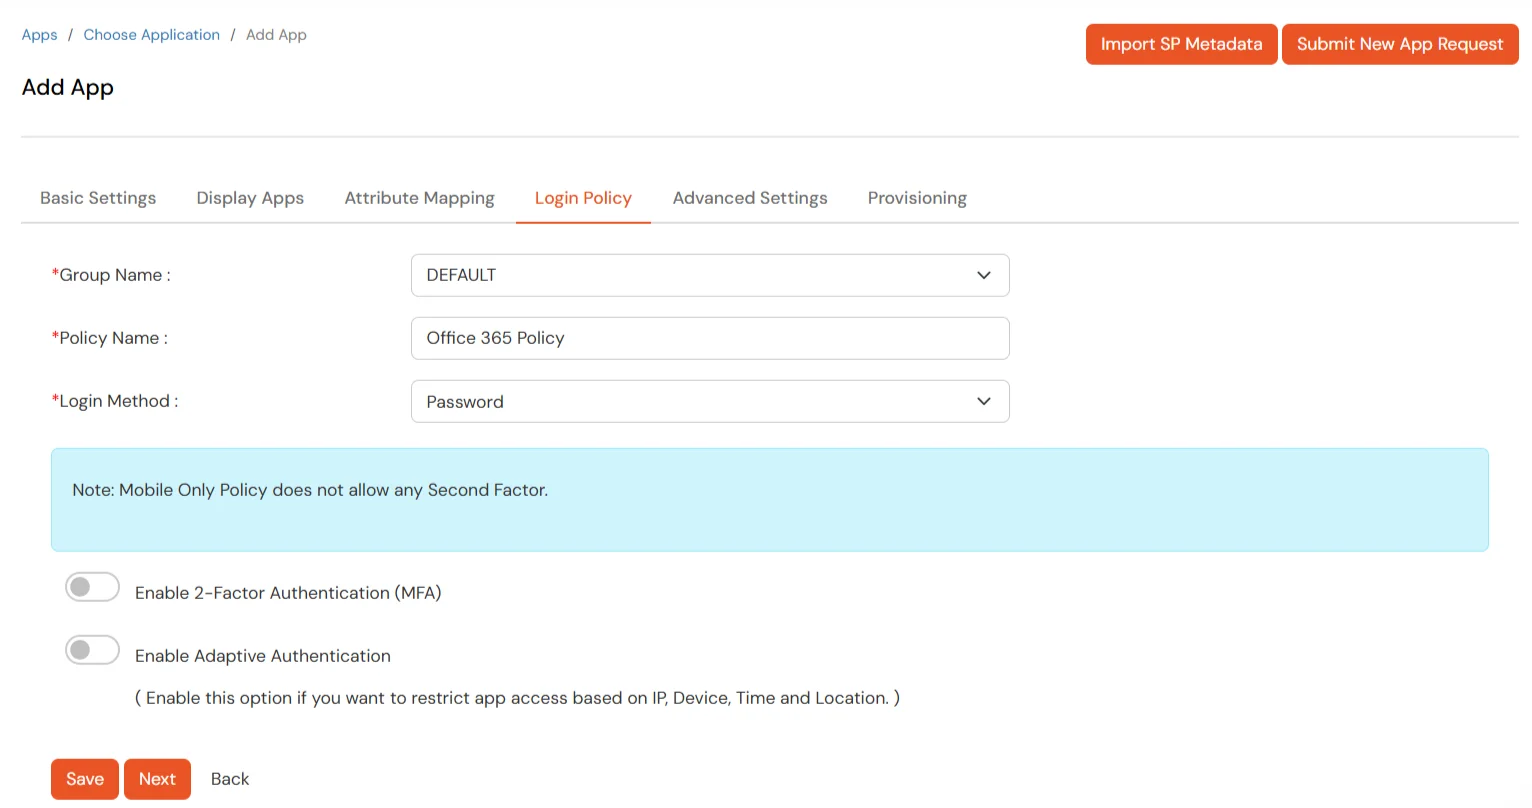
- Set the login policy. You can choose to enable 2FA for login or have users login using a standard username-password.
- Click on Save to configure Office 365.
2. Configure Microsoft Graph Services
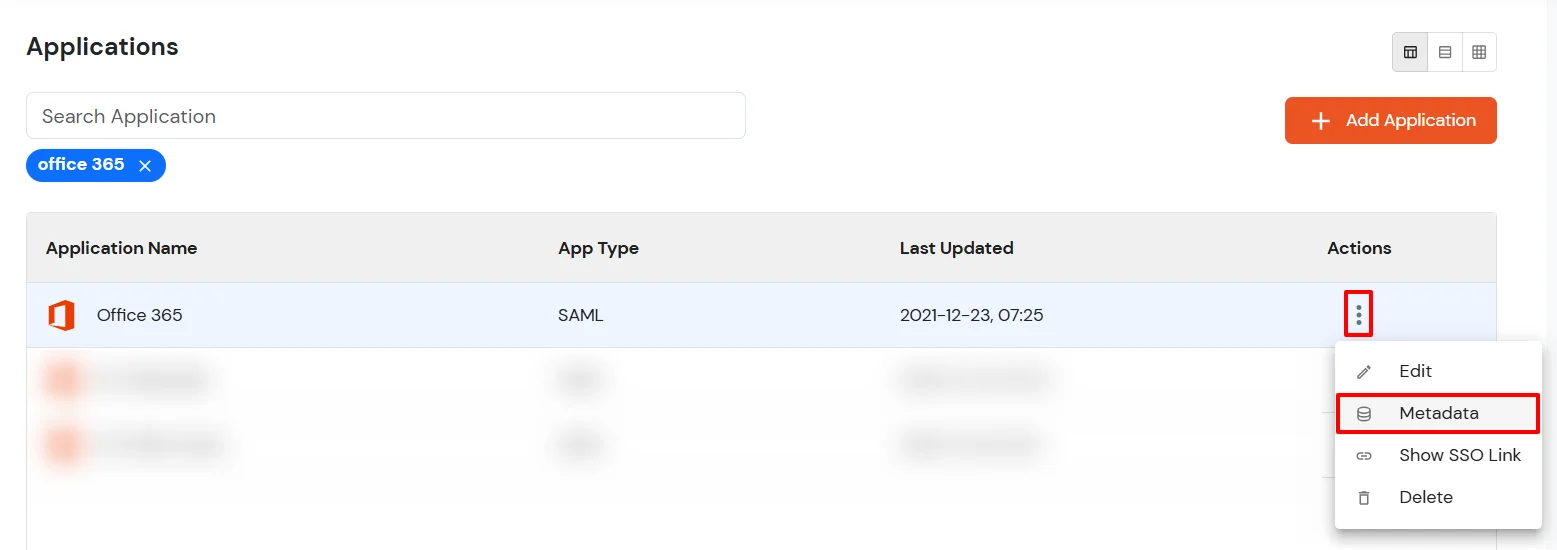
- Click on the icon ' ' and choose Metadata.
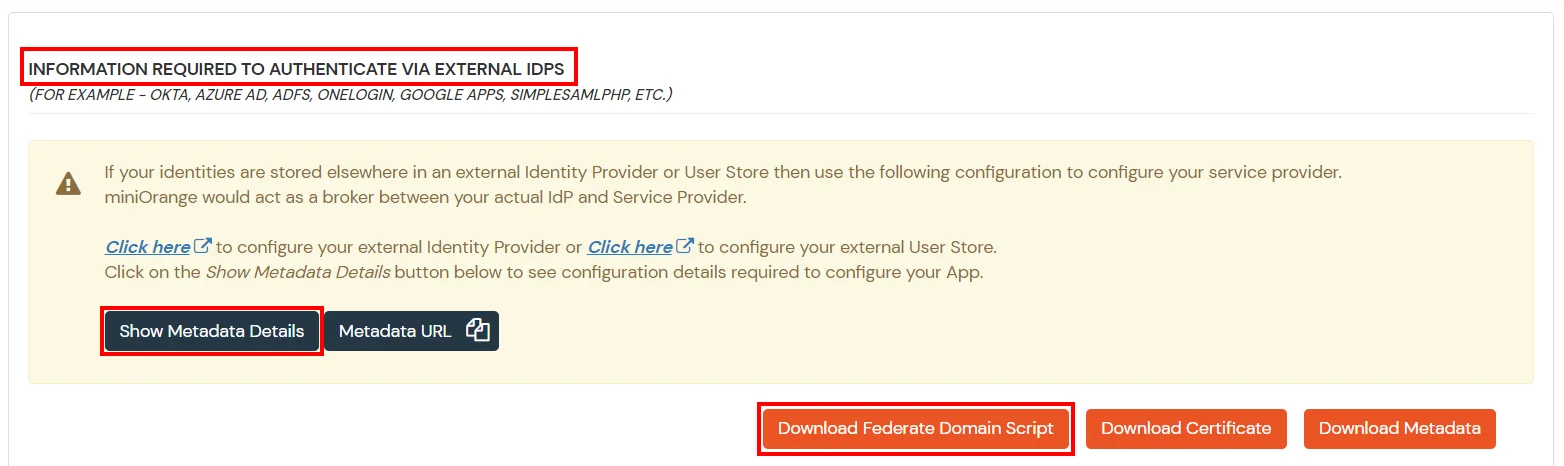
- Click on the Download Federate Domain Script button under "INFORMATION REQUIRED TO AUTHENTICATE VIA EXTERNAL IDPS"
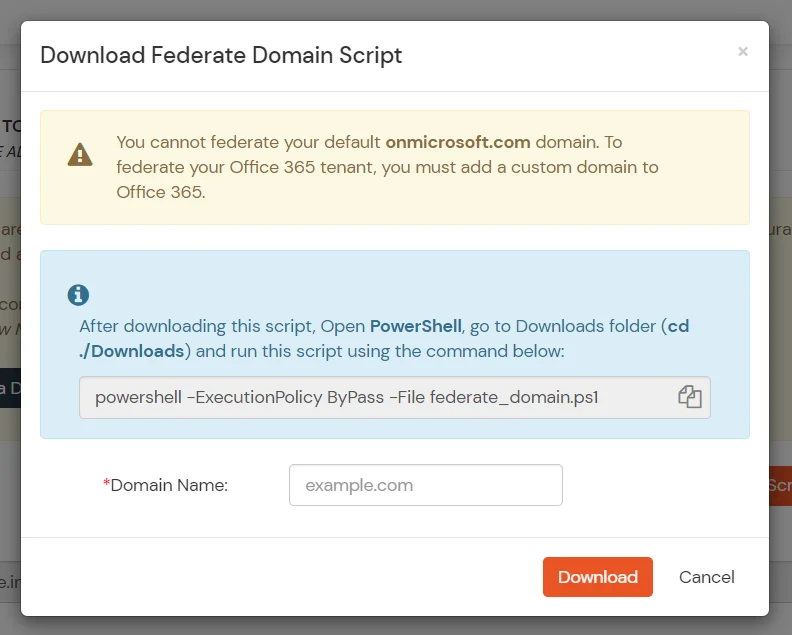
- Enter the domain name that you want to federate and click on Download.
Note: You cannot federate your default "onmicrosoft.com" domain. To federate your Office 365 tenant, you must add a custom domain to Office 365.
- After downloading the script, Open PowerShell run the federate_domain script using:
cd ./Downloads
    powershell -ExecutionPolicy ByPass -File federate_domain.ps1
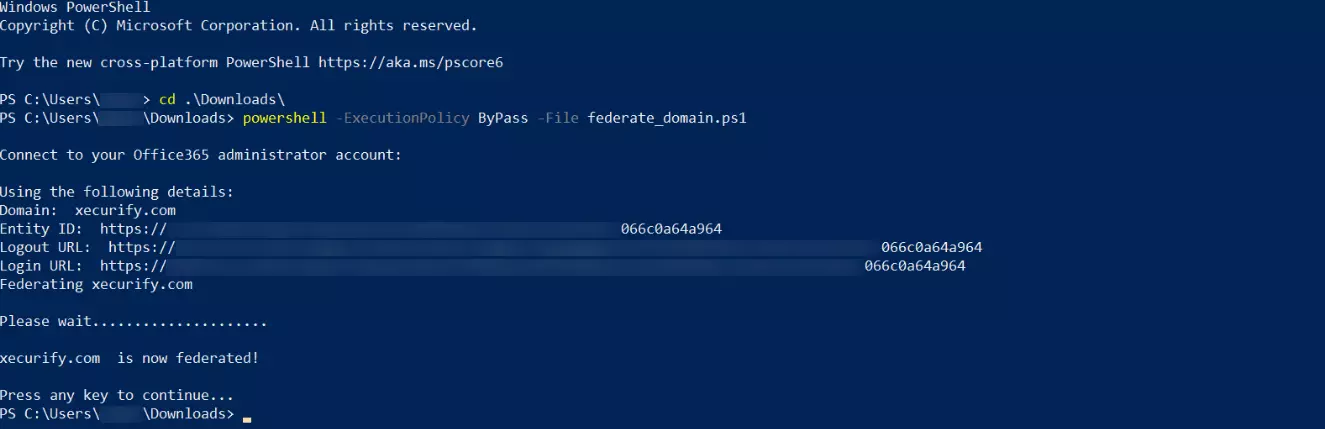
- Your domain is now federated. Use the commands below to check your federation settings:
Get-MgDomain -DomainId "<domain>" | Select-Object Id, AuthenticationType

3. Now sign in to your Microsoft Office 365 account with miniOrange IdP by either of the two steps:
1. Using SP initiated login :-
- Go to Office 365 Login and click on sign-in
- You will be redirected to Microsoft Graph portal. Here you have to enter the UPN of the user.(It should contain the domain that is federated with miniOrange)
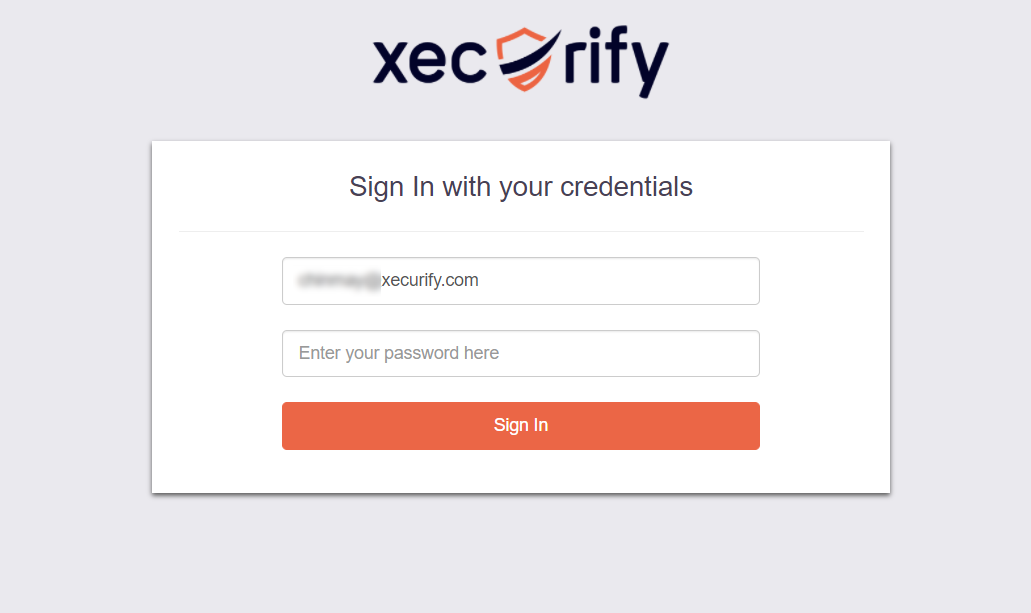
- Now you will be redirected to miniOrange IdP Sign On Page.
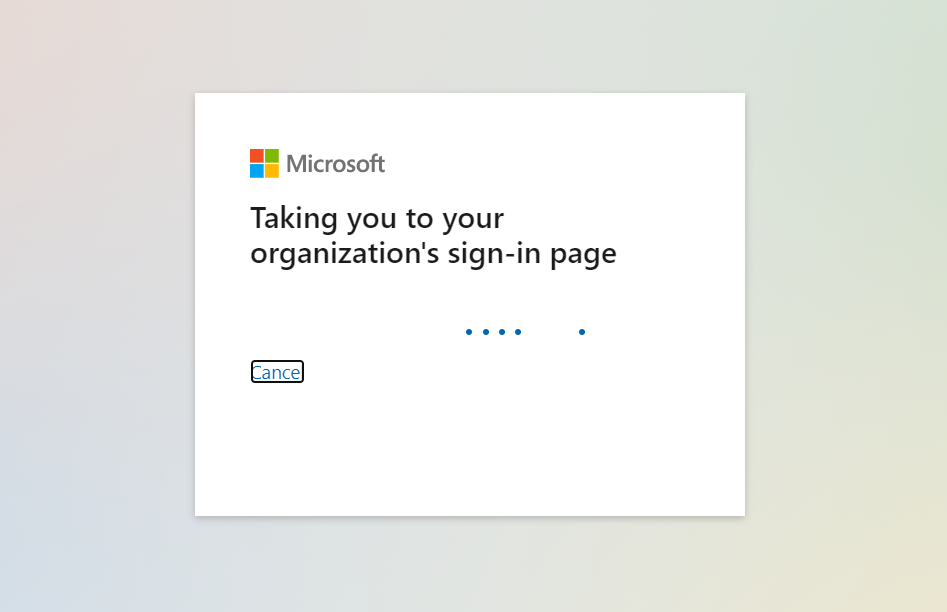
- Enter your login credential and click on Login. You will be automatically logged in to your Office 365 account.
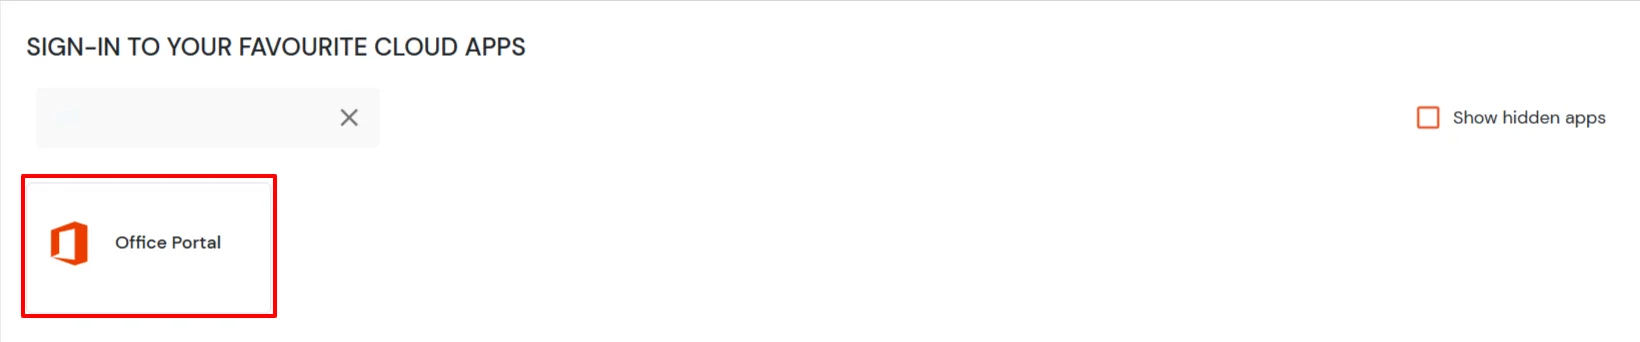
2. Using IdP initiated login :-
- Login to your miniOrange Self Service Console as an End User and click on the Office 365 icon on your Dashboard.
- Once you click on Office 365 you don't need to enter credentials again you will be redirected to Office 365 account.
Troubleshooting
How to identify errors in SAML assertions sent by your IDP?
- Use the SAML Assertion Validator to troubleshoot single sign-on (SSO) login problems and identify errors in SAML assertions sent by your identity provider. Click on this link know more about the error identification in SAML Assertions.
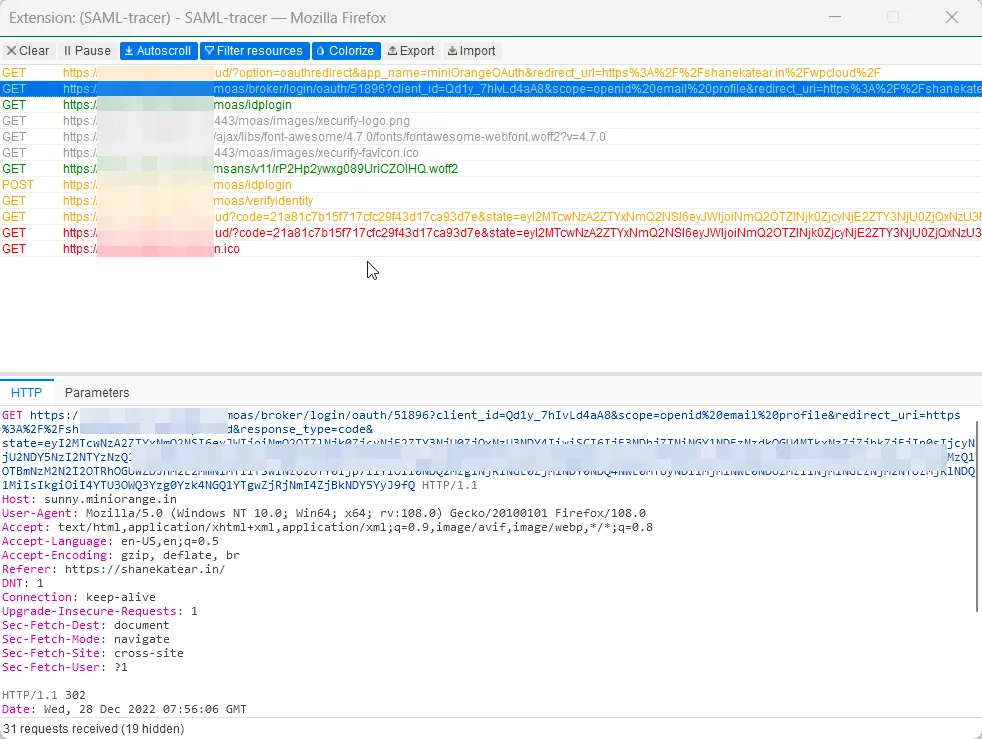
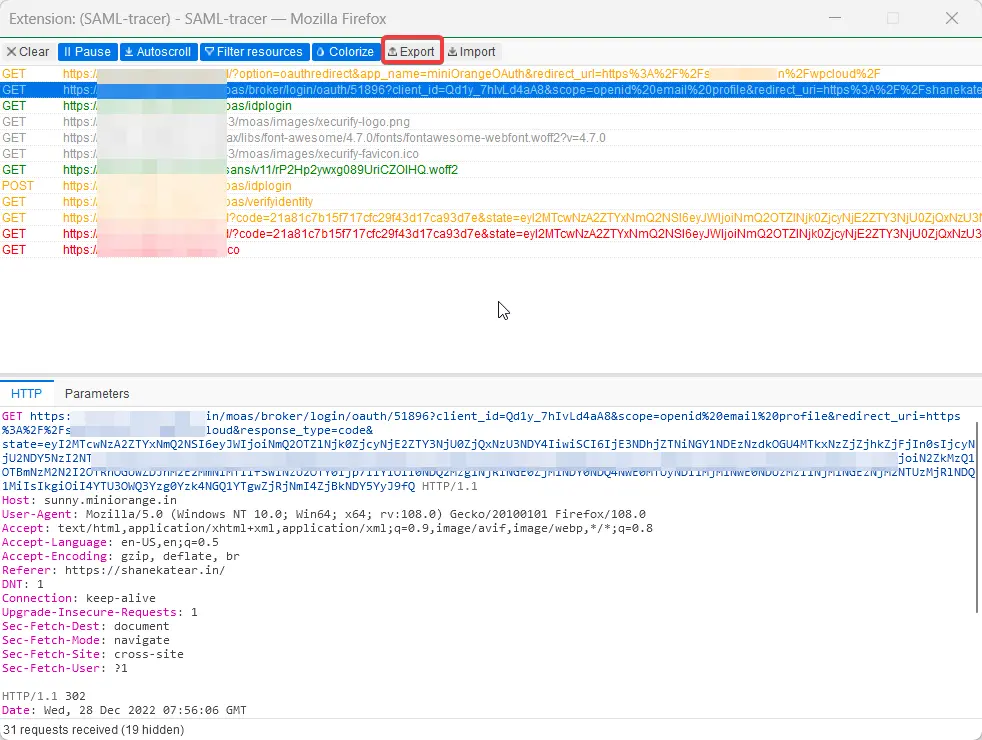
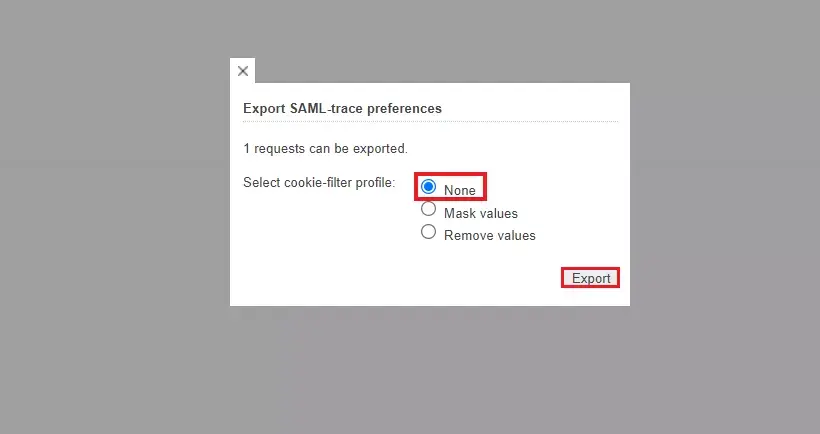
How can I trace and export the SAML tracer logs?
How to remove miniOrange SSO/2FA from Office 365?
- Open PowerShell as admin.
- Run the command Connect-MsolService.
- Enter your Microsoft Credentials. [Use Microsoft global admin who has Microsoft in his domain]
- Run the below command:
Set-MsolDomainAuthentication -Authentication Managed -DomainName <domainName> -PreferredAuthenticationProtocol SAMLP
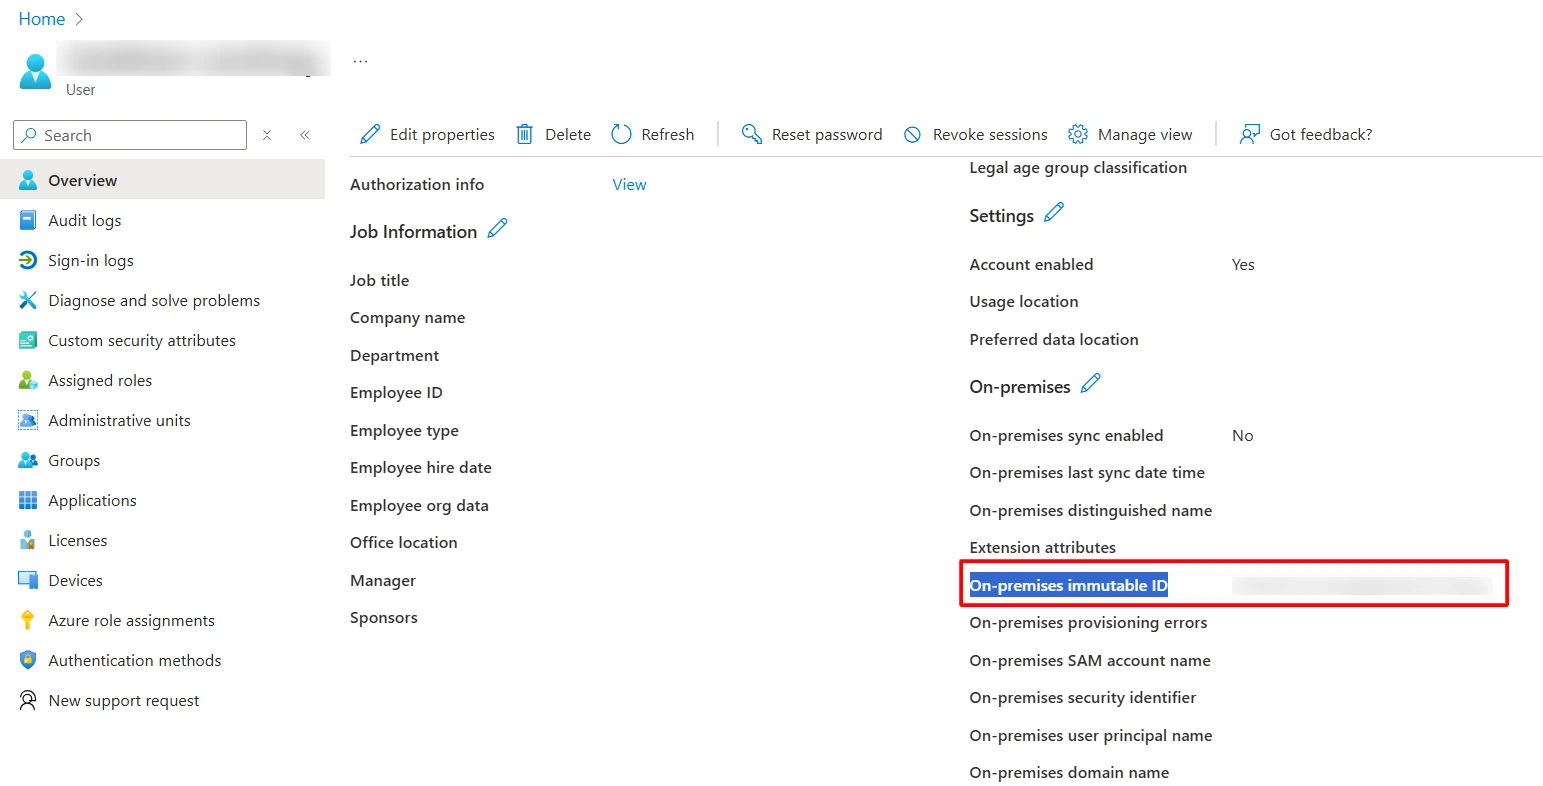
What to do if On-premises AD isn’t connected to Entra ID and users don’t have On Premises Immutable ID?
- You can manually update the OnPremisesImmutableId for a user using following commands:
Connect-MgGraph-Scopes "User.ReadWrite.All"$user = Get-MgUser -UserId "userprinciapname@domain.com" #To get the userObject.$objectGuid = "YOUR OBJECT GUID" #This can be created manually, or you can even use the UPN of that user.Update-MgUser -UserId $user.Id -OnPremisesImmutableId $objectGuid #To update the user On Premises Immutable Id.- Once updated, you can check the On-premises immutable ID in the user properties.