Setup Guide for Office 365 provisioning | Microsoft 365 Provisioning
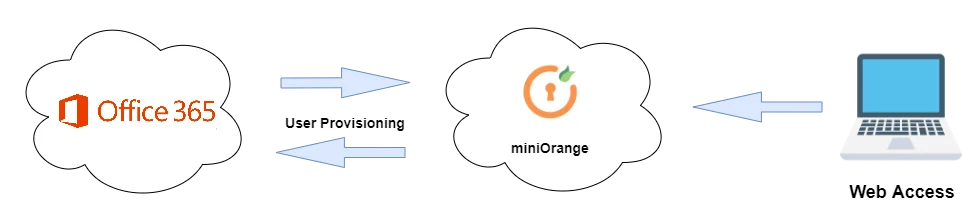
Microsoft 365 Provisioning involves the process of creating, updating and deleting a user's account in Office 365 from your miniOrange portal. With miniOrange provisioning feature, you can provision all the users with their identities automatically in Office 365.
By granting users access to Office 365, you can streamline the process of setting up new users and teams, while effectively managing access permissions throughout the user lifecycle. With miniOrange, you can create, read, and update user accounts for both new and existing users, deactivate and remove accounts when needed, and synchronize data seamlessly.
Microsoft 365 User Provisioning and deprovisioning actions are bi-directional, so you can create accounts inside an external application and import them into miniOrange, or alternatively create the accounts in miniOrange and then push them out to any linked external applications.
Office 365 Deprovisioning means deleting a user and removing their access from multiple applications and network systems at once. Deprovisioning action is triggered when an employee leaves a company or changes roles within the organization. The deprovisioning features increase your organization's security profile by removing access to sensitive applications and content from people who leave your organization.
What is SCIM for user provisioning?
System for Cross-domain Identity Management (SCIM) is an open standard to automate user provisioning. SCIM standard is a communication medium between an Identity Provider (IDP) and a Service Provider (SP) that requires user identity information.
SCIM provides a defined schema for representing users and groups, and a RESTful API to run CRUD operations on those user and group resources which is essential part of Provisioning users to Office 365
With the SCIM Protocol, user data is stored in a consistent way and can be shared with different applications. Since data is transferred automatically, complex exchanges are simplified and the risk of error is reduced. You will learn more about Office 365 provisioning in this document below.
Prerequisites
- Prerequisites to provision users in Office 365
- Make sure you have enough licenses in your Microsoft account to be assigned to users.
- If your Office 365 implementation uses Windows Azure Office 365 Sync Service (Azure AD Connect), then please contact miniOrange for further advice.
We will assess your use case and your current setup to determine what could be done to provide you with an optimal solution.
- miniOrange prerequisites
Provisioning & Deprovisioning Scenarios
miniOrange provides Provisioning solutions for all scenarios of user management (provisioning), which includes AD Integration, LDAP Integration and automated provisioning for all External Applications such as Office 365, Google Workspace, Workday, etc
Follow the step-by-step guide given below to setup Office 365 Provisioning
1. Setup Provisioning for Office 365
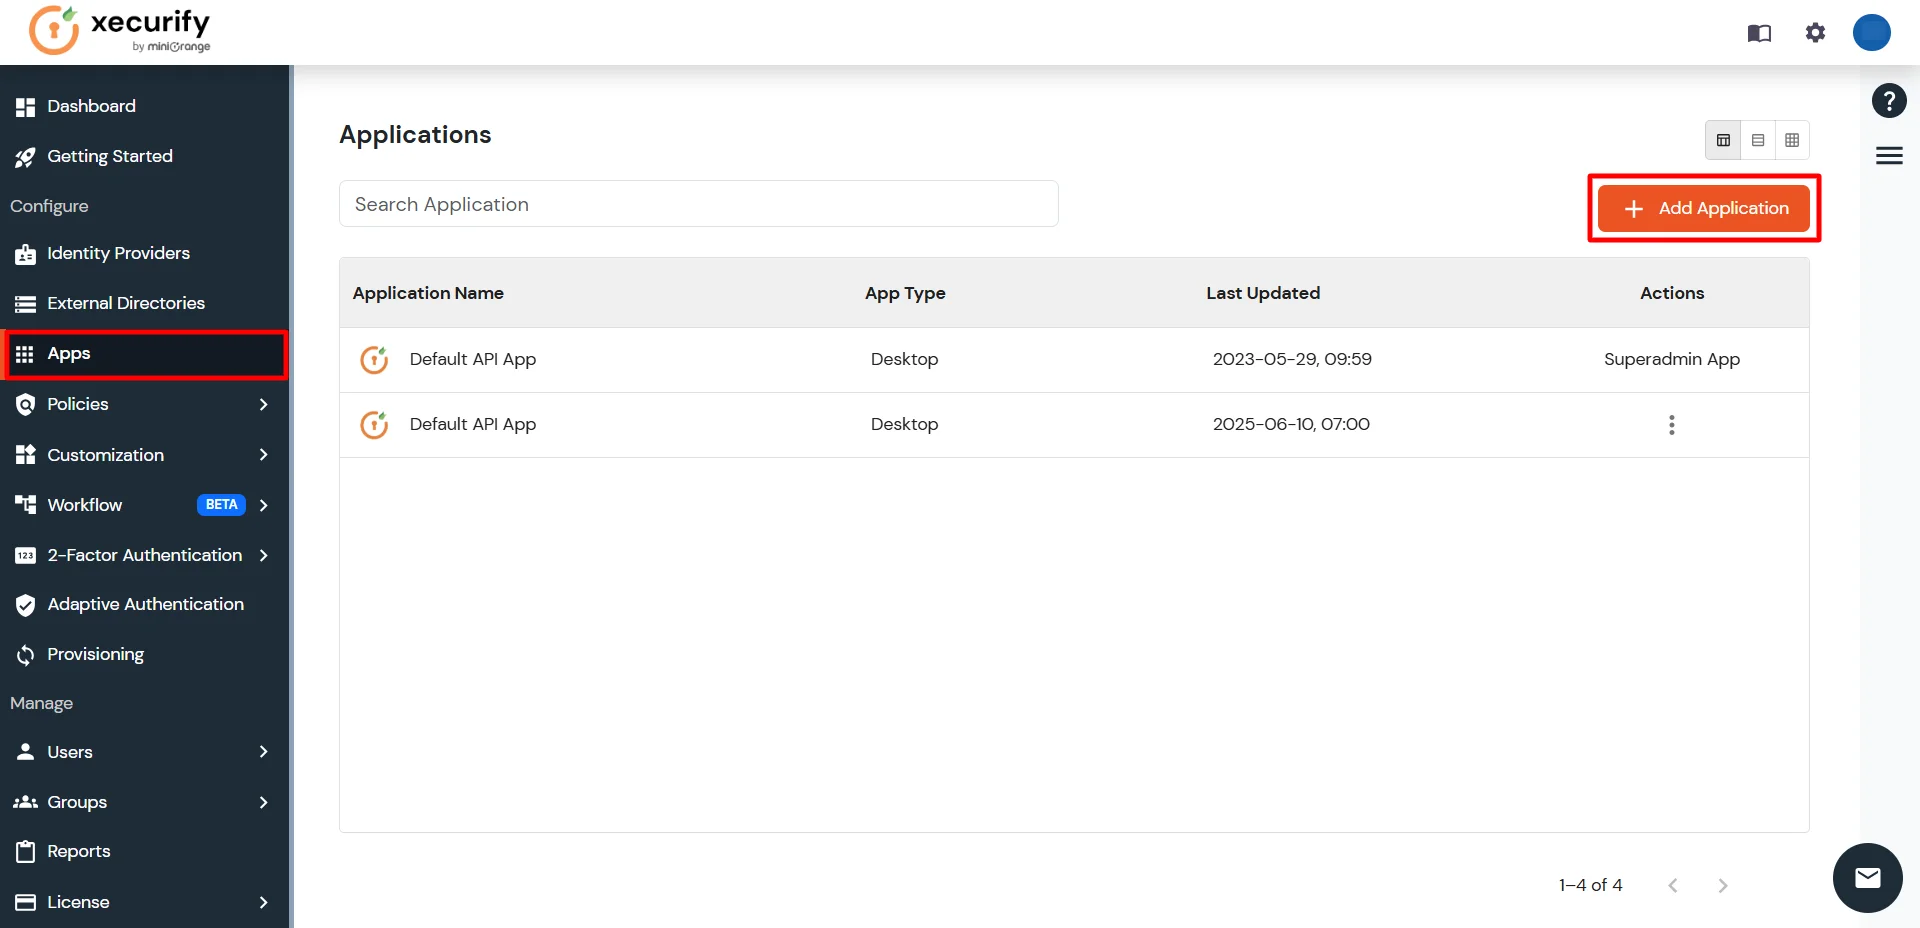
- Login into miniOrange Admin Console.
- Click on Apps from the left-side navigation bar. Then click on Add Application.
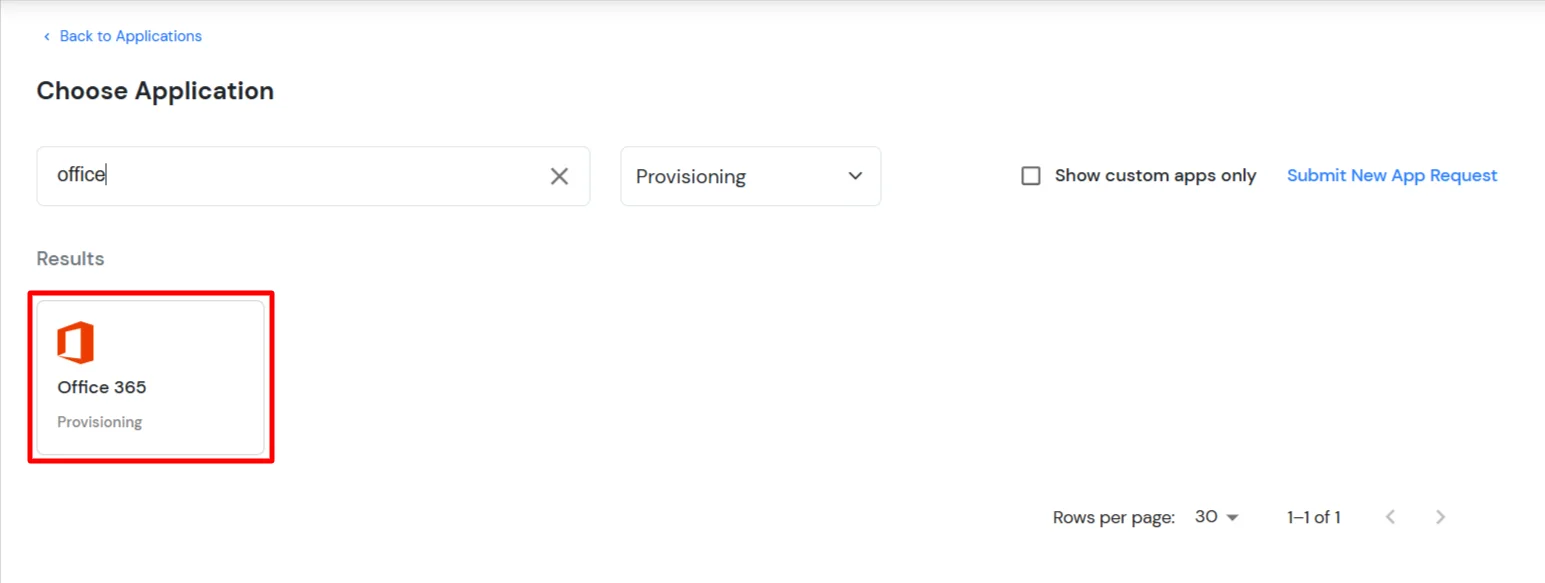
- In the Choose Application section, there is a search option and a dropdown menu next to it. By default, the dropdown is set to All Apps, change it to Provisioning.

- Search for Office 365 in the search bar and select the Office 365 application.
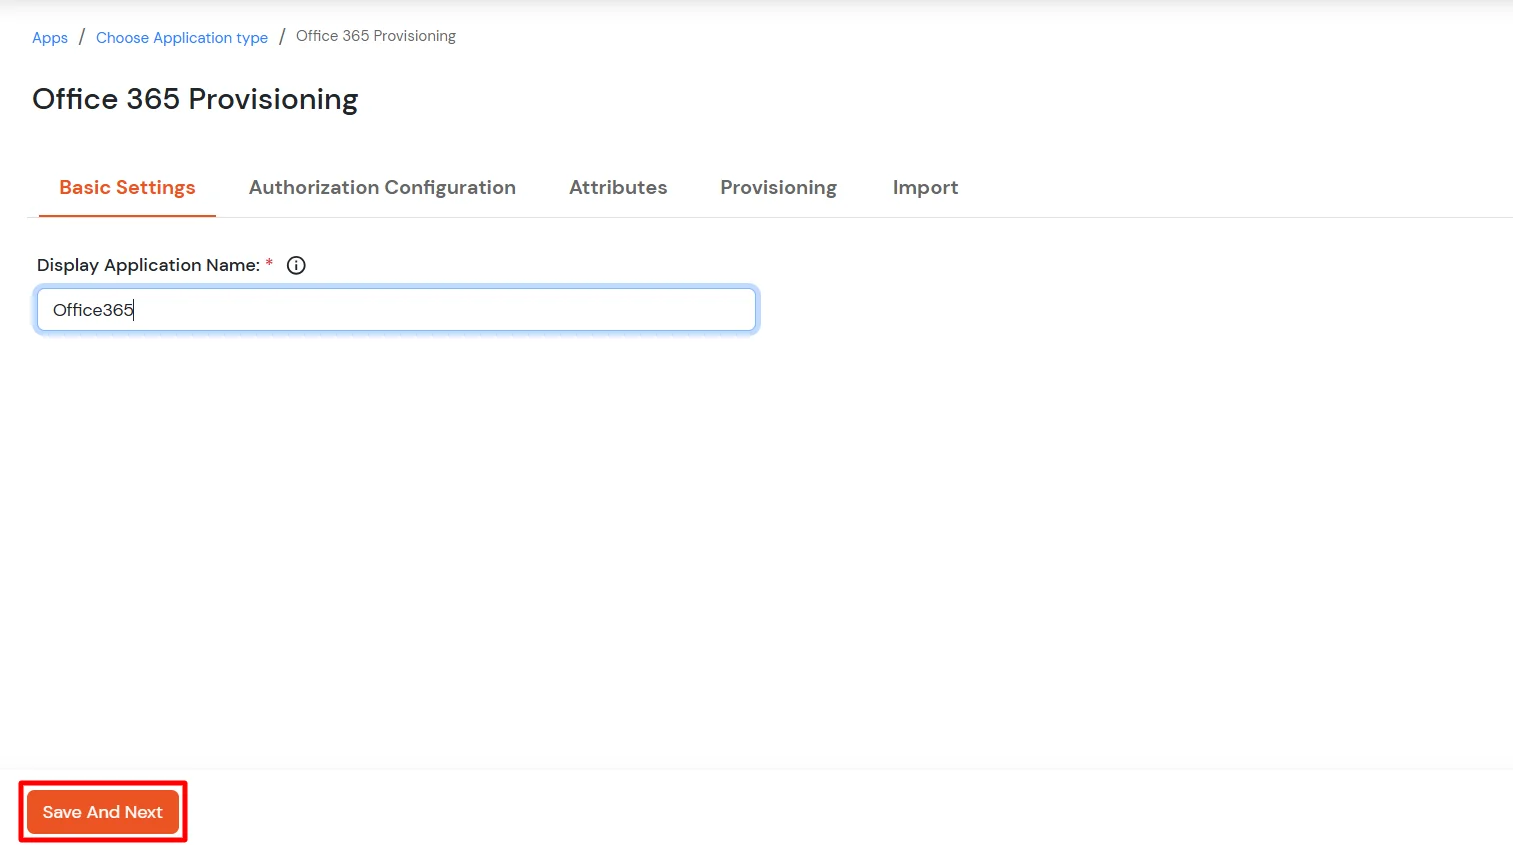
- Add a Display Application Name (for example: Office365), then click Save and Next.
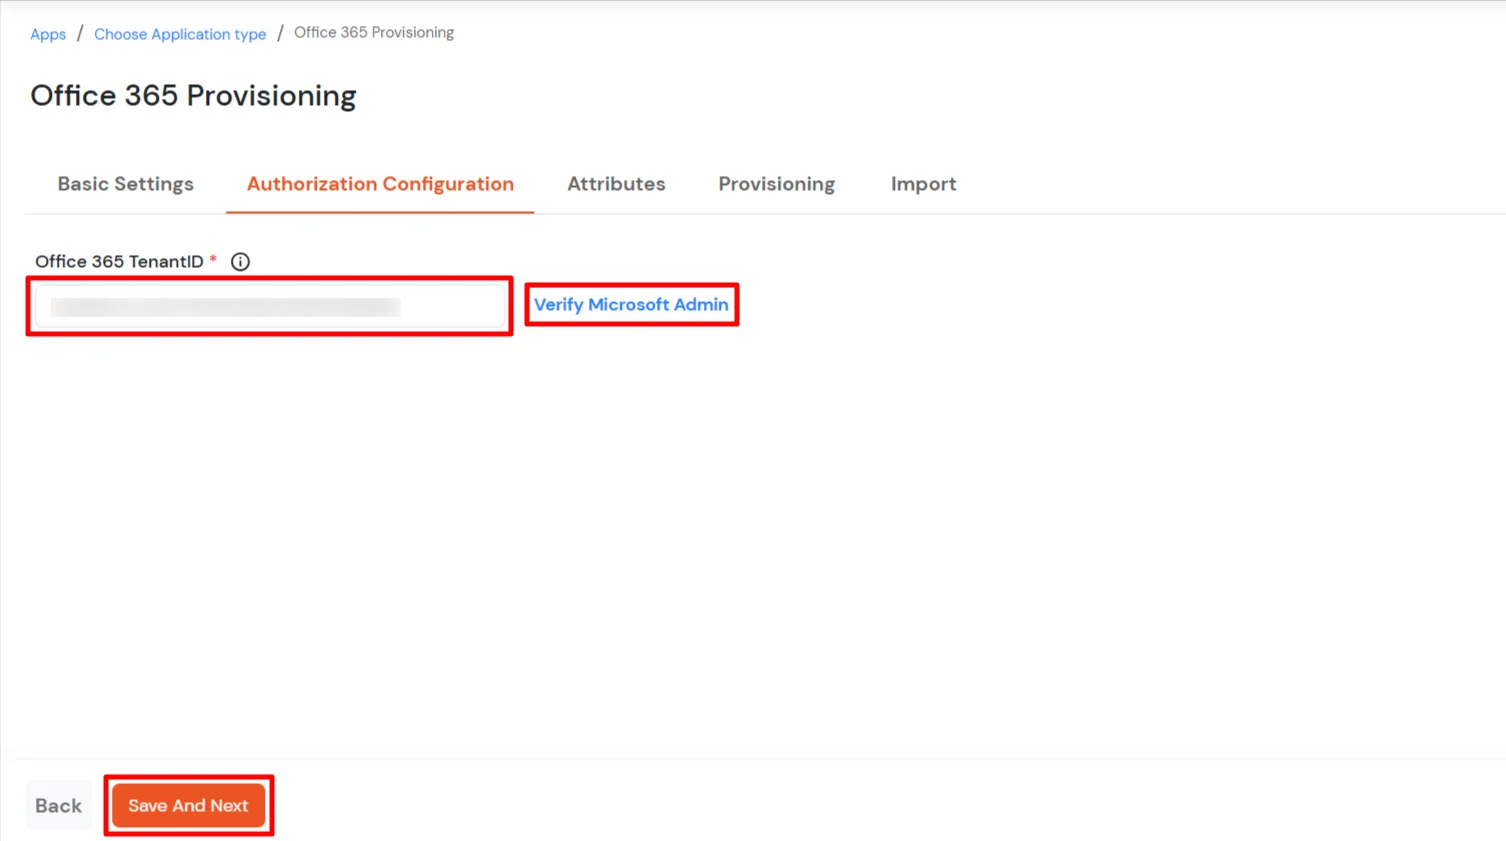
- In the Authorization Configuration tab, add the Office 365 Tenant ID. You can enter either the Tenant Domain Name or the Tenant ID,. Then, click on Verify Microsoft Admin. A new window will open where you need to sign in using a Global Administration account. You will be asked for consent—accept it. After successful authorization, you will see the message: "Authorization Successful. Please close this window to continue."
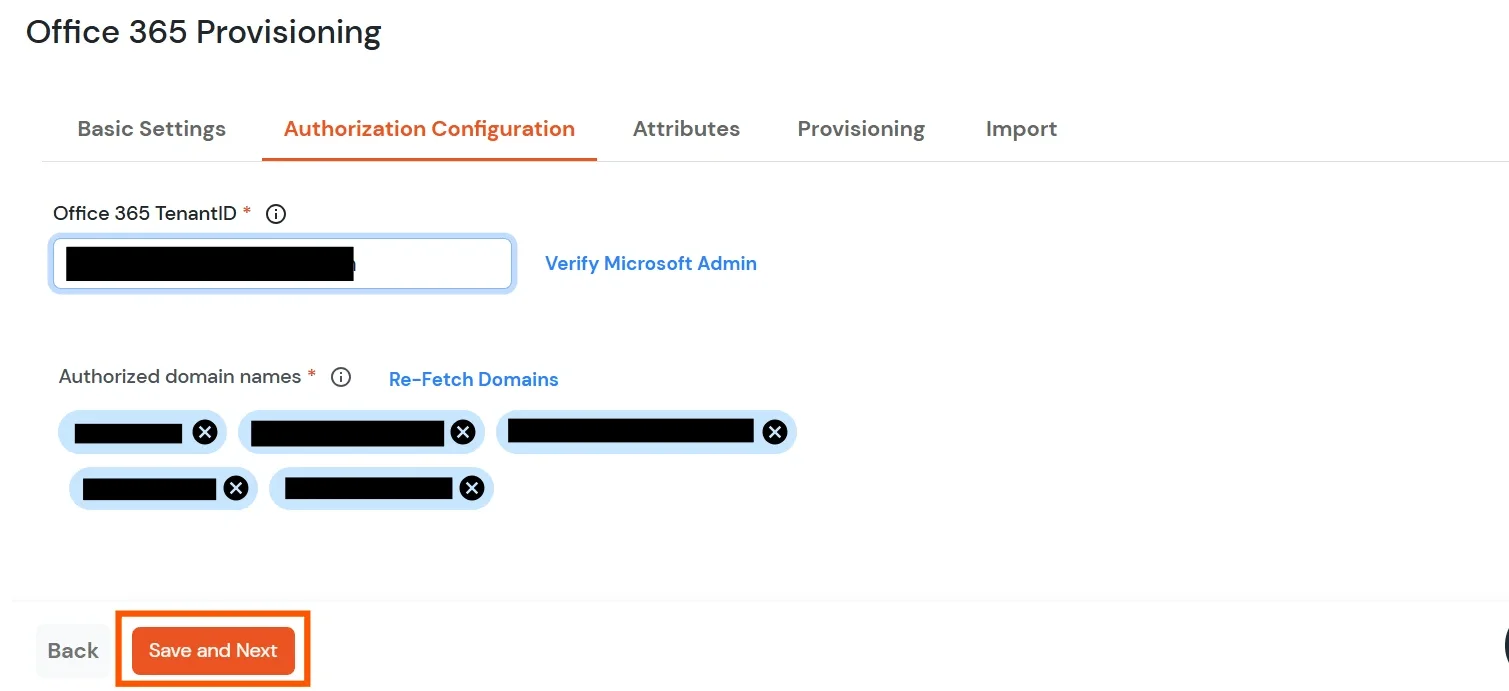
- Once completed, the authorized domain names will be displayed below the Office 365 Tenant ID option. Then, click Save and Next.
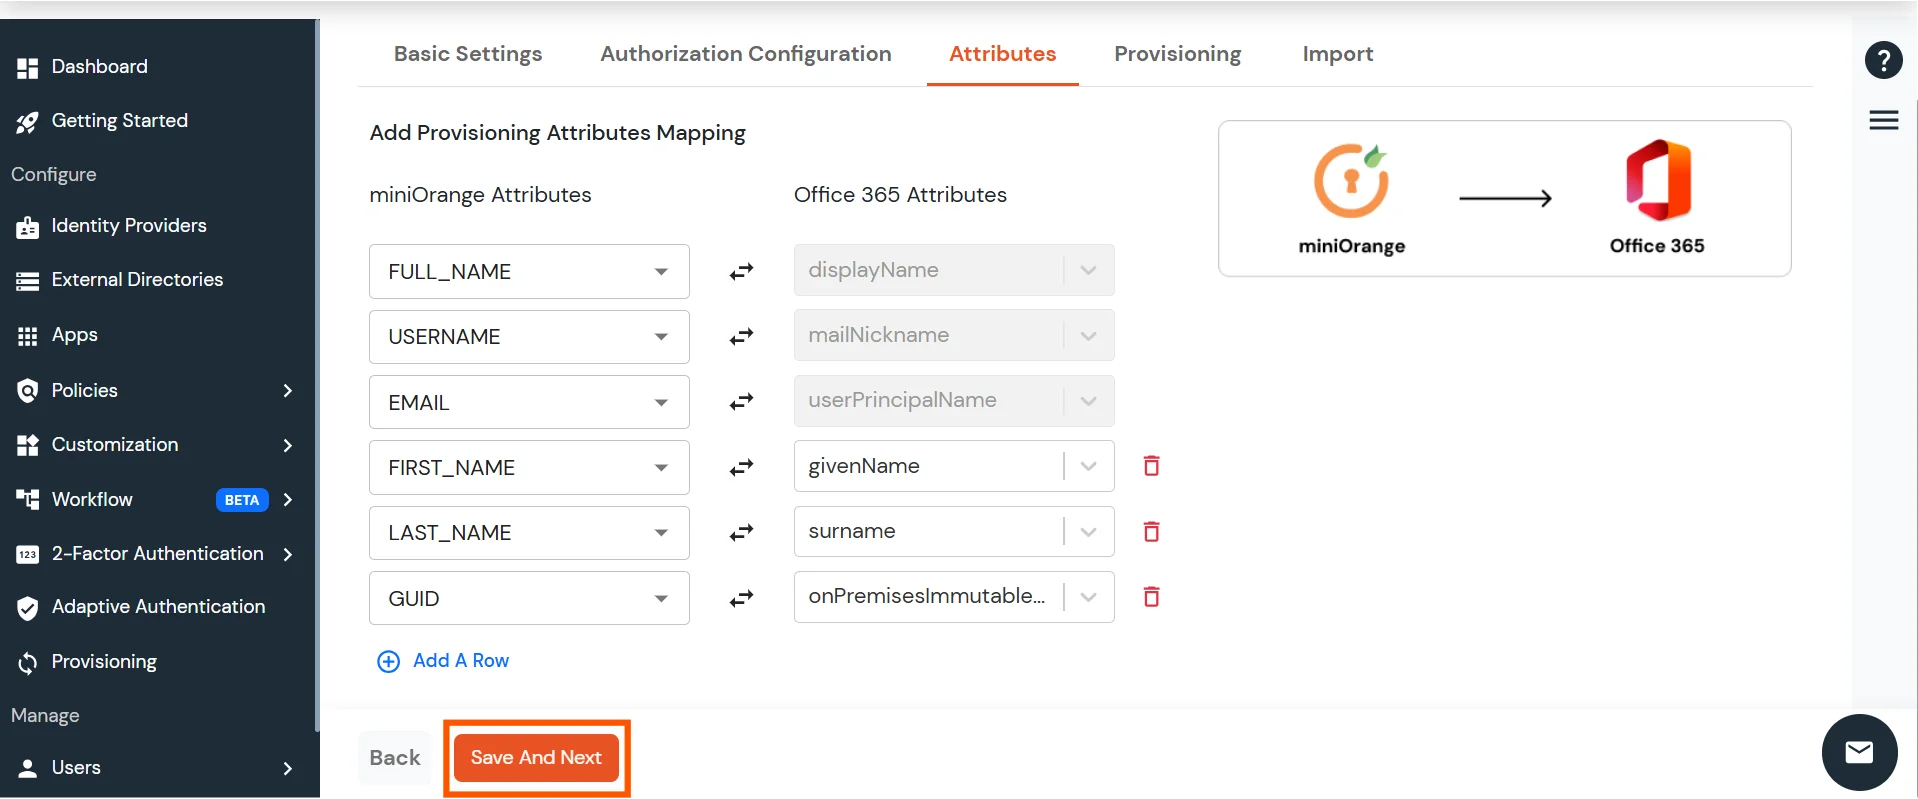
- In the Attributes tab, the following attributes are populated by default: Full Name, Username, Email, First Name, and Last Name.
Note:
- If you wish to use miniOrange as an Identity Provider for Office 365 SSO, create a custom user profile attribute (if it does not already exist) and map it to onPremisesImmutableId.
- If you do not intend to use SSO, remove the attribute mapping for onPremisesImmutableId.
- Click Save and Next to continue.
-
In the Provisioning tab, there are two sections: Users and Groups. Each section contains a list of attributes and their functions when enabled. You can enable or disable them as needed.
|
Attribute |
Description |
| Users |
Create Users |
Enabling this option will create the user in the selected application upon user creation in miniOrange. |
| Edit Users |
Enabling this option will update the user profile in the selected application if updated in miniOrange. |
| Delete Users |
Enabling this option will delete the user from the selected application if the user is deleted from the miniOrange. |
| Password Sync |
Enabling this option will sync the user password from the miniOrange database to the application selected. |
| Account Enable/Disable Sync |
Enabling this option will sync the user account enable/disable from the miniOrange database to the application selected. |
|
Attribute |
Description |
| Groups |
Create Group |
Enabling this option will create the Group in the selected application upon Group creation in miniOrange. |
| Delete Group |
Enabling this option will delete the Group from the selected application if the Group is deleted from the miniOrange. |
| Add/Remove Group membership of User |
Enabling this option will add/remove the Group membership of a user from the selected application if the respective user group membership is updated from the miniOrange. |
|
Attribute |
Description |
| Licenses |
Enable License Provisioning |
Enabling this option will allow to assign/unassign Office 365 licenses to users/groups from miniOrange.
Note: You need to import users and groups and then sync license assignments from the Import tab to sync the existing users and groups license assignments. The 'Manage License' option for the app will be available after syncing license assignments only. |
- Click on Save and Next.
2. Create Group
To create a group, follow these steps:
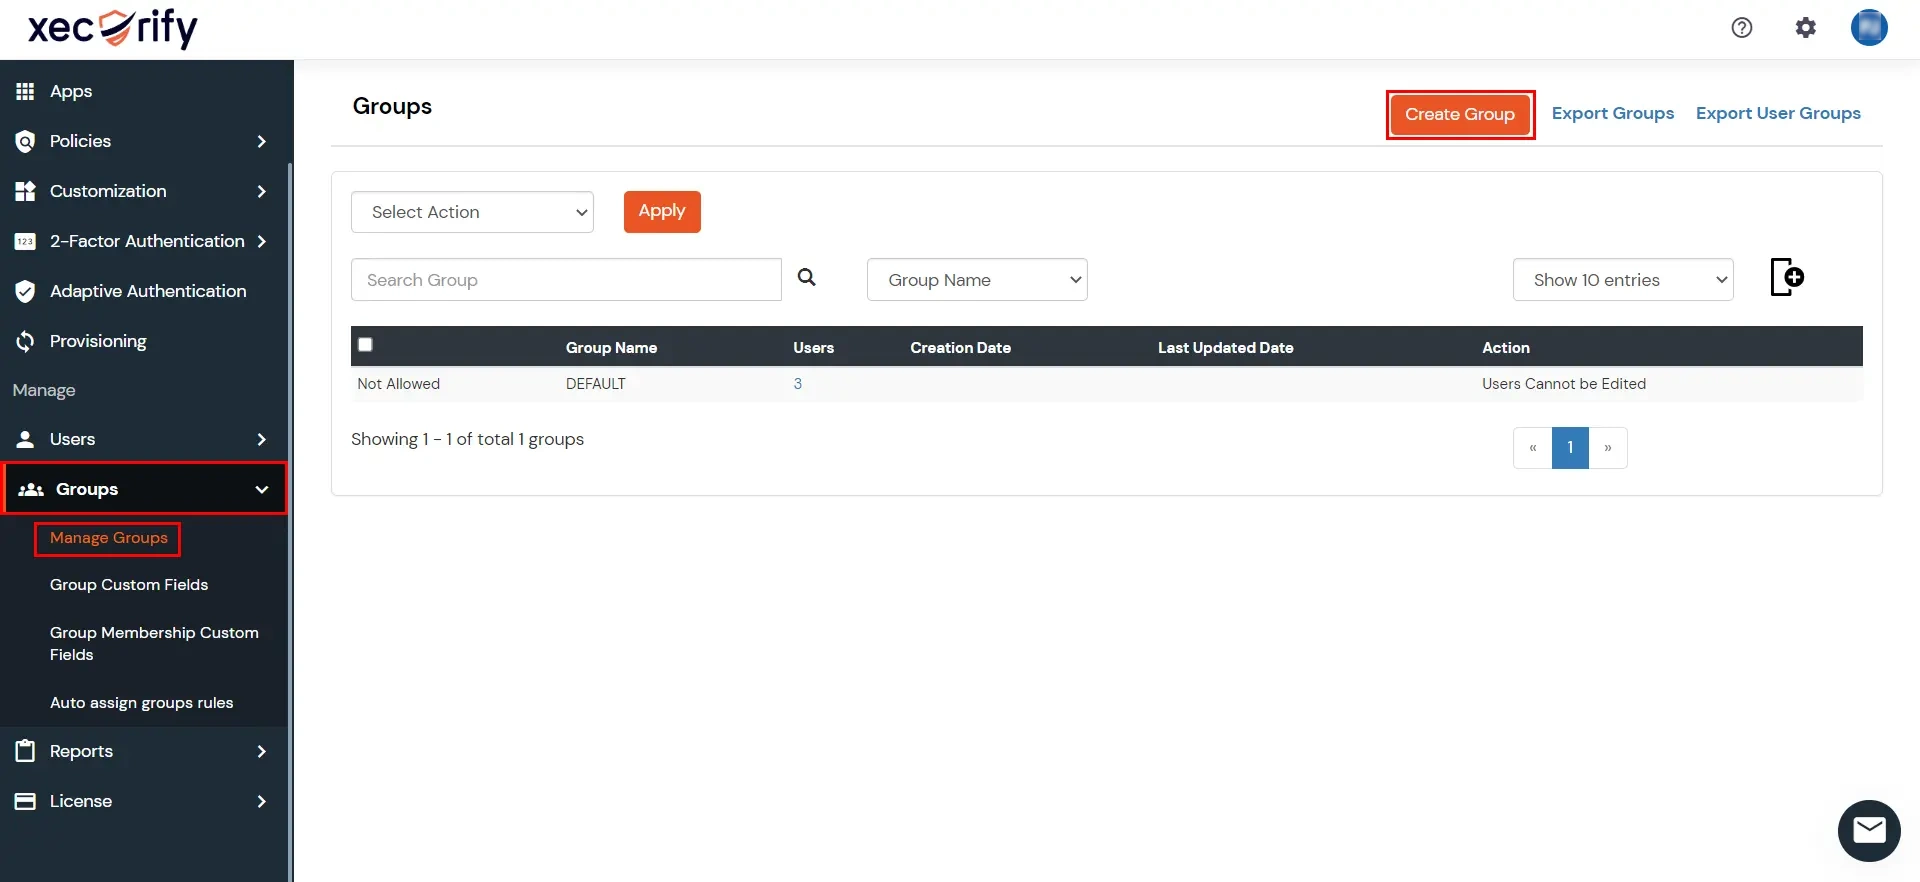
- Go to the Manage Groups section in the Groups tab, located on the left side and click on Create Group Button.
- Enter the Group Name and click the Create Group button.
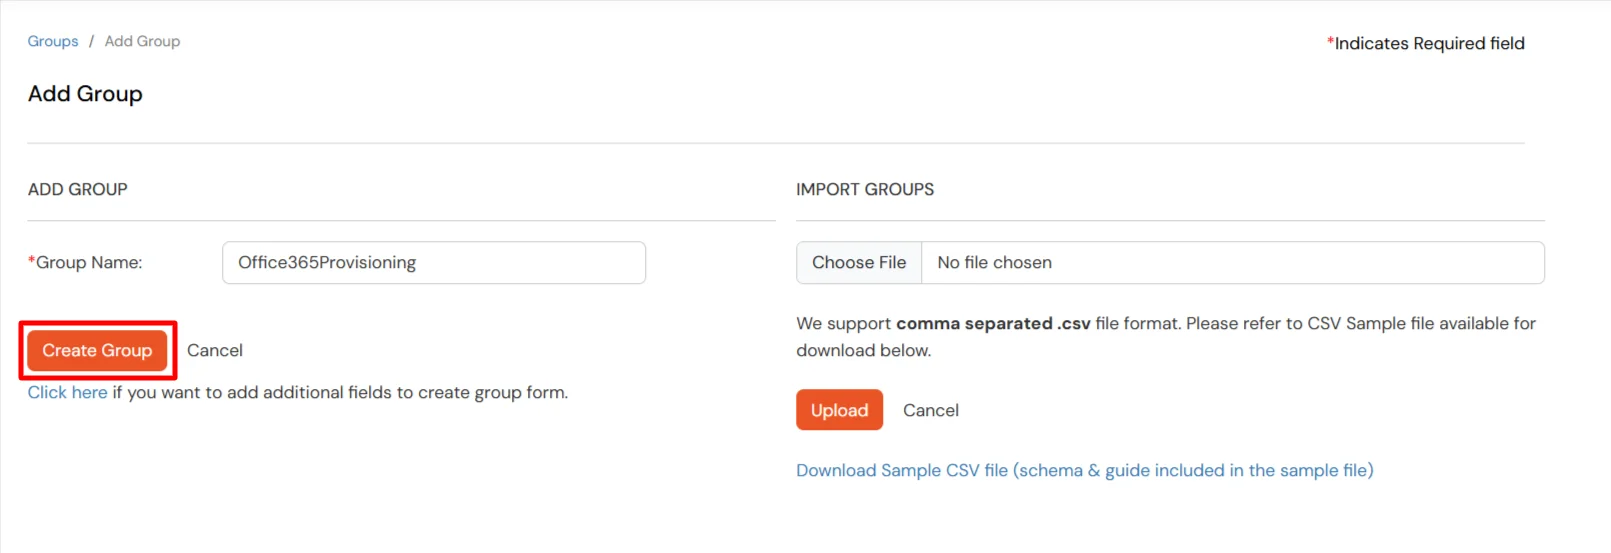
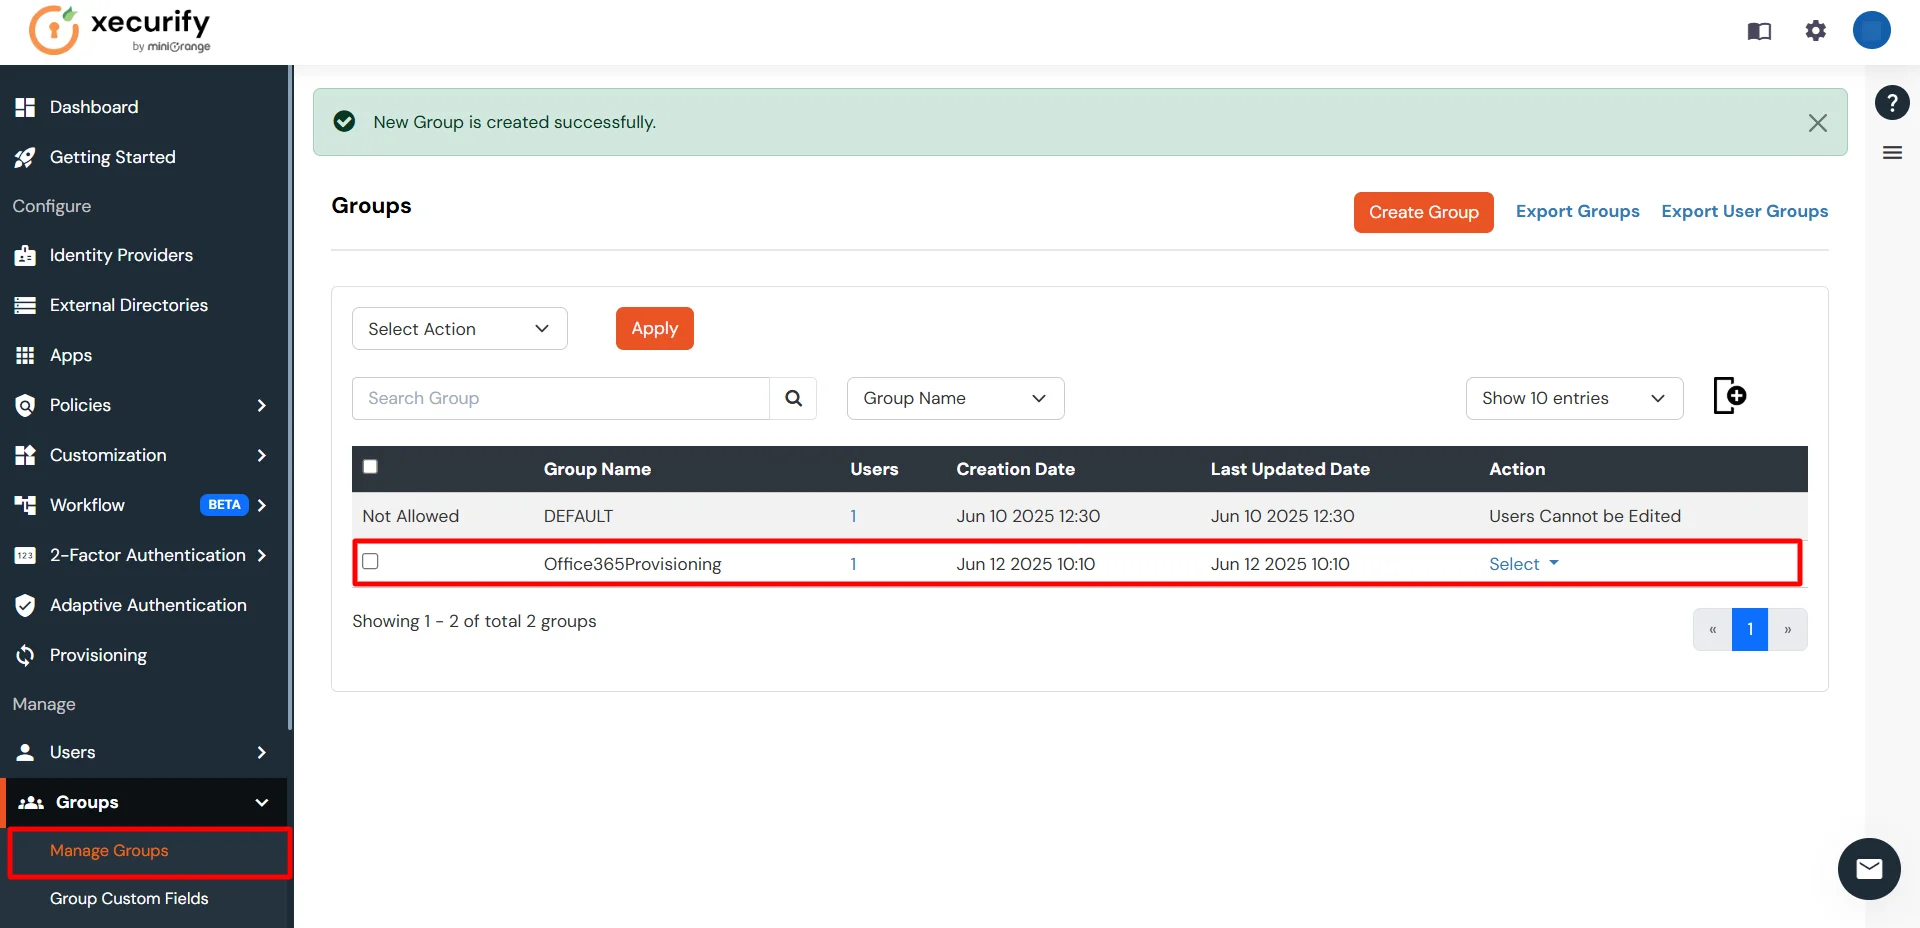
- You will receive a success notification upon group creation, and the group will be displayed in the Manage Groups section of the Groups tab.
3. App Policy (Provision Group to Office365 App)
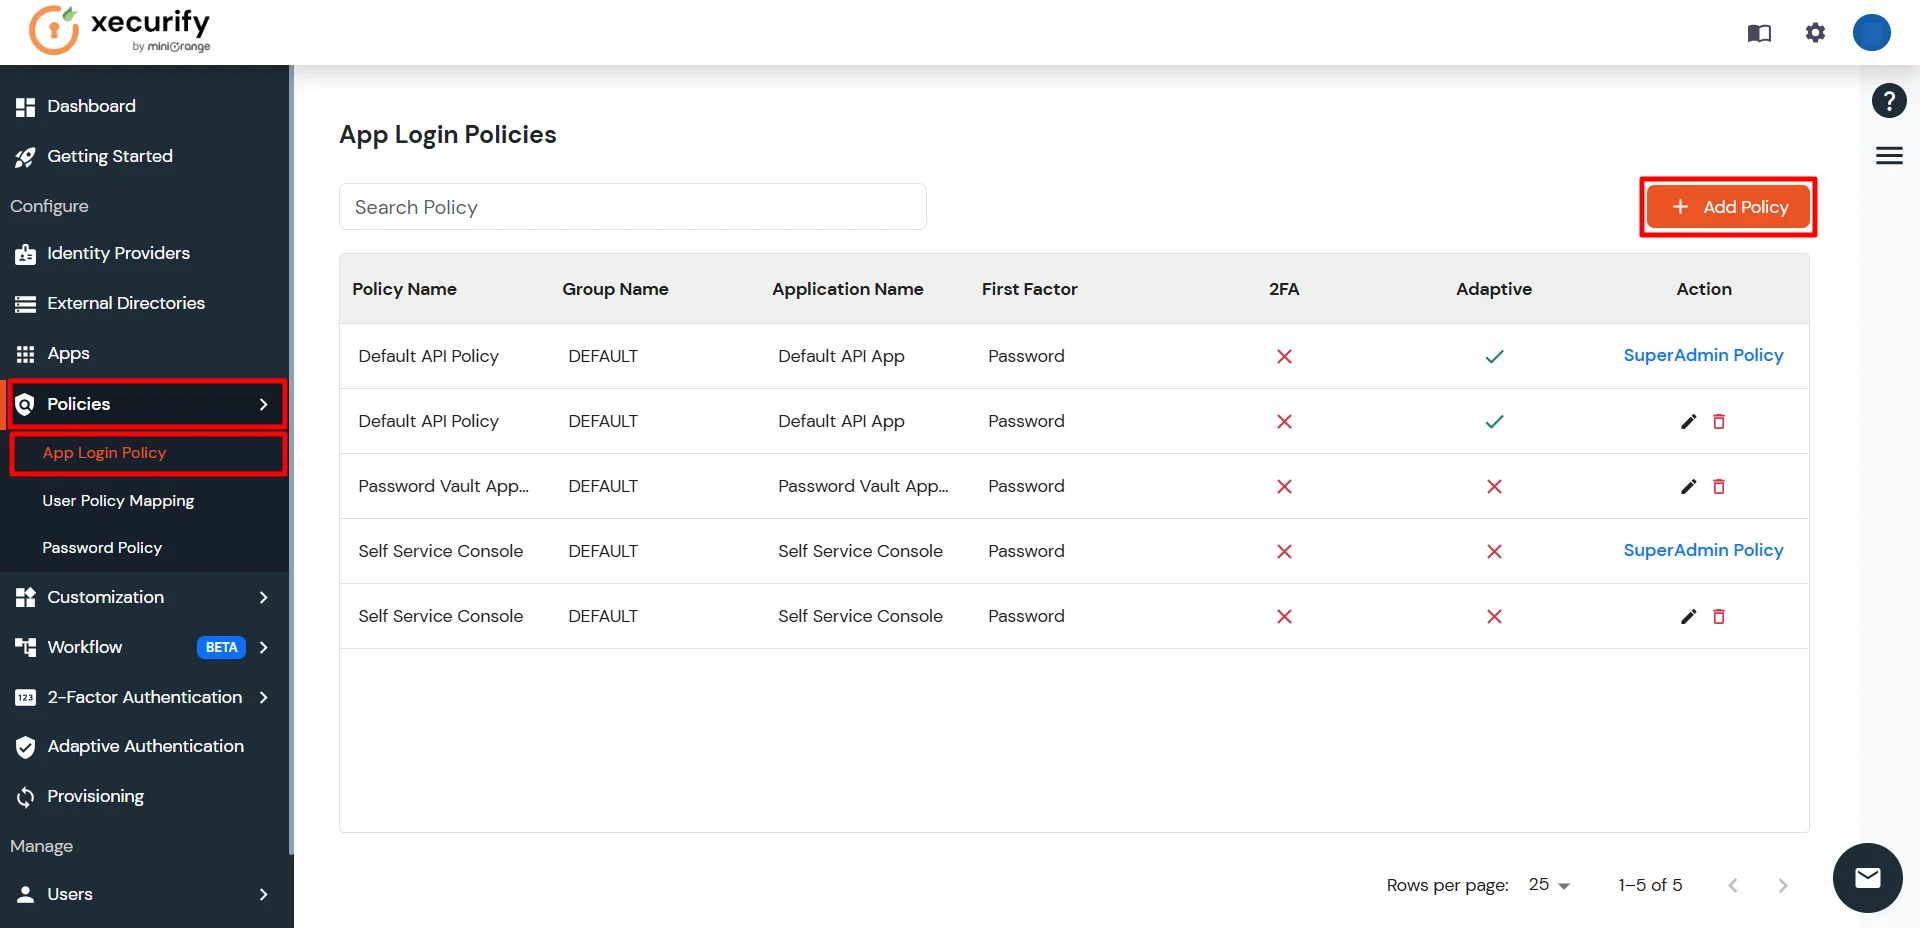
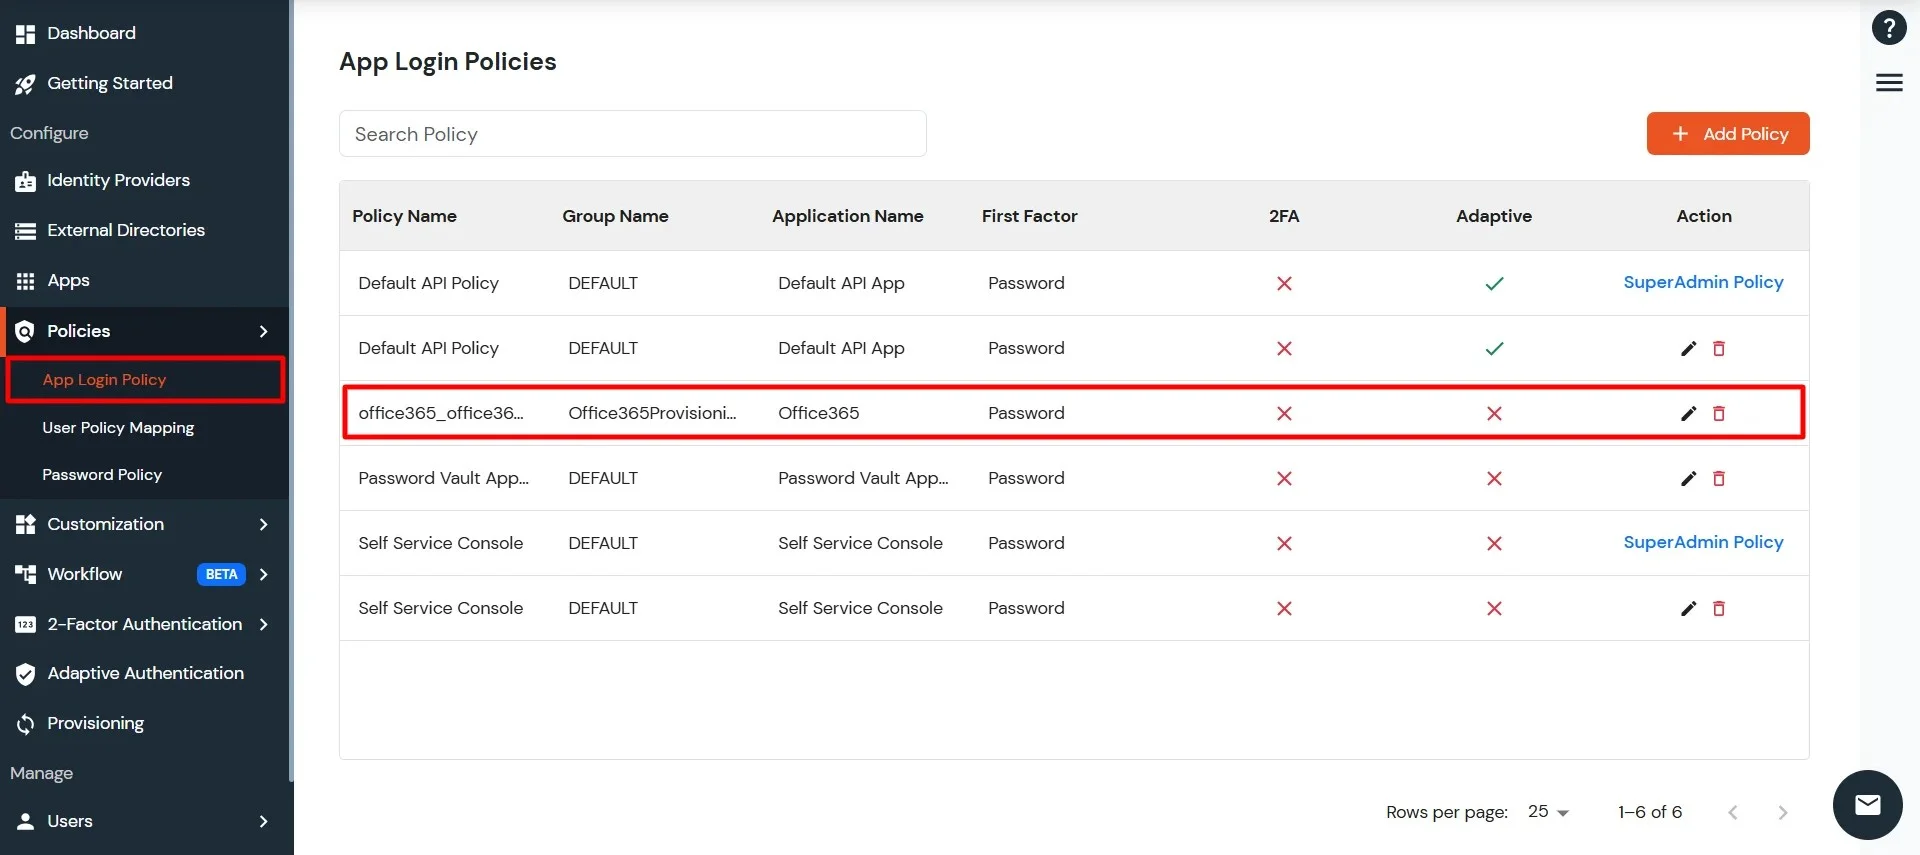
- Go to the App Login Policy section under Policies, and click Add Policy.
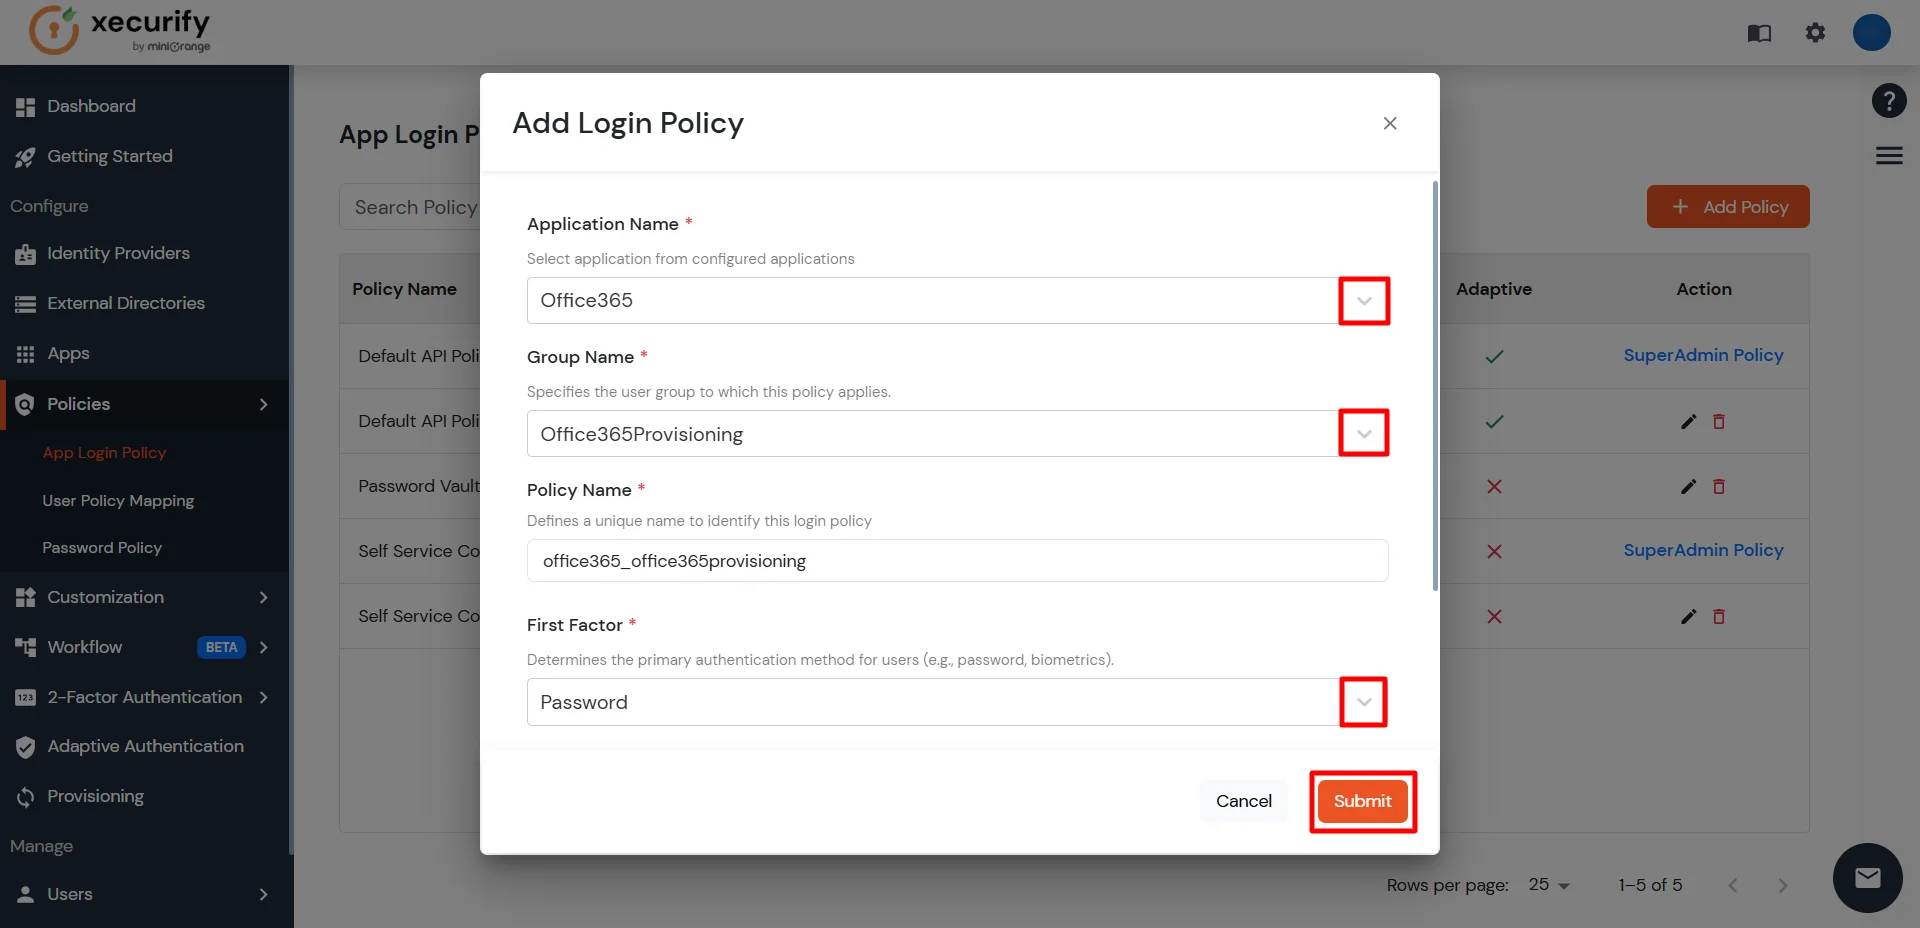
- Select the application you configured in the Apps tab (for example: Office365).
- Enter the Group Name you created (for example: Office365Provisioning).
- Enter a Policy Name of your choice (for example: Office365ProvisioningPolicy).
- Click on Submit button to create a policy.
- You will receive a success notification upon policy creation, and the policy will be displayed in the App Login Policy section of the Policies tab.
- Provisioning configuration is complete now.
- Now, we can verify whether provisioning is working as expected.
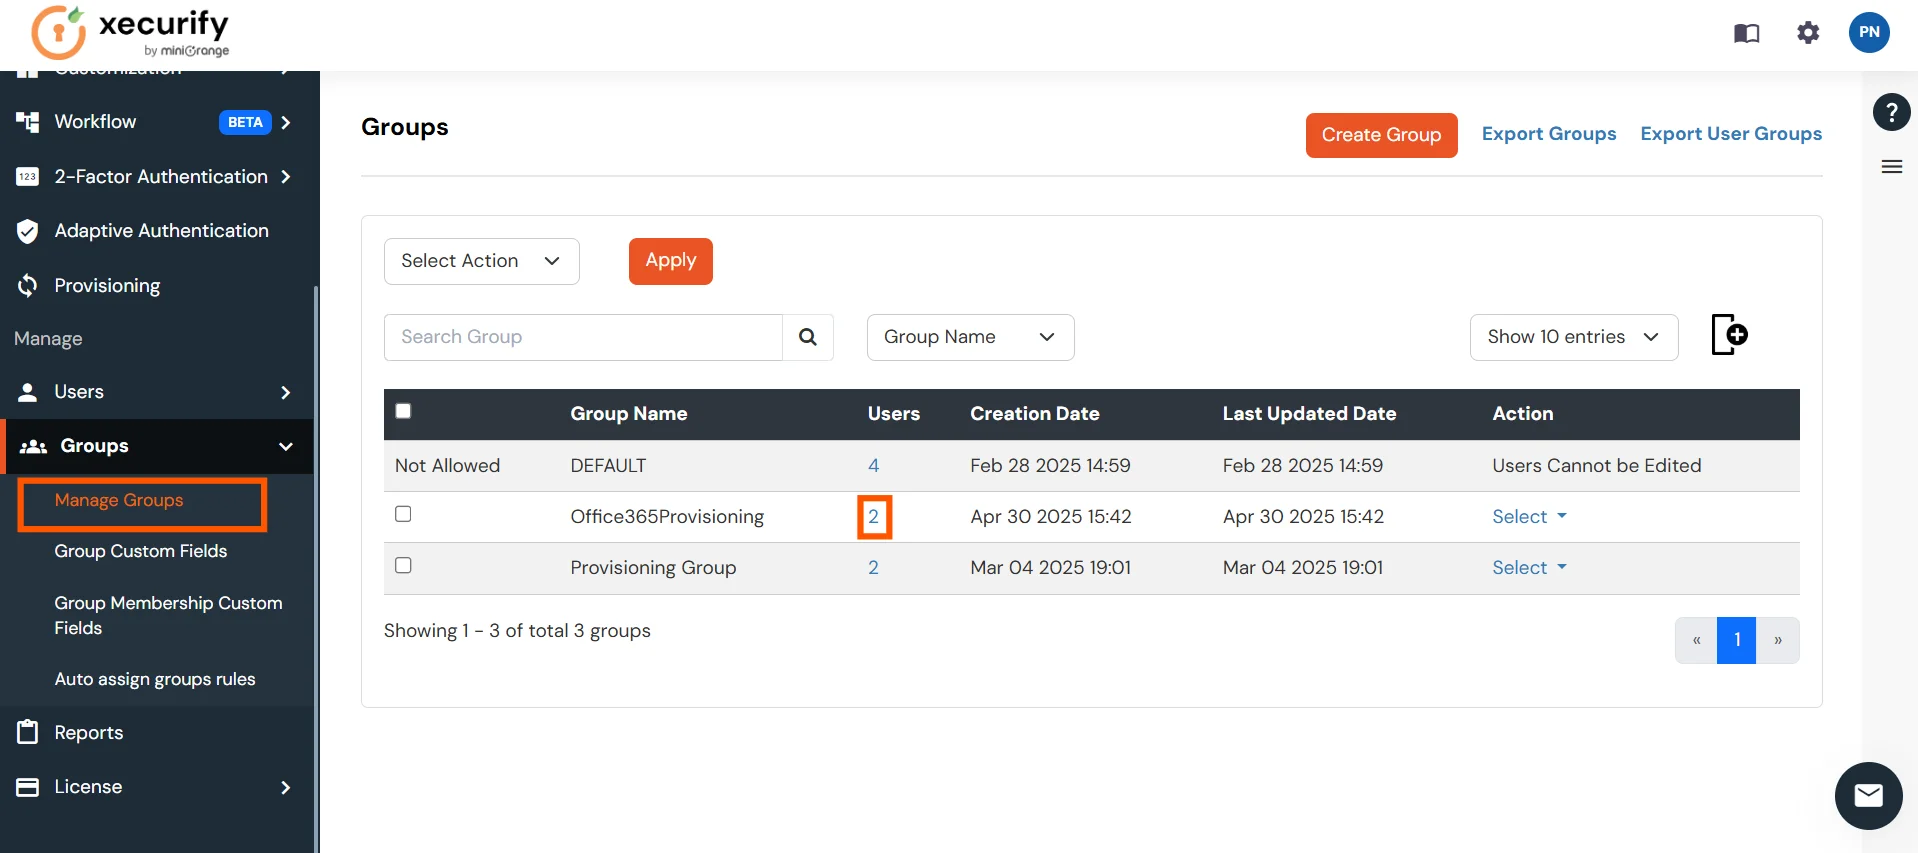
- Go to the Manage Groups section under the Groups tab.
- Locate the group you created (e.g., Office365Provisioning), click Select, and then choose Assign Users.
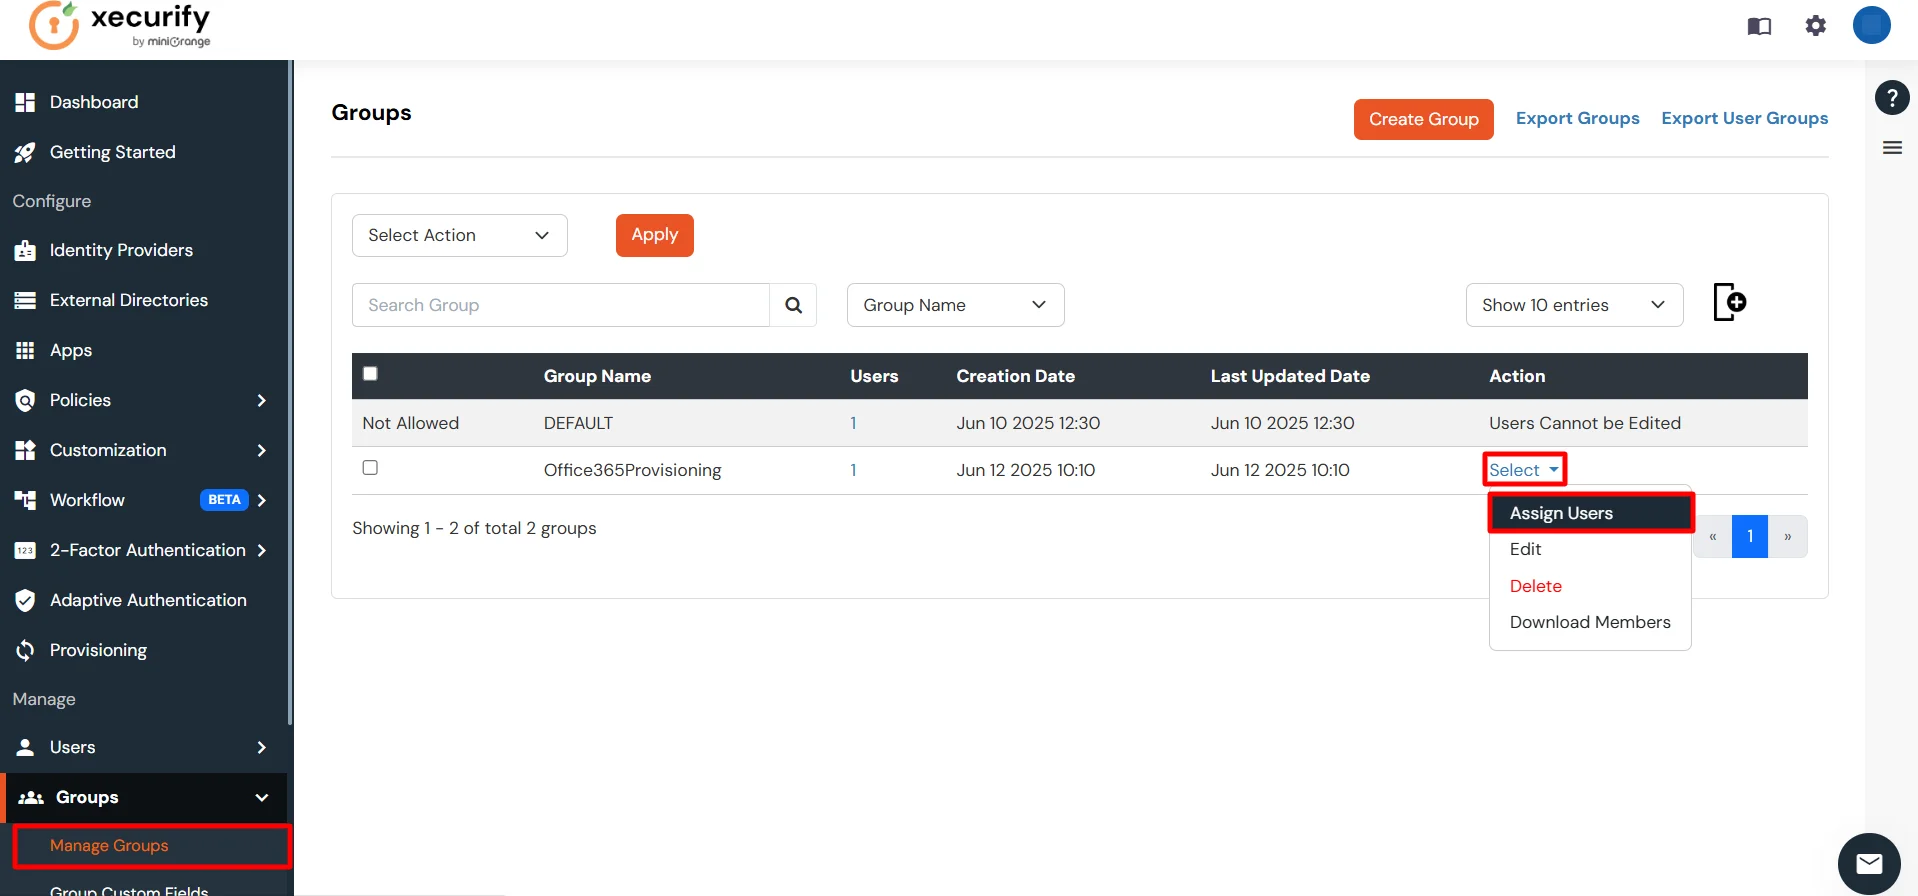
- Ensure that users are already present in miniOrange or import them into the user list. This allows you to assign the user you want to provision in Office365.
-
From the list below, select the user you want to provision, choose the Assign to Group option, and click Apply. This will automatically create the user in Office365 services.
Note: Assign users to a group that contains the authorized domain names for the configured application.
To view the authorized domains, go to the Authorization Configuration section of the application you configured in the Apps tab.
Only users whose email addresses match one of the authorized domains will be provisioned.
- Select the users whose email addresses belong to an authorized domain, then click Assign to Group, and finally click the Apply button.
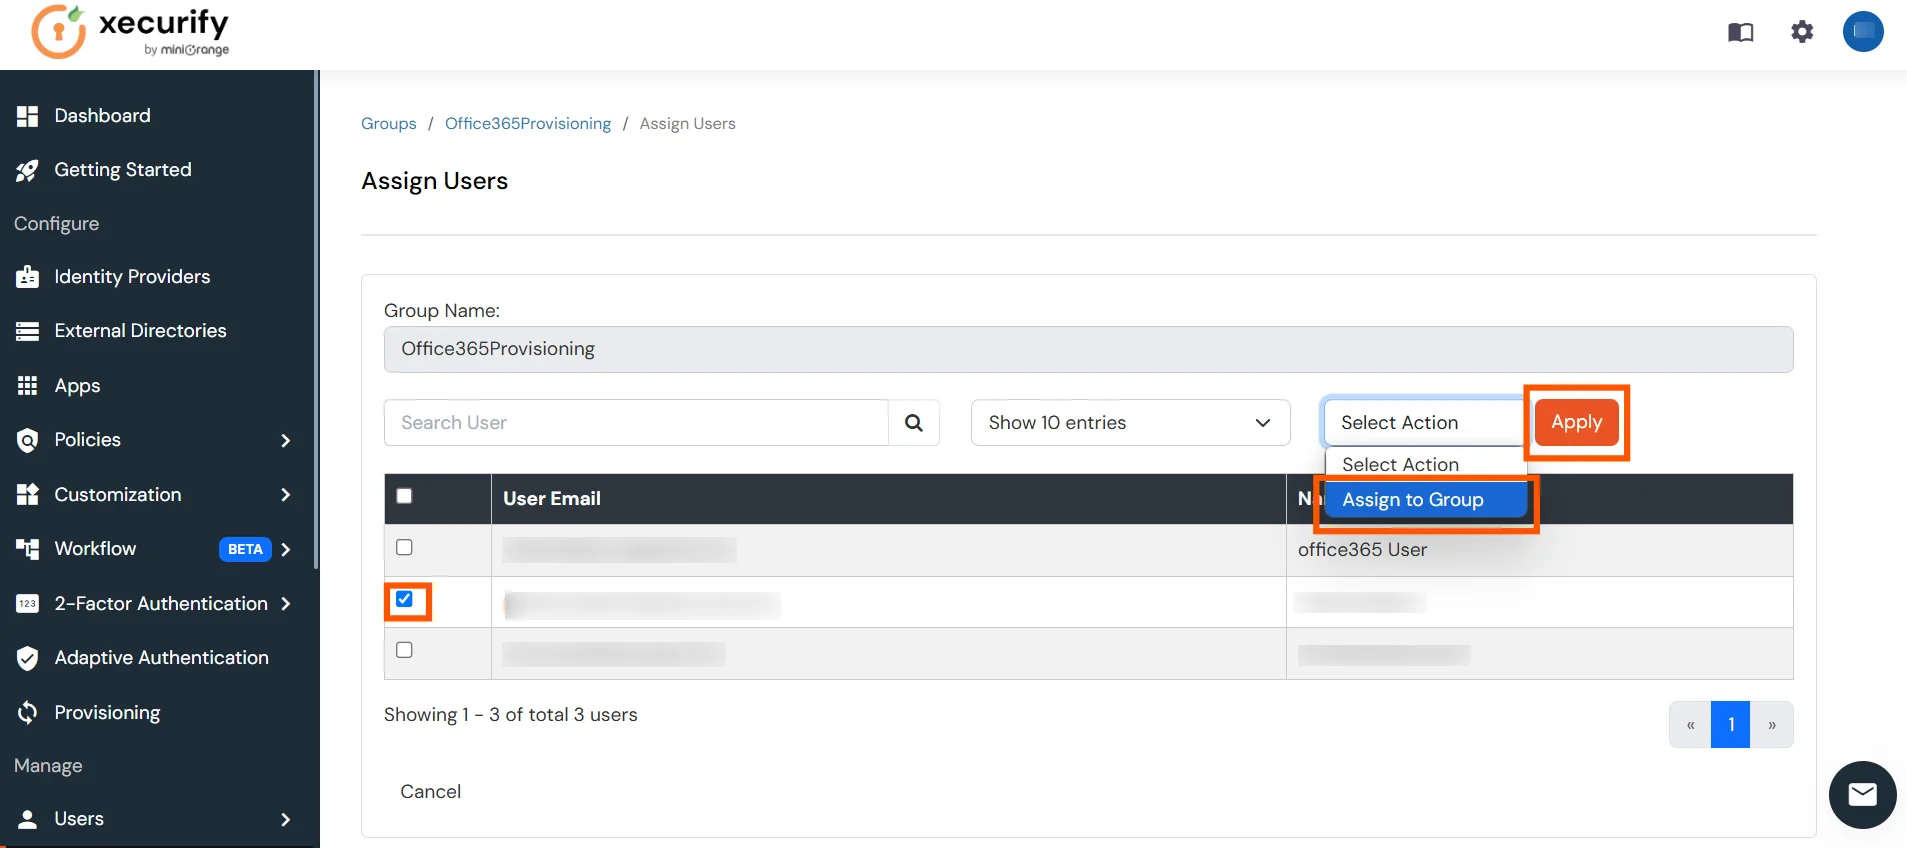
- Users are automatically created in Office 365 services.
- To update a user, go to the User List, select the user you want to update, click Select, and then choose Edit.
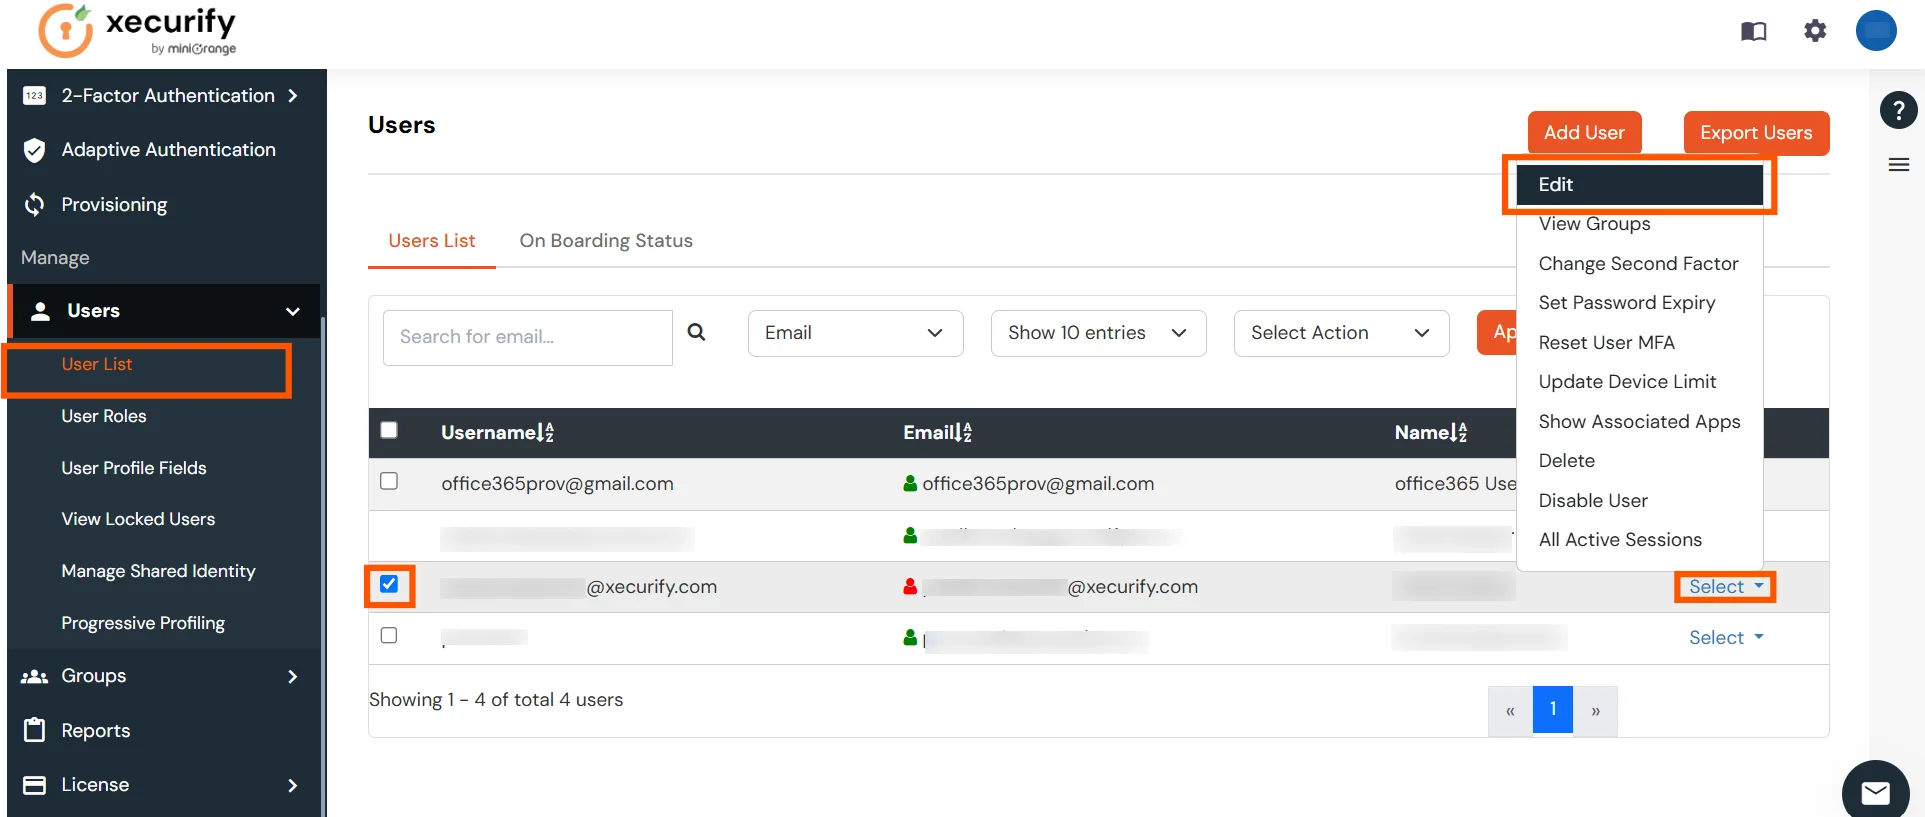
- After updating the user, click the Save button. This will automatically update the user in Office365 services.

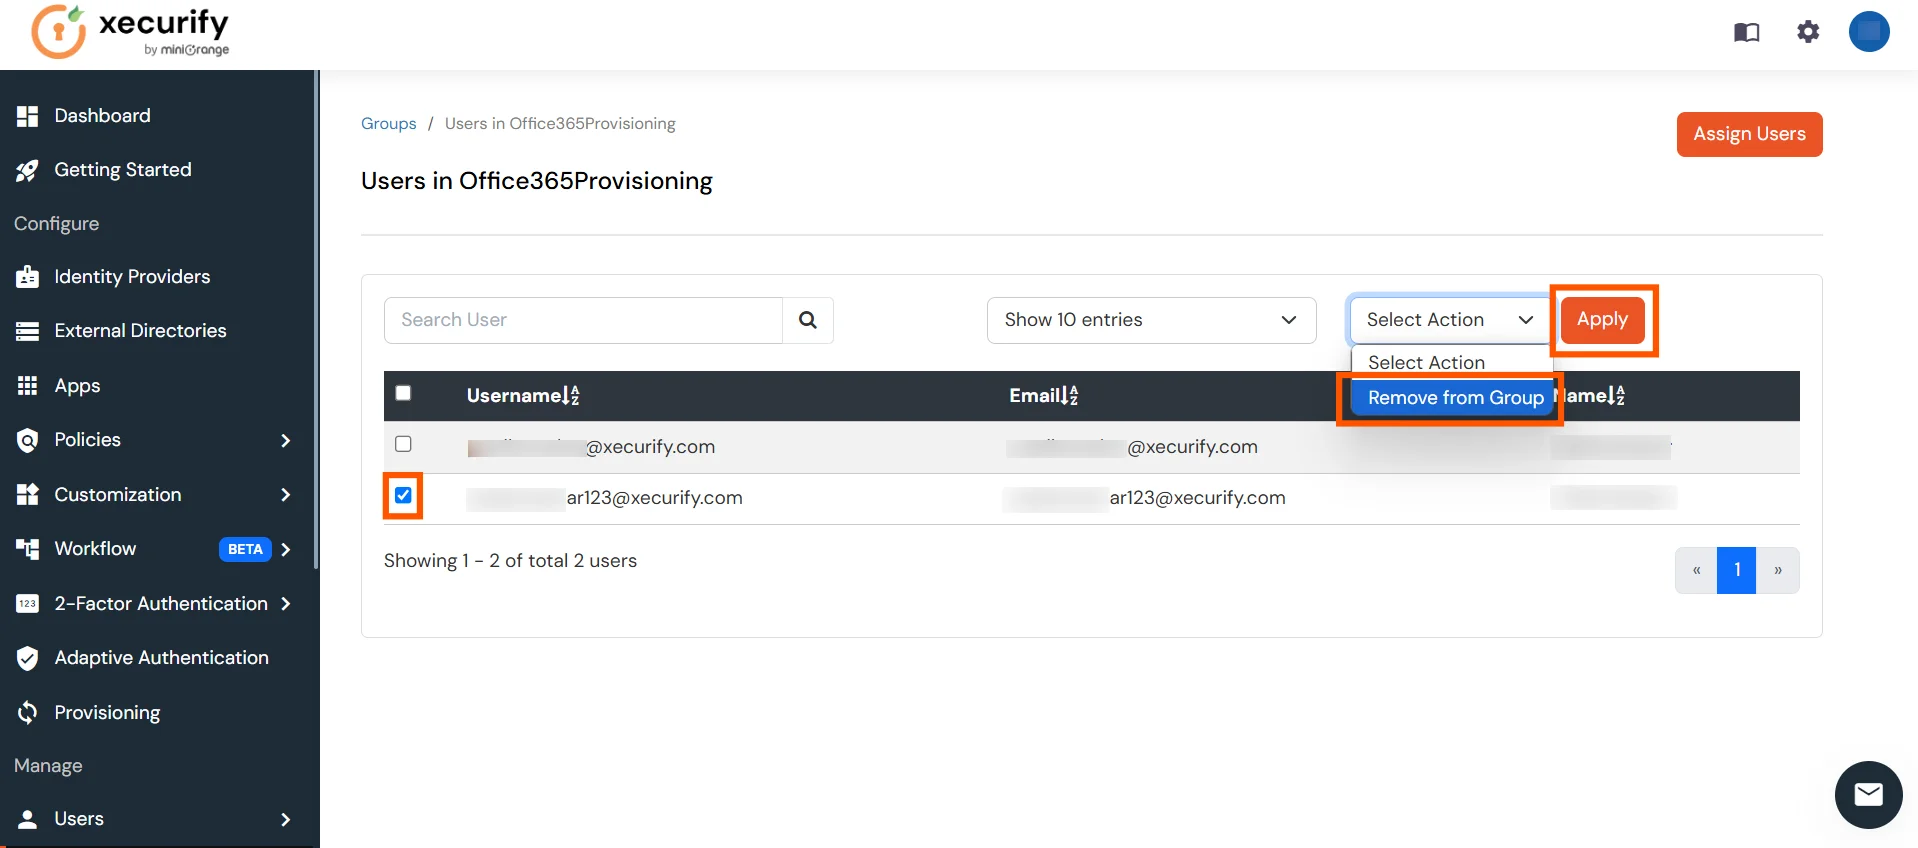
- To delete a user, go to the Manage Groups section of the Groups tab. Then, navigate to the group from which the user needs to be deleted. In the Users column, click on the displayed number of users.
- Select the user you want to delete, choose Remove from Group as the action, and click the Apply button. This will automatically remove the user from Office365 services as well.
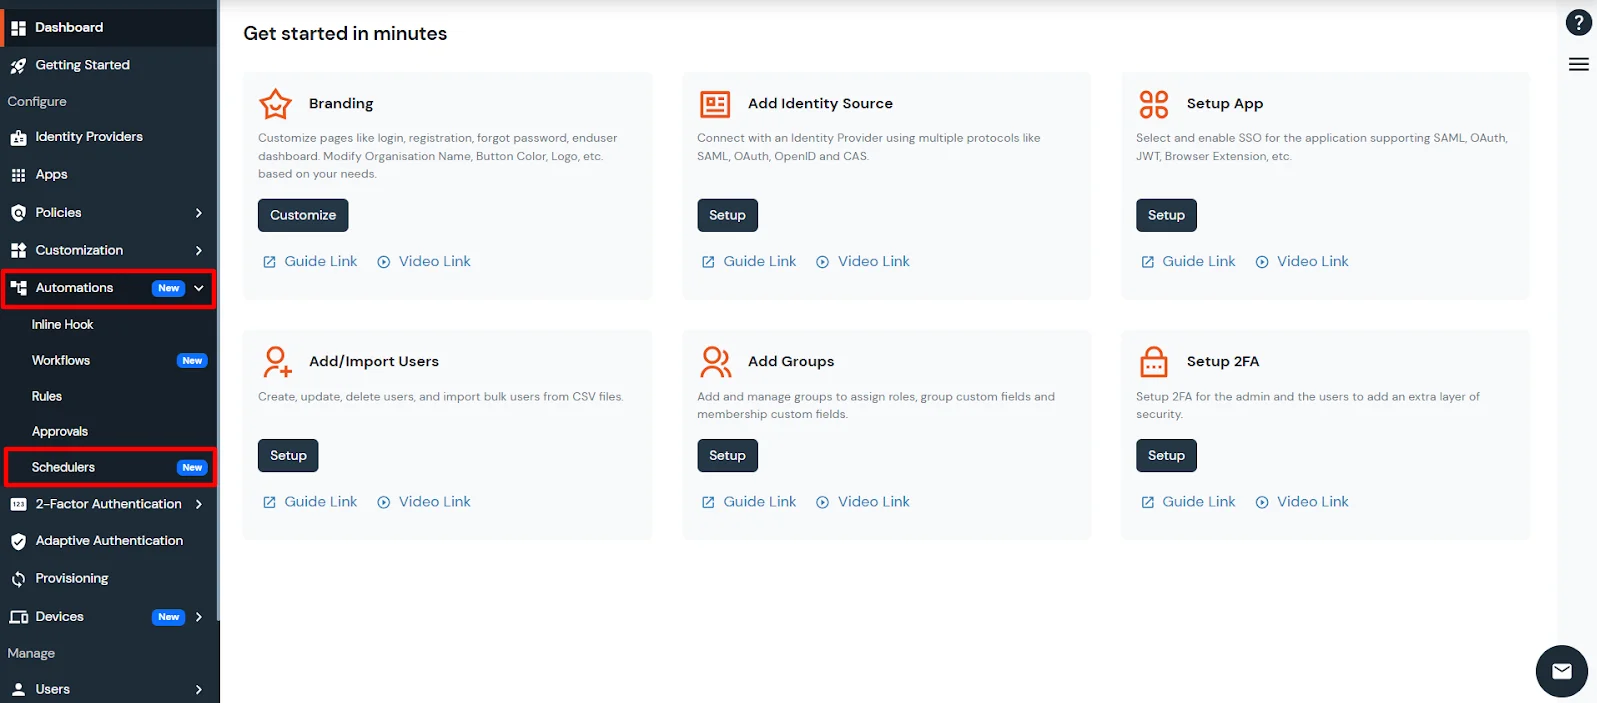
4. Automatic Scheduled-Based Import
- Navigate to the Automations tab and open the Schedulers section.
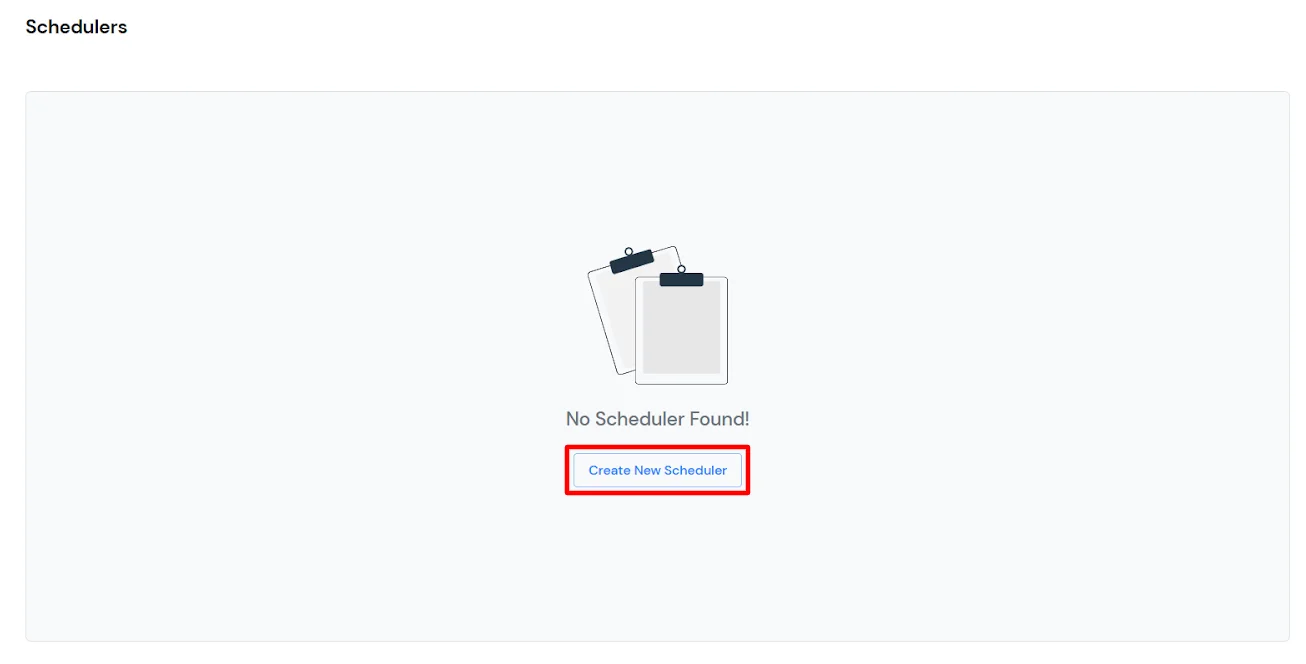
- To create a new scheduler, click on the Create New Scheduler button.
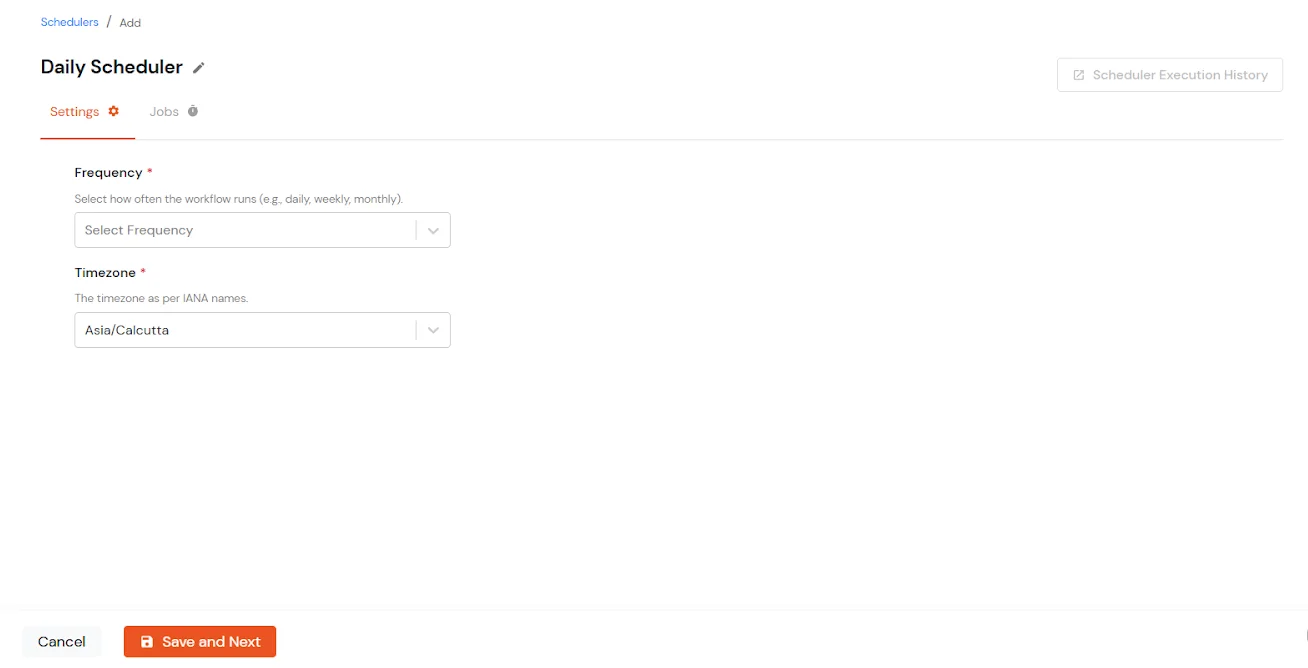
- Configure the Scheduler Settings by choosing the frequency (Once, Hourly, Daily, Weekly, Monthly).
- Specify the associated scheduling details and select the Timezone in which the scheduler should run.
- Once configured, click Save and Next.
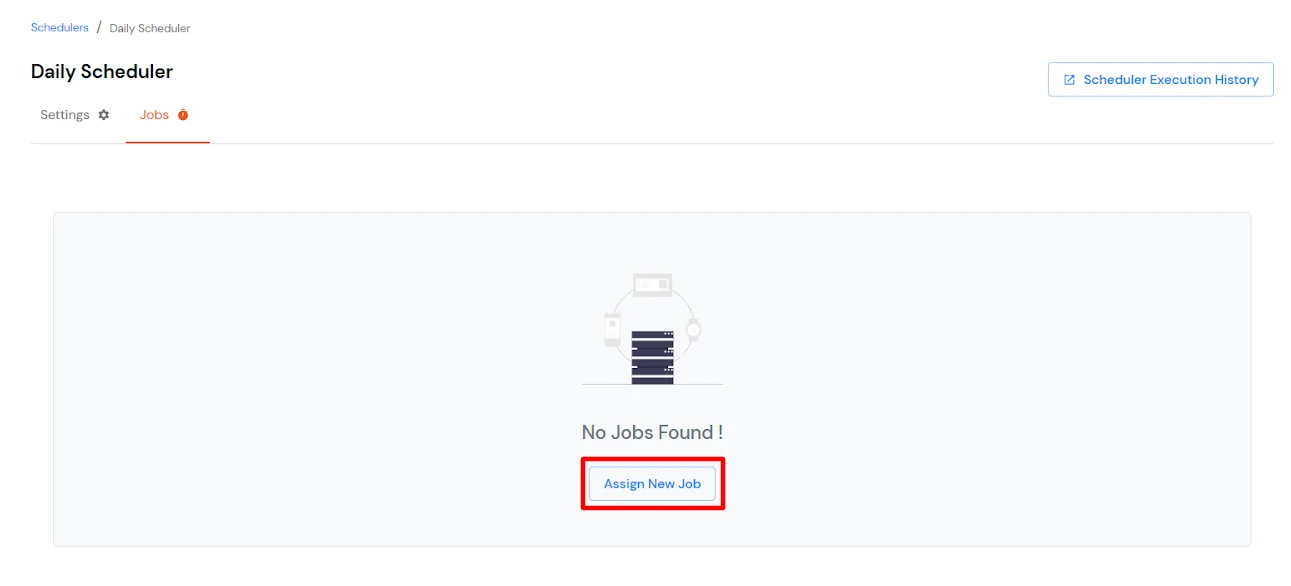
- The next step is to configure the Job and assign it to the scheduler that was created by clicking on the Assign New Job button.
- Choose the application from which the import needs to be performed, along with the job task required(Import the users, groups or user group assignments).
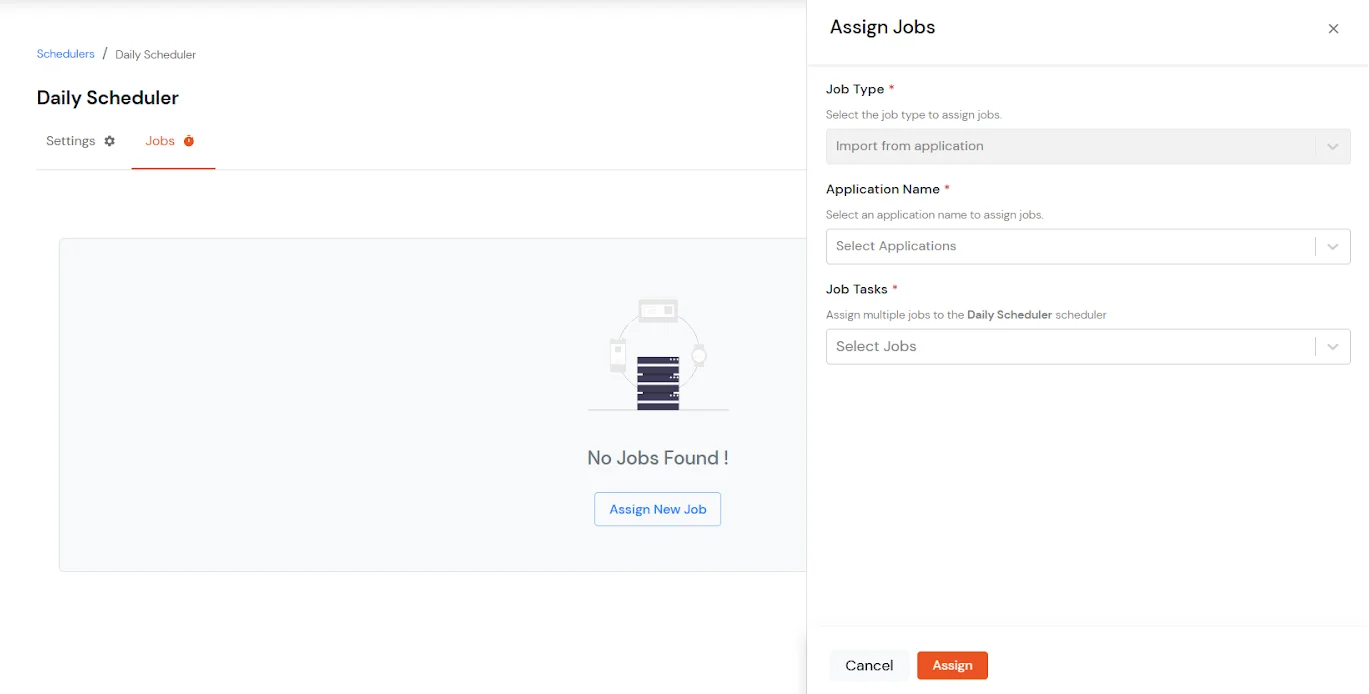
- Then click on the Assign button.
Note: If you want to import data from multiple applications, you can assign multiple jobs to the same scheduler.
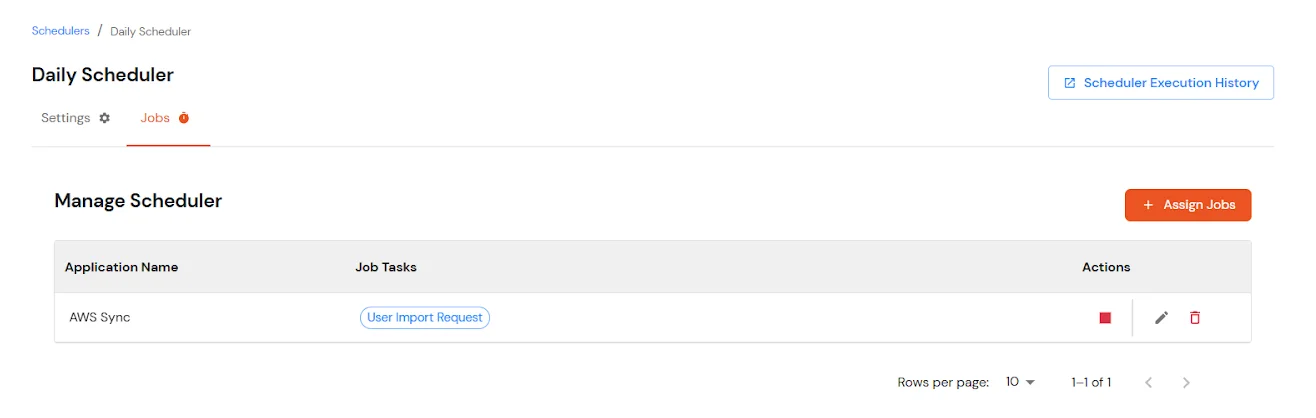
- Once the configuration is complete, automated scheduled imports will run based on the defined schedule.
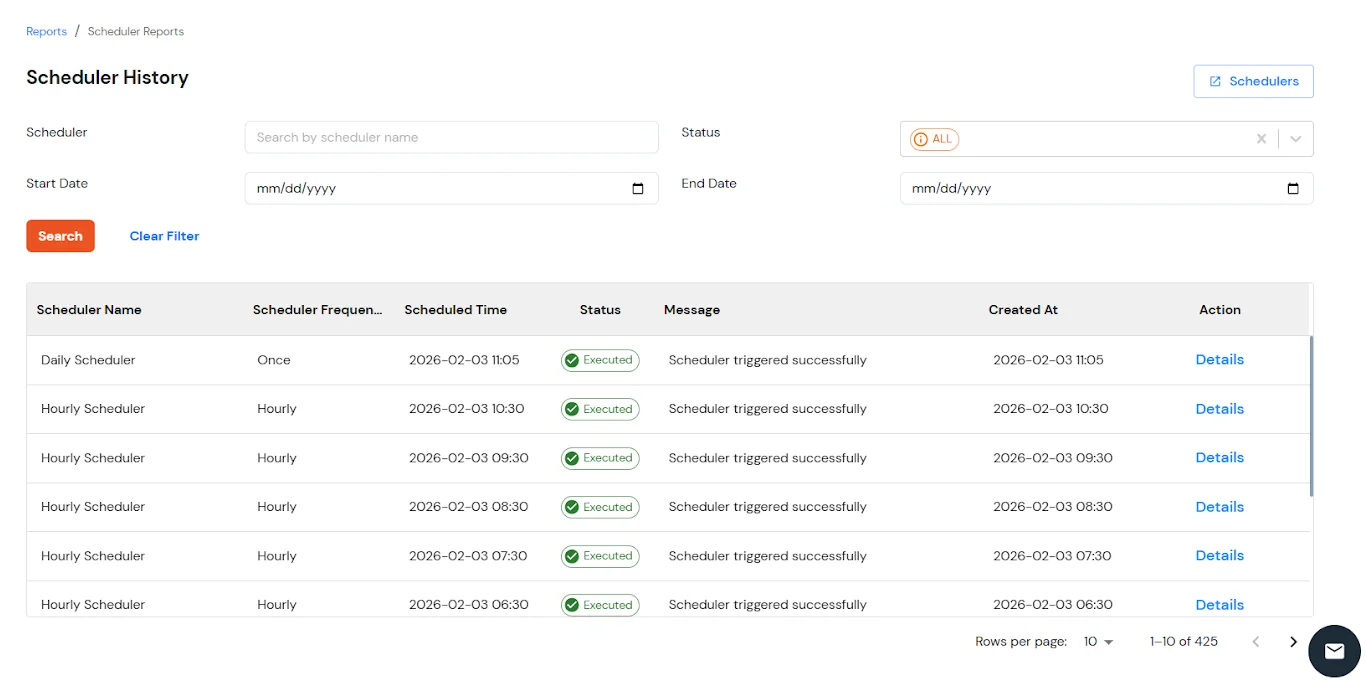
- To view scheduler execution details, navigate to Reports from the left menu and scroll down to check the Scheduler History.
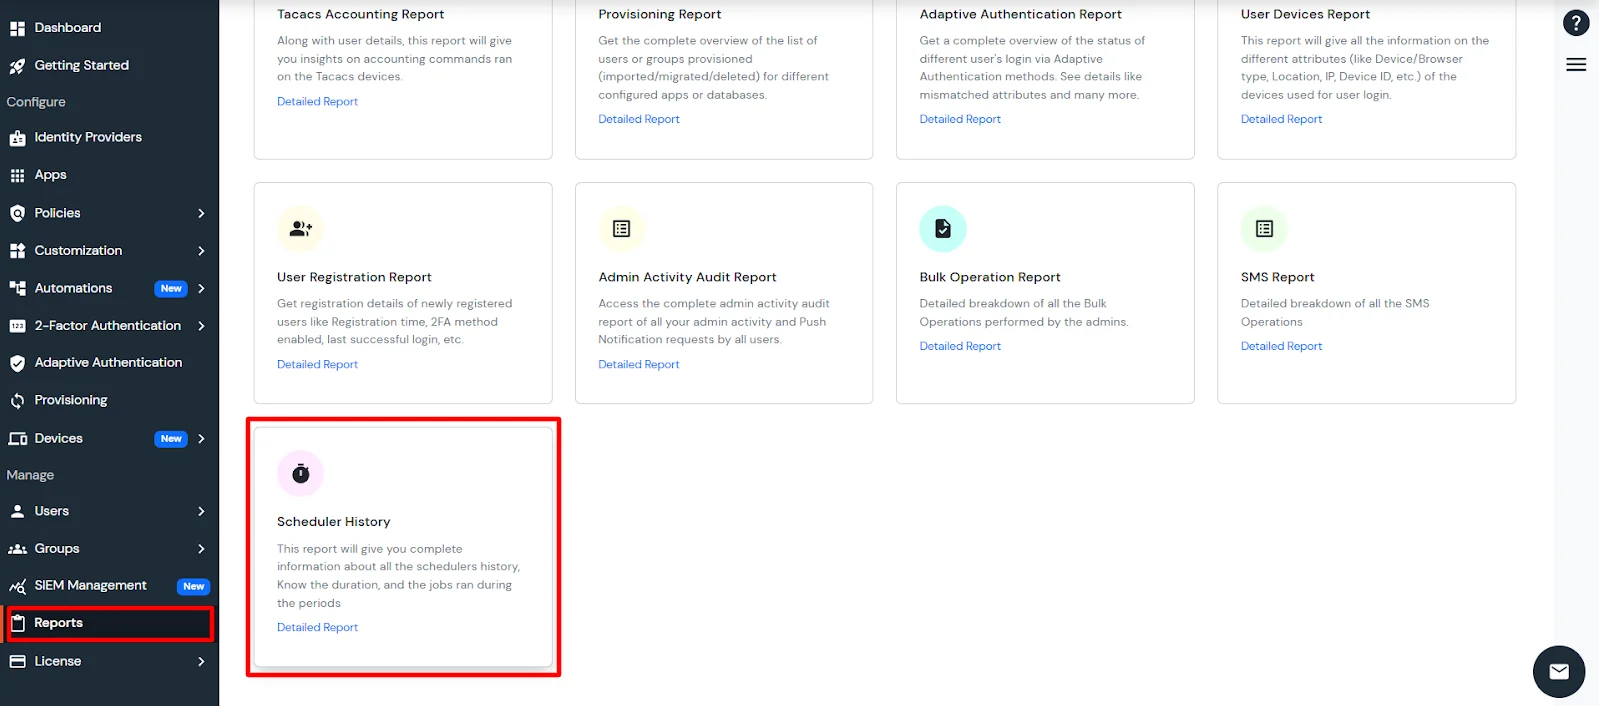
- This report will give you complete information about all the scheduler's history. Know the duration and the jobs that ran during the periods:
5. Managing Office 365 Licenses via miniOrange
To manage Office 365 licenses for users and groups, you can use the miniOrange dashboard to enable license management and synchronize users' and groups' already assigned licenses with Microsoft 365. Once the synchronization is complete, you can efficiently assign, update, or remove licenses as needed. For detailed configuration steps, please refer to the documentation Office 365 License Provisioning.
Frequently Asked Questions
How to access Provisioning Reports?
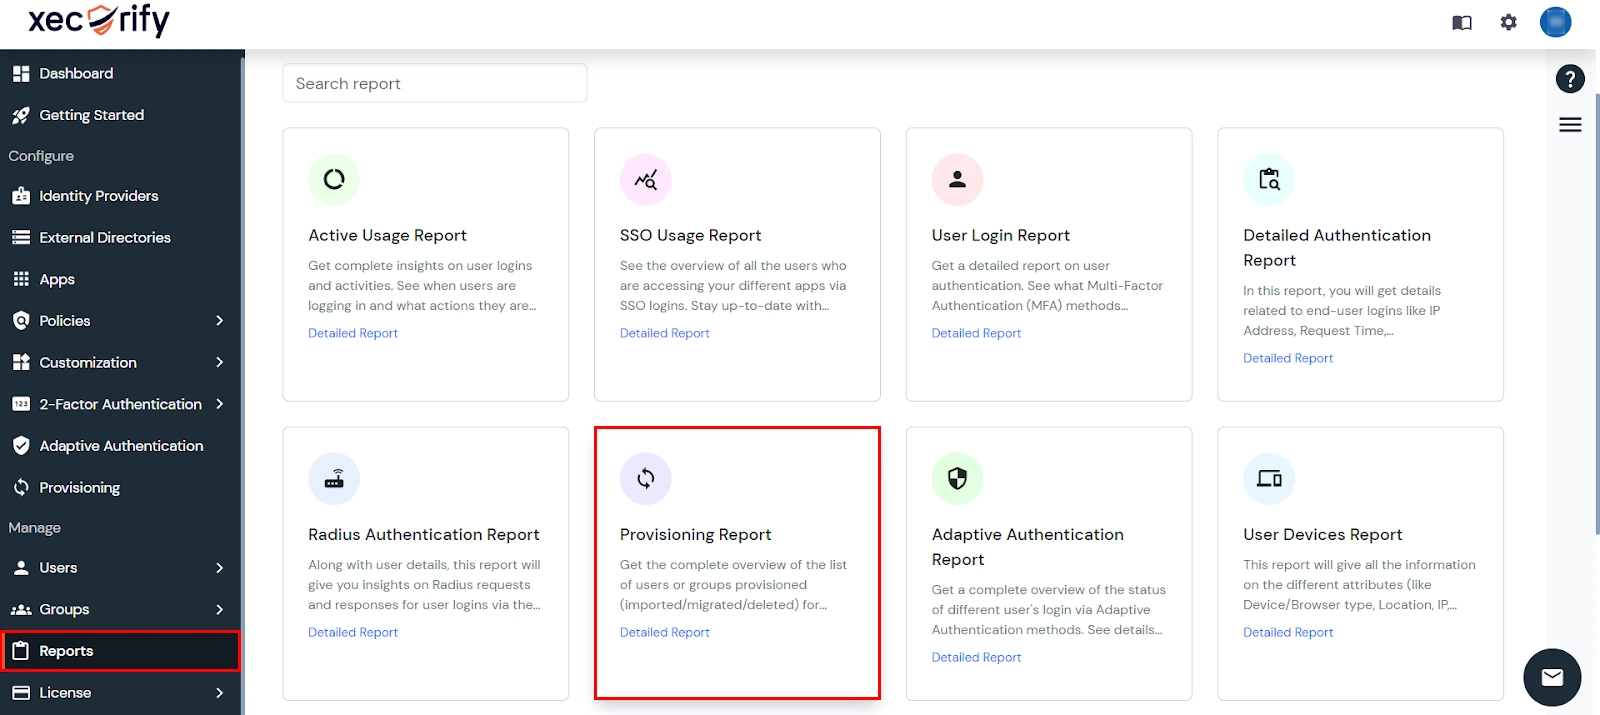
- Navigate to Reports in the left-hand navigation pane, search for Provisioning, and select Provisioning Report.
- Filter the reports by specifying Enduser Identifier and Application Name criteria. Additionally, choose the desired timespan for the reports. Once done, click on the Search.
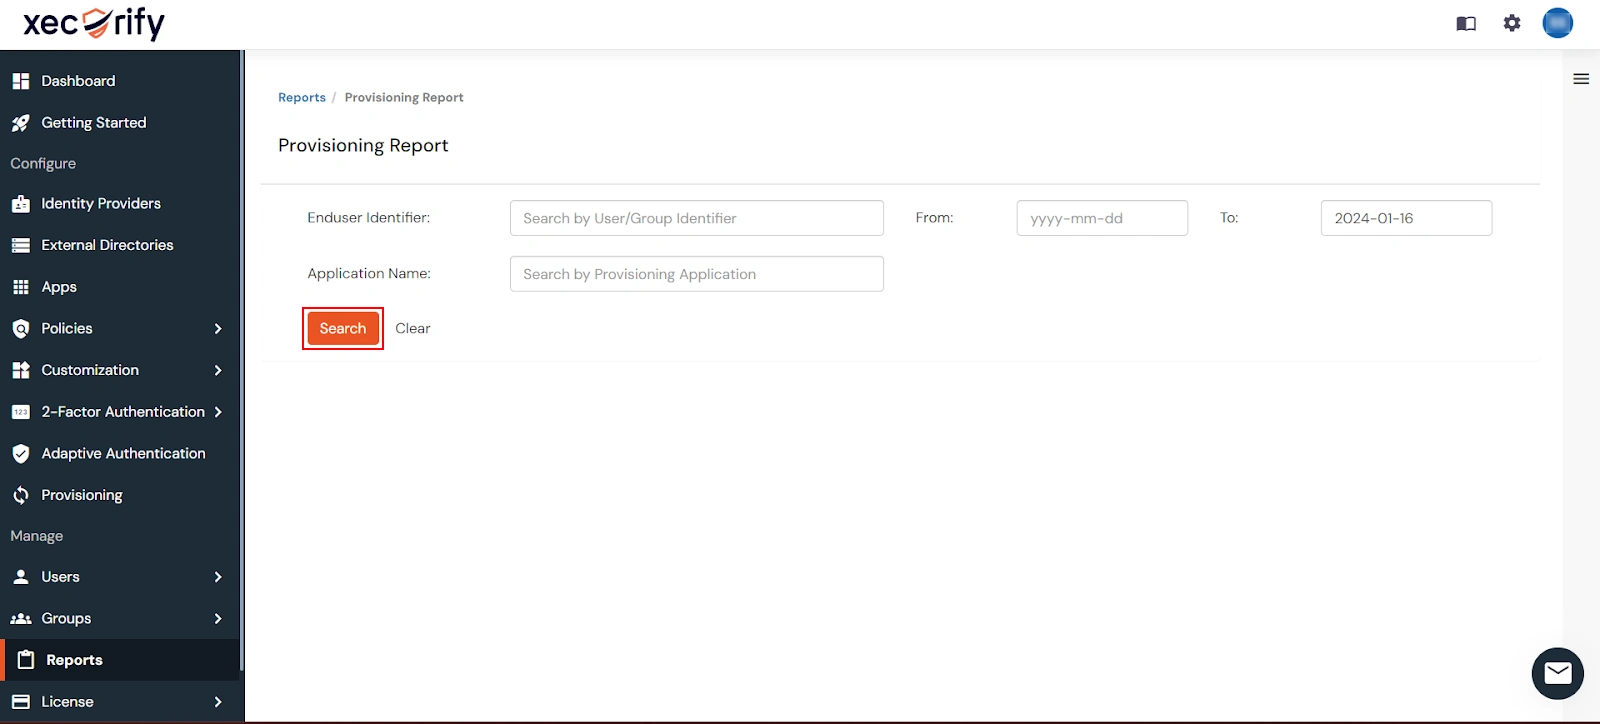
- Alternatively, you can directly click on Search to retrieve all provisioning reports based on time without applying any specific filters.
External References