Hello there!
Need Help? We are right here!
Need Help? We are right here!
Search Results:
×Configure Aspera Faspex SSO in a few simple steps using this setup guide. miniOrange SAML Single Sign-On (SSO) allows secure Single Sign-On access to your Aspera Faspex Account & other specific On-Premise / Cloud apps using a single set of existing login credentials.
Aspera Faspex SSO solution also provides an option to integrate with multiple third-party Identity Providers which support SAML and OAuth sort of standard protocols. IDP here means (Okta, Auth0, Ping, Onelogin, etc) or Active Directory (AD) where your existing users are managed. Aspera Faspex SSO for Cloud Identity, eliminating passwords by redirecting users to an external identity provider (IdP) for authentication, enhancing user experience with existing credentials.
With miniOrange Aspera Faspex SSO, you can:
miniOrange offers free help through a consultation call with our System Engineers to Install or Setup Aspera Faspex SSO solution in your environment with 30-day free trial.
For this, you need to just send us an email at idpsupport@xecurify.com to book a slot and we'll help you in no time.
miniOrange provides user authentication from various external sources, which can be Directories (like ADFS, Microsoft Active Directory, OpenLDAP, AWS etc), Identity Providers (like Microsoft Entra ID, Okta, AWS), and many more. You can configure your existing directory/user store or add users in miniOrange.

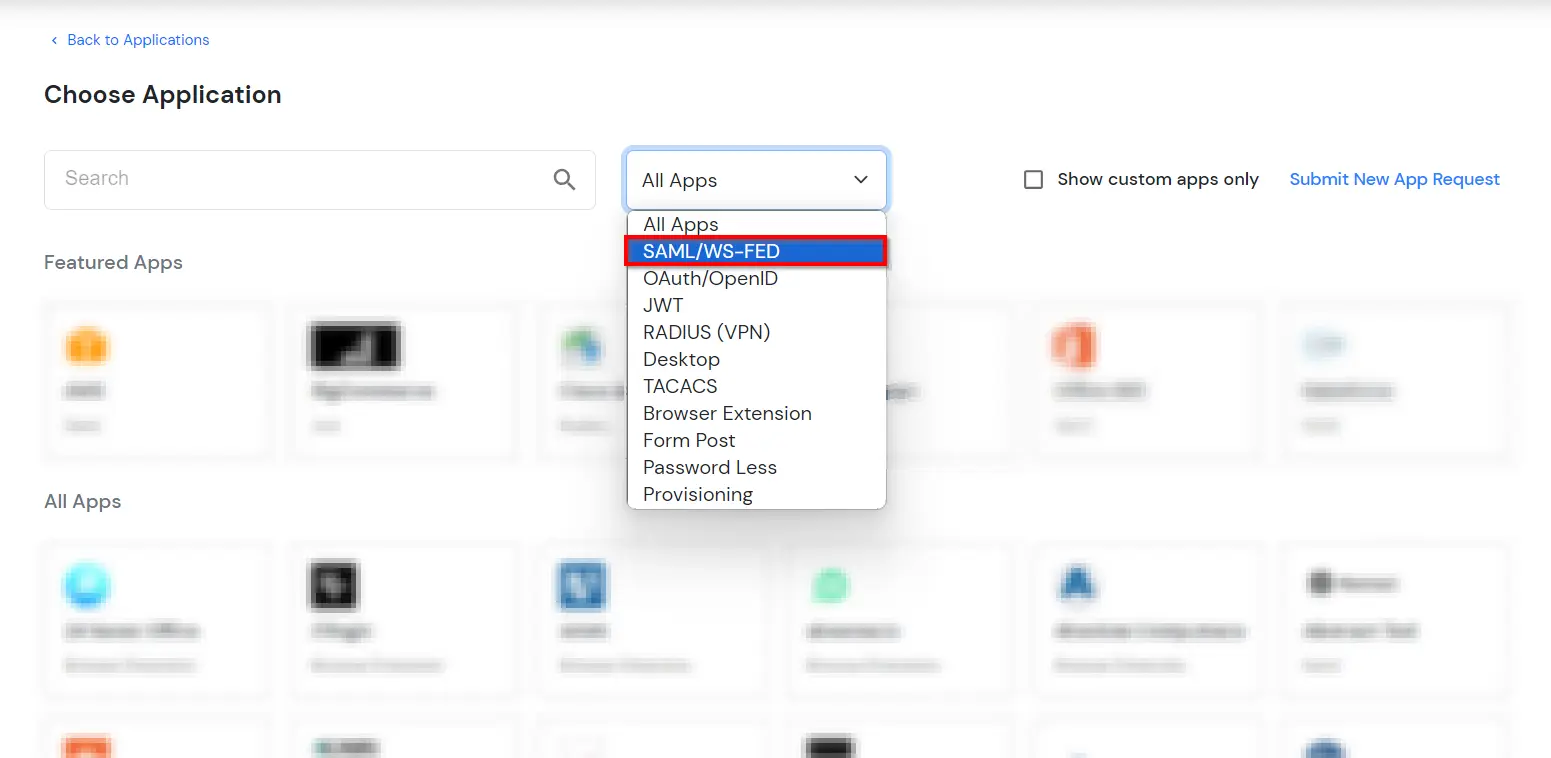
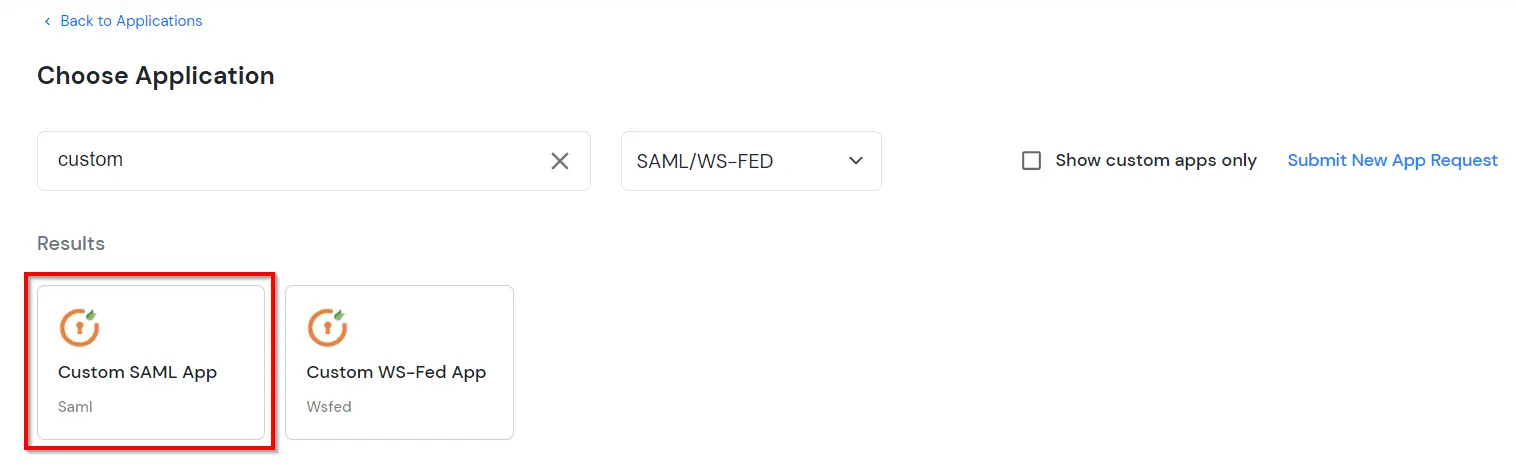
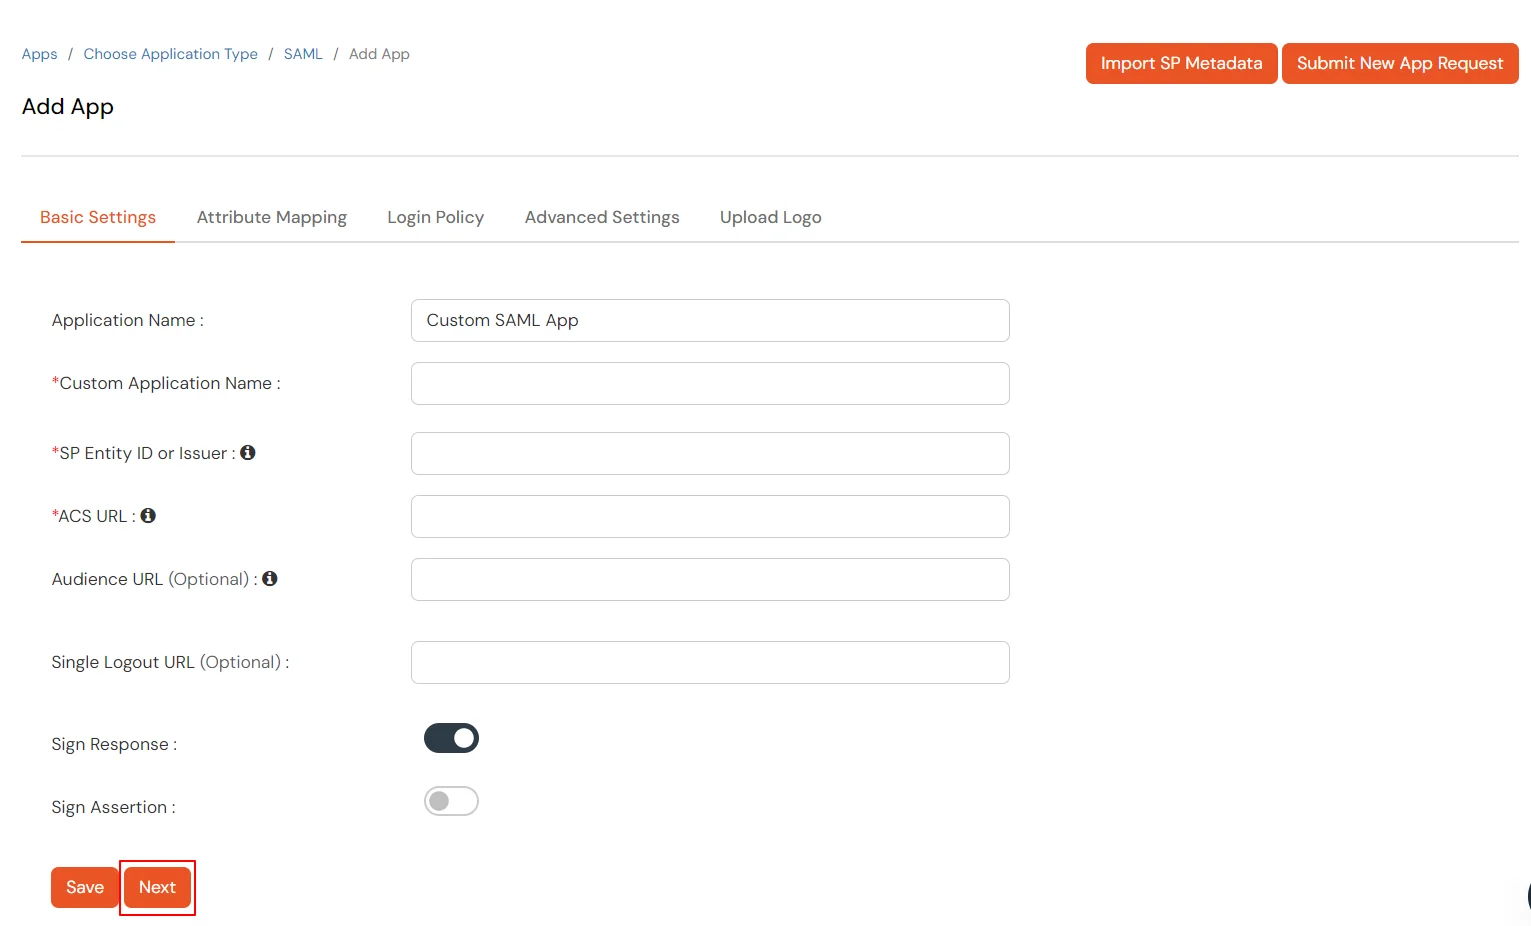
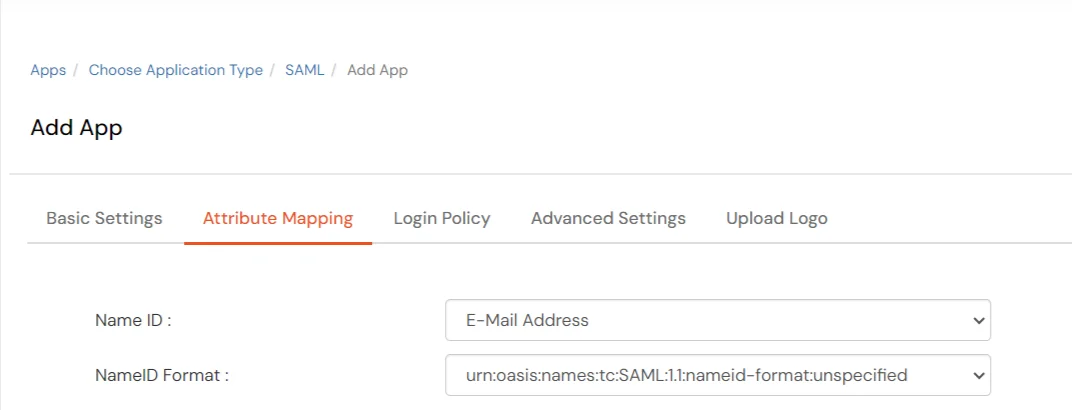
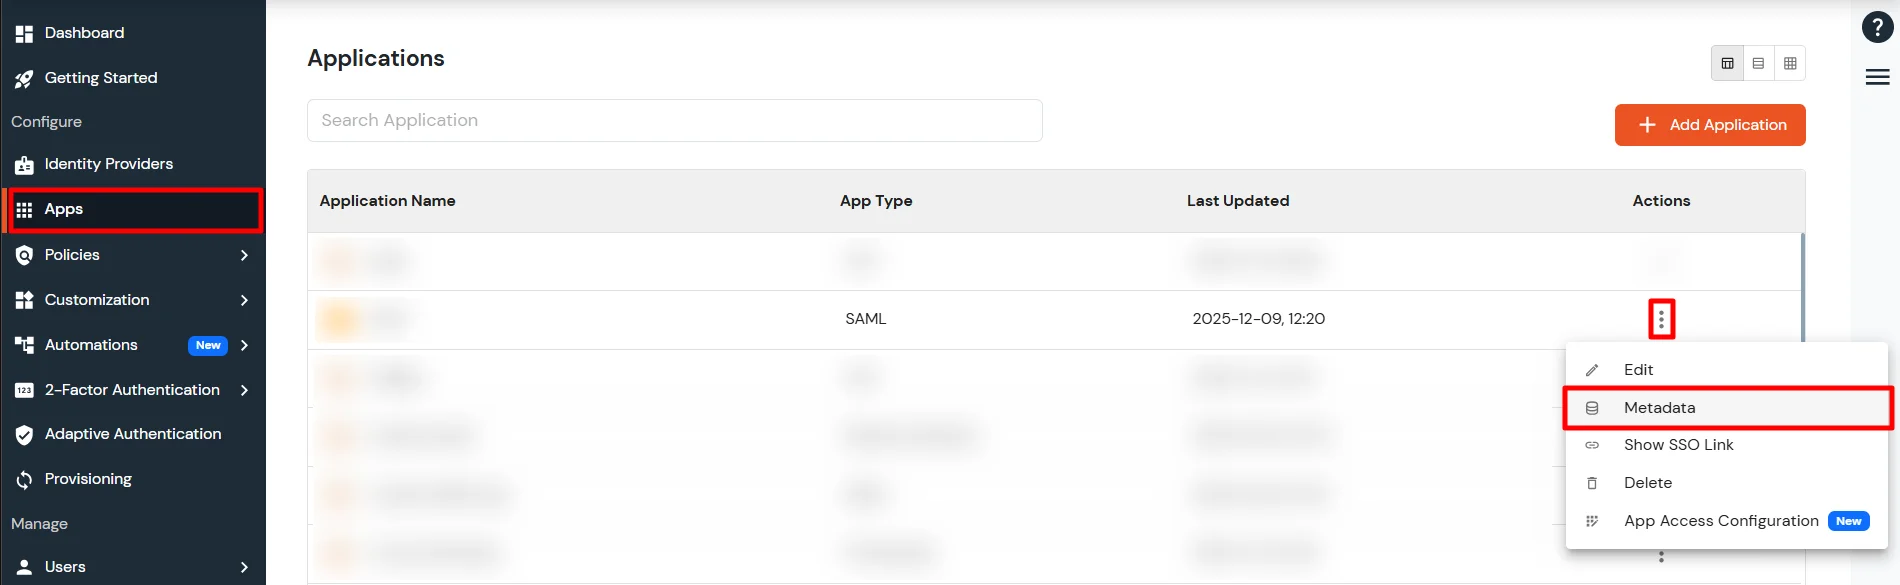
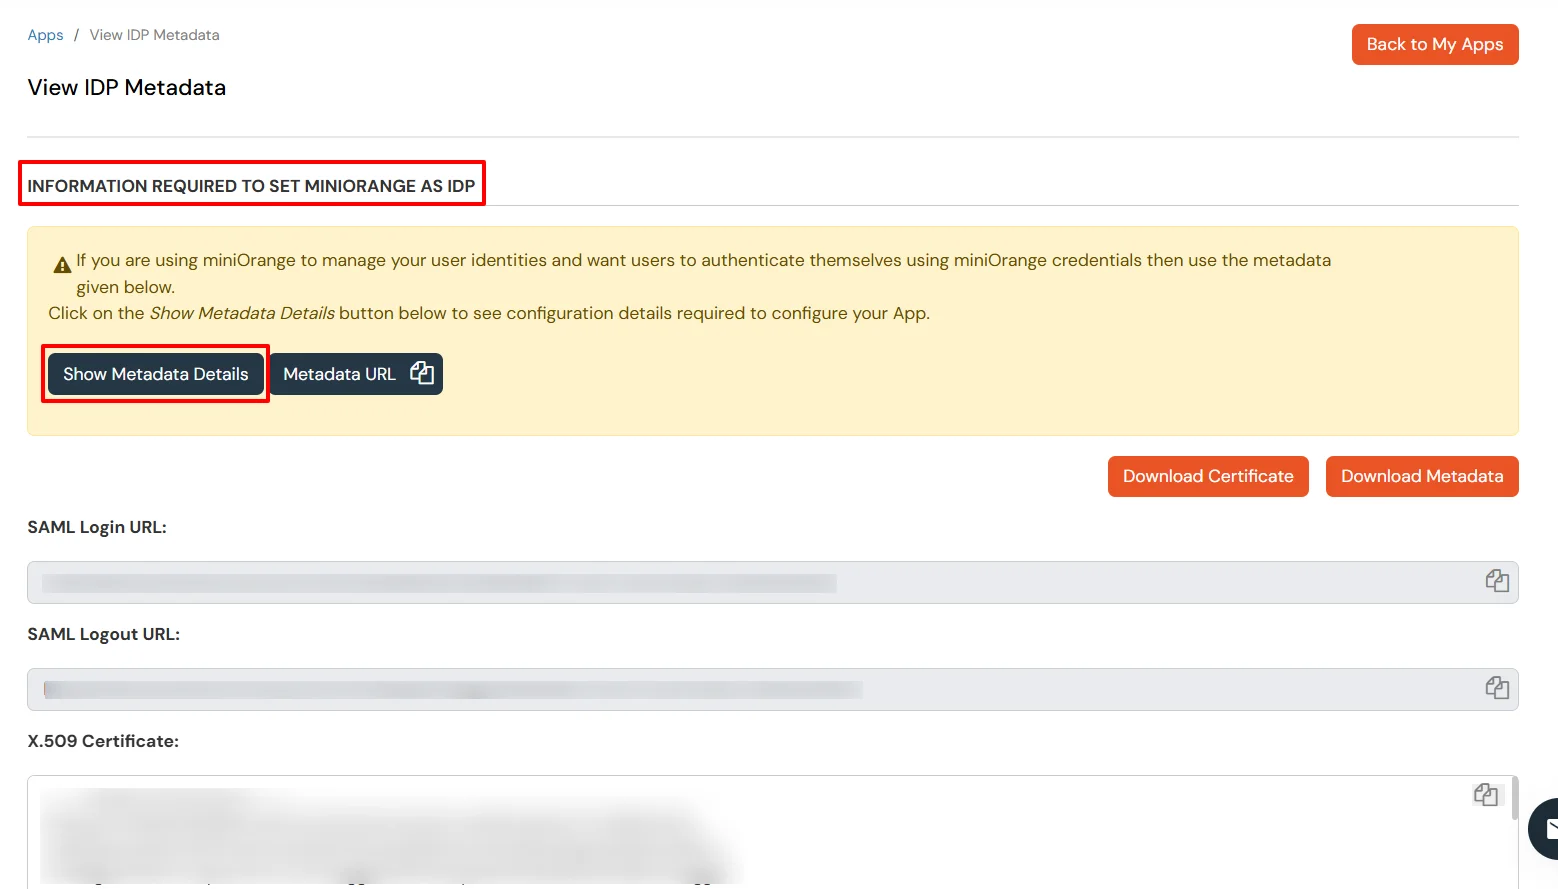
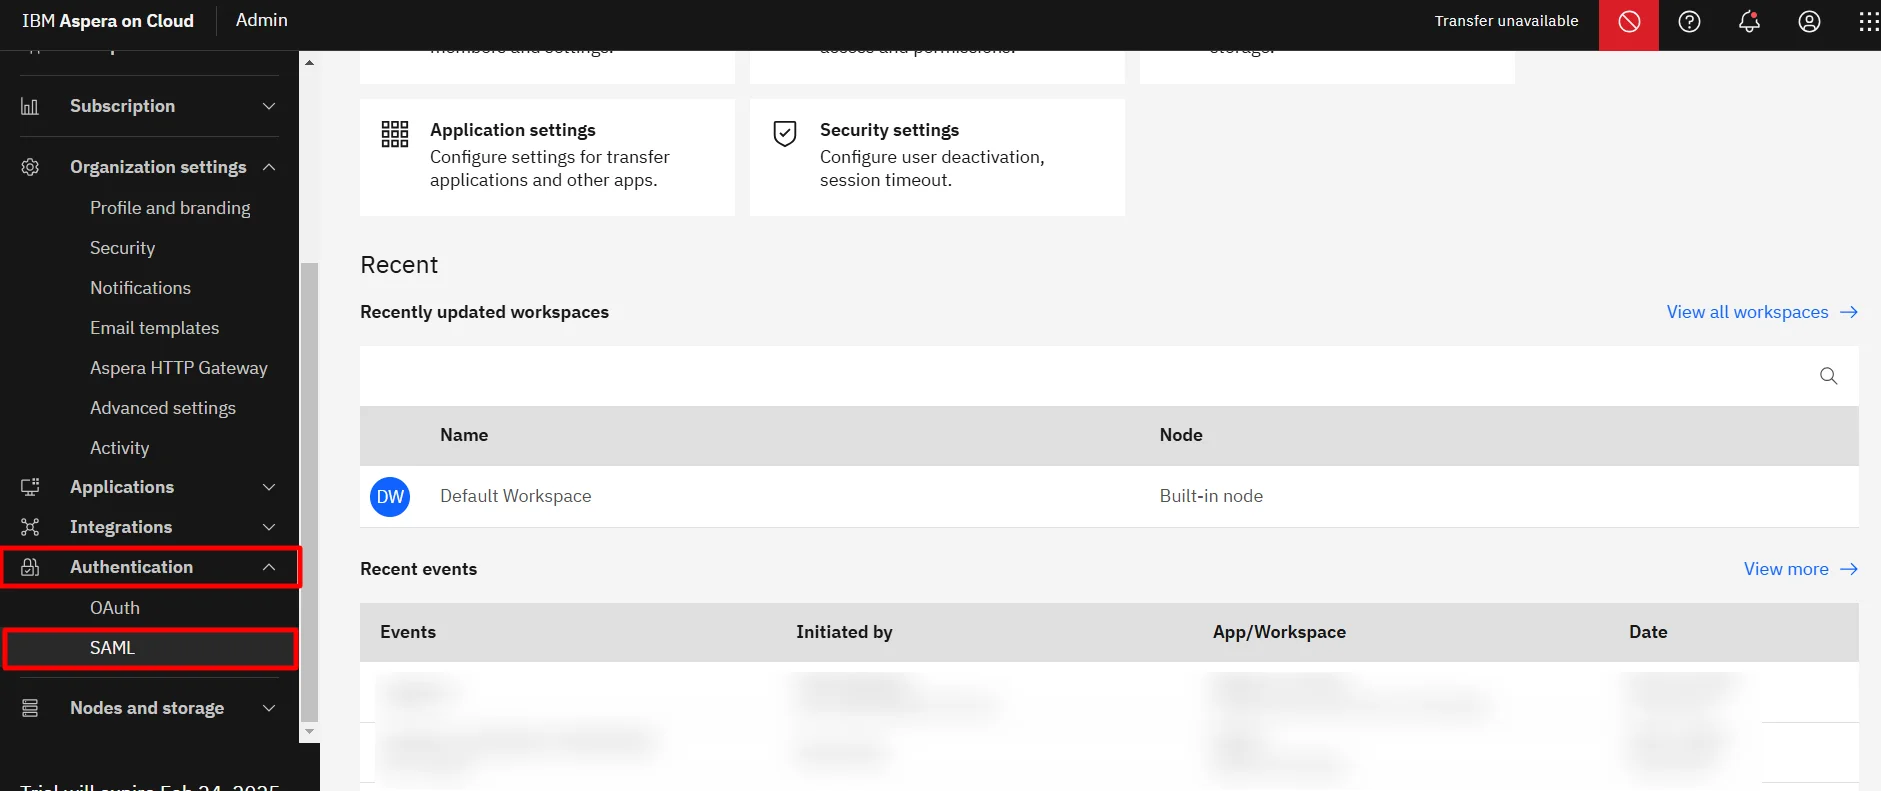
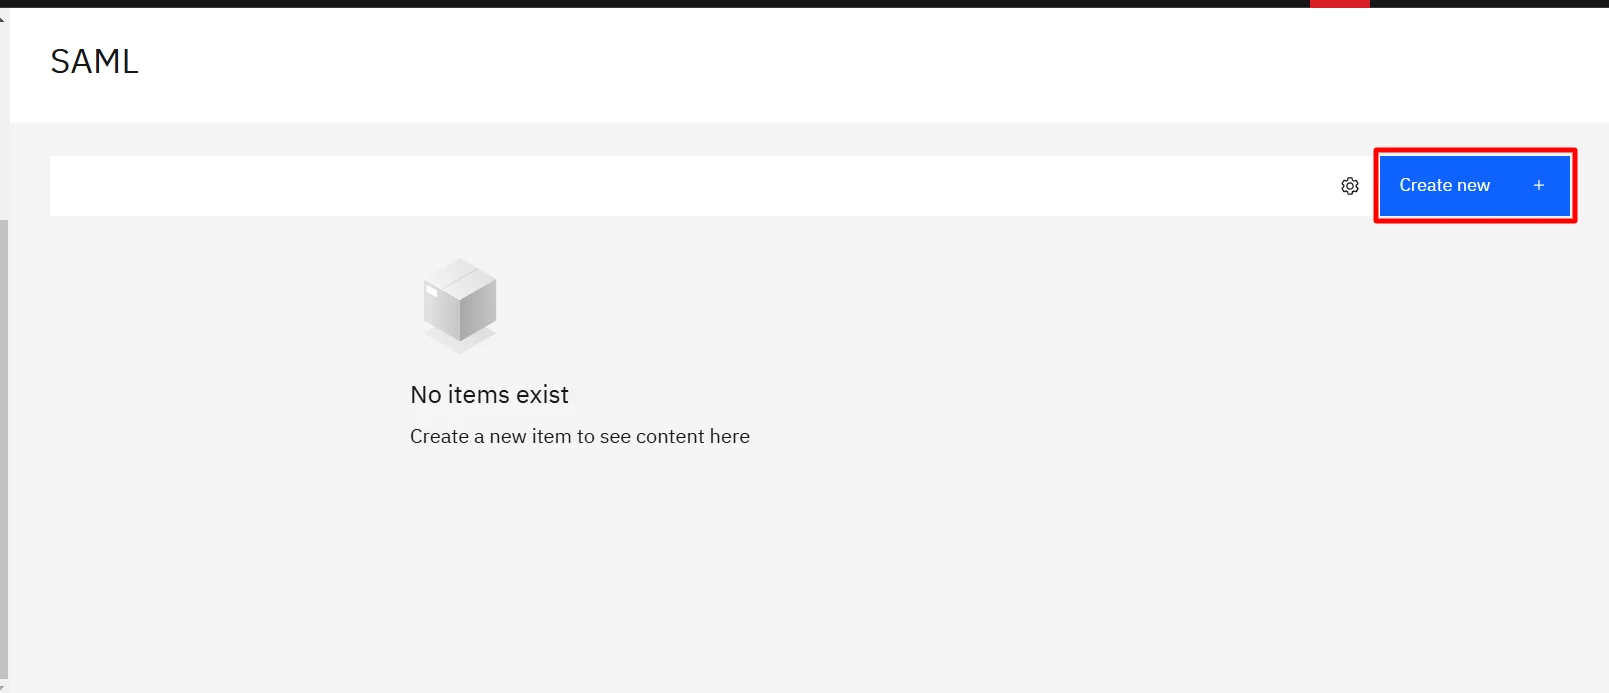
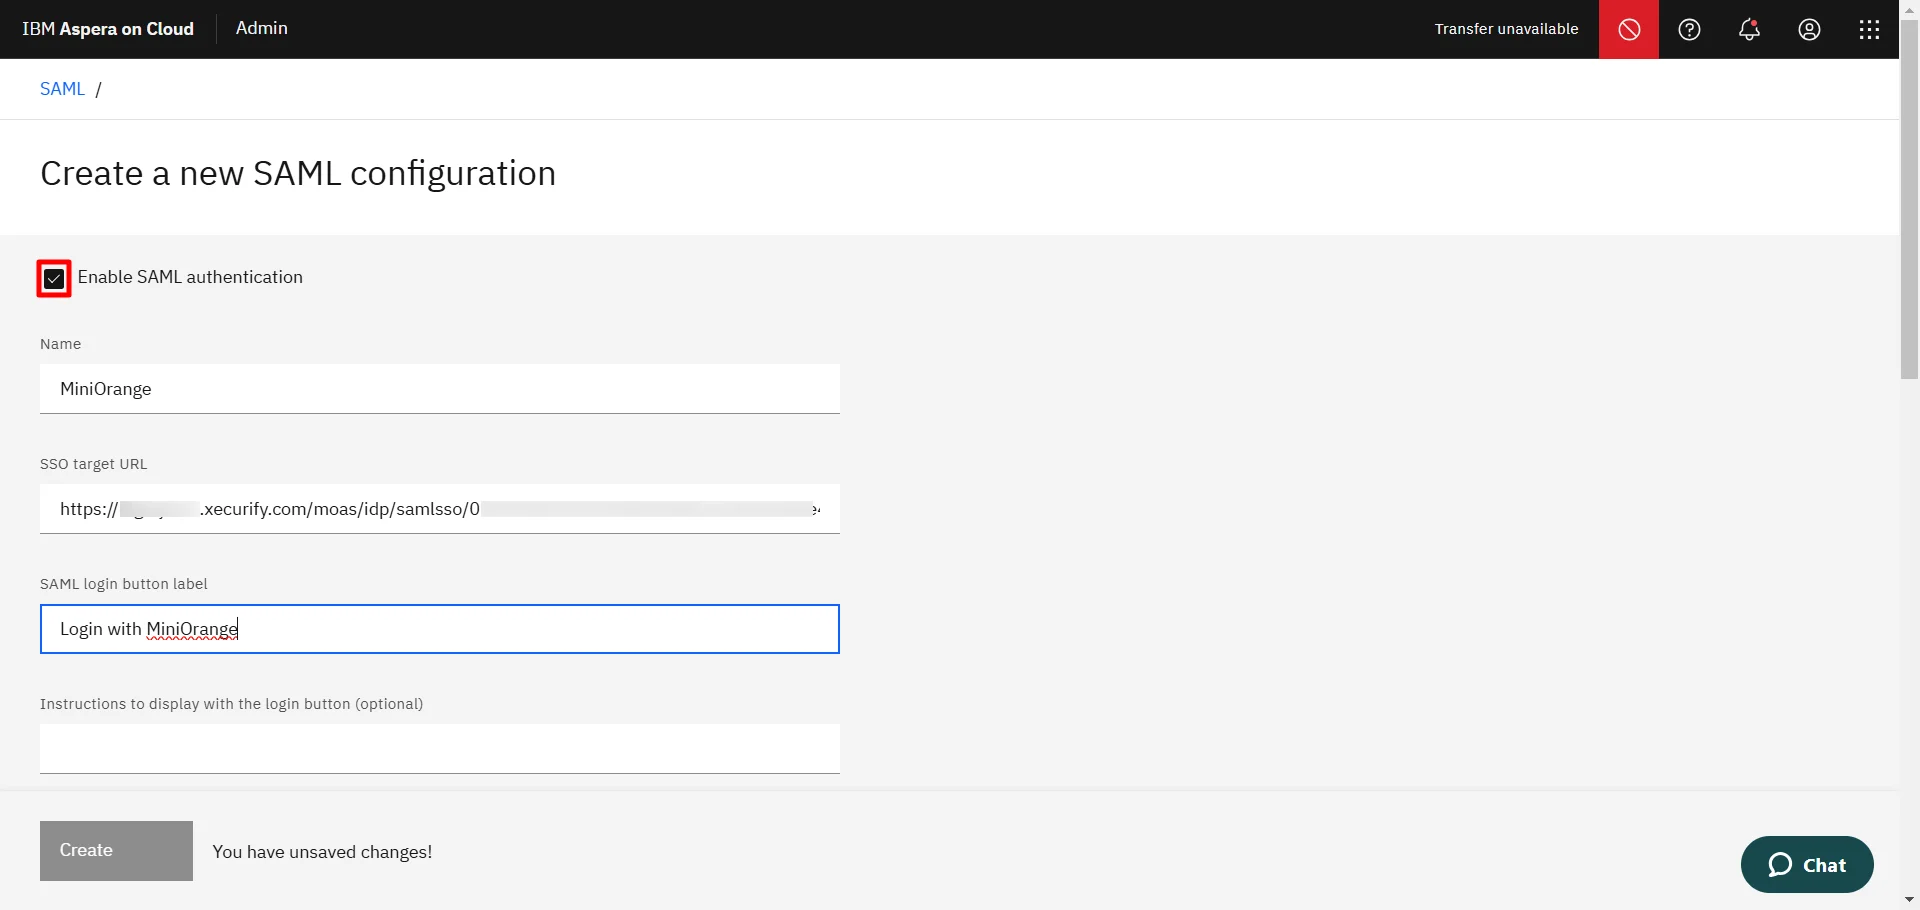
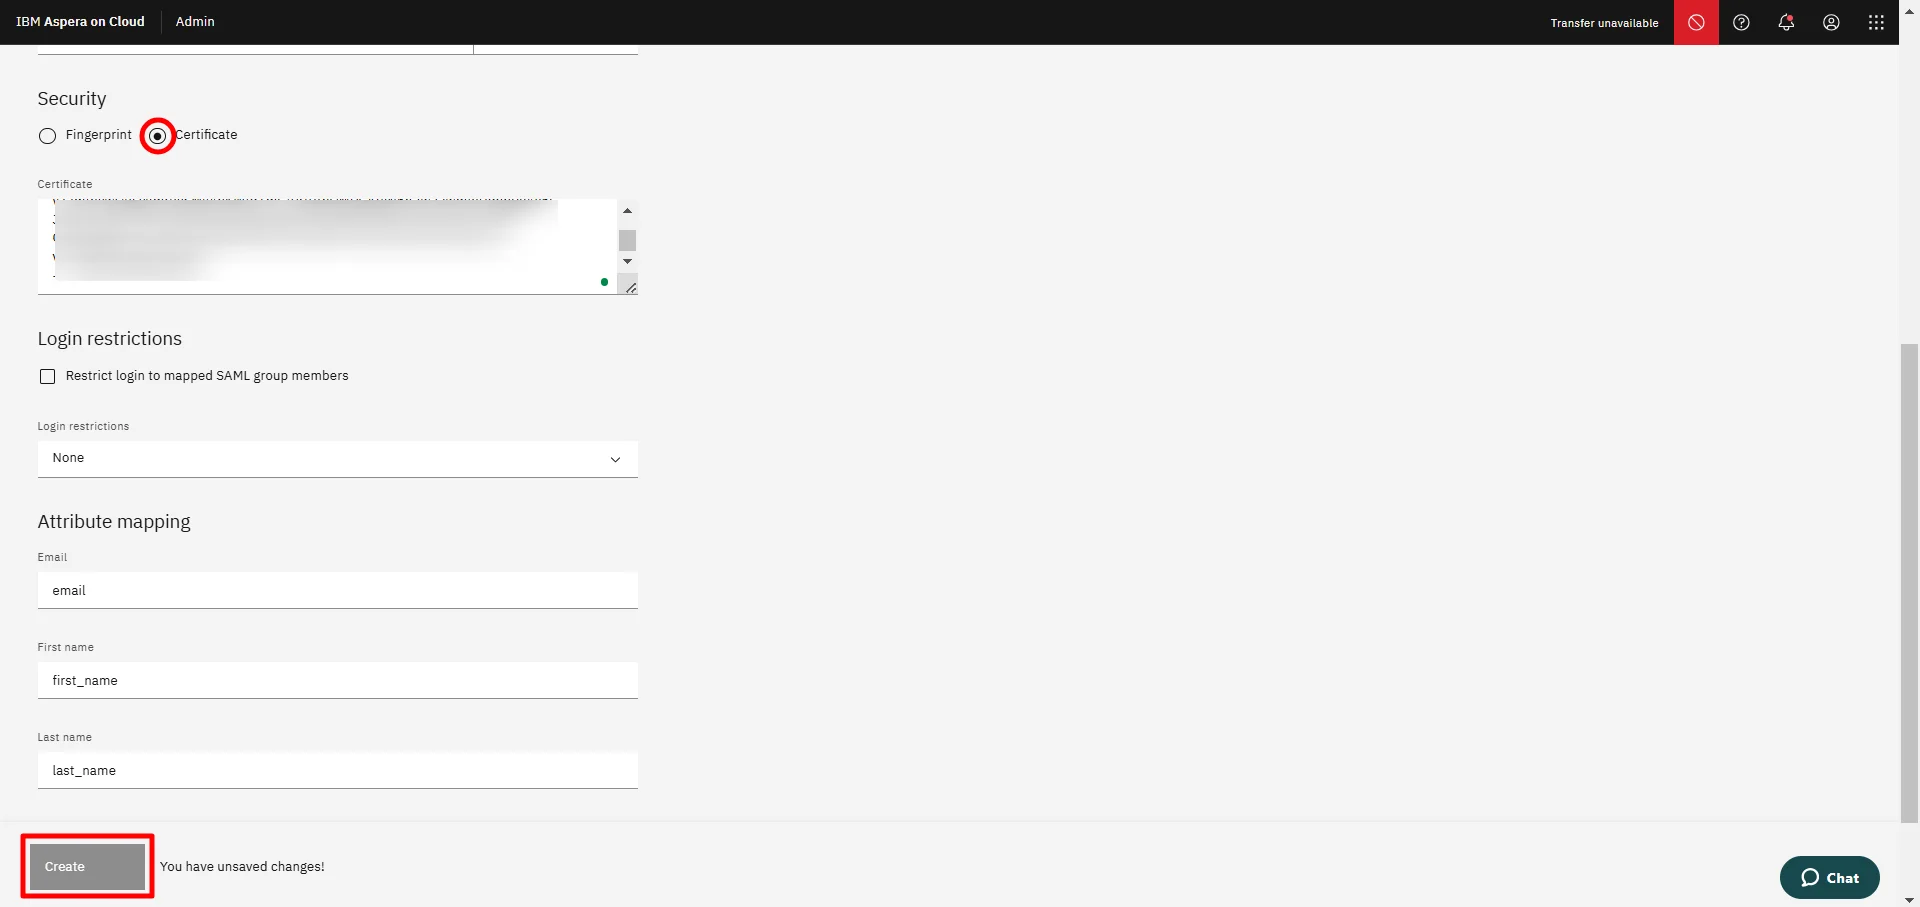
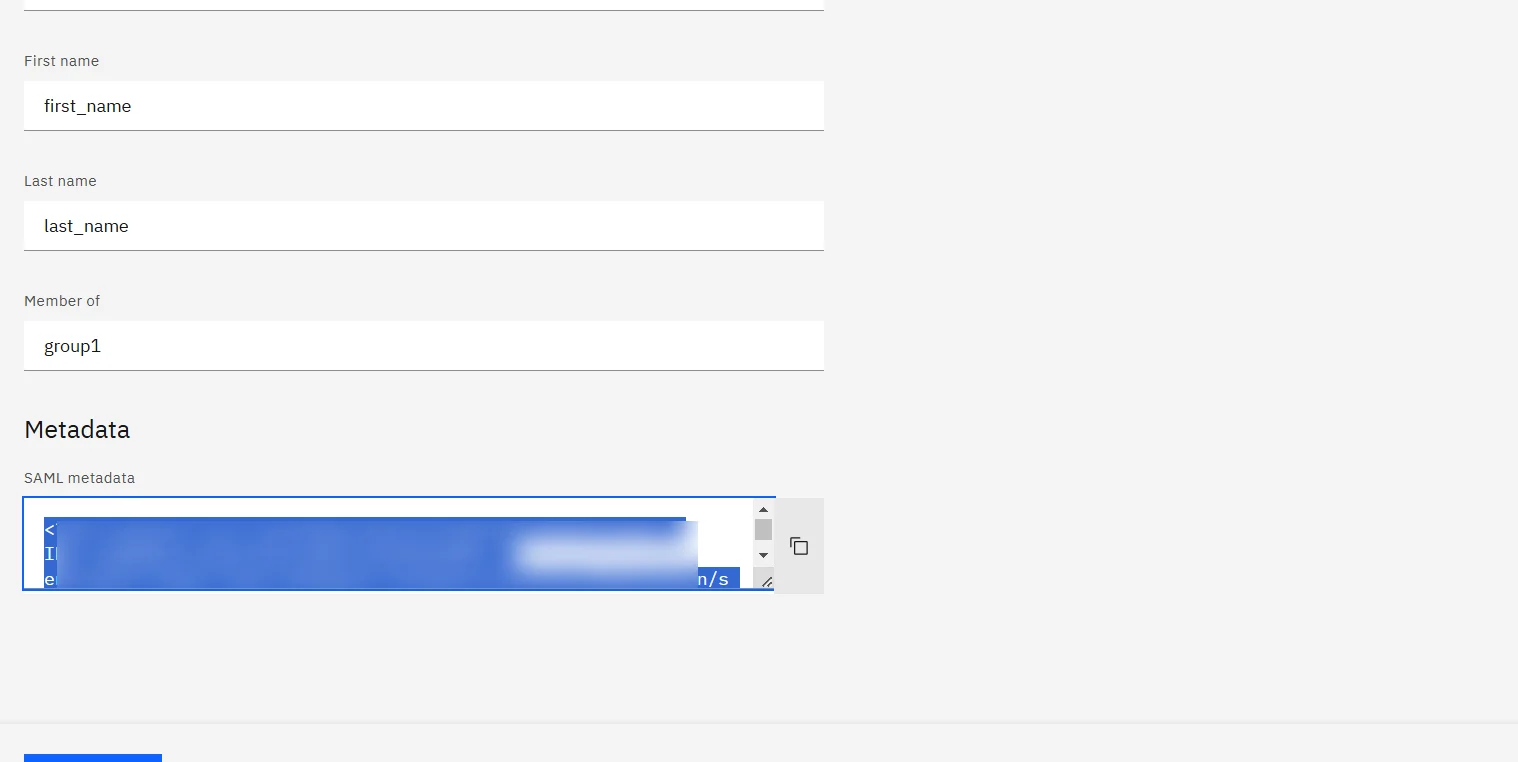
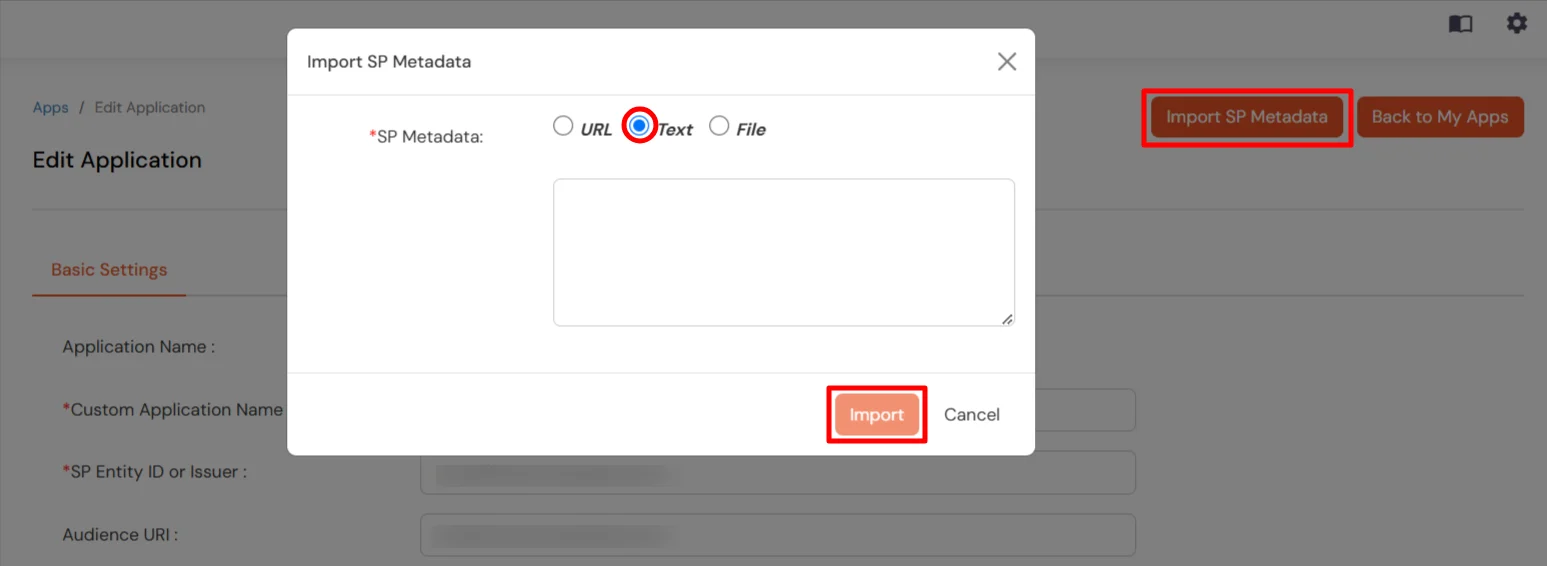
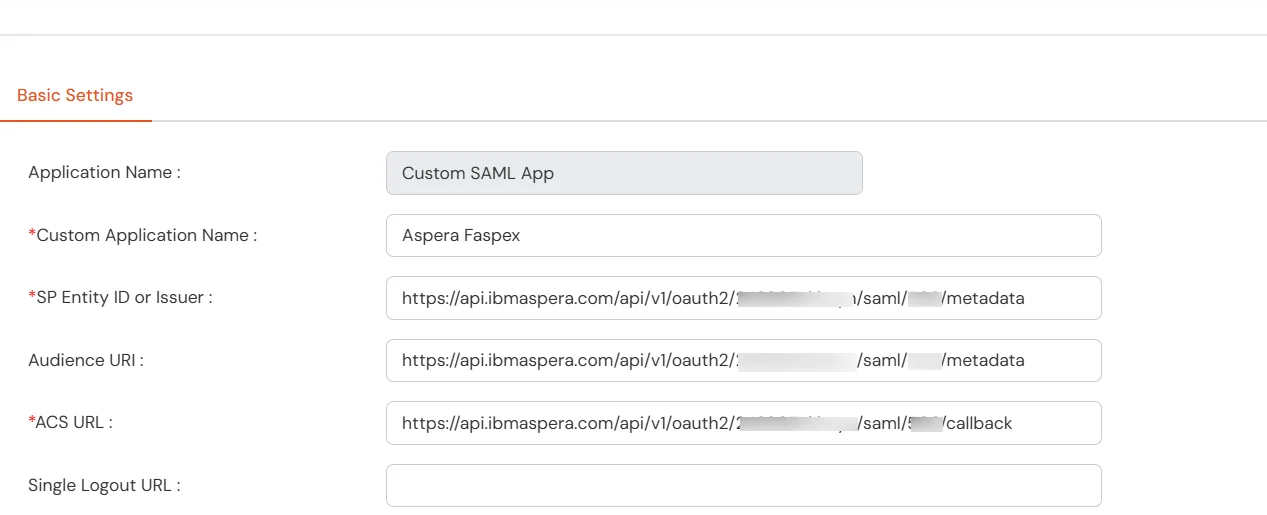
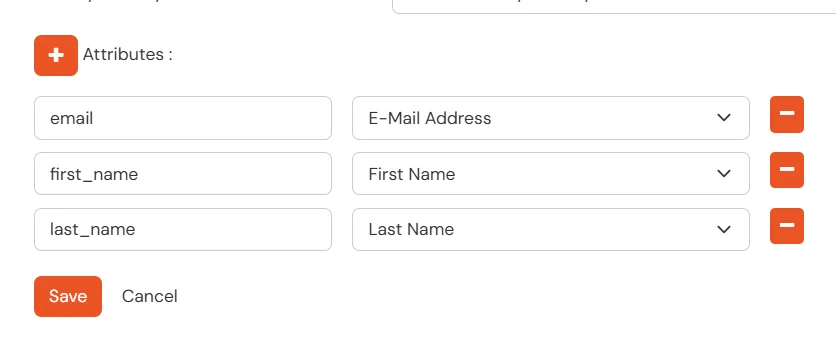
To get miniOrange metadata details in order to configure Aspera Faspex :

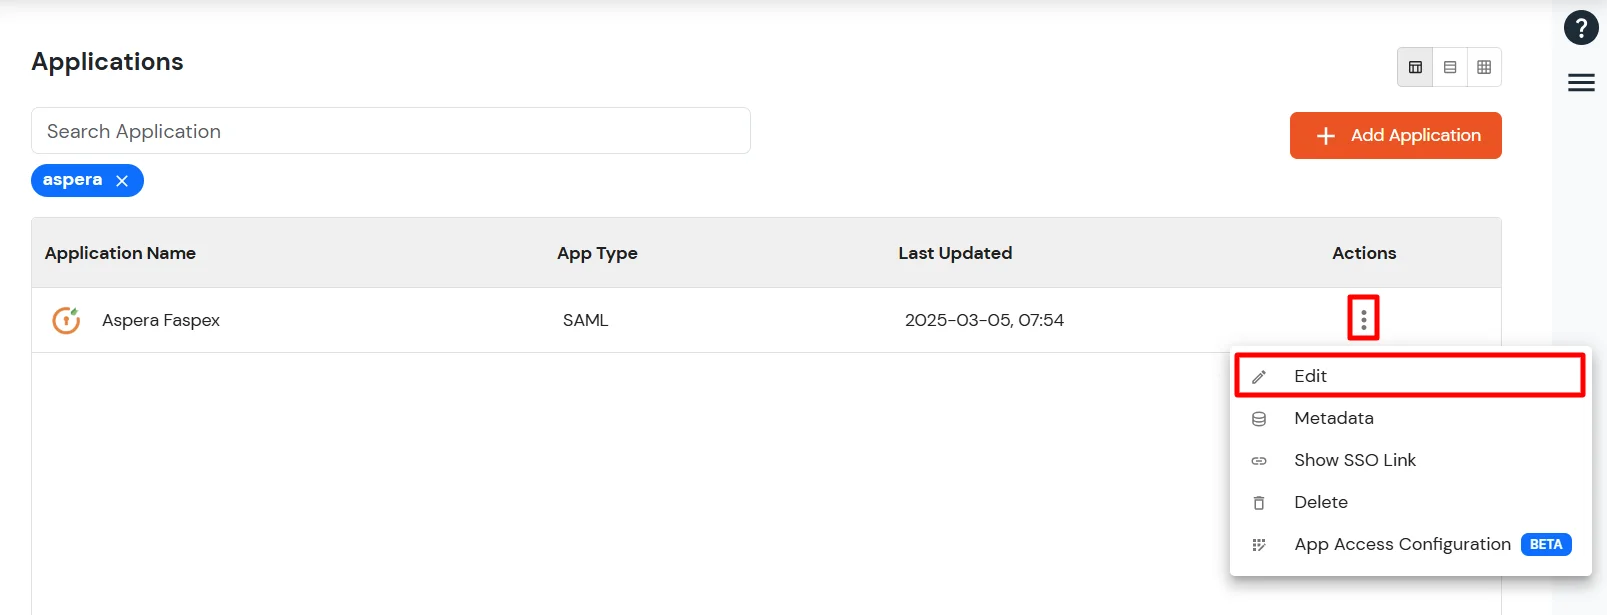
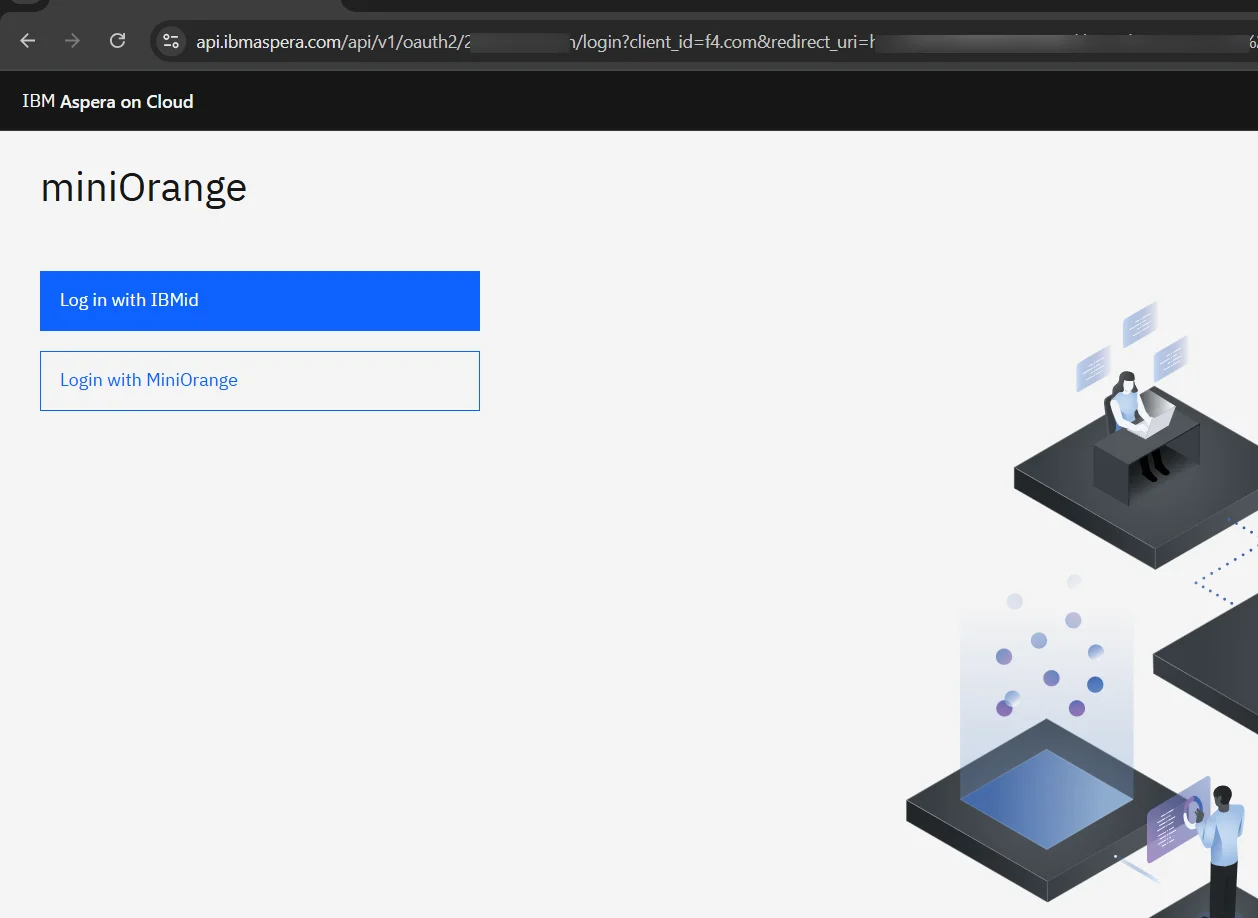
Test SSO login to your Aspera Faspex account with miniOrange IdP:

Contact us or email us at idpsupport@xecurify.com and we'll help you setting it up in no time.
